• Skip to primary navigation
  • Skip to main content
  • Skip to primary sidebar
  • Skip to footer
Stacy Risenmay
  • Home
  • About me
  • PRESS
  • Contact Me
  • My Book
    • Facebook
    • Instagram
    • Pinterest
    • Twitter
menu icon
go to homepage
subscribe
search icon
Homepage link
  • Home
  • About me
  • Project Gallery
  • Our House
  • PRESS
  • Contact Me
  • Privacy Policy
    • Facebook
    • Instagram
    • Pinterest
    • Twitter
  • ×

    Snow Globe Ornaments

    By Stacy Leave a Comment

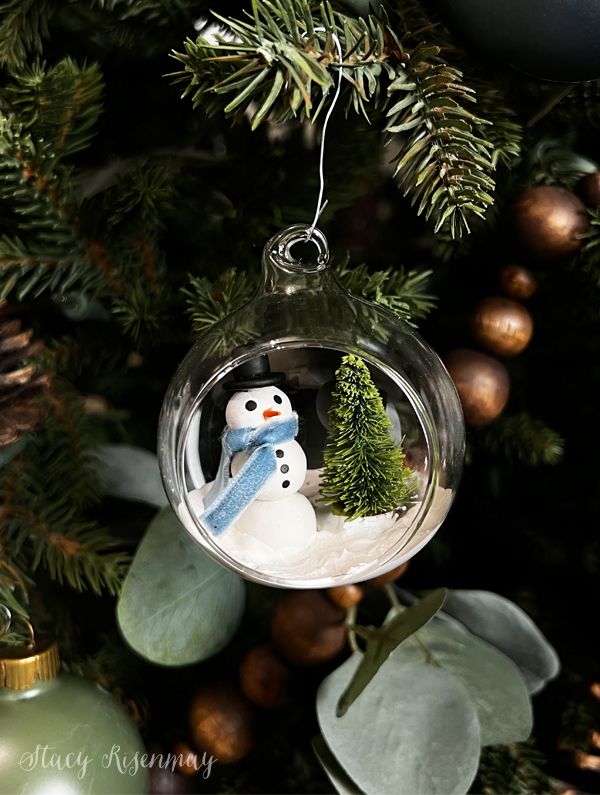
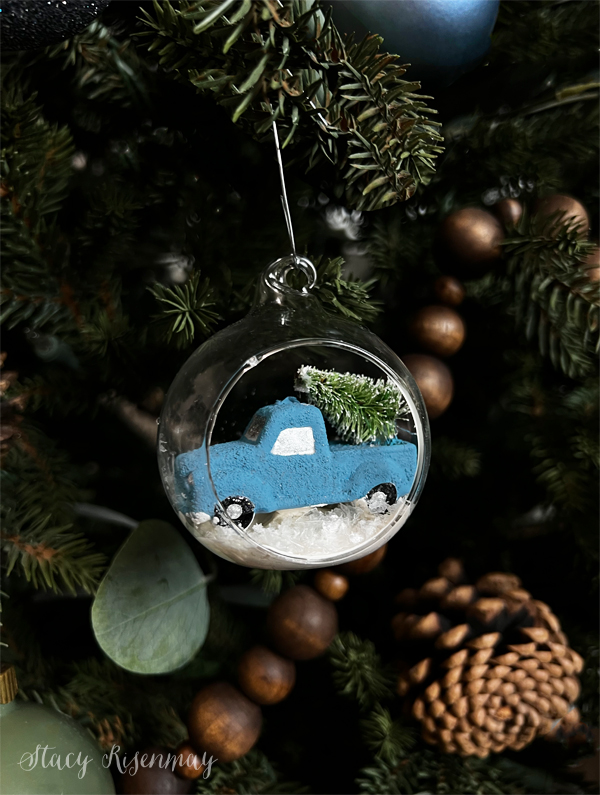
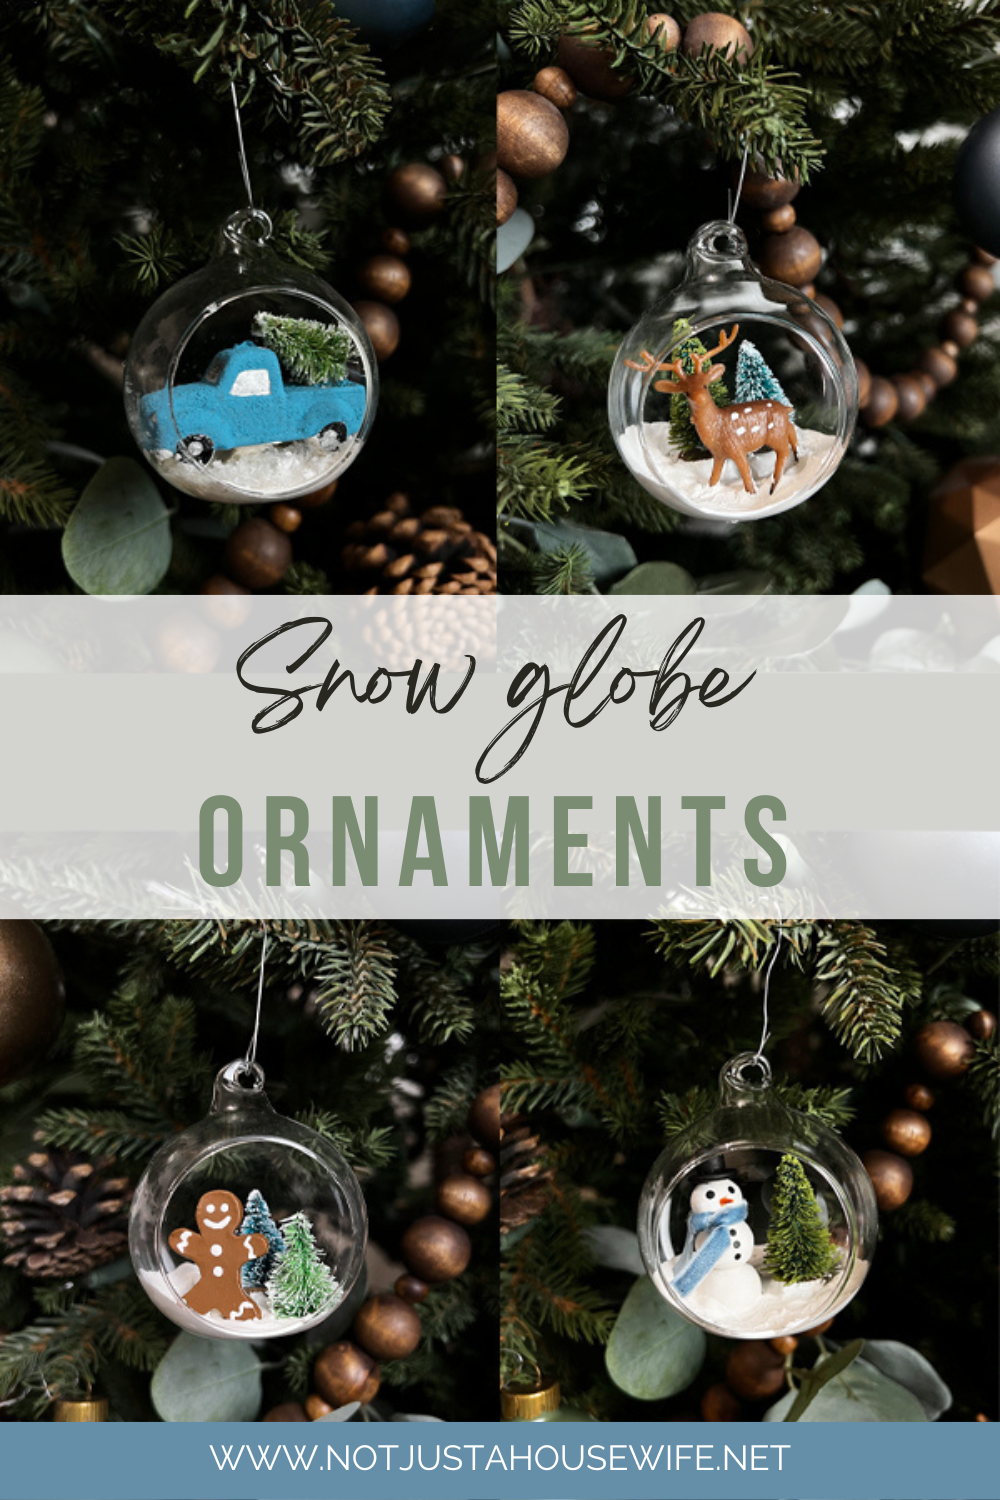
    I've had a fascination with snow globes since I was a child. It was so fun to see the miniature scenes inside. I knew that this year's homemade ornaments were going to be a take on my childhood favorite. Here are my snow globe ornaments!

    Snow Globe Ornaments

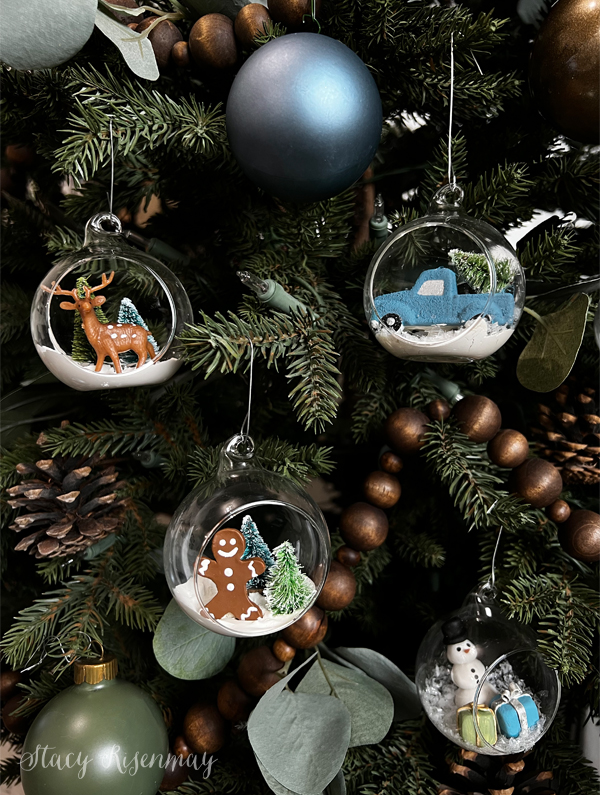
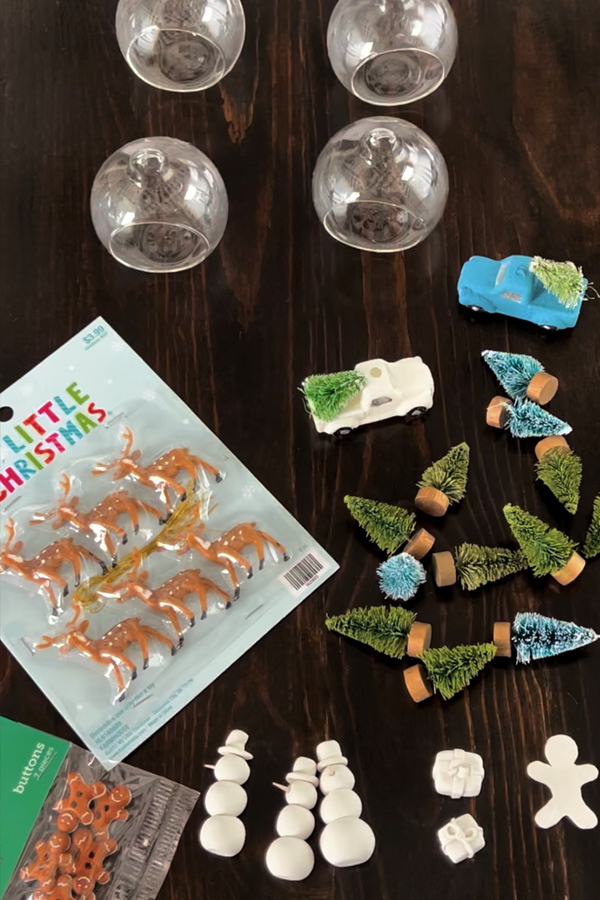
    I made a total of 12 with only a few repeats. I used some store bought miniature items from the craft store and I made a few things out of polymer clay.

    Snow Globe Ornament Supplies:

    Faux Snow

    Drywall Mud (Joint Compound) or Plaster Of Paris

    Clear Glue

    Miniature Trees and Other Items

    Glass Globes

    Polymer Clay (Optional)

    Step 1: Add Faux Snow

    For the faux snow, I used 2 different things. One is obvious and one may surprise you. I ordered some shredded plastic faux snow from amazon since it was hard to find a small bag in stores. I only needed a little. The other "snow" was drywall mud! Leave it to a DIYer to think of something odd like that. If you have plaster of Pairs that would probably work as well.

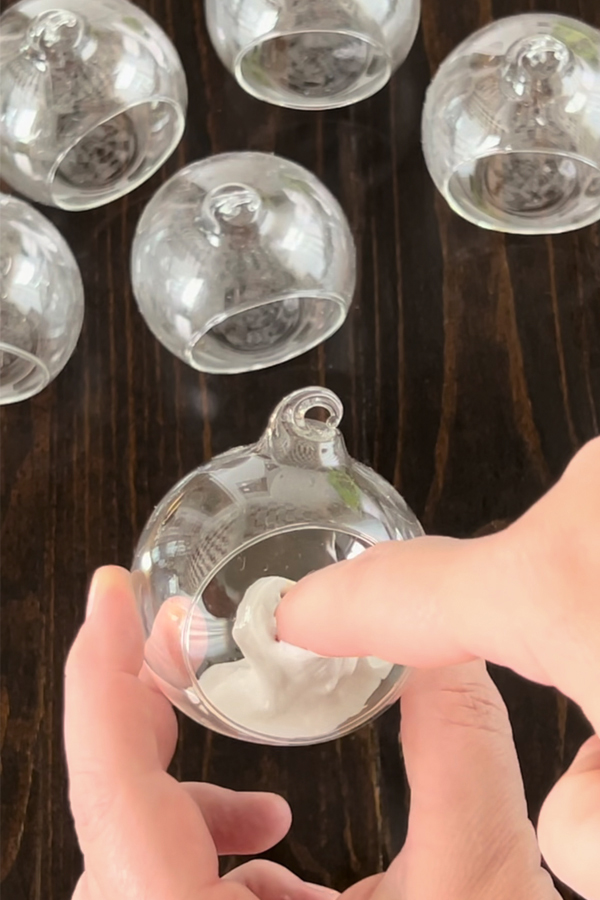
    I used clear glue to adhere the shredded plastic snow. I used Elmer's, but any clear glue will work.

    Step 2: Add Miniature Elements

    I painted the polymer clay items I made and when they were dry, I glued them into the globes that had the faux shredded plastic snow. The other items I stuck into the drywall mud. Once the drywall mud was dry, it "cemented" or glued the items in place.

    Some of the ones with drywall mud, I also added the shredded faux snow to. If drywall mud is too thick, it will crack when it drys. So I covered it with the fau snow while it was still wet. But most of them stayed just drywall because I liked the look.

    TIP:

    If the drywall mud does dry and have little cracks, get a small paint brush and dip it into the drywall mud. Brush over the cracks and cover them in a thin layer of drywall mud.

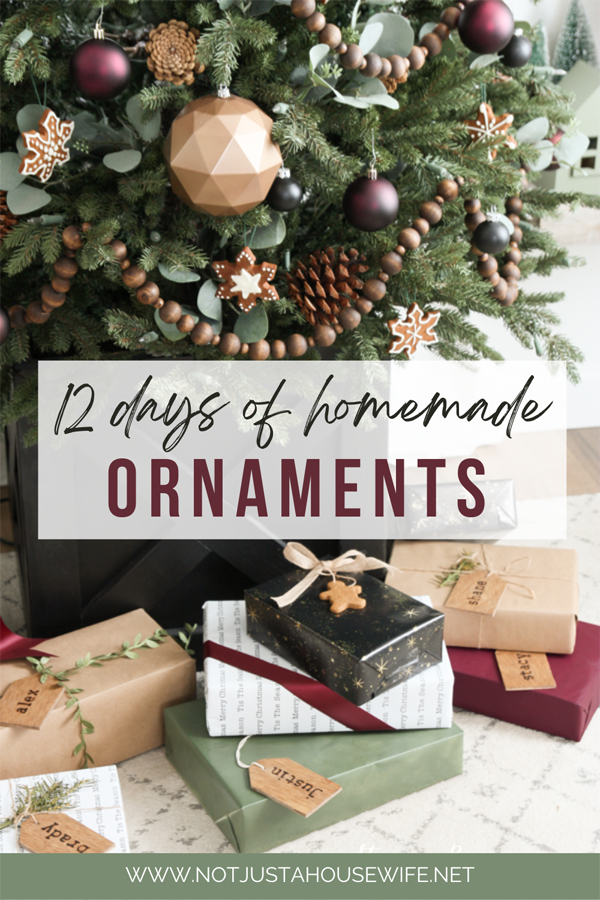
    Day 1: Mini Letterboard Ornaments

    Day 2: Clay Snowflake Ornaments

    Day 3: Leather Ornaments

    Day 4: Mushroom Ornaments

    Day 5: Glass Etched Ornaments

    Day 6: Gingerbread Ornaments

    Day 7: Clay Leaf Print Ornaments

    Day 8: Wood Slice Ornaments

    Day 9: Snow Globe Ornaments

    Day 10: Stamped Clay Ornaments

    Day 11: String Ball Ornaments

    Day 12: DIY Icicle Ornaments

    You will also like:

    • Clay Mushroom Ornaments (Woodland Christmas)Clay Mushroom Ornaments (Woodland Christmas)
    • Burgundy & Gingerbread {Christmas Home Tour}Burgundy & Gingerbread {Christmas Home Tour}
    • Christmas Cottage Home TourChristmas Cottage Home Tour
    • Clay Leaf Print OrnamentsClay Leaf Print Ornaments
    • Cottage Christmas Home TourCottage Christmas Home Tour
    • A Gingerbread Christmas Home TourA Gingerbread Christmas Home Tour
    • Wood Slice OrnamentsWood Slice Ornaments
    • Woodland Christmas Home TourWoodland Christmas Home Tour

    « Wood Slice Ornaments
    Stamped Clay Ornaments »

    Filed Under: Holiday Leave a Comment

    Subscribe

    for your weekly DIY fix.

    Reader Interactions

    Comment Below! Cancel reply

    Your email address will not be published. Required fields are marked *

    This site uses Akismet to reduce spam. Learn how your comment data is processed.

    Primary Sidebar

    stacyHey! I'm Stacy and am a DIY addict. I love to get my hands dirty, whether it's sawdust, paint, or dirt. My goal is to help YOU learn to fix up your home and yard. No matter the style or size, I think everyone should love their home. And it doesn't takes a big budget to get there. Let's DIY together!

    Subscribe to My Blog!

    Search this site

    categories


    Subscribe

    Footer

    Welcome! I'm sharing our adventures as we fix up our 1938 cottage. Whether it is big or small, I think everyone should love their home and I don't think it takes a lot of money to make a space your own

    About Stacy

    • Facebook
    • Instagram
    • Pinterest
    • Twitter

    My Favorites

    copyright

    All images and content are copyrighted via Stacy Risenmay unless otherwise stated. If you'd like to share my work, please link back to this blog.
    Thank you for visiting!


    Footer

    ↑ back to top

    About

    • Meet Stacy
    • Privacy Policy
    • Contact

    Categories 

    • Home Decor
    • Outdoor Projects & Gardening
    • DIY & Tutorials
    • Kid Activities
    • Recipes
    • Travel
    • Cleaning
    • Houseplants
    • Staining
    • Painting
    • Power Tools
    • Holiday Ideas

    Newsletter

    • Sign Up! for emails and updates

    As an Amazon Associate I earn from qualifying purchases.

    Copyright © 2020 Brunch Pro on the Brunch Pro Theme


    Privacy Policy
    Welcome! Thanks for visiting.
    Hi! I'm Stacy and I want to help YOU become a DIY rockstar! Sign up for my email list so each project, tip, and trick will go directly to your inbox :)
    Your information will *never* be shared or sold to a 3rd party. Pinky promise :)
    Welcome!
    Hi! I'm Stacy and I blog about fixing up our 1938 cottage. Join the thousand of others who get my posts sent to their inbox for FREE!
    Your information will *never* be shared or sold to a 3rd party.