
Wood slice ornaments are so each to make and add a touch of rustic charm to your Christmas tree. They are customizable too. Add the names of your children, a favorite verse, or a picture. You can cut your own wood slices or buy them ready made. Either way, wood slice ornaments are an inexpensive Christmas craft.

Wood Slice Ornaments

I was tasked with making 75 ornaments for the kids at so these seemed like the most cost effective choice.
Supplies:
Vinyl or Stickers
Drill
Step 1:
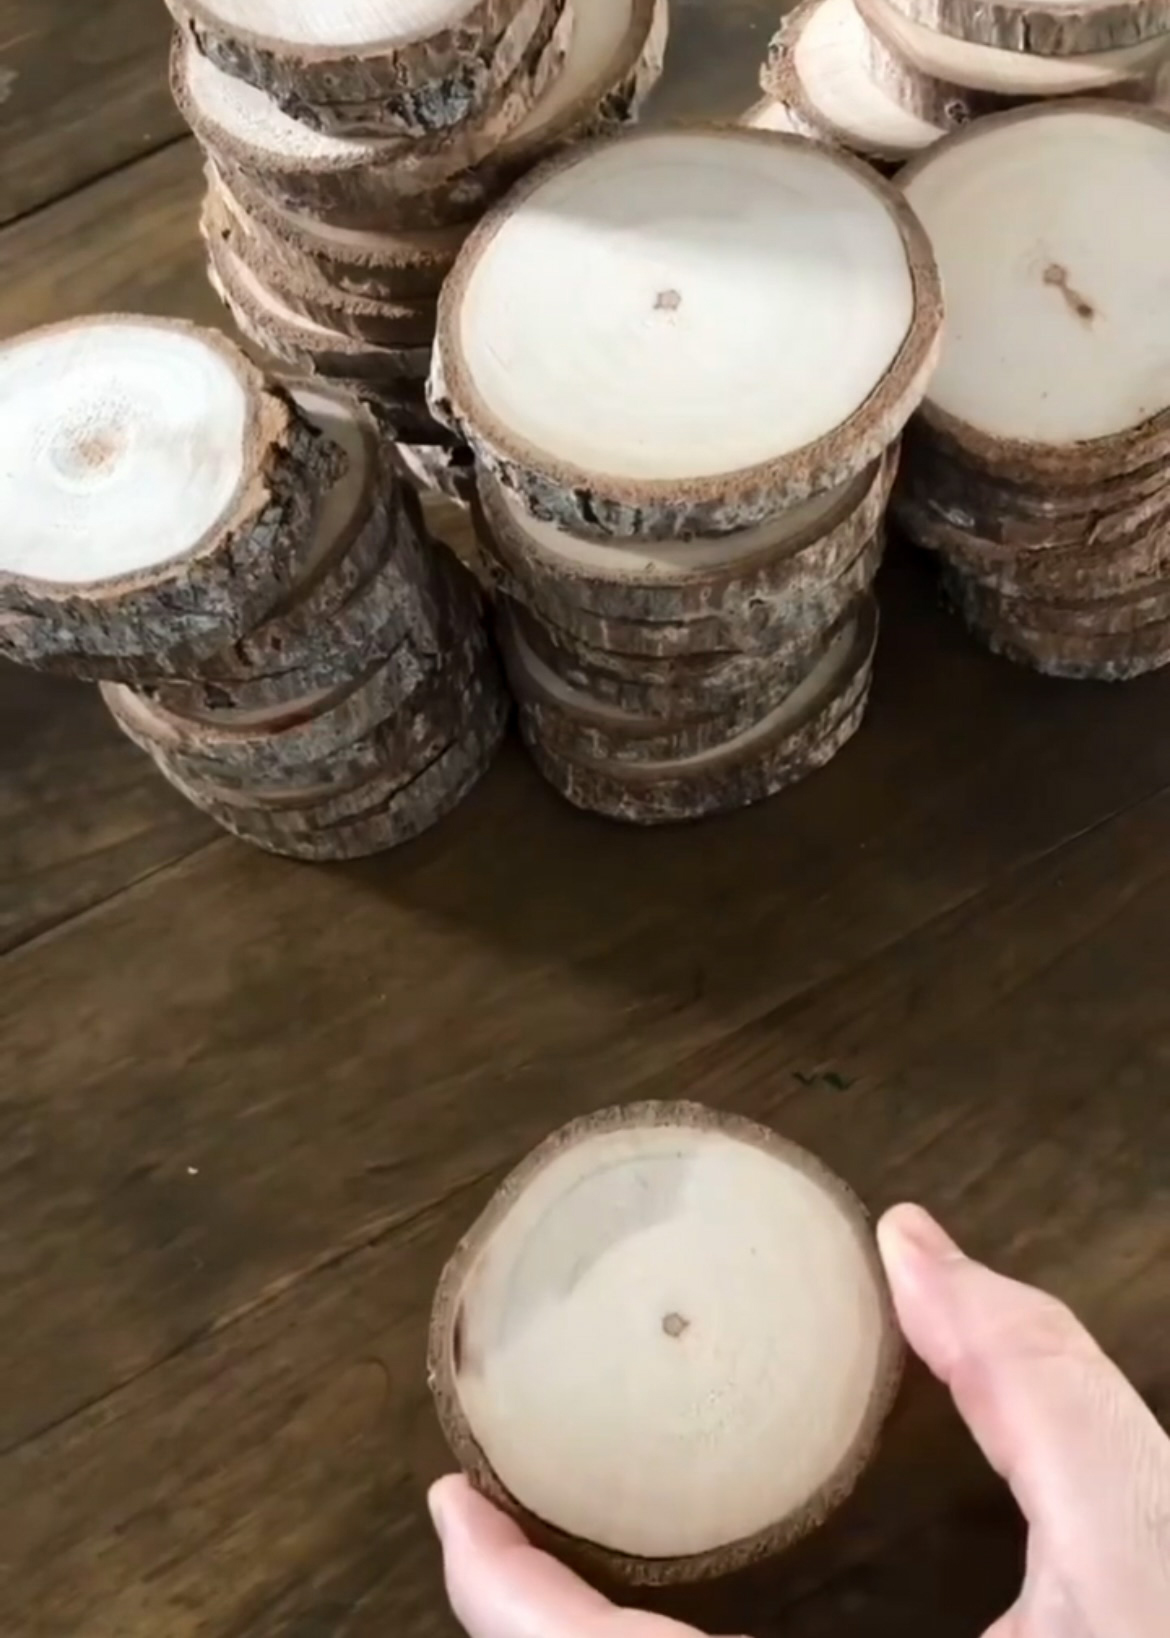
I got some branches from our yard and cut them with the miter saw so they were around ½ inch thick. You can also buy wood slices at craft stores or on Amazon. Sand the front if they are rough at all. Use a fine grit sandpaper like 220 grit.
Step 2:
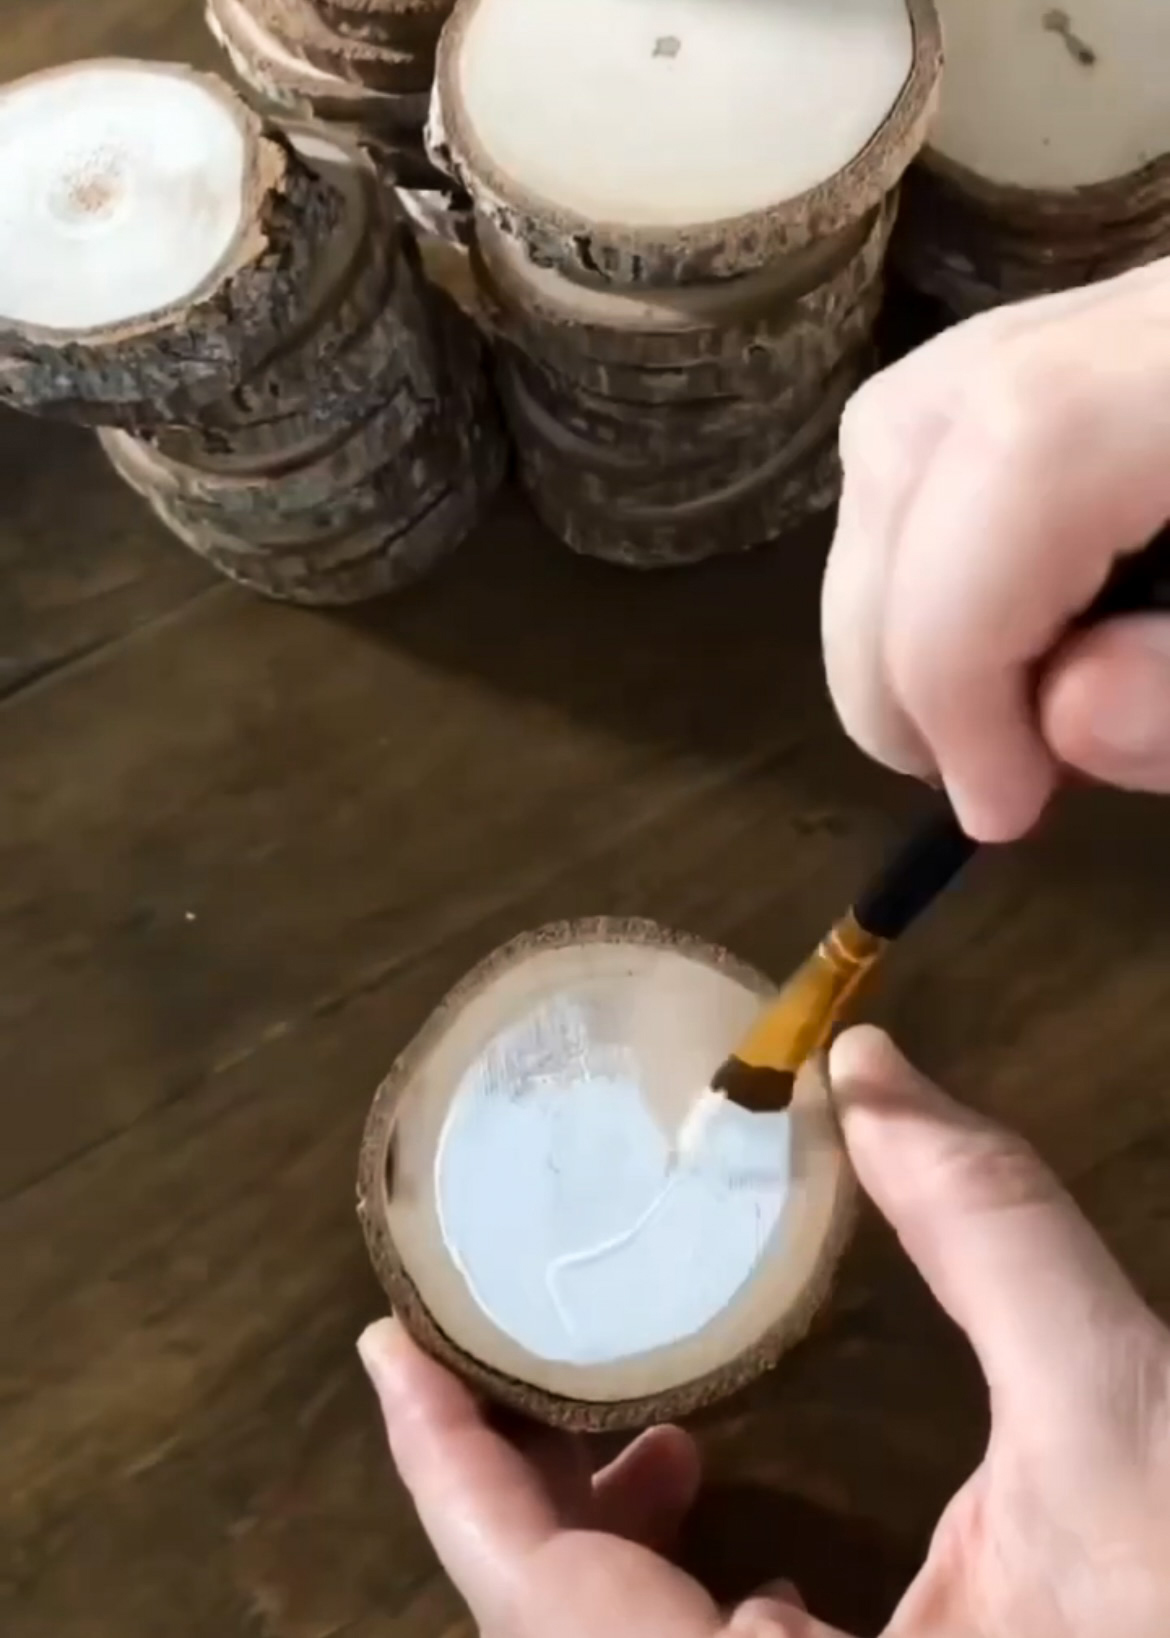
Using a flat brush, paint the center of the wood slice, leaving a border around the edge.
Step 3:
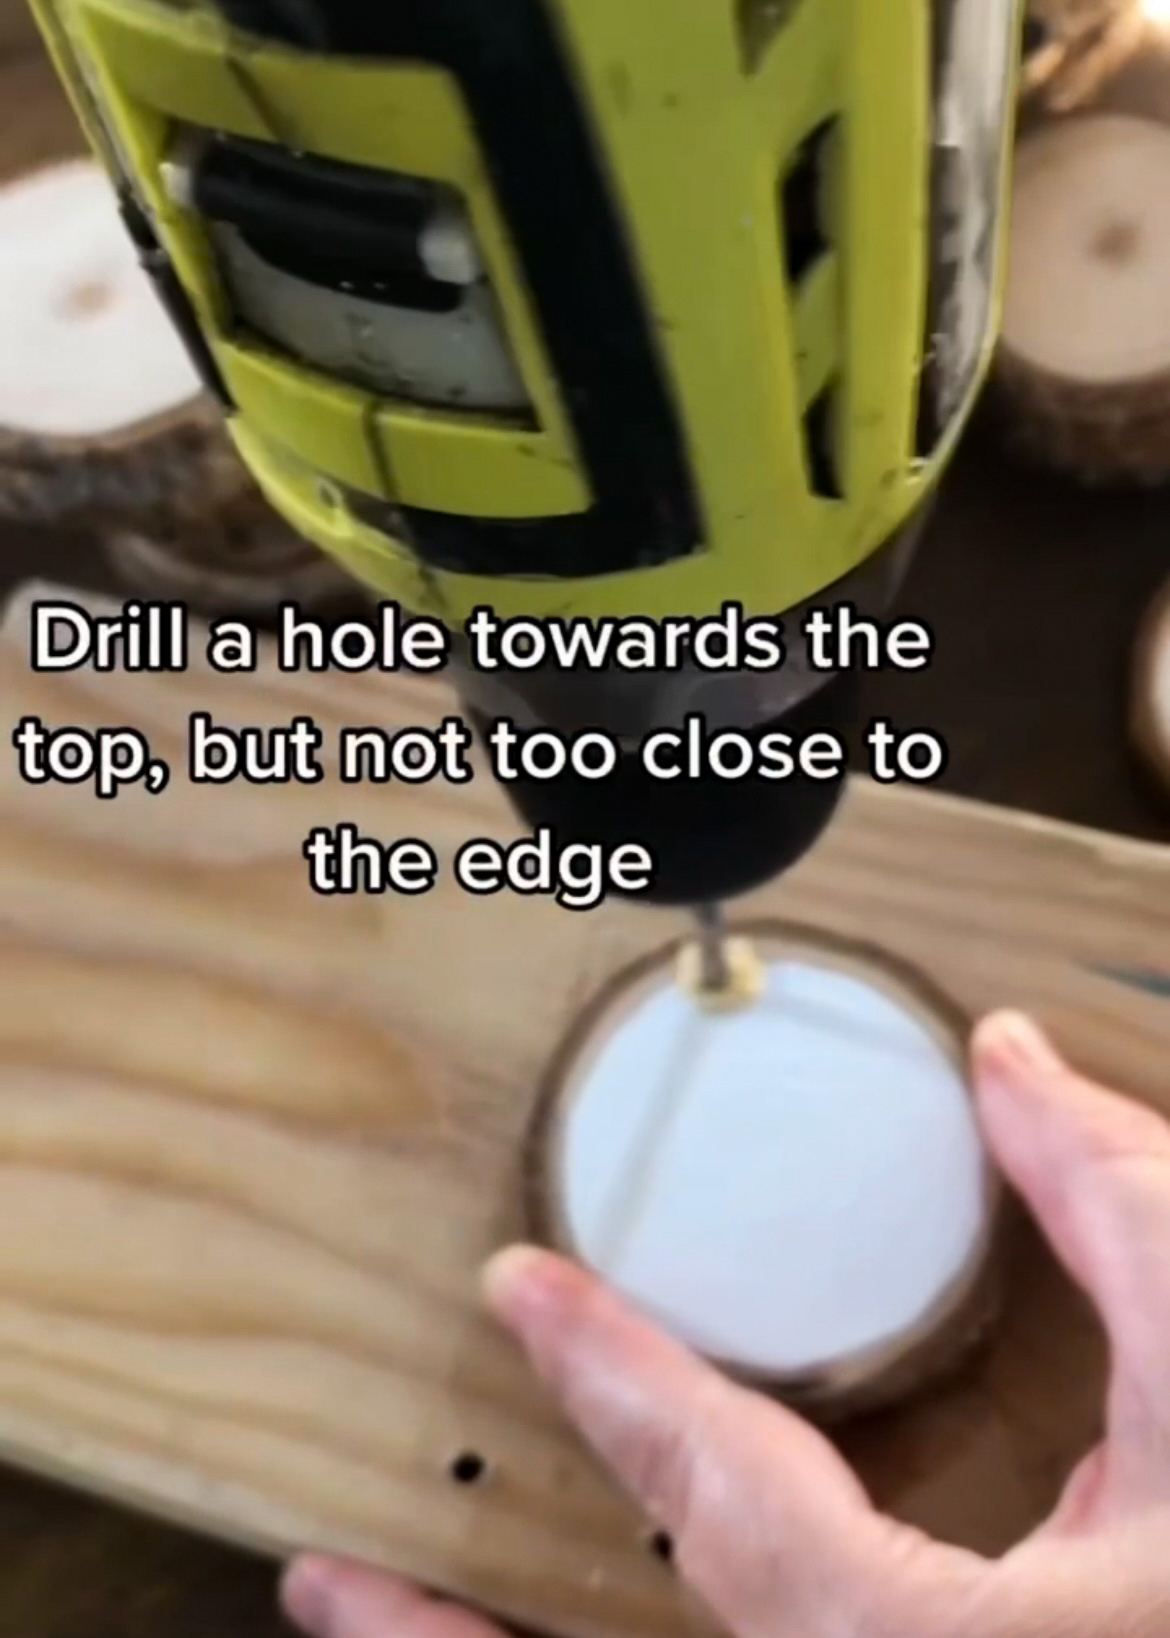
Once the paint is dry, drill a hole towards to top.
Step 4:
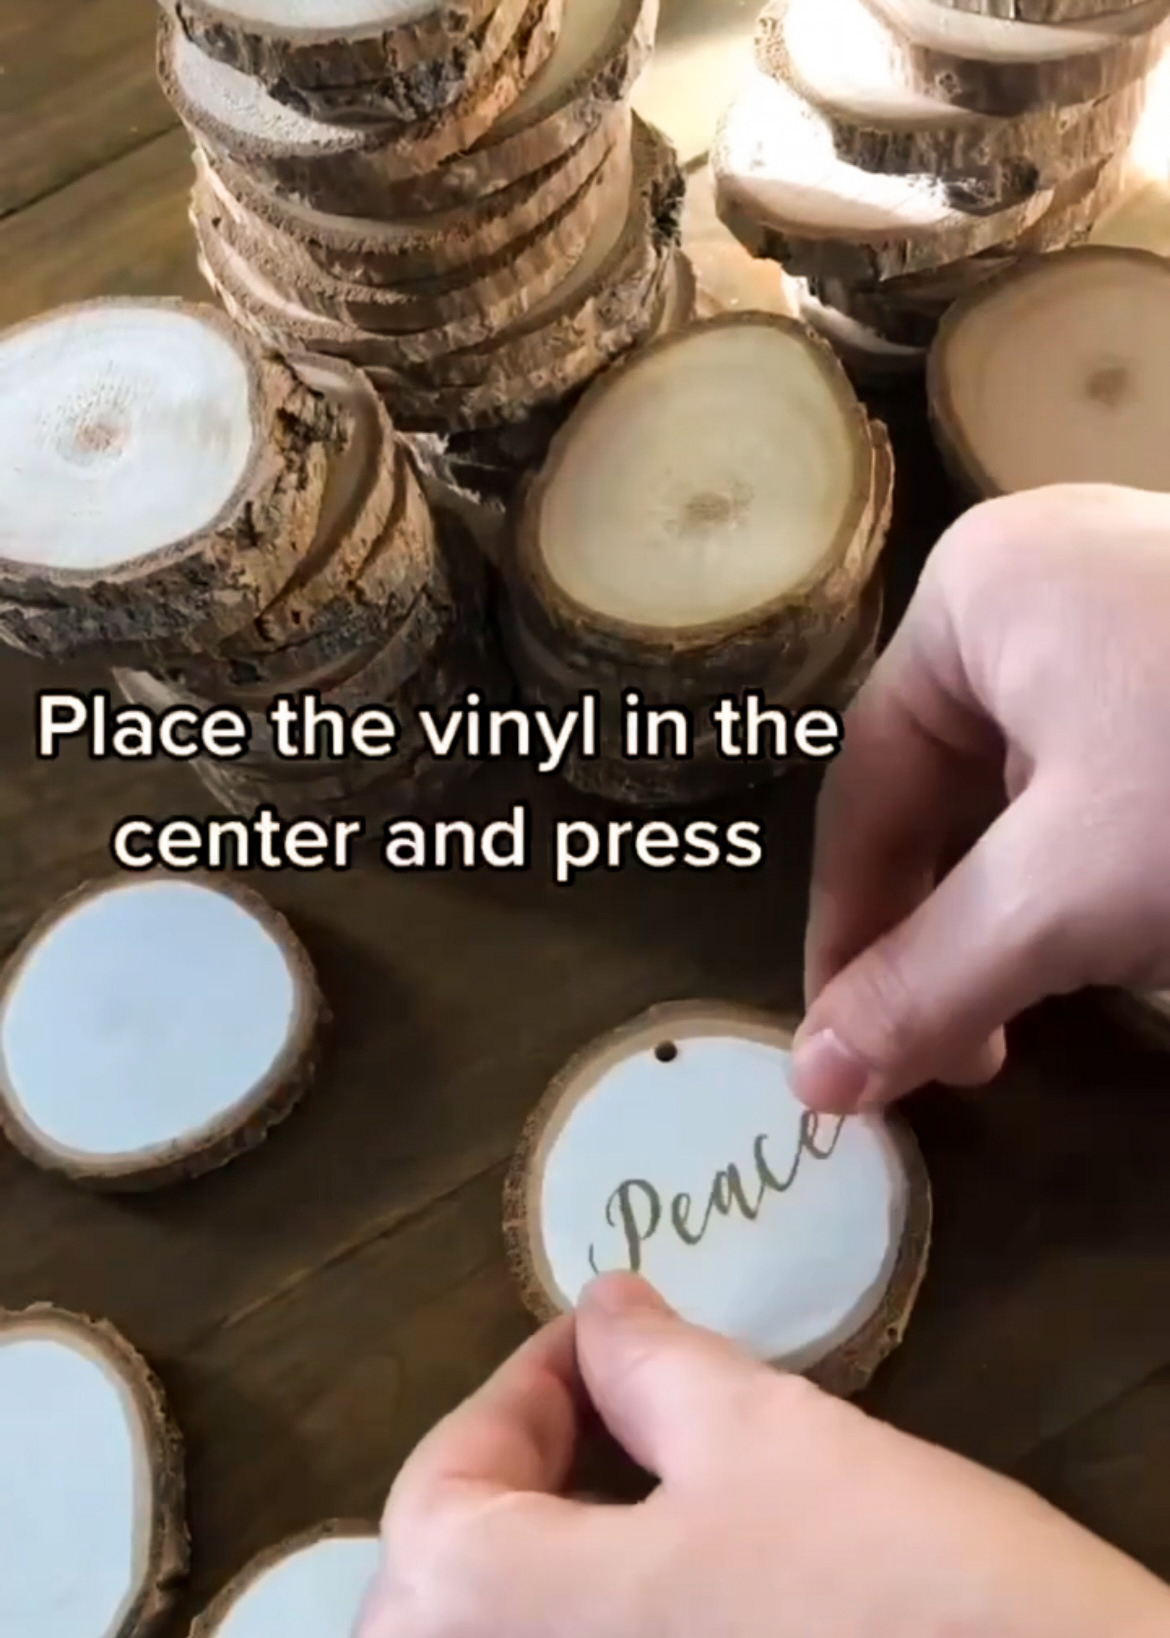
Place the sticker or vinyl in the center of the wood slice. If you have a steady hand and good handwriting, you could also use a marker or paint pen to write the words. I used metallic gold vinyl and I love how it shimmers.
Step 5:
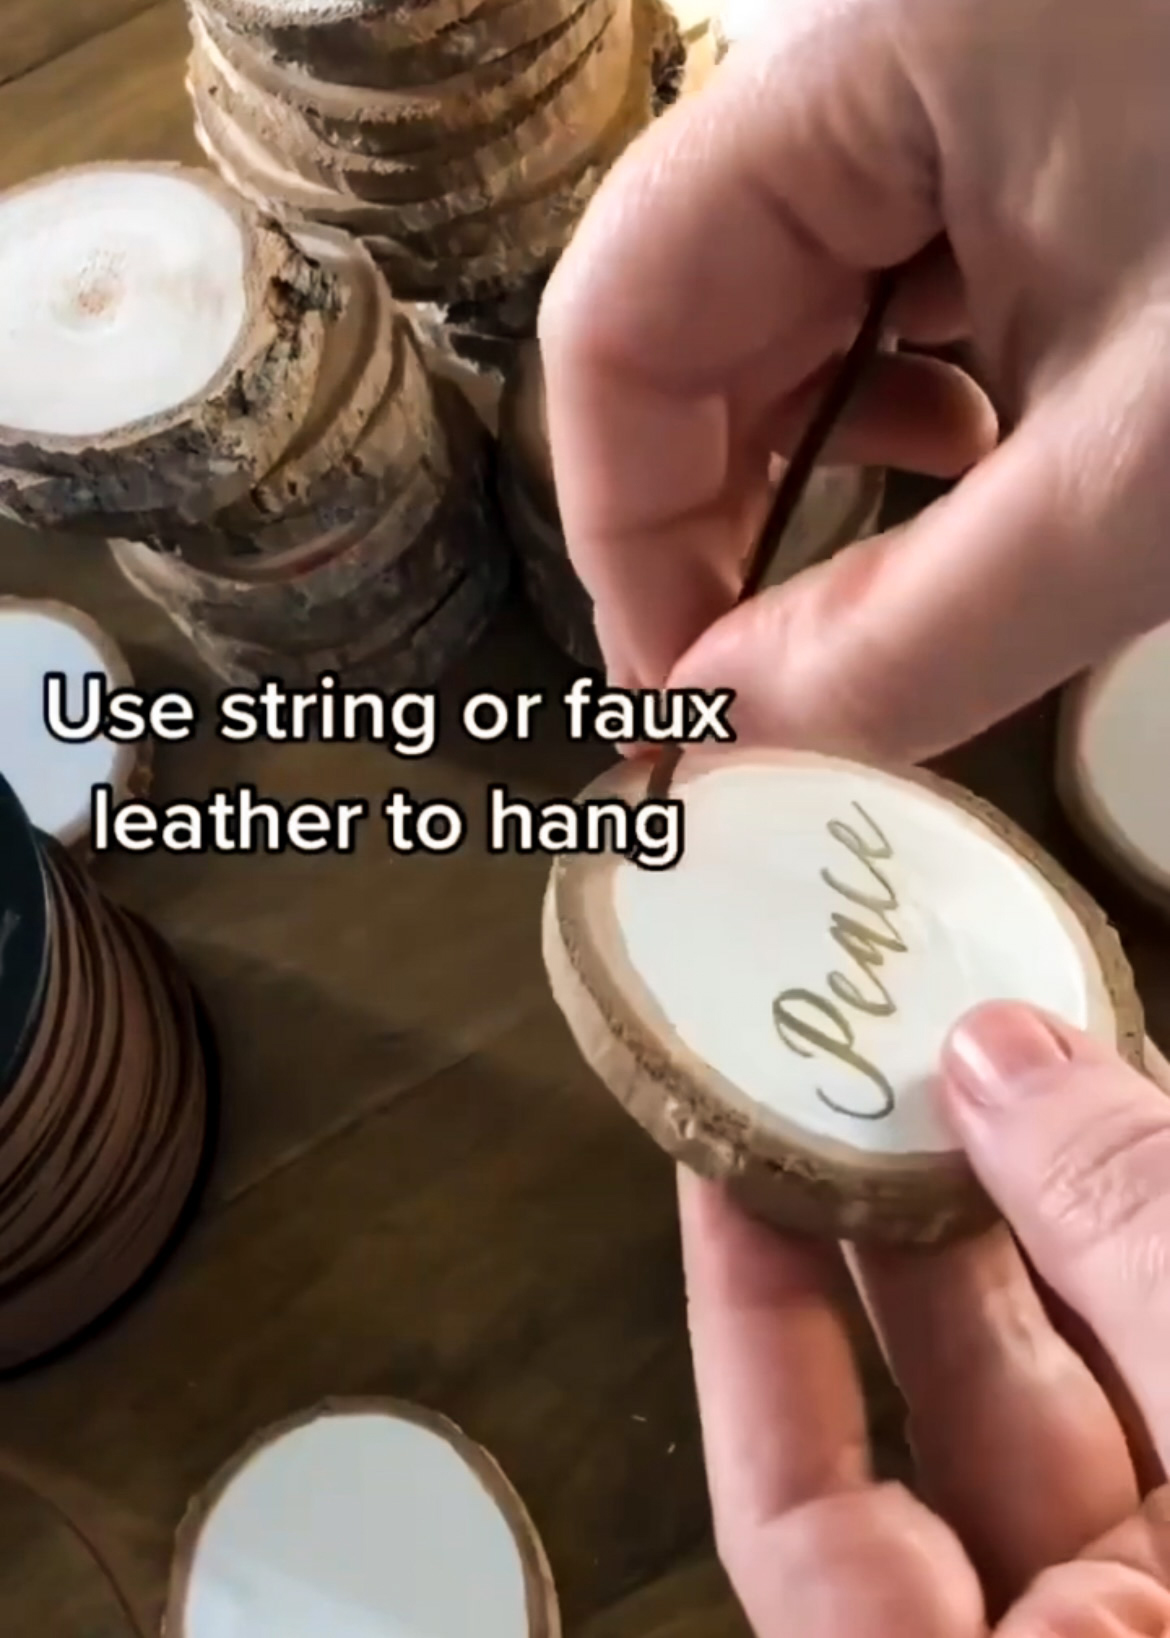
I used faux leather to string the ornaments but string or jute would work as well. I liked how the leather matched the rustic feel of the wood slices.
Here a video of the process.
Have you ever made anything with wood slices?

Day 1: Mini Letterboard Ornaments
Day 2: Clay Snowflake Ornaments
Day 3: Leather Ornaments
Day 4: Mushroom Ornaments
Day 5: Glass Etched Ornaments
Day 6: Gingerbread Ornaments
Day 7: Clay Leaf Print Ornaments
Day 8: Wood Slice Ornaments
Day 9: Snow Globe Ornaments
Day 10: Stamped Clay Ornaments
Day 11: String Ball Ornaments
Day 12: DIY Icicle Ornaments


Comment Below!