
Before you know it, it will be time to pull the Christmas tree down from the attic and start adding holiday cheer to anything that doesn't move. Over the next 12 days, I am going to be sharing some ornament ideas that are easy and inexpensive to make. Today I am sharing these darling mini letter board ornaments!
These DIY letterboard ornaments are adorable and totally customizable! Make them say whatever you want. Kids will love helping place the letters too!

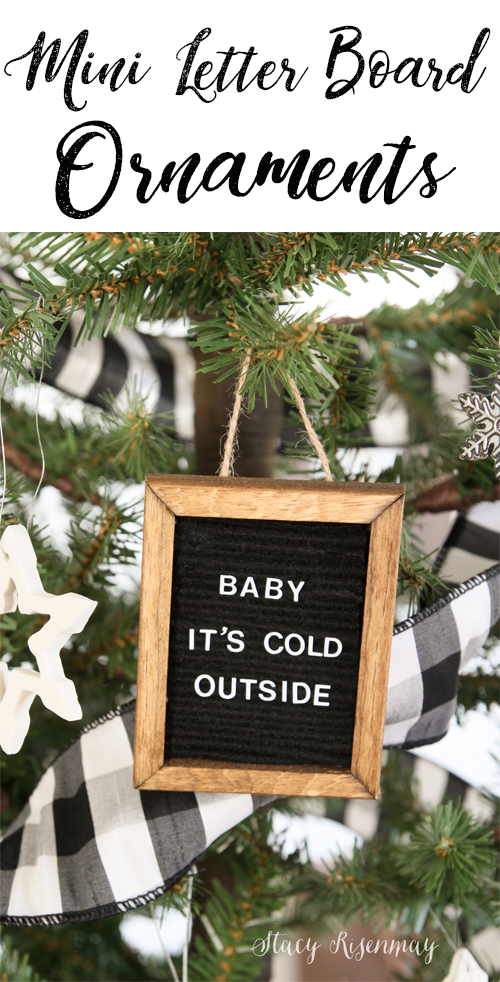
DIY Mini Letter Board Ornaments
*some links are affiliate
Supplies:
2x3 Frames or ¾" trim to build frames
Ruler
Scissors
Step 1
I had some 2x3 frames in my Amazon cart but then decided to make some. There is an insane amount of scrap wood in my garage and I am on a mission to use it up. I grabbed some ¾" trim and cut it to make my own 2x3 frames. I used glue to hold them together.

Step 2
You can buy felt sheets for really cheap (sometimes even per sheet) at craft stores and Walmart. I only used one and a little bit of the second to make 5 of these ornaments.
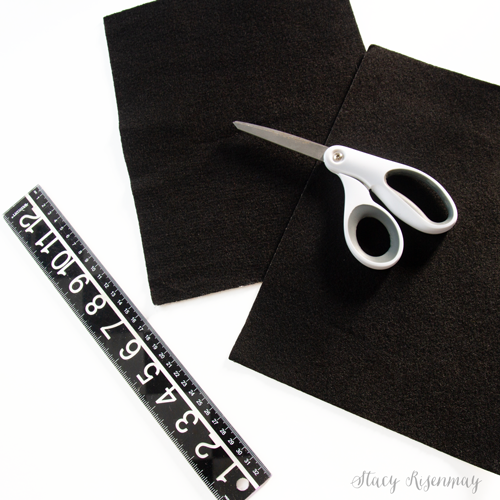
Measure the inside width of the frame and then cut a strip of felt that size. Luckily, the length of the felt sheet which is 12", was the right amount needed to create the letterboard.
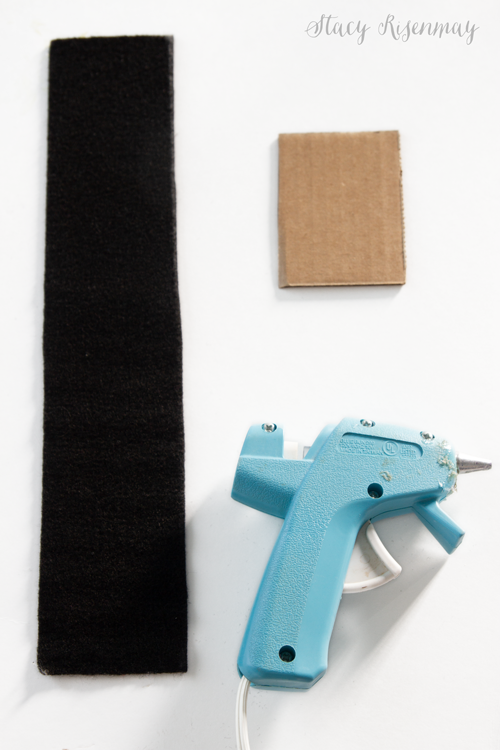
Step 3
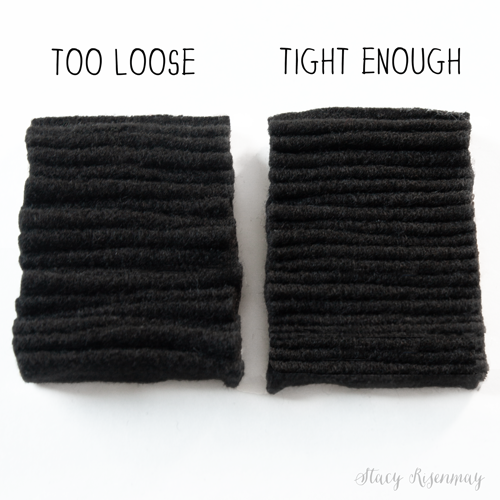
You will fold and glue the felt onto the backing of the frame. Since I made mine, I cut out some cardboard that would fit inside the frame. I tried a variety of ways to glue the folded felt (folded accordion style) to the cardboard. The easiest way I found was the fold three times and then glue them on. Any more than that and it would pop up and come unfolded.
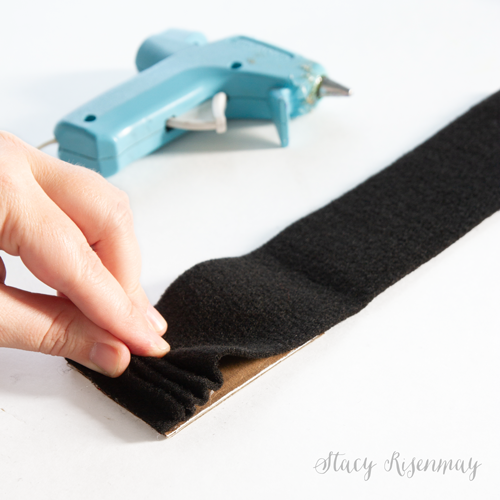
Here is my first one compared to my third one. The first one, I had leftover felt I had to cut off because I did the folds too big and they were too loose.
Step 4
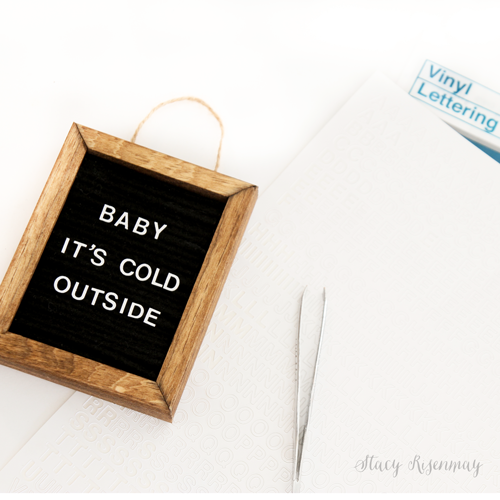
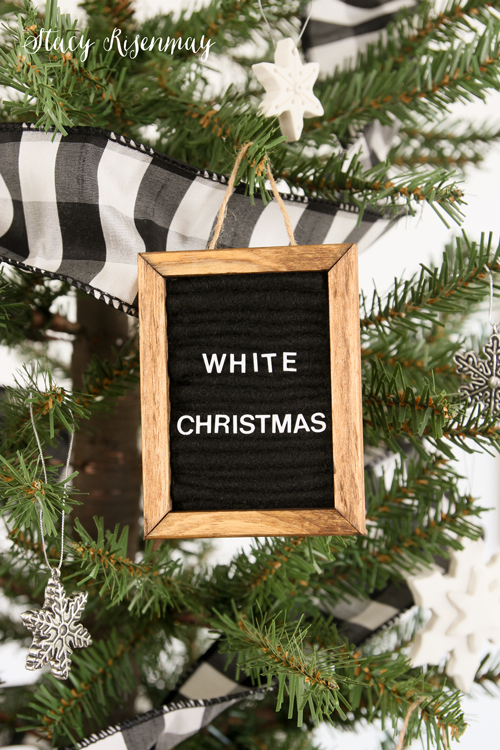
Once they were all glued down to the cardboard backing, I inserted them into the frames that I had stained. I glued some string to the back so I could hand them up.
Step 5
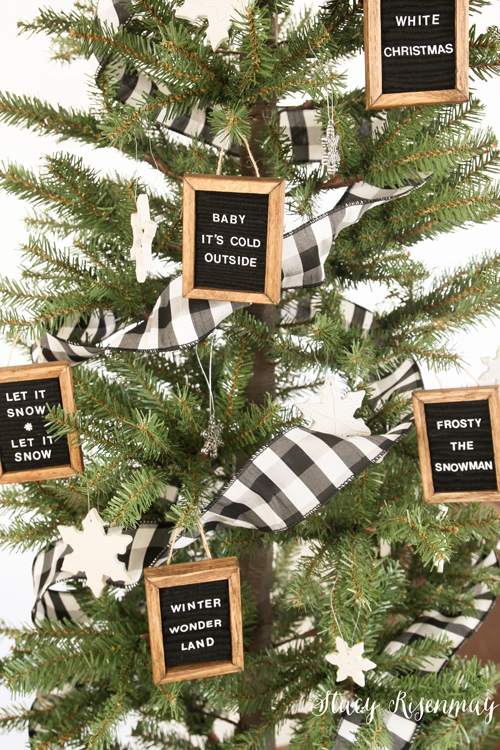
Add the tiny ¼" letters to create whatever saying you want. I went with song titles that had a SNOW theme. There were plenty of letters left over in case I want to change that from year to year.
These mini letter board ornaments are perfect for a kids tree! My teens think they are great :)
Tips:
You can use a spot of super glue to help make the letter permanent or skip it to change them out from year to year.
Paint the frames to match your holiday color scheme!
Day 1: Mini Letterboard Ornaments
Day 2: Clay Snowflake Ornaments
Day 3: Leather Ornaments
Day 4: Mushroom Ornaments
Day 5: Glass Etched Ornaments
Day 6: Gingerbread Ornaments
Day 7: Clay Leaf Print Ornaments
Day 8: Wood Slice Ornaments
Day 9: Snow Globe Ornaments
Day 10: Stamped Clay Ornaments
Day 11: String Ball Ornaments
Day 12: DIY Icicle Ornaments
PIN For Later:


These letter board ornaments are so cute!
Stacy - This is so cute and clever all the way down to the folded felt to resemble the real thing. Pinned.
Love your DIY ornaments, Stacy. Great way to use up extra wood. The theme of Christmas snow songs is wonderful. Thank you for sharing at Tuesday Turn About.