
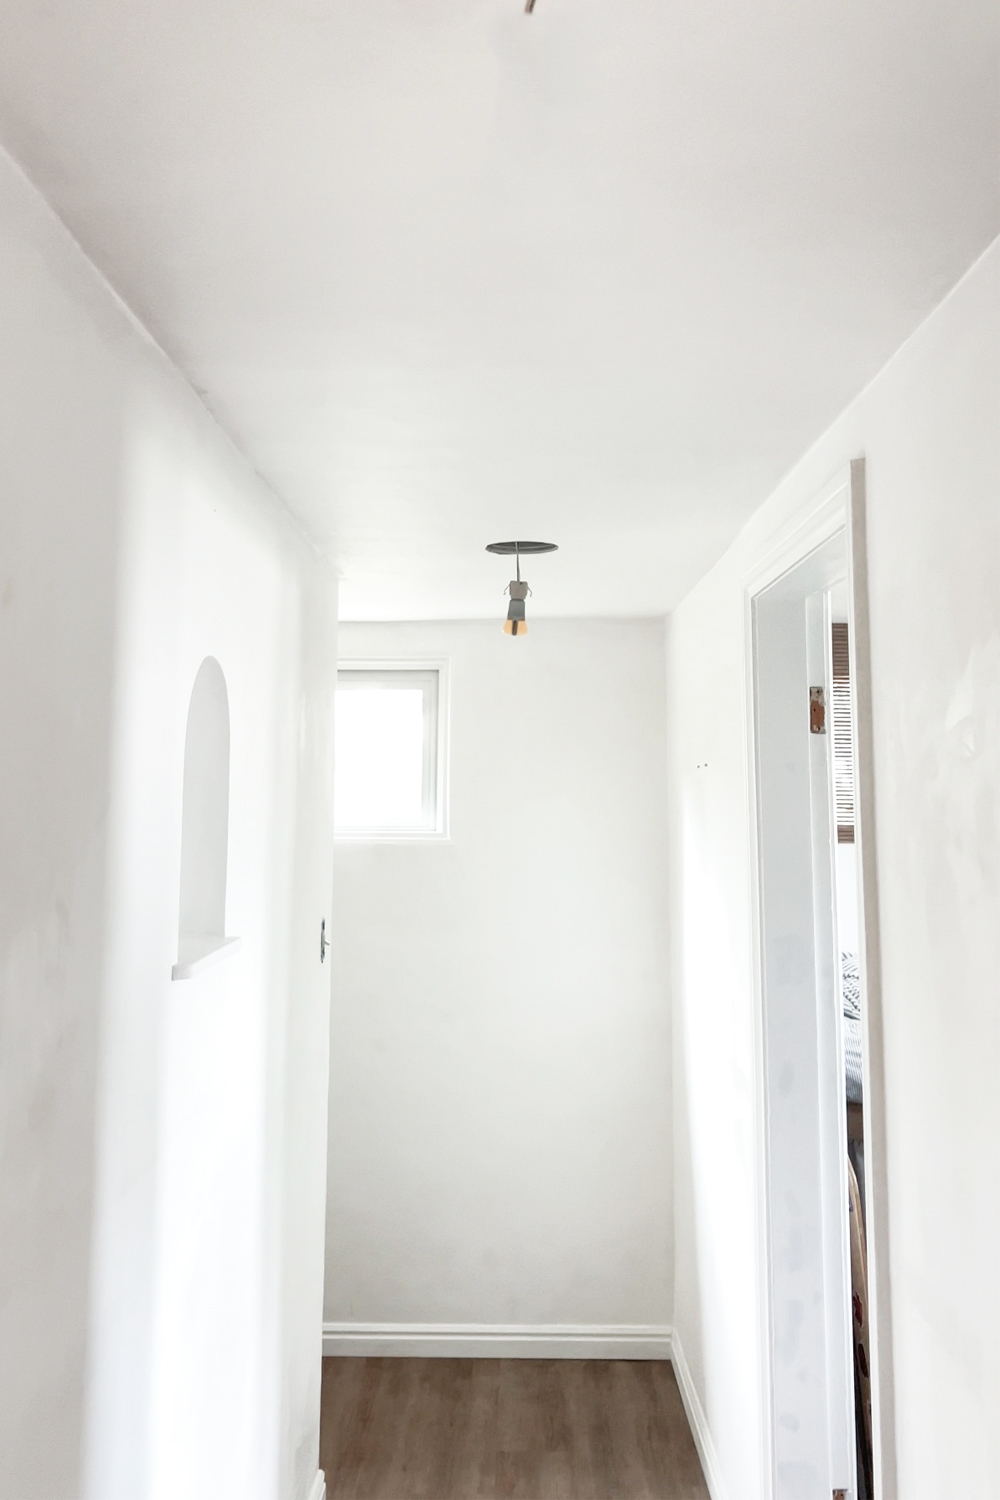
The main level of our 1938 home is brimming with charming details from the rounded front door, to built-ins and arches. But the basement has always been plain and well, boring. It is very... functional. And while we have decorated the bedrooms, they too need an update. So today I am sharing the first makeover with you. Our hallway! How do you add charm to a hallway you ask? Well, here's how I did it!
This post is sponsored by Wagner but all ideas and opinions are 100% my own.
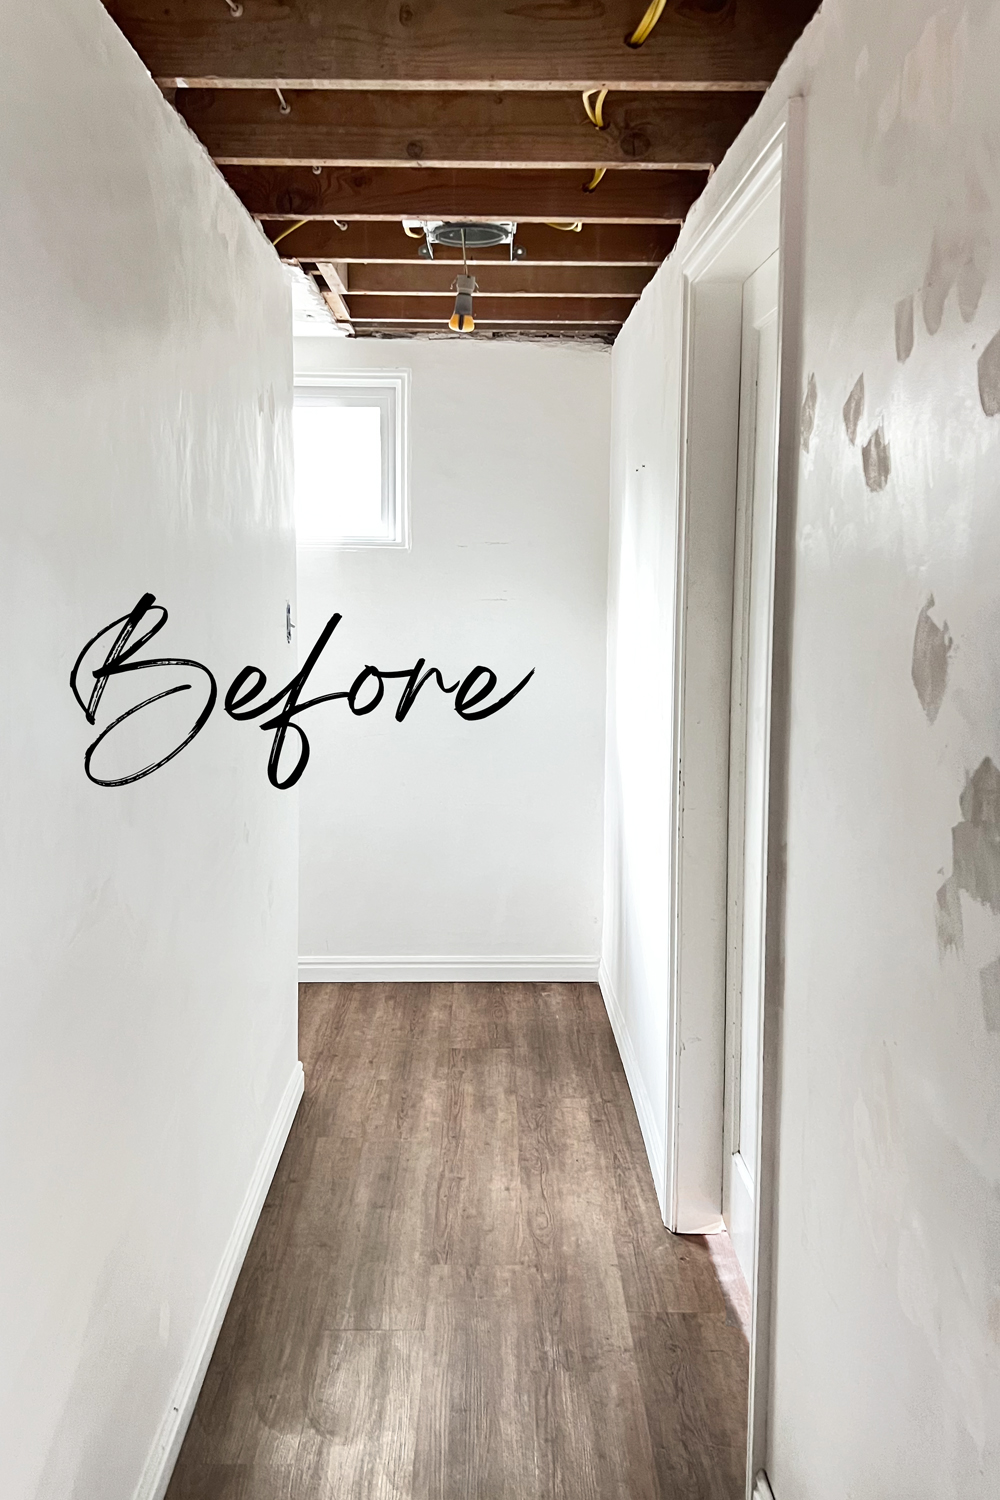
Because it is a basement we have kept the walls white to help keep everything light and bright. We had a couple of framed photos and art on the walls but it was very sparse. I took the ceiling down several years ago to add recessed lighting and never got around to adding drywall. Things like surgeries, weddings and outdoor projects kind of took over and the basement hall was not at the top of our to-do list.
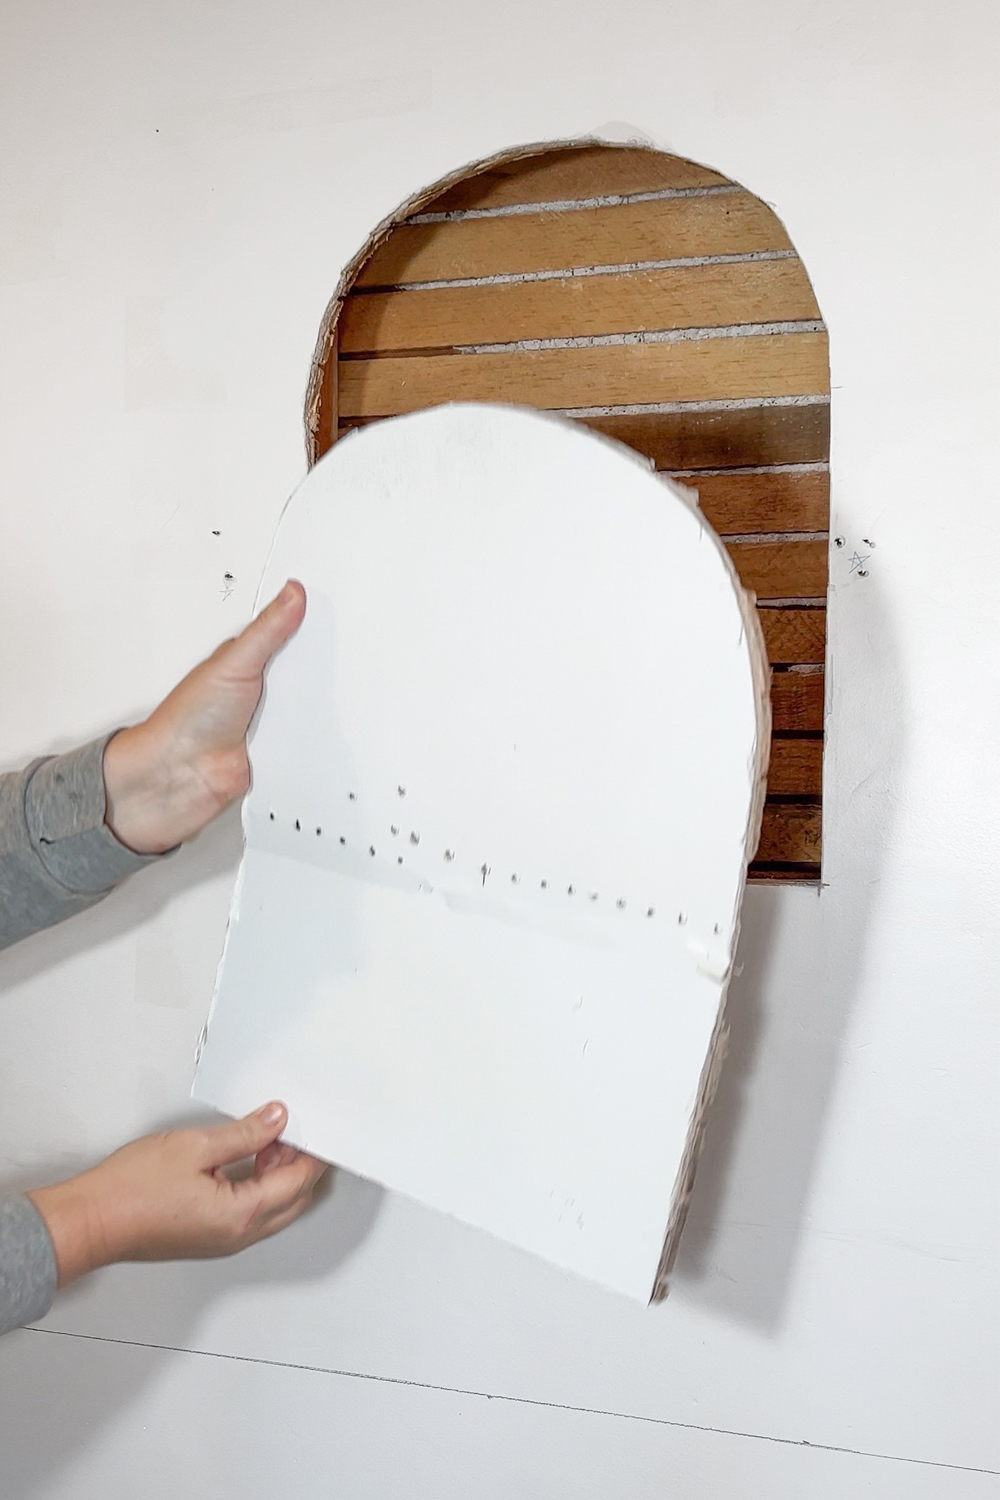
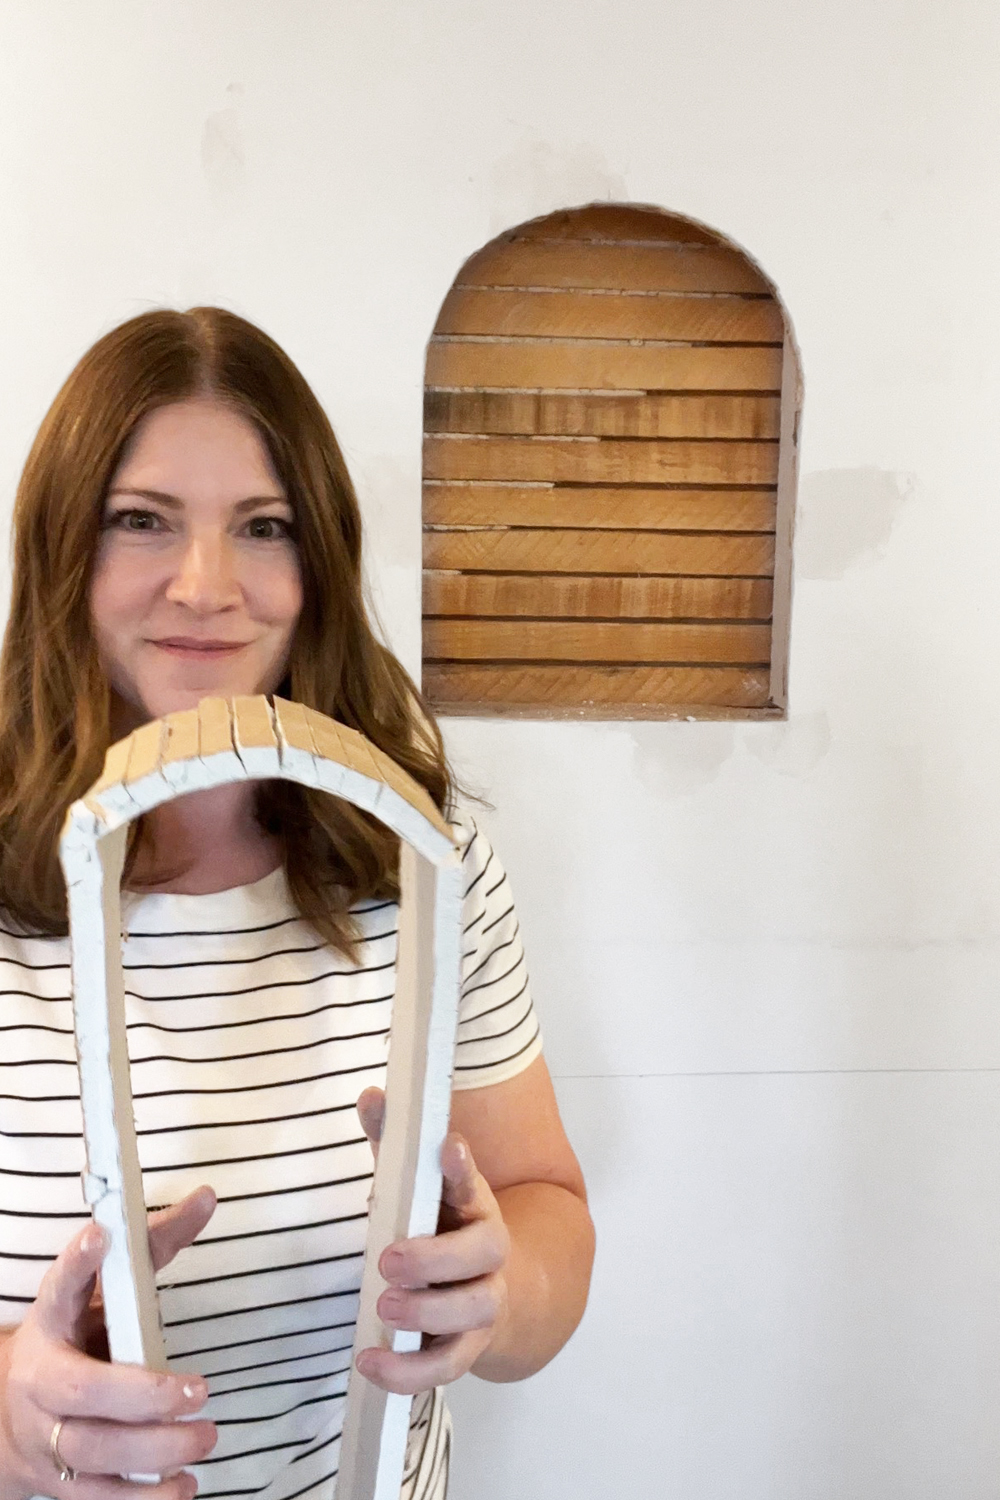
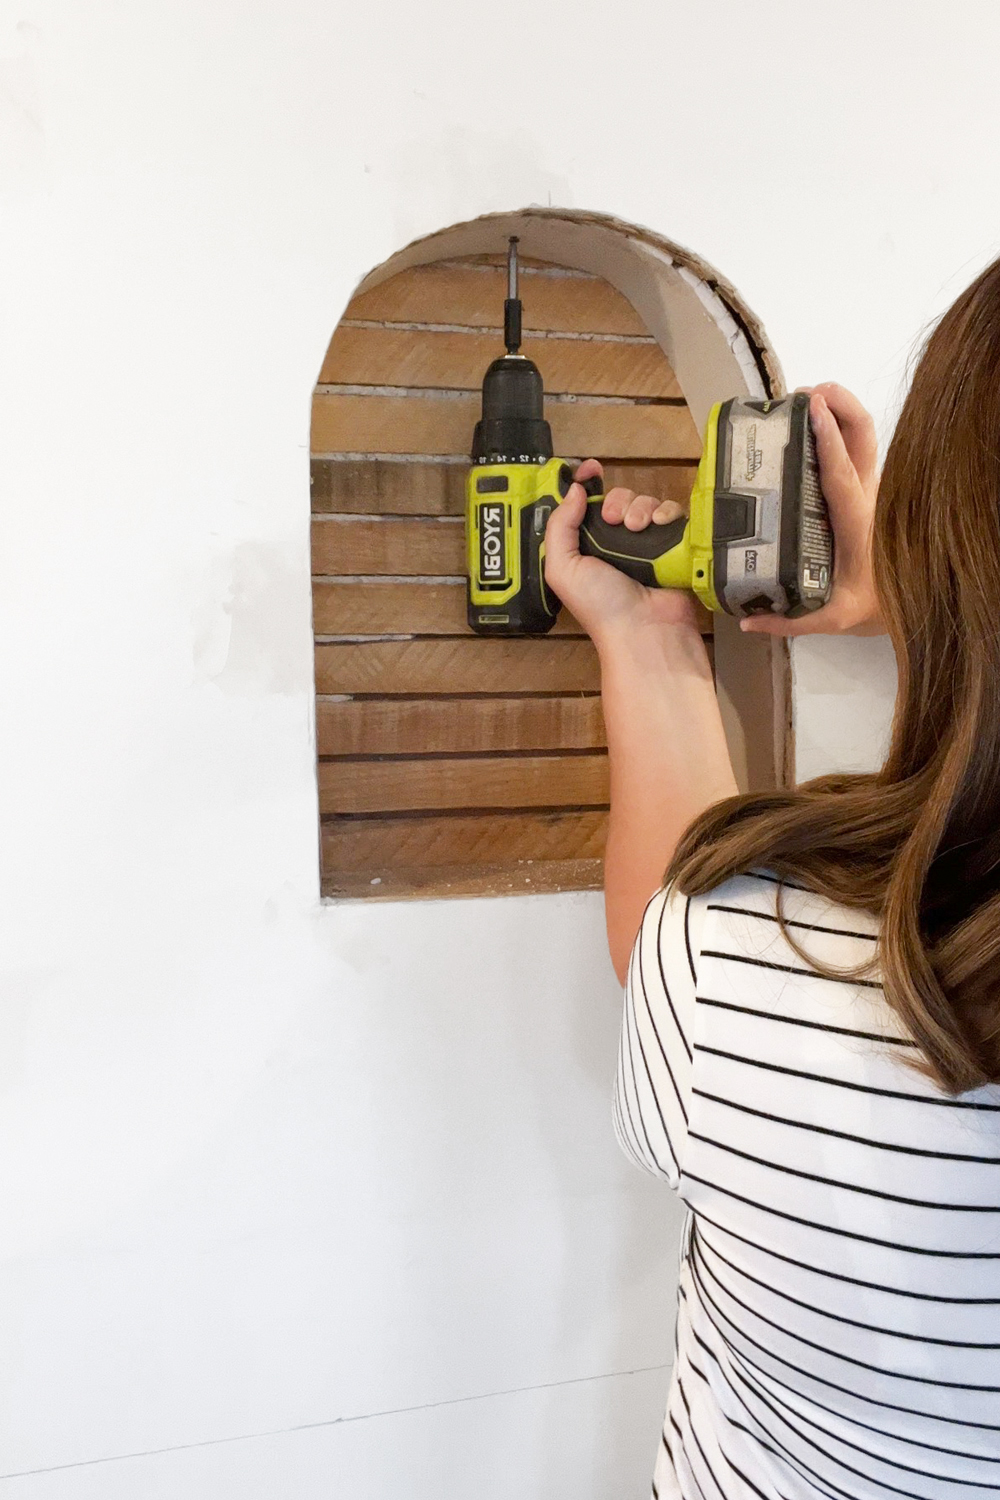
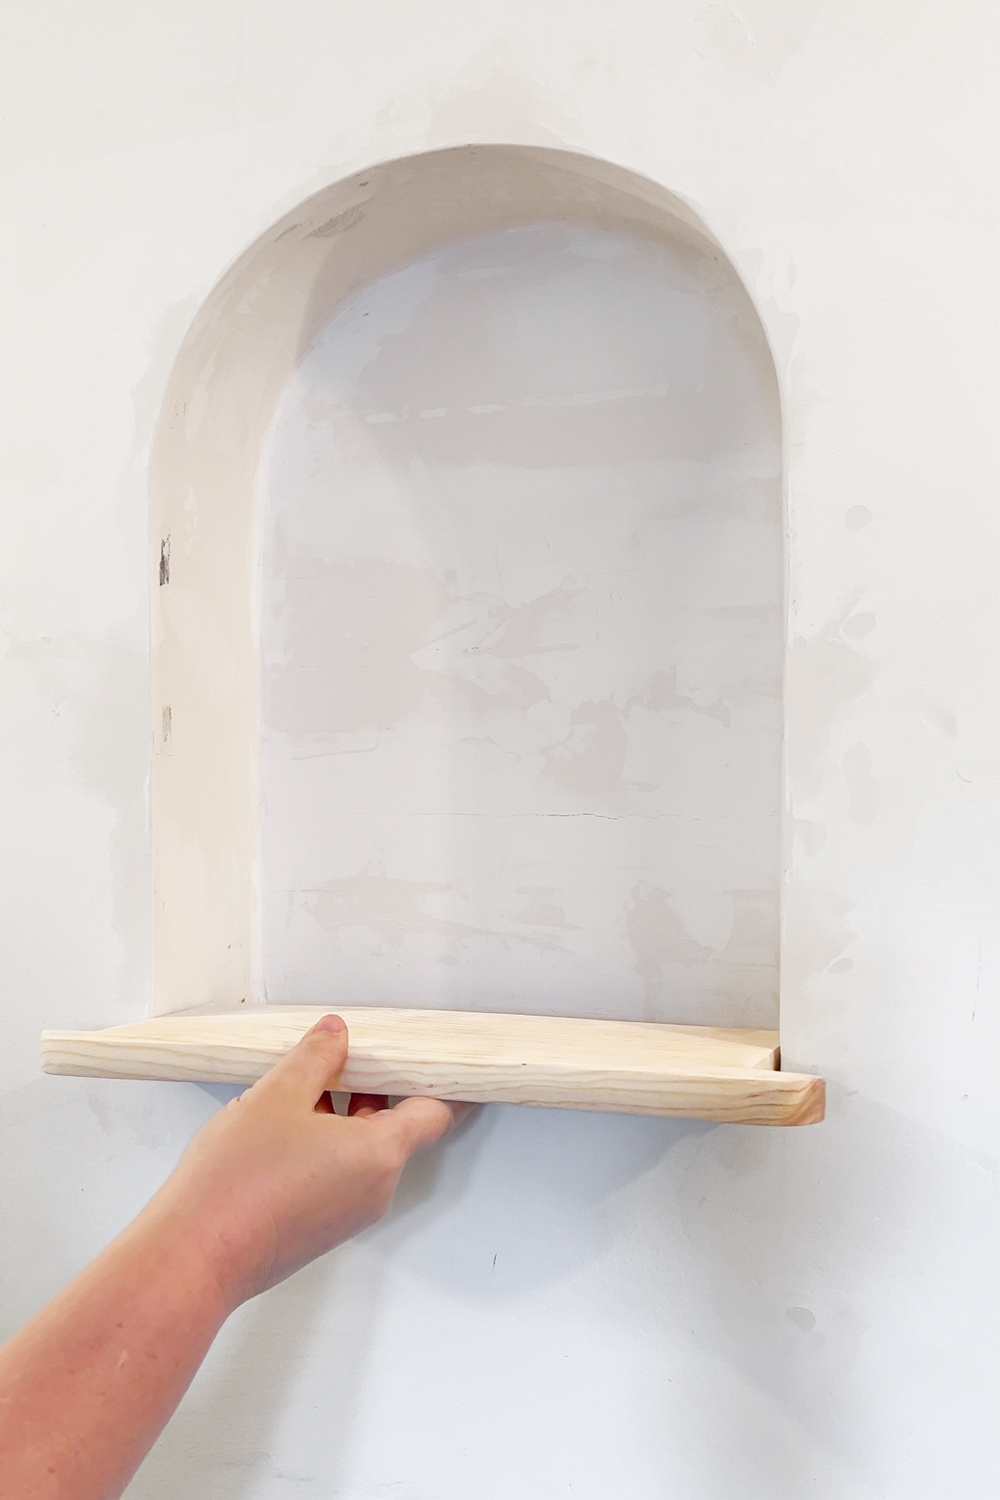
One of my favorite things about our house is the little arched nook above our sofa. I decided to add one to the longest wall in the hallway. I used posterboard to make a template patterned after the one upstairs. I had to drill a bunch of small holes to verify where the studs were. Since we have lathe and plaster, traditional stud finders do not work. Luckily, there were studs on either side of where the center was and where I wanted to add the nook.
I used an oscillating saw to cut the arch. I blocked out the opening with 2x4s so there was something for the drywall to get attached to. I had to cut lines in the drywall to get it to bend (kerf lines).
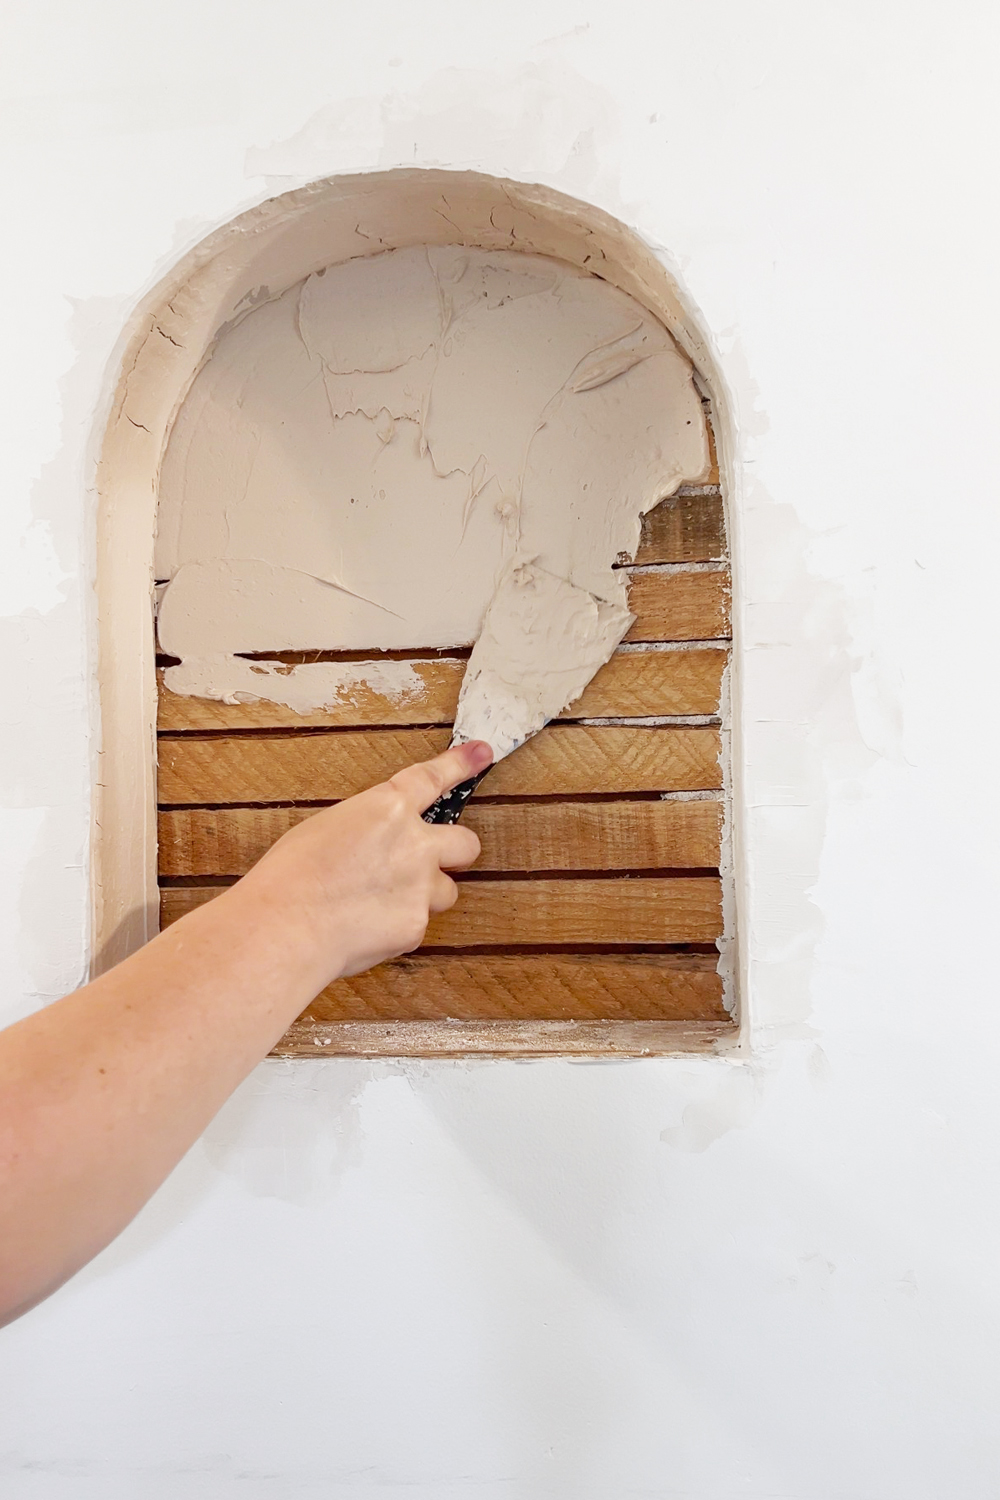
Once the drywall was in place I added drywall mud. One thing I wish I would have done was add drywall mesh tape over the gaps in the lathe because I got cracks there when the mud dried and had to keep applying more mud. So in the off chance that you have lathe and plaster walls and you want to add a little nook, add the mesh tape before mudding :)
I even added the little ledge/shelf like the one upstairs. I cut it out of a scrap piece of a 1x8 board.
After the nook was done I added drywall to the ceiling. I had to wait until I had a couple of helpers to hold it in place while I screwed it in. But after that I was able to tape, mud, texture, sand, touch it up, sand again, prime, and paint all on my own. The perfectionist in me made this process take way too long. But it is done!
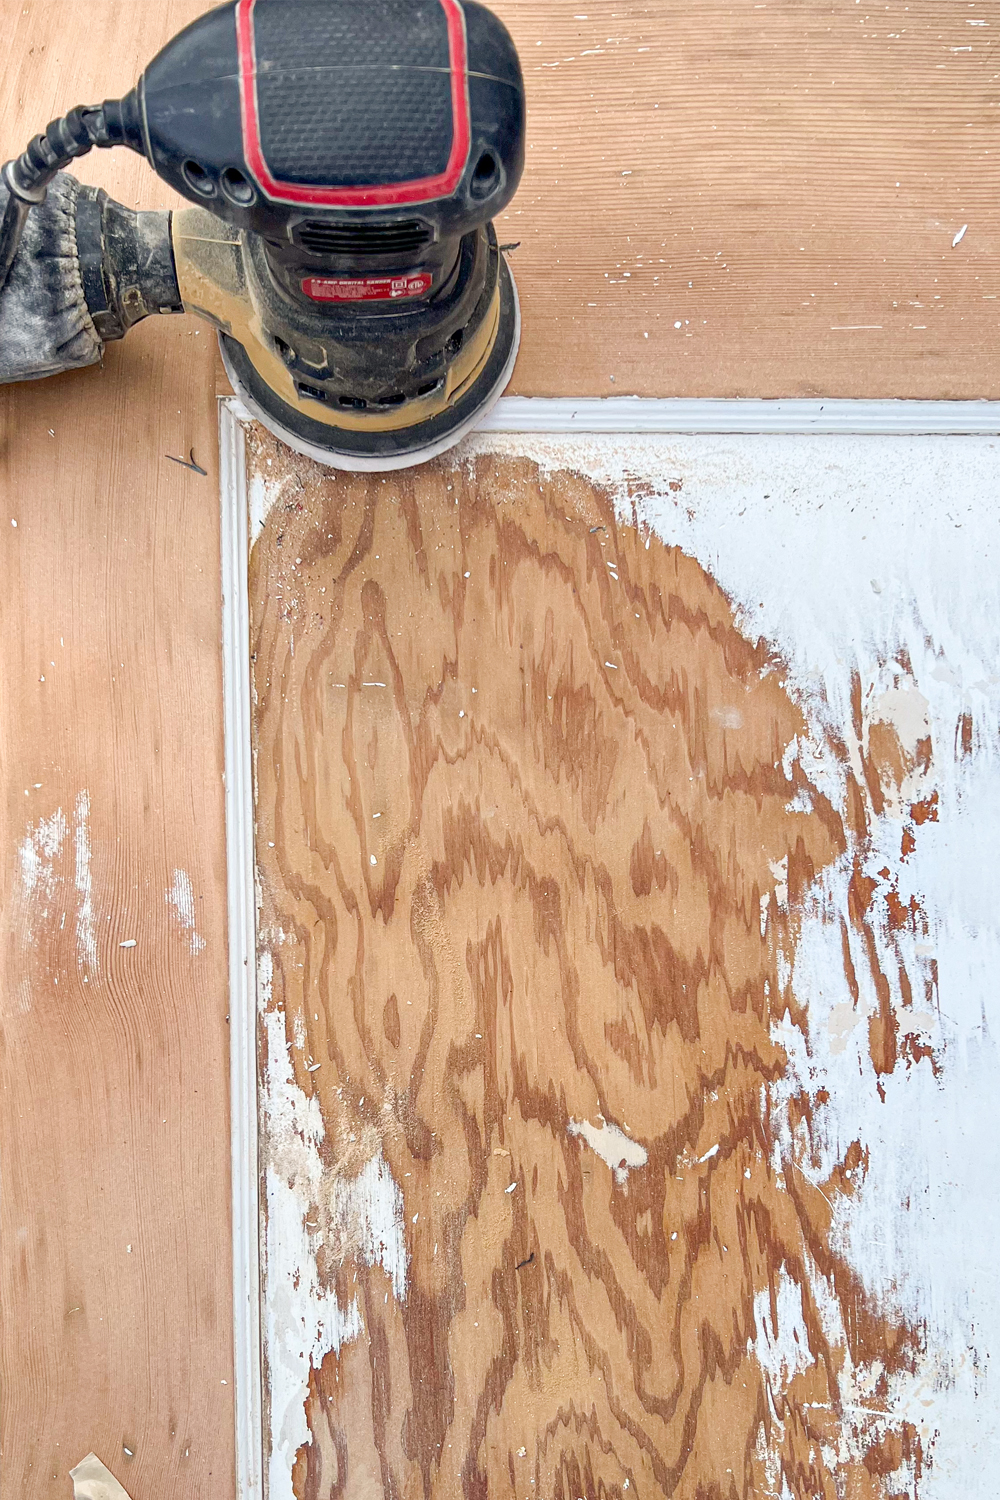
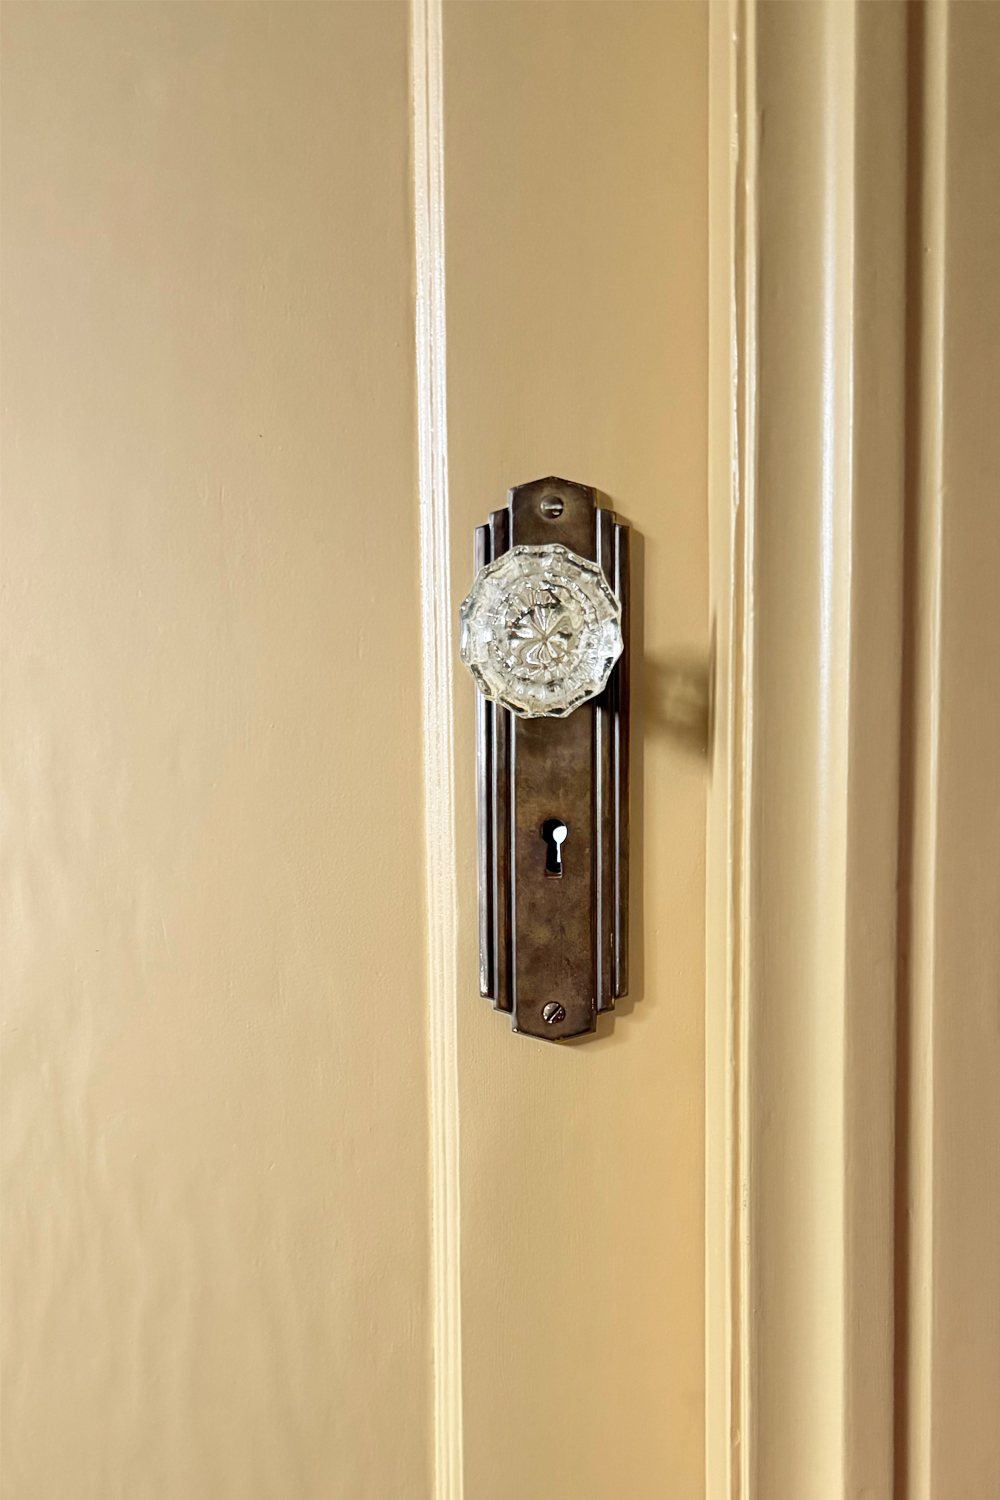
I tackled the doors next. The doors on my kids' rooms were the worst. Between ramming remote control cars into them, shooting arrows, and a little game called penny flipping, the doors were dented like you wouldn't believe. One door had only one thin layer of paint so I sanded it mostly down to the bare wood. The other had many layers so I sanded the best I could and then added bondo to the dents.
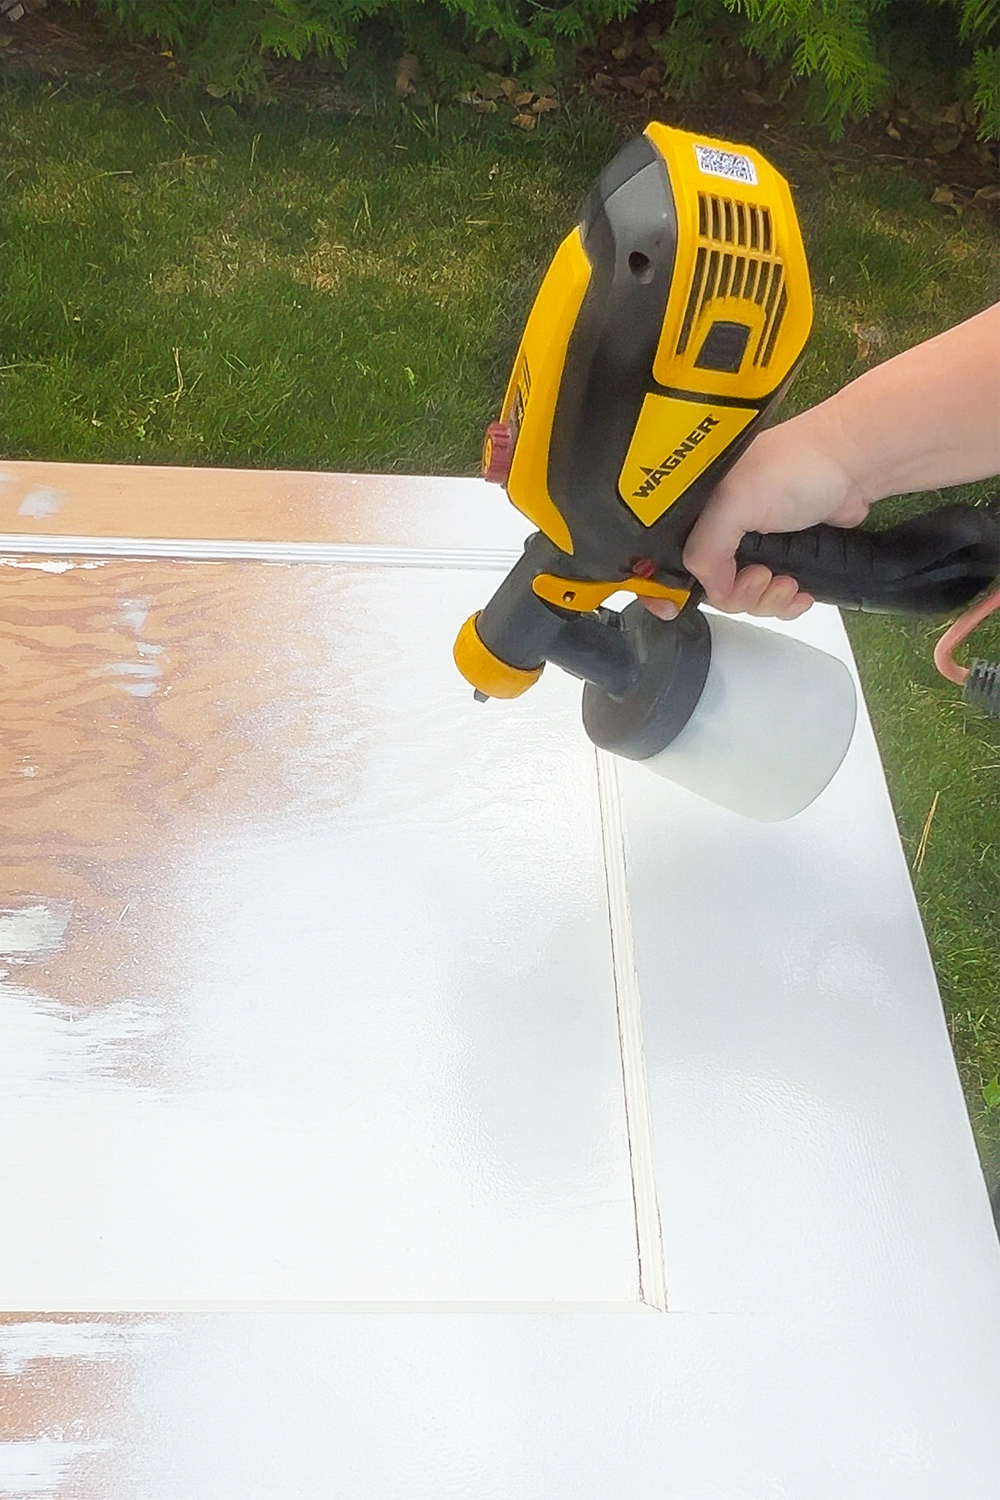
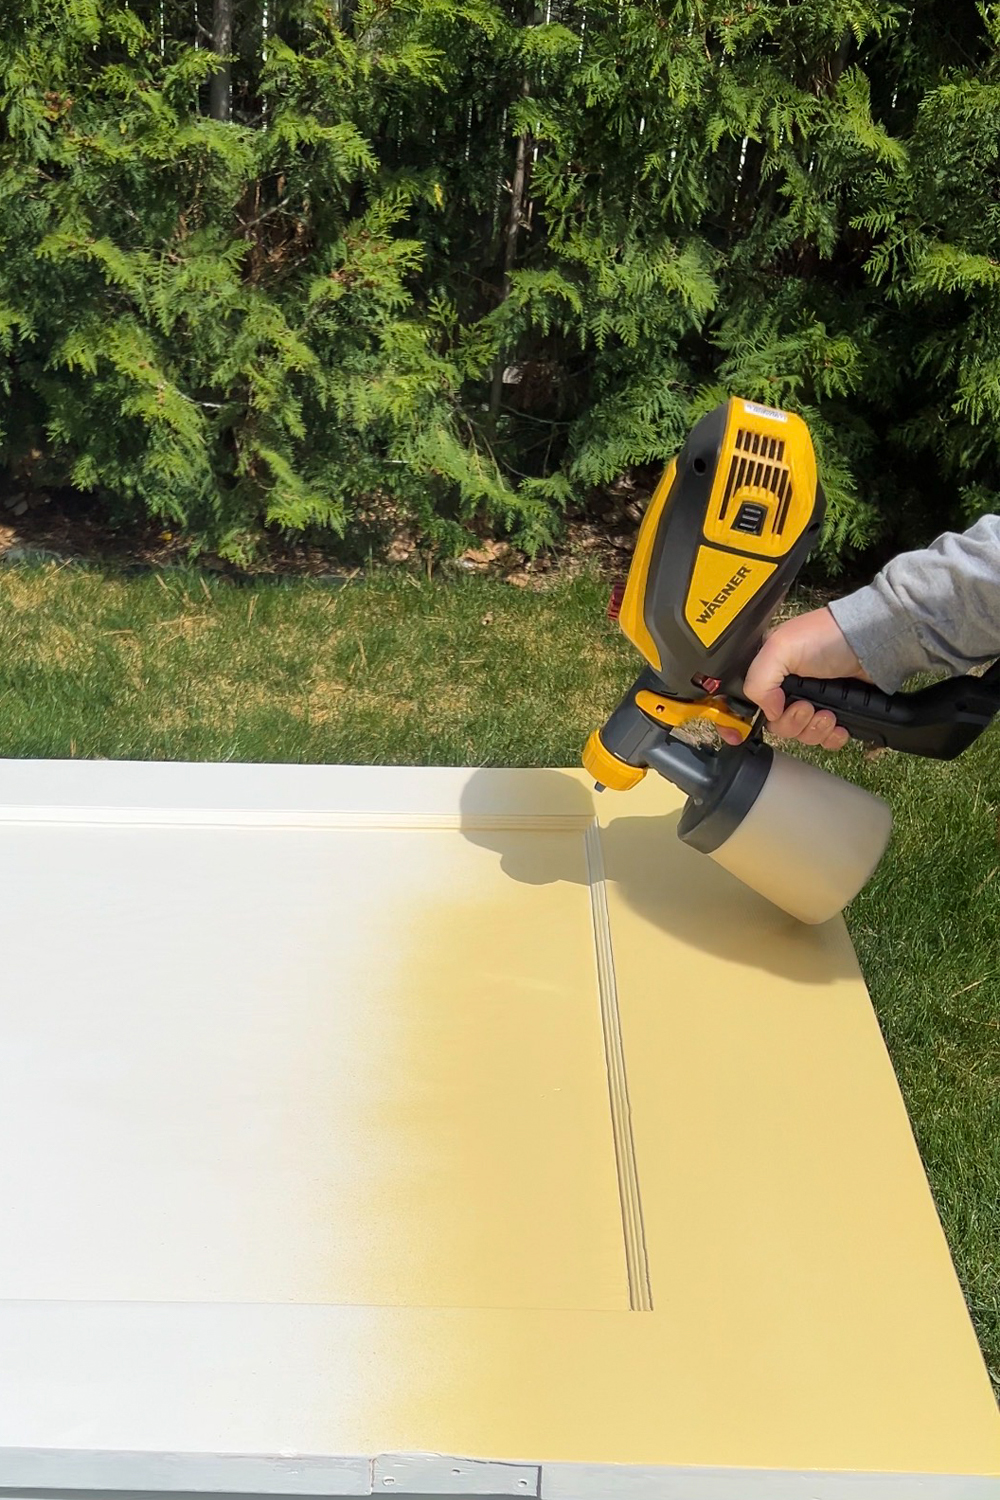
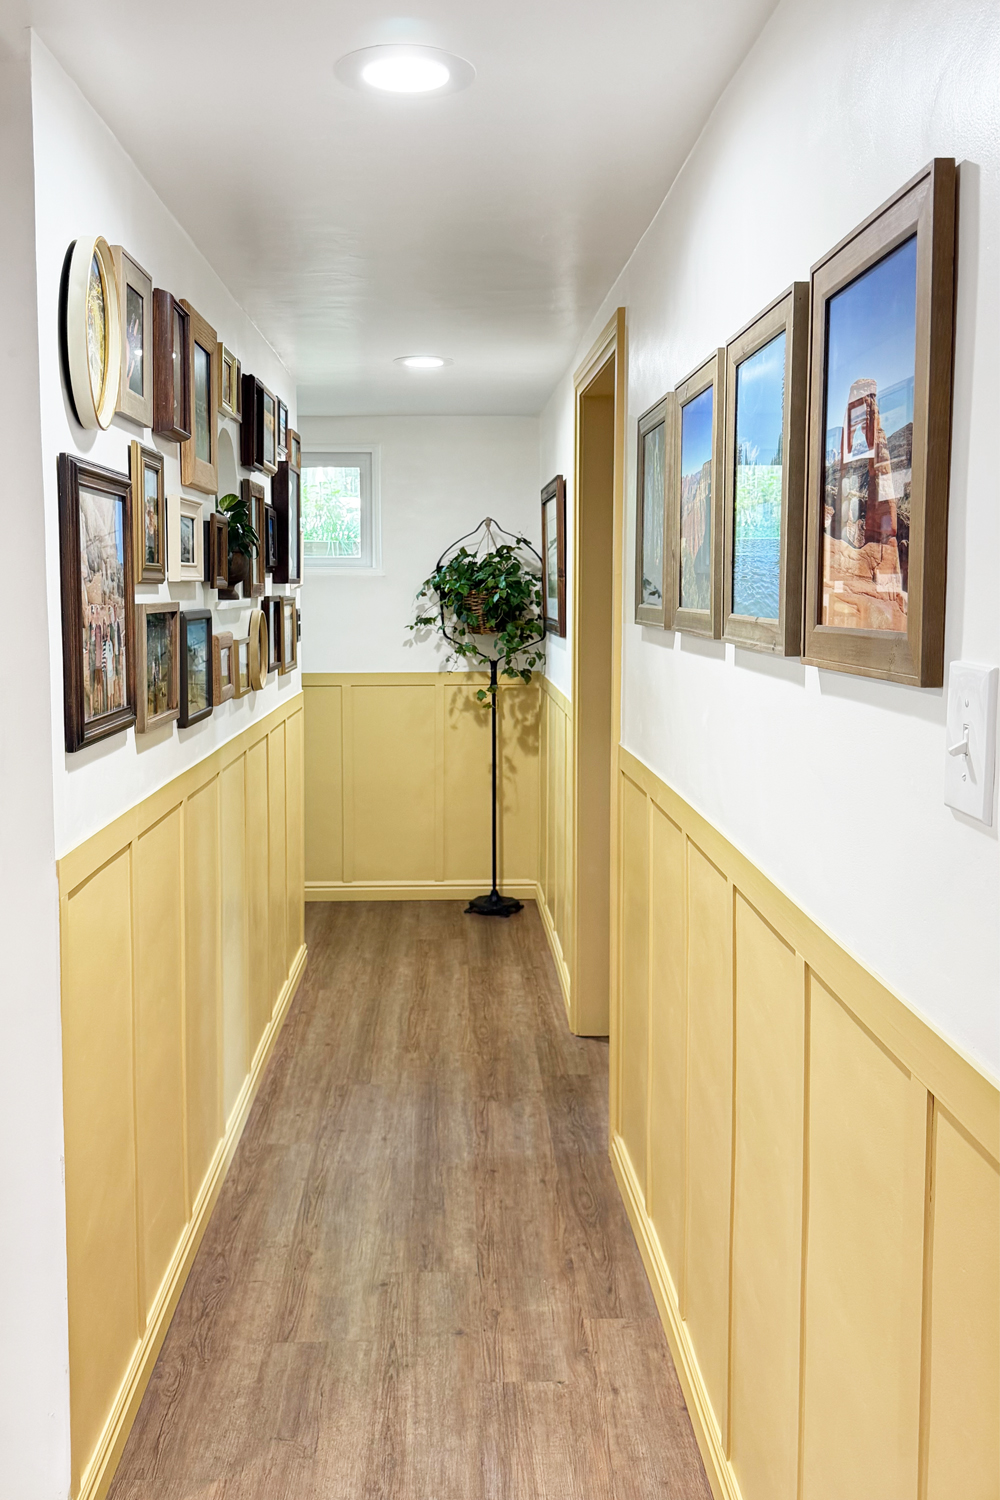
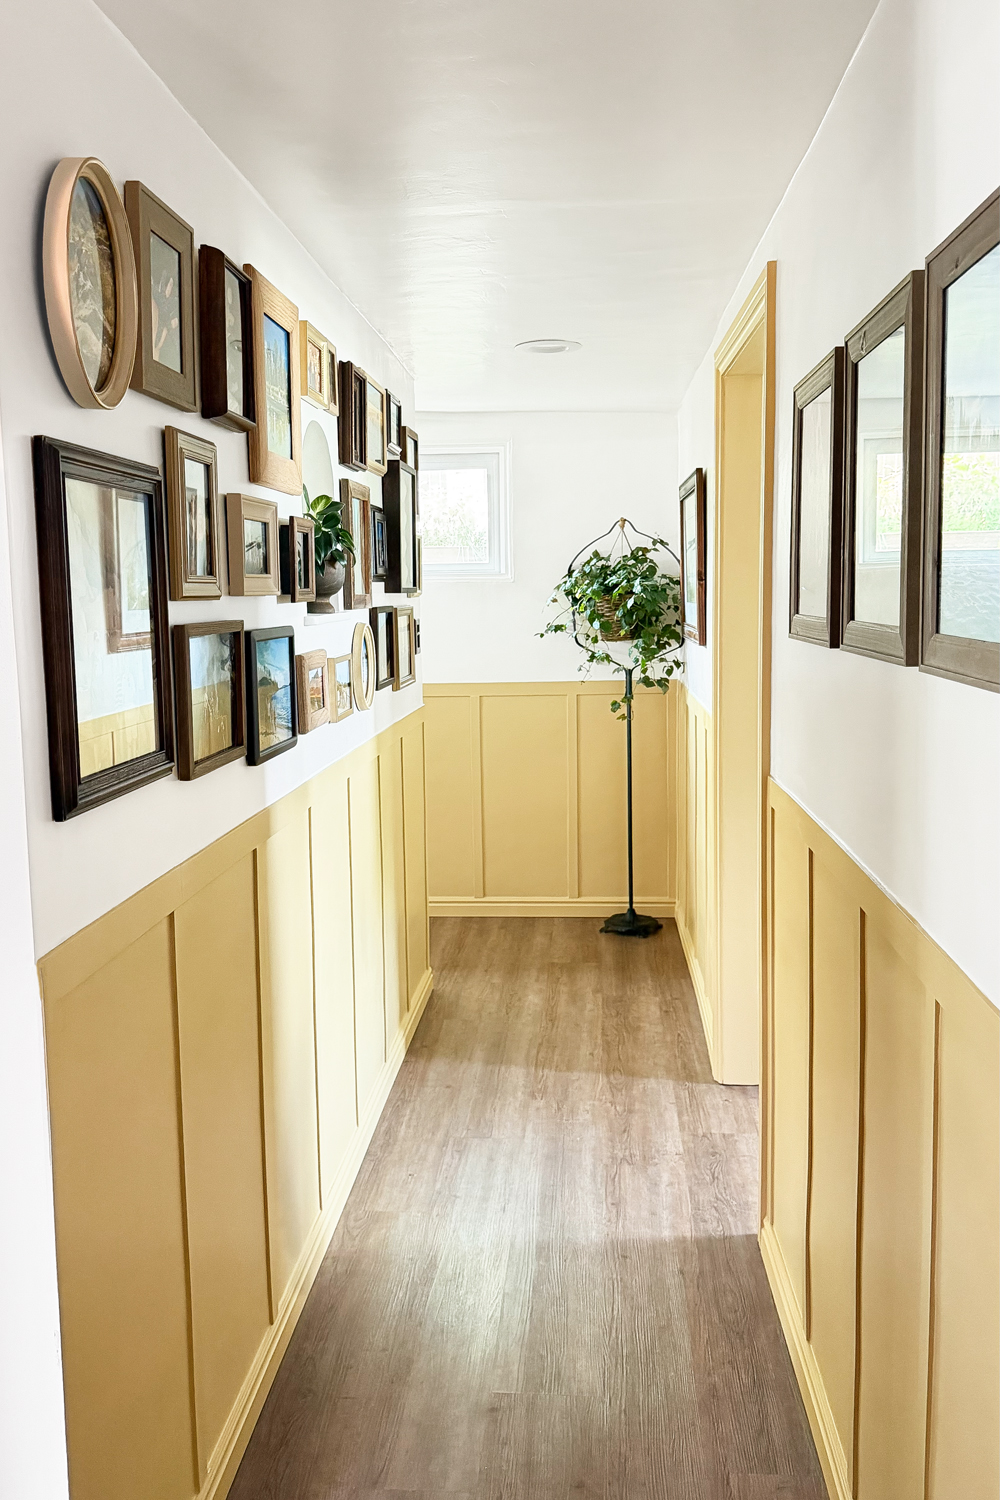
They both got primed and painted. Here's your first peek and the hallway color! It dries more tan and I am in love with the golden color. It is called Honey Tea by Behr.
My toxic trait is that I always think I can get a project done faster than I actually can. Every single time! You think I would learn. But nope. I forget to factor in LIFE. Appointments, errands, migraines, school events for kids, etc. Add in the fact that I have an old home that can be unpredictable and that I am a perfectionist and it is a wonder I get anything completed at all.
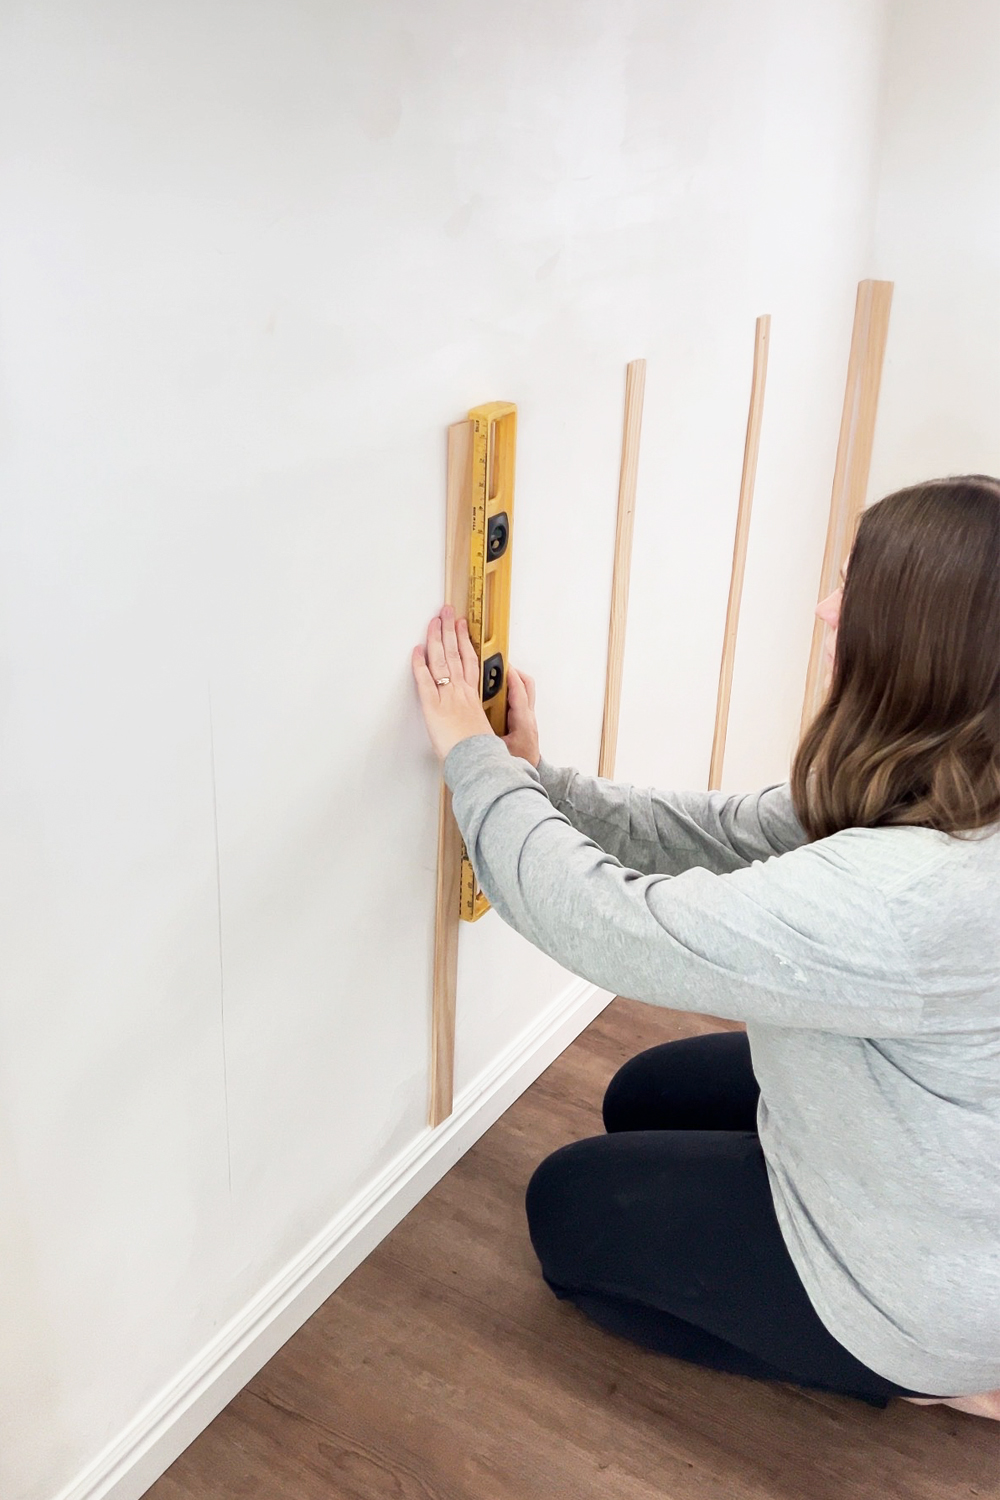
I added lattice trim to my walls. I didn't want to use 1x4s like people typically do because I don't like how much they stick out from the wall. Plus it effects the baseboard situation. The lattice trim was the same depth as the tops of my baseboards so it was easy to apply.
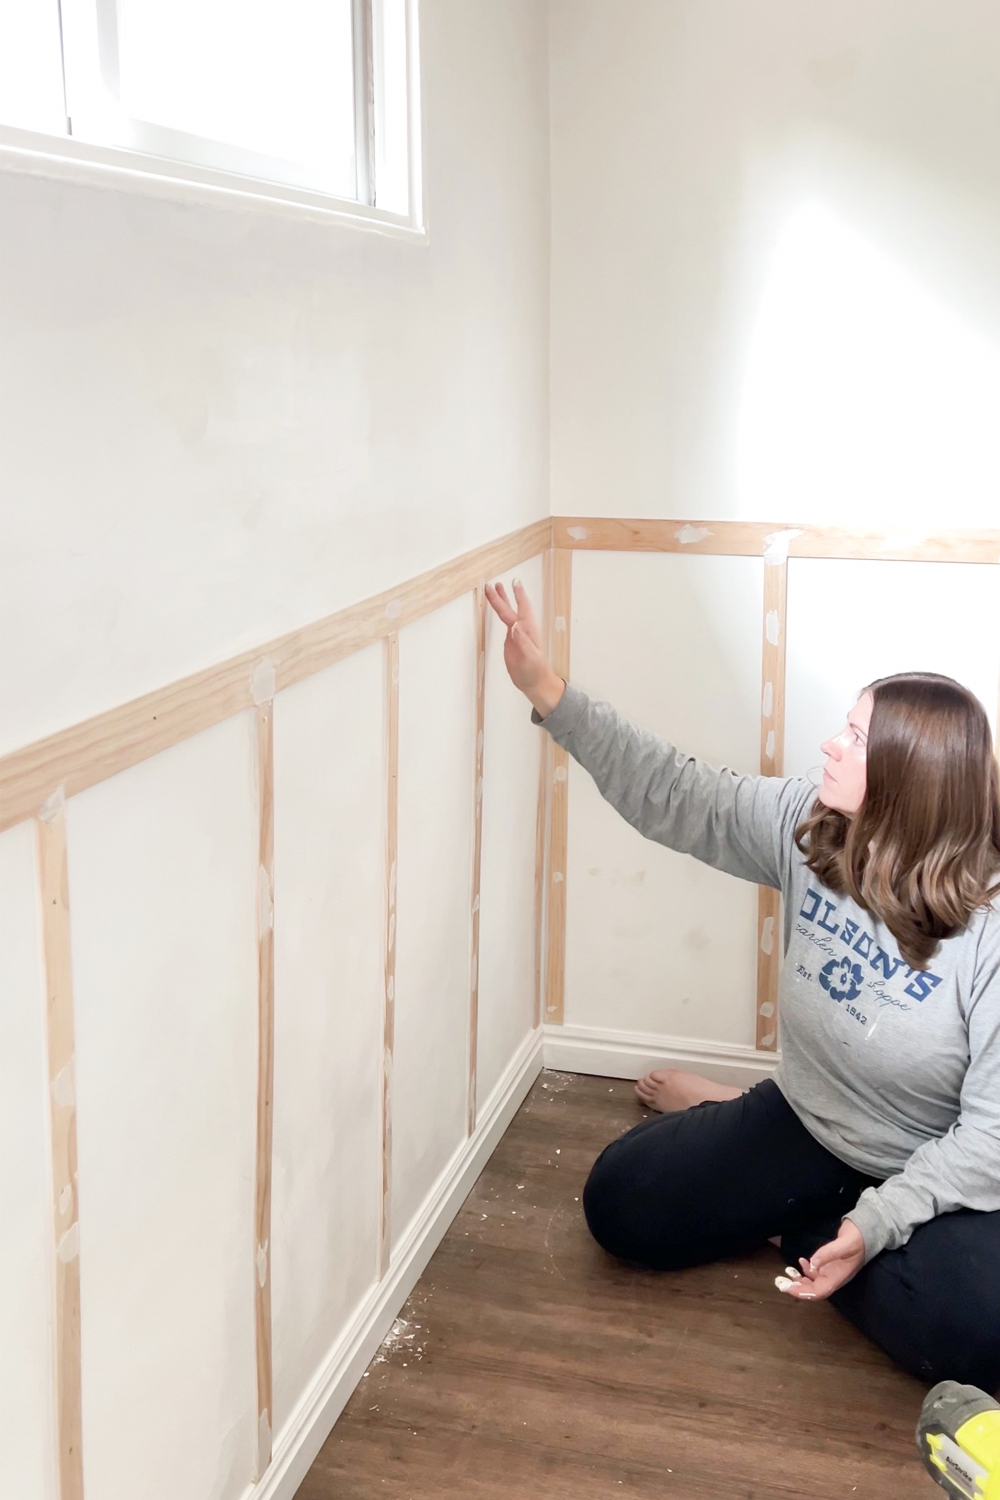
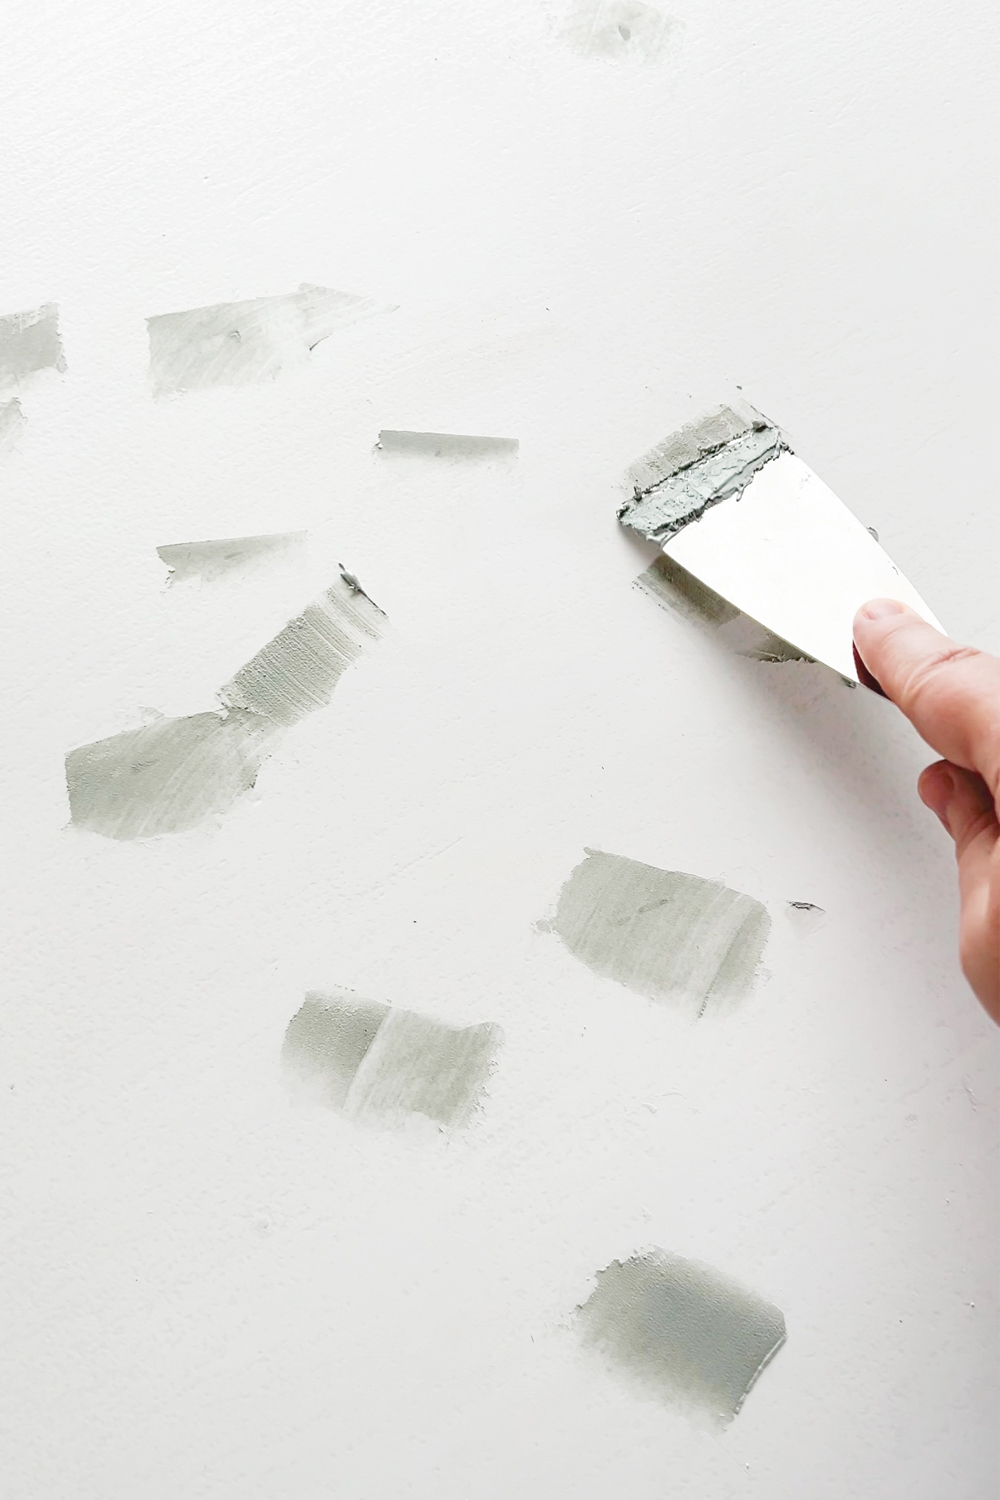
After adding the trim, puttying & caulking and then sanding, I was finally ready to prep for paint. Adding tape and tarps is probably my least favorite part of a project. Well, right after cleaning up the dust from sanding...
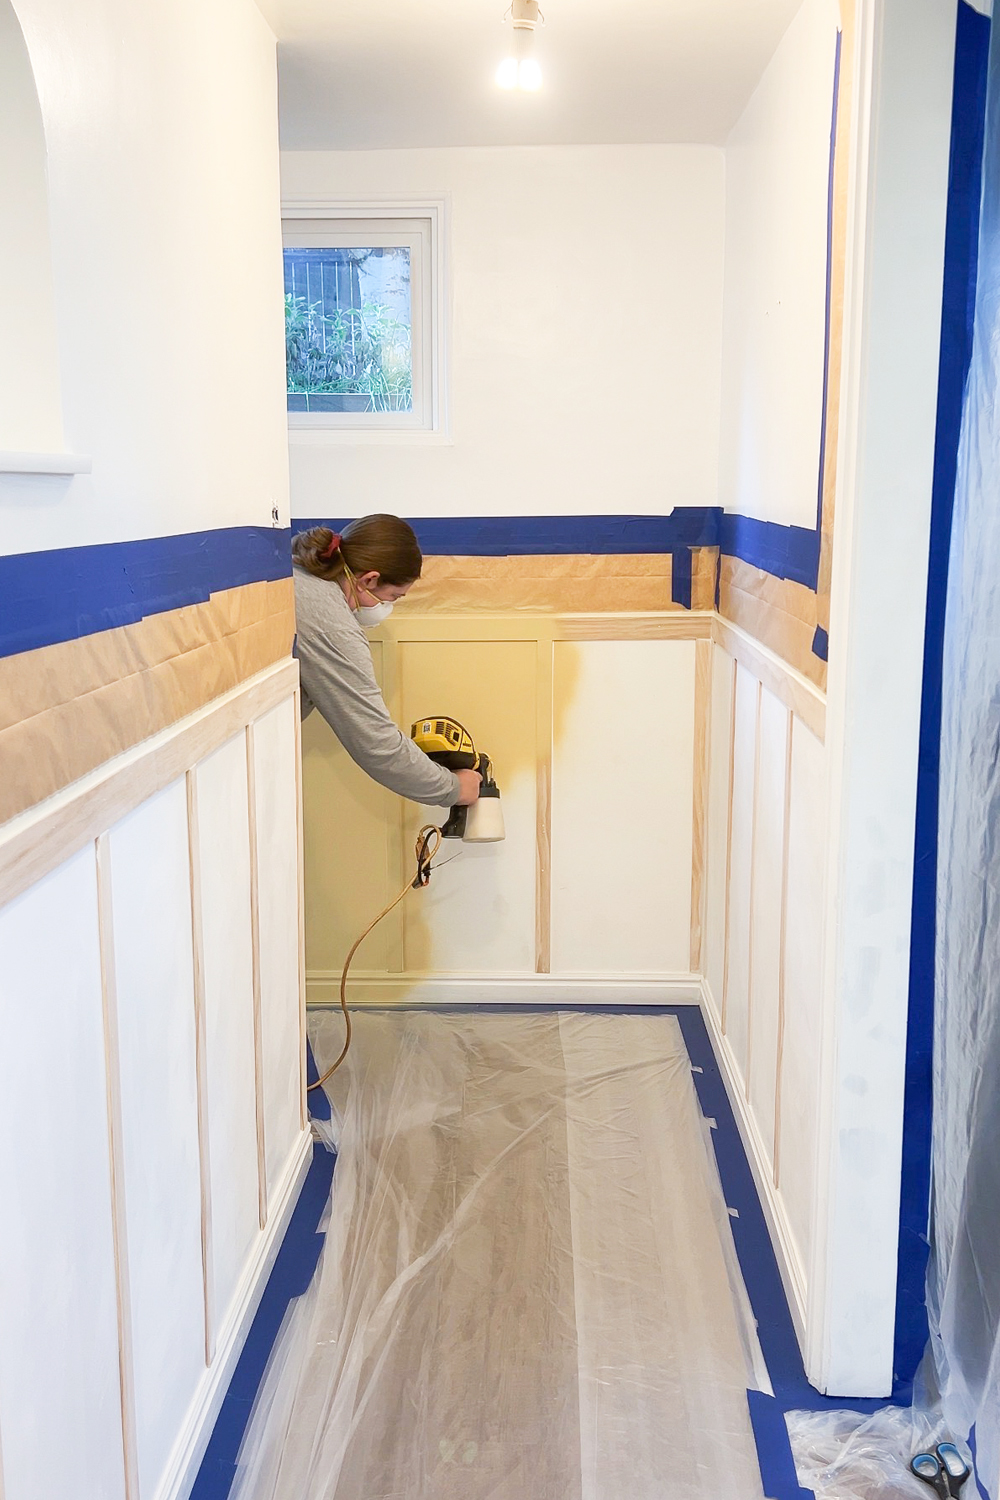
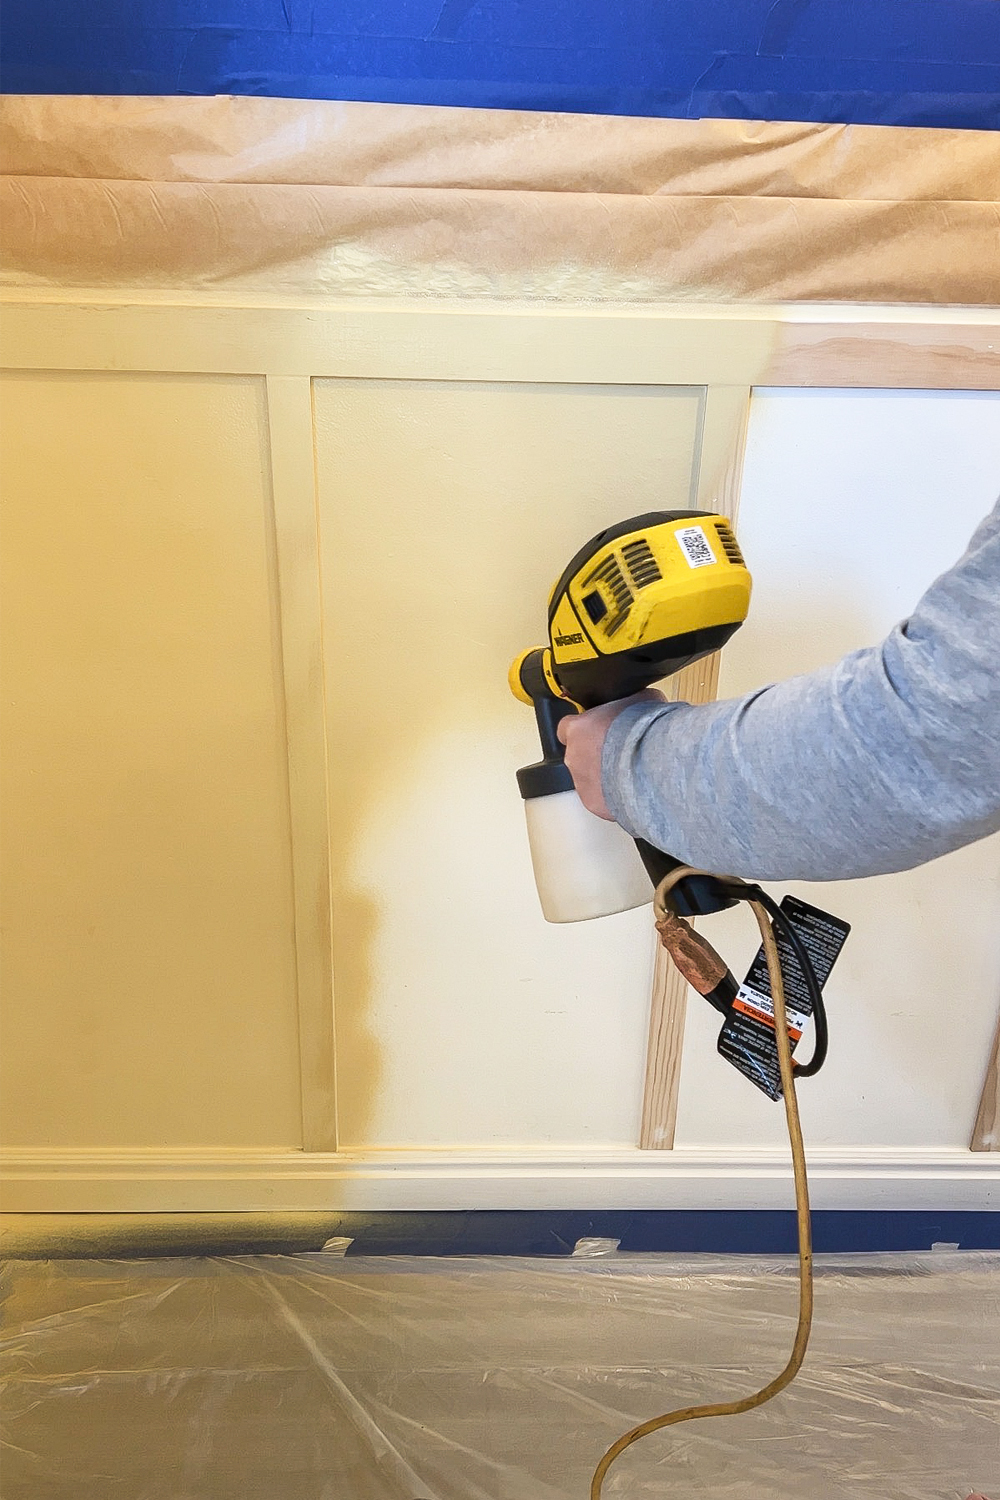
Thankfully I had my Flexio 3500 sprayer. Painting the doors and walls was the only thing about this project that went FAST. And of course it gave me a ridiculously smooth finish that a roller or brush could never do.
I have always wanted a place to display photos from trips we have taken as a family. I decided to add a large gallery wall on the wall with the arched nook. It was so hard to narrow down the photos! That was another time suck. Thousand of photos down to 24 was tough. I tried to have each trip represented.
*Side note: Basements are hard to photograph in general because of the low light situations. Hallways are tricky to photograph since they are narrow. And the color yellow is super hard (at least for me) to photograph and have it look true to what it is in real life. It took so long for me to get photos that I am okay with sharing and just know that it is so much better in person!
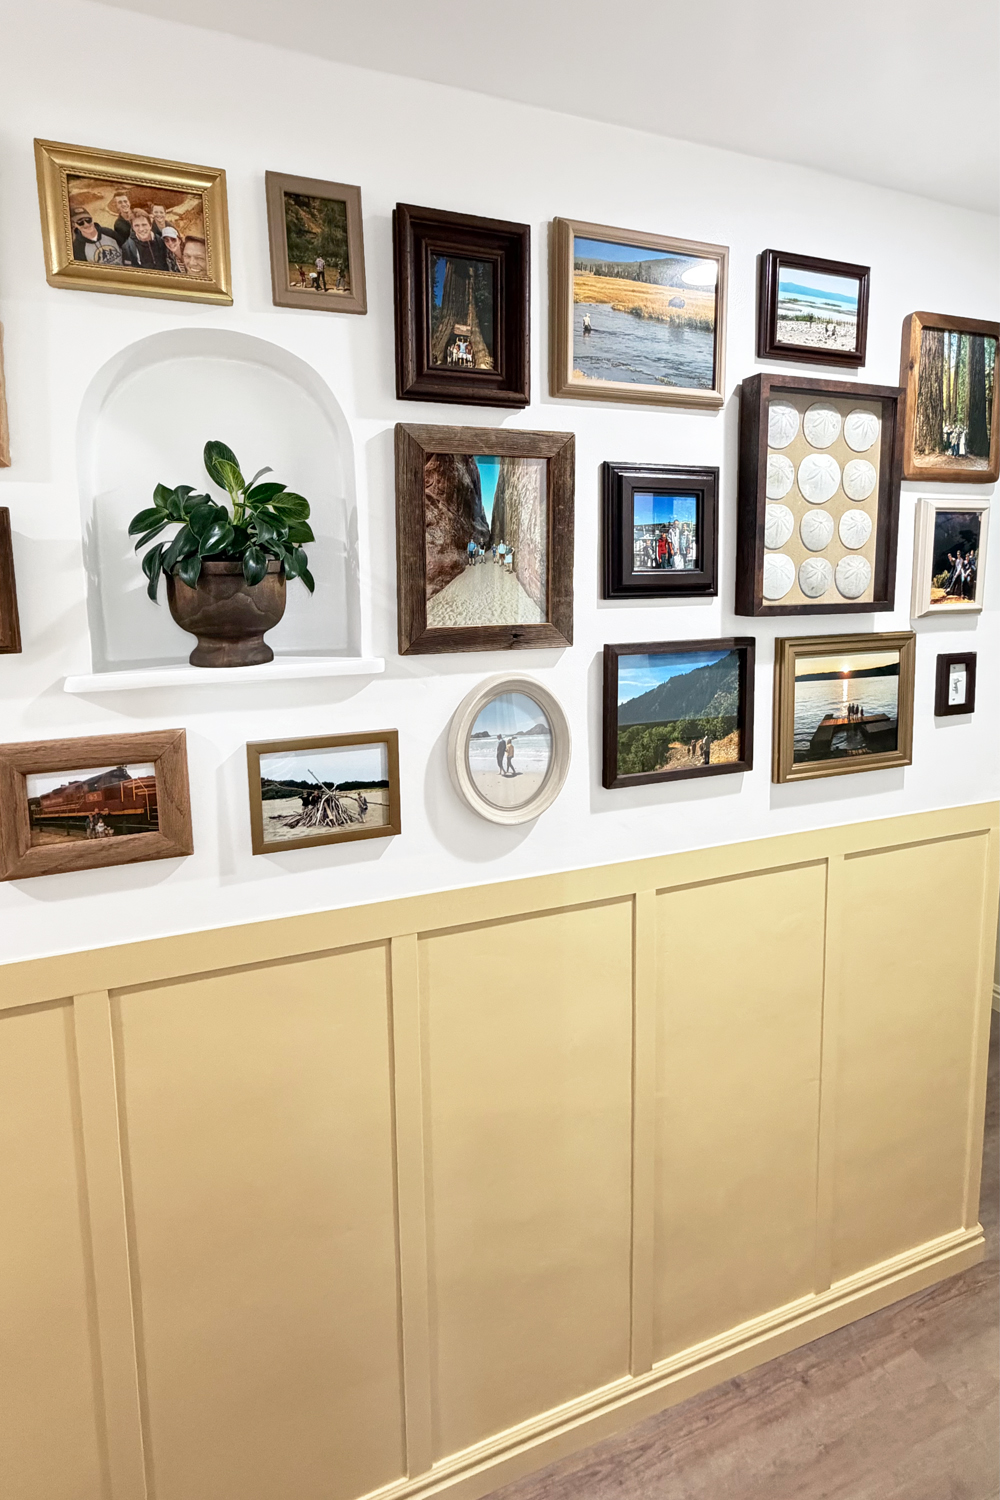
I thrifted most of the frames for 50 cents to 2 dollars. Most were only a dollar. I did buy a few of them new. I wanted a second oval frame and I needed a large shadow box frame.
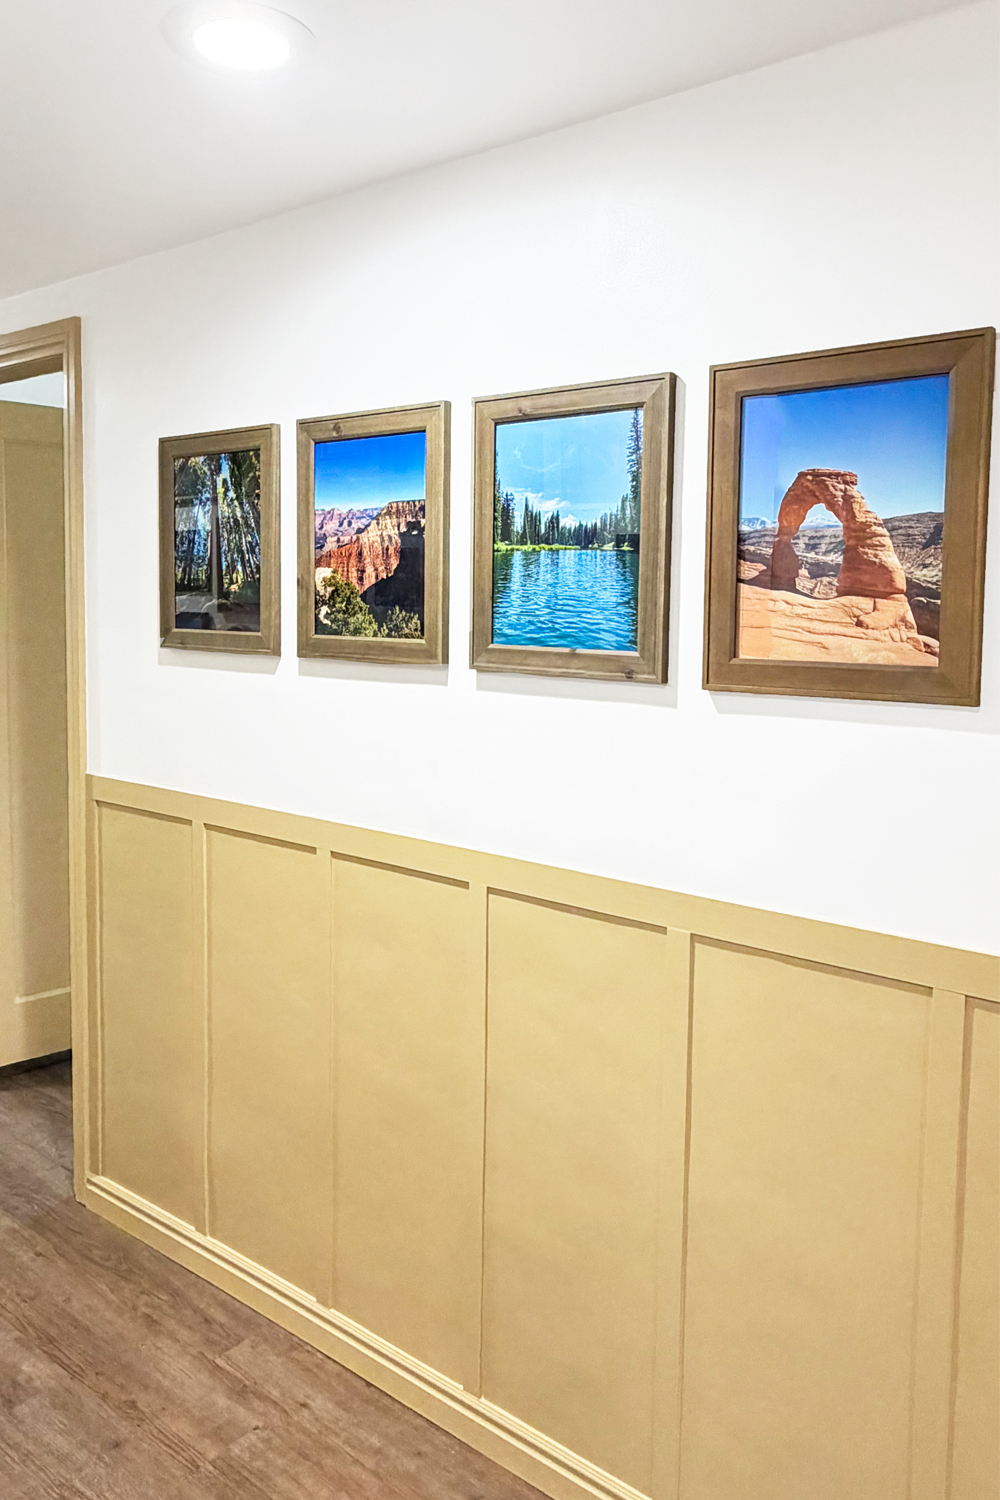
I have a whole system on how I easily hang photos for a gallery wall that I will probably make into a video for social media. So keep an eye out for that. I have lots of gallery walls in my home but my favorite kind is where that are all different frame types and sizes.
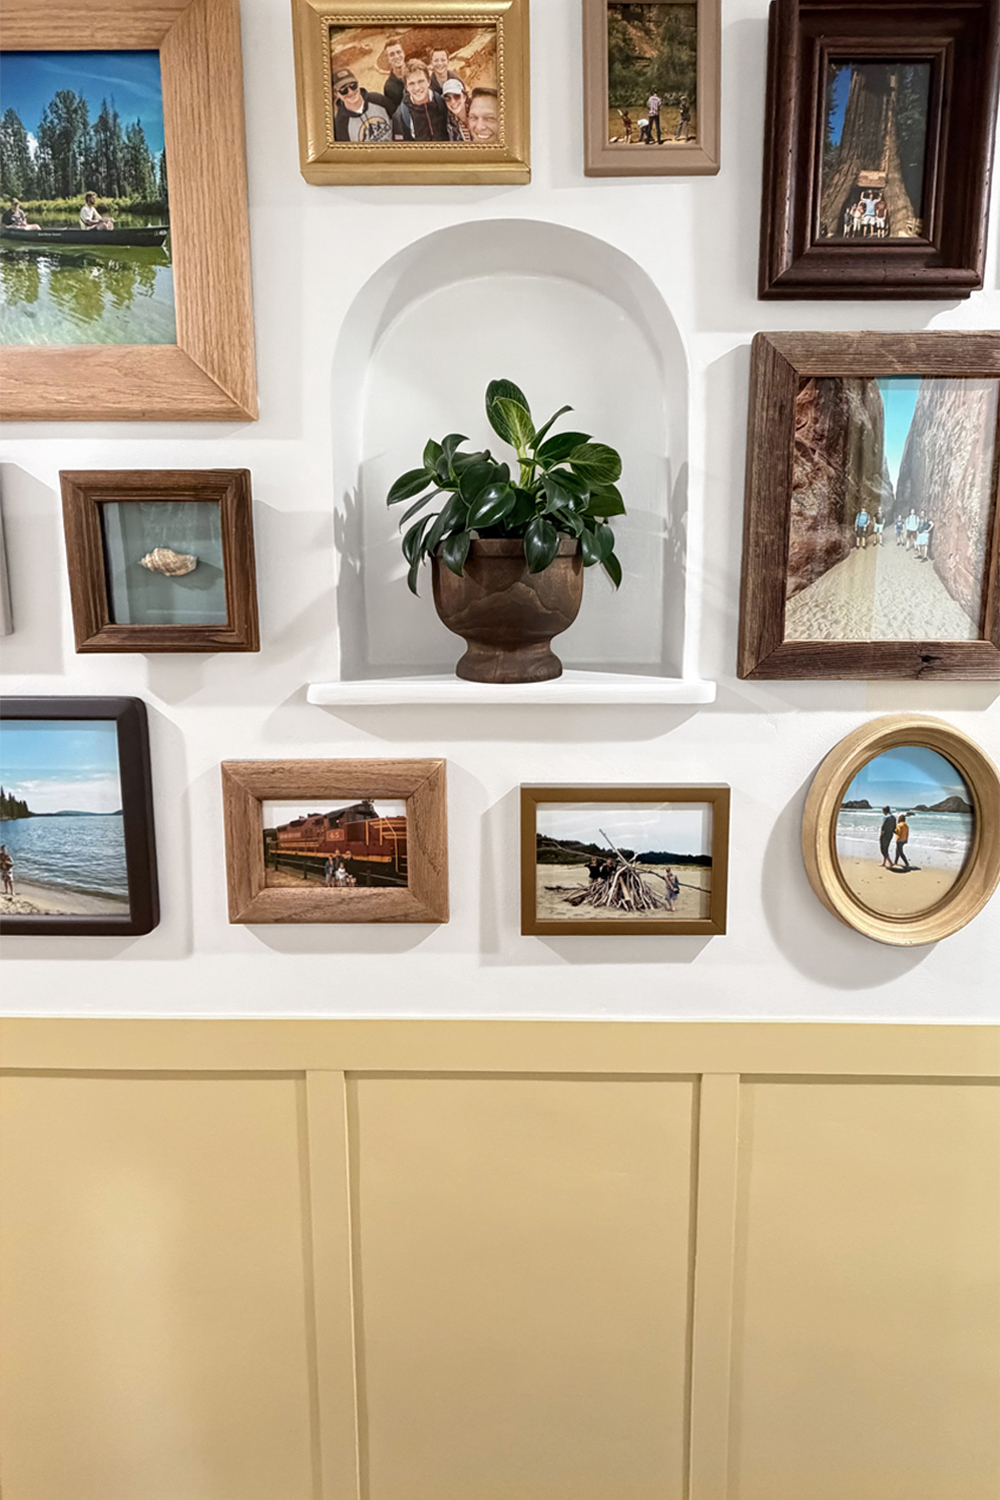
I know many of you are probably thinking that there are too many frames on this wall. That they are too crowded. As I get older I am finding that I want my memories and photos on my walls and not stuck in a computer or phone. So I am okay if there are "too many".

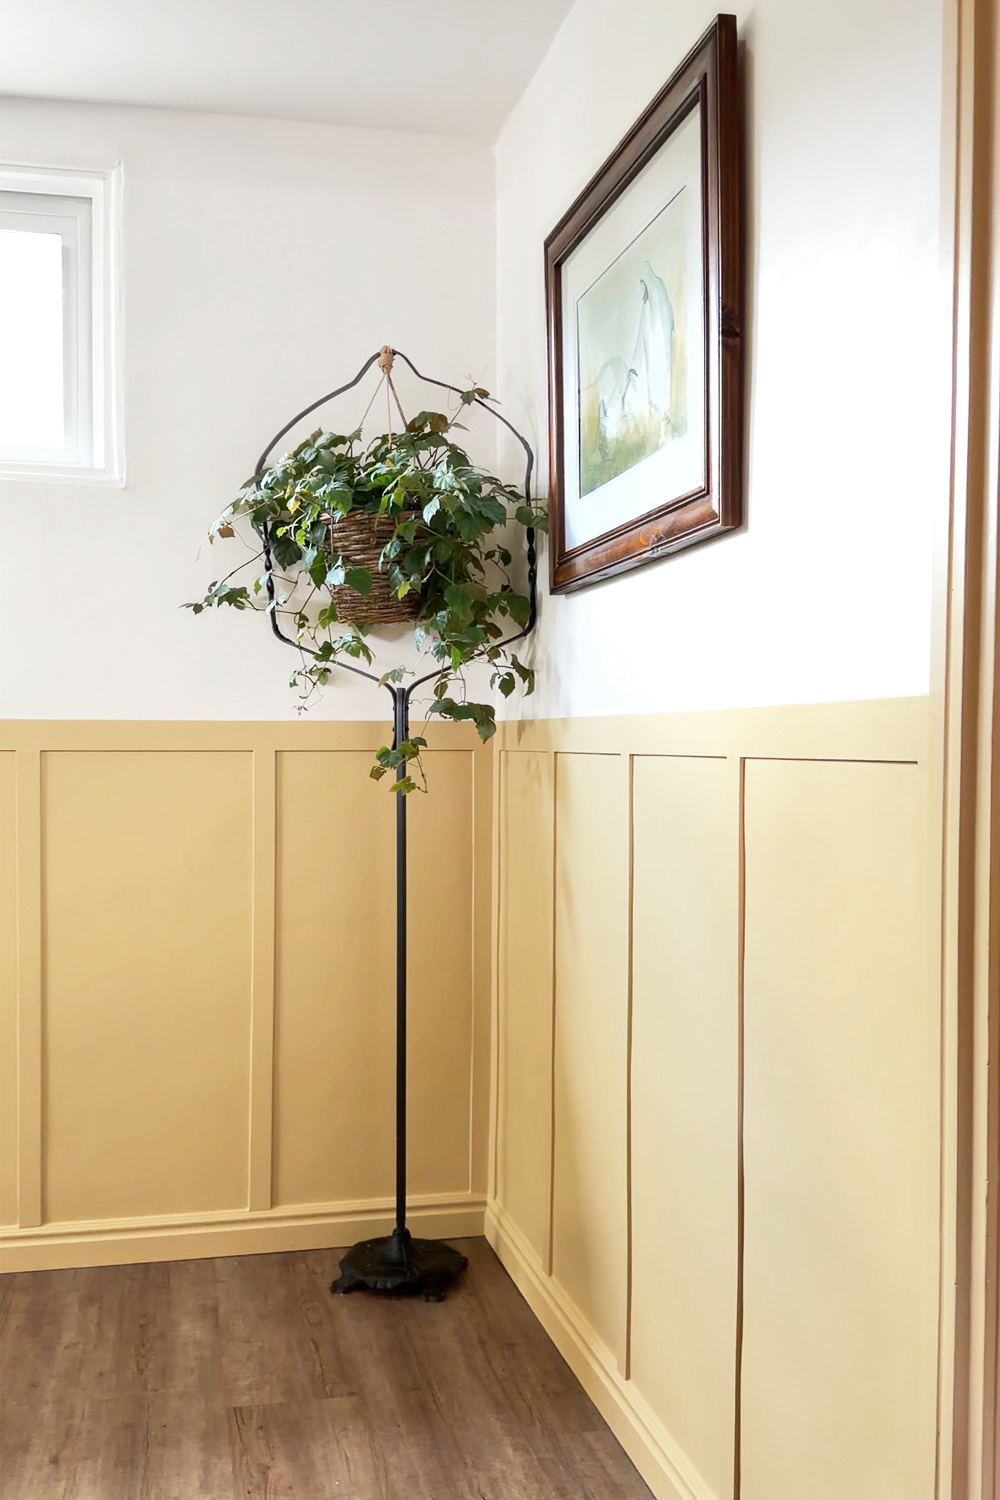
Between the sunshiney color and the sweet reminders of time spent with my kids on the walls, walking down this hallway makes me smile. The added cottage charm matches the other parts of the house and the nook looks like it has always been there.
I am so excited to share the next space in my basement with you. I have already started. It will be the LAUNDRY ROOM! And it is going to be good :)


I love this transformation! My mouth was literally hanging open in awe when I saw your final photos.
Oh you are so nice! Thank you for brightening my day. :)
The arched moon is perfect! As you said, it looks like it’s always been there. As I recall you’ve got windows in your basement on your backyard side - that allows you to have the plant there in the nook! …and I really like that unique plant stand in the last picture that holds the basket and plant. I’ve never seen one like that before. I’m sure you’re enjoying all the pictures and memories!
NOOK. …not moon! Don’t know what happened there!😉
Thank you! We are lucky and have a ton of windows in our basement. Every side (north, south, east, and west) all have windows. It helps it feel a bit less like a basement.
The plant stand is actually an antique bird cage stand. My mom collects antiques and when I was little I got a pet bird. She found the cage and bought it for me. So I’ve had it since childhood. I just repurposed it :)
Looks great! I’m impressed that you did that all by yourself. Is your paint sprayer easy to handle? I have always wanted one but they intimidate me.
They are so easy! Just make sure to always test the spray on cardboard before. Fiddle with the settings until you get the spray how you want it. I love that it’s so adjustable. It’s very user friendly and not super heavy.
I like it!
Thank you! 😊