
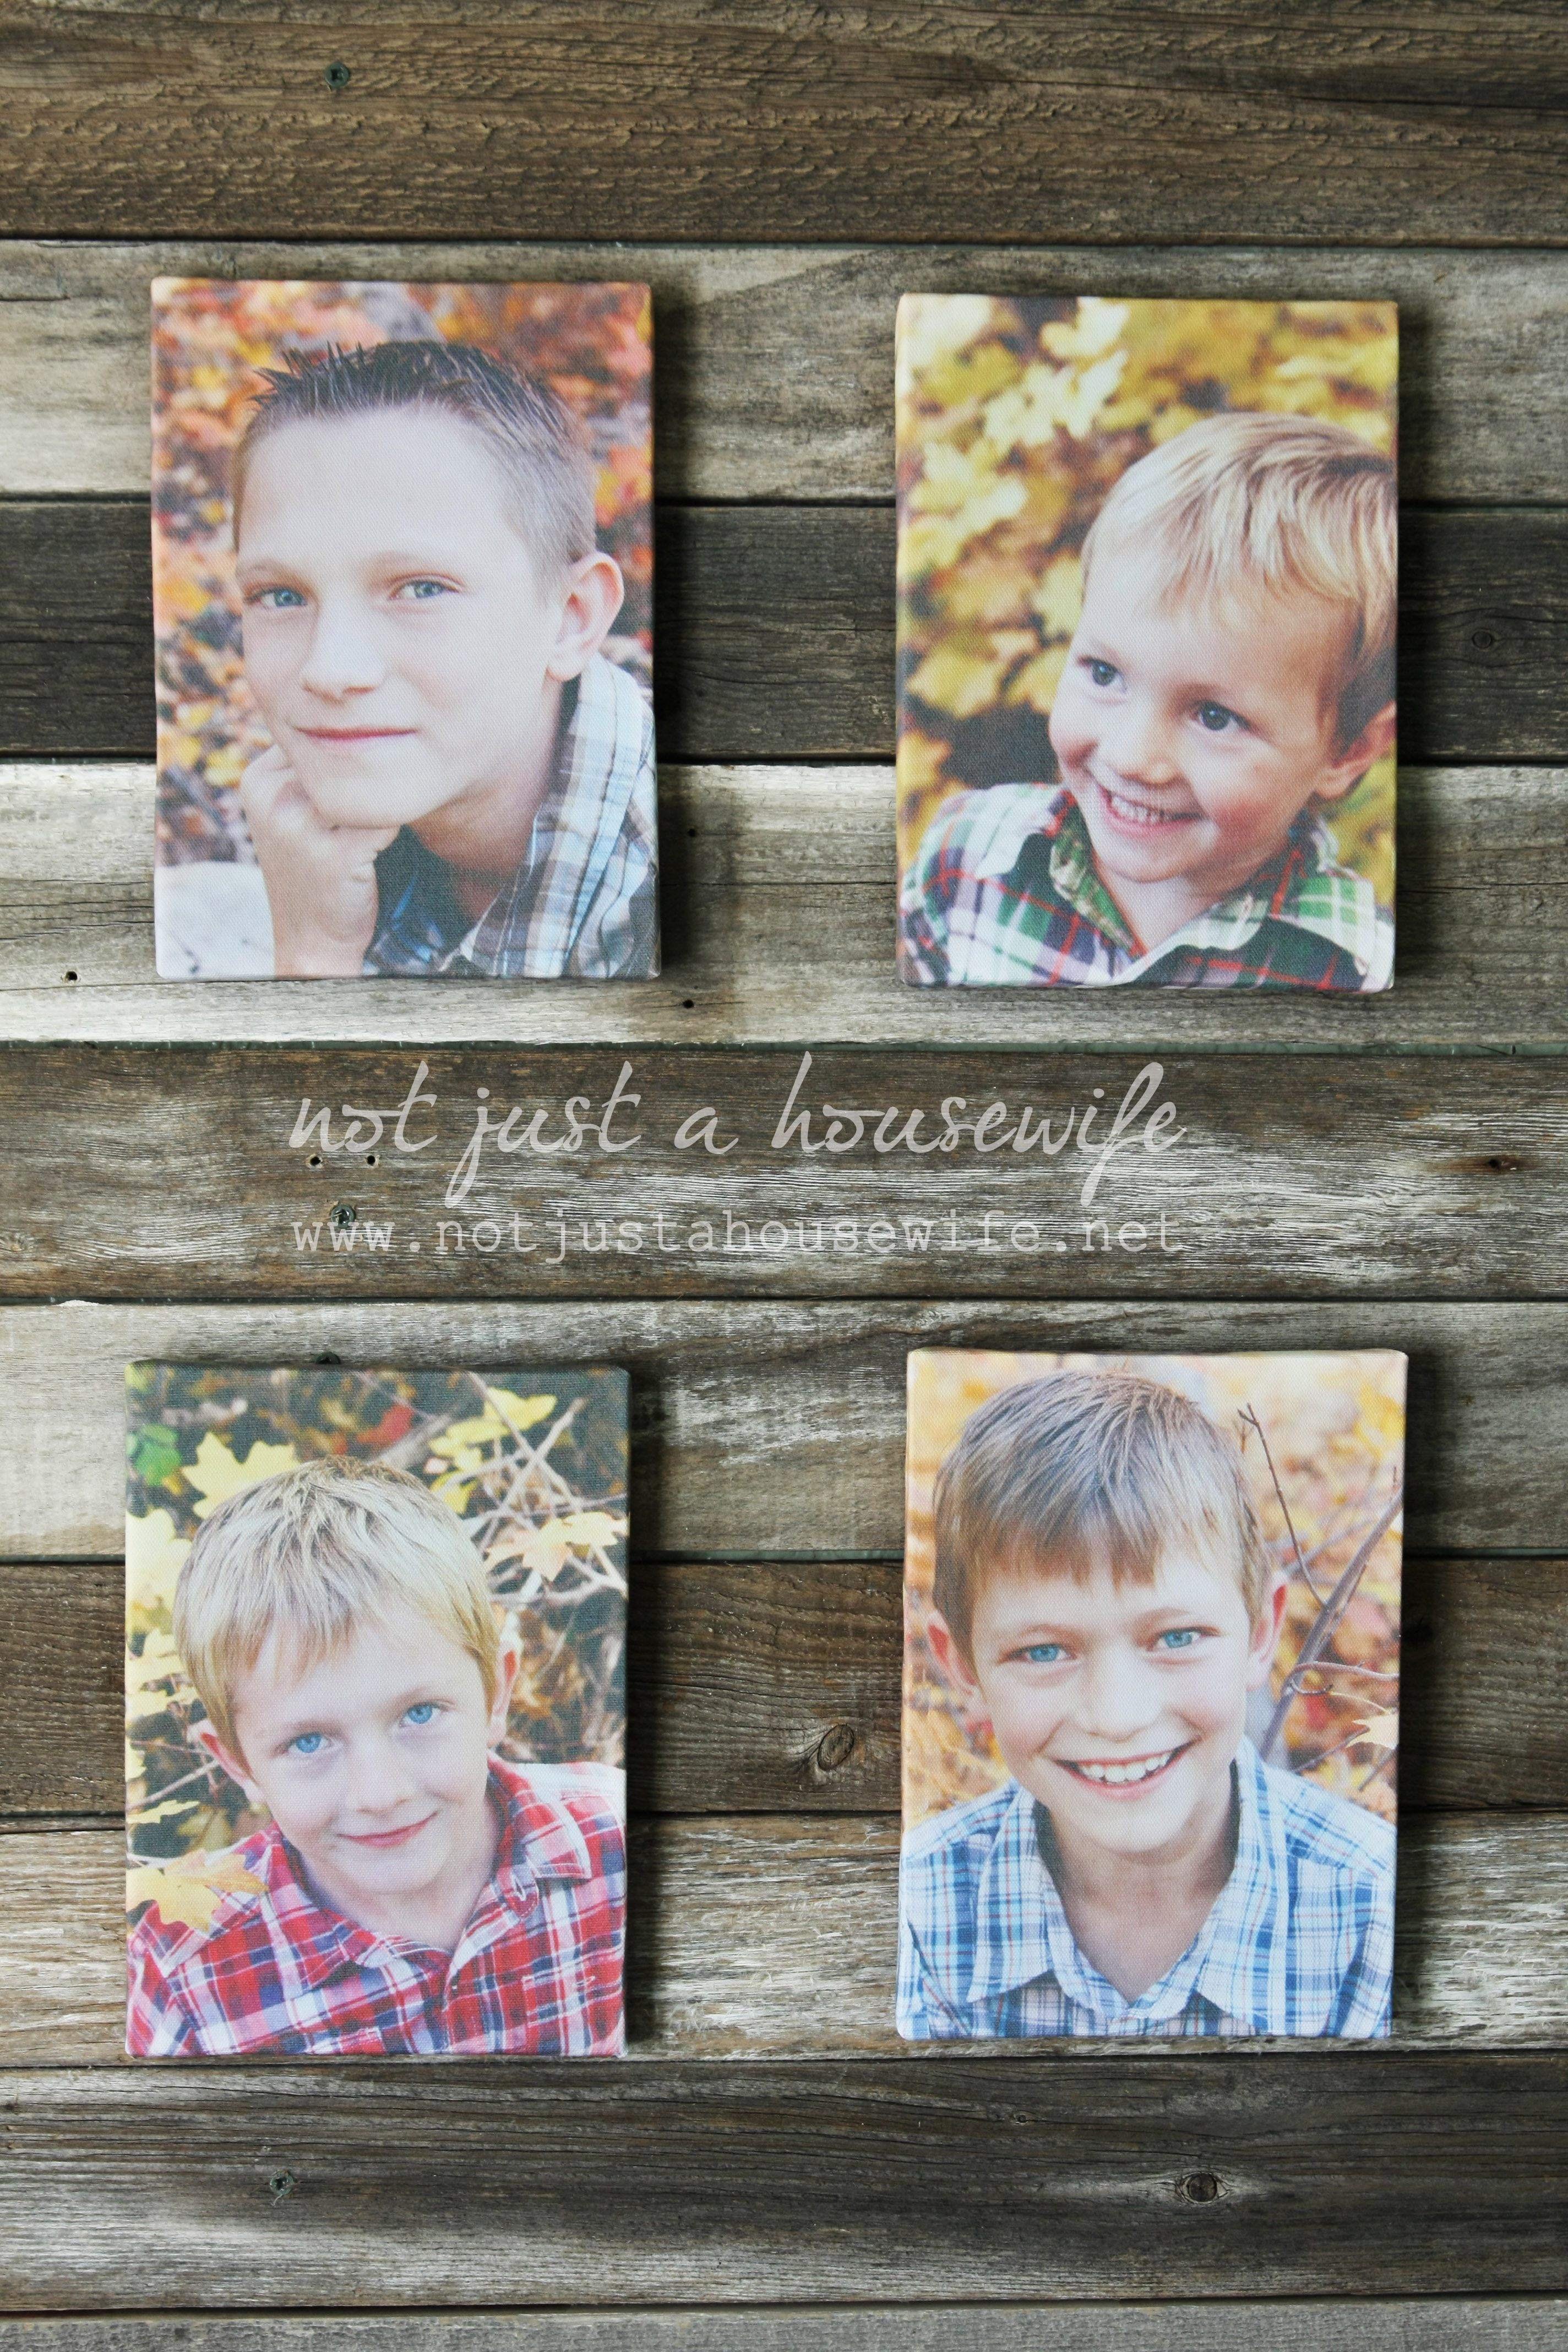
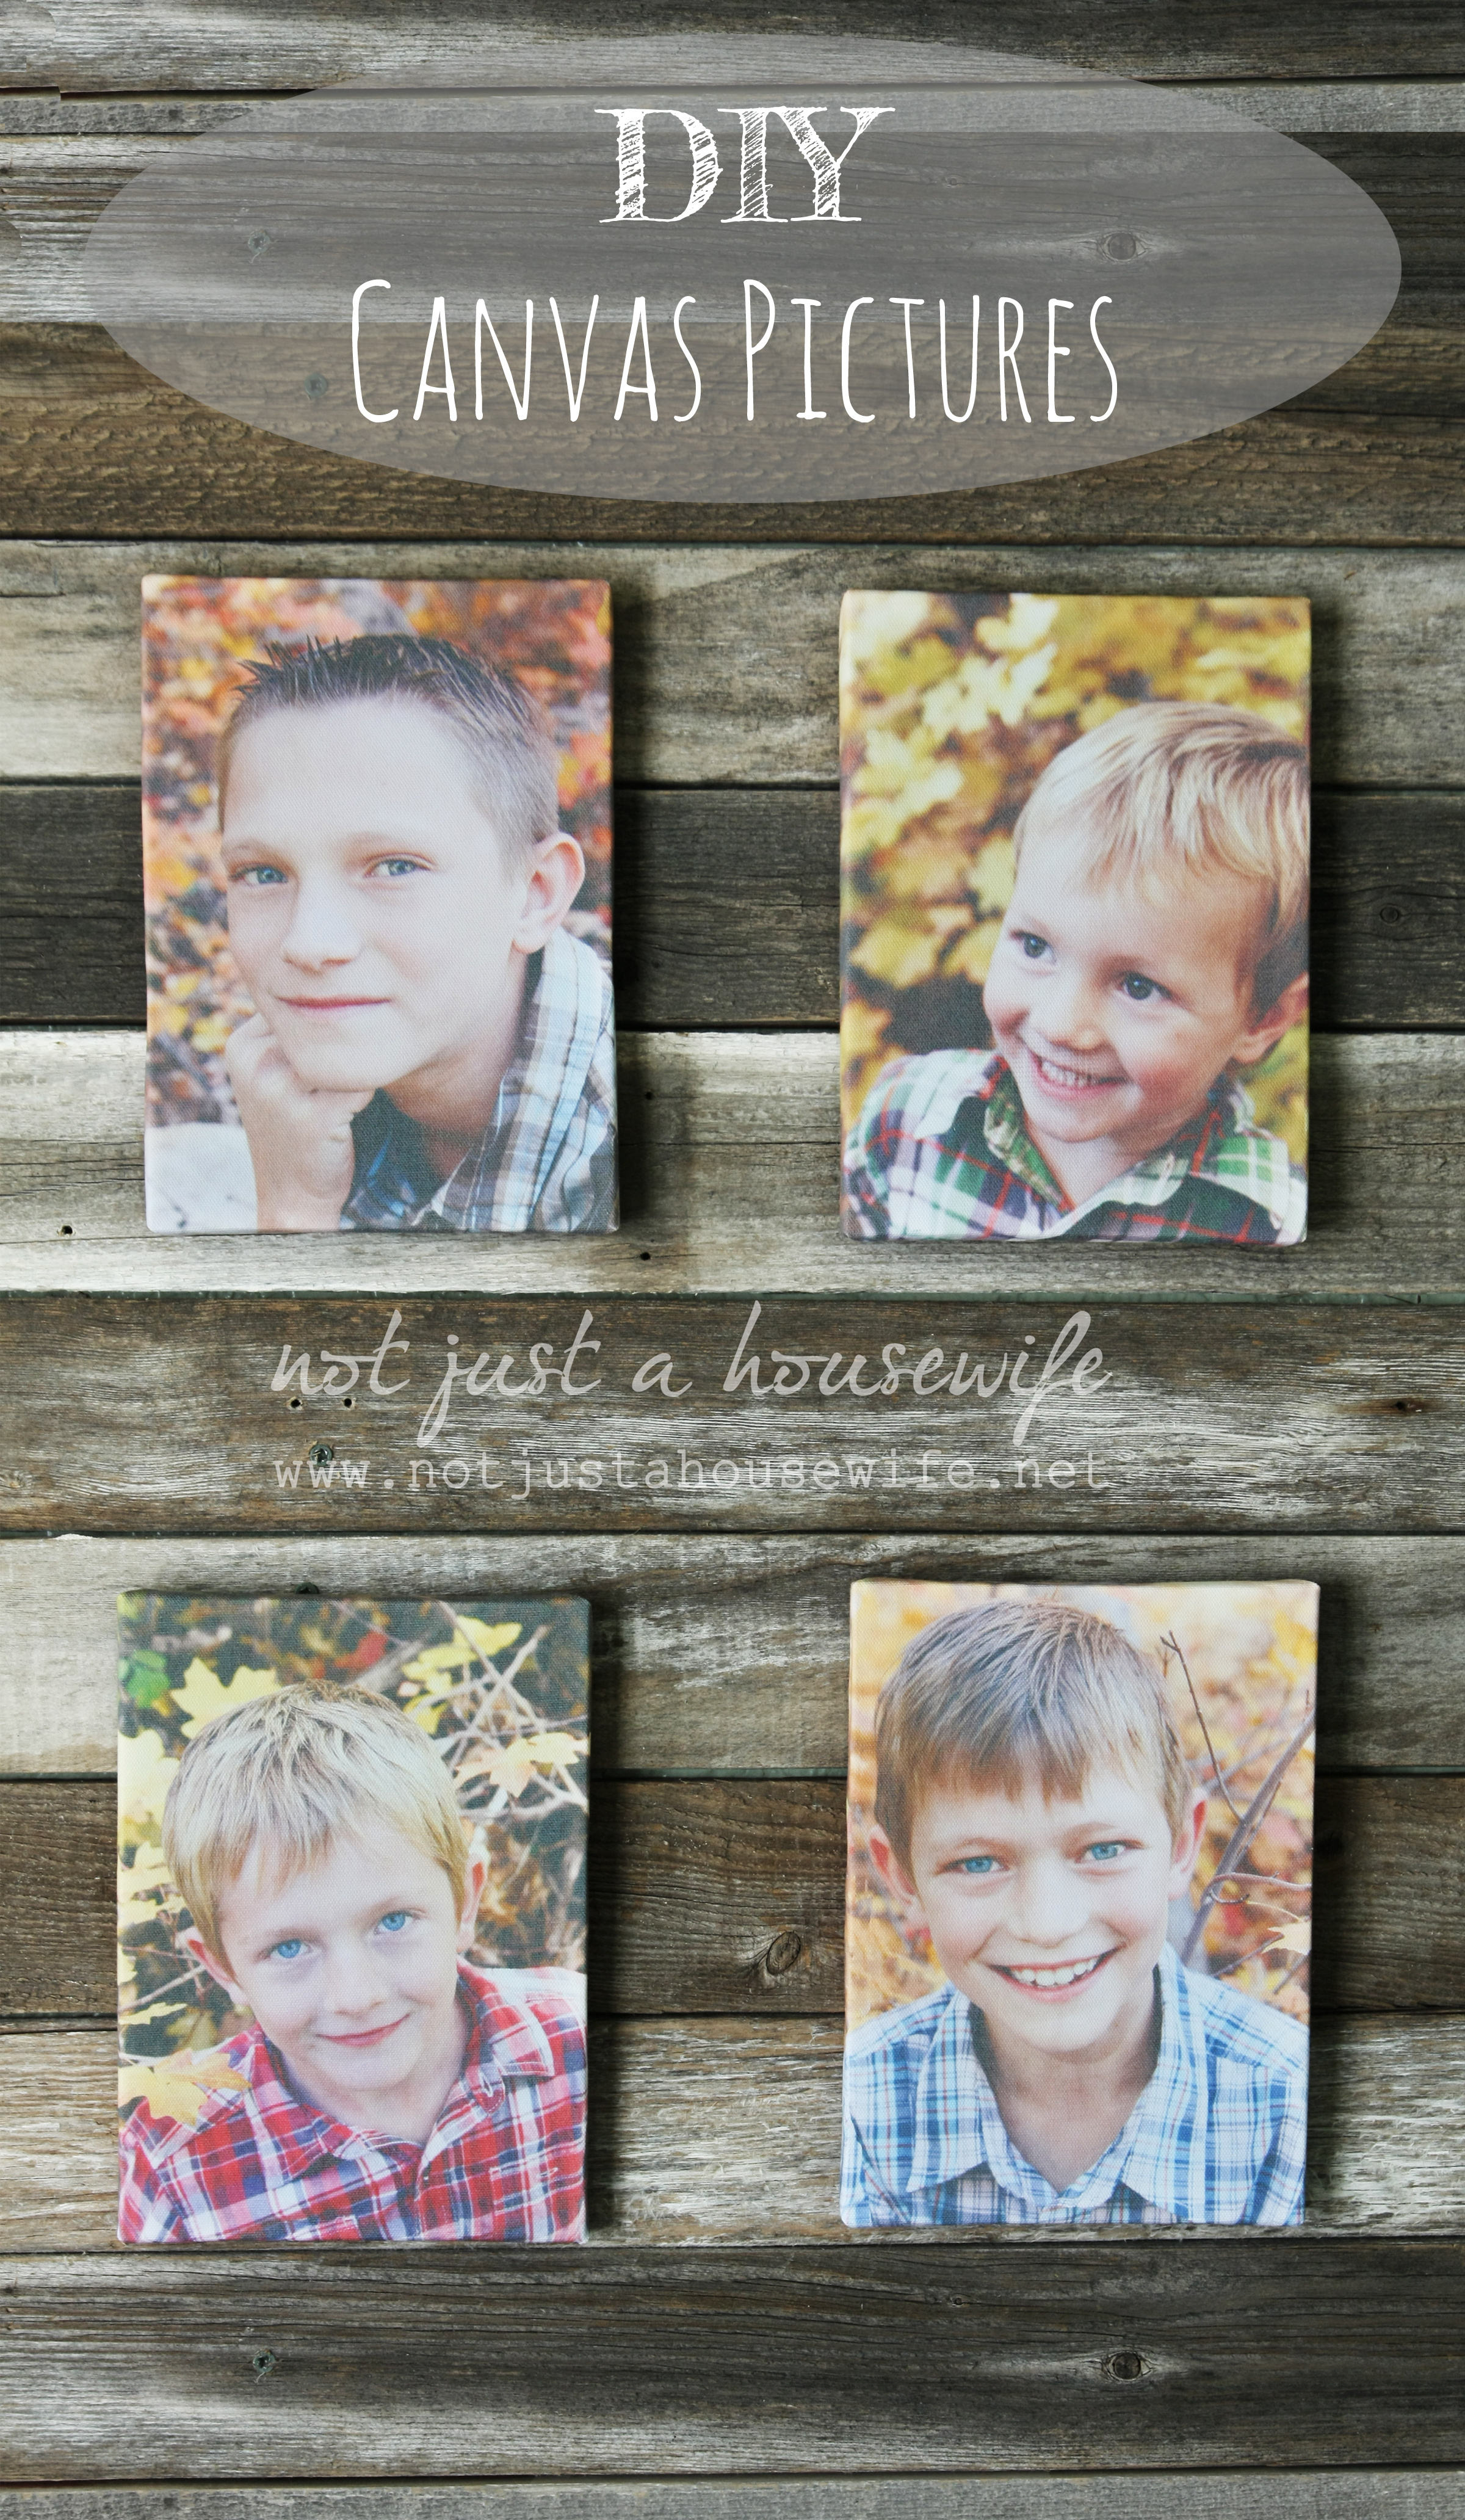
One of the goodies that came in my Silhouette bundle was printable canvas. I have always wanted pictures of my children on canvas but never wanted to pay the price most places charge. So I decided to try to DIY it :)
I put the canvas (canvas side down, paper side up) in my printer and printed the pictures of my kids.
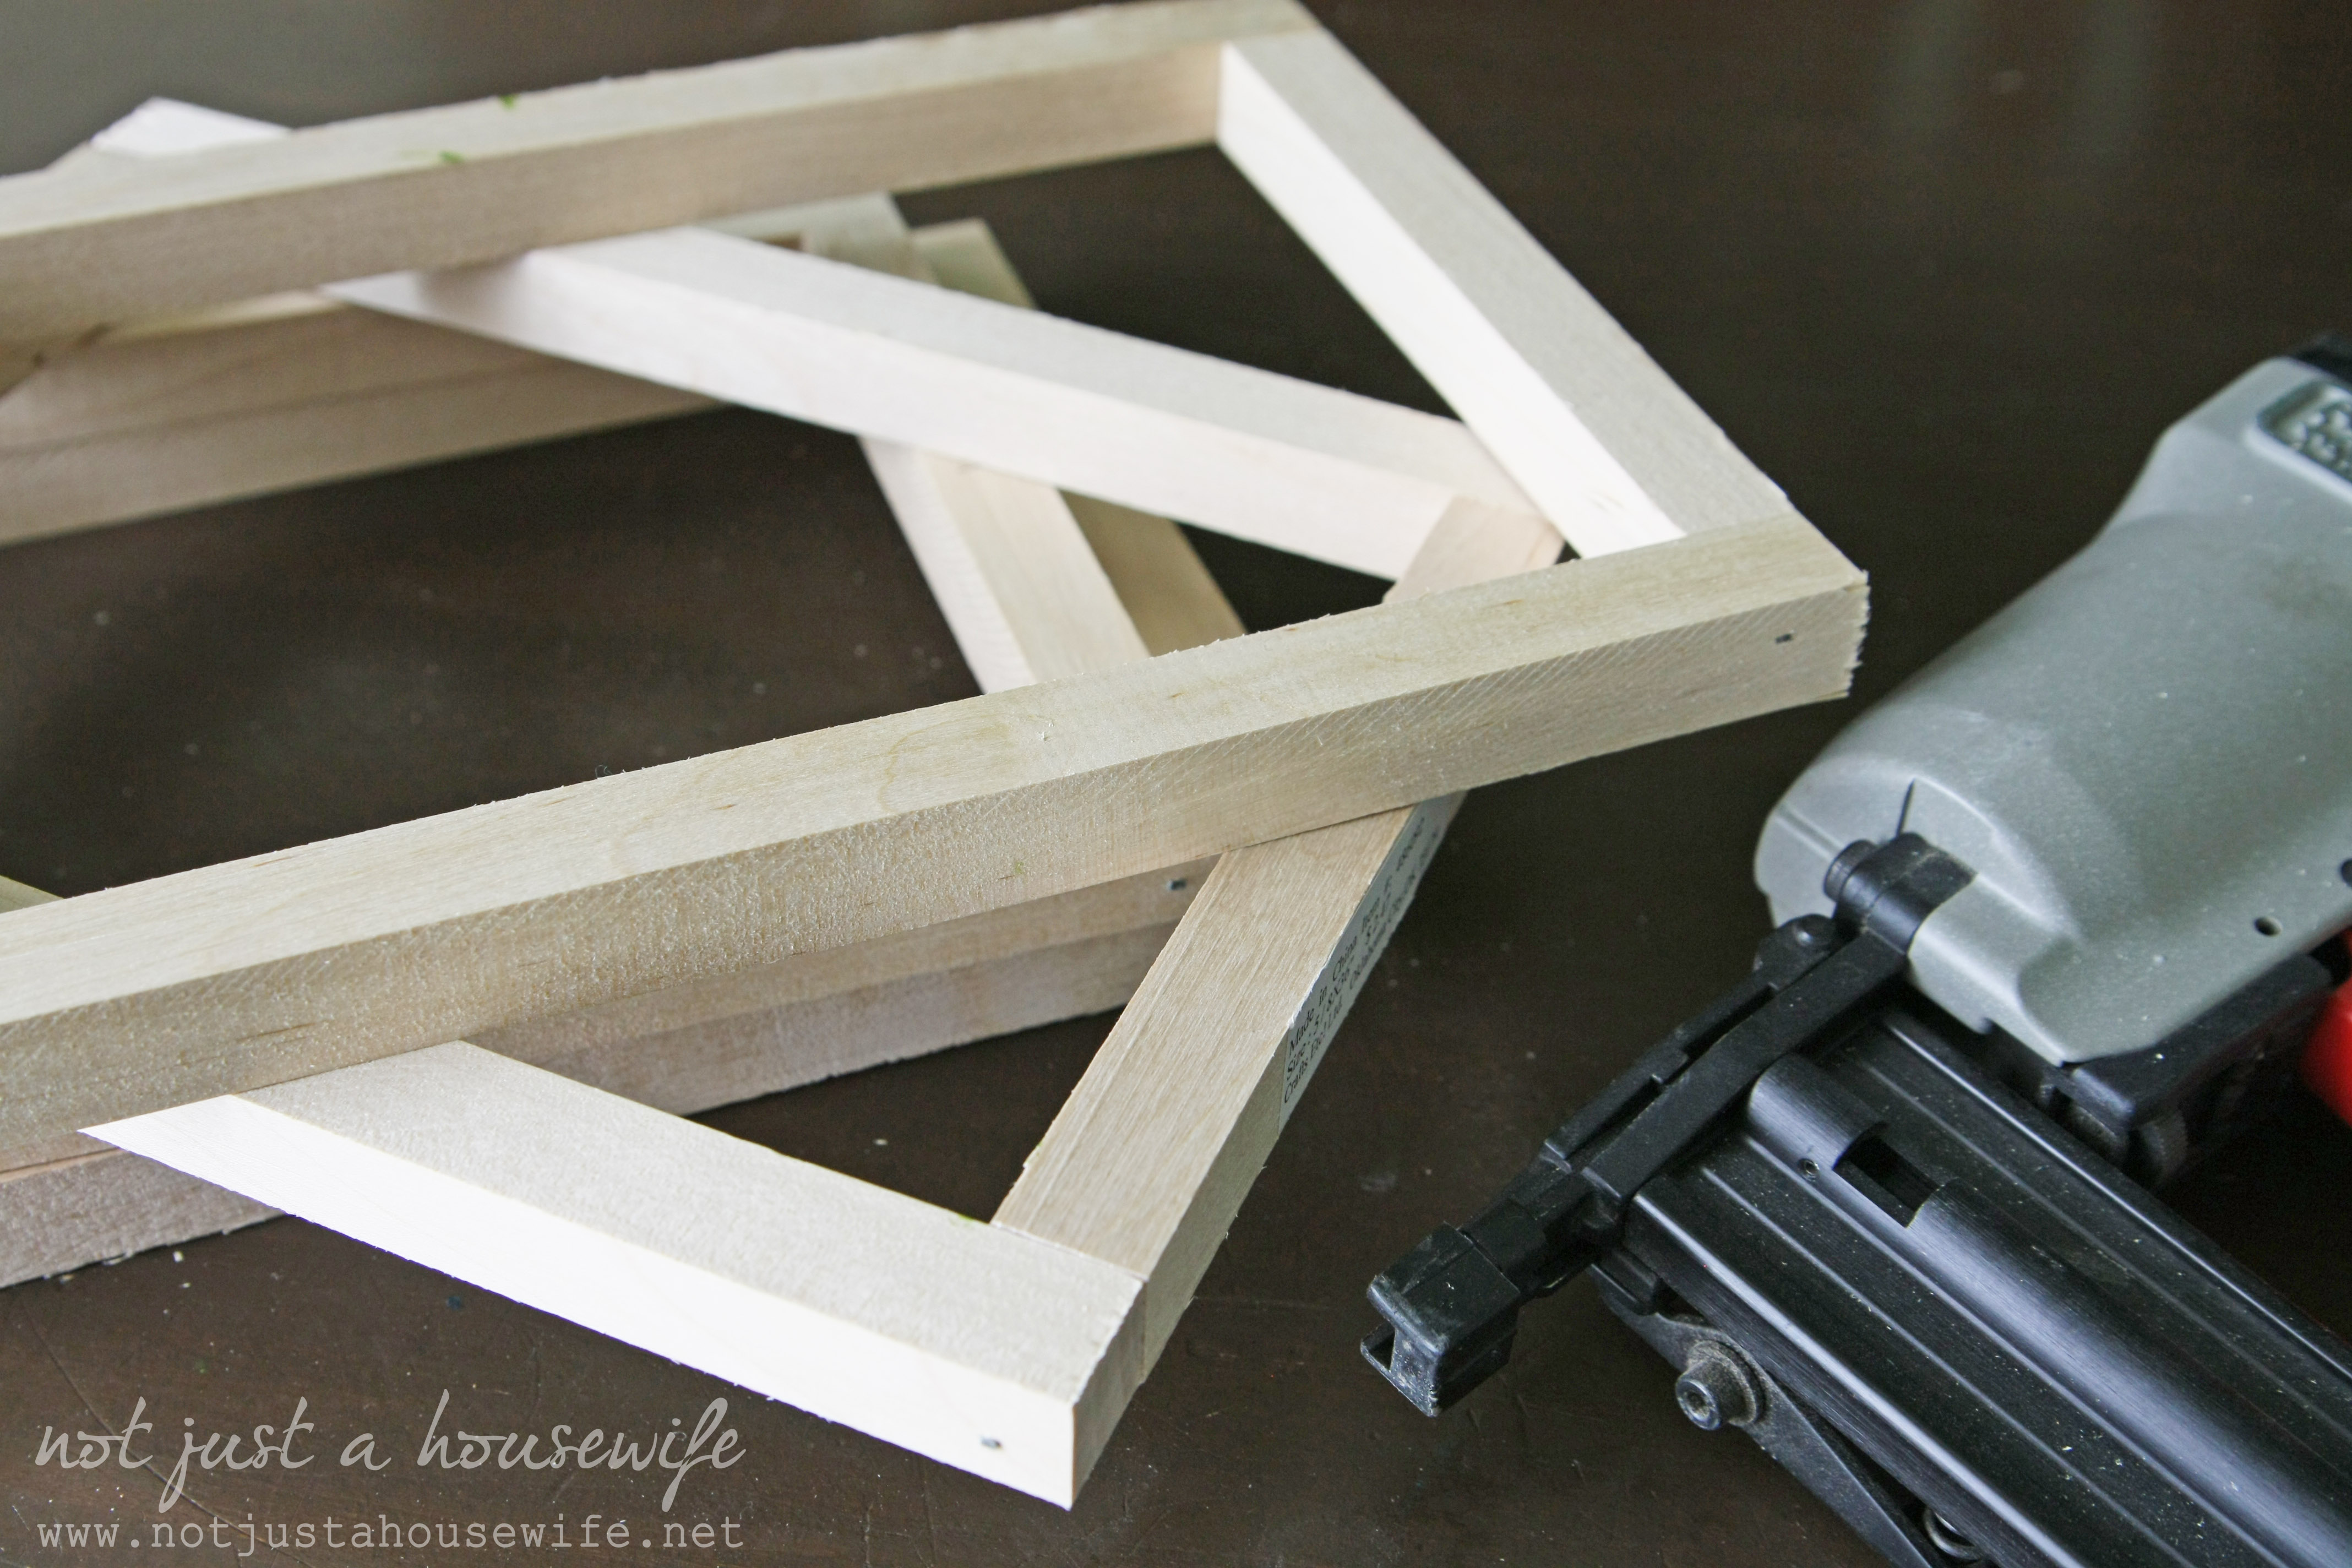
The sheets of canvas are 8.5 x 11 inches. I could have printed it and just framed them. But I wanted to stretch them over a wood frame. I cut a square dowel that measured ⅝ of an inch. I needed four framed so I cut 8 pieces that were 5 ¼ inches and 8 pieces that were 9 ¼ inches.

I nailed them together to form a rectangle frame. The smaller pieces fit inside the longer ones (shown below).
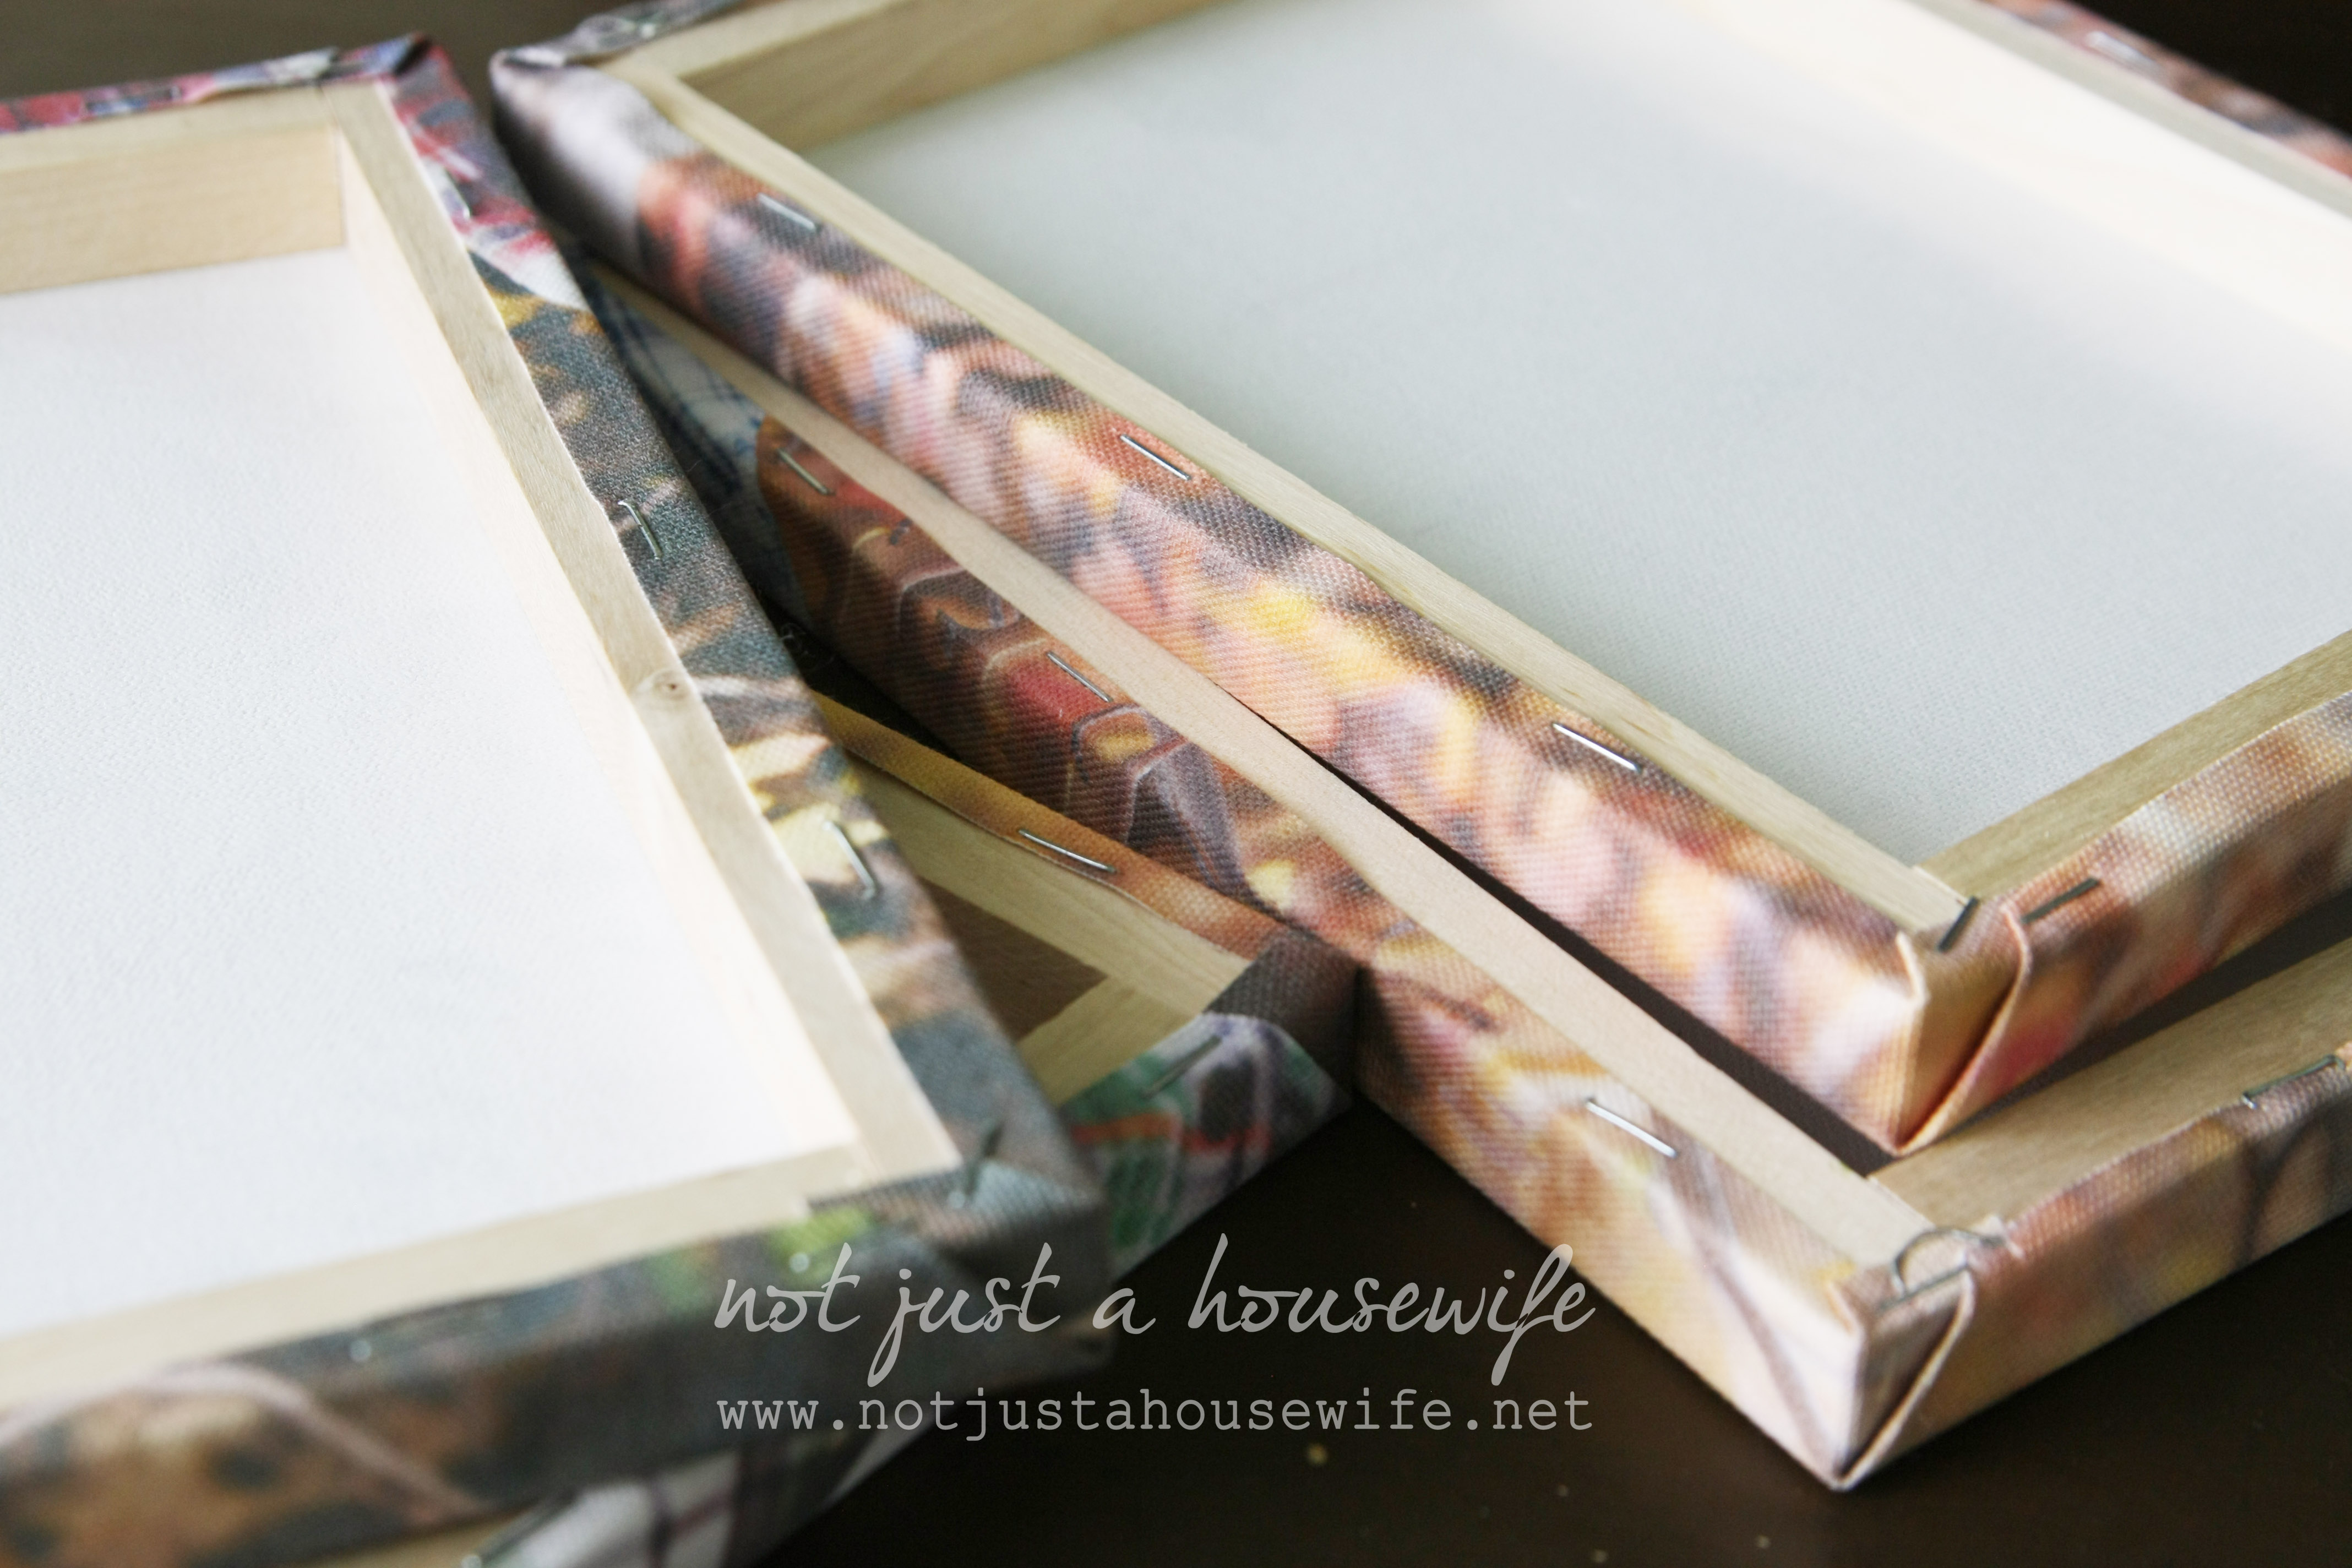
The canvas has a sticky back so it can be used in paper crafts and scrapbooking as well. I peeled off the protective paper off the sticky side. Then I laid the canvas face down (sticky side up) and set the frame on it. I made sure it was centered and then folded the sides up so I could staple them. The ends I treated like a wrapped package. The sticky back really helped with this step. It kept it in place while I secured it with a staple.

If you want, you could stick some paper on the backs where the sticky side is exposed, but it didn't bother me. I just left it as is.
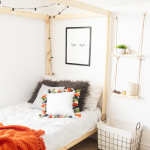
A single nail and they were hung!

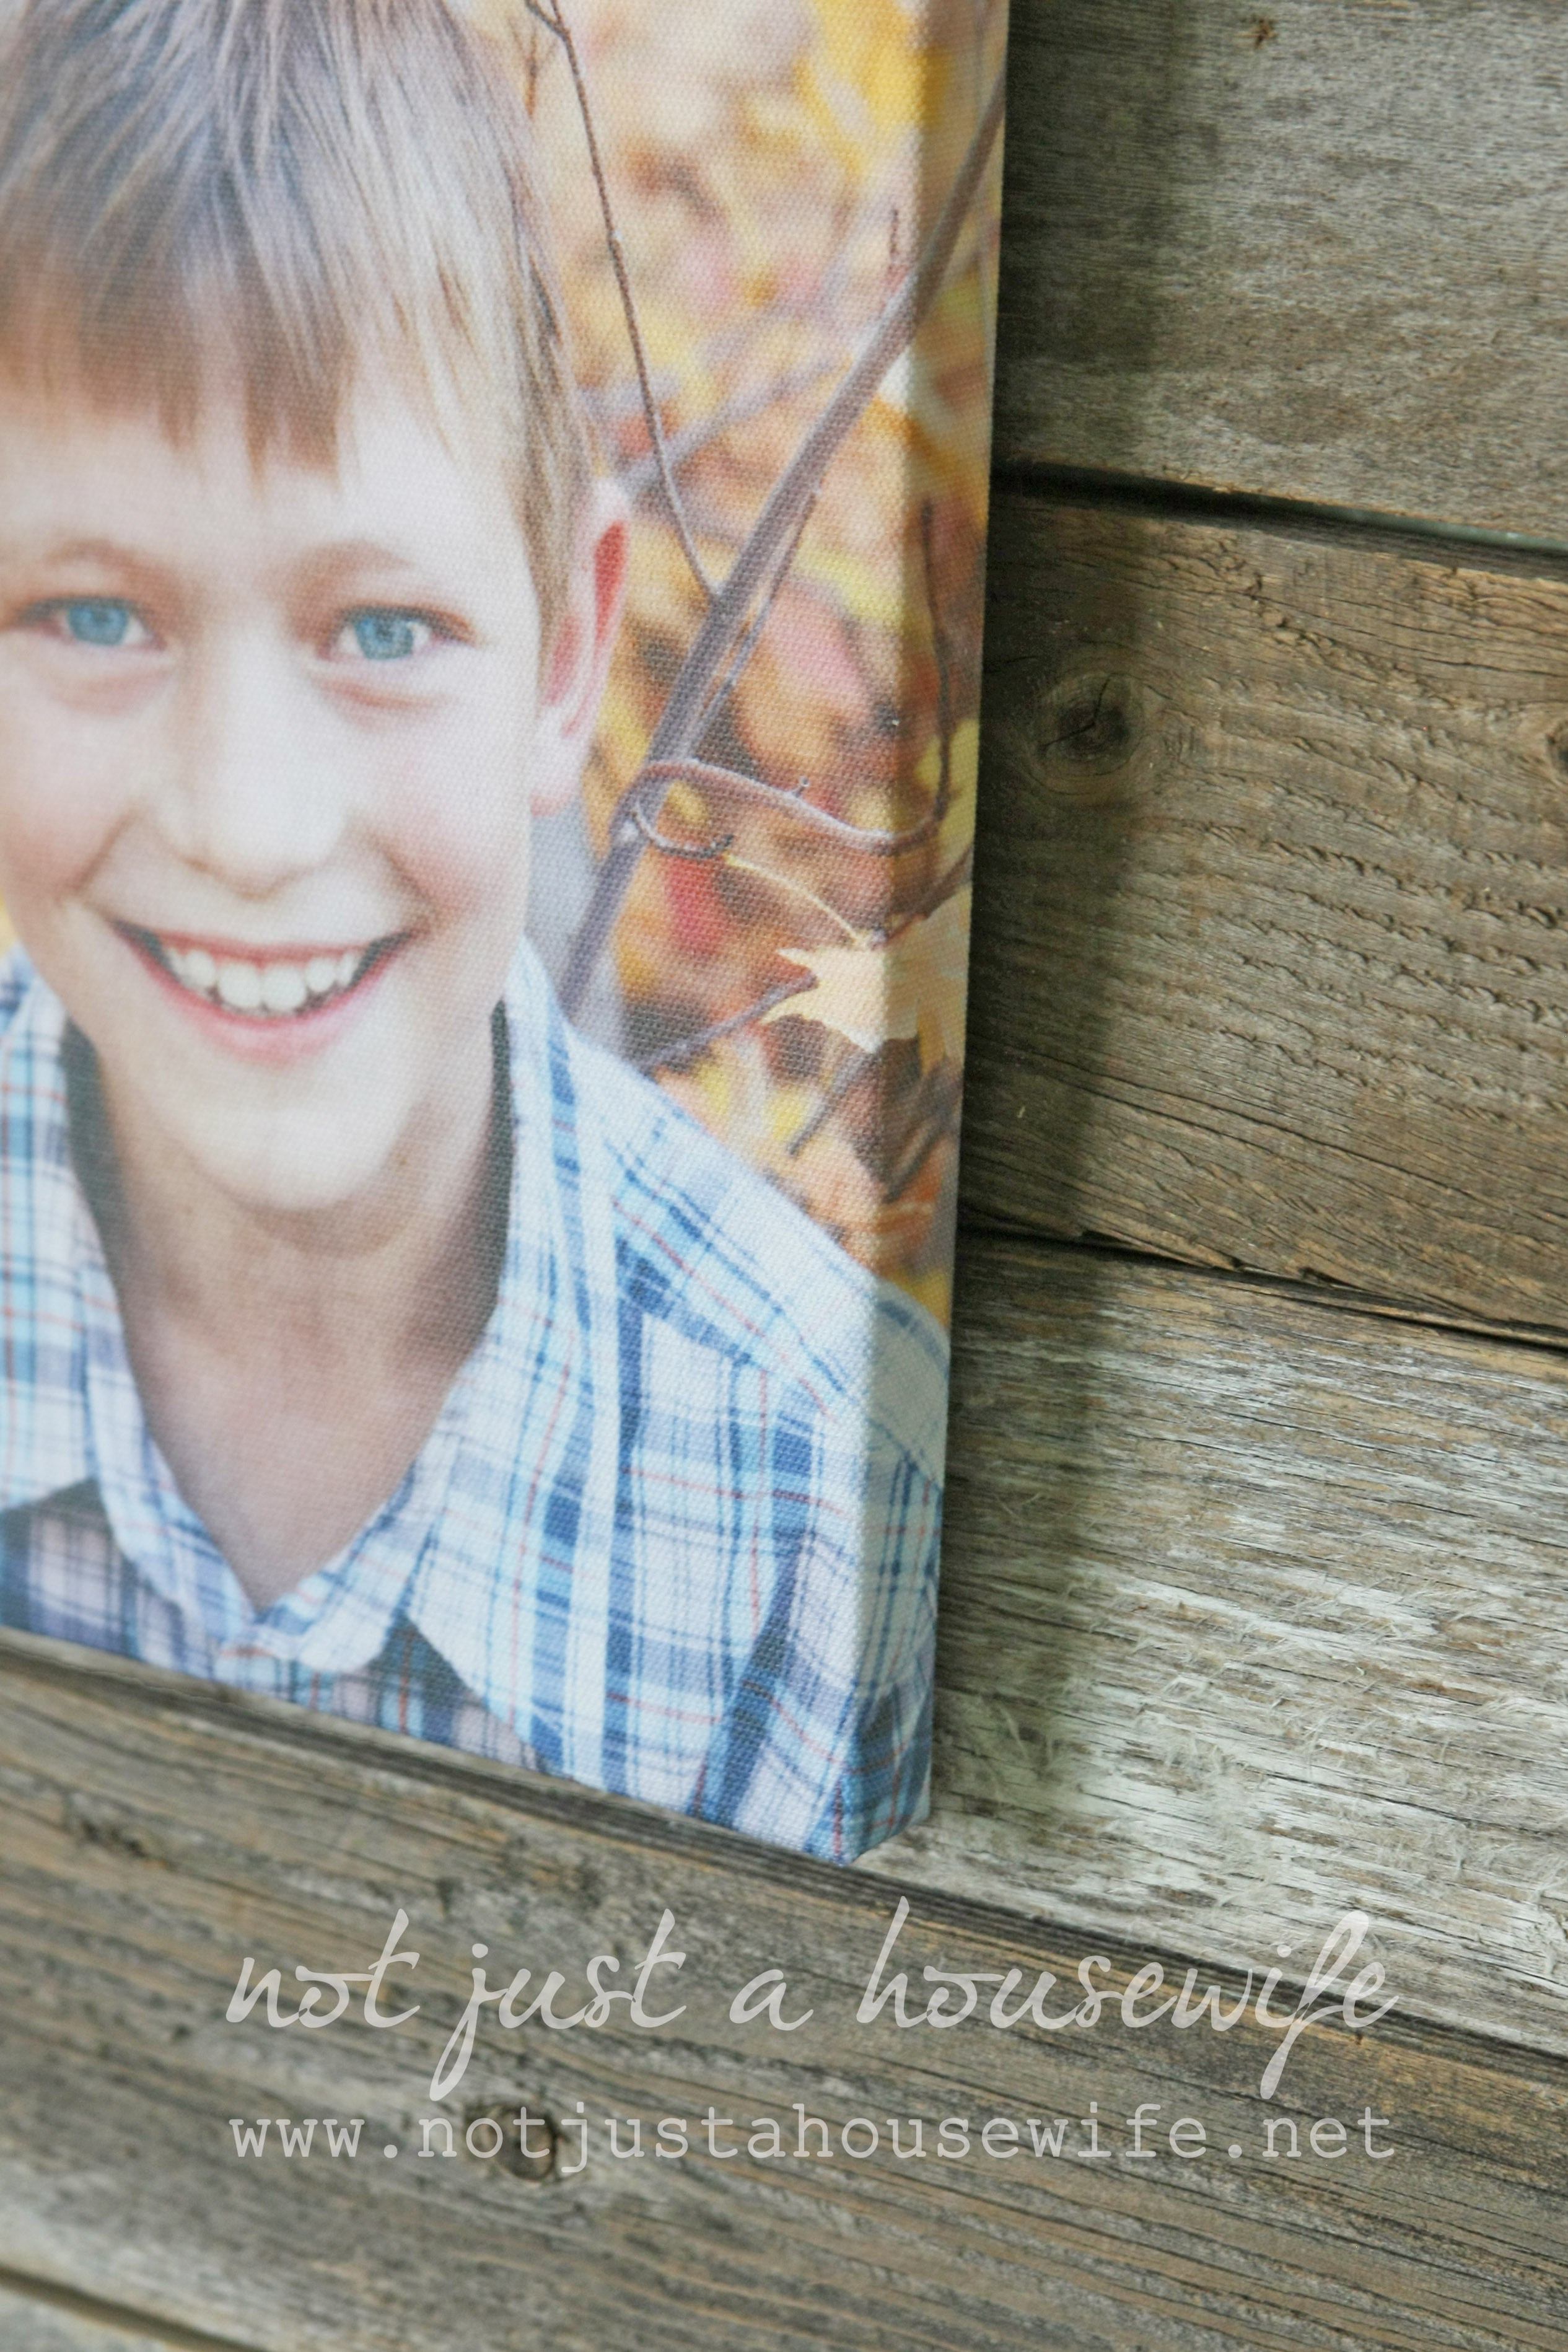
I love the look with the canvas wrapped around!
A few tips:
*If possible, edit your pictures to be a little more saturated in color before printing on the canvas. There are free, simple editing programs online. The ink will be adsorbed into the canvas a little so the picture will not be quite as vibrant as it would if you were printing it on photo paper. Don't over do it, but a little does help.
*Lay your canvas on a flat, hard surface when stapling. This will help the staples go into the wood all the way. If you have some that do not go in far enough, simply hammer them in the rest of the way.
*If you do not have a saw most Home Improvement places ( like Home Depot) will cut the wood for you as long as you have the measurements with you.


I love how these turned out!!
Fotini
Me either. Love them so much
Love these! You have some handsome boys.
Thanks for sharing!
Beautiful photos! Love how you framed them. Never heard of the canvas paper, thanks.
Great idea for framing. Beautiful photos! Hadn't heard about this special paper. Thanks.
Thanks for explaining how this is done Stacy, I am always looking for a reason to use my staple gun and hate paying for these expensive canvases. Your boys are SOOOOO cute!!
These look so nice, love these pics of your handsome boys.......they have your smile :)
These turned out really good, they look so professional ~ Lisa
I never would have thought you could just print on canvas, was there a special setting in your printer for that?
Nope. I set it as "matte photo paper" because my printer didn't give the option for card stock or something thick. But the canvas is really not all that thick.
Wondering about printing on canvas also. Do you have to have a special printer for this?
I used my regular printer :) And it worked great.
Hi Stacy,
This is a wonderful and priceless gift to yourself! I did two of my children holding their first child and the looks on my "kids" faces are so amazing. I look at these canvases every day and appreciate the gift I was given! You did a fabulous job on these works of art and gifs of children!
<3 Danita
Thank you for the party!
Love and hugs...:)
Lydia
Thank you!!!!!! I've been trying to find a place to print some mini size canvas pictures and everyone starts at 8x10.. I really actually need 5x7, and I have a silhouette, but I didn't realize they were carrying this now. I just ordered the paper and will def be doing this as soon as it arrives so I can finish the photo wall (maybe before Thanksgiving!).
I love this (seemingly) easy DIY. Well done! (Also, cute kiddos). Erin @ House Envy
Hi Stacy, I love the way your pictures turned out, I am currently awaiting for the arrival of my Silhouette Portrait that will also include the media bundle. It has the canvas paper in it so I am definitely going to try this. I have just one question, You said that you put the canvas side down with paper side up. So does that mean you are not printing on the canvas side of the paper? When looking at your pictures it looks like it is printed on canvas. I guess I will have to see the paper to better understand how it works. Is printing on the paper side of the canvas paper the usual way it is done?
Love love love these!! I am in love with canvas prints but they are just so expensive. I like that you were able to do this at home- they look great. You have a beautiful family!
This DIY project will be great as a Christmas present! Thanks for sharing this wonderful idea!
Hi Stacy,
I'm pretty new to this on-line DIY stuff. Your instructions are clear, and your finished product is wonderful.
However, did I miss where you purchase this sticky sided canvas? I live in Canada, so I really hope this is available to buy up here. I found you on Pinterest. Should I sign up here to subscribe or follow you on Pinterest.? Which is best?
Thanks for sharing this and taking the time to help me.
Gratefully,
Kari-Anne
Please,would You explane better-Convas side down with paper side up.What is meen?Would You put some Photo tutorial?Kiss from Serbia
Stacy, your boys are gorgeous! When you say these printed on your "regular printer," what type of printer is that? I am also looking to learn what will print to a larger size...perhaps I would need to visit a commercial display company. Ideas? Great job Stacy~
Cyndi
Lovely family! What type printer do you have/use? I've never heard of sticky back canvas paper...where do you get that?
Thanks in advance! Anna
Thanx Stacy, been looking all day for setting; will give it a try!
Your board just came up as a suggestion on my pinterest board and I was so happy to see it!! You see....I taught your two oldest sons computers, before I moved two years ago. What a lucky mom you are!! They are fantastic!! And what a great idea and talent you have! Tell your sons Mrs. Rowley misses them and thinks they are amazing young men! I look forward to following your board.
Hi Stacy. I too am confused by placing the canvas face down with paper side when feeding into the printer. Did you feed it into the printer through the rear/back of printer, hence canvas side down? Love your finished product. Thanks.
Wow, incredible pics. I love these very much
These prints are absolutely adorable, but for the life of me, I just don't get how you got the picture on the canvas using your printer. I know the canvas cannot feed through the printer, so how did you do it? Do you have pictures showing the steps by steps you did to creative this beautiful work of art. By the way, you have very handsome boys. Please advise.
Thanks for answering my question so fast. Have a great weekend
I have always wondered what it would be like to make a photo canvas without the high price of ordering one. I am going to give this a try next week and see how it turns out.