
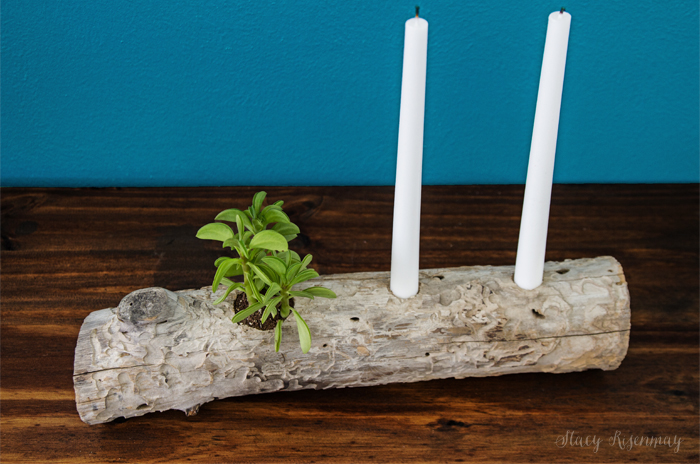
Are you looking for a unique decor item to place on an entry table or maybe to use as a centerpiece on your dining room table? Do you love adding natural elements into your home? I have the perfect project for you! Not only is it very inexpensive, is an easy project to make. This DIY log candle holder also functions as a planter! So go foraging in the woods or grab some unused firewood, because we are about to make a random log look better than it ever has!
DIY Log Candle Holder (+Planter!)
Let's make some natural candle holders that will be a great addition to your cozy home. First you just need to gather a few supplies. You probably already have them all in or around your home.
Supplies:
- Log
- Drill
- Spade Bit, or Forstner Bit (Bore Bit)
- Small Plant
- Candles
Step 1: Choose Log
I went into our backyard to our wood pile and got a log that the bark had already fallen off. You can certainly use one with bark. The type of wood (tree) will also change the look of this project. You could go with something straight and colunar, or pick a twisted, gnarled branch. Birch logs with its black and white markings would be beautiful too! The natural beauty of each log makes each of these handmade pieces unique!
I liked how my piece had insect burrowing lines along it. Whichever type or size of log you choose to use, make sure to clean it well before starting. If it is too long or has uneven ends, cut the ends with a saw or sand the rough edges.
Depending on your log, you may need to saw part of the bottom off to create a flat surface. A flat bottom will ensure that it doesn't roll. Obviously you don't want something that is on fire to be able to tip. Wood candle holders should be sturdy. You could also use battery operated candles if your log isn't as stable as you would like.
*Note: If your log or branch has recently been cut down and is fresh (wet) wood, it may need to dry out before being used for projects.
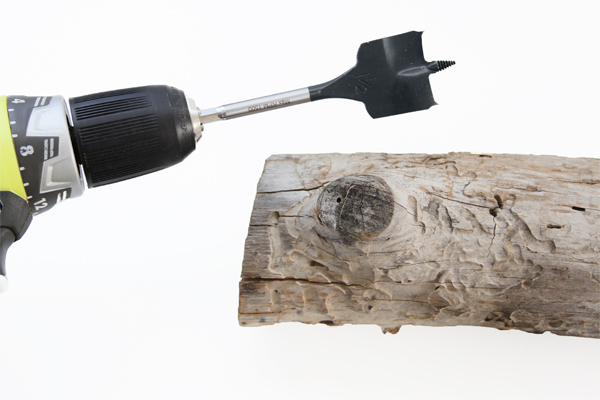
Step 2: Drill Holes
Once your log is clean and dry, you will start by drilling holes for the candles. Choose which candles you will use so you know which size holes to drill. I chose to use taper candles but you could use tea lights candles or any type of smaller pillar candles. I chose a large drill bit that was the same diameter as the base of the candles. You could also use a drill press if you have access to one.
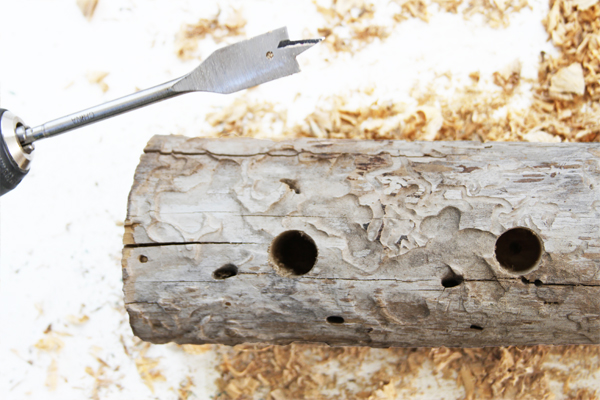
I also chose to do 2 candles but if you make a longer candle holder, you can add as many as you want. It would be stunning to have one that went the length of a dining table!
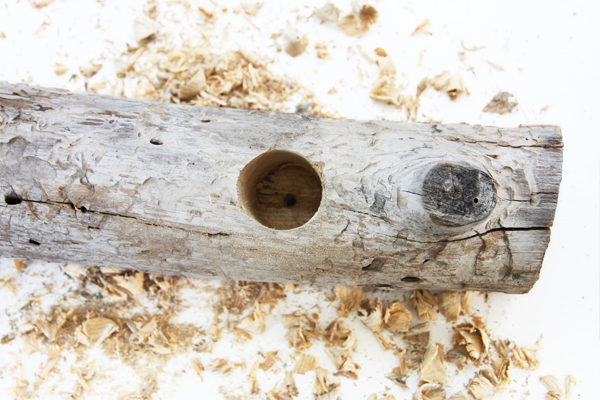
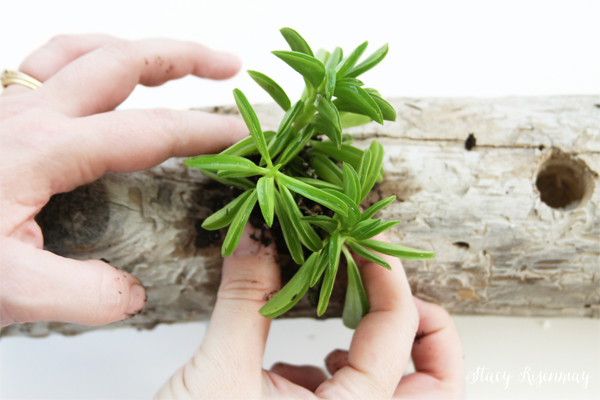
Then you will need to drill a larger hole for the plant to go in. I used a paddle bit but a bore bit also works. You will need one that is at minimum 2" wide. The bigger the better since you will need to fit dirt and a small plant in it.
The last step is the add a plant. The best type of plants for a small planter like this would be succulents. They like to dry out in between waterings and are less fussy than small terrarium plants like ferns. But if you were creating this log centerpiece for a wedding or other event and just needed them to be planted for a short period, ferns would look beautiful in these wooden candle holders.
If it will be in your home as a more permanent part of your decor, then something more waterwise is better and will last for a long time before needing to be repotted. You can find succulents that are already in 2" and 3" pots at your local nursery or online at Amazon.
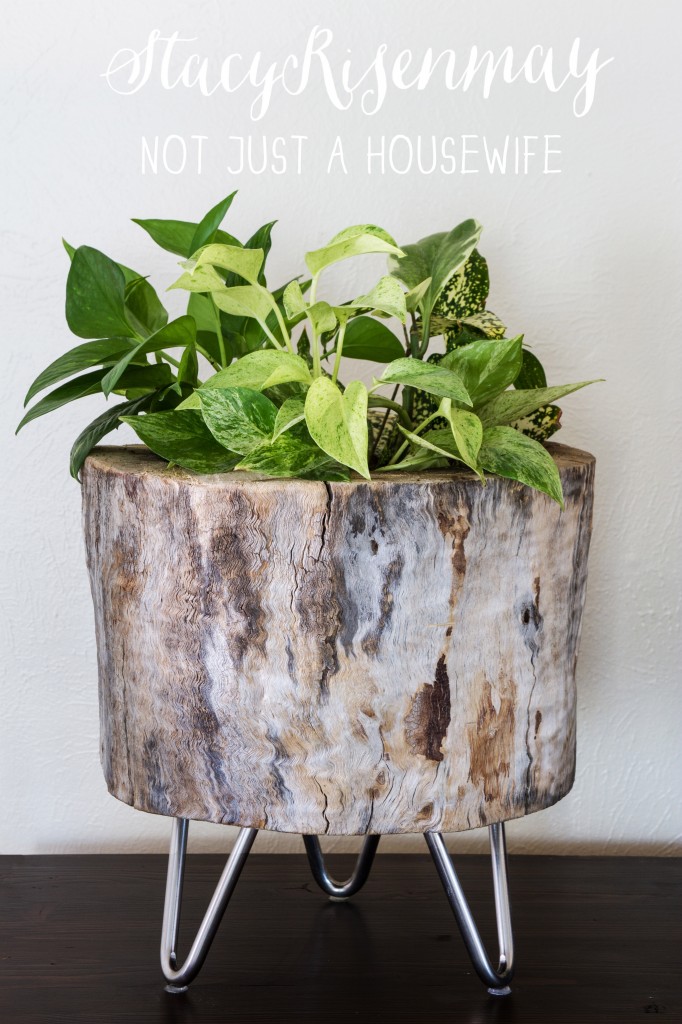
Now all that is left is to light candles! I love adding in bits of nature into my home like this natural wood and some greenery. These rustic candle holders are perfect for that! I love that you can take a scrap piece of wood and give it new life. This simple DIY project is one of my favorites from my book, Natural Accents.

Create your own natural piece of home decor by creating your own rustic wood candle holders or try some of these other DIY projects:


Comment Below!