
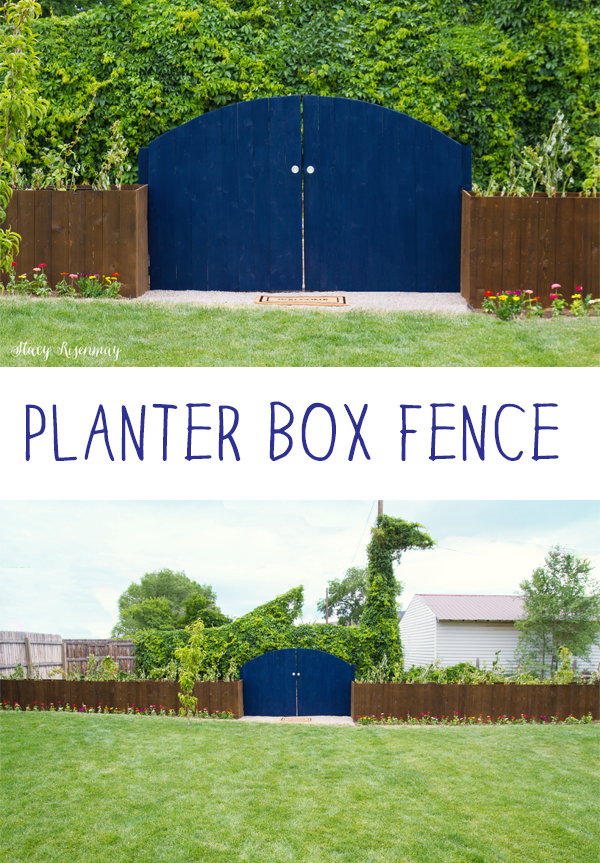
I am so stinkin’ excited to share this backyard project with you! It has been weeks in the making and I am thrilled with how it turned out. When Thompson’s WaterSeal asked if I had any big outdoor projects we could work on together, I knew this planter box fence was it. I dreamed up this project during the winter when my backyard was under three feet of snow so it is so fun to finally see it come together. It was worth all the 12 hours days in record heat.
I shared what the back of my yard looked like in a previous post, but as a reminder here are a couple of shots.
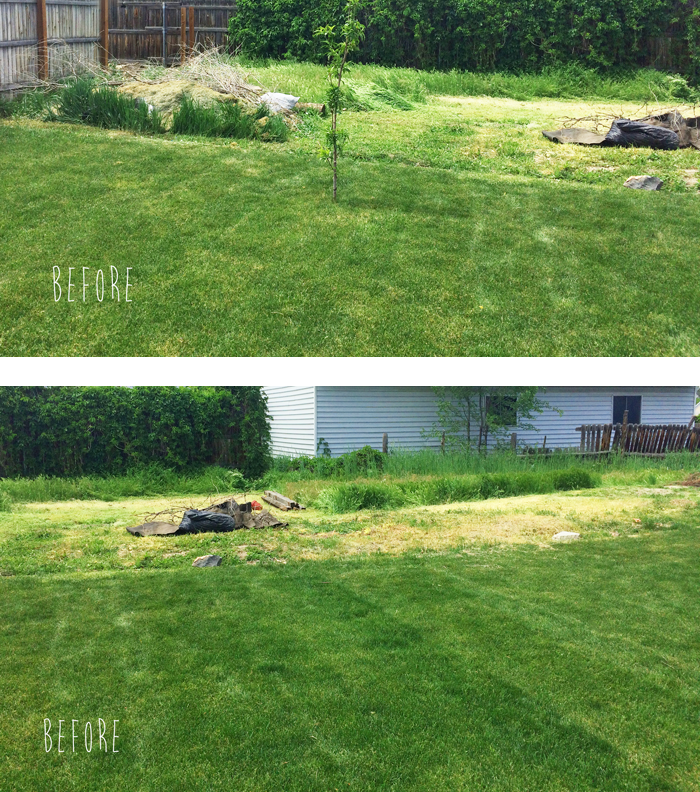
This was one of those times I was extra grateful I have four boys because I put them to work leveling the ground. Our yard slopes towards the center and I knew we needed these boxes to be level. It took days and days of all of us shoveling but we finally had it ready to build on!
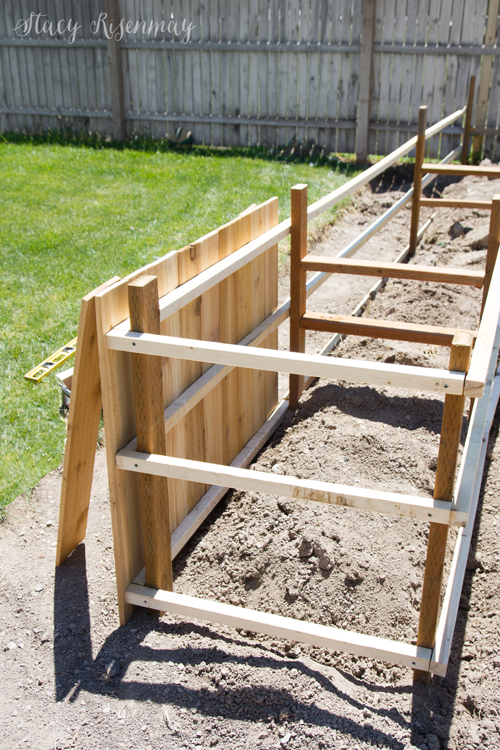
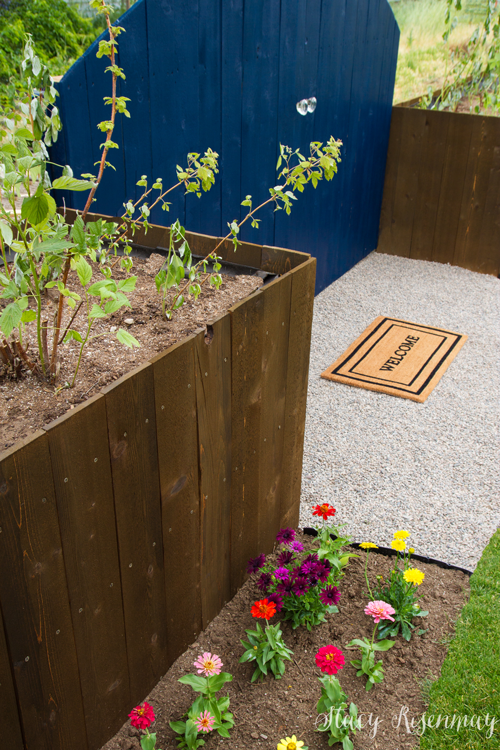
Shane and I started out by measuring and setting posts. It was very similar to setting fence posts only it formed a box instead of just a line. The we added 2x2 boards to connect the posts. After that all we had to do was add cedar pickets! We bought regular 6-foot fence pickets and cut them in half so the planter boxes would be 3 feet tall.
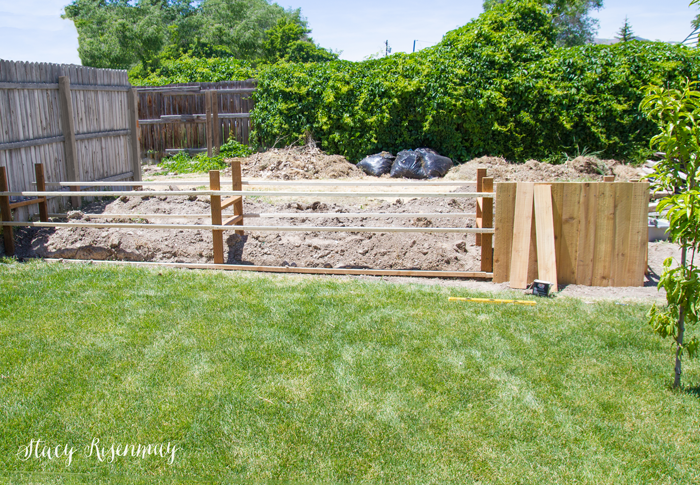
To prevent the boxes from bulging when full of dirt, we also added support in-between the posts.
Once the pickets were all on, we lined the inside with water proof landscape fabric.
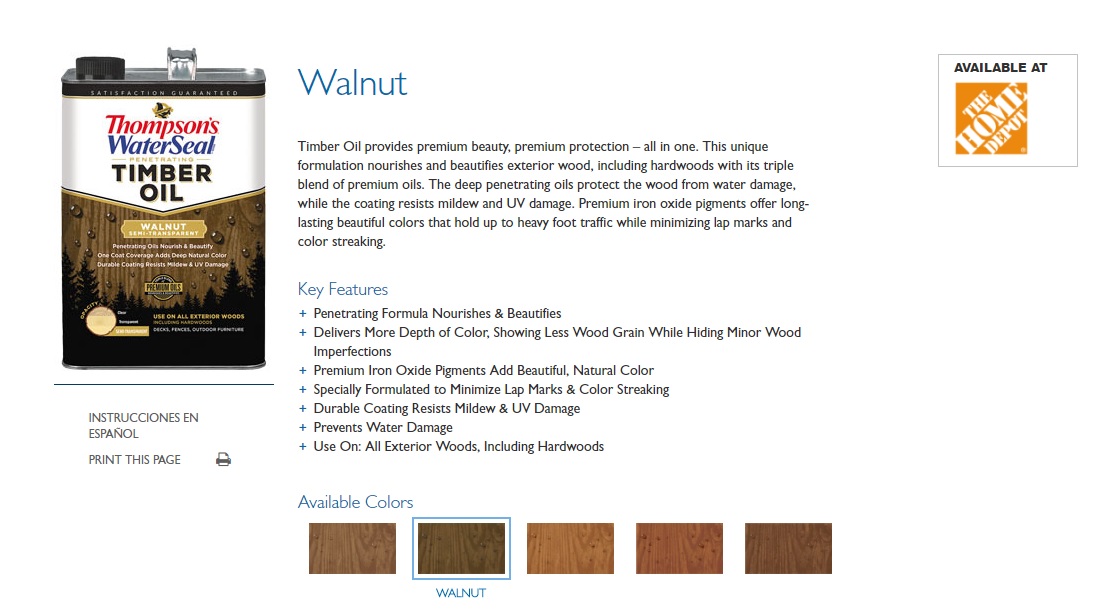
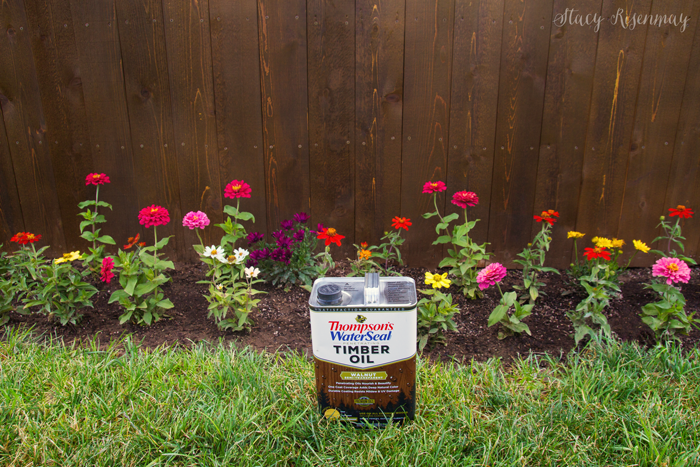
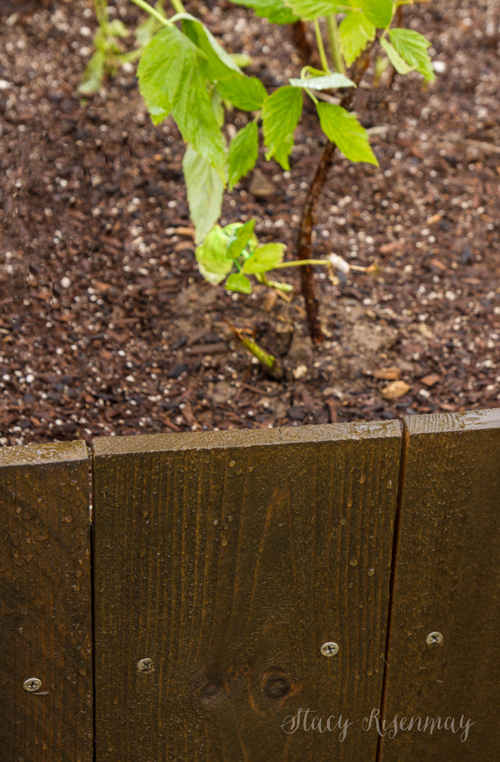
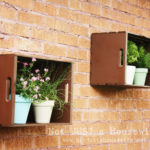
Now came the fun part! Staining! I chose to use Penetrating Timber Oil Semi-Transparent in Walnut. I loved the rich brown color. I didn't want a solid color that would cover most of the wood grain. This was perfect!
It was really easy to pour. No mess!

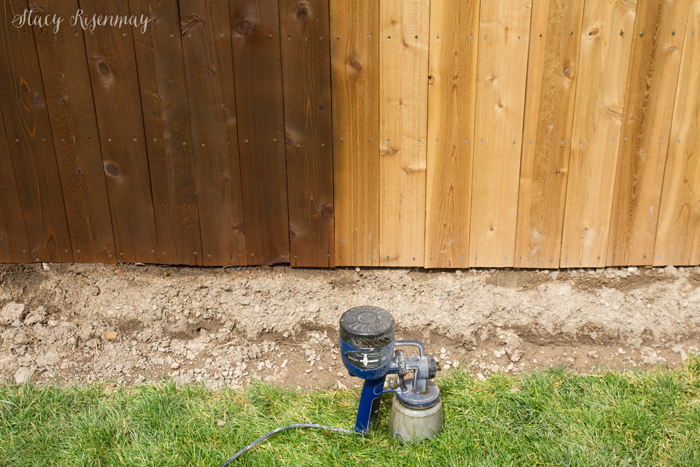
Because I had so much surface area to cover, I chose to spray the stain on the boxes. It went fast and gave it a nice even coat. Make sure to wear clothes you can get dirty, gloves, and a face mask.
To save money, we filled the planter boxes ⅔ full of the dirt we dug up when leveling the ground. It also saved us from having to haul it away. The top portion was filled with top soil and compost we purchased locally.
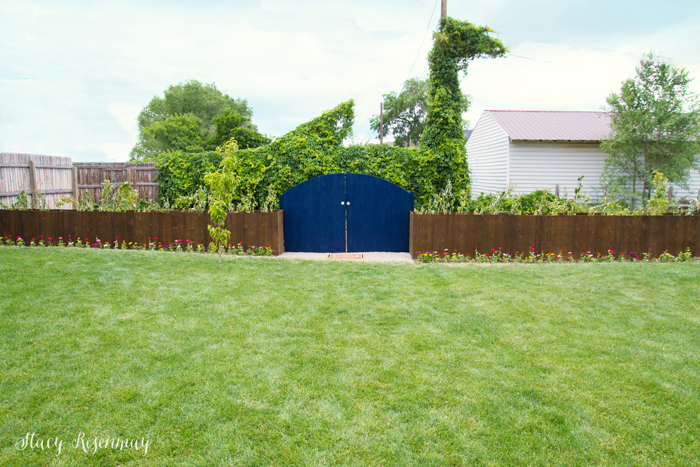
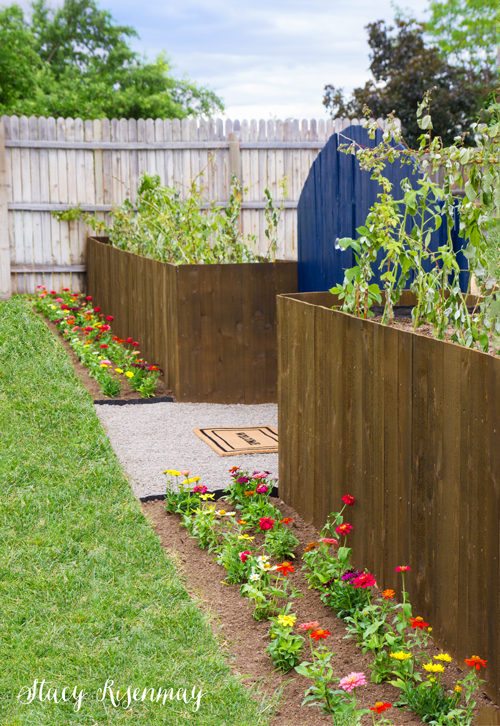
We dug a trench in front of the planter boxes since the dirt was so rocky. The trench also got filled with the new dirt and compost to become a flowerbed. I planted one of my favorite flowers, zinnias! Don’t they look amazing next to the beautiful walnut stain? I love that you can still see the gorgeous wood grain of the cedar.
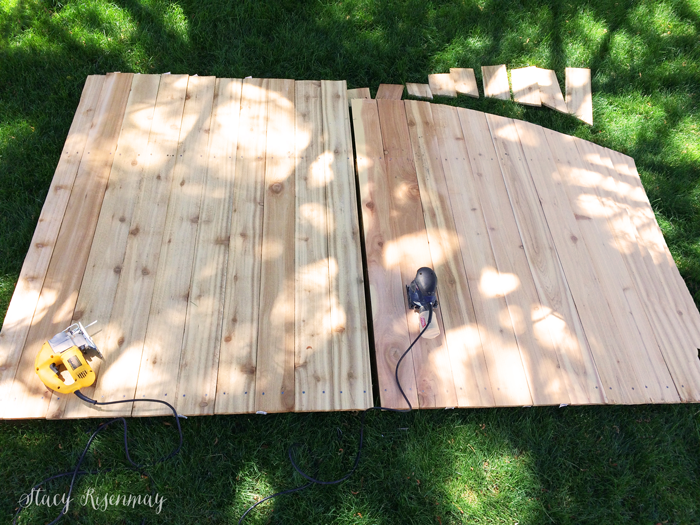
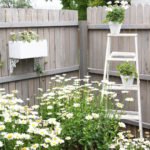
I built a basic frame for the gates and covered them on one side with pickets. I played around until I got the arch just right and penciled it in darker so I could cut it with the jigsaw. I didn’t bother to sand the boxes, but I knew the gate would be touched more than the planters so I went ahead and lightly sanded them.
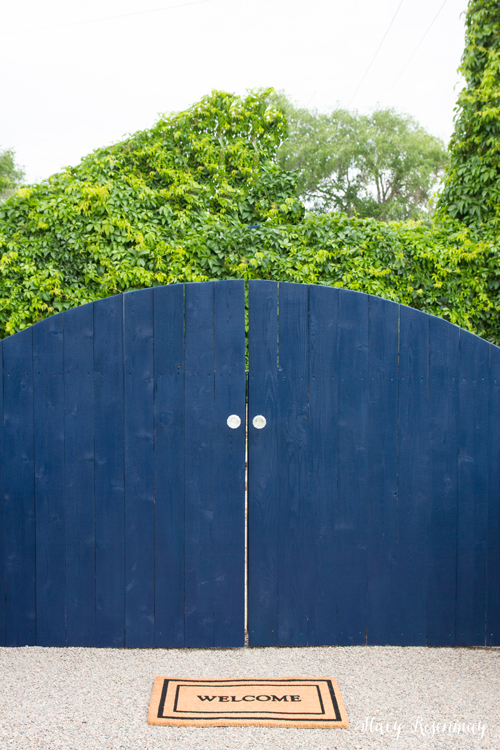
I decided to paint the gate blue to match all the interior doors of my house. I used the same navy color that I love. I even bought reproduction crystal knobs just like the doors in my house.
We planted raspberries in the planters and I can’t wait for them to fill in more and be covered in juicy berries!

After I watered the transplanted raspberries, I noticed how well the water beaded up showing how well Thompson’s WaterSeal protects the wood. I'm confident they are going to hold up really well over time.
I love how the planters double as a fence! If you remember our backyard plans I share awhile ago, behind the planters will be storage for all the things we don't want to see like wood piles and compost bins.
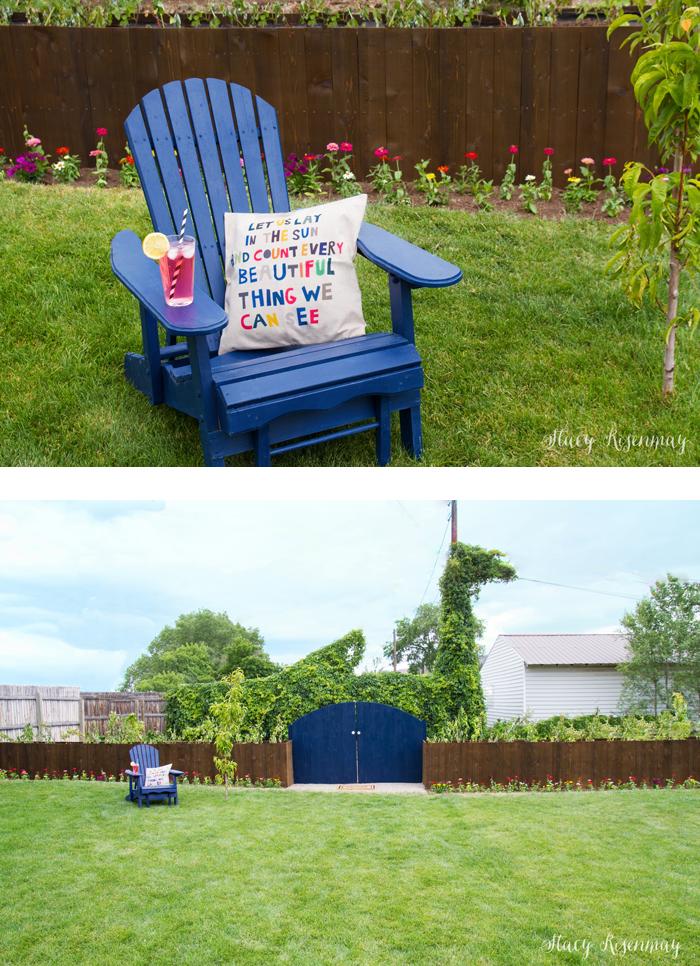
Now that all the hard work is done, I can’t wait to sit here and read while I enjoy the view of the whole backyard.
It feels so nice to have such a big project checked off the list at the beginning of summer knowing I will have the rest of the year to enjoy it.
What outdoor projects do you have planned this summer? I'd love to hear!
PIN For Later:
This post was sponsored by Thompson’s WaterSeal but all ideas and opinions are all my own.


very clever! what does the back side of the planter box look like?
Thank you! The boxes look exactly the same on the other side. They are stained the same color and everything. There are dead weeds and a pile of compost so I didn't photograph the back :) The gate doesn't have pickets on the back so you just see the X frame and the pickets from the front peeking through. I was worried they would be too heavy if I added pickets to both sides.
Is that a dragon in the hedge behind the fence?! Or do I have a too vivid imagination?! Blooms so good with the pop of blue!
Hahaha! The vines grow up the telephone pole and the wires that way. My kids call it the lama :)
Stacey: That looks amazing and so beautiful. Great job. I like that they are practical planters but also act as a fence to hide less than pretty things. Love the blue gate doors and crystal knobs. Thank you for sharing!!!! :) -Jill
Wow! What a transformation! Your idea was amazing and to see it come to life a real treat! Hope those berries blossom this year and you reap extra rewards from all your labors! Well done, Stacy! The flowers are amazing touch! Really enjoy watching your place grow, change, improve and all with love!
Did you use Thompson water seal on the inside of the boxes too ? To protect it from wet soil ?
I didn't but it probably would have been a good idea. I lined it with waterproof cloth though. The Thompson's WaterSeal would have been one more added layer of protection.
This was such a good idea! It really adds some character to your yard. I would love to try this out myself!
I love the idea of a planter wall!
I have a question about painting with a sprayer. It says to spray on calm, windless days. Where I live it'll be calm and then there will be sudden gusts. When painting outside how do you deal with that?
We have gusts here too. I usually wait for it to calm down, hurry and spray, and then stop again if it gets windy again. It's not a huge deal but it is easier to wait for a calm day.
Big job well done. I love it. You rock!!!!
AWESOME! Love everything about it. Hats off to the boys for the foundation work. Their just rewards will be sweet and juicy. The darling pillow is so apropos for your yard--so many wonderful things to look at. I spotted the dragon, too, instantly. Makes it seem like the gate leads to a secret, magical garden.
I love the giraffe topiary in the background! It could be a dragon, good feng shui!
Wow!! You did an amazing job on this project - I can imagine how much work was involved. But it definitely paid off!
Wow Stacy, this is just gorgeous! What an awesome idea, and I really love the colors you chose!
I just wanted to let you know that you were featured as a Rockstar at last week's Creativity Unleashed party! Congrats, and thanks for sharing at our link party!
My late husband built me raised beds but...neither of us thought to place chicken wire in bottom or double it..( overlaying it in different pattern) to keep out moles,voles..wish we had.... & Stacey did you use fence hinges ? Or a full length piano type hinge? On the gates! I'd like to see a pic of the back of the gate! Just sayin...what brand & color of Navy did you use? Love it ...
Luckily we don't have a mole problem here but chicken wire would be a good idea if they were a problem! I used large gate hinges. Next year when I do more with the other side of the planters I'll make sure and show a shot of the back. The paint is True Navy by Glidden :)
Love the fence, its original and I will use your idea but in a smaller scale. Thanks.
I love your raised beds but your original flower garden was so wonderful! I love plants & flowers and out the time in to take care of it. But my four children are raised & gone so I have plenty of time to tend to the weeds. Thanks for the update!
I am a master gardener in Indiana and you have shown to awesome ways to utilize growing plants, flowers & herbs!
I just found you! We are going to build the chairs!!