
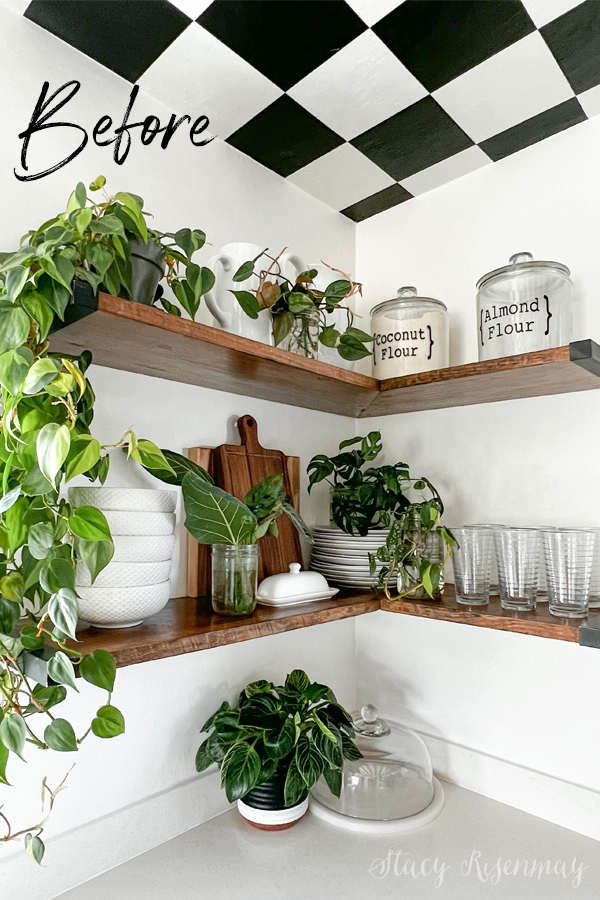
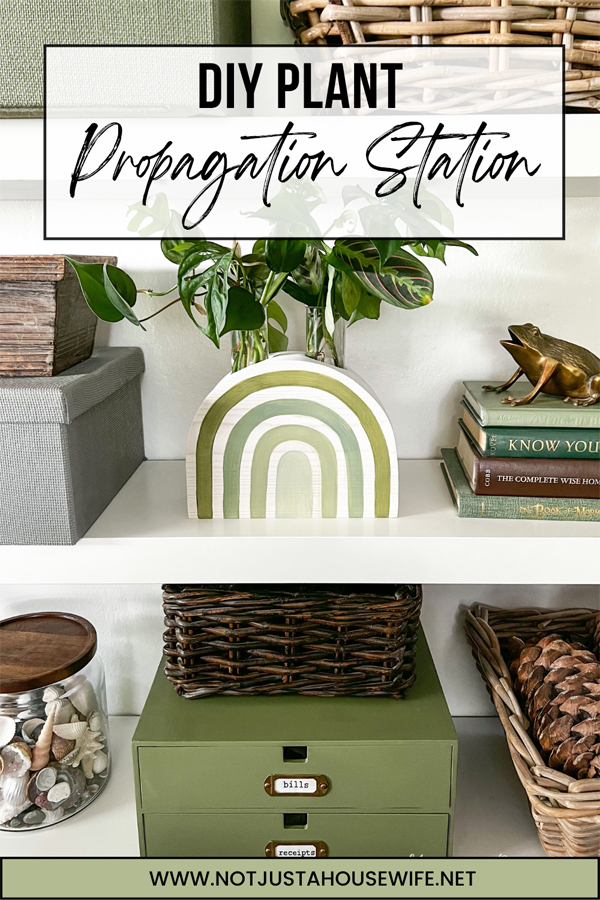
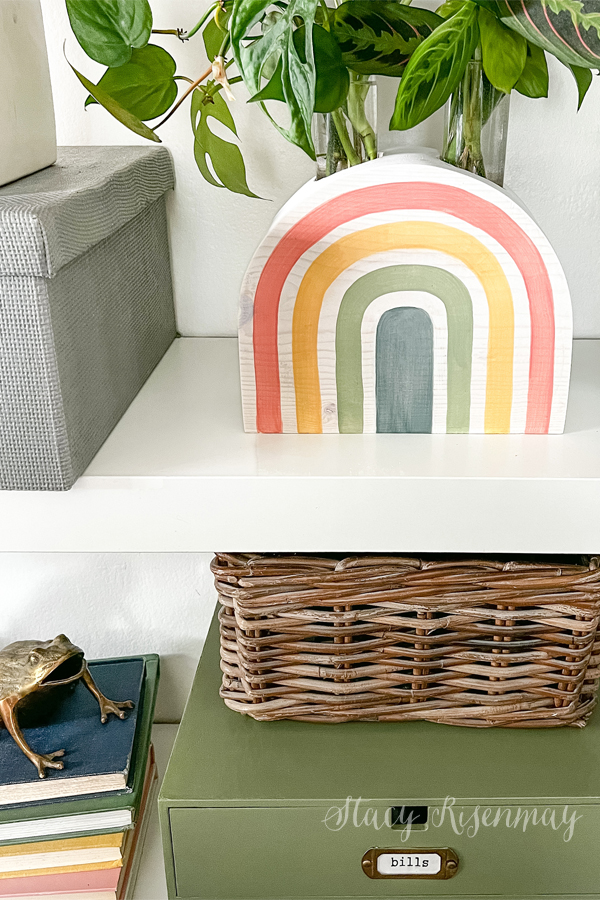
Hey plant lovers! I have a fun DIY for you today! I love propagating my houseplants. It is a great way to create new plants. And who doesn't love free plants? I usually have several propagating all at once. I have been using mason jars and it is getting a bit cluttered on my kitchen shelves. There are even glass jars in my bedroom and in my office. I decided that I needed to make some cute propagation stations that could blend in with the decor better instead of crusty old jars. I created one so far with plans to make even more kinds to place around the house. Today's DIY plant propagation station is a painted wood arch. I am really happy with how this cute propagation station turned out!
This post contains affiliate links.
What is Propagating?
Real quick before we get into the tutorial, propagating is when you take a cutting from a plant and either place it in water, or directly into soil, and then it roots and created whole new plants. Soil propagation can be a bit tricky for most plants so I prefer to do water propagation.
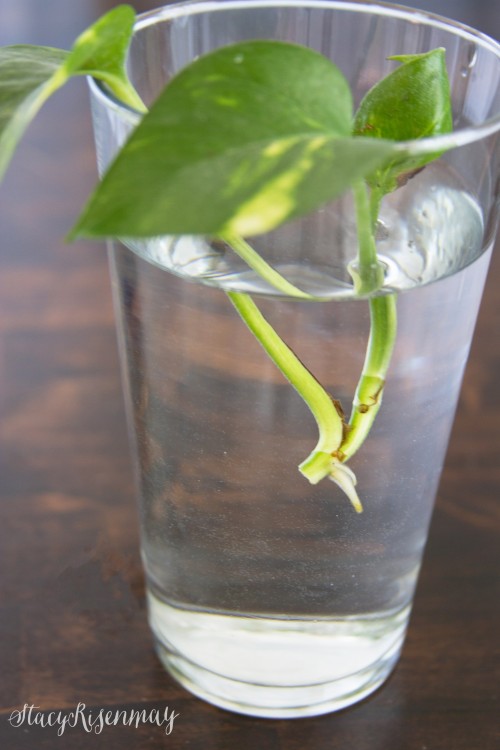
Pretty much any plant clippings can be propagated but some of my favorite plants to propagate are pothos, philodendron, snake plants, calatheas, ficus, and monstera. I am making a wood DIY propagation station today but you can always use a mason jar like I have been doing or glass vases, glass bottles. I have a whole post on how to propagate a fiddle leaf fig if you want more details about where to cut and when it is ready to plant in soil.
DIY Plant Propagation Station
Supply List
1x8 Board or Plywood
Medium Sized Mixing Bowl
Pencil
Ruler
Paint
*Polyacrylic (Optional)
DIY Plant Propagation Station Tutorial
Step 1
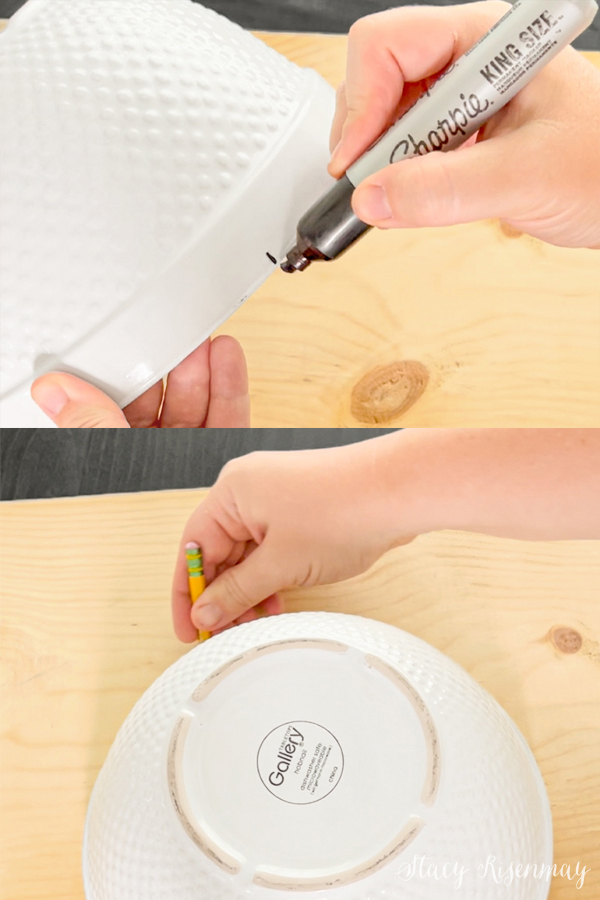
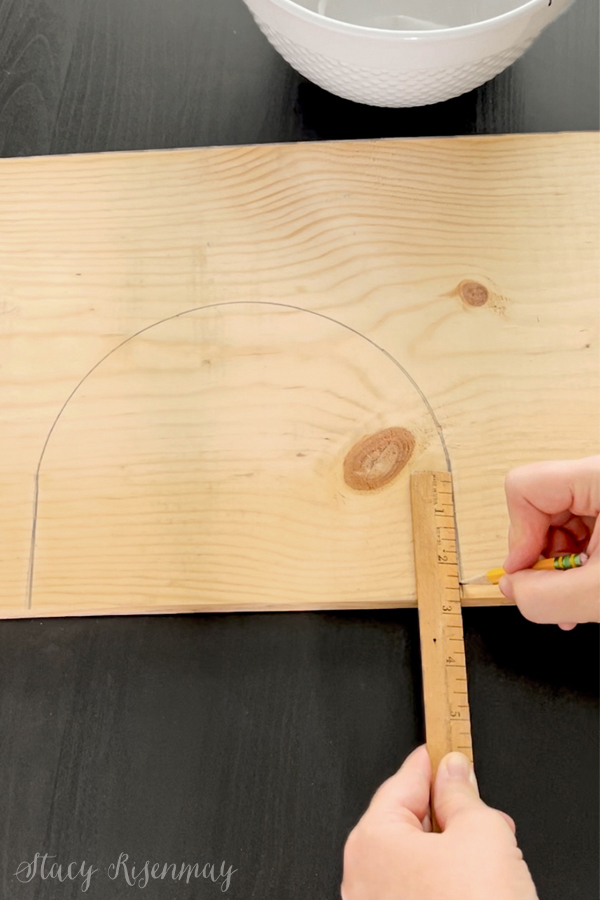
You know I love arches (my 1938 home has them all over) so I started by tracing an arch pattern onto some boards. I happened to have some scrap wood but you could use plywood as well. A little trick I used to get the arches all the same size is to mark the bowl. I created one the size and height I wanted and then marked with a Sharpie where the bowl lined up with the edge of the board. That way the arch would be the same width and height each time.
Then to make the sides, I lined a ruler up and marked where I wanted it to start going straight down. It ended up being exactly 3" so each time I was able to mark the sides at 3" and have a uniform arch.
Step 2
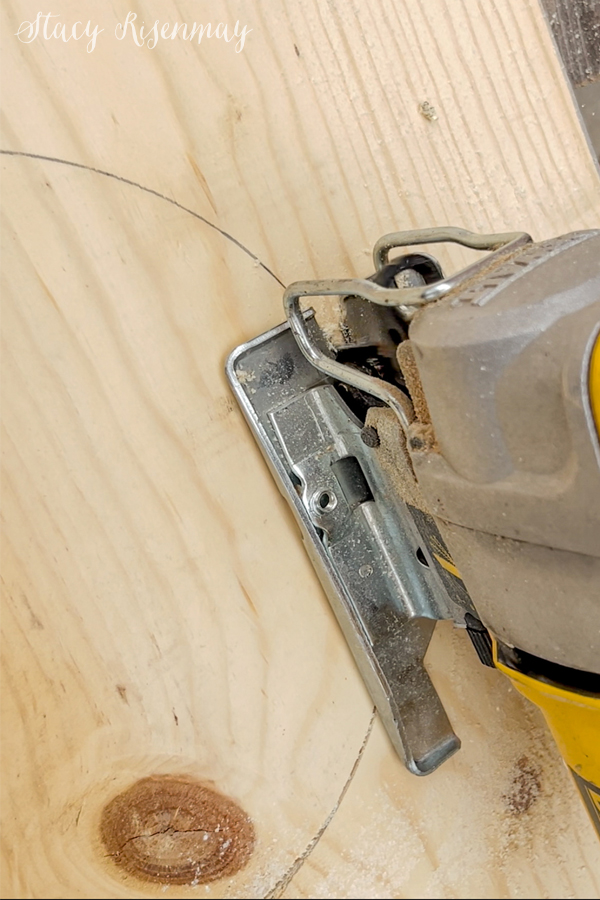
I used a jigsaw to cut them out but a bandsaw or scroll saw would also work. Another alternative would be to buy wood craft circles (or ovals) and simple cut them in half. It would be a slightly different shape, but would a good option if you are not confident in cutting out the shape. Add enough layers so that it is wide enough to fit whatever sized glass vase or tube you will be using. The wider it is, the more stable the flat bottom will be as well.
Step 3
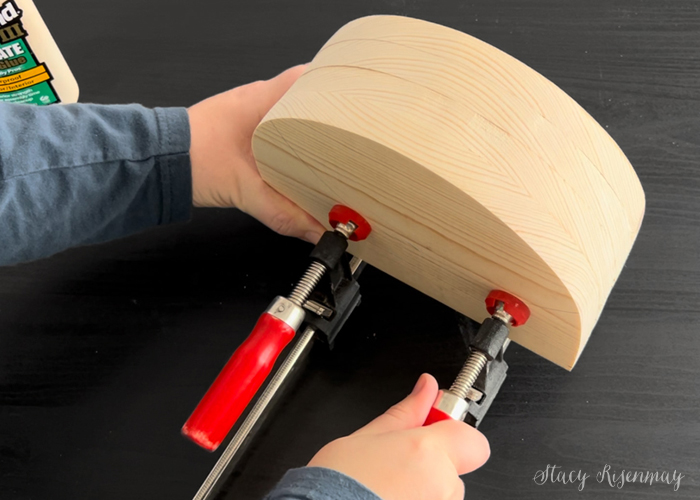
Once all the pieces were cut out, I used wood glue to adhere them all together.
I clamped them and waited for the wood glue to dry overnight before sanding them. Start off with a 120 grit sandpaper and my palm sander to get all the pieces to be smooth. I am pretty skilled at cutting things out with the jigsaw, but there were still a few high points that needed to be sanded down. I finished it off by hand sanding with 220 grit sandpaper.
Step 4
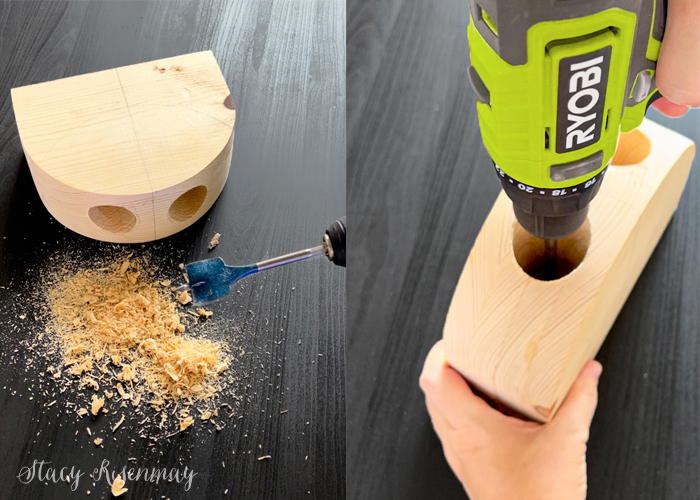
I had some large glass test tubes that I wanted to use for this project so I found a paddle bit that was slightly bigger than the diameter of the test tube vases. I drilled 2 holes into the top of the wood arch. This is a hard process to get started so it is a good idea to clamp it to your workspace before drilling. If you have access to a drill press, that would be the best option. A drill press would be such an easy way to get uniform holes. After this process, guess what's on my Christmas list?
Step 5
If there are any places you need to putty, fill them in with a sandable, paintable wood filler. Once that is dry you can lightly sand those spots with 220 grit sandpaper. Now you are ready to paint!
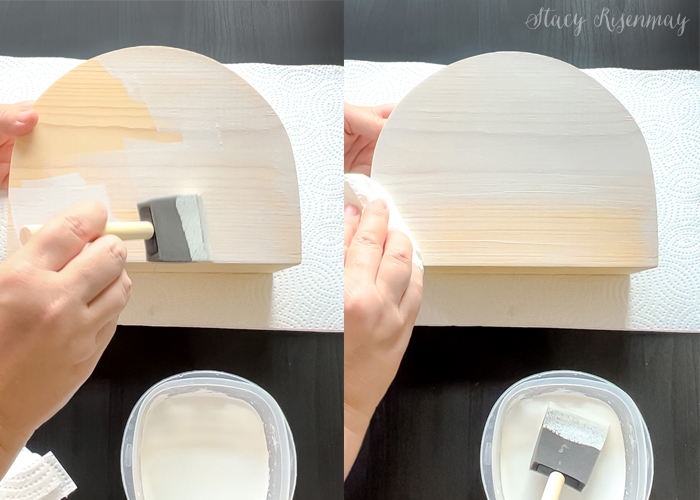
Step 6
I chose to do a whitewash for the base layer. I watered down some white craft paint and then wiped off the excess with a paper towel. Let it dry before painting the colors on.
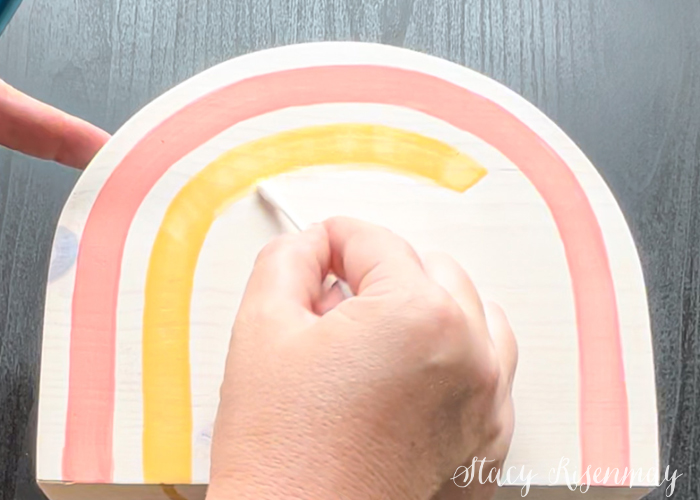
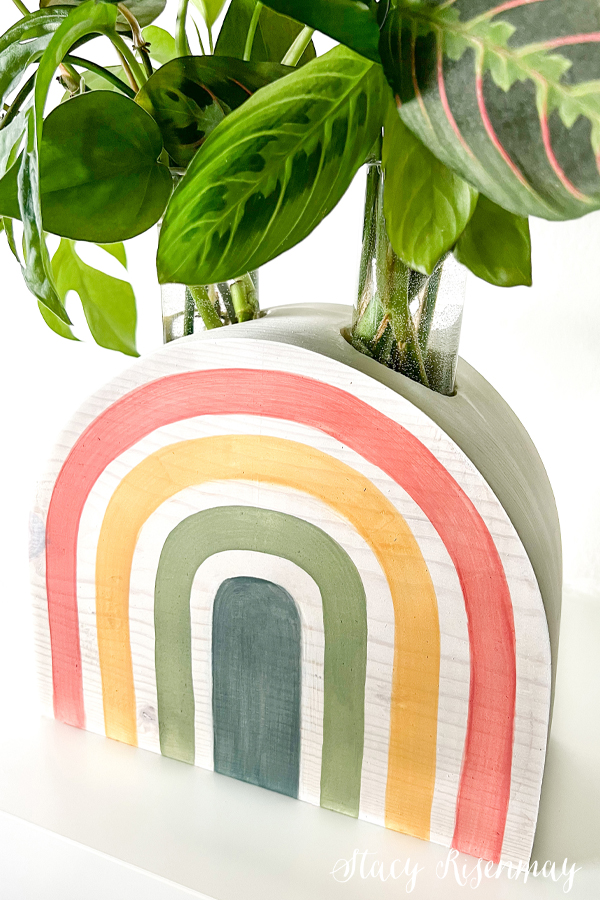
I couldn't decide between doing a more traditional rainbow or a monochromatic. Luckily it has two sides so I did BOTH! I also watered down the colored paint because I wanted to see the wood grain through it and I wanted it to have a watercolor feel.
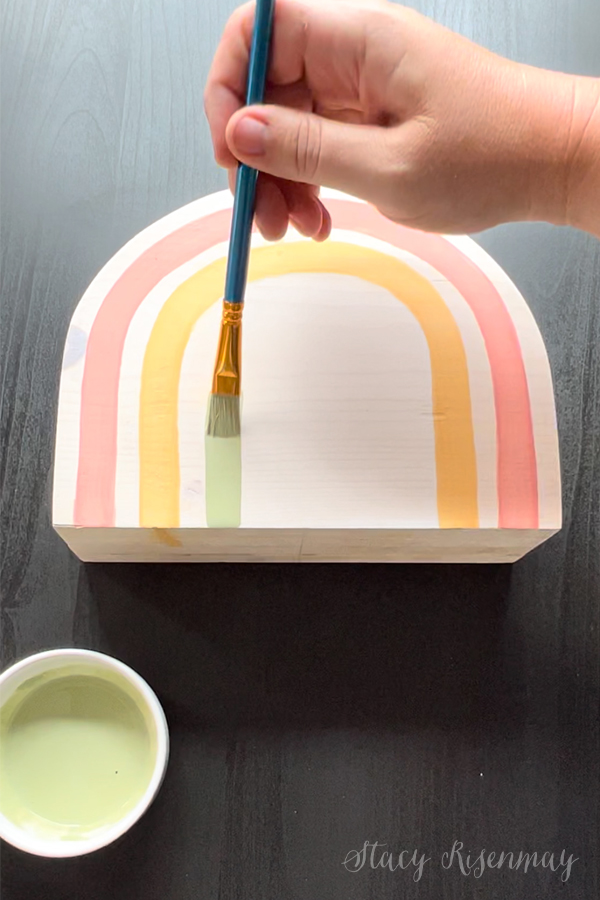
The key to painting the stripes is to use a wide, flat craft brush. Practice on a scrap piece of paper before doing it on the wood to get a feel for it and to see how many colors you want to use and the spacing of each stripe. If you mess up a bit, have some wet Q-Tips handy to wipe the paint away quickly. Worse case scenario, you sand it down a bit to get the paint residue off. But I had no trouble removing the paint in the places where I went to wide or too close to the neighboring stripe. Always have paper towels on hand as well.
* Optional
When the paint is dry, you have the choice to leave it as is for a matte look or seal it with polyacrylic. Don't use polyurethane as it will yellow.
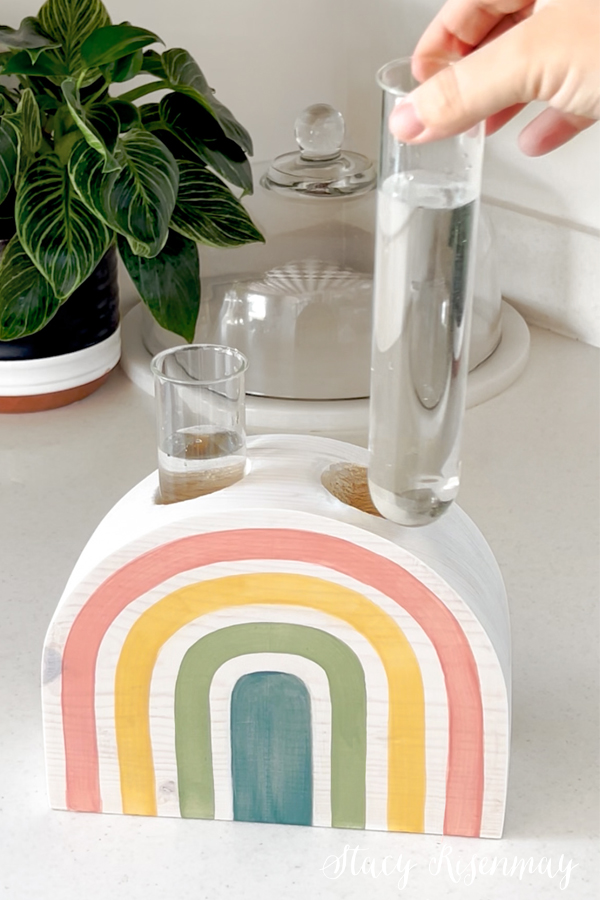
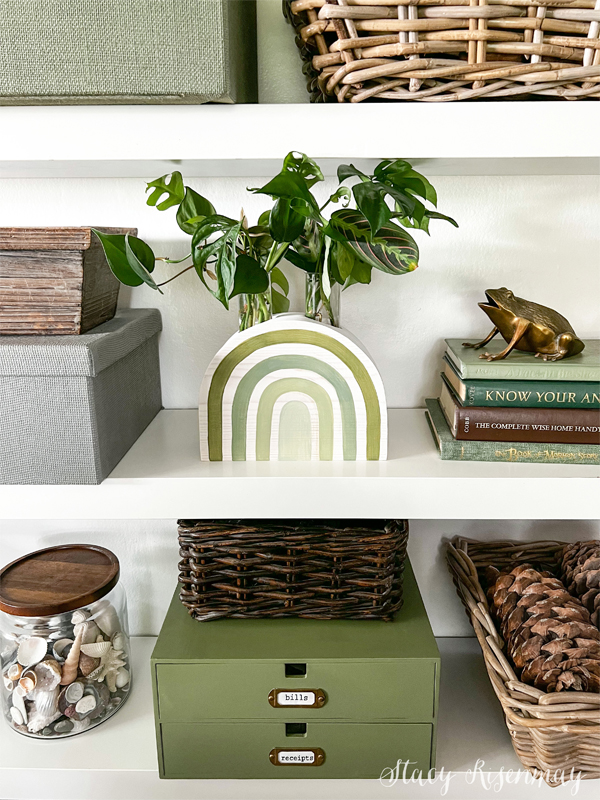
I was so excited to add the glass tubes filled with water. I finally had my own propagation station ready for plant cuttings! It will be fun to wait and watch for new roots to form. I love new plant babies! Now I need to make another unique propagation station to place around the house so I have enough space on my kitchen shelves for all my dishes. I like the idea that they will blend in my my other decor.
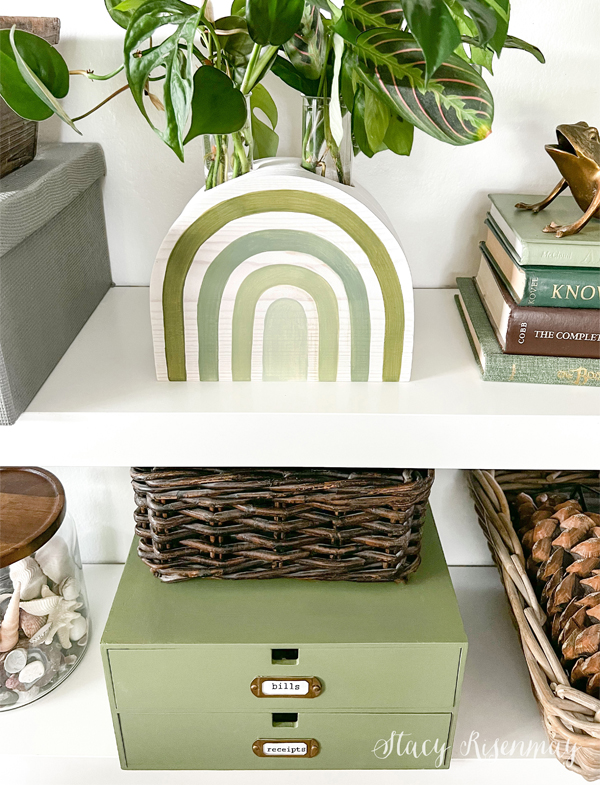
I like that the glass test tube vases stick up above a bit since it makes it easier to refill with water and makes it so the plants don't cover up the rainbow.
There is a video tutorial of the whole process on my social media. Sometimes it is easier to get a feel for a project by watching it being made.
What do you think of this modern propagation station? I am currently brainstorming for more great options and different ways to create other propagation vases. Maybe a propagation wall? I have some beautiful walnut live edge slabs that could be a fun material to use for a simple wood stand. I might need to make a trip to the thrift store or dollar store to see if they have anything fun that I could use. Let me know down in the comments if you have any fun ideas.
Do you propagate your indoor plants as well? I'd love to hear about which plants you like to propagate!


What a clever idea! Love it!
So cute and much more attractive than the olive jar sitting on my window sill. Thanks!
a very good idea, on so many levels, thanks.