Stacy Risenmay

Do-it-yourself projects and Home Decor

  • Home
  • About me
  • Our House
  • Project Gallery
  • PRESS
  • Contact Me
  • Videos
  • My Book

Wood Slice {Styled X3}

By Stacy 19 Comments

Wahoo! It is time for my favorite series. I purposely have the participating bloggers NOT tell me what they did because I want to be just as surprised as you. The ladies that are helping me this month are SO FANTASTIC and I covet their stylish homes so I know they are going to knock our socks off! KariAnne from Thistlewood Farm and Julie from Julie Blanner.

As always, I chose an item and bought three of them. I kept one and sent the other 2 items to blogging friends to style in their home. Altering the item is optional but by no means necessary. The point is to show how one simple item can be interpreted in multiple ways by people with different styles.
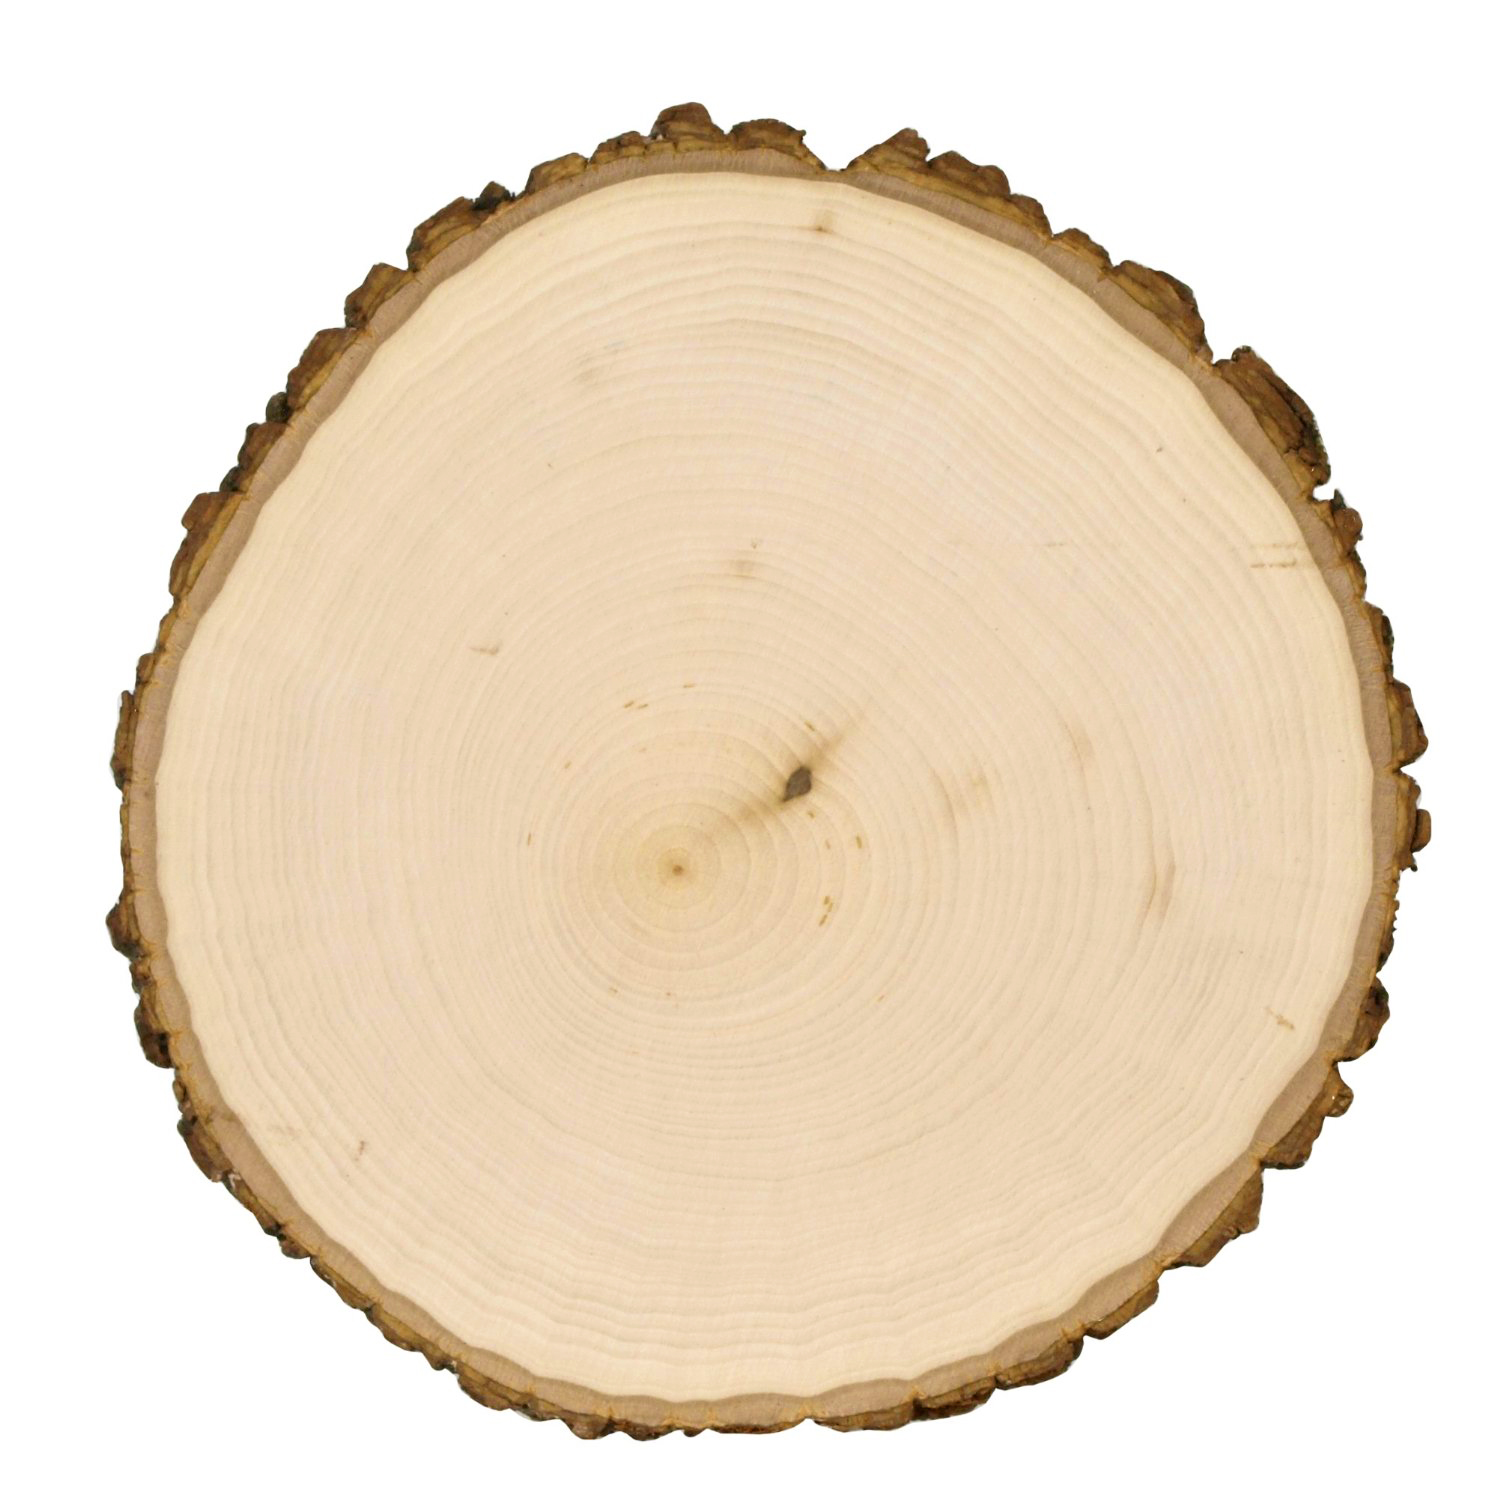
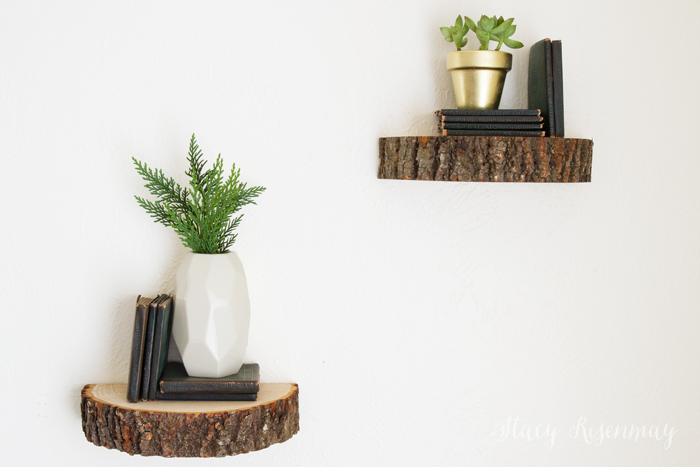
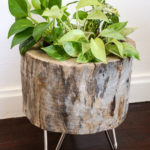
 

styled x3


This month the item I chose was a big ‘ole wood slice! (affiliate)

wood slice


Now you guys, I totally cheated this month. After a week and a half of every single person getting the flu at our house, the most horrendous flu ever, I got behind on everything except cleaning toilets. I still have my stump I ordered for this series sitting in my living room…unstyled and untouched.

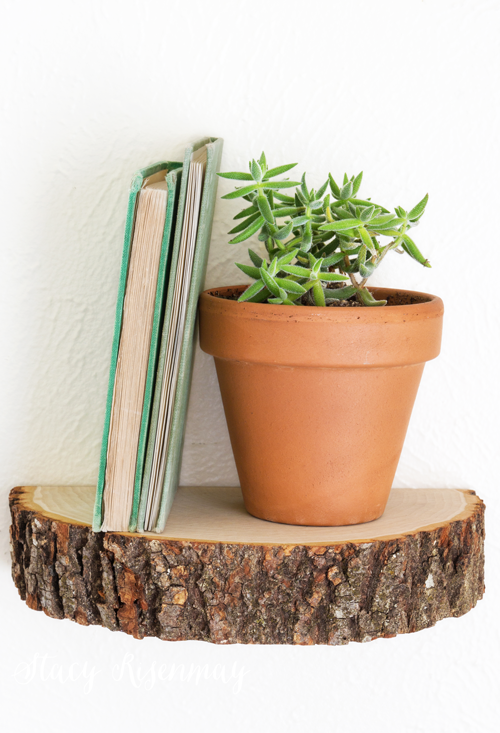
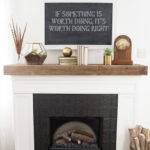
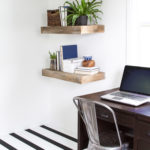
BUT I do have a project using a tree stump slice that I have never shared on the blog. It is from my book, Natural Accents. So  I am sharing it with you today as well as a couple of other past projects using wood slices. I bought these at Micheal’s.


tree-stump--wood-slice-shelf


Start by cutting it in half with a table saw or miter saw.

tree-stump-cut-in-half


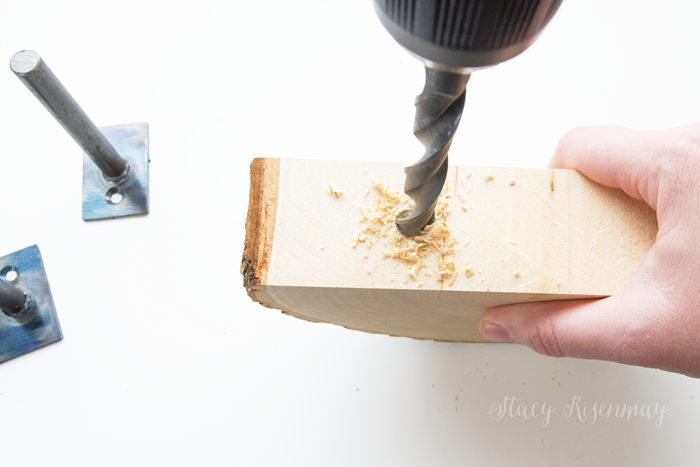
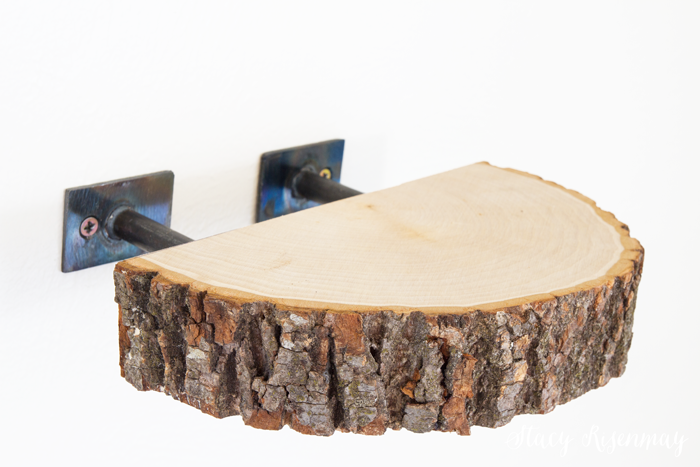
I used these metal brackets (for lack of a better word) that are used for solid floating shelves.  I drilled a hole that was slightly larger that the bracket so it would fit but not be too loose.
drilling-hole-in-tree-stump-for-shelf


Attach the brackets to the wall and slide the wood slice right on.


attaching-shelf-to-wall


I am getting ready to redo my boys’ room and these are going in there. I will actually cut the new slice I just got and make some more of these shelves making four total. I think they are perfect for trophies, rocks, and other things boys collect.


wood-slice-shelf


Now make sure and hop over and see what KariAnne and Julie did with their wood slices!


What would you do with a chunky wood slice?
stlyed x3 other posts

You will also like:

  • Office Closet Makeover {The Big Reveal!}Office Closet Makeover {The Big Reveal!}
  • These are a few of my favorite things…. 2016 Edition!These are a few of my favorite things…. 2016 Edition!
  • Using Paper to Decorate a FrameUsing Paper to Decorate a Frame
  • Reclaimed Wood DeskReclaimed Wood Desk
  • Small House Tour {Day 1}Small House Tour {Day 1}
  • Laundry Room Makeover!Laundry Room Makeover!
  • To Paint or Not To Paint…. Wood FloorsTo Paint or Not To Paint…. Wood Floors
  • Modern Tree Stump PlanterModern Tree Stump Planter

Subscribe to My Blog!

Filed Under: DIY & Tutorials 19 Comments

Comments

    Leave a Reply Cancel reply

    Your email address will not be published. Required fields are marked *

    This site uses Akismet to reduce spam. Learn how your comment data is processed.

  1. Julie Blanner says

    February 10, 2016 at 6:11 am

    That is so brilliant and beautiful and your photography is impeccable. Thanks for inspiring, friend!

    Reply
    • Stacy says

      February 10, 2016 at 7:24 am

      Thank you! That comment about photography coming from you is a HUGE compliment! I have always admired yours :)

      Reply
  2. Carole @ Garden Up Green says

    February 10, 2016 at 6:19 am

    I love these style challenges they are fun.
    Love the wood slice looks great!

    Reply
    • Stacy says

      February 10, 2016 at 7:27 am

      Thank you! I love it too!

      Reply
  3. KariAnne says

    February 10, 2016 at 6:37 am

    Love the shelf idea! What a fun project. :)

    Thanks so much for the invite to the party. :)

    karianne

    Reply
    • Stacy says

      February 10, 2016 at 7:27 am

      Thank you so much for accepting!

      Reply
  4. Mindi says

    February 10, 2016 at 9:50 am

    So beautiful Stacy! I love them on the wall, you are amazing! And I agree with Julie, your photos are awesome!

    Reply
  5. Holly McCall {McCall Manor} says

    February 10, 2016 at 10:17 am

    What a fun concept for a series! I loved seeing all 3 of these projects. You, KariAnne and Julie hit it out of the park.

    Reply
  6. Shawnna says

    February 10, 2016 at 12:16 pm

    hey girl this is so cool! Great job!

    Reply
  7. cmt says

    February 10, 2016 at 8:16 pm

    What a bummer to all catch the flu. Hope everyone is doing better and able to enjoy some special treats for Valentine’s Day. Love these ideas, especially that semi-circular shelf.

    Reply
  8. Jessy @ The Life Jolie says

    February 22, 2016 at 9:16 am

    Ok, this is seriously such a beautiful idea! Pinning!

    Reply
  9. Lindsey says

    February 22, 2016 at 7:56 pm

    I absolutely love this! I get a bit intimidated by adding rustic but you make it look so easy!

    Reply
  10. Jeanne Grunert says

    February 27, 2016 at 10:18 am

    Interesting project idea! Thanks so much for sharing it on the #HomeMattersParty this week. We really appreciate it and hope you will come back next week.

    Reply
  11. Julie says

    July 6, 2016 at 12:50 pm

    Hello, where did you get the brackets? Thanks!

    Reply

Trackbacks

  1. DIY Rustic Wood Bathroom Stool says:
    February 10, 2016 at 6:32 am

    […] you as excited as I am to see what Stacy of Not Just a Housewife and KariAnne of Thistlewood Farms did with their wood […]

    Reply
  2. Something to Talk About Link Party #58 - The Crowned Goat says:
    February 29, 2016 at 3:57 am

    […] Wood Slice Shelf by Not Just a Housewife […]

    Reply
  3. Something to Talk About Link Party #58 | Karen's Up on The Hill says:
    February 29, 2016 at 3:59 am

    […] Wood Slice Shelf by Not Just a Housewife […]

    Reply
  4. 31 Creative Tree Stump Furniture Ideas / Examples To Inspire You -TastyMatters says:
    November 3, 2018 at 7:02 am

    […] Image Source […]

    Reply
  5. 51+ Adorable DIY Nightstand Ideas and Projects {Budget-friendly} In 2019 says:
    December 23, 2019 at 1:58 am

    […] Source […]

    Reply
stacyWelcome! I'm sharing our adventures as we fix up our 1938 cottage. Whether it is big or small, I think everyone should love their home and I don't think it takes a lot of money to make a space your own.
 

Search this site

categories


Subscribe

Privacy Policy

Copyright Not JUST A Housewife © 2021 | Web Hosting By RFE Hosting

To the Top

Welcome! Thanks for visiting.
I blog about fixing up our 1938 cottage. I post tons of budget friendly projects and by subscribing, you'll never miss a single one!
Your information will *never* be shared or sold to a 3rd party. Pinky promise :)
Welcome!
Hi! I'm Stacy and I blog about fixing up our 1938 cottage. Join the thousand of others who get my posts sent to their inbox for FREE!
Your information will *never* be shared or sold to a 3rd party.