
Sometimes when I have a big project that is starting to feel overwhelming I like to stop it for a bit and work on a smaller project. I think I just need to FINISH something. When the project or room I am working on seems like it will never be done, it is nice to have a sense of accomplishment that something did get done. Shane calls it project ADD, I call it keeping my sanity :)
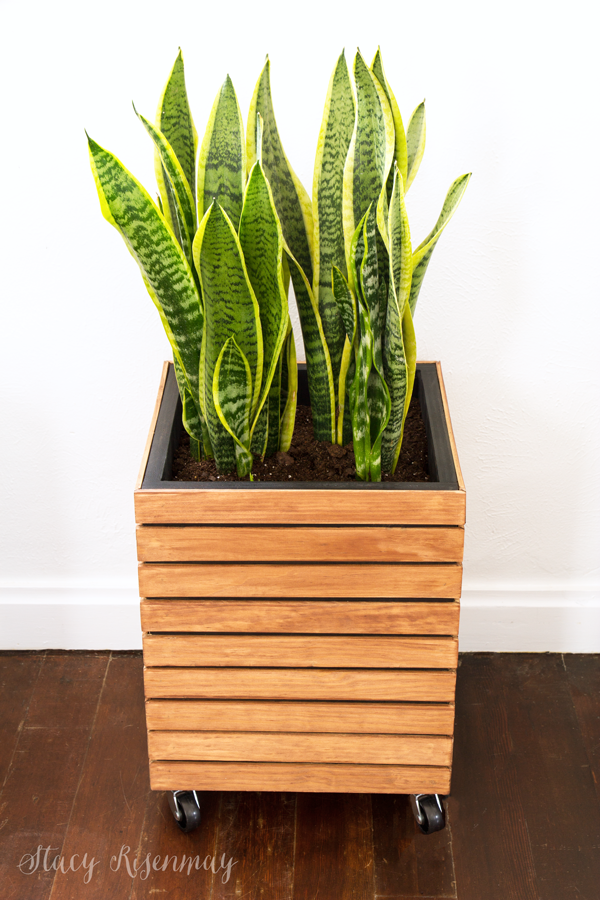
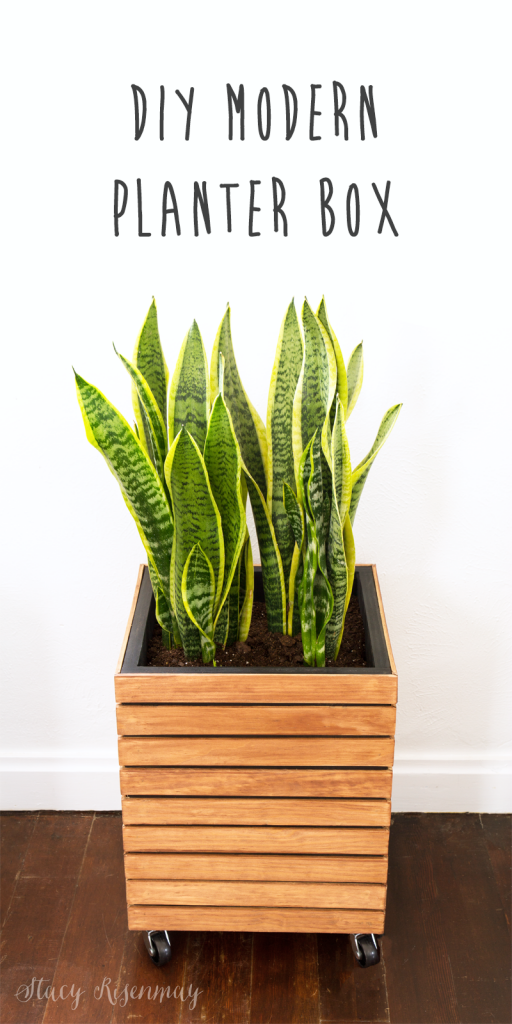
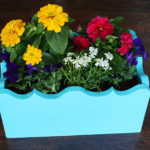
The big project I needed a tiny break from is our upstairs bathroom and the little project I decided to do was this DIY modern planter box. I partnered with Minwax to bring you the tutorial. It is pretty simple and would look great indoors or outside on a porch.
Supplies:
¾" plywood
Table saw
Miter Saw
Lattice trim
Brad nailer gun
Drill
1 ½" screws
Stainable wood putty
Sandpaper
Black paint
Wood stain
Foam brush
Paper towels
1 ½" casters
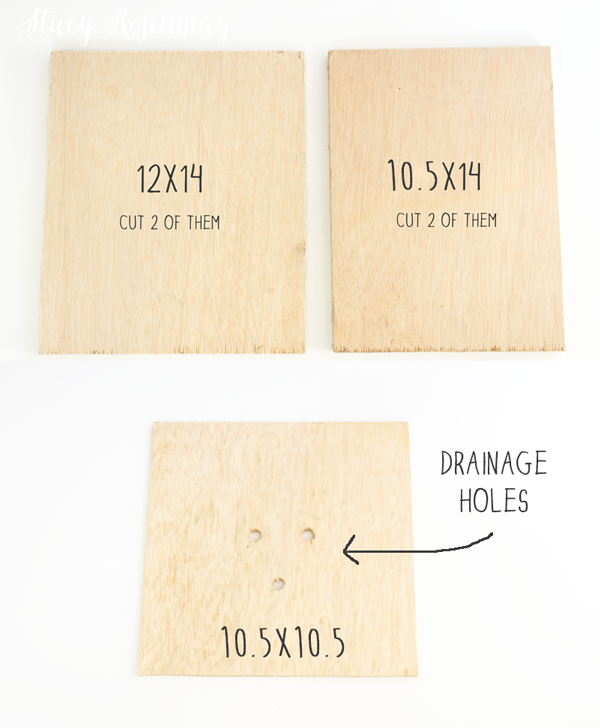
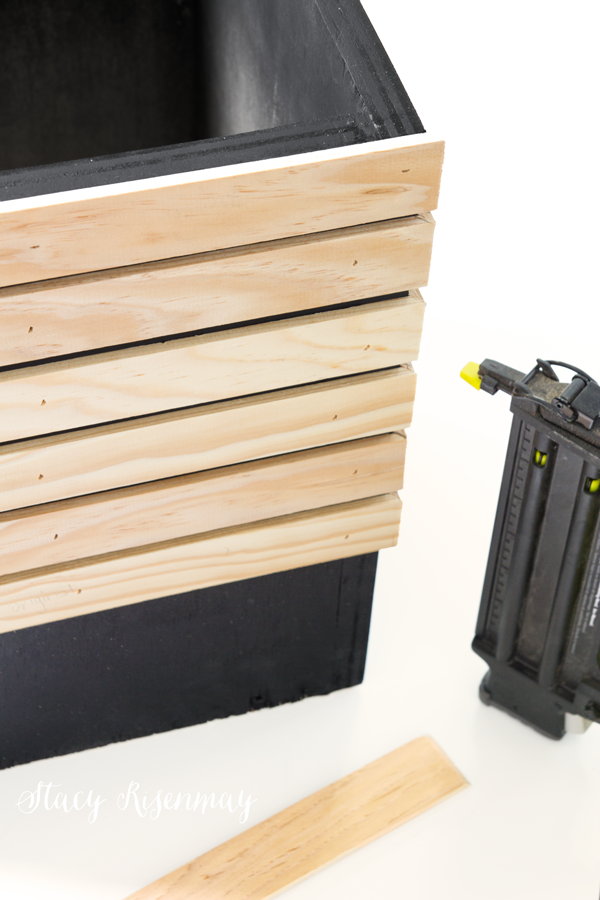
First, you need to cut out the pieces for the box. I wanted it to be 12 inches wide by 14 inches tall. Since I was doing a basic butt joint, two sides had to be narrower to fit inside the other two sides. You could always do a 45 degree cut to have a prettier corner, but since it was going to be painted and mostly covered up, I didn't think it mattered to take the extra time.
Add the width of two boards and then subtract that from the width you want it to be when completed. For ¾ inch boards, that is 1 ½ inches making the inside boards 10.5 inches instead of 12.
Because the bottom piece will also fit inside, it will also need to be 10.5 inches.
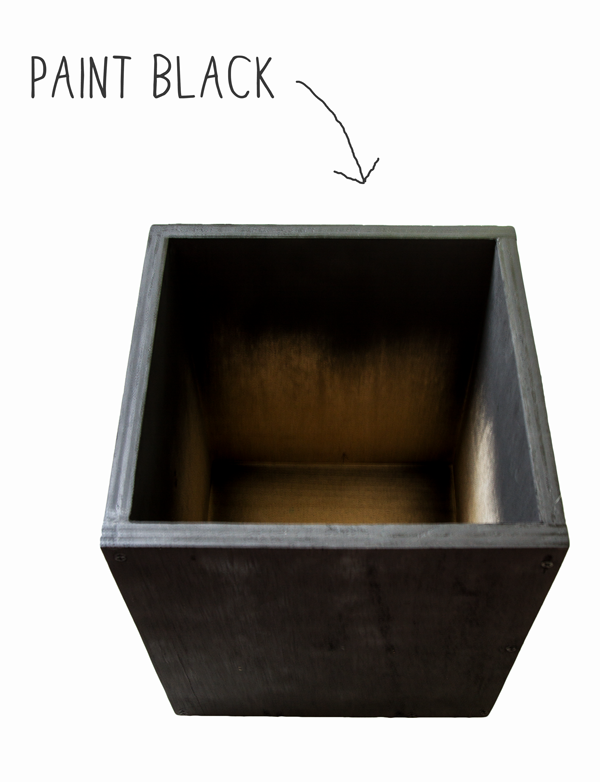
Because planters will be getting wet when watering the plants inside, the wood will want to warp over time. I have found that brad nails do not hold up well over time. I use screws to hold together planters. Screw together your box, sand it well, and then paint or stain it the base color.
I cut the trim on my miter saw to have 45 degree cuts on each end so when they meet up at the corner they had a nice mitered corner instead of a butt joint. Nail the trim on with a finishing brad nailer or glue it and hold it on with clamps until the glue dries.
Putty the nails holes and any gaps using a stainable wood putty. When it is dry, sand it smooth. Make sure you sand off all putty except where the little nail hole was. Even though putty is stainable, it is only stainable to a point and your finish may look splotchy if you don't sand off all the extra putty.
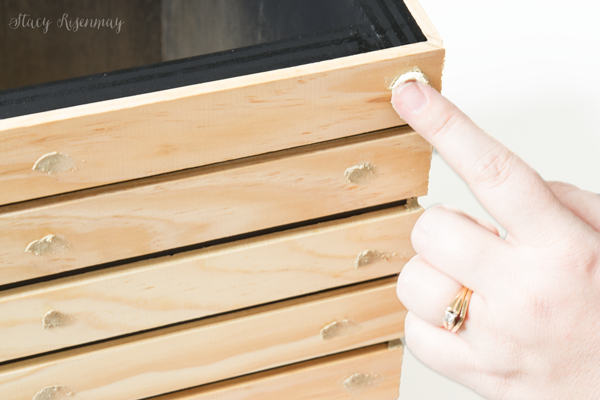
Wipe down the planter box after sanding. I ended up hosing mine down because the sawdust in all the little recessed areas was hard to wipe off. When it is dry, it is time to stain!
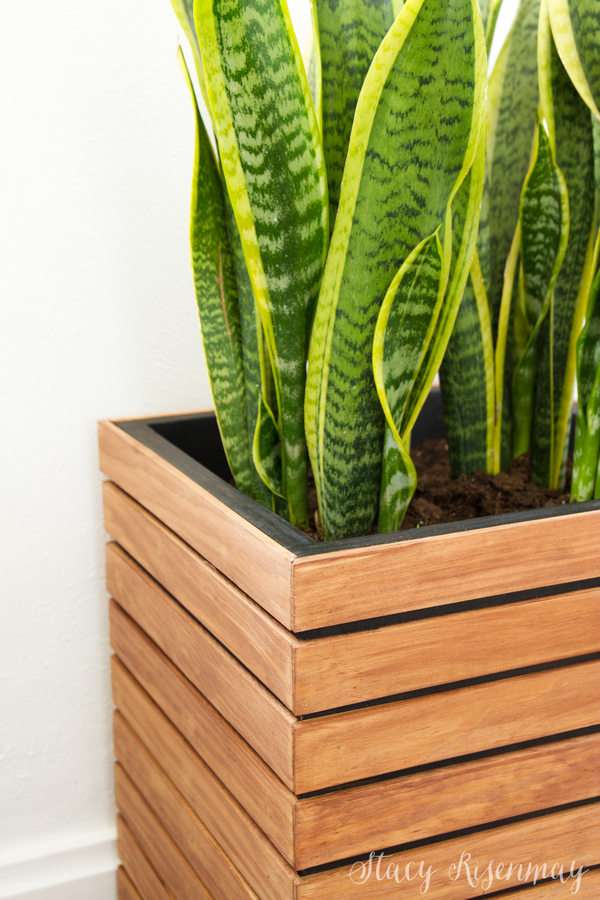
I chose to use this Minwax Wood Sheen. It is waterbased and is easy to clean up. Because it has a sheen to it, I made sure to wipe off any that got on the painted wood by running a damp cloth over the painted parts. If I would have had an extra foam brush (I go through them like crazy!) I would have used a damp foam brush since it would have fit so well in between the slats.
I did two thin coats. The more coats you add, the more sheen your project will have. I like satin or matte finishes so I didn't add more but you certainly could for a richer and shinier look.

I am really happy with how it turned out! It is actually going to go in one of the boy rooms I am hoping to work on this summer. That is my next big project after the bathroom renovation. One of the rooms will have a mid-century modern vibe and I think this DIY planter will fit right in with the design.
But for now it will happily reside in our family room!
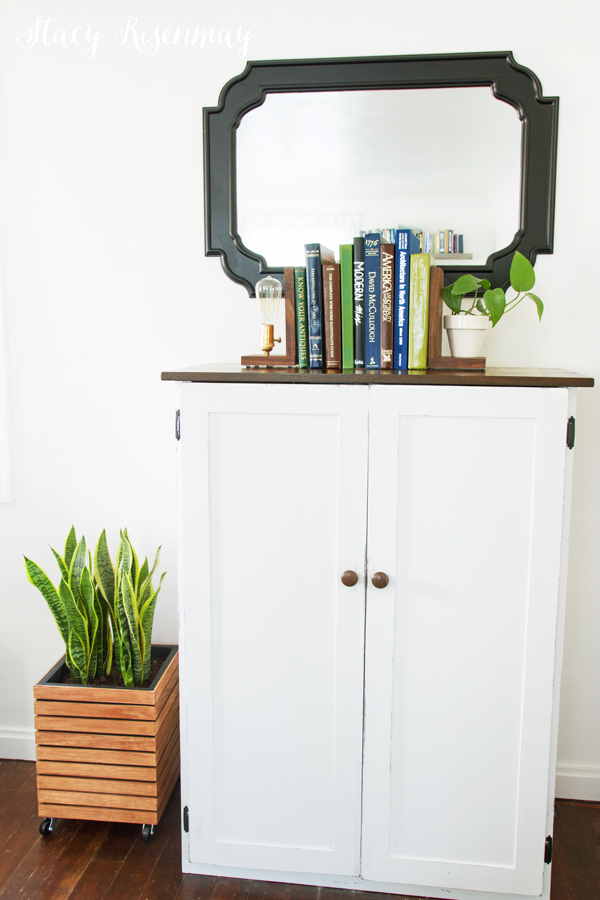
I wasn't going to add casters at first but I am glad I decided to. I think it looks better with wheels!
Pin for later:
This post was sponsored by Minwax but the project idea and opinions were all my own!


This is so neat! I love the contrast between the black and the stain.
This is such a clever project and I love that the planter is one wheels so you can move it easily! :)
Such a great addition, Stacy! I love the stained you chose! And I feel the same way - sometimes you just need to FINISH something.
Girl.....I'm swooning. I was literally just telling the hubs the other day that I wanted to build planters just like this. LOVE LOVE LOVE!
It's gorgeous!
This is gorgeous!!! Love it ❤️❤️❤️
I really love the clean, modern look of this planter! Thanks for linking up with Merry Monday last week - I'll be featuring your DIY planter at our upcoming party.
Love this planter! The black really makes it look like you can "see" between the slats! At first I thought it was a made out of a pallet!
Very cool! This would look perfect in my new house!
This looks so cute! My potted plants don't look pretty and I've been trying to figure out what to do with them. I think this is it. I'm a bit worried since I don't do much wood working stuff but it seems straightforward enough. And you added great instructions. So thanks! Goodbye boring pots
what size are the boards or slats you put on the outside of the planter
thank you
dirt + water+plywood = rot. User redwood or cedar for the inside of you planter. Plus the glue in plywood is toxicant good for plant health.