• Skip to primary navigation
  • Skip to main content
  • Skip to primary sidebar
  • Skip to footer
Stacy Risenmay
  • Home
  • About me
  • PRESS
  • Contact Me
  • My Book
    • Facebook
    • Instagram
    • Pinterest
    • Twitter
menu icon
go to homepage
subscribe
search icon
Homepage link
  • Home
  • About me
  • Project Gallery
  • Our House
  • PRESS
  • Contact Me
  • Privacy Policy
    • Facebook
    • Instagram
    • Pinterest
    • Twitter
  • ×

    DIY Braided Fabric Basket

    By Stacy 8 Comments

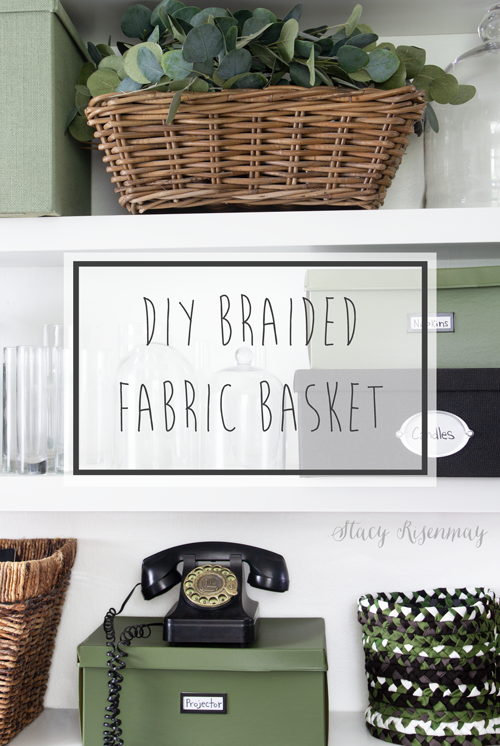
    I like to make lists. I have a lot of them :) One is of all the projects I want to do. This braided fabric basket has been on my list forever! The kids dragged the fabric tote out the other day and dug through it and I saw this green fabric that matched the new green cabinets in my office. I decided the go ahead and make a braided fabric basket and cross it off my list! It is a fun DIY project to do while you are watching TV and curled up on the couch. Years ago I made a large braided rug using this method so I knew making a basket would be easy!


    Supplies for the Braided Fabric Basket:

    Cotton Fabric (approximately 2 yards)

    Iron & Ironing Board

    Scissors(affiliate link)

    Needle & Thread

    Safety Pin


    Step 1:

    Cut a slit and then rip the fabric into strips about 1 ½ inches wide. Do this to all the fabric until you have a big pile of strips of fabric.


    making strips of fabric

    Step 3:

    Fold the edges in to the center and iron them so they stay folded. This will give a nice clean edge.

    Step 4:

    Use the safety pin to secure three strips of fabric to your pant leg or something that will stay stationary while you braid. Braid the fabric, and when done, use a tiny stitch to keep it together until you are ready for the next step.

    Step 5:

    Hand stitch each braid to each other to form a long rope. Use sharp scissors to trim the extra fabric off so you have a clean edge at the seam. Once done, roll into a ball.


    making braided fabric for a basket

    Step 6:

    To create the bottom of the basket, start sewing the braided fabric into a circle. I used a basic whip stitch to connect the braids. I made my bottom about 8 inches across but you can customize it to any size you want.

    Step 7:

    Once the bottom is complete, start adding braids to form the wall of the basket. I used a whip stitch here as well. I am a terrible seamstress and my stitches are far from even. I didn't stress about it because the stitches are only visible on the inside.

    *TIP* Don't pull on the fabric while sewing or you could distort the basket and it will look wonky when you are done. Keep the braids loose.


    sewing a braided basket


    Continue until the basket is as tall as you want it. Mine ended up being about 10 inches tall.

    sewing a braided basket

    My braided fabric basket fit perfectly on my prop shelf in my office. It is my "small miscellaneous" basket. All small things that don't have a home go in here. At least that is what it is for now. I could change it up later.


    office shelves


    I wish I had a little girl because I think ream, coral and yellow would look so cute! Really, the possibilities are endless on the colors and textures of fabric you could use!


    Green and black items on office shelves


    Have you ever done a braided fabric project before? I love to hear about it in the comments!


    Pin for later:


    You will also like:

    • Details About The Mountain RoomDetails About The Mountain Room
    • DIY Bench {Knock off Challenge}DIY Bench {Knock off Challenge}
    • Fireplace MakeoverFireplace Makeover
    • Wood Bead PlanterWood Bead Planter
    • Tips for Painting Kitchen CabinetsTips for Painting Kitchen Cabinets
    • DIY Modern Beds {Teen & Tween Room}DIY Modern Beds {Teen & Tween Room}
    • L Shaped Kid Beds with StorageL Shaped Kid Beds with Storage
    • 2019 Home Goals {And How I Did With Last Year's Goals}2019 Home Goals {And How I Did With Last Year's Goals}

    « DIY Resin Drawer Knobs
    Camping, Canoeing, and an UPDATE! »

    Filed Under: DIY & Tutorials, Home Decor 8 Comments

    Subscribe

    for your weekly DIY fix.

    Reader Interactions

    Comments

    1. Bobbi

      September 04, 2019 at 4:38 am

      Love this! I can’t wait to give it a go!

      Reply
      • Stacy

        September 04, 2019 at 8:08 am

        Thanks! It really is fun :)

        Reply
    2. Brittany Hurst

      September 04, 2019 at 4:50 am

      Ok, yep. Adding it to the project file! Lol mine keeps growing too. I think the boys can all make one, it'll be family crafts.
      Do you think it will be okay if we skip the iron stage though? It will just be more rag-rug and less crisp right?

      Reply
      • Stacy

        September 04, 2019 at 8:07 am

        Absolutely! I think that could be really cute!

        Reply
    3. Danita

      September 04, 2019 at 9:13 am

      This is such a fun project! I save fabric scraps from ALL my sewing projects and some are large enough for this...It's on my "bucket list" to do this! ;-)

      I have to say I LOVE your phone!!! I have antique phones throughout my home and every one who visits can't believe we actually use them. My favorite is a 100 year old candle stick in the kitchen! OK, I don't pick that one up any more the thing weighs a ton! But I appreciate having it and it's great kitchen decor! Wink, wink!!

      Reply
      • Stacy

        September 04, 2019 at 9:54 pm

        It is a great scrap fabric project! We love our old phone too. I did have to teach my kids how to dial it when we first got it thought :)

        Reply
    4. Cynthia Nessel

      September 05, 2019 at 1:31 pm

      These are so cute. I'm also a blogger and I plan to share this post on my Saturday blog post. Check it out.

      Reply
    5. Darlene Garver

      January 22, 2023 at 10:53 pm

      I'm making baskets for next Christmas. They're going to be bread baskets for my family, I have 10 to make. So I better get started. This will clean out my scraps and since I have so many to do I'll have to go to Joann's & pick up some remnants. This pattern seems very doable.
      Thank you.

      Reply

    Comment Below! Cancel reply

    Your email address will not be published. Required fields are marked *

    This site uses Akismet to reduce spam. Learn how your comment data is processed.

    Primary Sidebar

    stacyHey! I'm Stacy and am a DIY addict. I love to get my hands dirty, whether it's sawdust, paint, or dirt. My goal is to help YOU learn to fix up your home and yard. No matter the style or size, I think everyone should love their home. And it doesn't takes a big budget to get there. Let's DIY together!

    Subscribe to My Blog!

    Search this site

    categories


    Subscribe

    Footer

    Welcome! I'm sharing our adventures as we fix up our 1938 cottage. Whether it is big or small, I think everyone should love their home and I don't think it takes a lot of money to make a space your own

    About Stacy

    • Facebook
    • Instagram
    • Pinterest
    • Twitter

    My Favorites

    copyright

    All images and content are copyrighted via Stacy Risenmay unless otherwise stated. If you'd like to share my work, please link back to this blog.
    Thank you for visiting!


    Footer

    ↑ back to top

    About

    • Meet Stacy
    • Privacy Policy
    • Contact

    Categories 

    • Home Decor
    • Outdoor Projects & Gardening
    • DIY & Tutorials
    • Kid Activities
    • Recipes
    • Travel
    • Cleaning
    • Houseplants
    • Staining
    • Painting
    • Power Tools
    • Holiday Ideas

    Newsletter

    • Sign Up! for emails and updates

    As an Amazon Associate I earn from qualifying purchases.

    Copyright © 2020 Brunch Pro on the Brunch Pro Theme


    Privacy Policy
    Welcome! Thanks for visiting.
    Hi! I'm Stacy and I want to help YOU become a DIY rockstar! Sign up for my email list so each project, tip, and trick will go directly to your inbox :)
    Your information will *never* be shared or sold to a 3rd party. Pinky promise :)
    Welcome!
    Hi! I'm Stacy and I blog about fixing up our 1938 cottage. Join the thousand of others who get my posts sent to their inbox for FREE!
    Your information will *never* be shared or sold to a 3rd party.