
It's finally here! After 5 months I can say that we are officially done with the attic fort for our boys. This garage attic makeover began as a way to keep our kids happy and busy during quarantine back in late March. This project took longer to do than I originally thought mostly due to the roof situation and the high temps during July and August, limiting how long we could work. I am so excited to share this space with you!
Like I said in my instagram stories, I was torn between going all out like it was a room in my house and also realizing that this is a BOYS' FORT in a garage. It was hard to reign in sometimes and I probably did more than was necessary, but it was a fun project that the kids got to help with and I am happy with how it all turned out.
BEFORE
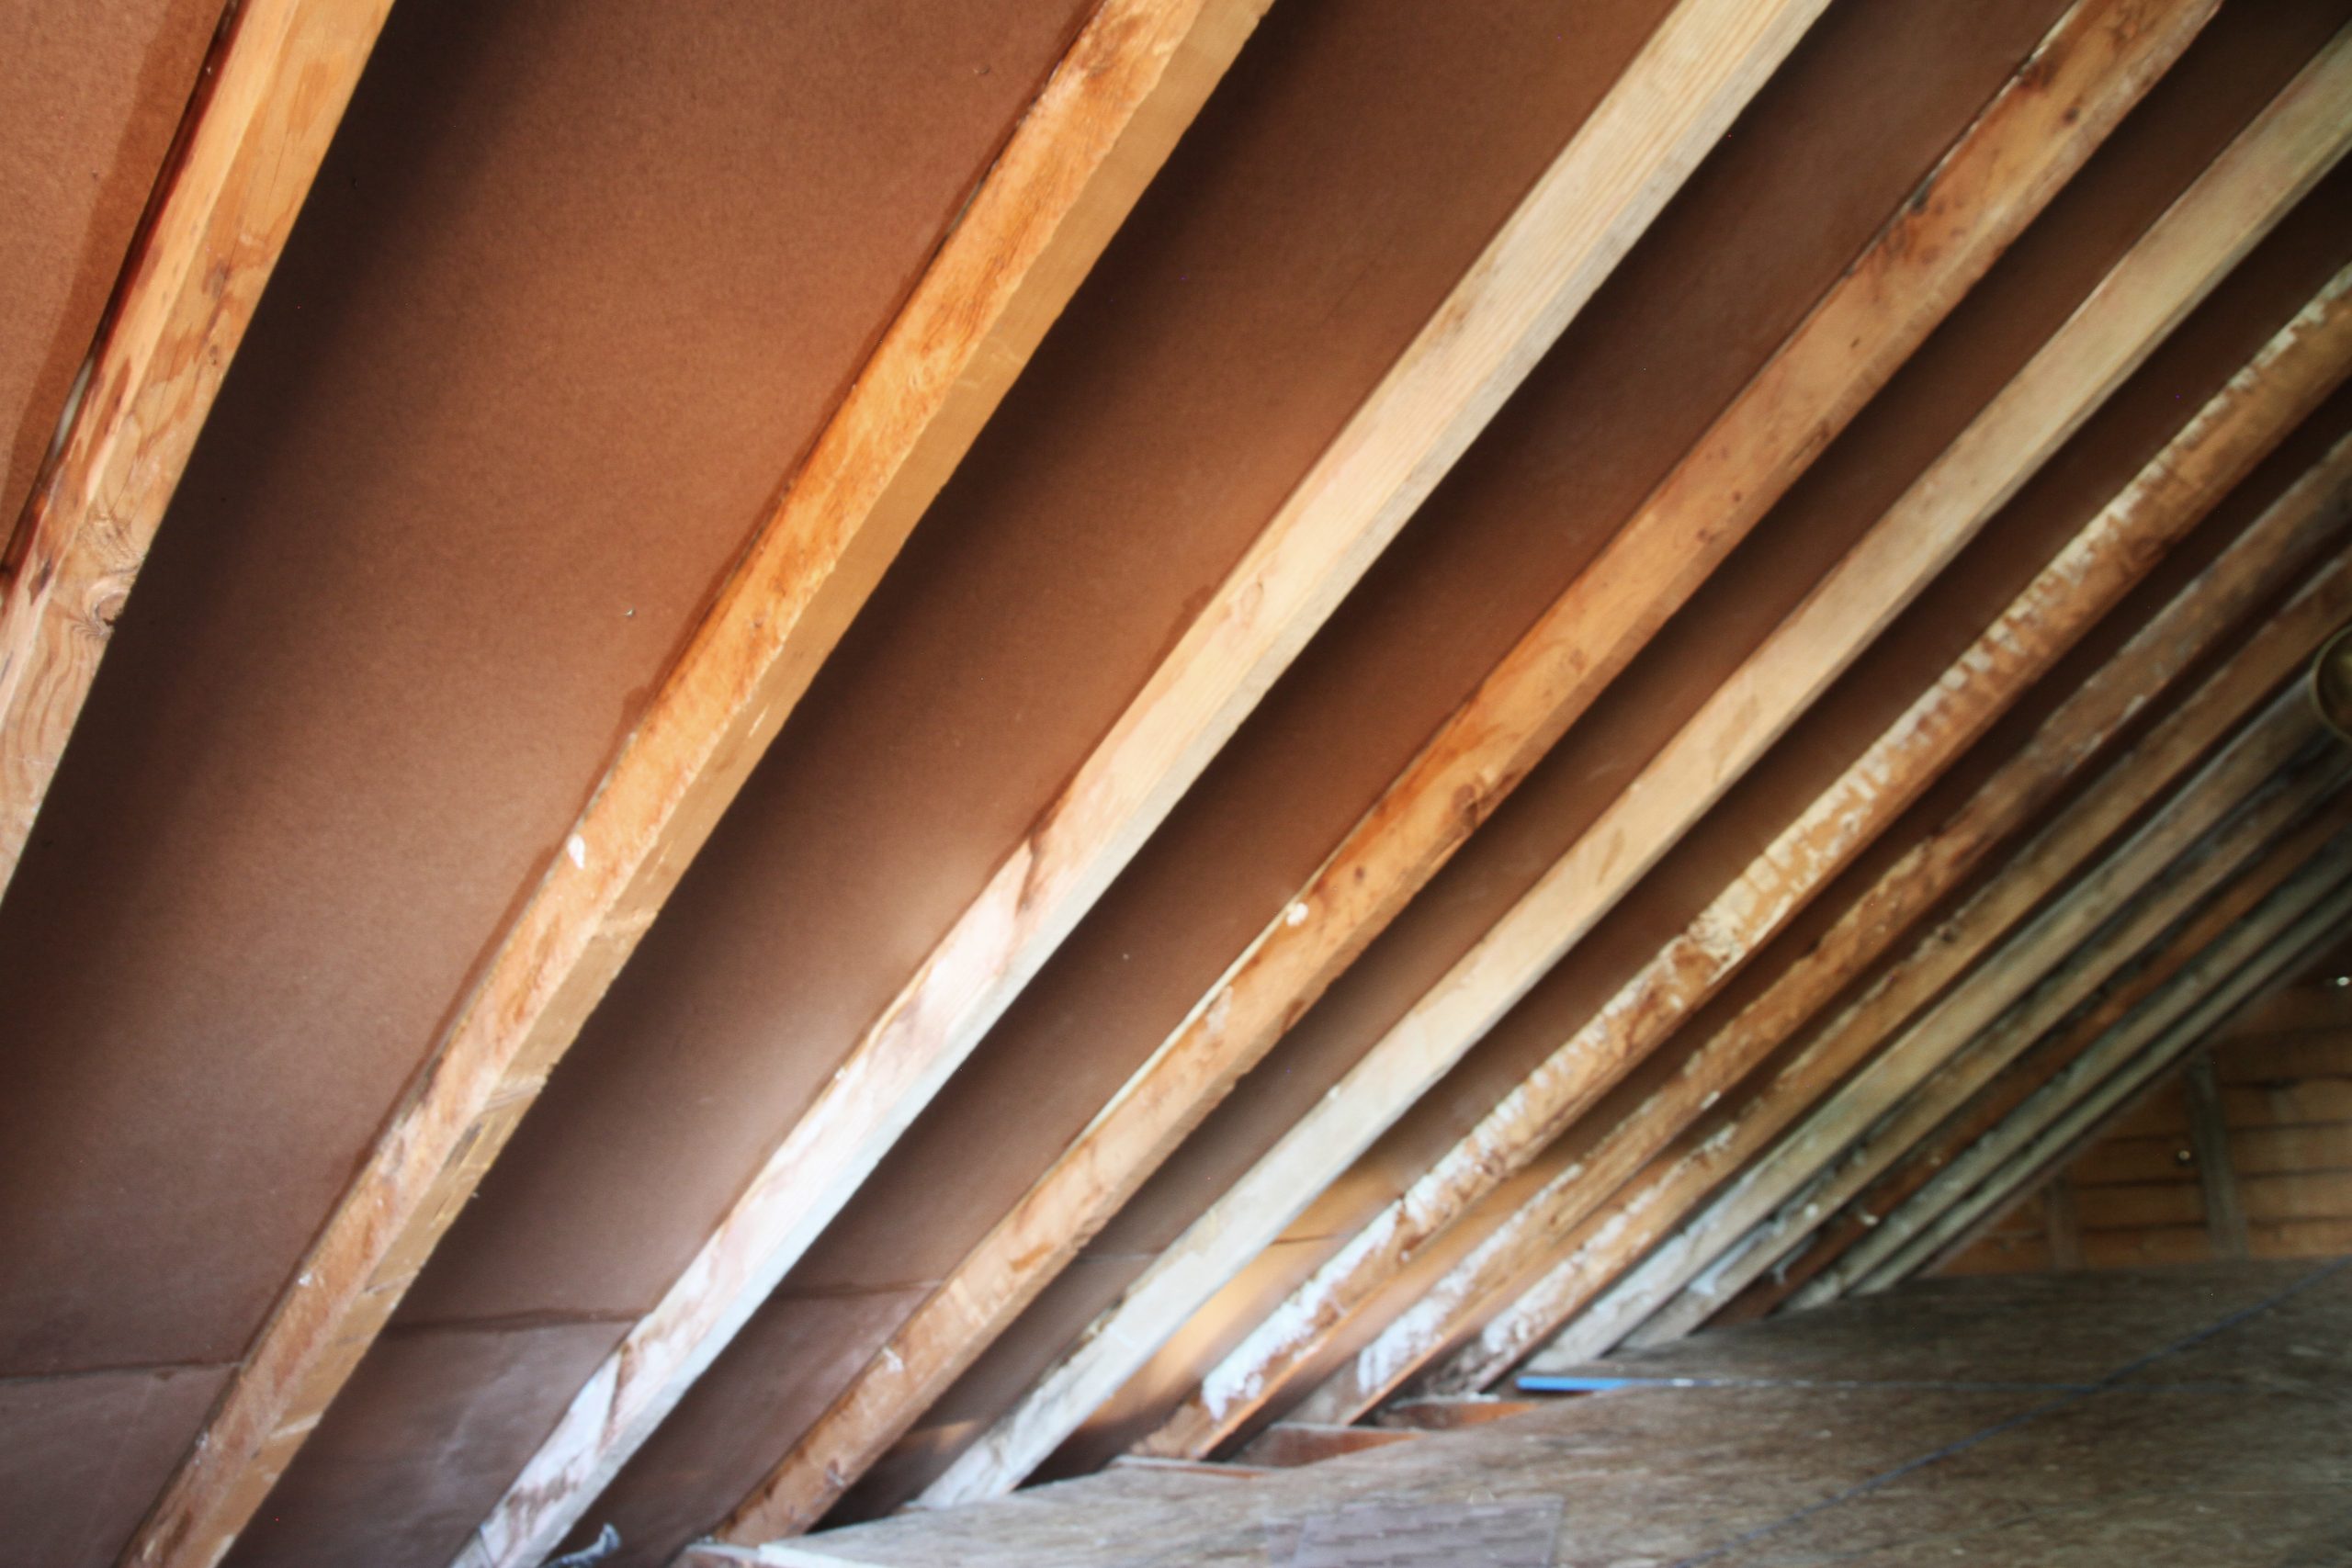
There were some loose boards that were laid out across the ceiling joists that had a tarp over them. It did not cover the whole area, but it was enough to store a few things up there. Things we rarely used.
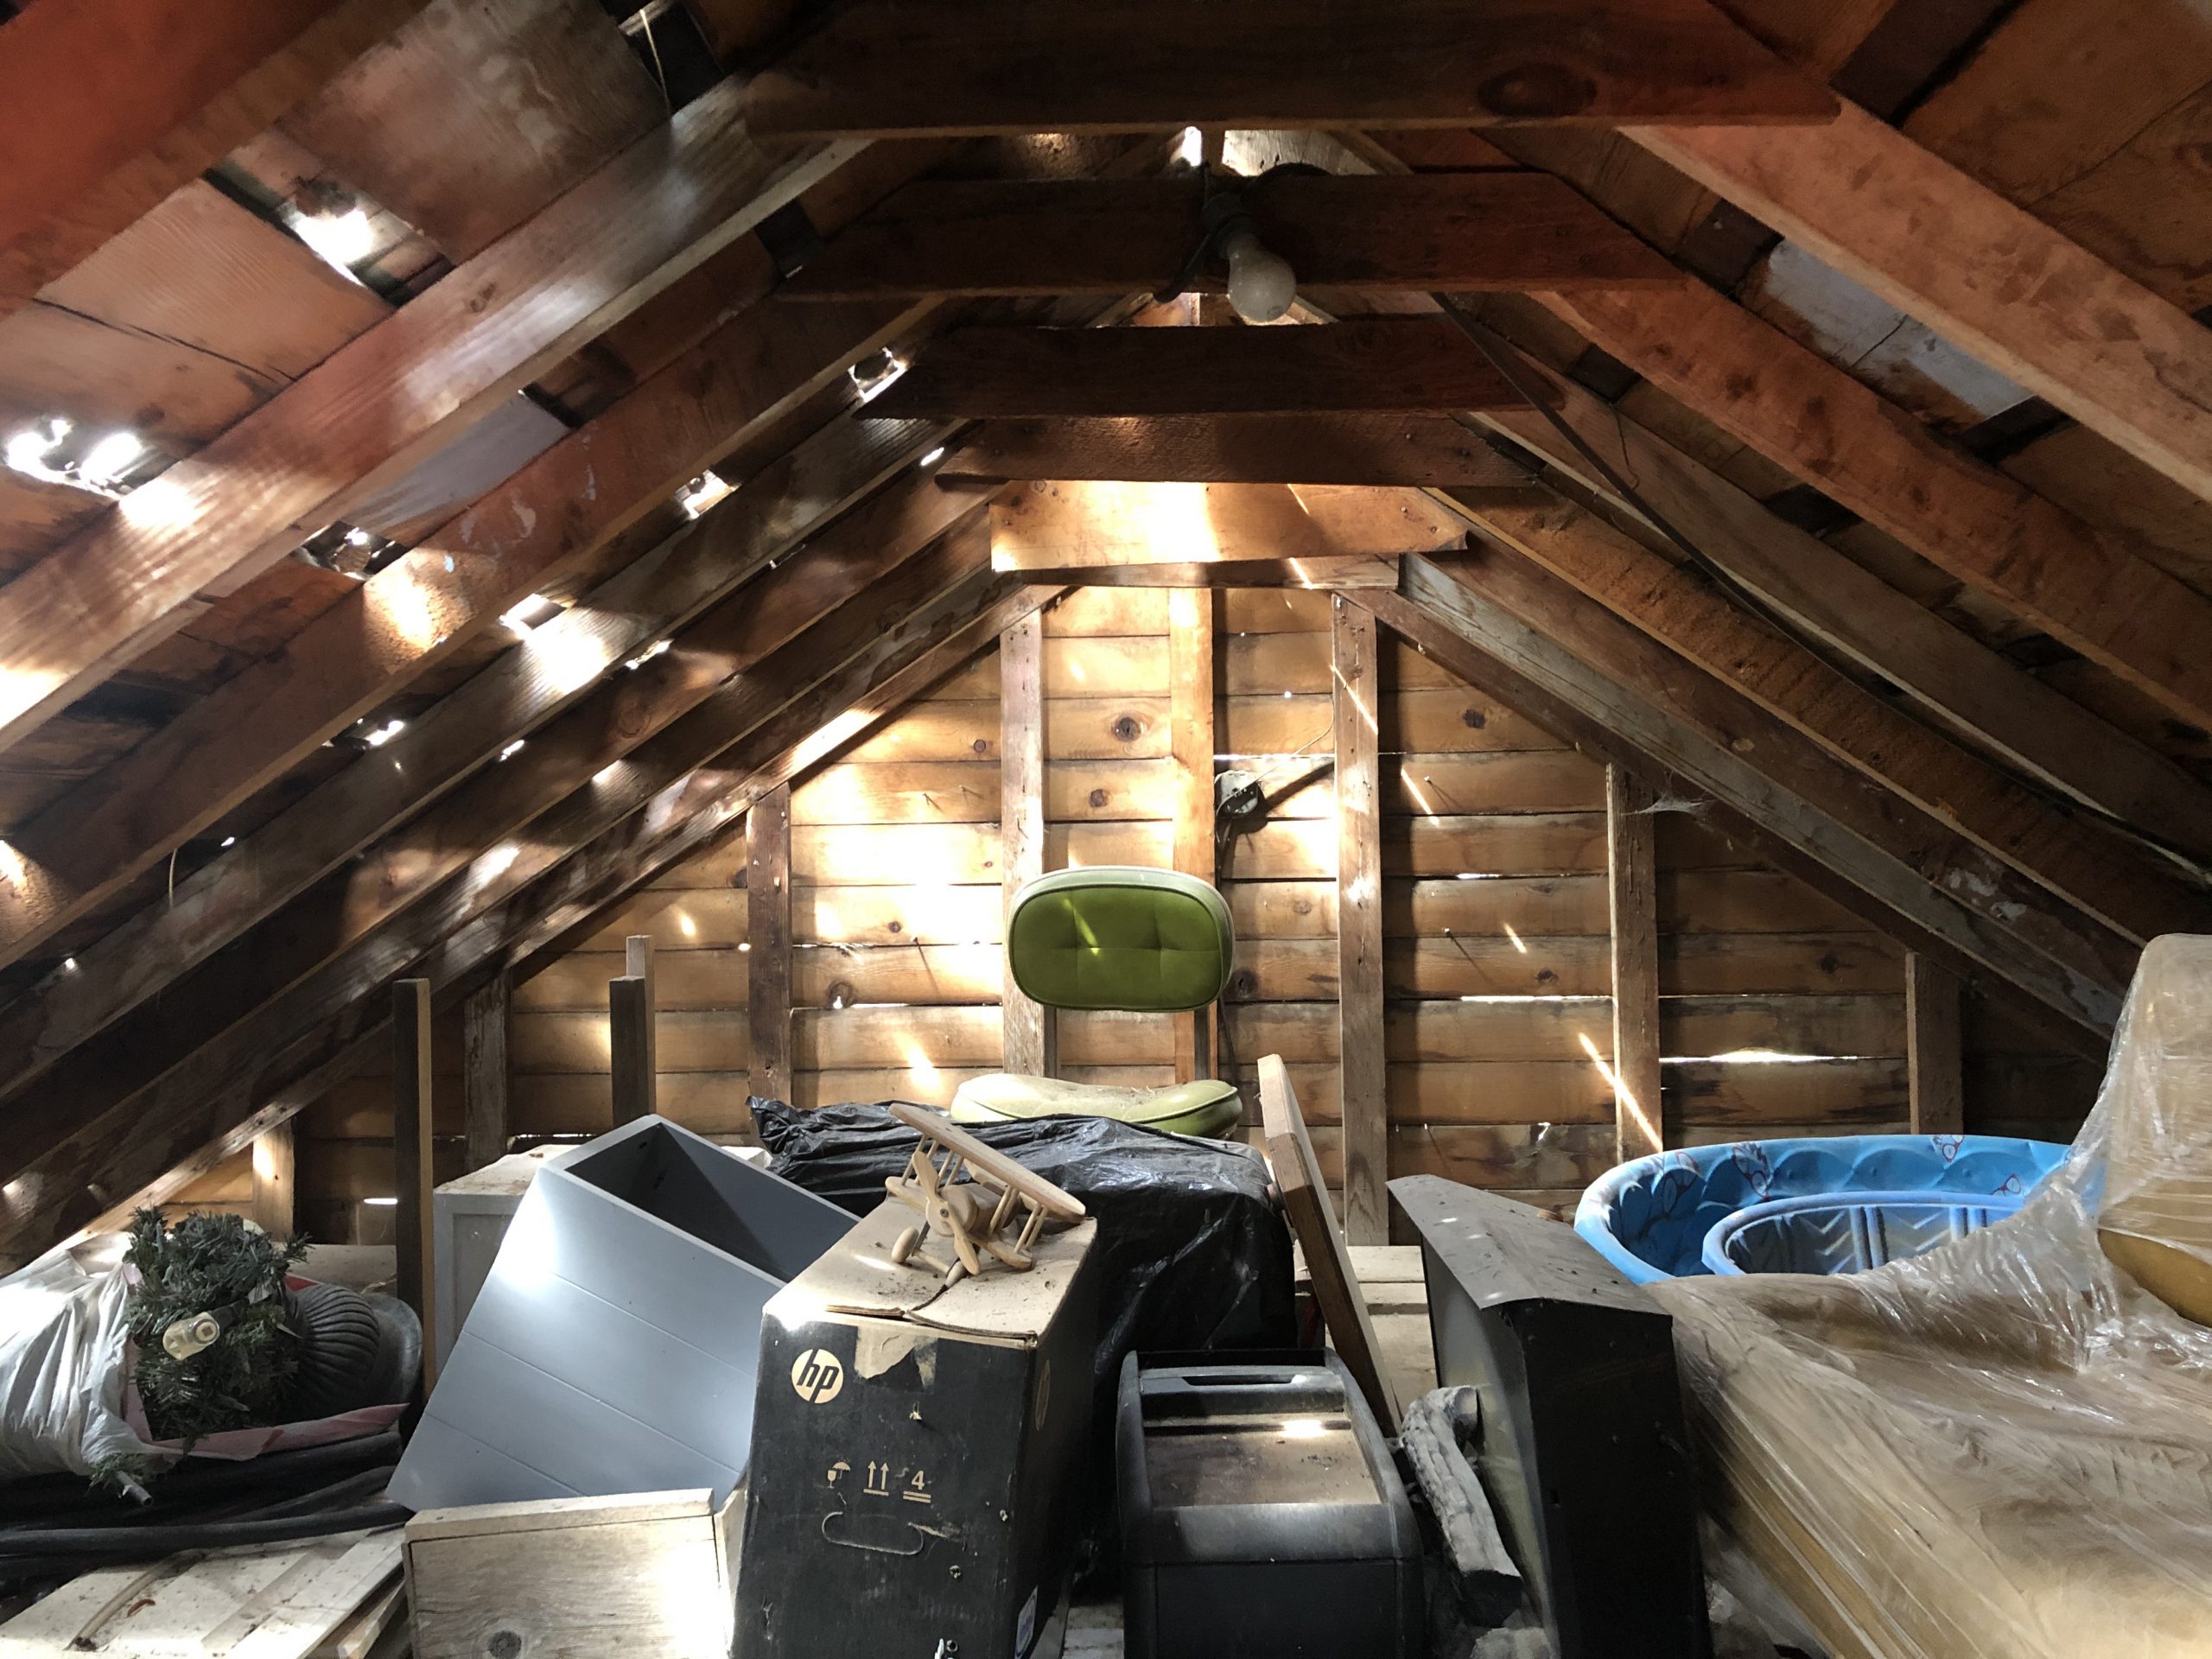
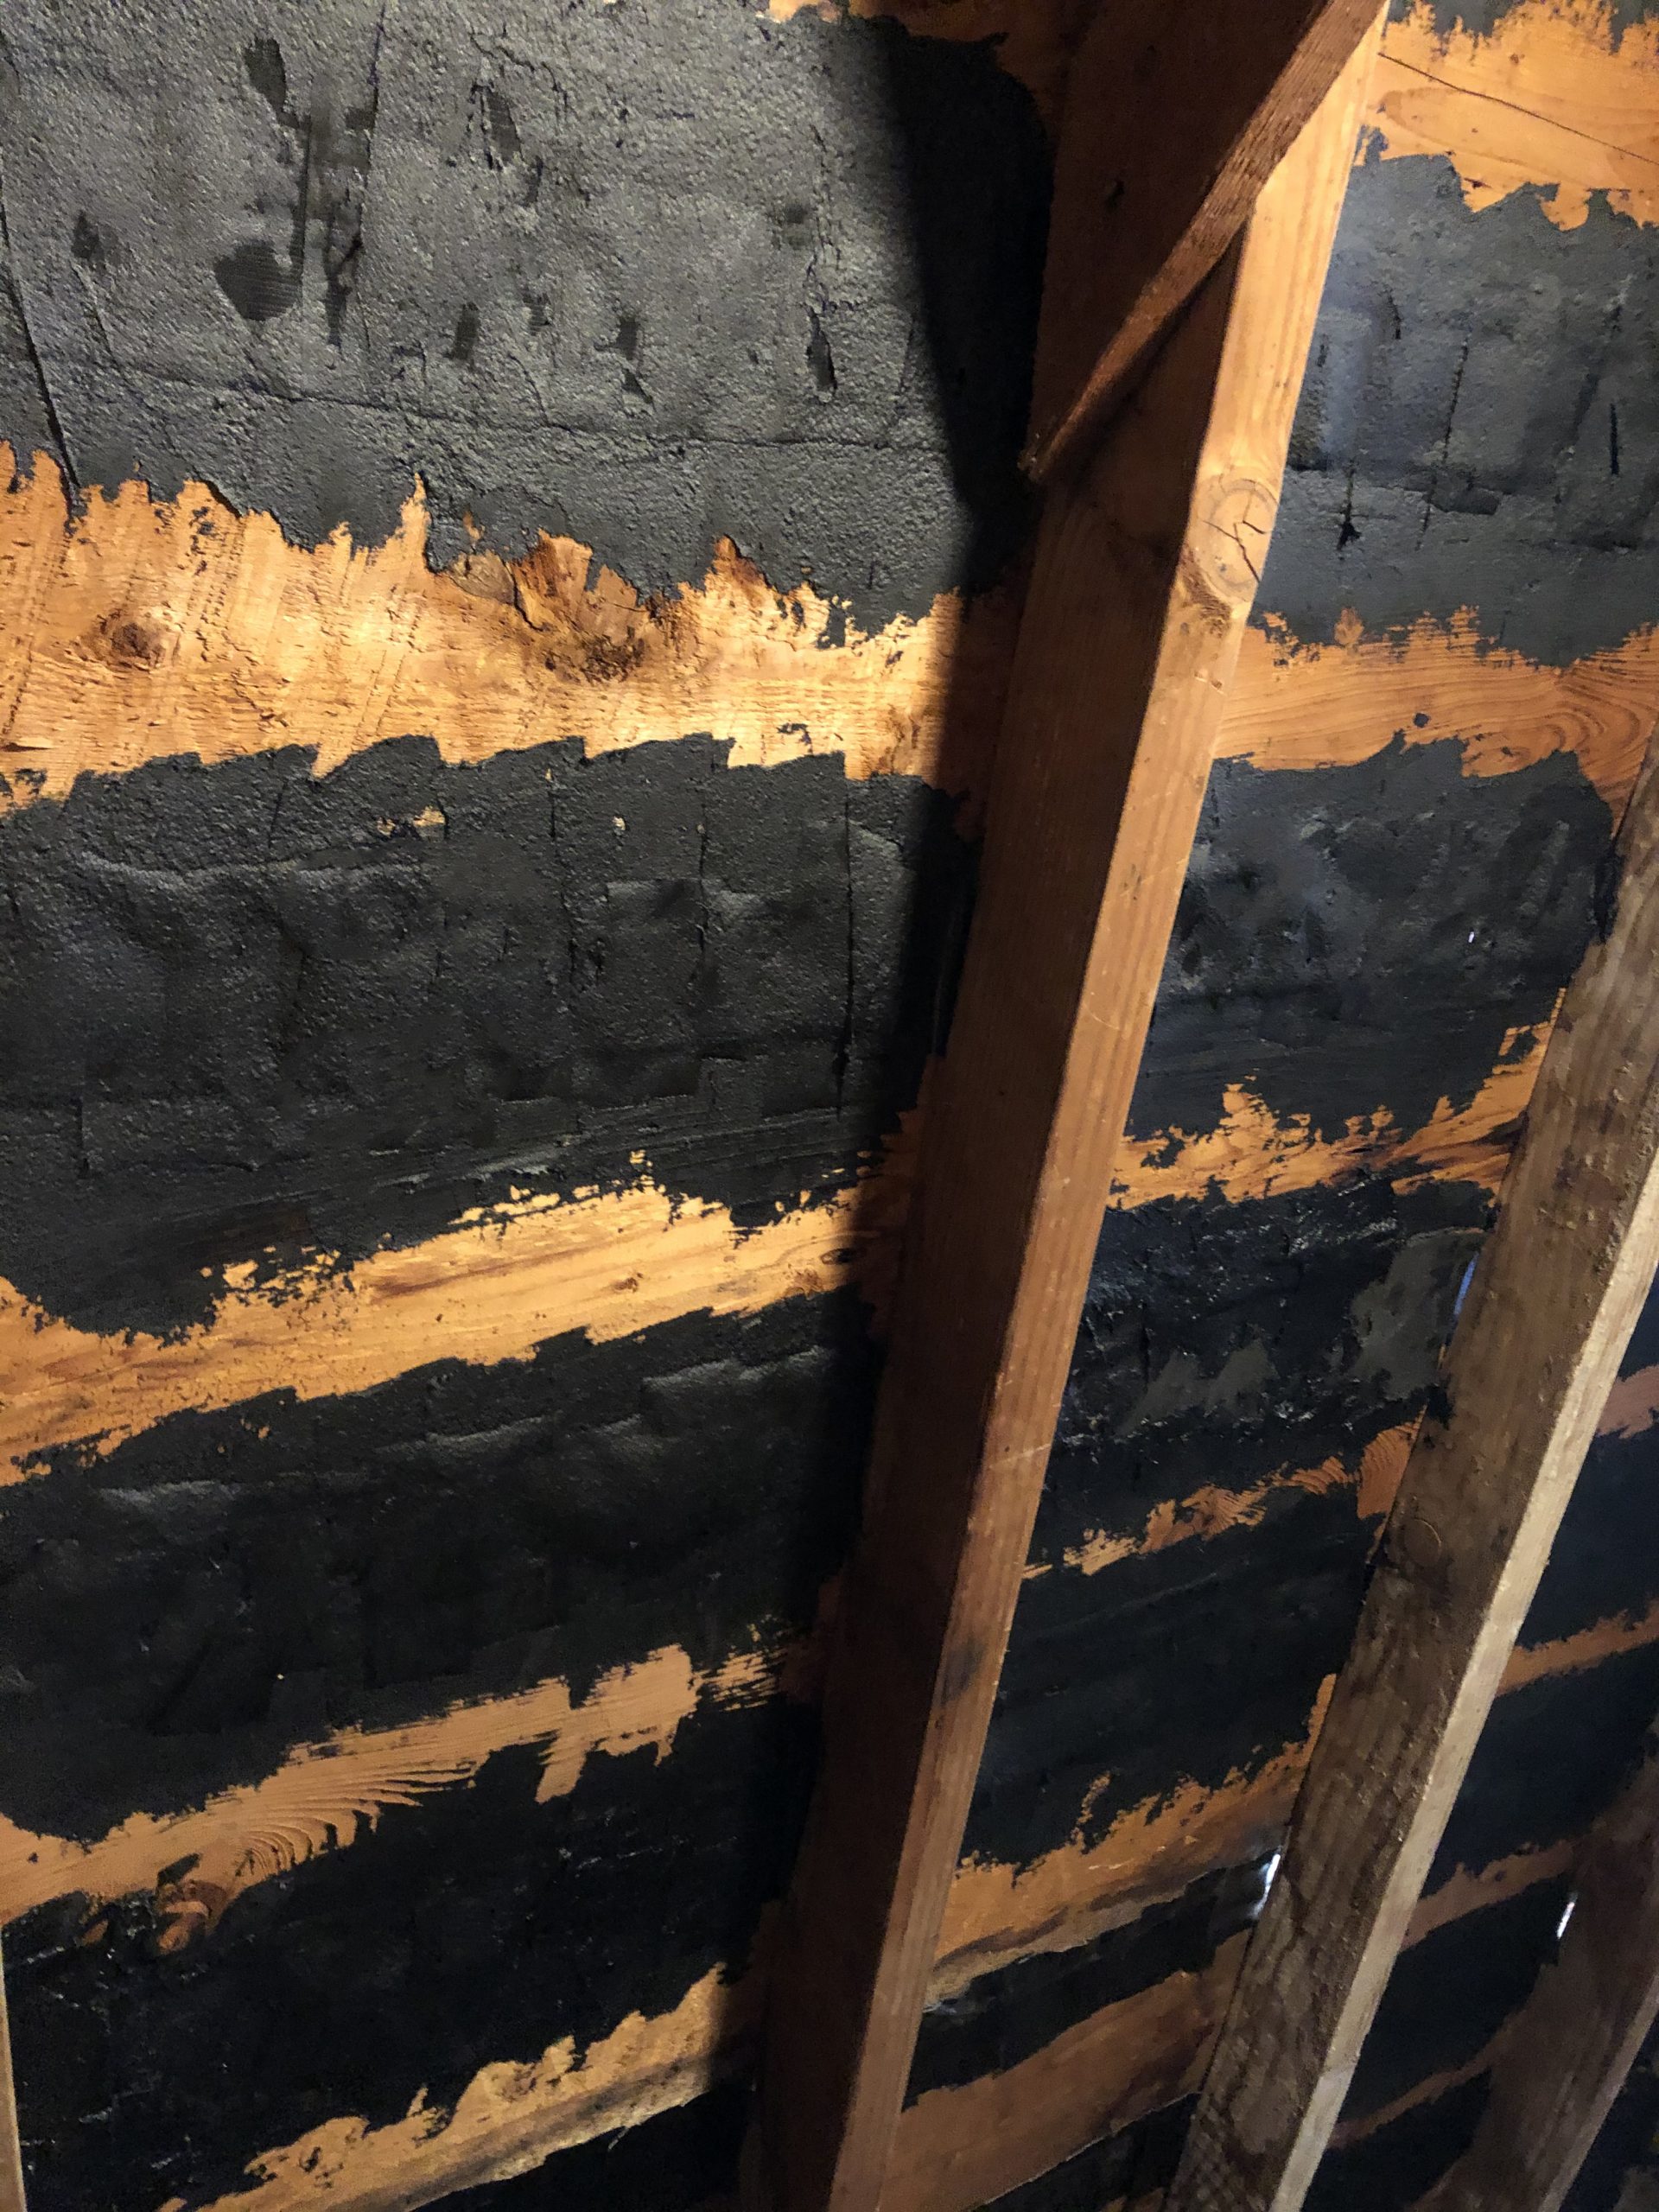
The roof on the north side was in okay shape but the south side was Swiss cheese. Because of the holes, wasps had taken residence for years. Luckily it was March when we cleaned it out so the 50-ish nests were empty.
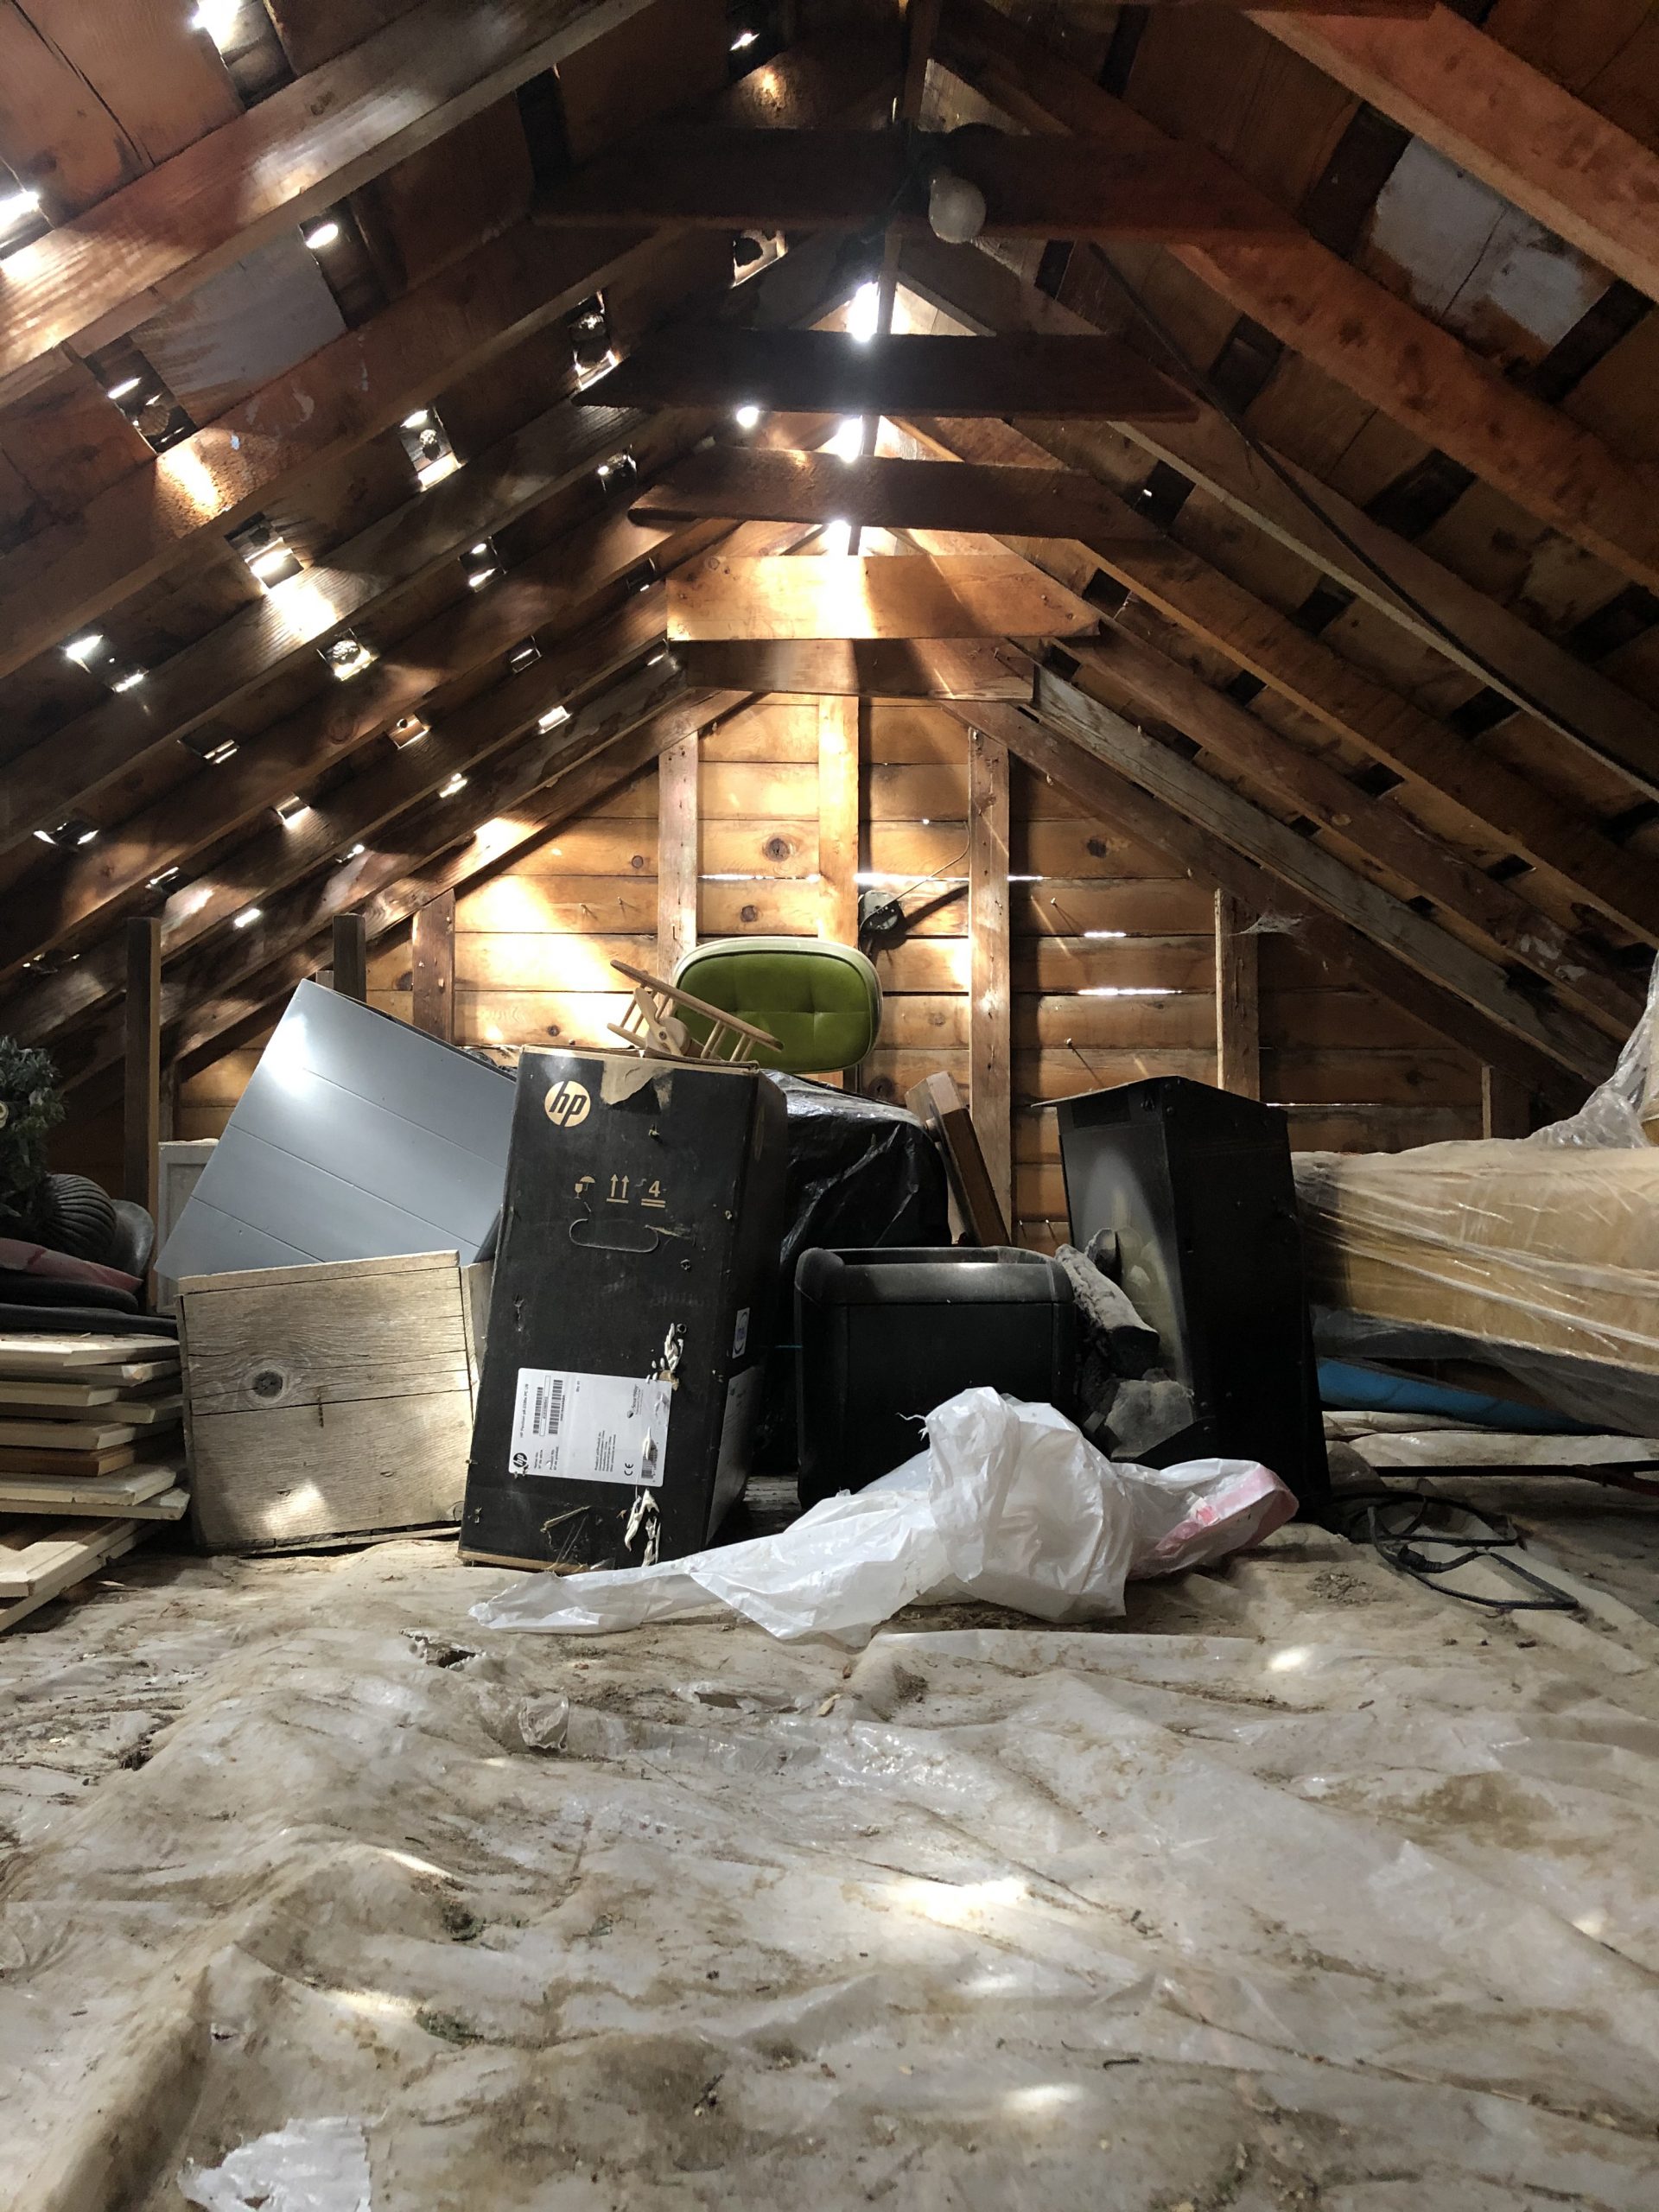
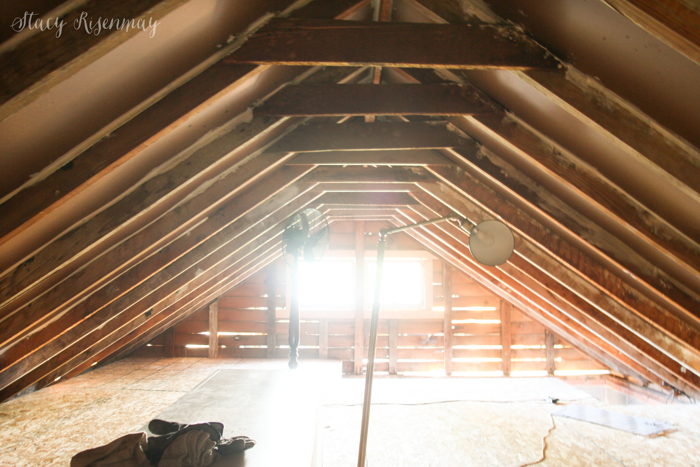
This is the view from below looking up at the loose boards acting as the floor.
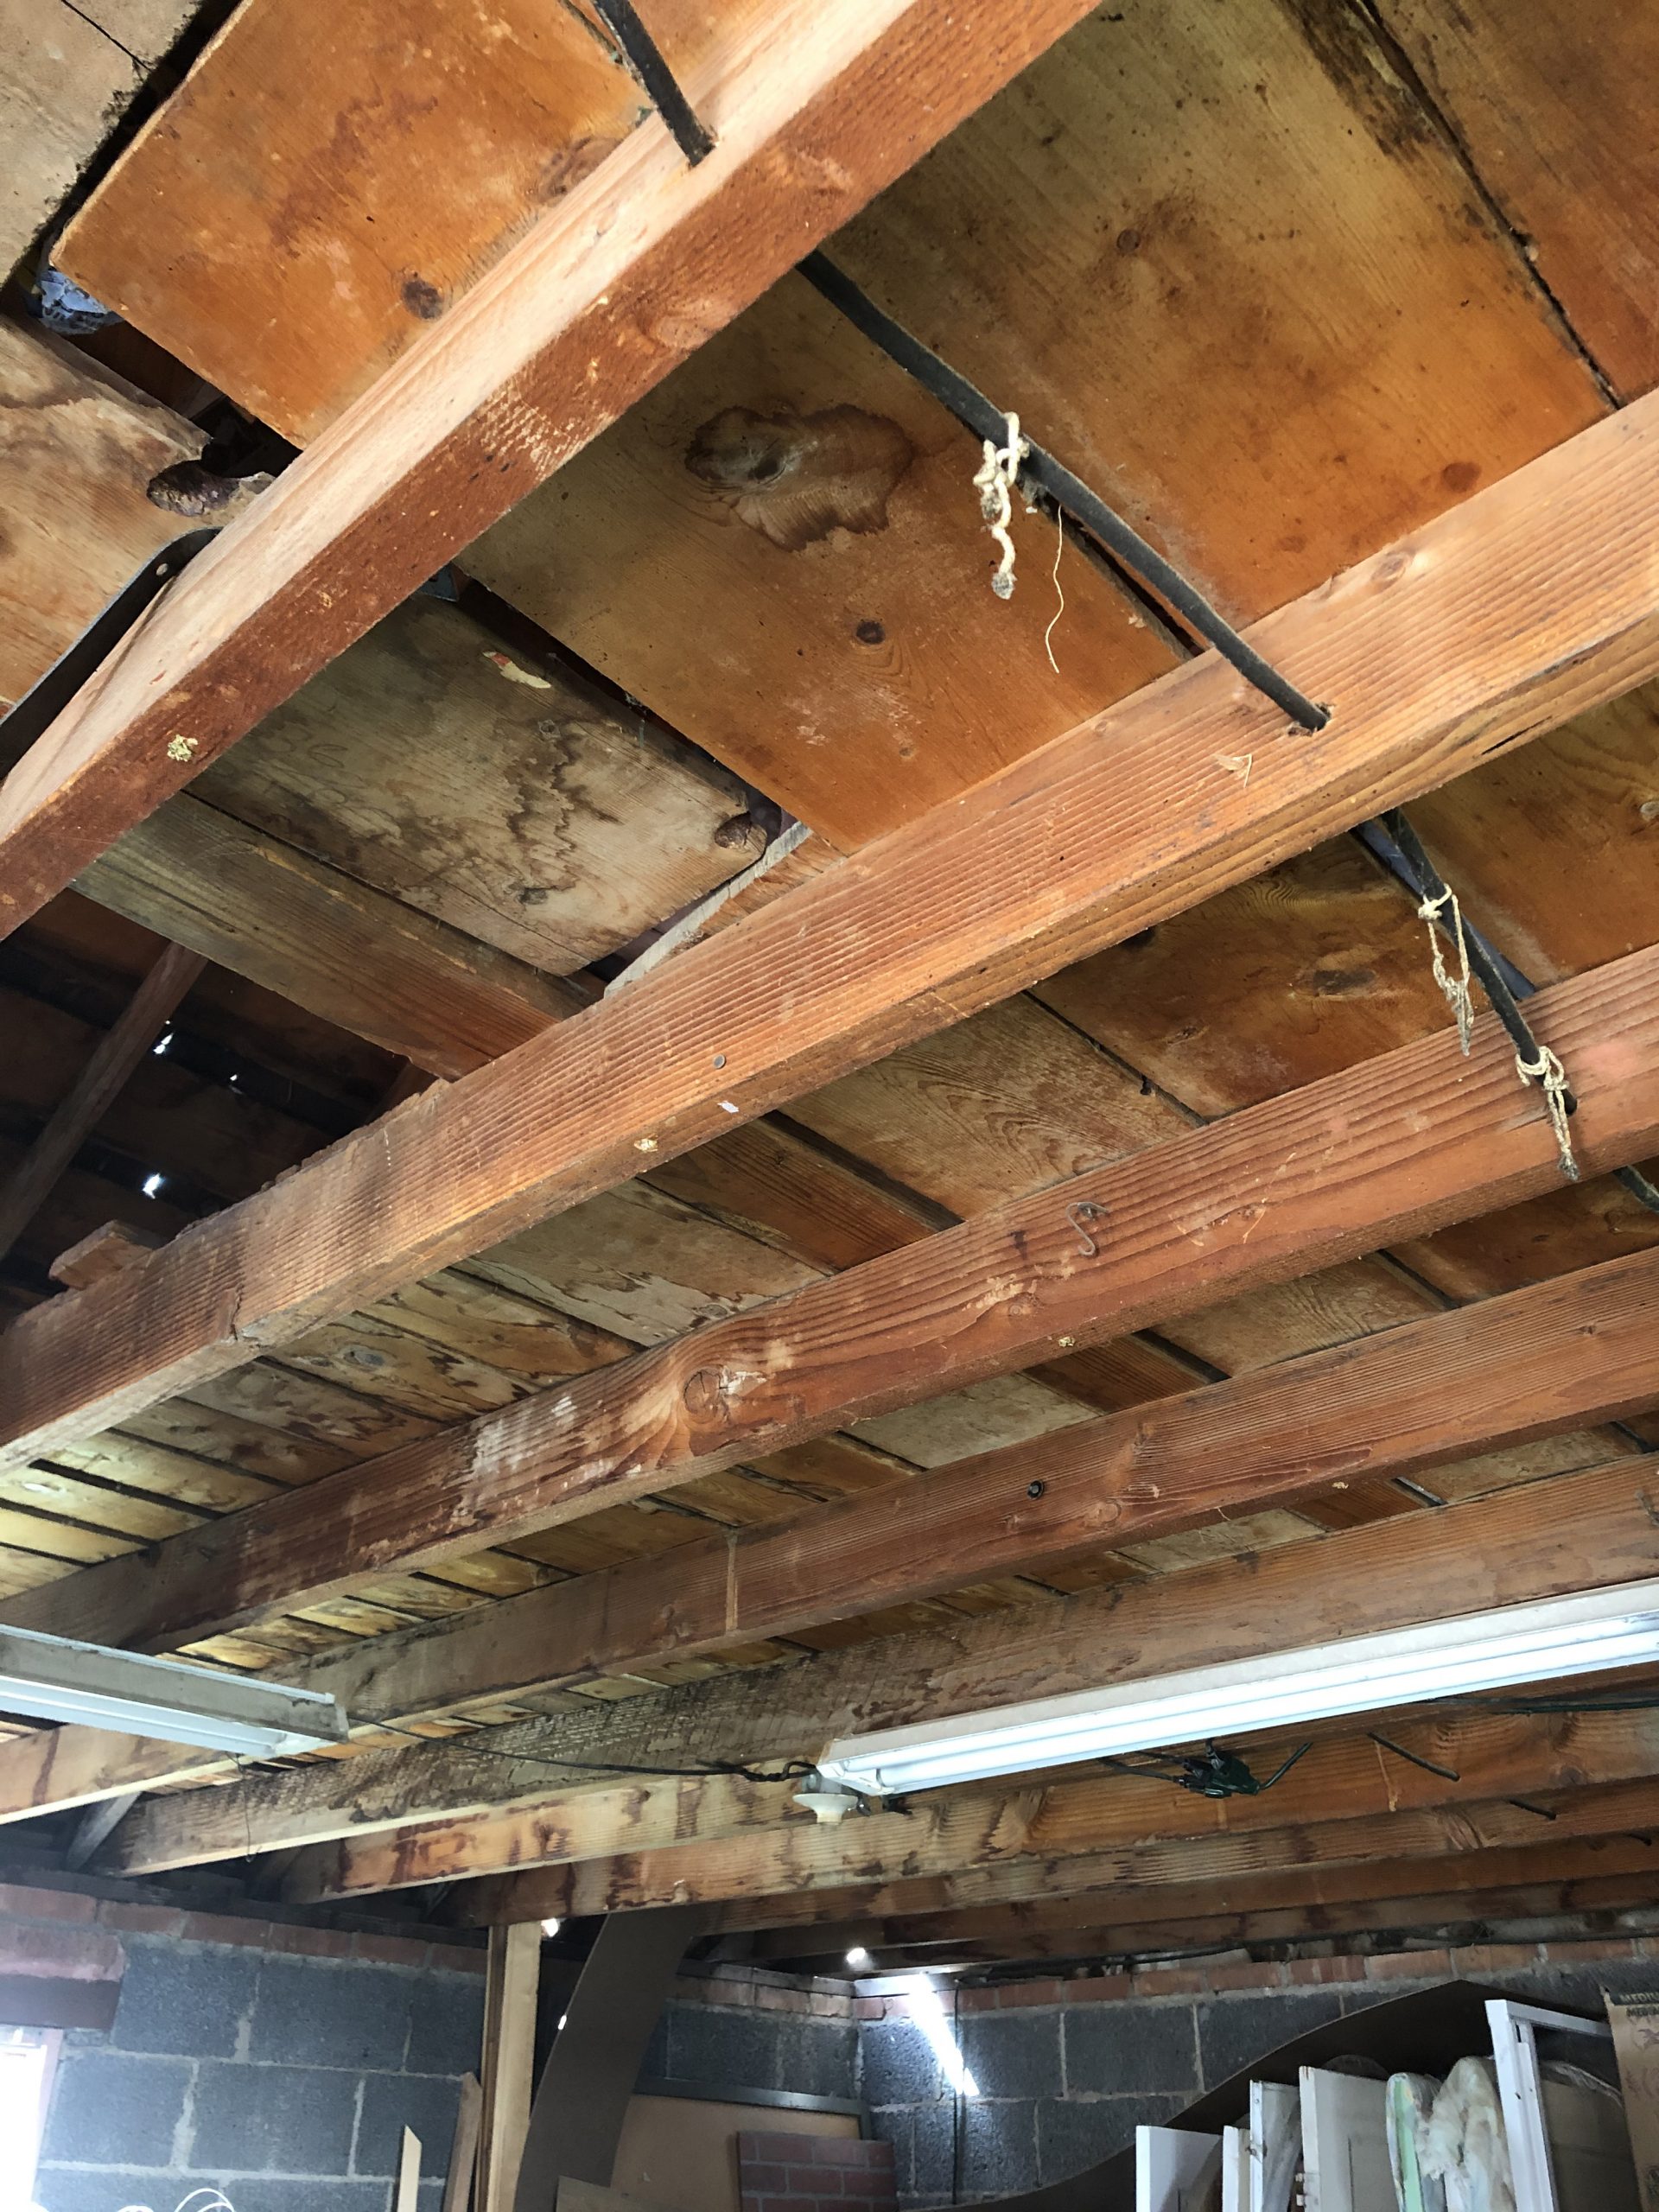
The first thing we did was to re-enforce the ceiling joists so we could add OSB boards for a floor. The existing joists were 2x6s so we might have been okay to leave it as is, but it wasn't a big deal to add more support just in case. After the OBS boards were added and an opening for the stairway, I went to work patching the holes in the roof.
Once the patch work was done, we covered the roofing tar with hardboard. After the panels were done we caulked along the edges. This process took so long!
On either end, there were gaps between the boards. I lost count of how many tubes of caulk we went through, but it was a lot!
Shane also added a window to one end. It is a window that was original to our house. I like that we could reuse it :)
Lots of light coming through the gaps!
I used a sprayer to prime and paint the walls and ceiling. Originally I was going to do black or gray so that if there were any water leaks, you wouldn't see brown water stains. But there is limited natural light in this space so I didn't want it to be too dark. After priming it and seeing it all white, I decided to go with a bright white paint.
We have had a few big rainstorms and so far, no leaks!
We decided to go with sheet vinyl for the flooring. It was the cheapest option and would be pretty fast to install. The pieces were large, heavy, and a bit awkward to move into place once the glue was down, so Shane helped out with that. It took all afternoon, but looked like an actual livable space after it was all down.

I had an idea as we were adding the OSB boards down for the floor. Instead of a skylight (I didn't dare cut into the fragile roof) I added cutouts in the floor right above the garage windows. This allows light to come up into the attic from below. Since they are along the edge, you would have to lay down and scoot or roll over to even lay on them. Even though it would be very hard to hurt the thick plexiglass windows because of their location, I added a "bumper" along the edge for safety. A 1x3 on its edge all around the perimeter to stop toys or little scooting bums :)
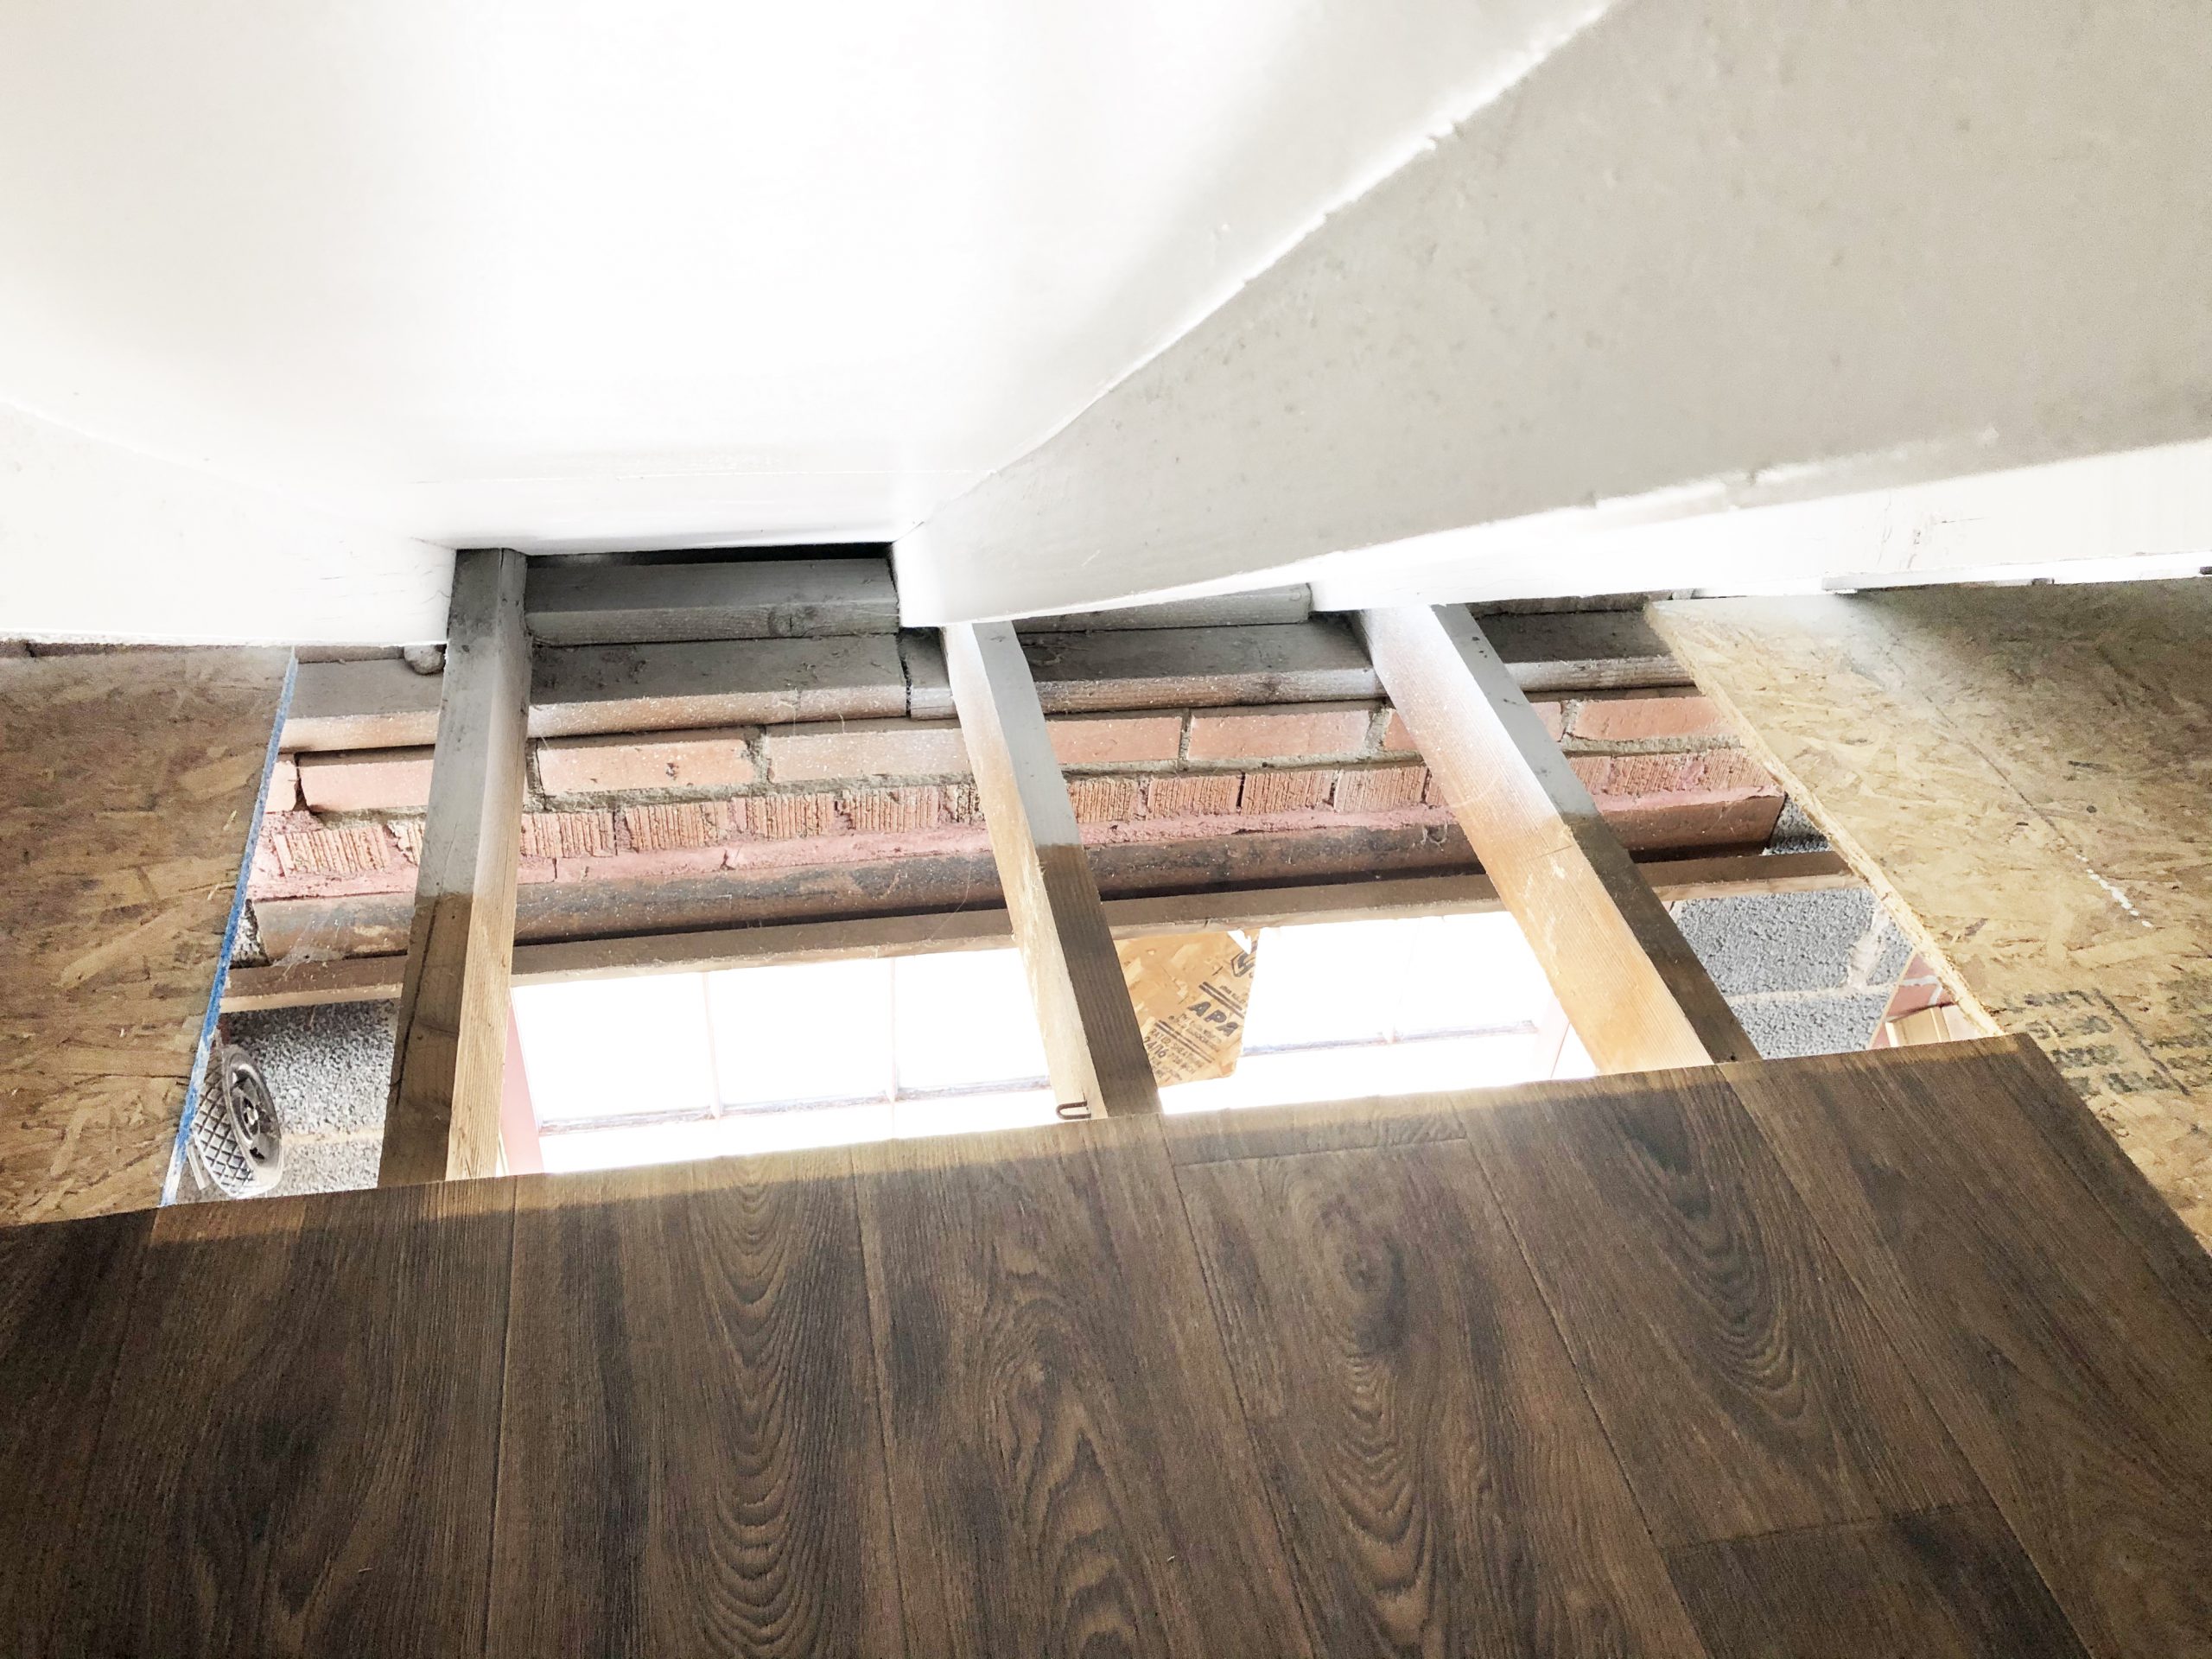
The opening for the floor window. You can see the garage window below.
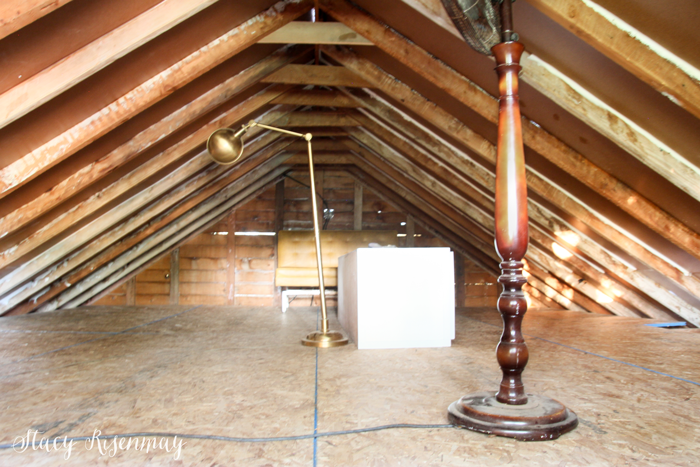
Let's start the tour of the finished space!
The Reveal of the Garage Attic Makeover
Fun facts: The attic space is 17 feet by 21 feet. The highest point it 5 foot 8 inches so my youngest 2 and I can stand but the others in our family can't. The garage is 82 years old.
The stairs! I didn't want my kids (and the neighborhood kids) to have to climb a ladder to access their new fort. I wanted nice, sturdy stairs. I spent extra to get metal stringers. I ordered them online at Home Depot and had them delivered along with the other building materials. In order to have it so you entered the attic at its highest point (and avoid hitting your head) We needed to split up the stairs and add a landing. It took a bit to figure out since the cement garage floor is cracked and anything but level. But these stairs are very sturdy! We do need to add a little hand rail for safety still, but other than that, we are good to go!

I told the boys they were be responsible for cleaning the fort so it was up to them to decide if they wanted to take shoes off before they went up. They hate sweeping so they opted for it to be a shoe free zone. I made a mat to serve as a reminder. I spray painted a plain doormat.

Remember those metal card catalog drawers I painted this spring? This is where they were meant to be! Filled with all sorts of boy treasures.
The one thing my boys asked for was a small desk where they could draw or tie flies for fly fishing (which is their latest hobby). I made a VERY simple desk out of the old attic floor boards.

This darling green chair was Shane's grandma's office chair. When she passed, this is one of the items we picked. It is perfect for this colorful space.


Here is the main area!
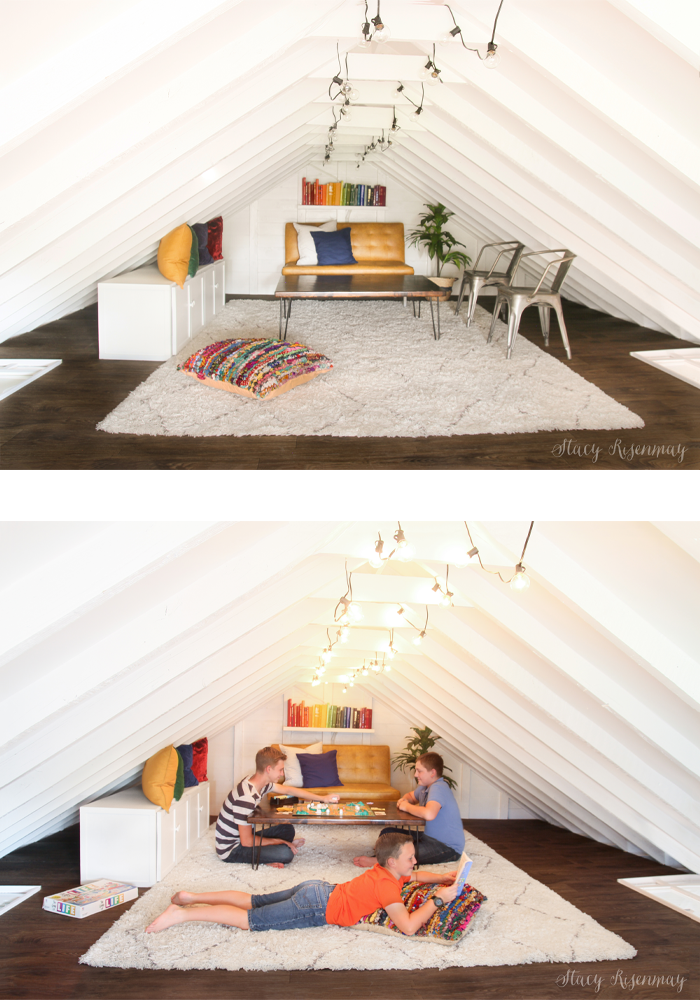
You can see the floor windows along the edges
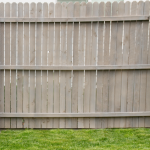
They mostly play games and read up there. I like that it is an electronic free space. We even do family scripture study up here occasionally.
Because heat rises, and it gets really hot here in the summer, I bought a small AC unit that is on wheels so they can move it where they need it most. Now that it is cooling off for Fall, they can probably get away with a fan.
Recycled Furnishings
I went over my (small) budget when building the space so I really wanted to make sure I didn't spend much on decorating it. The storage bench used to be in our office, the yellow love seat was free and once went in our living room, the chairs we use inside and out as needed when we have guests, the rug was in our living room at one point, and the coffee table/game table is the old dining room table top that we out grew. Remember I built a new top?
The only things I ended up buying for the space were the string lights, a couple of faux plants from the local online garage sale site, hairpin legs, and 2 IKEA pillow covers.

It has been very rainy here so it was tough to get a good bright photo, but luckily the string lights help. Aren't string lights so fun?
It has been a big hit with the kids. They even had a small party with neighbor kids. We also have an air hokey table the kids bought with lawn mowing money for the space that gets stored along the edge where you can't sit or walk. We take the legs off and it is completely out of the way!

I think my favorite thing about the garage attic makeover was the work involved in actually doing it. The kids learned new DIY skills and we had a lot of fun working on it together. I think our quarantine project was a success!
PIN For Later:


It's incredible. Great job. I think painting it all white was an excellent idea.
Wow. So impressive. I also like the photo of Shane with a smile on his face. Nice to have a happy co-worker. This reminds me of the garage attic play space my friend and I created as kids. Life was different then. Parents didn't really make super nice play forts for their kids much. It looked like your before picture, but it was fun. Lucky boys to have such talented parents.
Your Boys'Fort turned out beautifully, Stacy, and I love that the whole family contributed to the project! They will never forget this time together!
This is such a fun and welcoming space, Stacy! I'm so happy for you and your family! Kudos to the no shoe mat! I love that the kids are responsible for keeping the space cleaned up! You have outdone your self, again! Love this revel!
It looks amazing and fun! What a great space for kids to hang out. I might even try to sneak in there myself!;)
how something so terrific could remind me of the cleaning up and creation of a "clubhouse: from a chicken house, i do not know.
great transformation and it kept you all busy and family sane. such a great accomplishment. thanks for sharing.
WOW! I want you to come live in my house and fix everything for me!
Wow, that space is great. I know the boys love it, I would. You think of everything and love the stairs. You are correct, much safer. The boys will enjoy this for years. Great area and idea.
I cannot believe those before pictures! I'd assumed the space was already in decent shape and you just added a coat of paint and decorations. Good job on the transformation. This has me dreaming about the possibilities in my own attic garage.
Oh my golly! That is absolutely AMAZING!!!!!
Those boys looks so happy. Great idea!
WOW! Awesome remodel and makeover!!
Have a great week!
Creatively, Beth
Wow! What an amazing transformation! I love that you have decorating this space sustainably with all your lovely finds. That green office chair IS perfect in this space and is full of memories I'm sure.
This is amazing!!!