
I revealed the backyard landscaping project last week and you were all so kind! I am excited to be sharing the tutorial for the DIY concrete fountain. It was one of those projects where it could have been an epic fail. I had never done a large scale concrete project before. I think Shane and I were both pleasantly surprised when it came out just like I had planned.

Supplies:
Melamine Boards
Screws
Caulk (*optional)
Concrete Mix
90 Degree Metal Conduit Tube
Shower Flange
Spray Paint
Fountain Pump
River Rocks
PVC Pipe
Rubber Mallet
Drill
L Brackets
Video & Photo Tutorial
When Shane and I were making the fountain, because we used quick set concrete, we had to work fast. We set up my phone on the tripod to film but didn't have time to stop and also take photos. So all of the photos of the concrete process are all screen grabs from the video. It really is easier to understand the process by watching the video, but I also know that some people prefer not to watch videos so I added the photos as well.
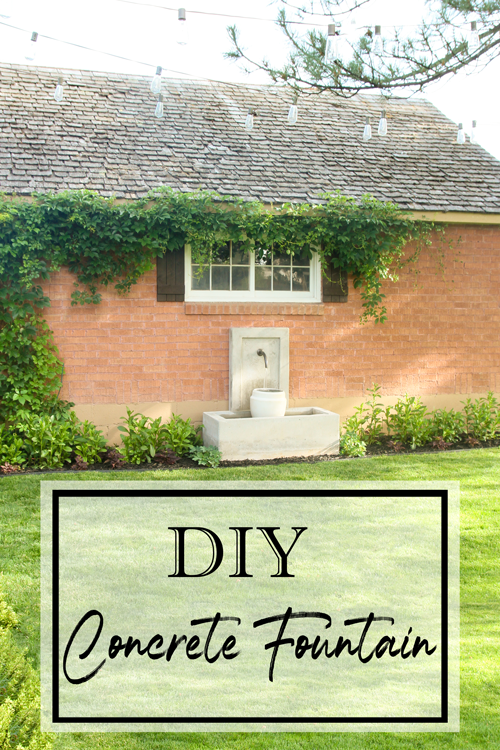
DIY Concrete Fountain
I watched a lot of videos and read a lot of articles and decided that the best material to use for the forms was melamine. It is relatively cheap and the concrete won't stick to the slick surface. I built the form for the fountain back and two boxes for the trough base out of this material. I ordered it online from Home Depot and had it shipped to my home. You could also get it by curbside pick up. I order a combination of 4x8 sheets and smaller pieces meant for shelving.
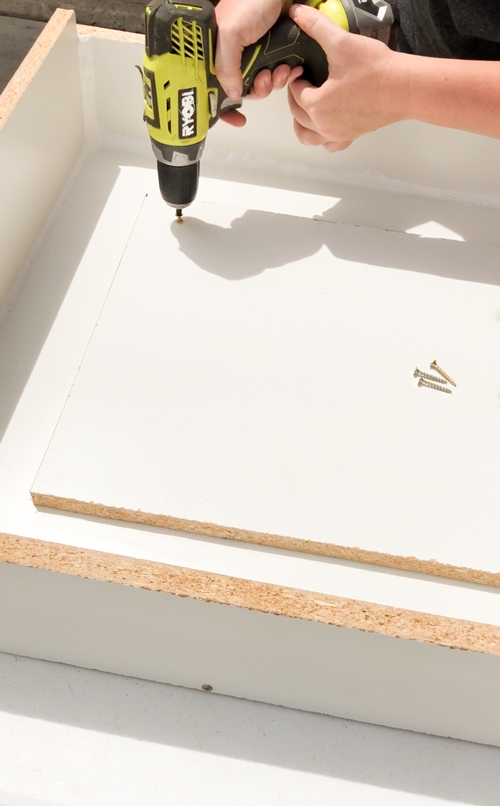
The DIY Concrete Fountain Back
I built it to be 2 feet wide by 4 feet tall. I wanted a border so I added a melamine board in the center. I wanted everything to be smooth so the rough, unfinished edges of the center melamine board got a layer of caulk. I also puttied where the screws were so you wouldn't see an impression of a screw head in the finished fountain.
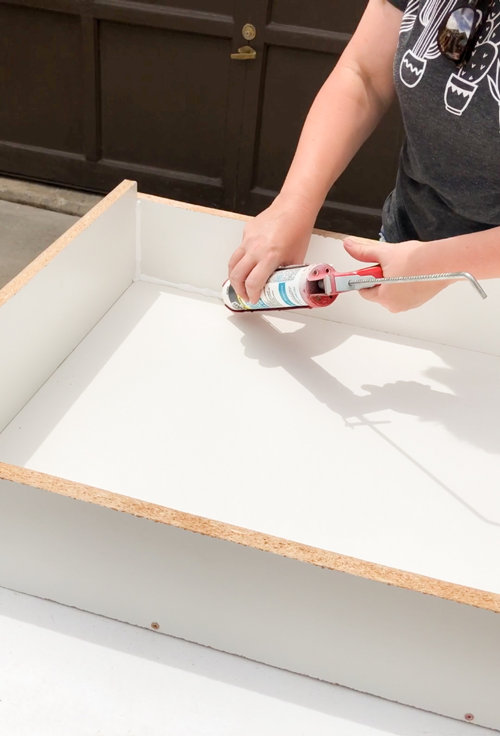
I wanted the corners to be rounded so I added caulk around the whole thing and added extra to the corners.
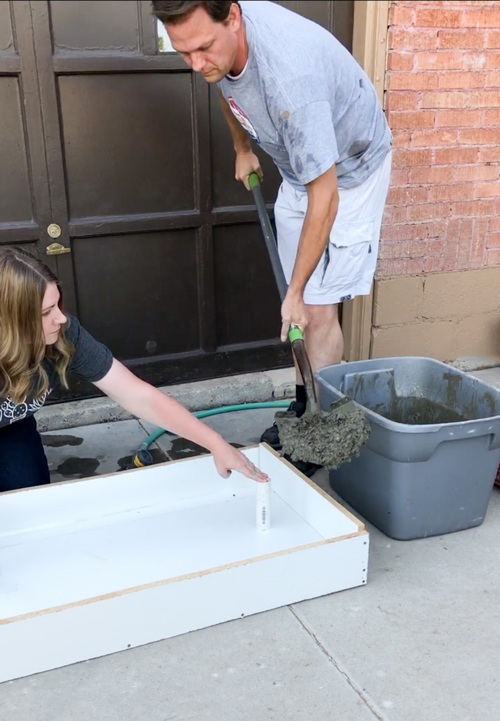
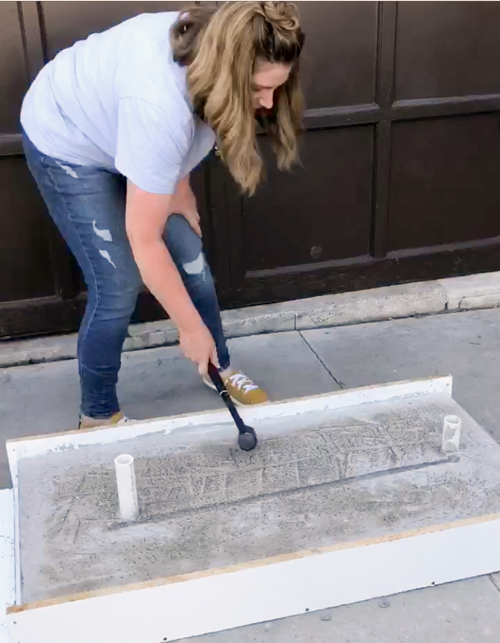
I measured and marked where the holes needed to be for the pump tubing. I cut small pieces of PVC pipe that I knew would be large enough for the electrical plug and tubing to fit through. When Shane started adding cement mix to the form, I held them in place until the concrete was smoothed and held it on its own.
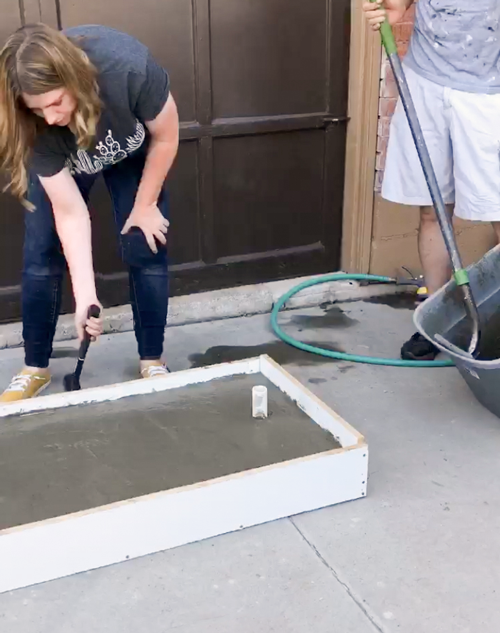
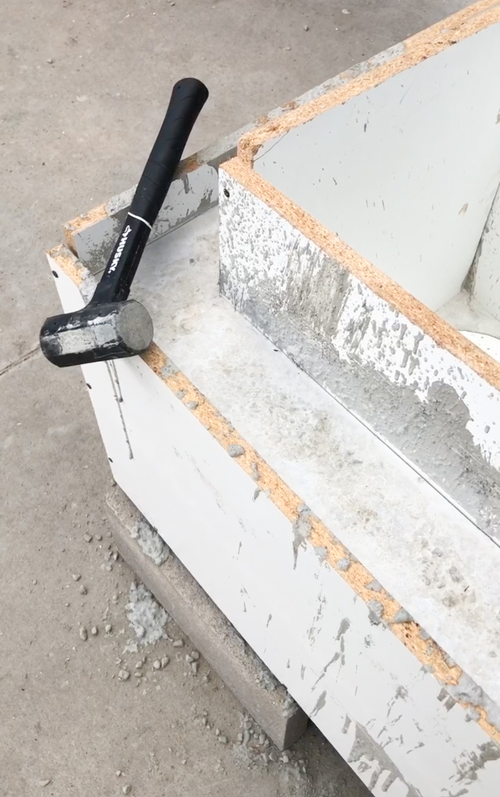
As we were adding the cement mix, I spread it evenly and hit the sides of the form with a rubber mallet to ensure that there weren't any bubbles.
Once it was all filled and was 4-5" thick, I pressed a PVC pipe into the back in between the two pipes. Then I removed the long pipe. This created a channel on the back for the pump tubing to press into. Since the fountain was going to be pressed up against the garage wall, I didn't want to risk the tubing getting squished.
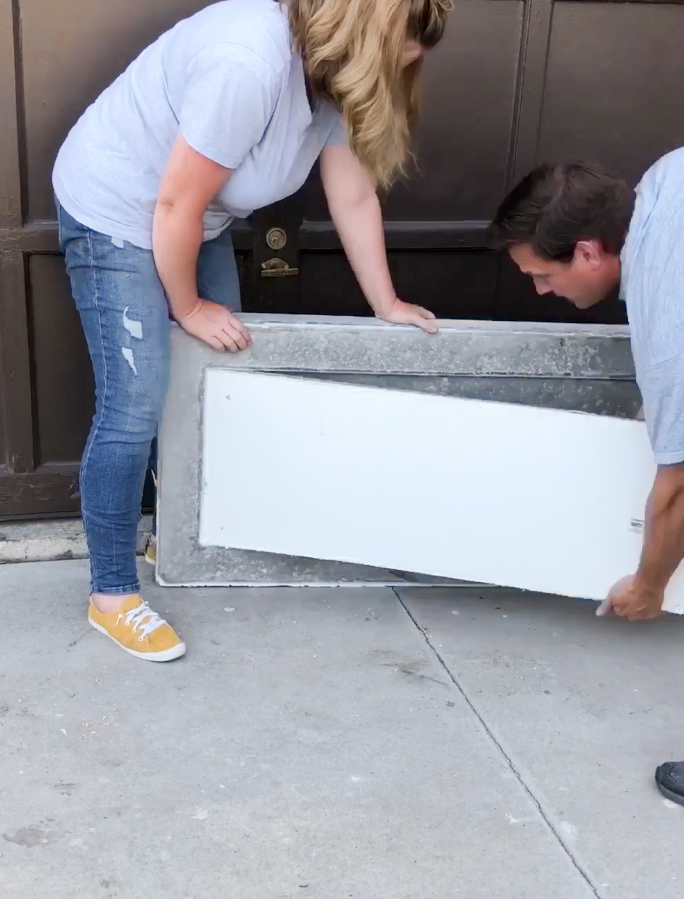
Once it had dried overnight, I unscrewed the form and tapped the form off of the cement.
Getting the center board off required a crowbar and some tugging.
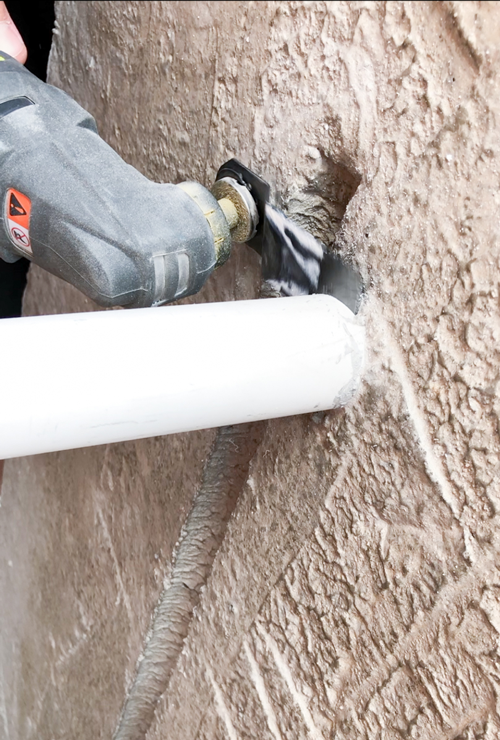
I used a saw to cut the excess pipe off the fountain back so they were flush with the concrete.
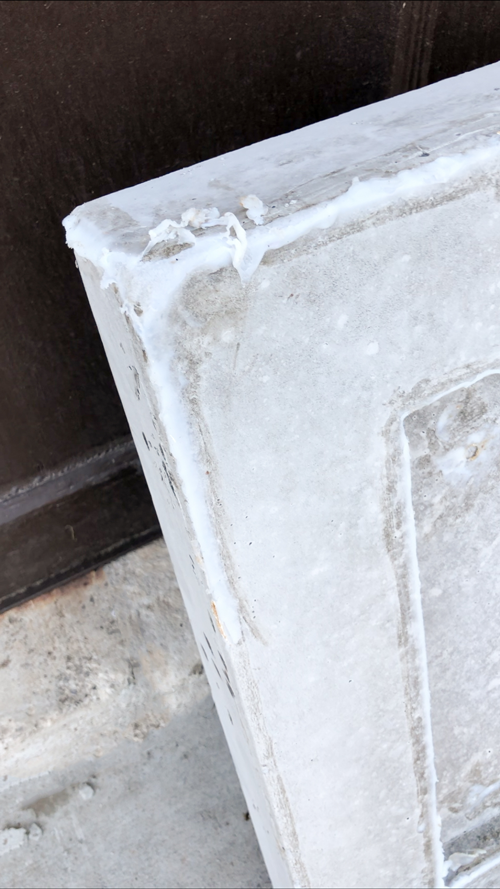
You can see how the caulk made the edges softer and rounded. The kids helped me pick it off. Any residue got sanded off with a 220 grit sandpaper.
The DIY Concrete Fountain Trough
I wanted my fountain to be roughly the same width as the window so it ended up being 4 feet long and 2 feet wide. I built the outside box to those measurements and then since I wanted the sides and bottom to be 4" thick, I built the inside box accordingly (40x16). I screwed the large box together really well since it would have a lot of concrete poured in it and I wanted it to hold up to the weight.
I did the same caulk trick to ensure the edges and corners were rounded.
The inside box didn't need to be as structurally sound. I also needed to attach it from the inside so I could disassemble it when the concrete dried. I used L brackets.

Once we had about 4" of cement mix in the largest form and I had hit the side to level it well, we put the smaller form inside and began adding more cement mix in to form the sides. I constantly hit the sides with the mallet to release the air bubbles and help level the cement.
When the cement was dry, I unscrewed the forms and tapped the pieces off. The bottom piece of the smaller (box) form had to be chipped out. It did not come out easily! If you have any ideas on how to get that piece out more easily, I'd love to know! Tell me in the comments :)

The DIY Concrete Fountain Spout
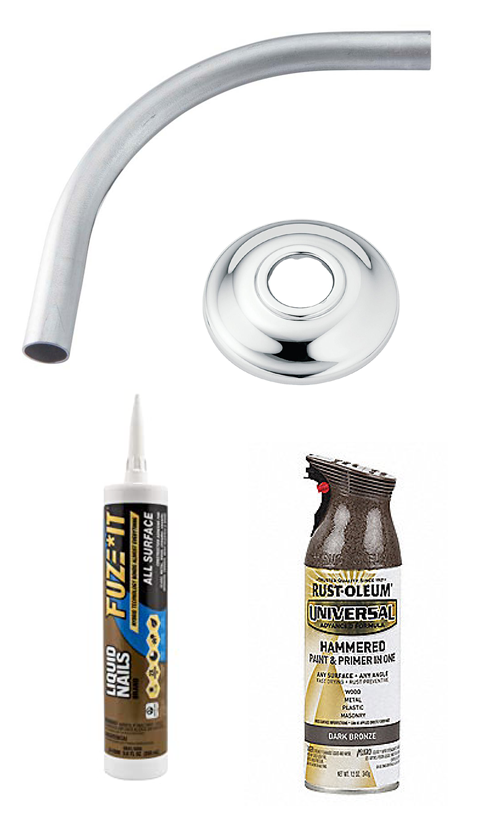
I started looking around for a fountain spout and all of them were well over $100. Of course my DIY brain kicked in and decided to try and figure out a way to just make one. I ended up using 90 degree angled conduit with a shower flange. A little spray paint and there you have it! I used Liquid Nails Fuse It since it was recommended for metal and concrete.
Moving The Concrete Fountain
The back used five 50 pound bags of concrete mix and the trough used sixteen bags. This fountain is HEAVY!

If it was good enough for the pyramids, it is good enough for my garden fountain. We did the 'ole rolling it into place trick using PVC pipes. It actually went really fast! And by "we", in this case I mean my handsome hubby and sons. By this point I had sprained my ankle and wasn't much help other than filming.
I love the look of the fountain and I like hearing it as I relax on the patio or as I'm weeding the garden. The kids are trying to convince me to take out the pot and add some small fish. We'll see.... I do think it might be fun to add a few small water plants. But then again, I am always in the mood to add more plants!

If you missed the whole reveal, make sure to check that post out!
What outdoor project are you hoping to tackle this summer?
PIN For Later:


Beautiful! I love it...great problem solving and execution...
Beautiful, yet straight forward! How did you seal the tube/pipe at the trough hole so water doesn't run out onto the ground?
I absolutely love this!!! Thank you for sharing with us. I may attempt to make one for my home. It is absolutely lovely!
Wow, when I first saw the fountain I had no idea you made it, although I should have because you can do anything. It is perfect!
amazing, as usual...
How much did the materials cost all together??
The cement and the melamine boards came to $176 and change. The supplies for the spout and caulk all together was less than $20. All the fountains I found that were this size were around $1,000 so I was happy to get the same look for less!
Nice idea and cool! I love it! Thanks for sharing this with us!
Wow! Such a beautiful project!
Did you use any sort of sealant on the concrete to keep the water from seeping out? We are looking to make our own fountain, soon, and yours is one of the better how to guides I’ve found. :)
Hi Stacy,
Thank you SO much for sharing the details on your beautiful fountain. I cannot wait to attempt this and hopefully achieve a beautiful outcome!
I just had one question. Did you use the pot because the water splashed too much or too loudly, just for aesthetics, or to house the pump?
I appreciate all the research you did and passed forward!
Thank you! The pot was just for looks :)
LOVE this thank you for sharing the process. You make it look so easy!!! After shopping around and seeing the price tag on something comparable this is definitely an amazing option. Will be attempting!! Also, may I ask where the pot is from?
Thank you :) You made my day. The pot is from Home Depot!
Hi, To make it easy to remove the form from the concrete, spray it with a light coat of WD40. Do this after assembly of the form and corner caulk or it Woodstock.
If you use OSB or regular plywood polyurethane the sides that touch the concrete, allow to dry then light cost with WD40. WD40 doesn't hurt and residue if any quickly no residue.
Great Tip!
How did you secure the top piece so you don’t risk it tipping over? Do you think wire or rebar in the concrete would be necessary if the top piece extended the length of the trough?
The long piece with the spout is pinned between the garage and the bottom piece filled with water. It doesn't budge. I didn't use rebar or wire mesh at all and it has been great but it also wouldn't hurt (and would make it stronger) to add some to reinforce the concrete.
Cool project! Did you have an issue with the inner box wanting to float upward as you poured concrete in around it? I would think there would be a bouyancy to it, but it doesn't look like you secured it down or added weight inside to hold it down.
Thank you!
It didn't move at all. I thought I would have to weigh it down with something but I didn't end up needing to.
Great work. How long did you let the cement dry/set before using water in it?
Thanks so much for sharing! What kind of pump did you use? Would you do anything differently if you did it a 2nd time?
I just bought a small, basic fountain pump from Home Depot. Nothing fancy since it only holds about 40 gallons. There isn't anything I would do differently. It has held up well and works great. I really want to make another one!
What did you use to seal the hole in the tank that you did to get the pump tube and wire out from?
Hello!
I am getting ready to pour a similar concrete fountain for my garden and have referred back to your post SO many times. Thank you for your help!
Did you end up needing to seal with anything? Has water seeping out or mold/mildew been an issue without sealing? Do you have to empty it out in the winter to avoid freezing and cracking?
Thank you again for all your help and inspiration!
I am excited you are going to make your own! I did not seal it with anything. There's no mold or mildew but I do live in Utah which is on the dry side. Not a lot of humidity here. I empty it out in the winter but it usually fills up as snow melts and runs off the roof. It haven't had a problem with it cracking. Good luck on your project!
What did you use to seal the hole in the tank that you did to get the pump tube and wire out from?
I used silicone caulk to seal around the tube.
Great videos and blog post. What concrete mix did you use?
Thanks
Quikrete :)
Fantastic job! I am wanting an extra long trough in my garden, and I had no idea how to go about it. Thank you so much for sharing your amazing process!
INCREDIBLE JOB! I have been daydreaming of building this fountain for my backyard this summer. I'm wondering if you use anything to keep your water clean. My luck is that I will have beautiful water to start with and then the basin will get gross with water stain, algae, etc. When looking at fountains online, some companies ask if you want to add "water treatment"..seems like it comes in a bag? (so odd) Thanks for your help!
Thank you! I use a barley straw extract because it is safe for fish and we have a few that live in our fountain. It works well. I still empty and scrub the fountain once a year but this stuff is good at maintaining it. https://amzn.to/4a21TDB