
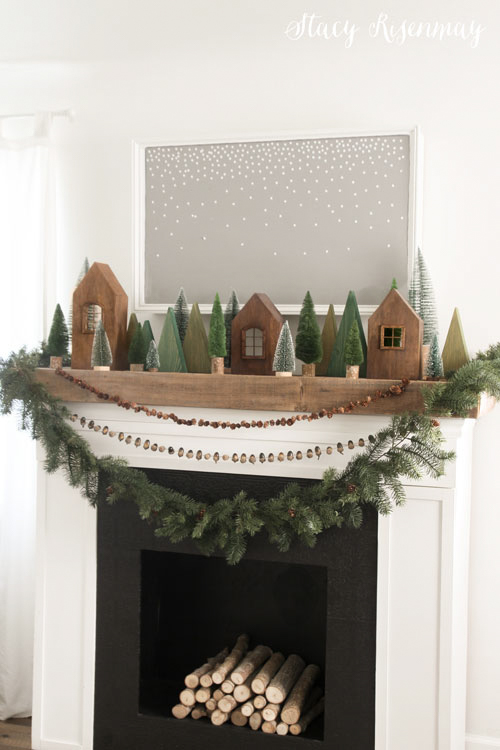
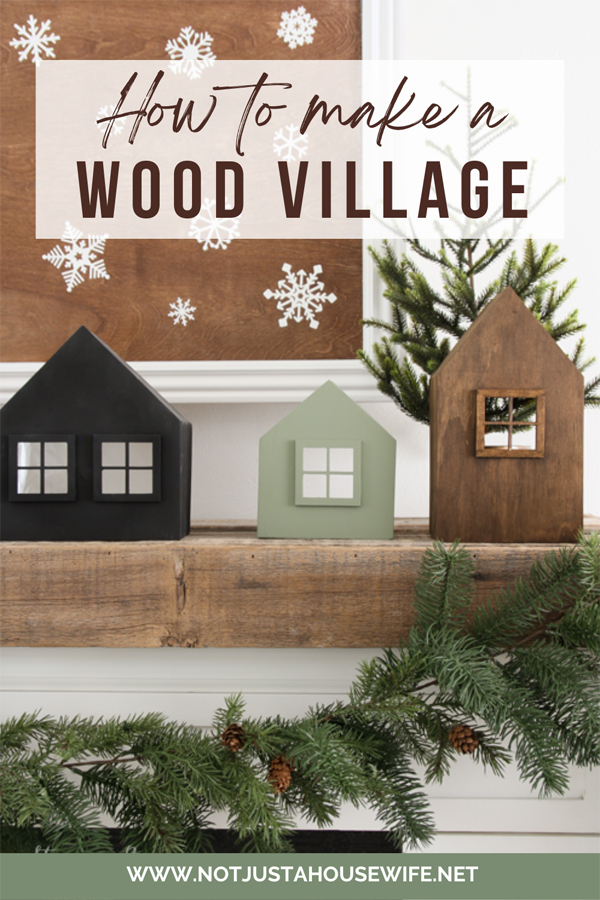
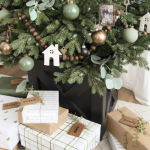
I made these DIY wood houses back in 2018 and have used them in my decor every year since. Most years they are prominently displayed on my mantel. I do paint a couple a different color each year to go with the each new theme. They have held up beautifully.
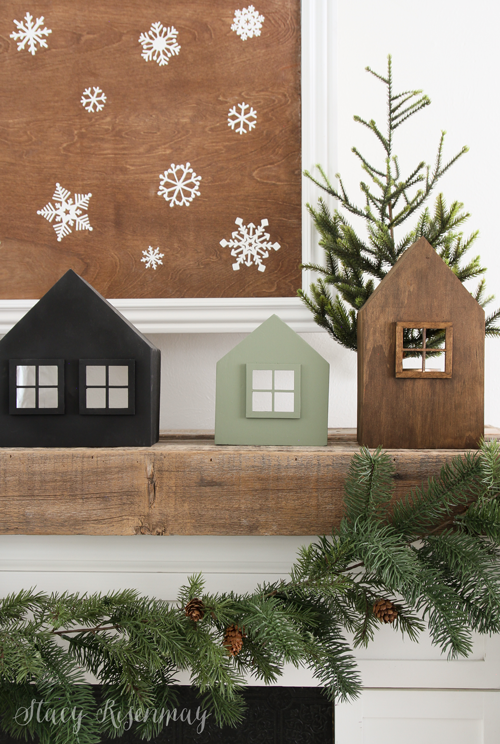
Every year starting in November, my inboxes and DMs fill up with people asking where I bought these houses. Once I tell them I made them, they then ask if I have a tutorial. I never created a tutorial back when I first made them because it was a last minute idea and I made them late at night.
Every year I think "I am going to make another one so I can take pictures this time." And every December it gets nuts and I put it off. But this year I finally decided to make the time.
DIY Wood House Tutorial

Supplies:
Miter Saw
Hot Glue Gun (Optional)
Stain or Paint
I debated about having a printable for each of the cuts for all 7 houses I made, but who is to say you would want your houses the exact same sizes I chose? So I decided to do a general tutorial and teach you how to get the measurements, so you could customize them to your needs and space.
Cuts Needed For DIY Wood Houses:
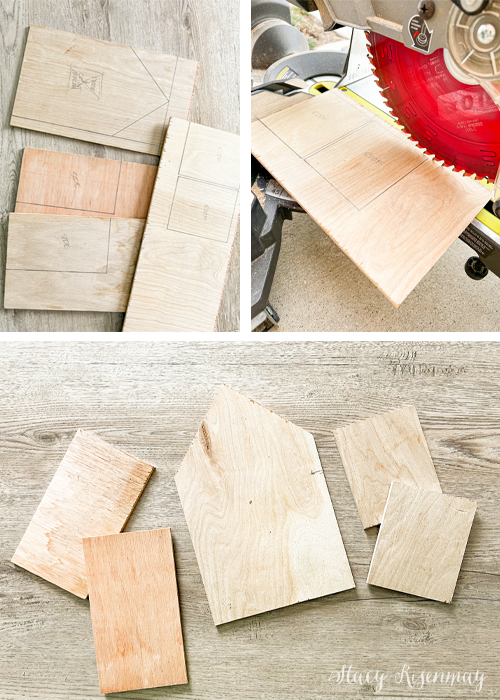
Measure and mark the front piece first. Make is as wide and tall as you want. The front piece will determine the size of all other pieces.
The 2 sides will be the same size. Make them as tall as the side on the front piece.
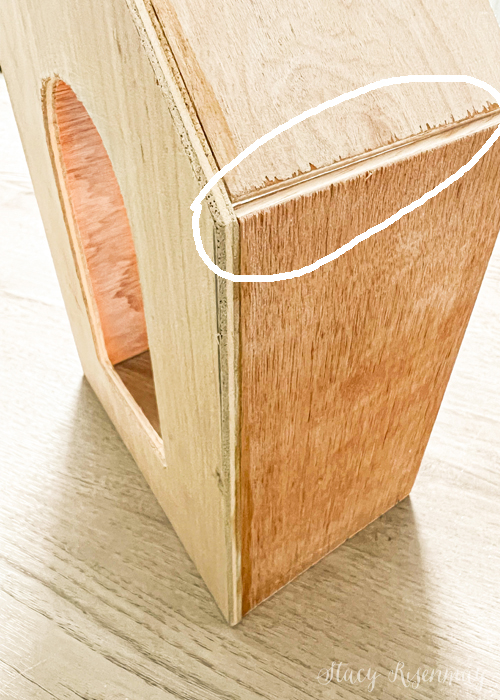
The roof pieces will be slightly different sizes.They will be the same depth, but different lengths. One will be shorter because of how the roof pieces line up. My plywood was ⅛ inch so one piece was ⅛ inch shorter. If you use ¼ inch plywood, the difference would be ¼ of an inch.
*If you do choose to use thicker plywood, you could miter the roof pieces and then they would be the same exact size.
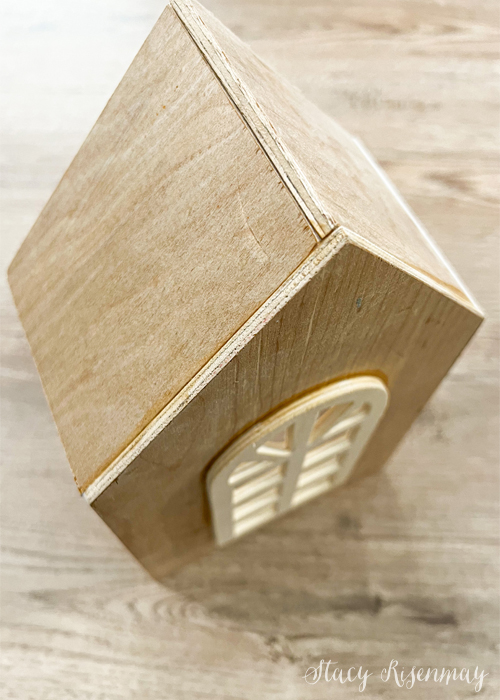
I chose to not put a back on mine since they can easily nest inside each other and take up less space for storage. It makes it easy to put candles or led lights behind them too.
Step 1: Measure & Cut
Measure and draw on the cut lines on the plywood. I used scrap plywood leftover from other projects. I'm always happy when I can use up scraps!
I was able to use my miter saw to make all the cuts. If your houses are larger, you may need to use a table saw.
Step 2: Cut Out The Windows
Once all the cuts are made, trace the window onto the front piece. Then make another line about ¼ inch inside the line you traced. You need the hole to be slightly smaller so the window has an edge to be glued to.
Drill a hole large enough for a jigsaw blade to fit through. Cut out the hole for the window. It doesn't have to be perfect since you won't really see it once the window is in place.

Step 3: Glue The Wood Houses
It is time to glue the pieces up! It is kind of like assembling a gingerbread house.
I use wood glue to assemble them. Wood glue takes a while to fully dry, and I am not patient. So I used hot glue on the inside to hold it together while the wood glue is drying.
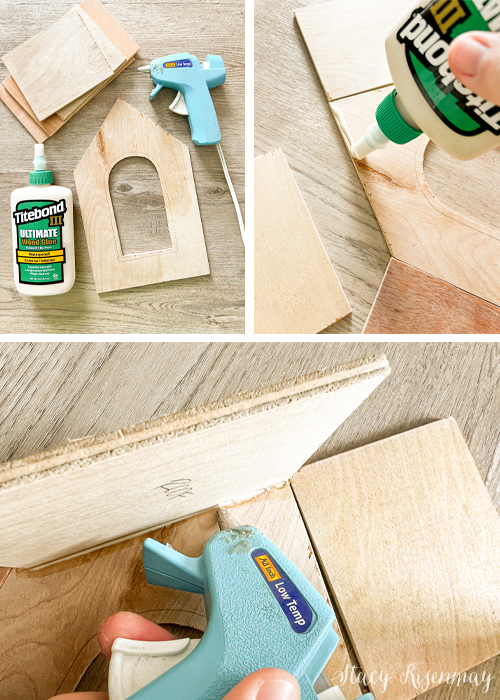
Where the roof lines up with the side there will be a slight gap. I fill it up with stainable, paintable wood putty. If you build these with thicker plywood, you could miter these joints as well.
Step 4: Staining & Painting
If you are staining these houses there are couple of key things you need to pay close attention to. The color of the putty is important. If you are staining them dark like mine, get a dark putty. Even though light colored stainable putty is stainable, it only stains so much. It will be a lighter color than the wood. Lighter stains are fine to use a lighter putty.
Make sure to be careful with the wood glue. It won't stain well so it if gets on the wood, you will need to sand it off before staining.

I hope this tutorial was helpful. Let me know if you have any other questions.
Pin For Later:


Comment Below!