
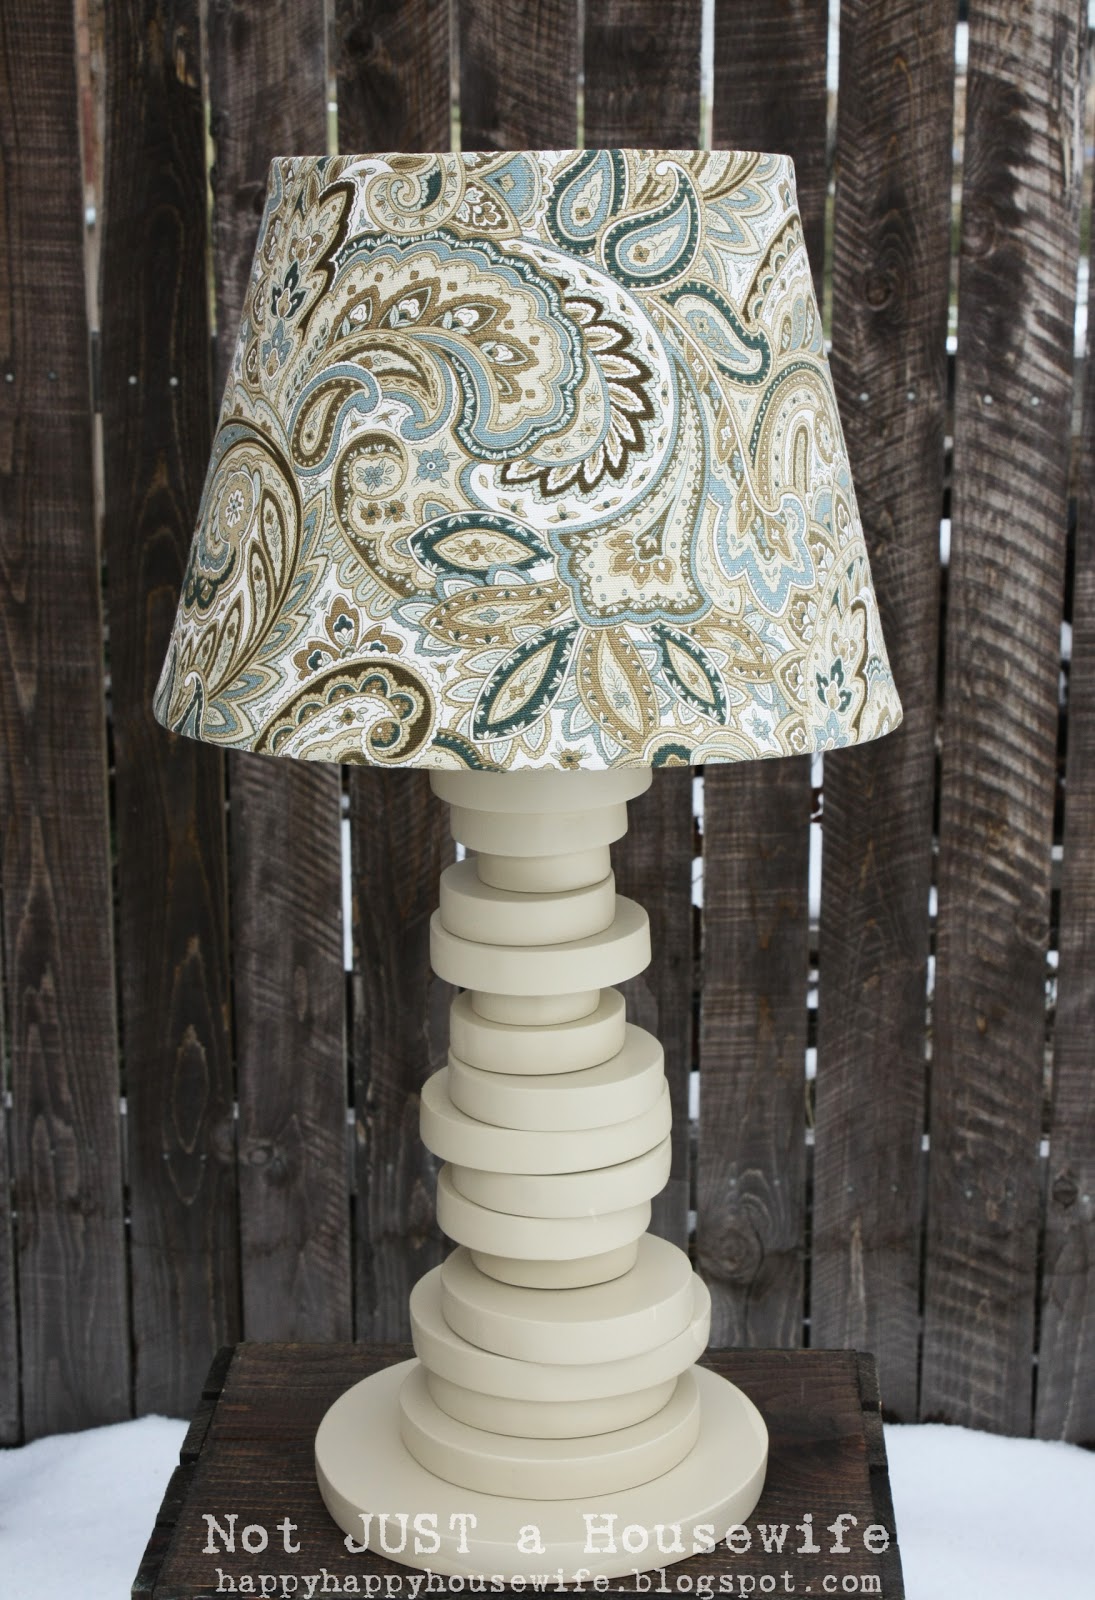
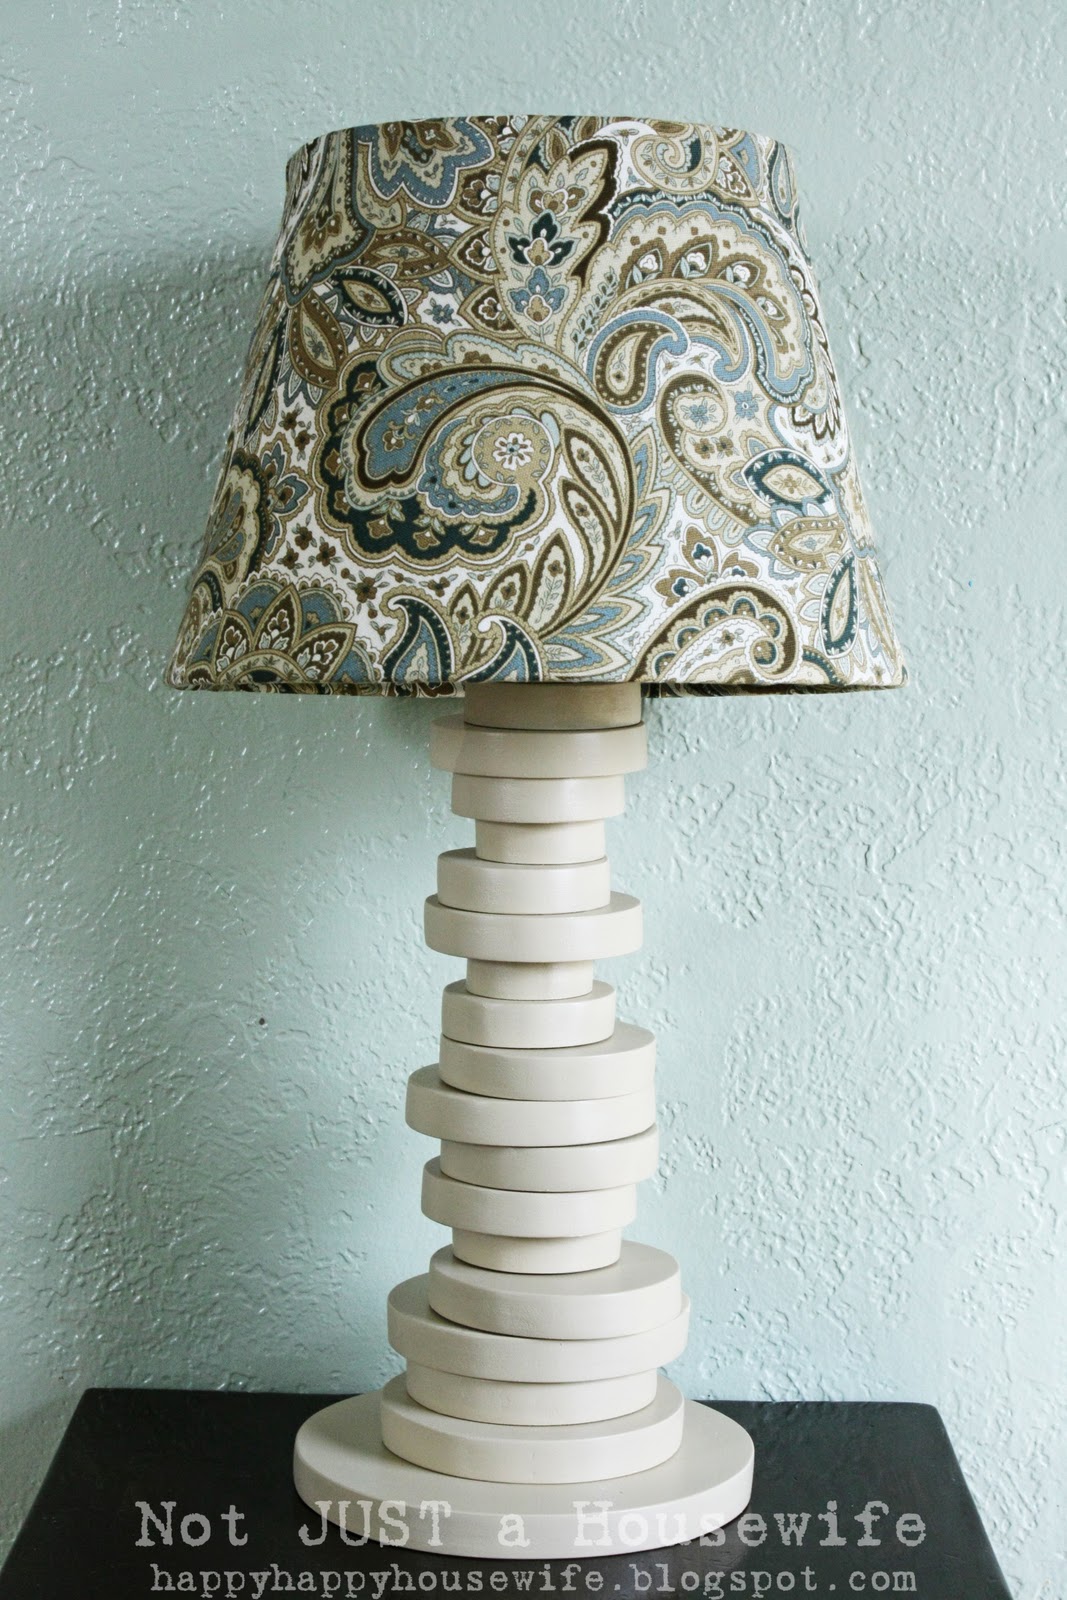
I had some MDF (medium density fiberboard) left over from a project that I will be posting about on Monday next week so I thought I would use it to make another version of my scrap wood lamp. Instead of squares, this time I did circles!!! I love it :) My playroom/downstairs family room isn't even done yet but it has a lamp!
And like a lot of my projects, this requires power tools. I am on a quest to get you all to use them :)
First I used a jig saw to cut out some circles that I traced using small plates and cups.

Once you cut them out they may have places you need to touch up. Put them on the ledge of whatever you are using for a work surface with the part that needs touching up hanging over the ledge. Press down with one hand to steady it and cut with the other hand.
Touch up or not, you will definitely need to sand them. Start by using a very gritty sandpaper like 60. That will shave down any bumps and shape it. Then go back over it with a fine grit sand paper (120 or 220) to smooth it out.

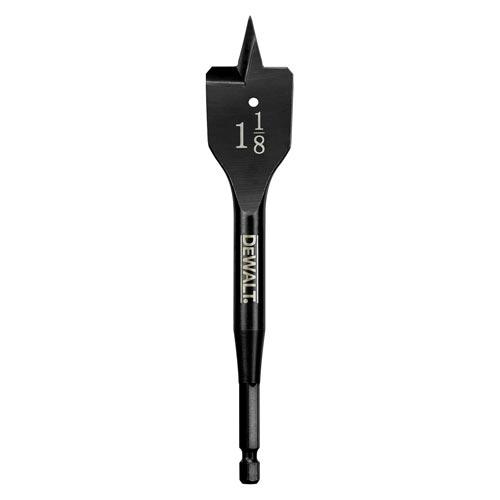
I used a wood boring bit to drill holes into the circles. I didn't want them to all be centered. I wanted them to be all wonky. This is not the size I used. It is just a google image because my camera battery died right about now.
I painted the circles a tan color that matched to fabric. Valspar: Prairie Dance I believe was the name. Sometimes when you paint MDF it gets rough. Just lightly sand it with a fine grit sand paper after the first coat of paint. All the coats after will go on smooth.
Okay. Battery recharged.
The very bottom piece will NOT get a hole drilled. The second to last one will get 2 holes drilled. An extra one for the cord.

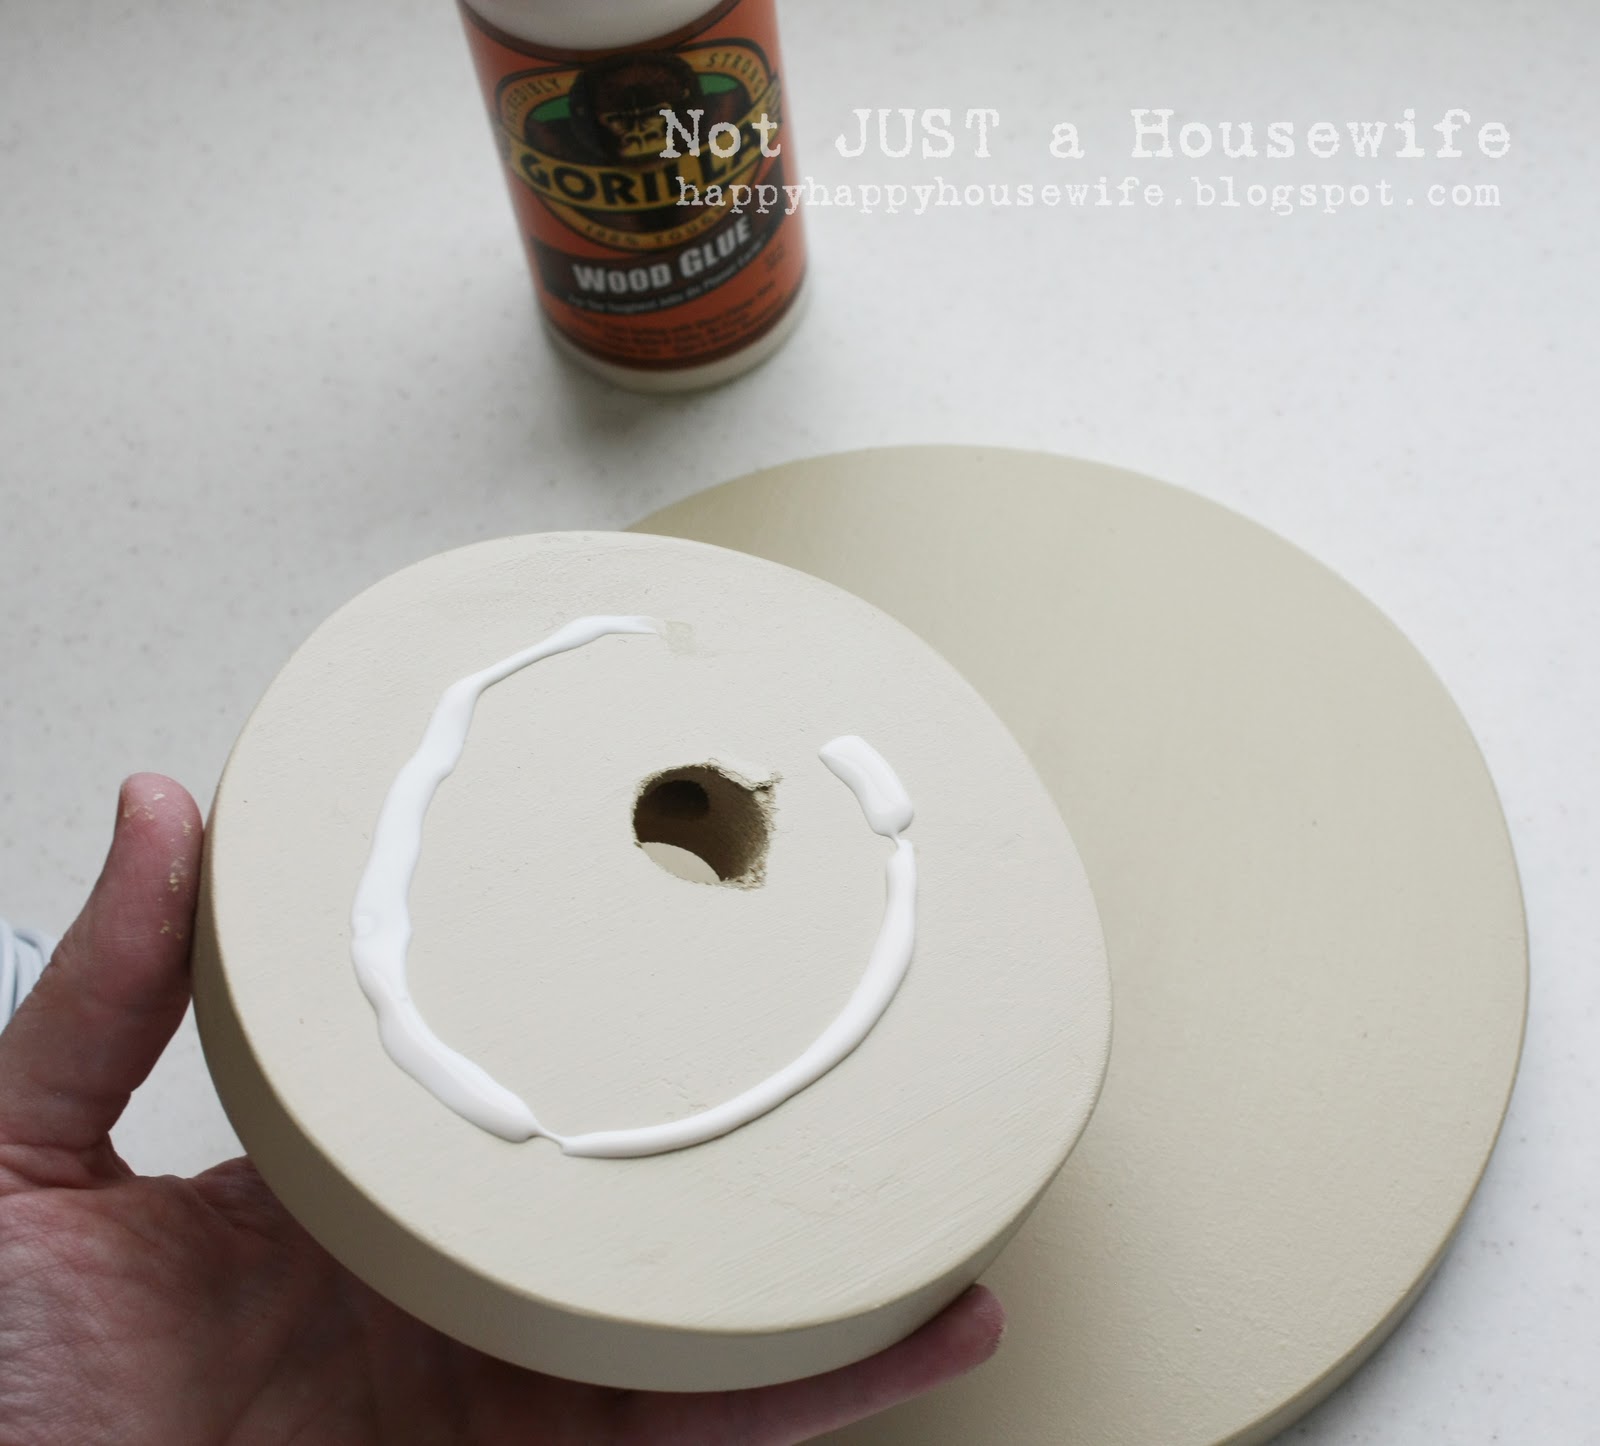
I used wood glue to attach all the circles together but it was because I was going to nail them with my brad nail gun. If you are not going to use a nail gun I would use a stronger glue like epoxy.
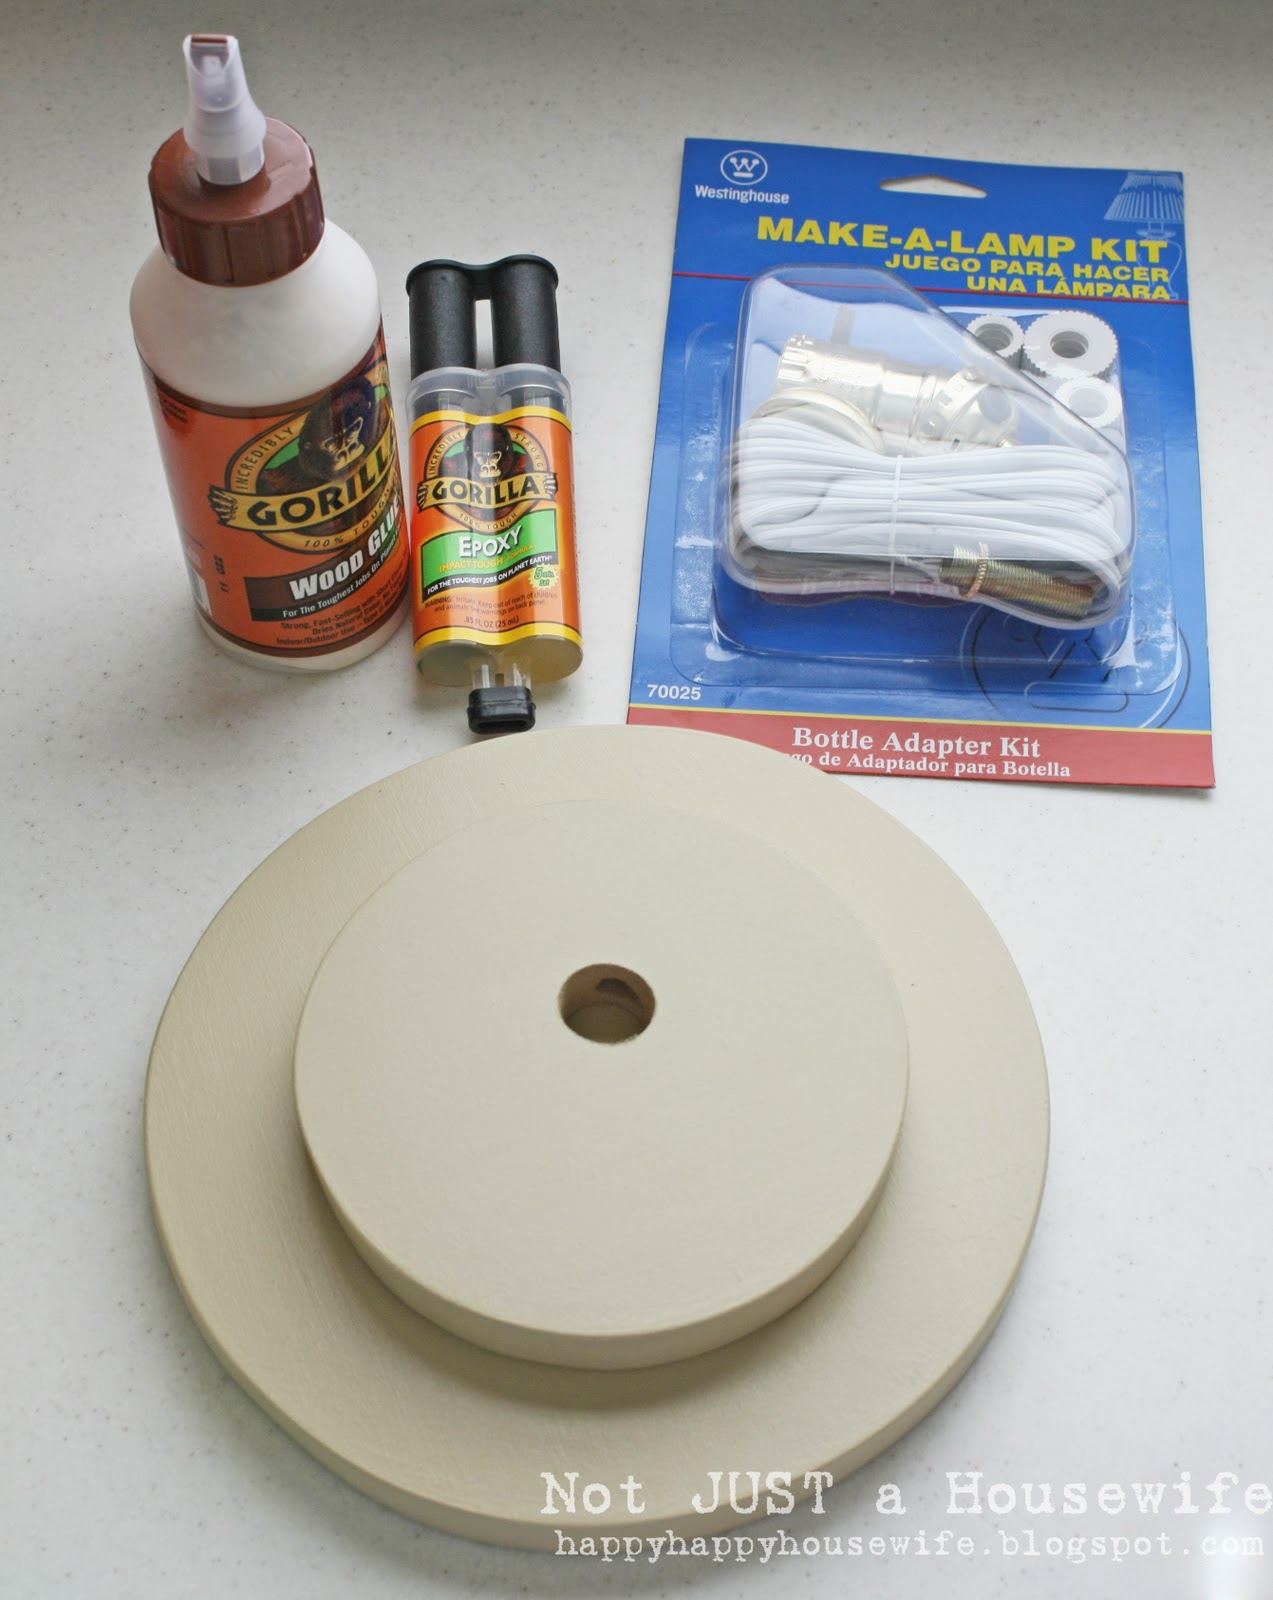

I threaded the cord from the $10 lamp kit through the holes.


Then I used conduit for added strength. I wish I would have done this with my first scrap wood lamp. I put the cord through it as well. This made it so I strung the circles onto the pipe (that the cord was running through). I hope that made sense. I was so excited for the fun assembly part I forgot to take pictures :)
Once all the circles were stacked up I added the rest of the lamp kit. They are so easy to put together. Easy. I promise.
P.S. Conduit is cheap and is meant for electrical! I cut mine with a hand saw but you might be able to get someone at Home Depot or Lowe's to cut it for you in the store.
Now for the shade!
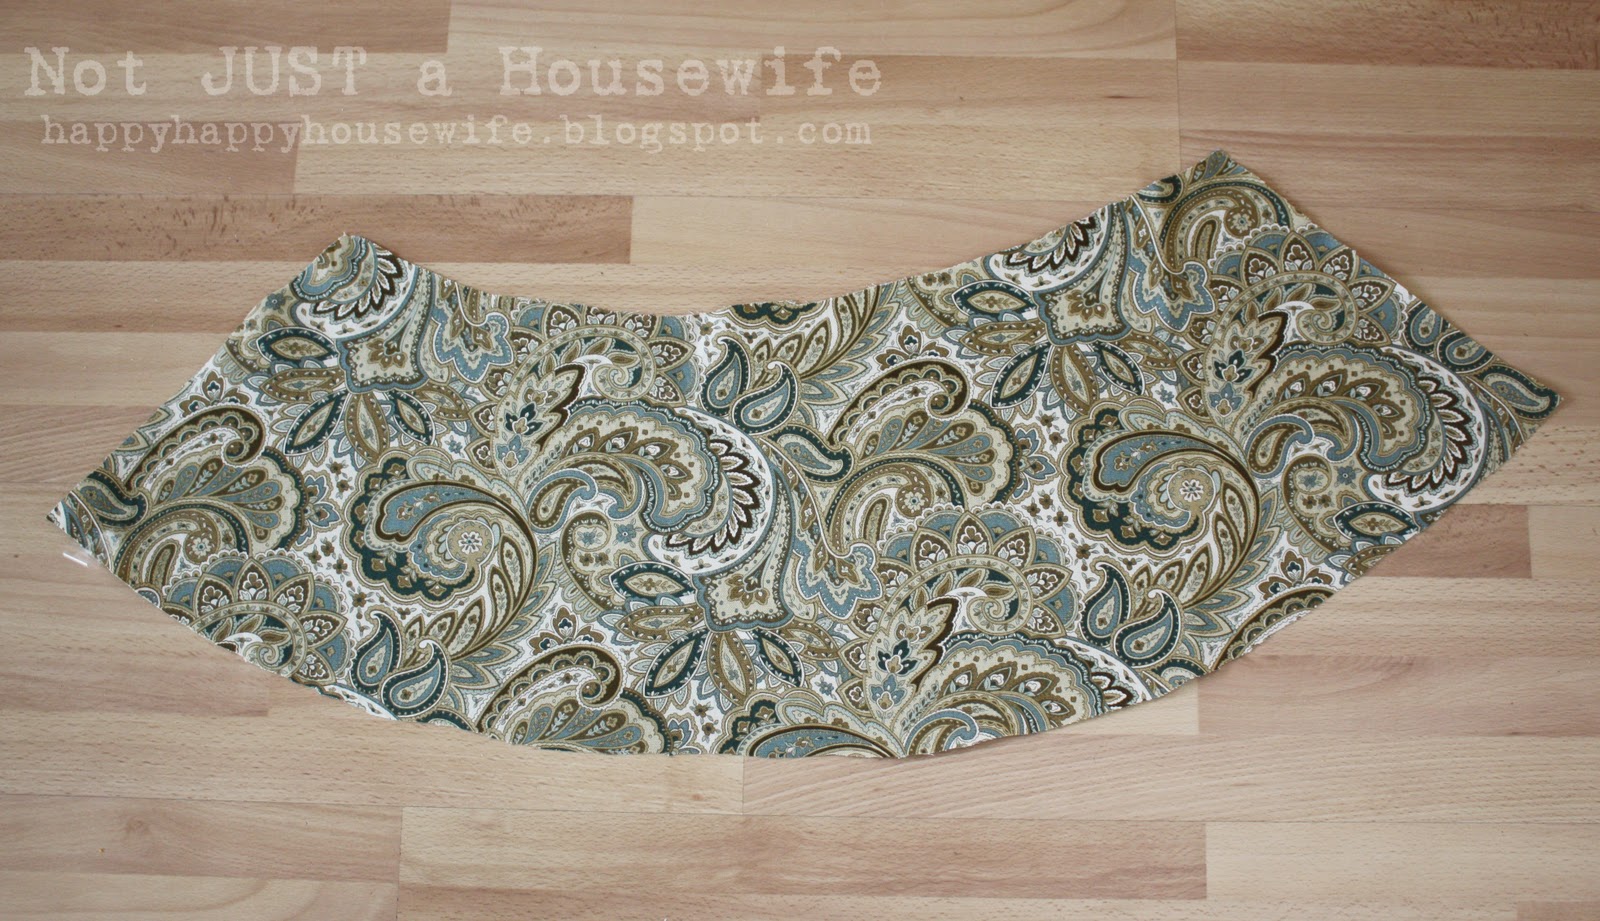
I didn't hand paint it this time. I wanted to show how you can use fabric instead. I used the shade and cut out this shape.
I sprayed the shade with spray adhesive first and then wrapped the fabric around the shade. This took longer for me than the actually building of the lamp! I kid you not. Me and material don't always see eye to eye. I struggled to get it to line up. But eventually I did. I glued one end down to the shade. The other end I glued a hem before gluing it down. The "hemmed" side covered the un-hemmed one.

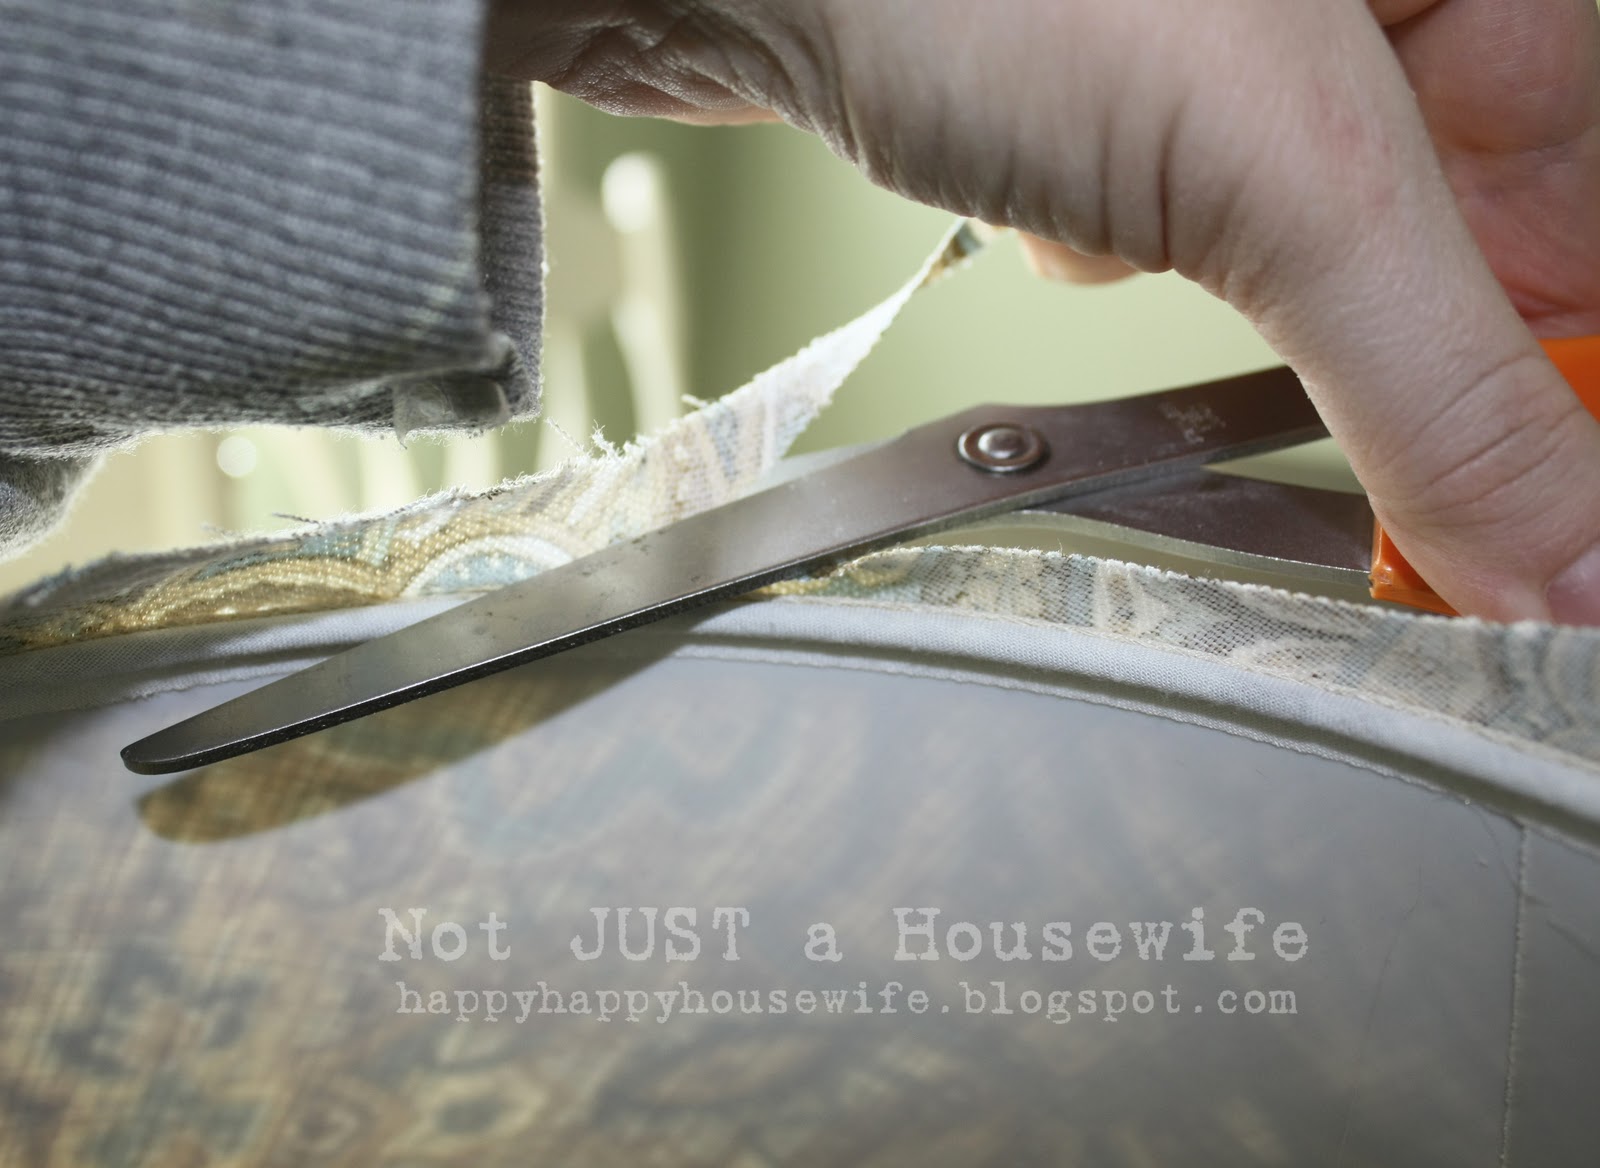
Then I trimmed off the extra material all around the top and the bottom. Like that awkward shot? I was trying to show you how and take a picture myself. No cute assistants to help this time!
Then I used the glue gun again to glue the fabric down on the inside of the shade. I don't have a picture of this but I glued cream ribbon on the edge of the fabric to cover up the raw edge.

And there you have it! My new lamp :)


Both of these lamps are rockstars! I am featuring them at somedaycrafts.blogspot.com tomorrow. Good luck on TV! You will do great!
love it! So creative!
That is beautiful! I love it!
Awesomeness! I love it!
this is too darn cool! I am totally in love with the fabric on the shade, too!
Fantastic! Can you tell me where you purchased the lamp shades? I bought 2 lamps at Marshalls the other day for 10$ a pop...but they didn't come with lamp shades. And all of the ones i find i don't really LOVE! so i would like to buy an inexpensive one and recover, like you have done!! THanks for the tutorial. You should really sell these lamps on ETSY!
I love this!! I can't wait to try my own!!
LOVE that fabric! I've always been a big fan of anything paisley. (Remeber my paisley pants in high school??)
love love love love love.
That is so cute...really!
This one looks great too! This smaller versions makes it seems a little more manageable to possibly tackle myself too. I agree with the poster above, these would be GREAT to sell!
Oooh I love it even more than I loved the square one! Beautiful!! :)
I LOVE THIS LAMP! I stumbled it I loved it so much!
Oh wow! This lamp is fabulous! I'm too scared to try to do lamps! Maybe it's time for me to get over it! ;)
Jo-Anna
you not scary for this just go and do it
Love this!
this is crazy cool! I gotta get me a jigsaw.....
Fantastic! I love how it turned out! I'm in the market for a DIY lamp. I'm also a sucker for paisley.
Stacy, I just can't tell you how much I enjoy your "scrap wood" lamps. My hubby and I are going to make the square-ish version from your tutorial for our son-to-be's nursery in the next few days, and I am so excited! Thanks for sharing!
I love this lamp. Its just the right mix of pretty and fun.
This is so cute! I LOVE powertools, so I might just have to try this out. I really liked the paisley material too. Okay, I should probably stop drooling over the lamp know...
Stacey I LOVED that last lamp and this one is even cuter! I am making some for my night stands soon =) I would be delighted if you would link this up to my VIP party this weekend. http://designergarden.blogspot.com/2011/03/guess-what-were-back-online-for-weekly.html
Sommer @ Designer Garden
this is such an adorable idea! and your lamp is super cute!!
OMG this is amazing! Way to knock it out of the park. I am going to have to remember this project idea for the future.
http://itsybitsypaper.blogspot.com
This is fantastic! My kind of funky and unpredictable!!
I love it. Great job!
I love this! I featured it at my blog today, please feel free to check it out!
Jen
http://jen-simplyliving.blogspot.com/2011/03/stuff-i-like-sunday-6.html
DARLING, funky, different, so darn cute. LOVE IT! winks-jen
I am so going to try to make this lamp when I have spare time. I am a new follower. Please follow back. Thanks
http://www.womanofhopeandprayer.blogspot.com/
This lamp is so cool! Love how you made it --- just darling!
I have been on the prowl for new lamps in the living room. I think I have just solved my problem. Thank you so much. It is georgeous!
This is way cool! Love it!
Love the lamp! Where did you pick up the beautiful material? I have been looking for an awesome paisley like this and cannot find one in my local store.
tats a very cool one of a kind lamp.. love that fabric.
I love this! It turned out so cute!!
I love the fabric on the lamp shades! Where did you find it?
This is SO CUTE!!! Saw it over at "Simply Living". I'll be following you now.
I've put together a round up of pretty lamp projects on Craft Gossip today and included your post. :) You can see it here
http://homeandgarden.craftgossip.com/6-pretty-lamp-redos/
If you would like to share the Craft Gossip love and show your visitors you've been featured, you can grab a button here!
http://homeandgarden.craftgossip.com/grab-a-craft-gossip-button/
I found your amazing lamp at Beneath My Heart. So fun and creative. Great job! A new follower here. Can't wait to see more!
Very cool! Big thumbs up!
happy crafting!
Linda
I LOVE this lamp. I love Paisley. If you ever decide it needs a new home....just sayin'....I'd love it and treasure it. :)
So cute! I may have to break out the scraps and jigsaw to make one for me! I'm trying to place that fabric..help? What manufacturer or name?
I've been wanting to cover a lamp shade that I have, but I wasn't sure the best way to cut the fabric. Thanks to seeing the way you did it, now I'll know the best way. I love lamps, and I love lamp makeovers!
Love it! I had a go at making this too and your tutorial is amazingly easy to follow. Love your tips for the cable too. I wish I'd not put gloss paint on mine as it's too thick and shiny, I much prefer the effect of yours but it's great anyway.
Thanks
Wonderful! Can you please share where you purchased the fabric? I have been looking for a print like that!
Love the lamp and your blog!! Great ideas and beautiful things!!