
I LOVE handmade ornaments! There's no better way to save money and customize your tree than with ornaments you have made. If you make them with found items or things you have already at home, even better. It is not only a beautiful way to decorate your tree, it is a fun activity to get into the Christmas mood! These ideas I am sharing today all use one of my favorite crafting tools, a heat gun!
This post is sponsored by HomeRight but all ideas and opinions are 100% my own :)
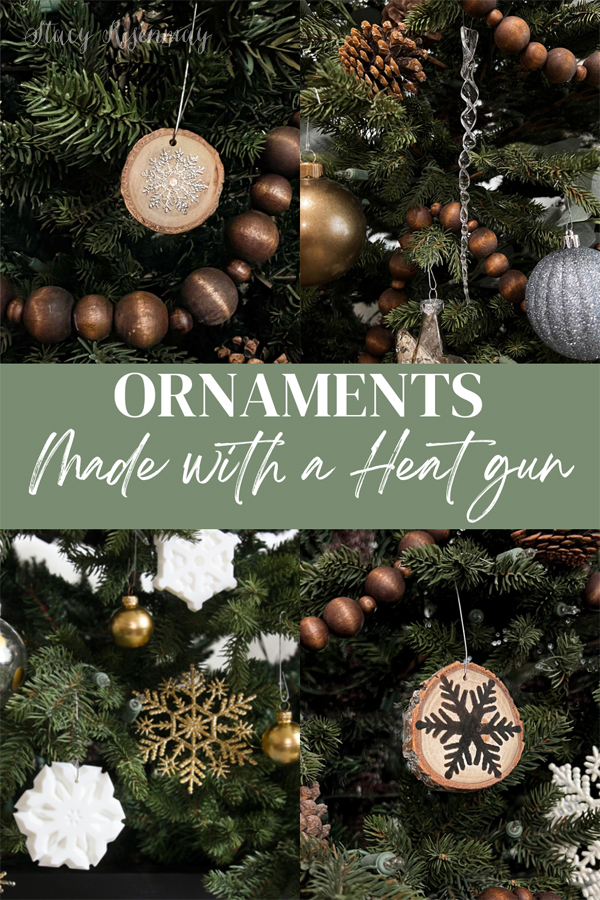
Ornaments Made With A Heat Gun
A Heat gun is a handy tool to have if you are a crafter and/or a DIYer. I have shared many projects over the years where I have used them for all sorts of things. These are my favorite ornaments that I have made using a heat gun!
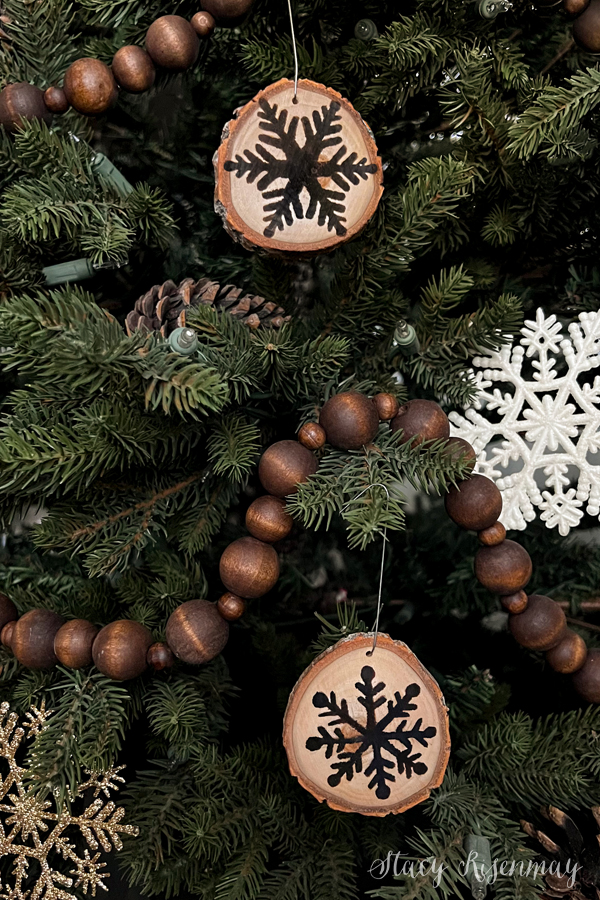
Wood Burning With A Scortch Pen
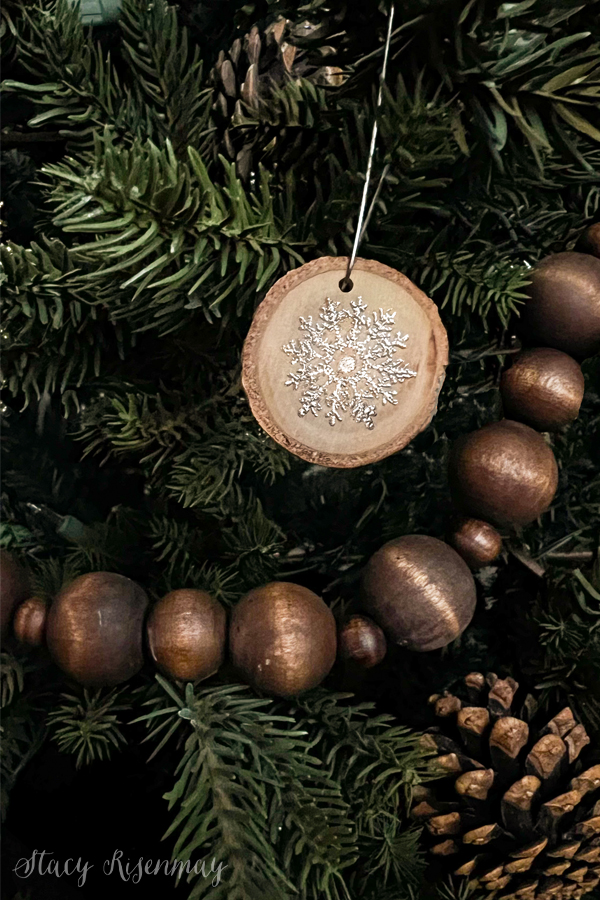
Last year I made garden markers using this method and ever since I have wanted to try making more things with the scorch pen. Wood slice ornaments seemed like the perfect way!
Supplies:
Stencils or Vinyl
I cut my own wood slices with the miter saw with branches from my yard, but if you aren't comfortable using power tools, you can easily buy them at craft stores or on Amazon.
Using the scorch pen, add your design. If I am drawing it on, I like to draw it with pencil first. Draw it on lightly and then you can go over it with the wood burning pen.
If you are using a stencil, it is very important to prep your pen properly since they have a tendency to bleed. You will need to push down on the pen tip to get the ink to flow to the tip. At first, it will come out heavily. I use a scrap piece of paper or wood to write on until the ink comes out only a little at a time. Now you are ready to fill in your stencil design.
*If you do experience bleeding, it is easier to wood burn it with the heat gun and then sand it off than it is to try to sand or clean off the wet ink. Once burned, it sands off fairly easily with 120 grit sandpaper. Then you don't waste a wood slice!

Then the magic happens! Place your heat gun over the wood slice and watch the heat transform and burn the design into the wood! It is so fun to watch! I have a video below so you can watch it happen.
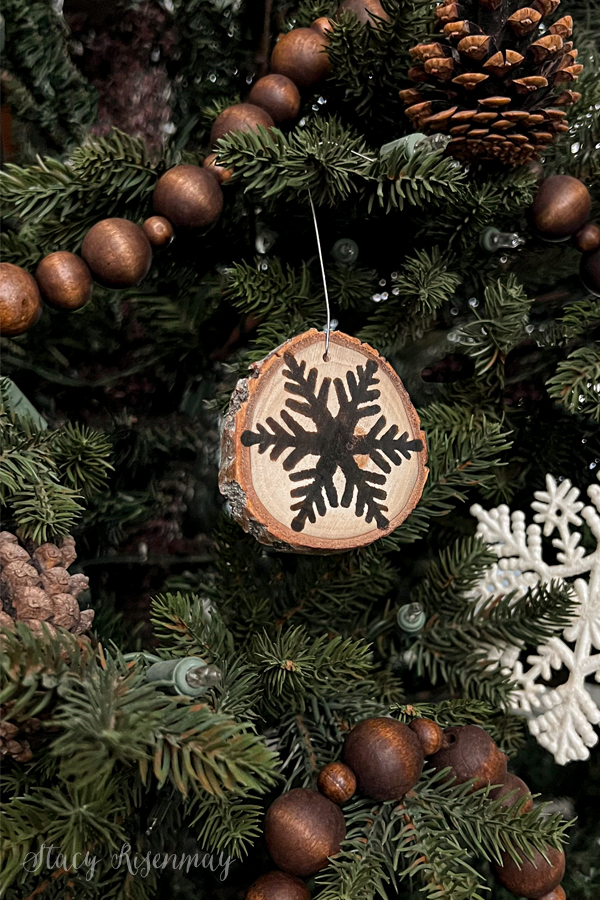
What designs or words would you wood burn into your ornaments?
Heat Embossed Ornaments
Last year I embossed some holiday cards and gift tags. I had done embossing with my mom when I was growing up and had forgotten just how much fun it was to do! Ever since, I have wanted an excuse to to put my embossing powder and these cute snowflake stamps to use again. So I decided to try heat embossing on wood!
Supplies:
Embossing Powder (Gold, Silver, White)
I cut smaller wood slices. I made them tiny because it is good to have a variety of sized ornaments on your tree and also because the snowflake stamps I have are small.
Use an embossing stamp pad to add the ink to the stamp and then press it hard onto the wood slice.
Add your choice of colored embossing powder. I chose silver and gold. Dump the excess powder back into the jar.
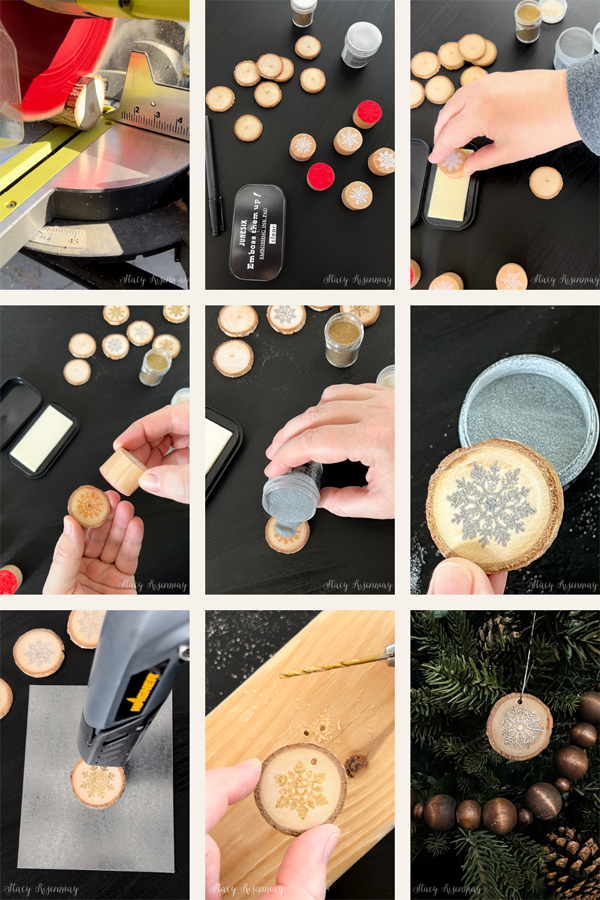
Use the heat gun to melt the embossing powder. It is so fun to watch it turn shiny! I used the Wagner HT400 heat gun. It is very affordable and small which makes it perfect for crafting.
Drill a small hole in the wood so you can hang it on your tree.
Here is a video so you can better see the process of the embossing powder heating up.
Here are some other ornaments I have made in the past using a heat gun.
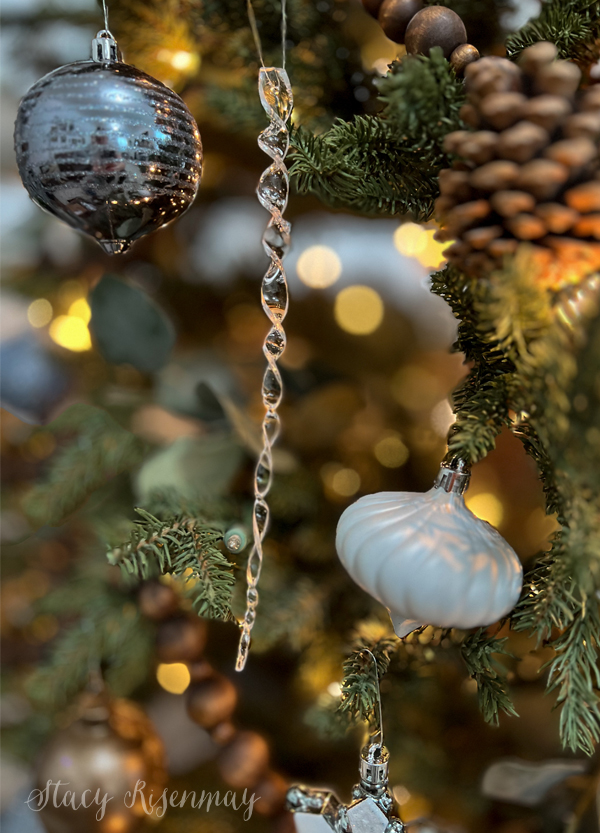
DIY Icicle Ornaments
I first shared these icicle ornaments back in 2014. I made a bunch more last year since my theme for my tree was winter wonderland. It was oddly satisfying to heat and twist the plexiglass!
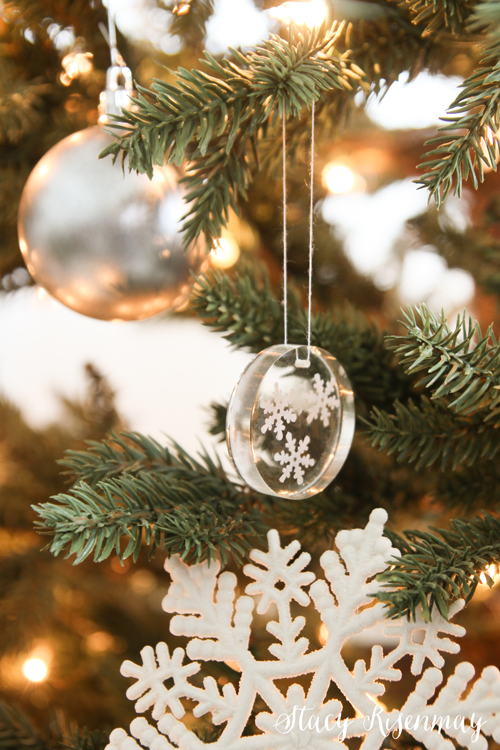
Resin Snowflake Ornaments
Resin is so fun to work with! I create two types of resin ornaments several years ago. I accidentally bought resin that turns white. It is a casting resin. But instead of being mad at my mistake, I had the idea to use them to make snowflake ornaments! I had a silicone mold already and they turned out great.
The other kind of resin ornament used snowflake confetti. I added clear resin, then added some confetti, and then another layer of resin. The heat hun is great for removing the air bubbles!
Do you enjoy making homemade ornaments? What have been some of your favorites you have made over the years? I would love to hear about them. Please share in the comments below :)


I love the ornaments. Such talent!