• Skip to primary navigation
  • Skip to main content
  • Skip to primary sidebar
  • Skip to footer
Stacy Risenmay
  • Home
  • About me
  • PRESS
  • Contact Me
  • My Book
    • Facebook
    • Instagram
    • Pinterest
    • Twitter
menu icon
go to homepage
subscribe
search icon
Homepage link
  • Home
  • About me
  • Project Gallery
  • Our House
  • PRESS
  • Contact Me
  • Privacy Policy
    • Facebook
    • Instagram
    • Pinterest
    • Twitter
  • ×

    Retexturing My Kitchen Walls

    By Stacy 1 Comment

    The previous owners did some renovations and most of the things they did I was grateful for like the fire pit, new driveway, and adding the plumbing for a downstairs bathroom. But they retextured some of the walls and I wasn't a fan of how deep the texturing was or the fact that it was so very different than the original texture that was in most of the house. It bugged me when we moved in but I was in a hurry to get all the walls painted and the floors refinished so we could actually move in and live. I said "I'll do it one day....." Well that day is now!

    I waited until I was ready to repaint. The green walls have had a good run. They have been green since we moved in which was almost 8 years ago. I was ready for a change.

    I posted about it on instagram and many of you said you have older homes with the same problem so I decided to make it a post for those of you in my same boat.

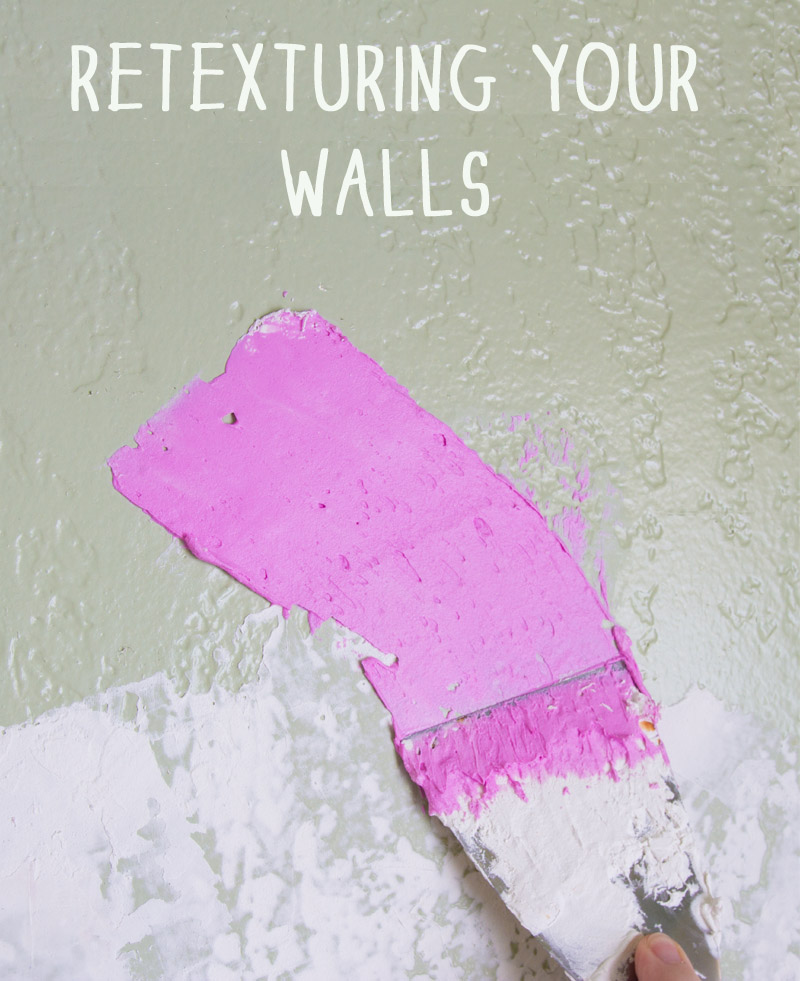
    Since our walls had areas that were recessed, I wanted to fill those in. I applied some joint compound with a putty knife.

    applying joint compound


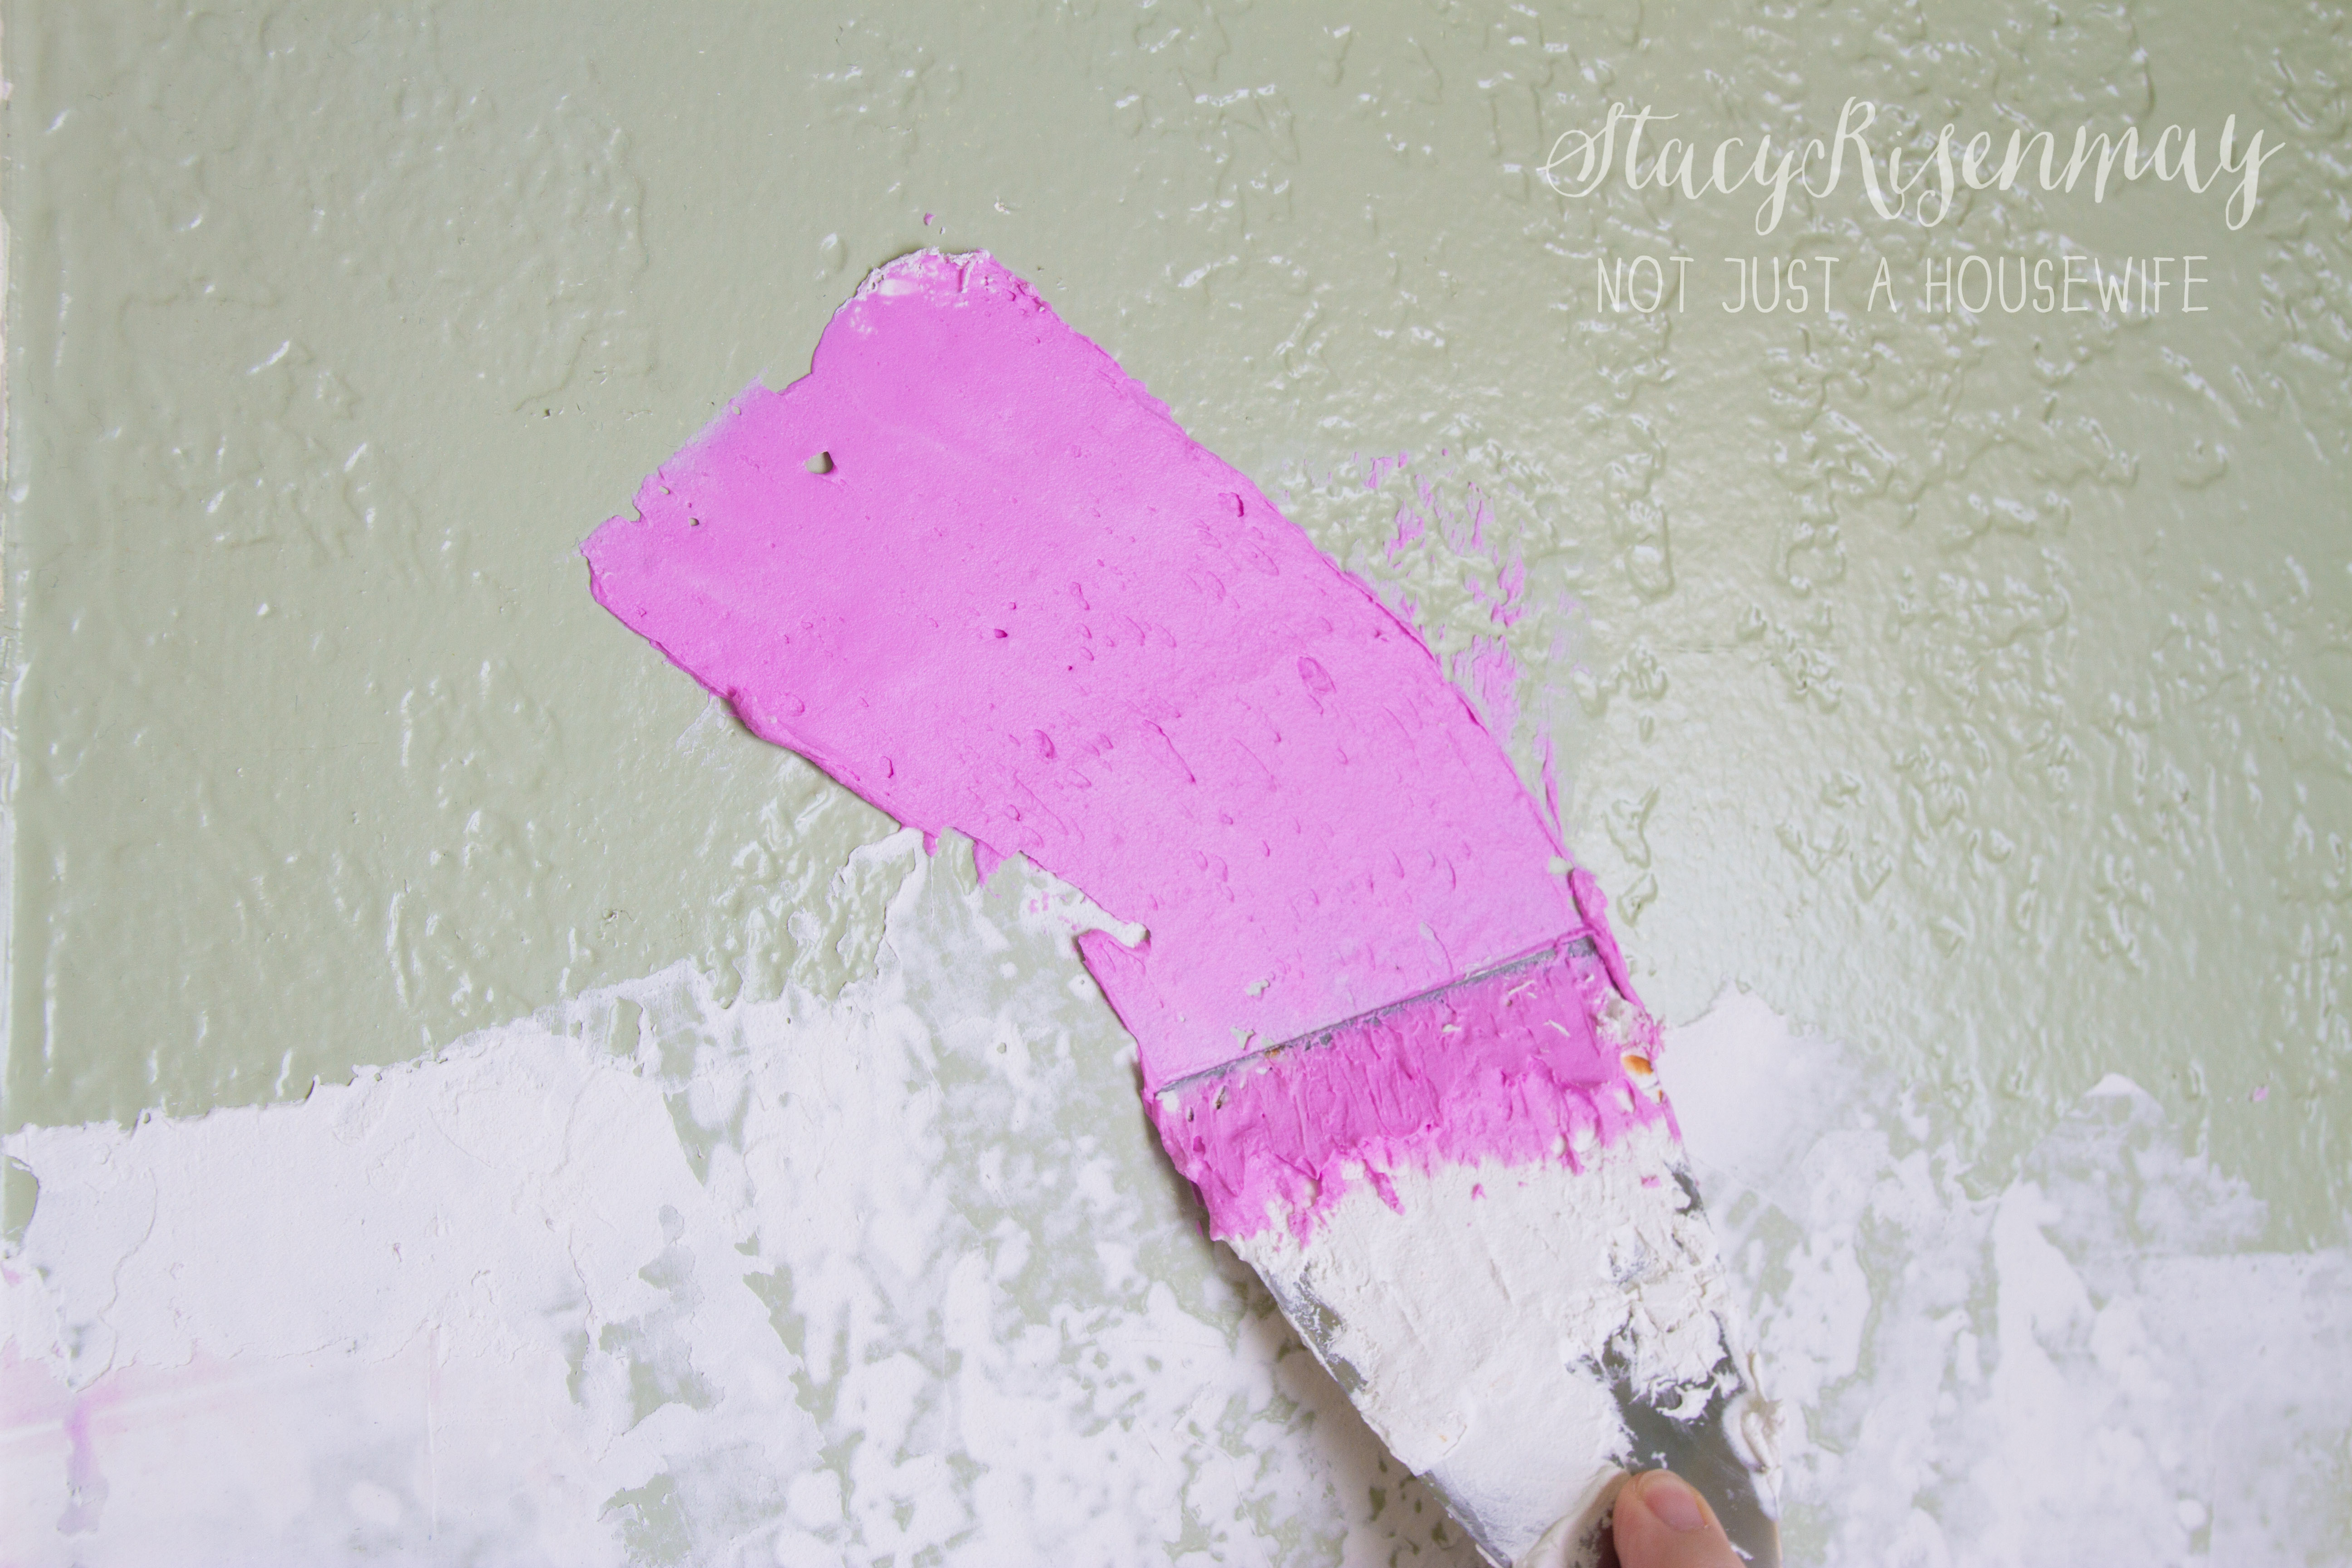
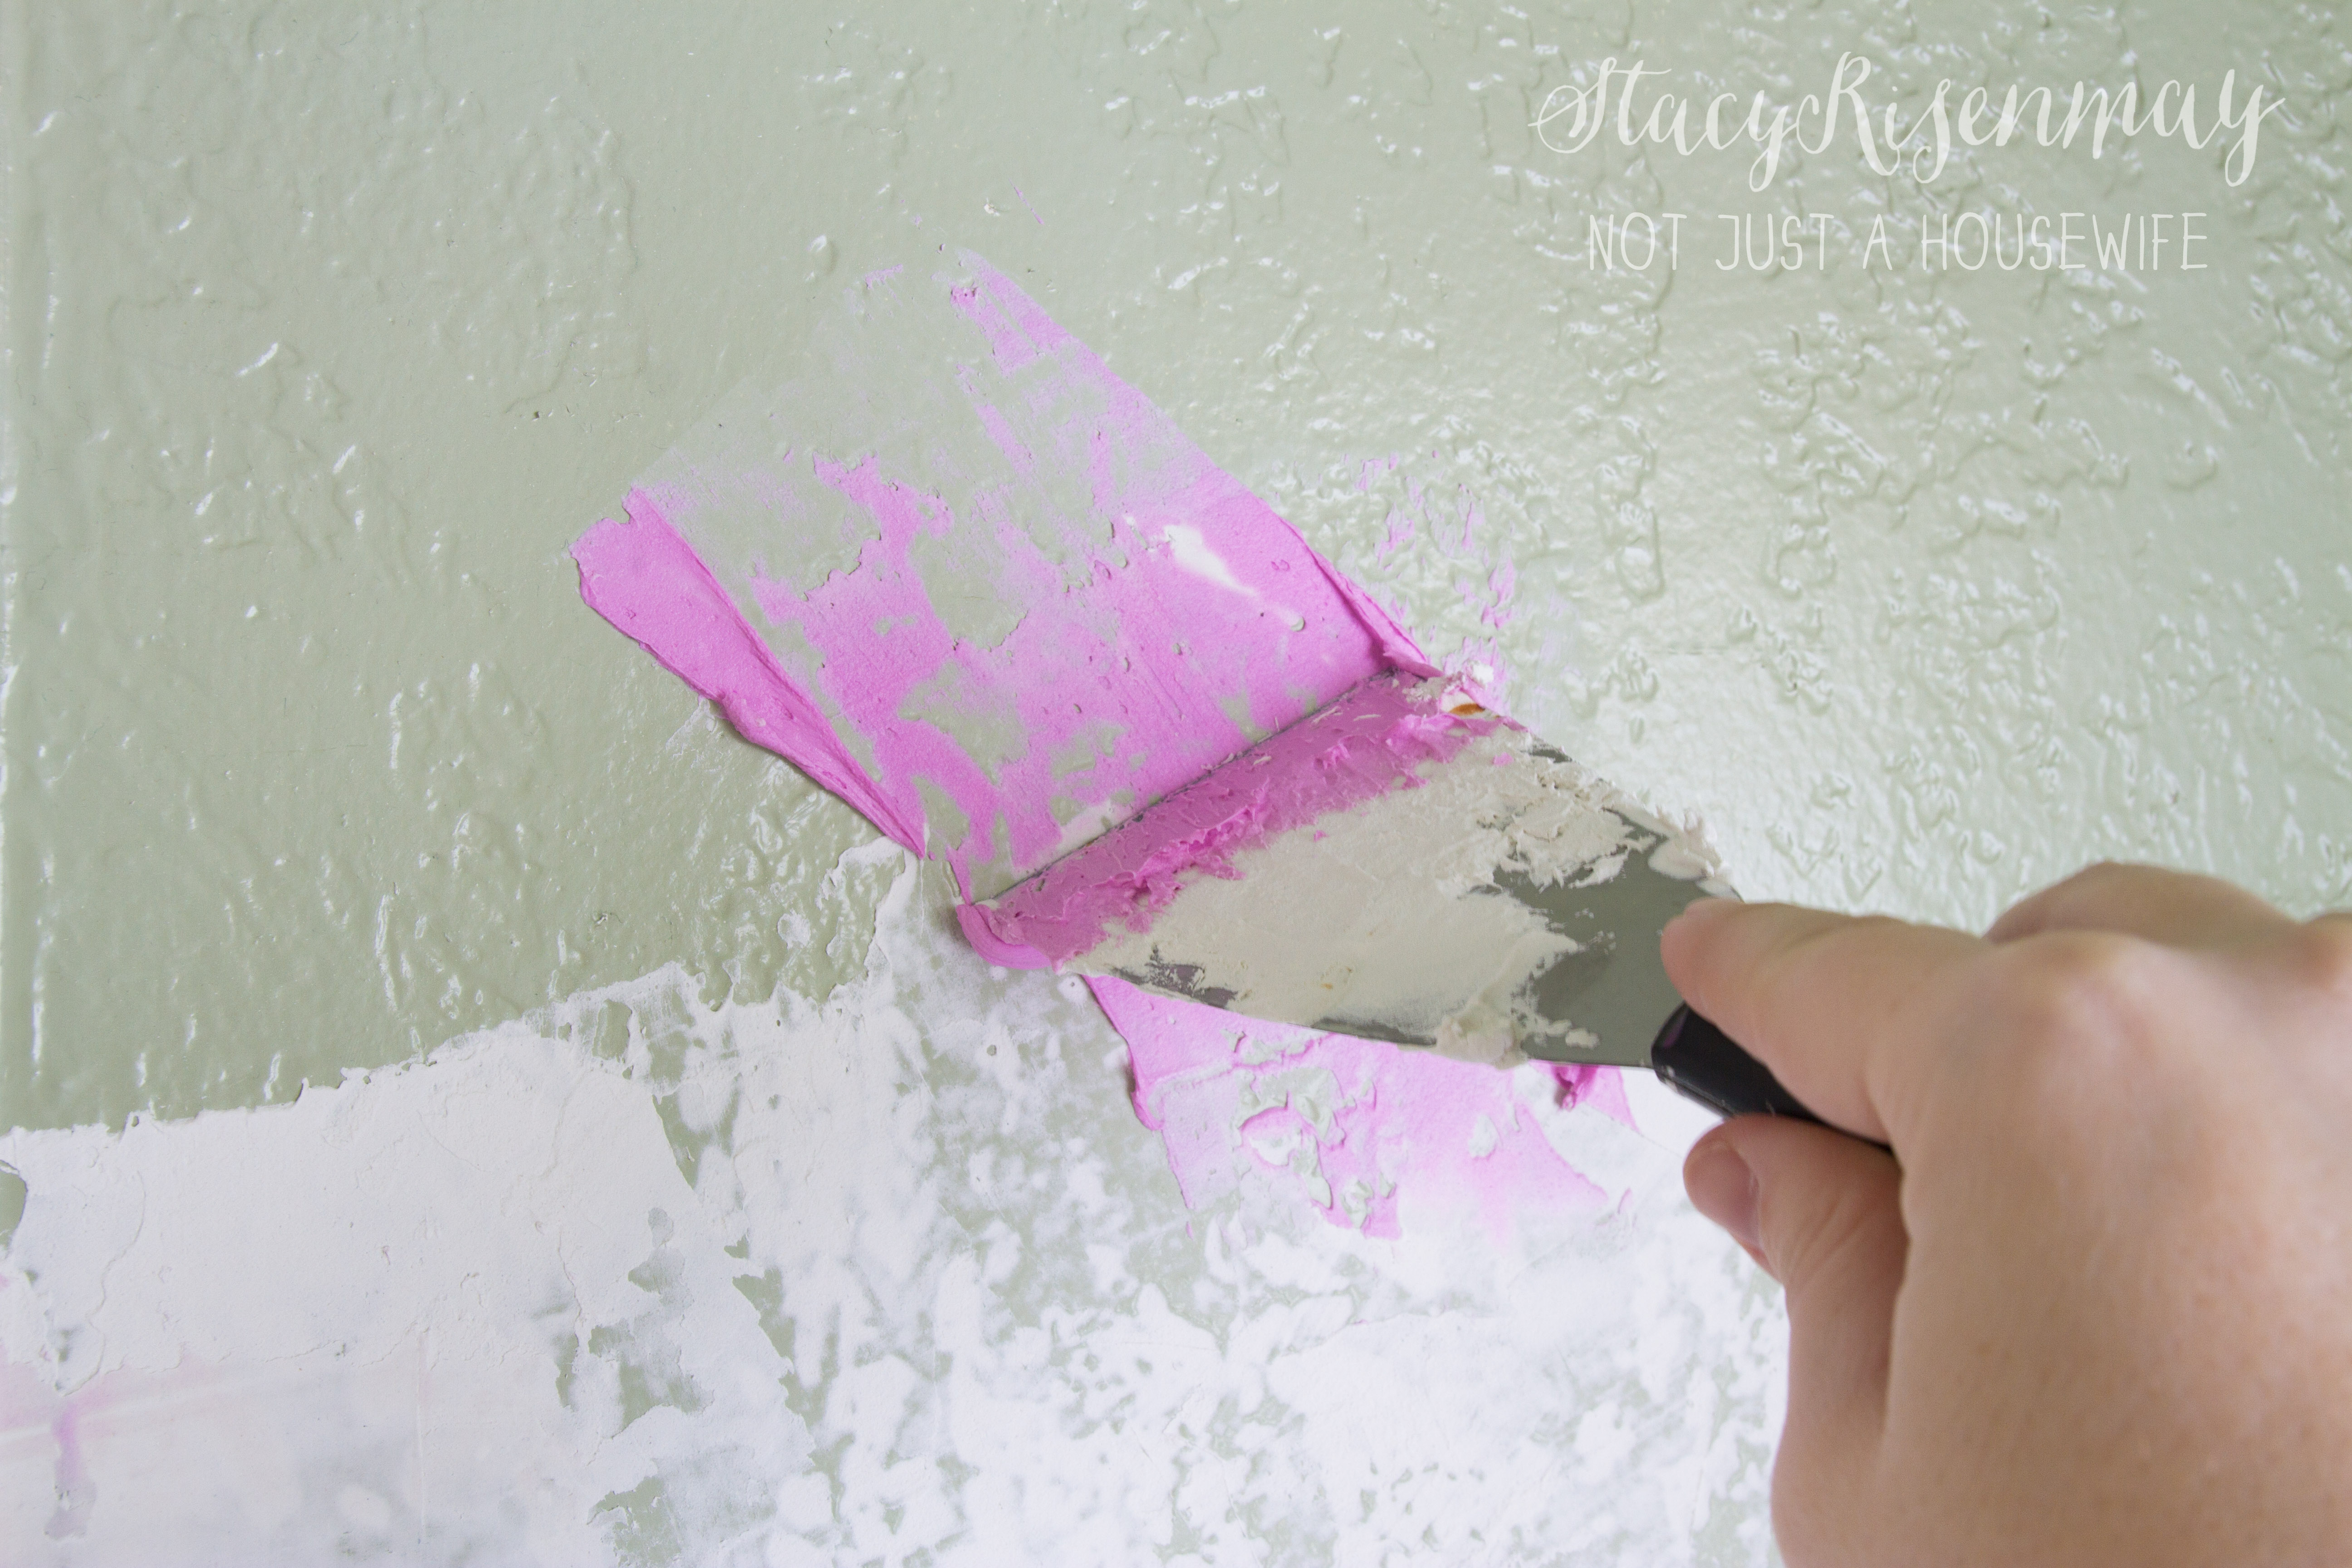
    Then I scraped most of it off by holding the putty knife on a 45 degree angle.

    joint compound

    Here is a super quick video showing me applying the compound.


    It went pretty quickly. I will also be doing the ceiling before I go ahead and paint. The ceiling will still be checker board.....it just won't be the colors it is now :)


    kitchen wall retextured_edited-2

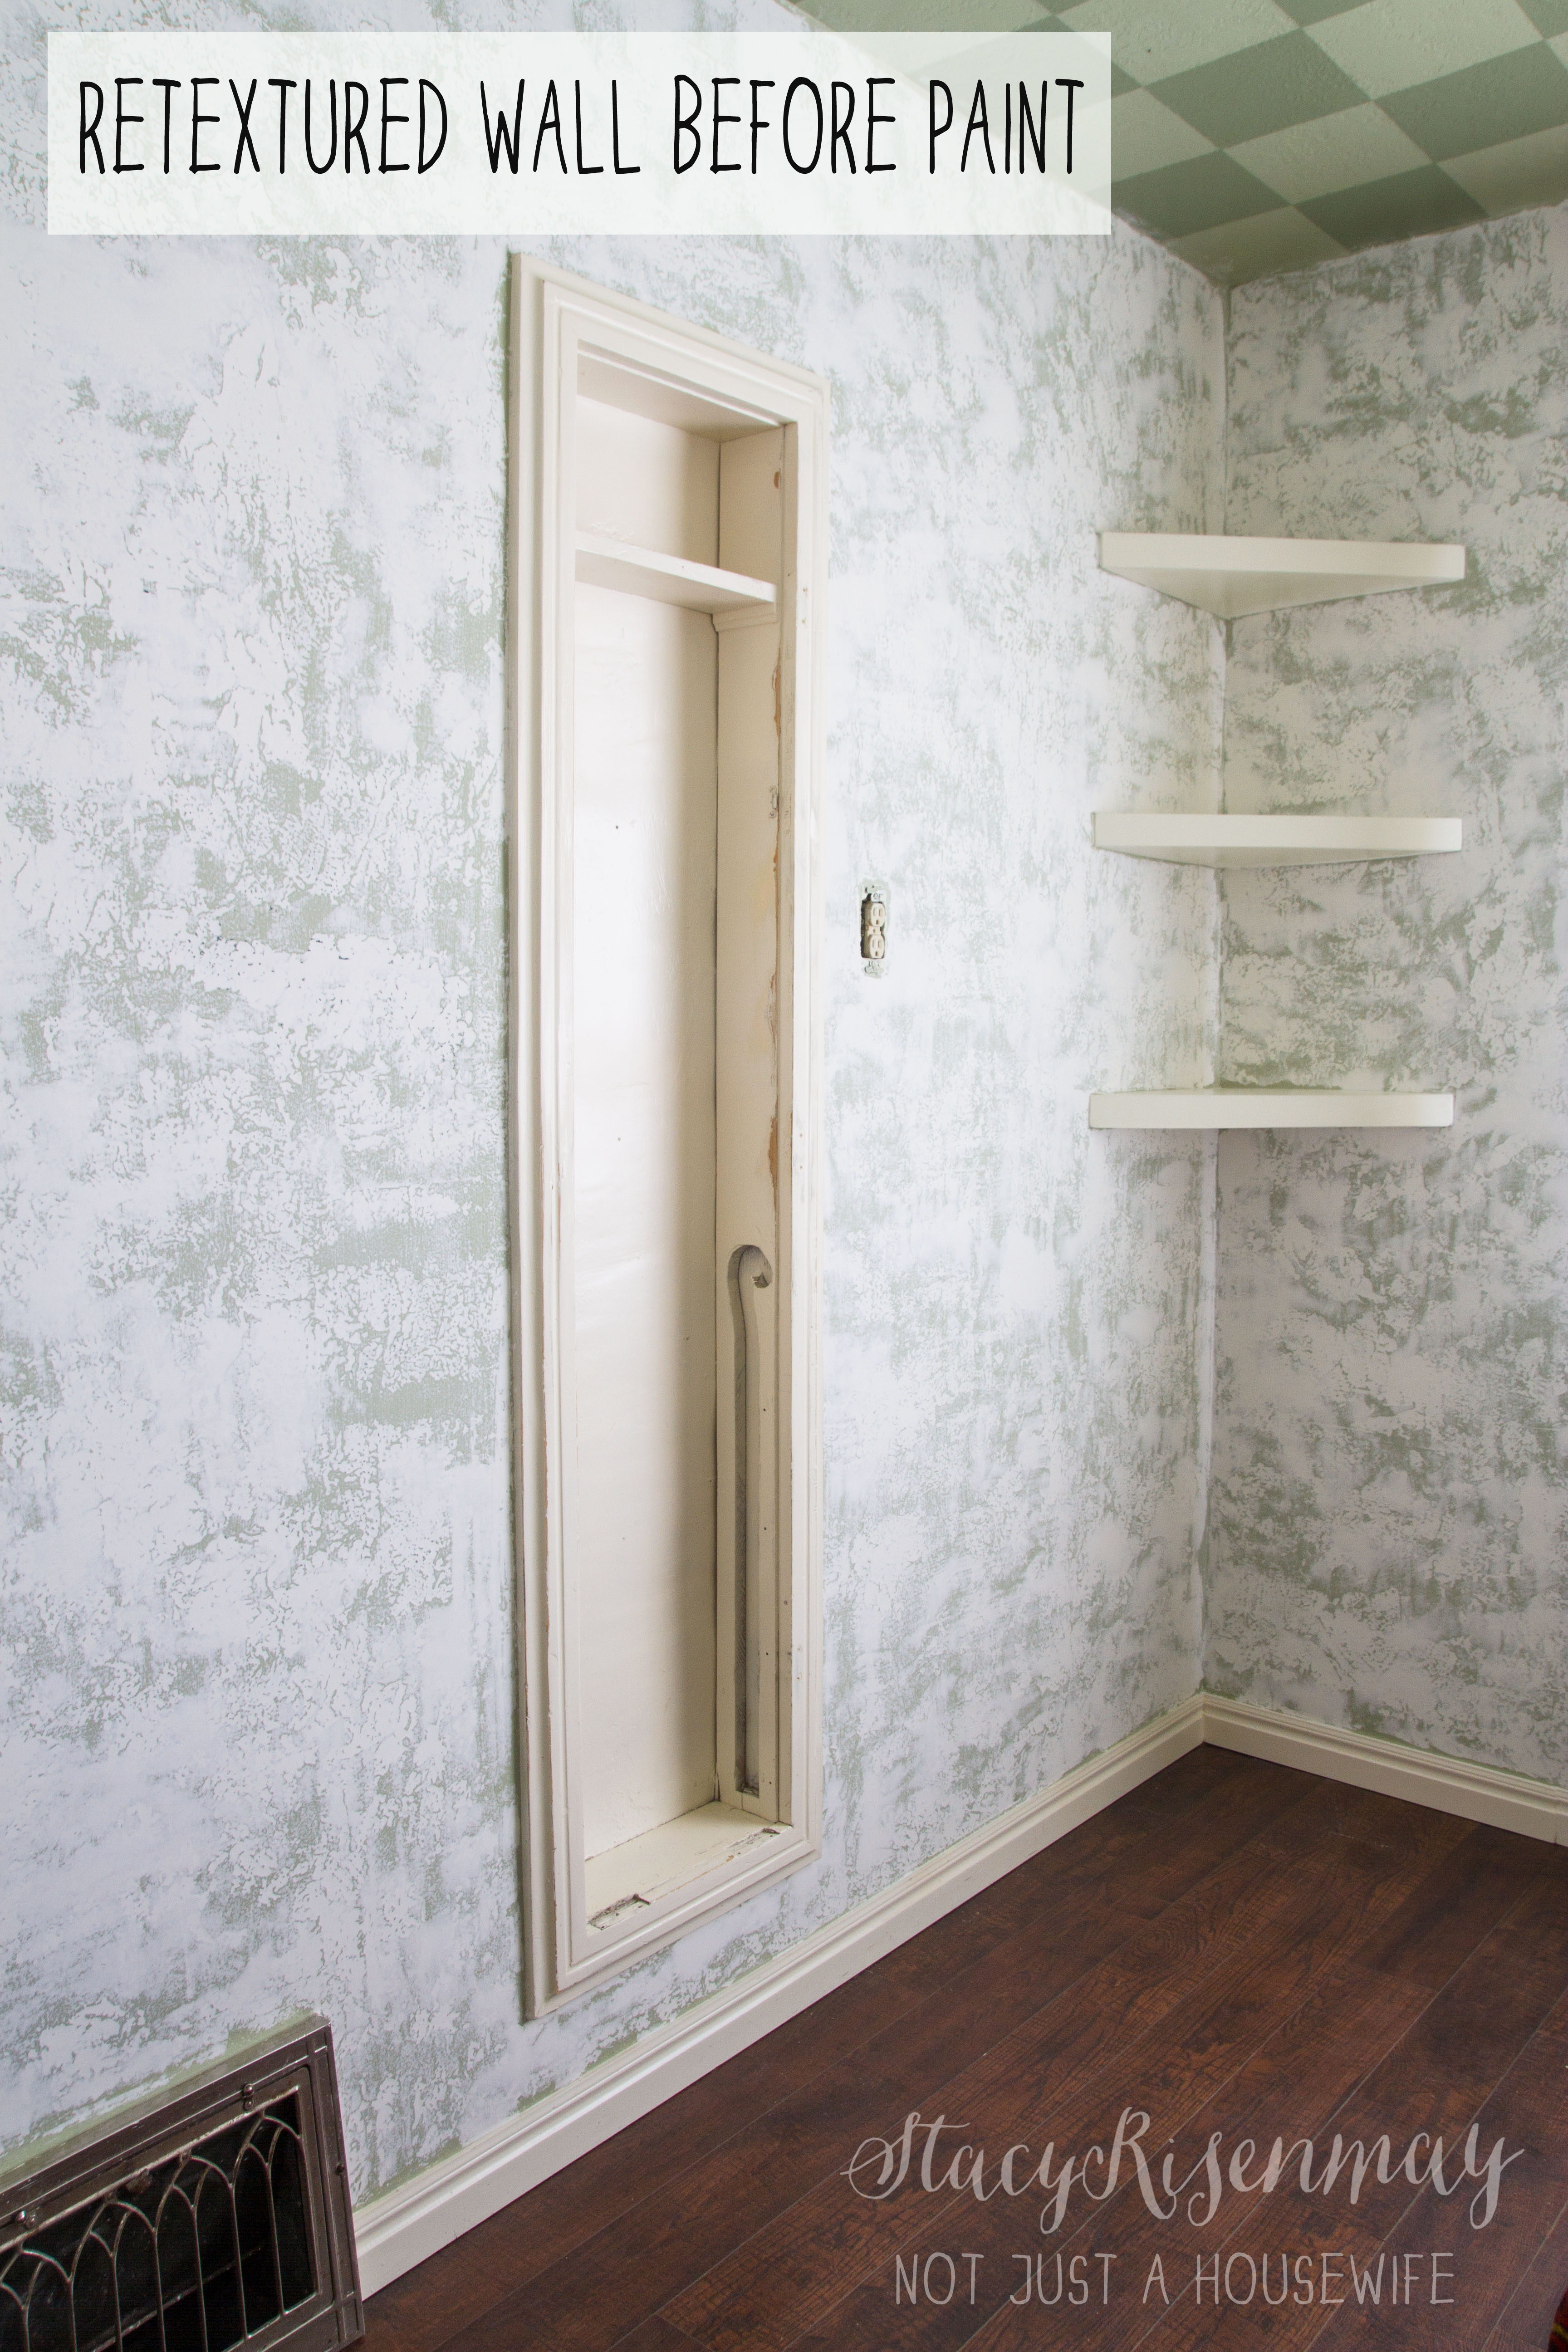
    After it dried, I lightly sanded it with a 220 grit sand paper. I can't wait to prime and paint!

    after the joint compound was sanded

    retexturing your walls


    I am planning on finishing the dining room (primer and paint) before jumping in and doing the same with the kitchen area. That way I can move appliances into the dining room area. Hopefully it will be retextured and painted soon. I see a lot of take out in our future this week :)


    You will also like:

    • Summer So Far...Summer So Far...
    • Rainbow GardenRainbow Garden
    • Crushing On: Pedestal & Footed PlantersCrushing On: Pedestal & Footed Planters
    • My 5 minute $1 Christmas WreathMy 5 minute $1 Christmas Wreath
    • Meet The Blogger {Simply Kierste}Meet The Blogger {Simply Kierste}
    • Glass Etched VaseGlass Etched Vase
    • Removing Labels From Crates + Giveaway!Removing Labels From Crates + Giveaway!
    • Easy DIY Terrarium LampEasy DIY Terrarium Lamp

    « So this just happened....
    Dream Bathroom {He Said She Said} »

    Filed Under: DIY & Tutorials, videos 1 Comment

    Subscribe

    for your weekly DIY fix.

    Reader Interactions

    Comments

    1. brenda

      February 03, 2015 at 1:54 pm

      what a job. I am sure you are thankful you are physically and mentally able to do such an undertaking. wow

      Reply

    Comment Below! Cancel reply

    Your email address will not be published. Required fields are marked *

    This site uses Akismet to reduce spam. Learn how your comment data is processed.

    Primary Sidebar

    stacyHey! I'm Stacy and am a DIY addict. I love to get my hands dirty, whether it's sawdust, paint, or dirt. My goal is to help YOU learn to fix up your home and yard. No matter the style or size, I think everyone should love their home. And it doesn't takes a big budget to get there. Let's DIY together!

    Subscribe to My Blog!

    Search this site

    categories


    Subscribe

    Footer

    Welcome! I'm sharing our adventures as we fix up our 1938 cottage. Whether it is big or small, I think everyone should love their home and I don't think it takes a lot of money to make a space your own

    About Stacy

    • Facebook
    • Instagram
    • Pinterest
    • Twitter

    My Favorites

    copyright

    All images and content are copyrighted via Stacy Risenmay unless otherwise stated. If you'd like to share my work, please link back to this blog.
    Thank you for visiting!


    Footer

    ↑ back to top

    About

    • Meet Stacy
    • Privacy Policy
    • Contact

    Categories 

    • Home Decor
    • Outdoor Projects & Gardening
    • DIY & Tutorials
    • Kid Activities
    • Recipes
    • Travel
    • Cleaning
    • Houseplants
    • Staining
    • Painting
    • Power Tools
    • Holiday Ideas

    Newsletter

    • Sign Up! for emails and updates

    As an Amazon Associate I earn from qualifying purchases.

    Copyright © 2020 Brunch Pro on the Brunch Pro Theme


    Privacy Policy
    Welcome! Thanks for visiting.
    Hi! I'm Stacy and I want to help YOU become a DIY rockstar! Sign up for my email list so each project, tip, and trick will go directly to your inbox :)
    Your information will *never* be shared or sold to a 3rd party. Pinky promise :)
    Welcome!
    Hi! I'm Stacy and I blog about fixing up our 1938 cottage. Join the thousand of others who get my posts sent to their inbox for FREE!
    Your information will *never* be shared or sold to a 3rd party.