
Let's chat about painted floors. Painted wood floors to be exact. I don't have to be a mind reader to know that some of you are very against it. Heck, I am against it in a lot of cases. But if you have floors that are not in good shape, if you know you will be replacing them down the road, why not have fun and paint them? That is what I did and I have loved it!

I have really loved partnering with ScotchBlue™ and being able to share projects with you that are all about PATTERN!
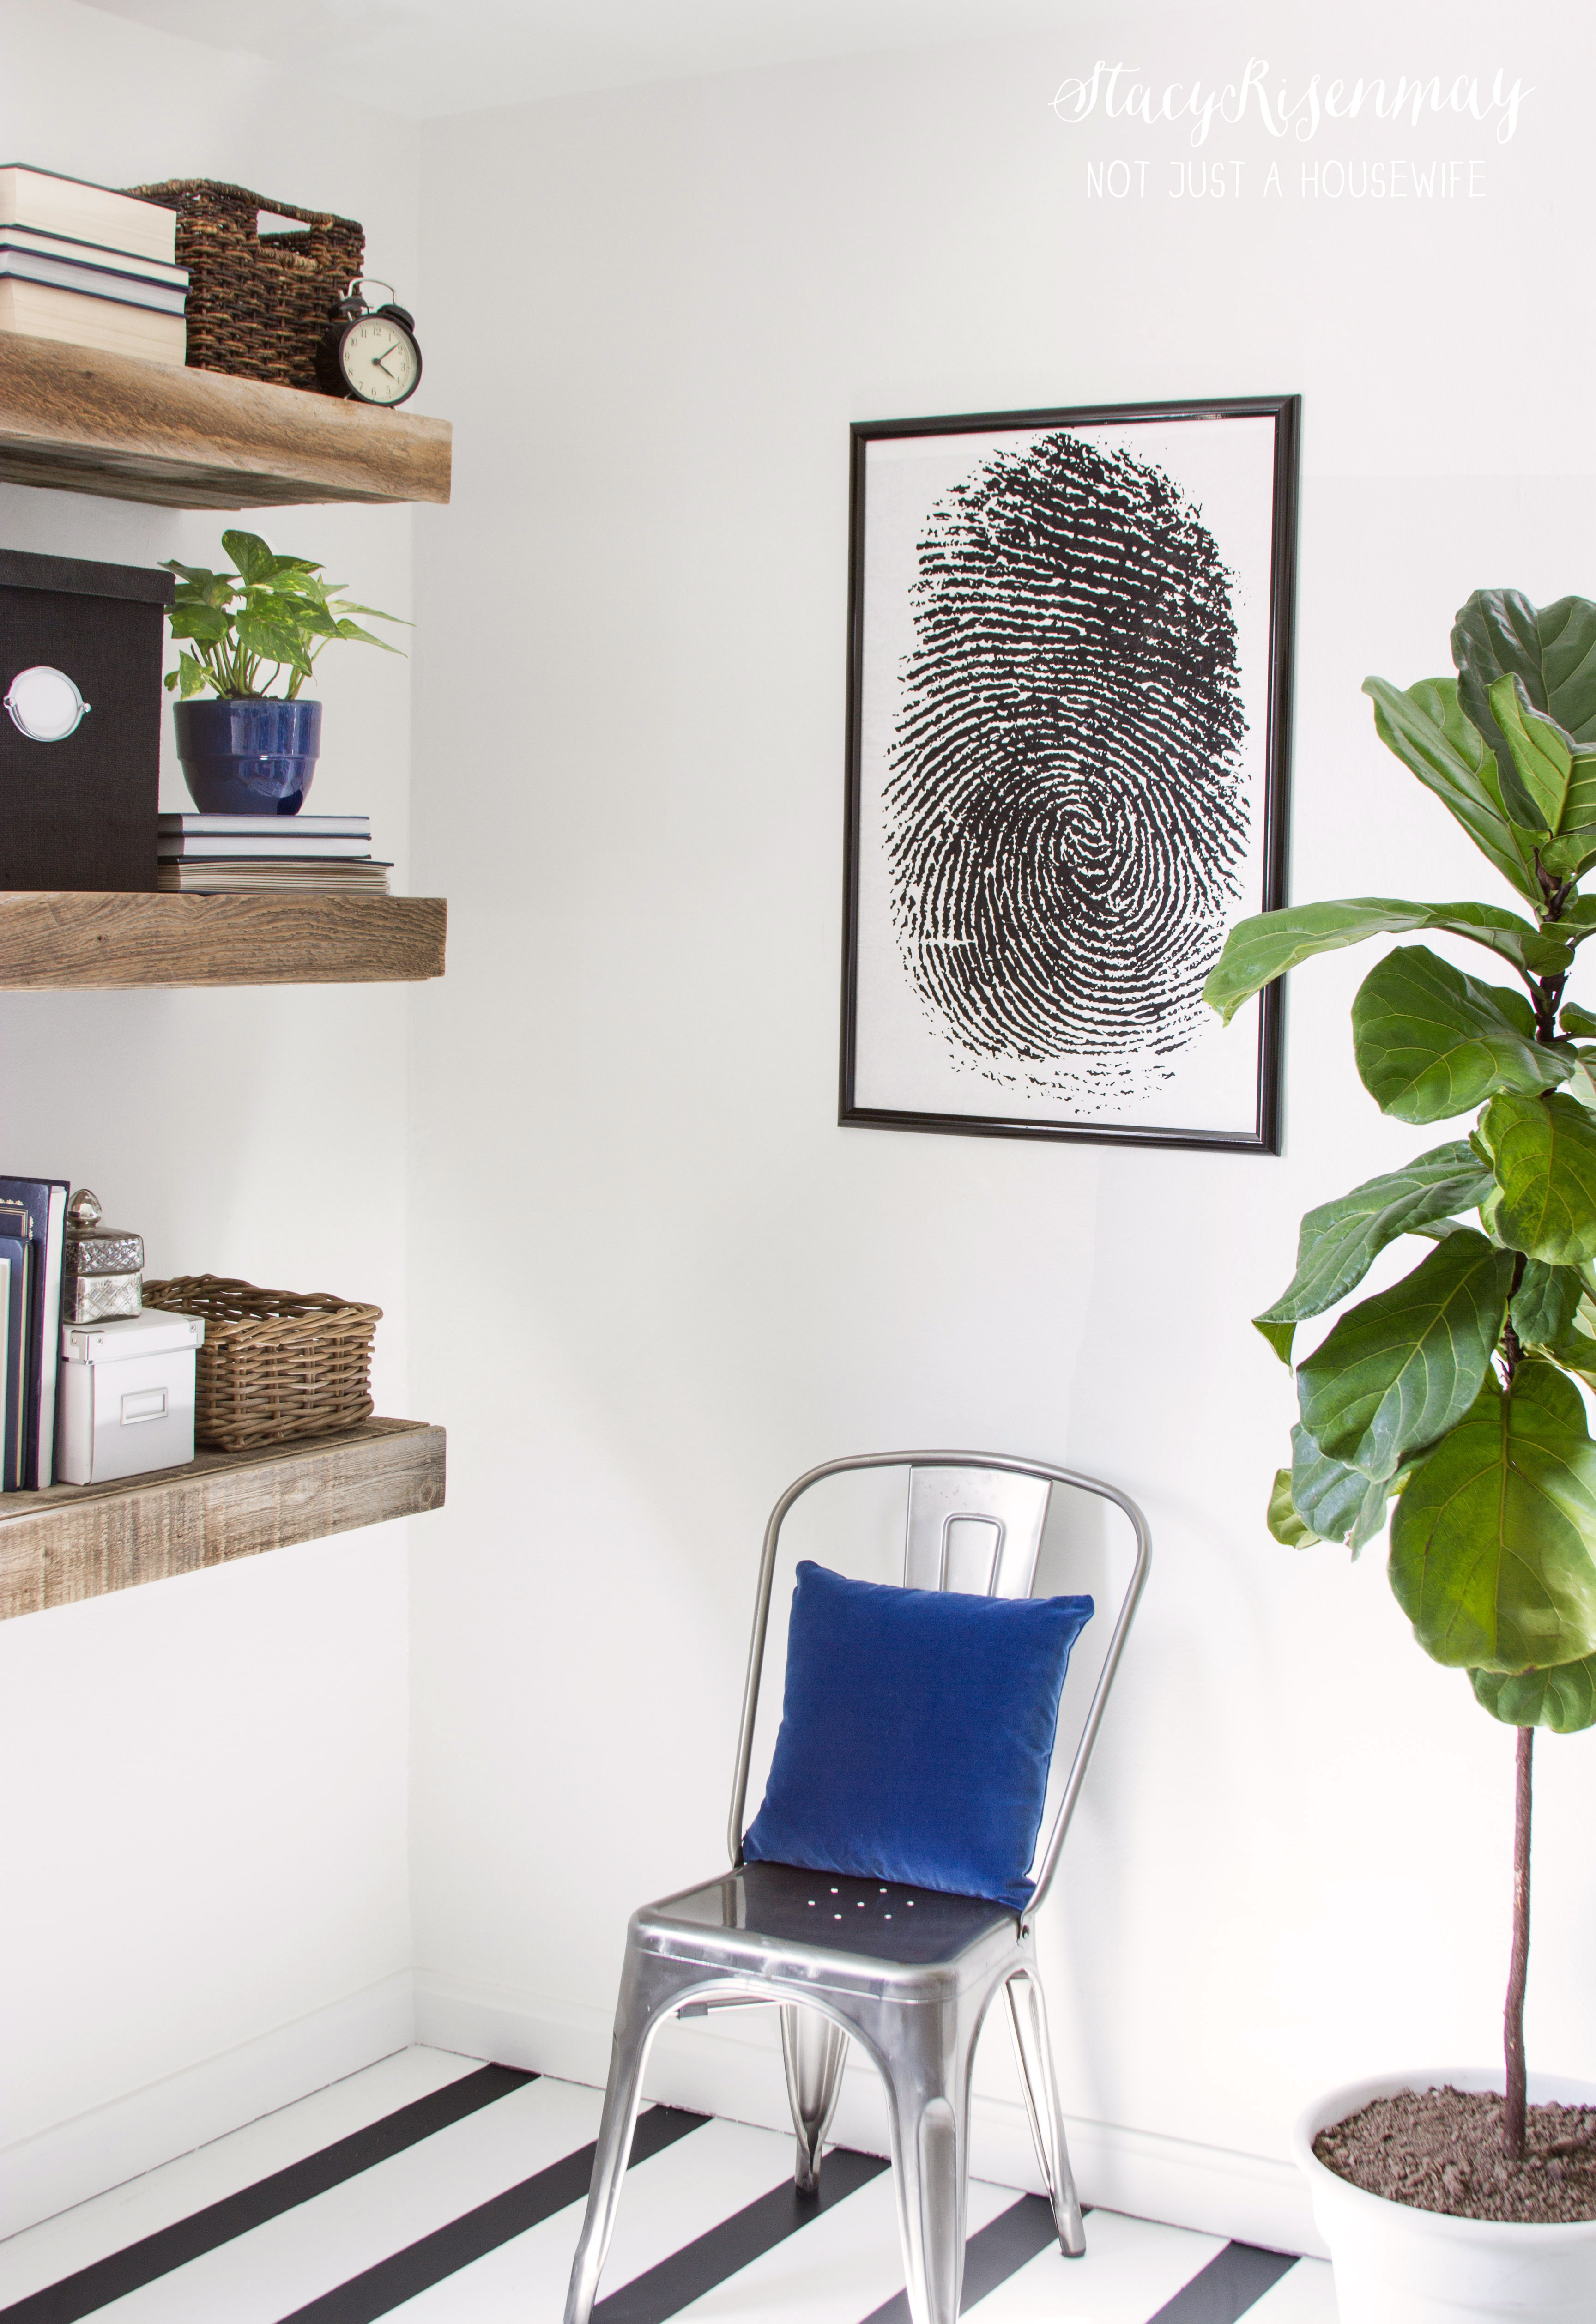
When we moved into this house eight years ago I refinished the wood floors in the front room and hall. I can't remember the whole reason we didn't opt to do that in the office space but I think it is because that was the holding area for all our stuff while the other rooms got finished. But long story short, they have never looked good and have only gotten worse in the last eight years.
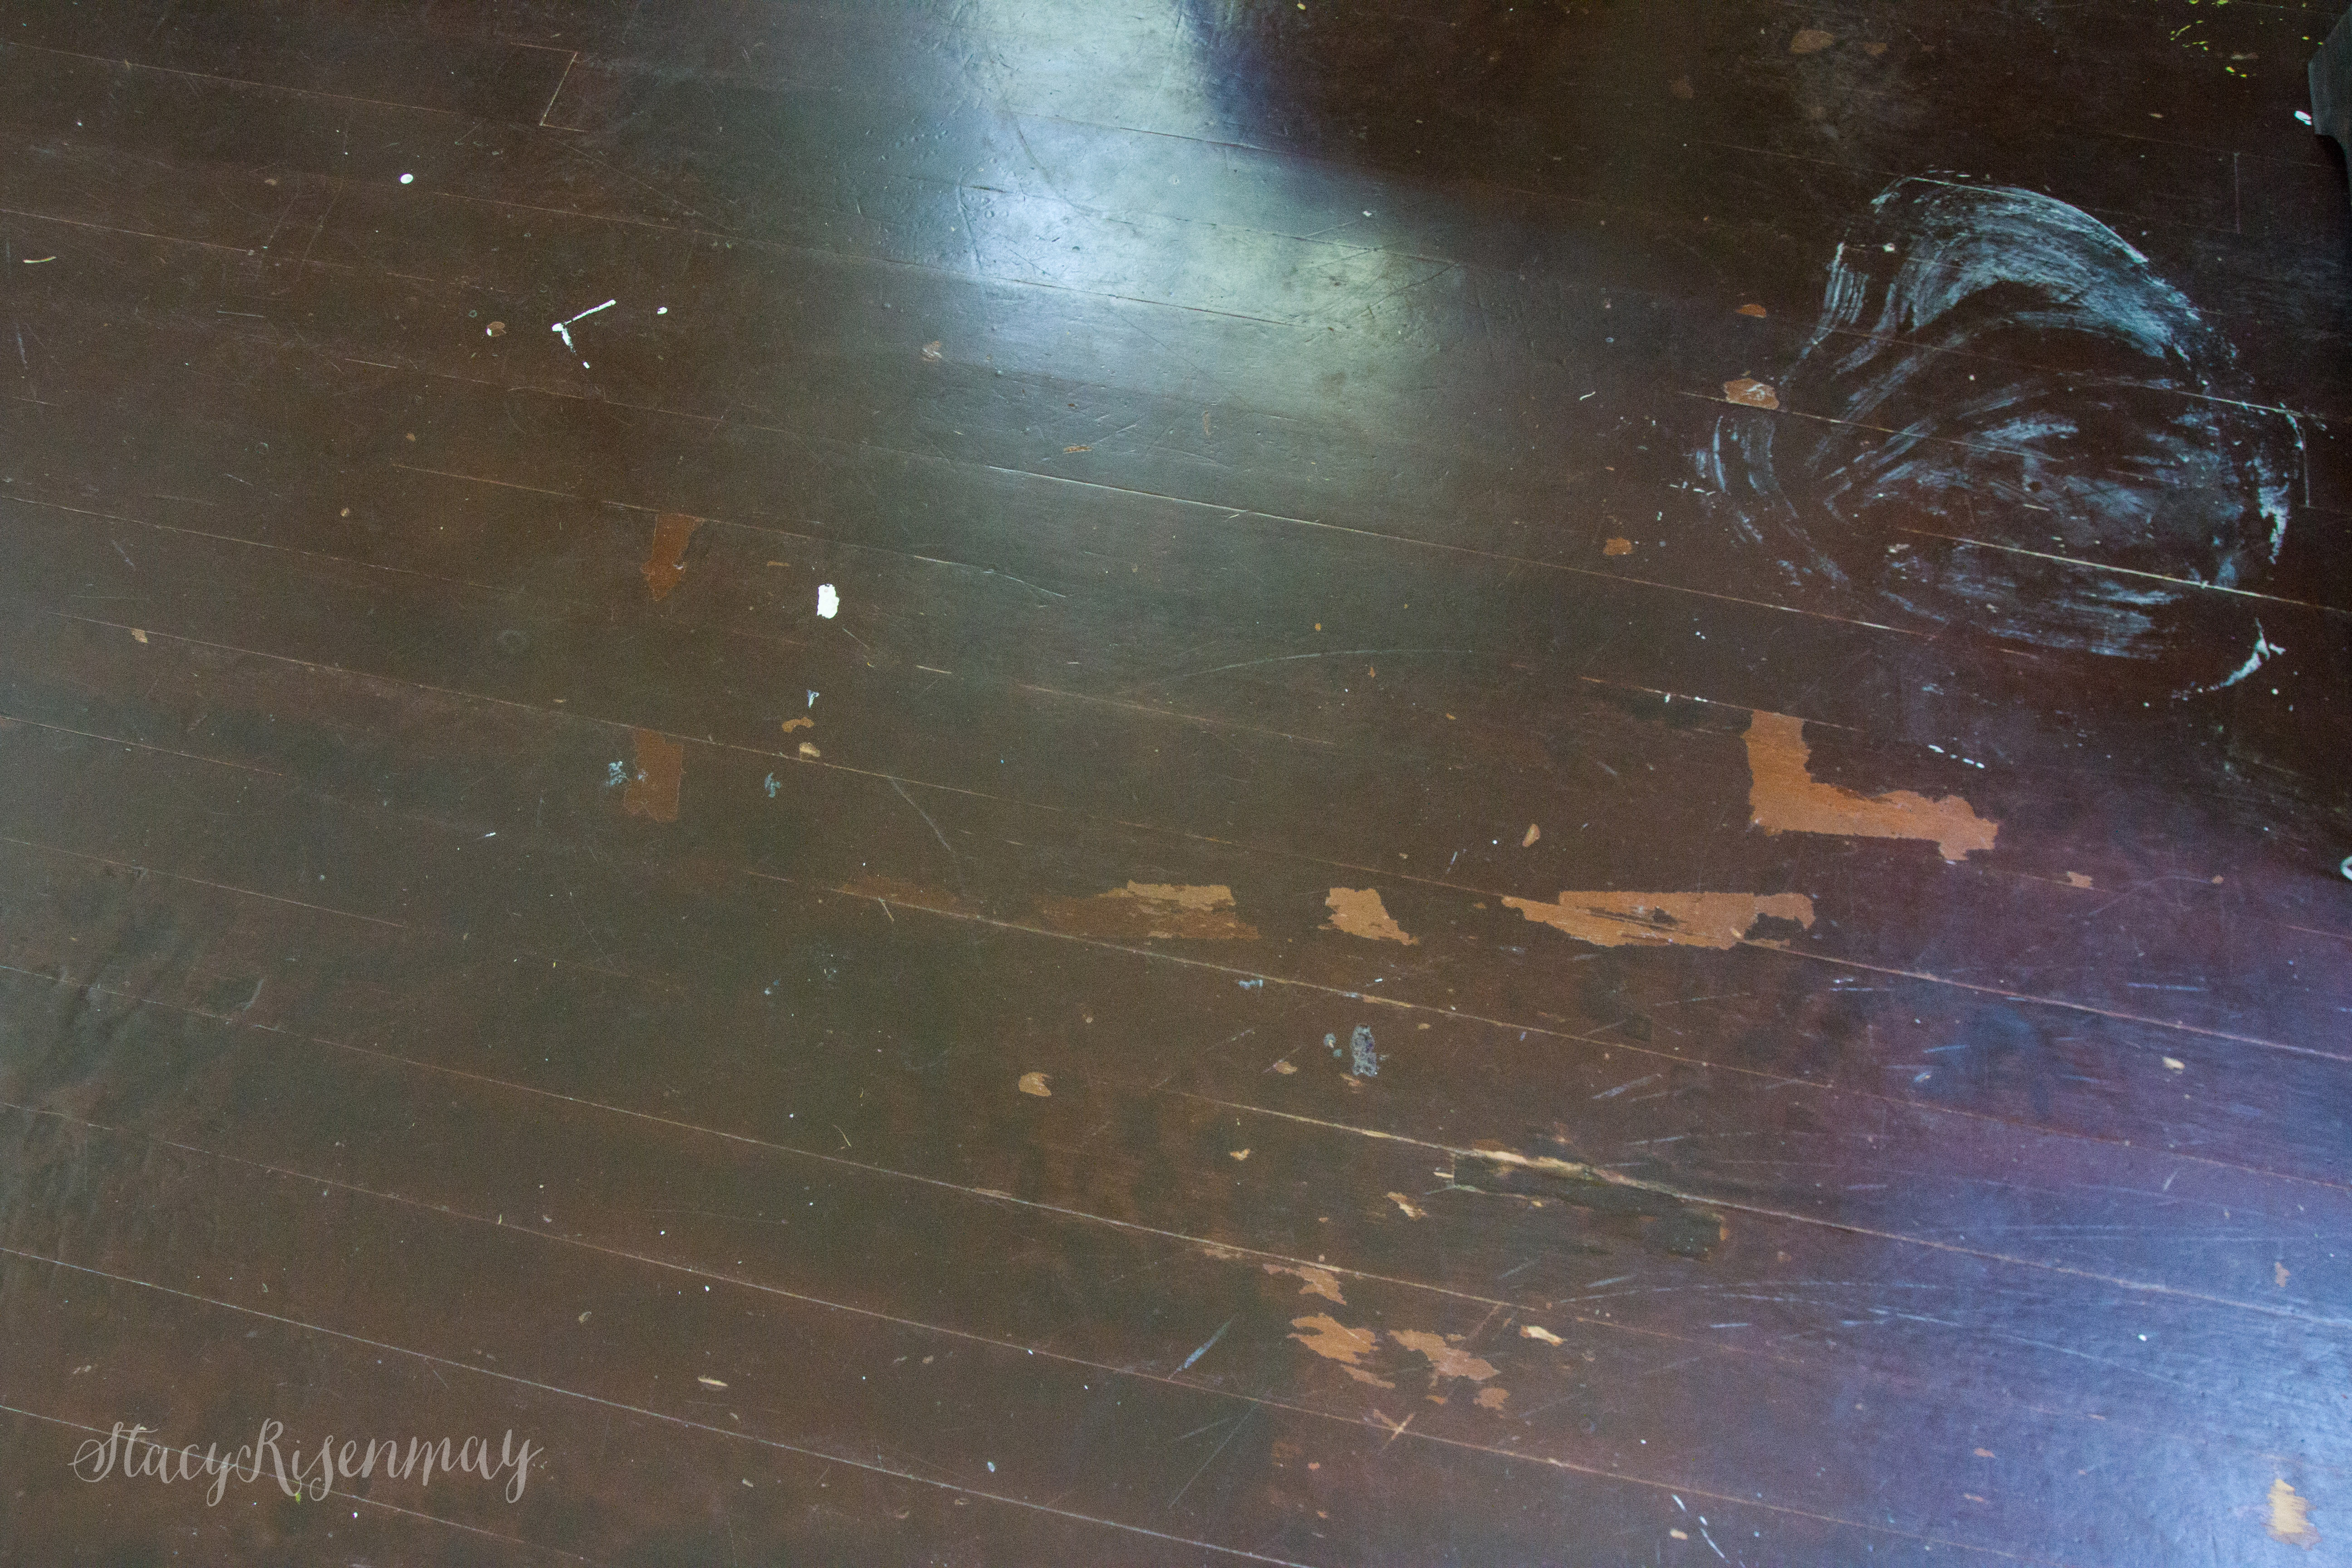
Shane was really against painting them. I casually brought it up a few years ago and he was not ok with it. It was a space not many saw and the floors could easily be covered with a rug so I let it go. Then one day this spring I spilled a gallon of paint on the floor by accident (I swear it was an accident!) and it brought the topic up again. This time he was more open to the idea so I jumped on it before he could change his mind :)
Materials Needed:
- 220-grit sandpaper
- Vacuum
- Mop
- Foam paint brush or foam roller
- Paint sprayer or paint roller
- Enamel paint (specifically for floors) in your choice of two colors – this project used black and white
- ScotchBlue™ Painter’s Tape Multi-Surface with Advanced Edge-Lock™ Paint Line Protector
- ScotchBlue™ Painter’s Tape Delicate Surfaces with Advanced Edge-Lock™ Paint Line Protector
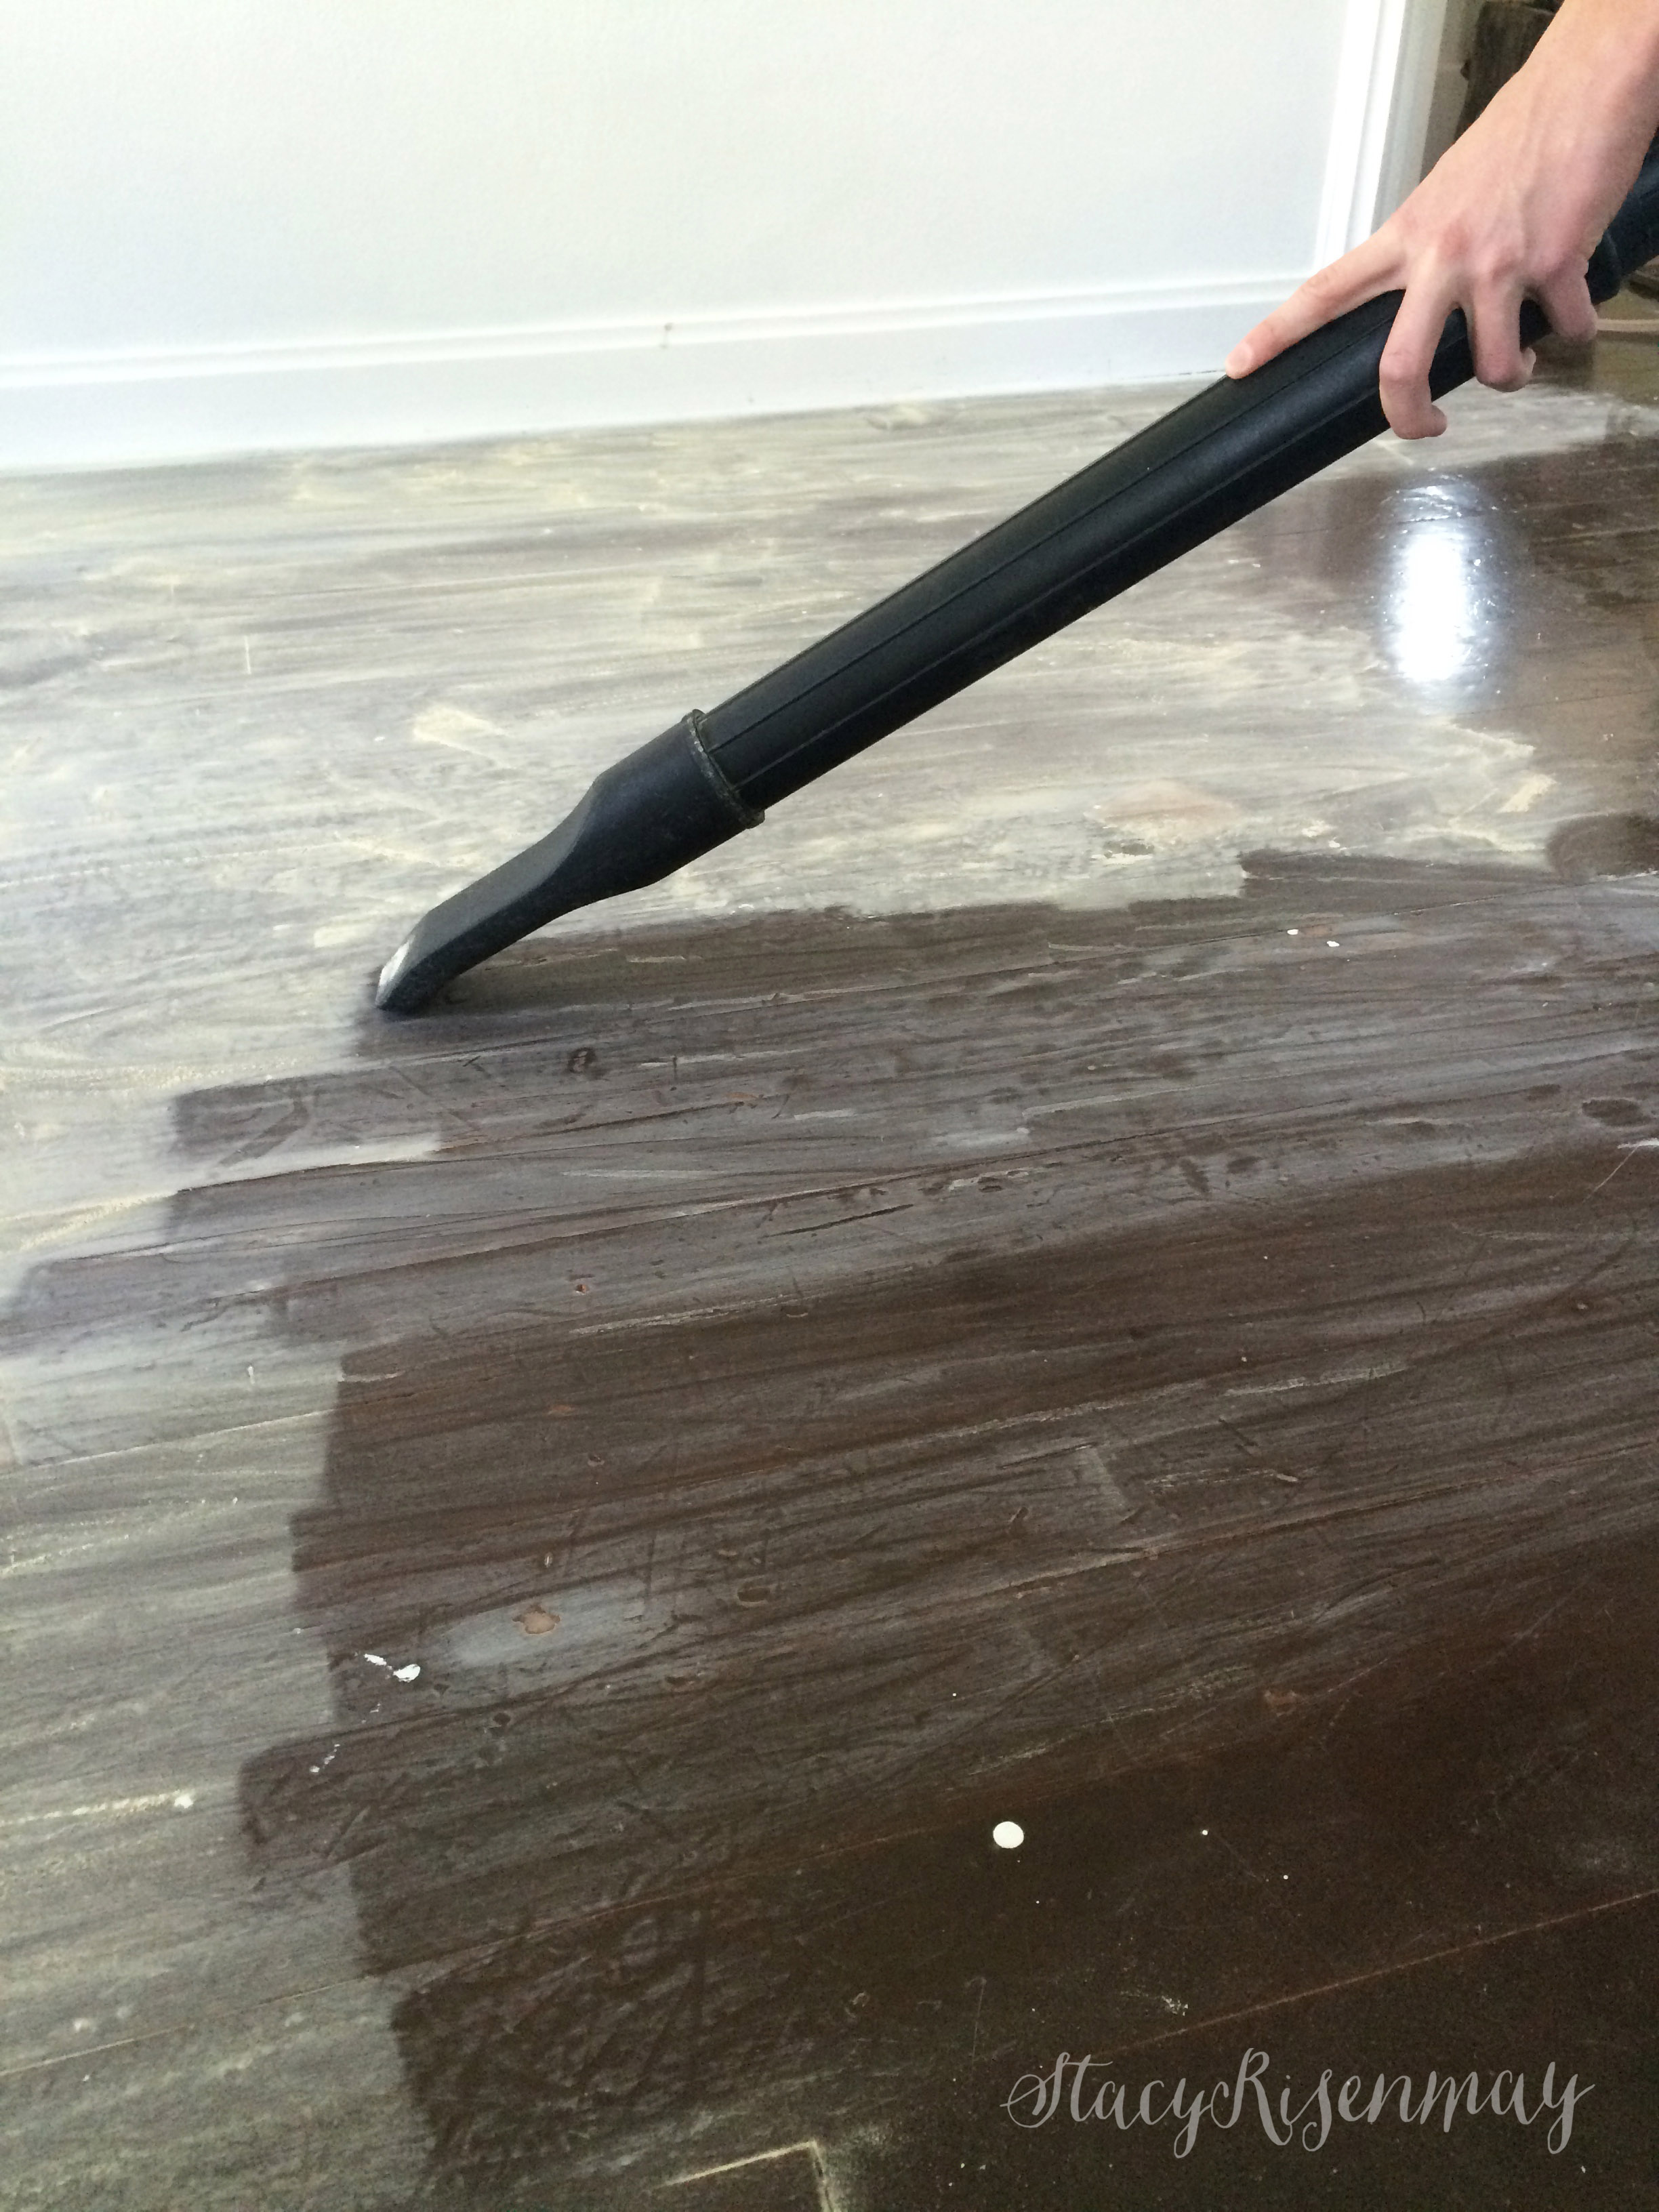
Start by sanding the floor really well with a 220-grit sandpaper, going along with the grain of the wood. You do not need to sand it down to the bare wood – instead, simply rough up the surface so the paint will adhere to it better.
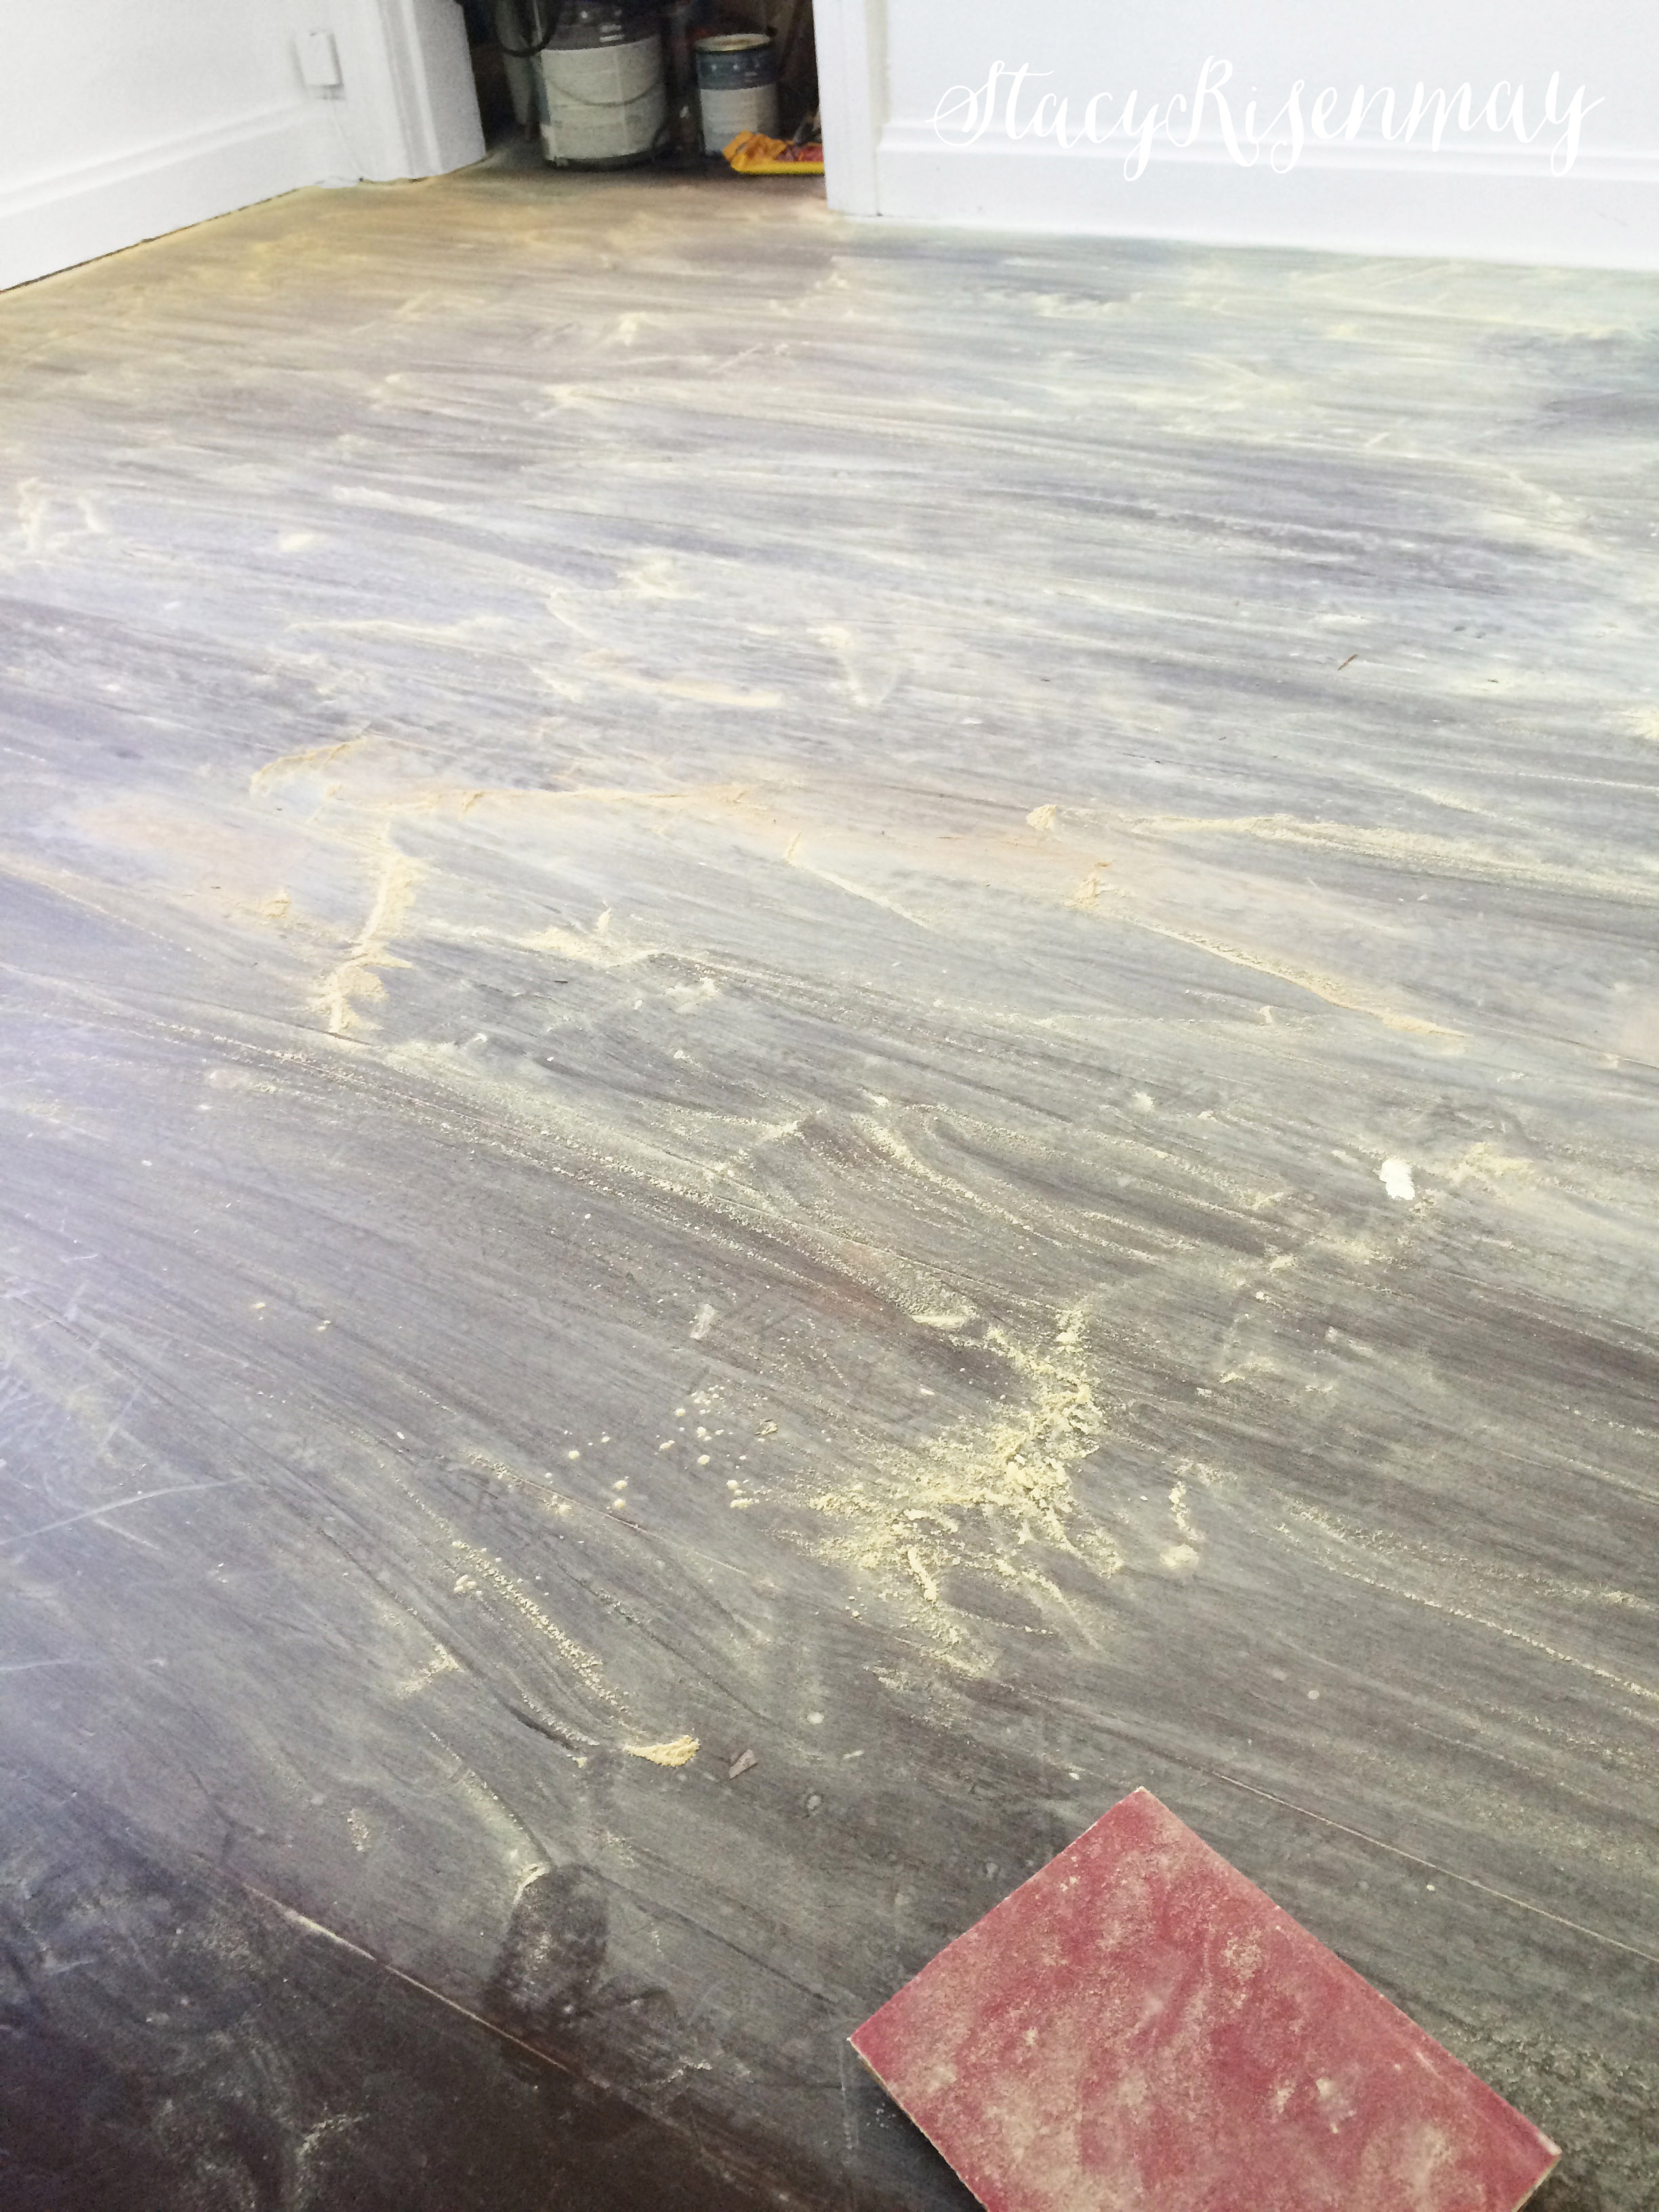
Vacuum up the dust and mop the floor. Be sure to clean it really well as any dust or dirt will prevent the paint job from lasting as long as it could if it was prepped correctly. Then, use ScotchBlue™ Painter’s Tape Multi-Surface with Advanced Edge-Lock™ Paint Line Protector to line all baseboards and trim.
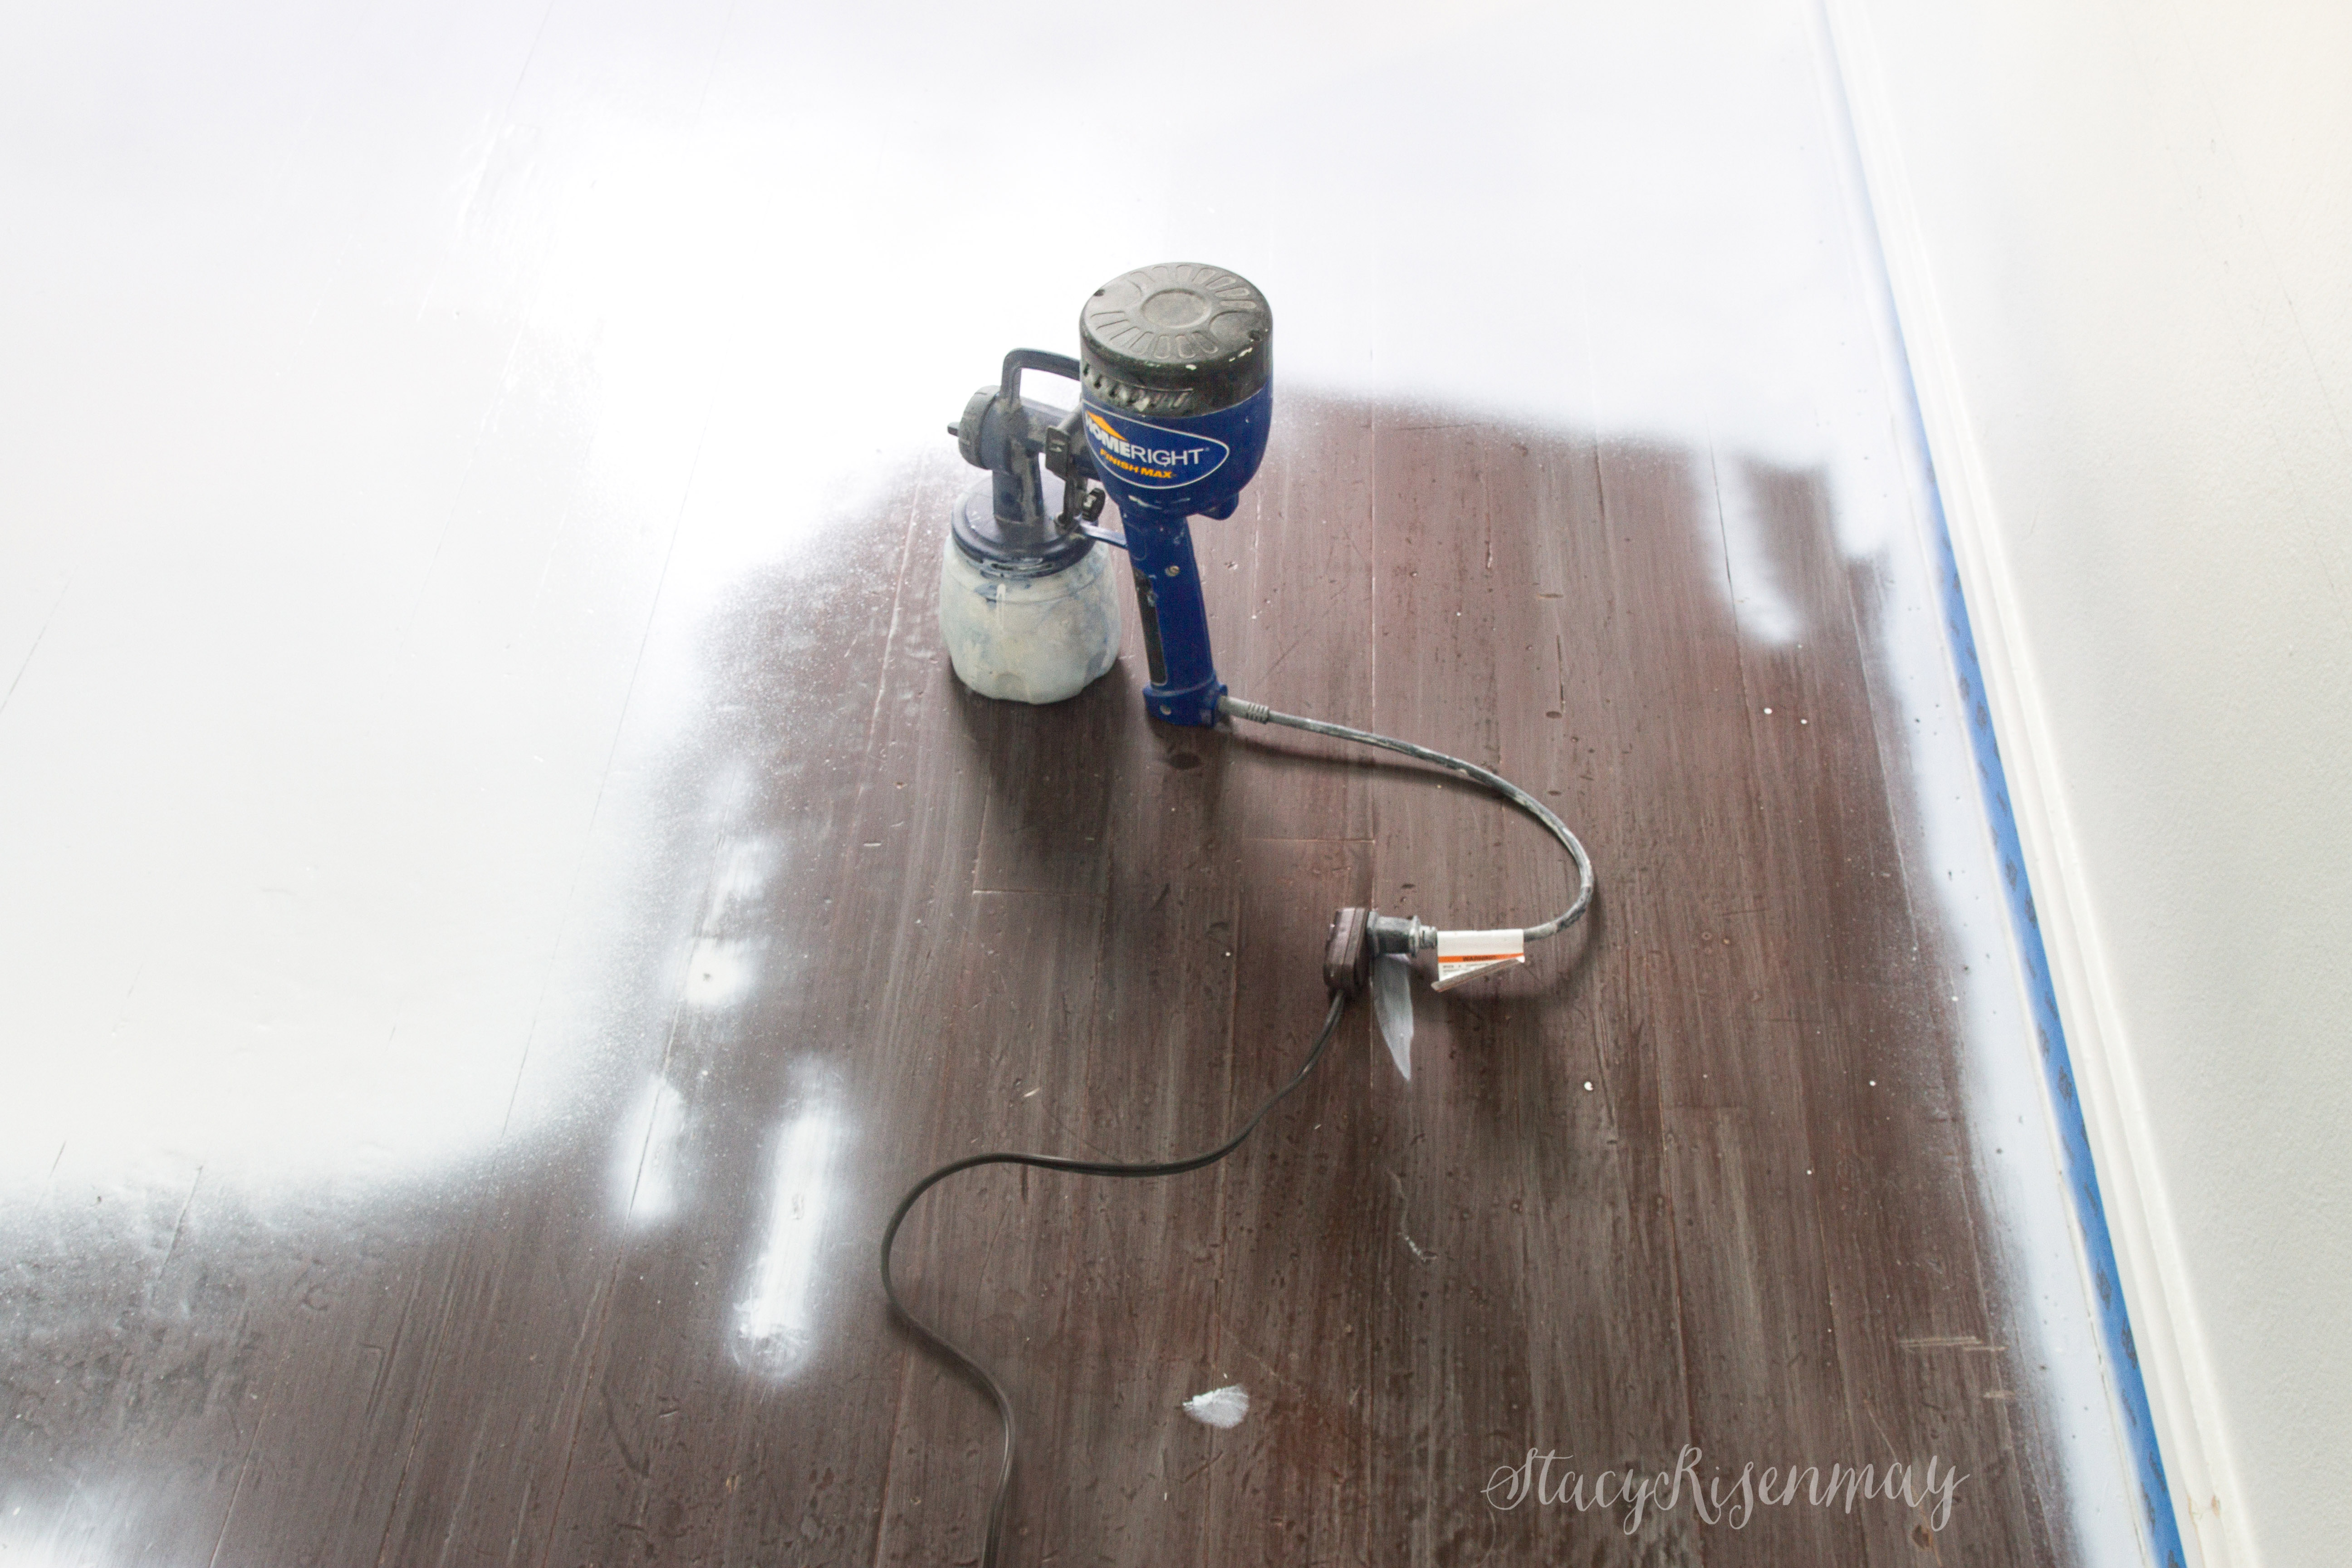
Use a paint sprayer to paint the floor in the base color – this project used white as the base. If you don’t have a sprayer, you can use a roller to accomplish the same result. TIP: To prevent the paint from dripping into the cracks between floorboards, spray (or paint) two thin layers
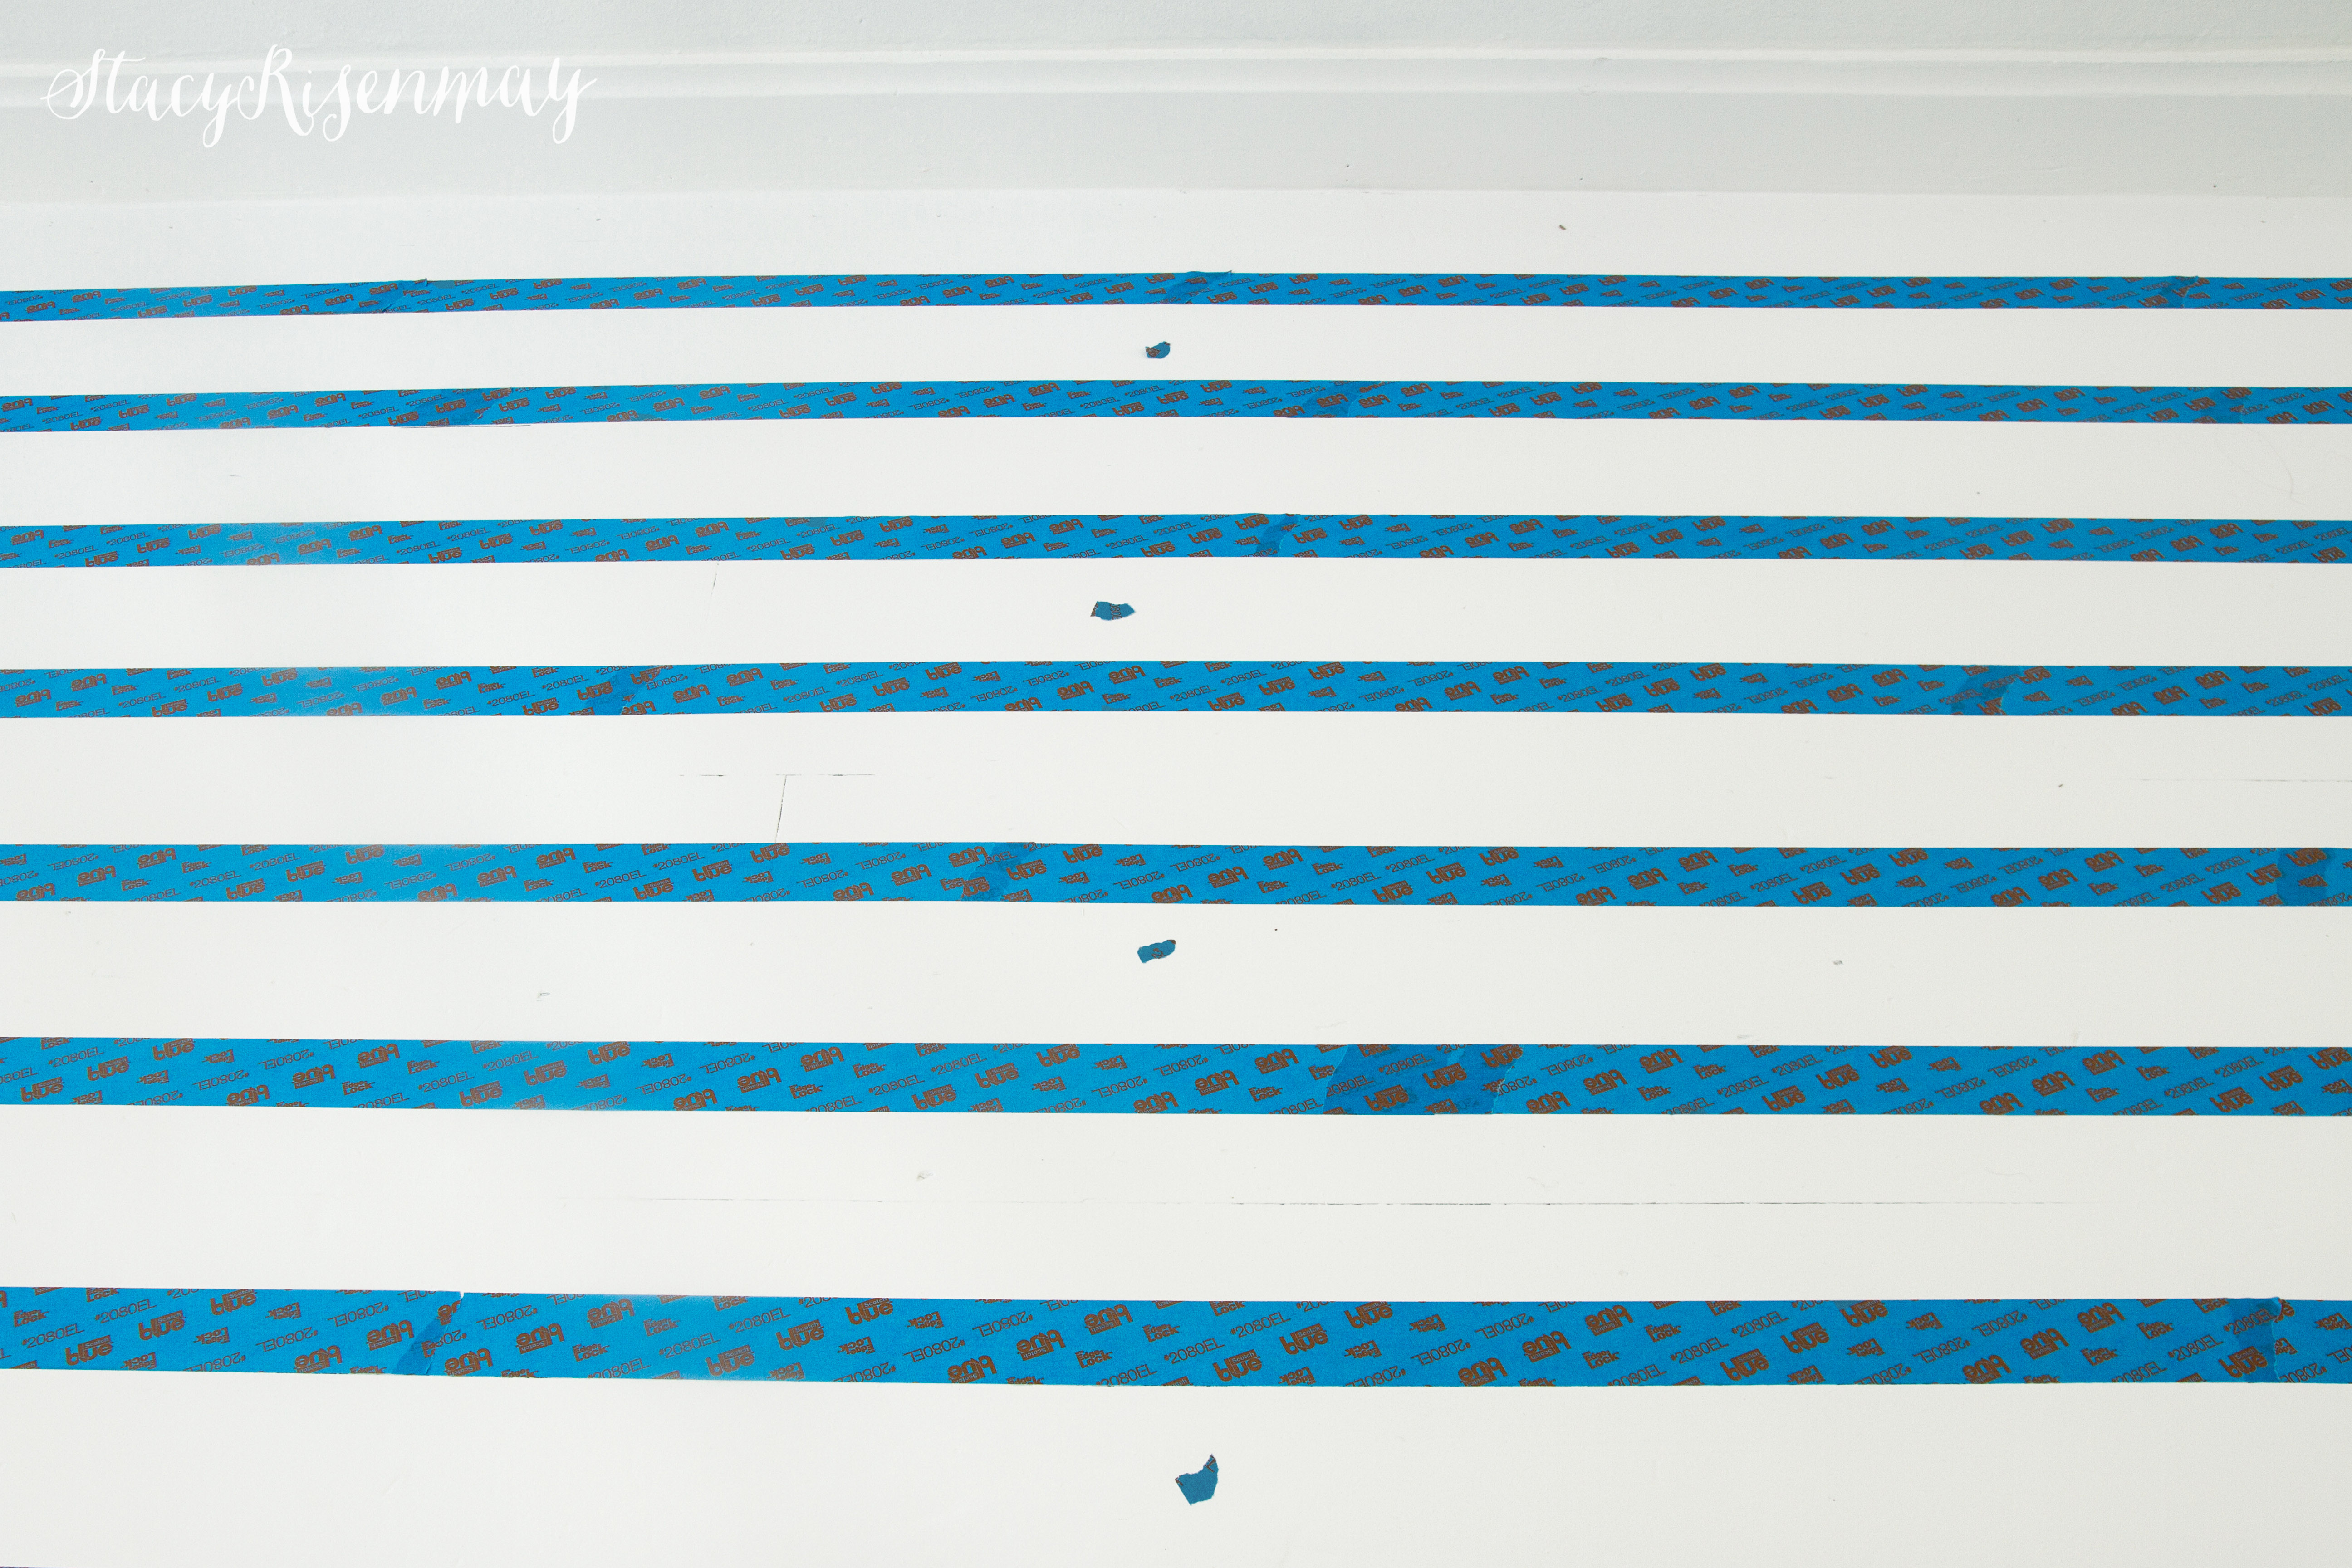
Once it has had time to dry, according to the manufacturer’s instructions on the paint can, you can tape the stripes. Note that freshly painted surfaces must be at least 24 hours old prior to applying the tape in the next step.
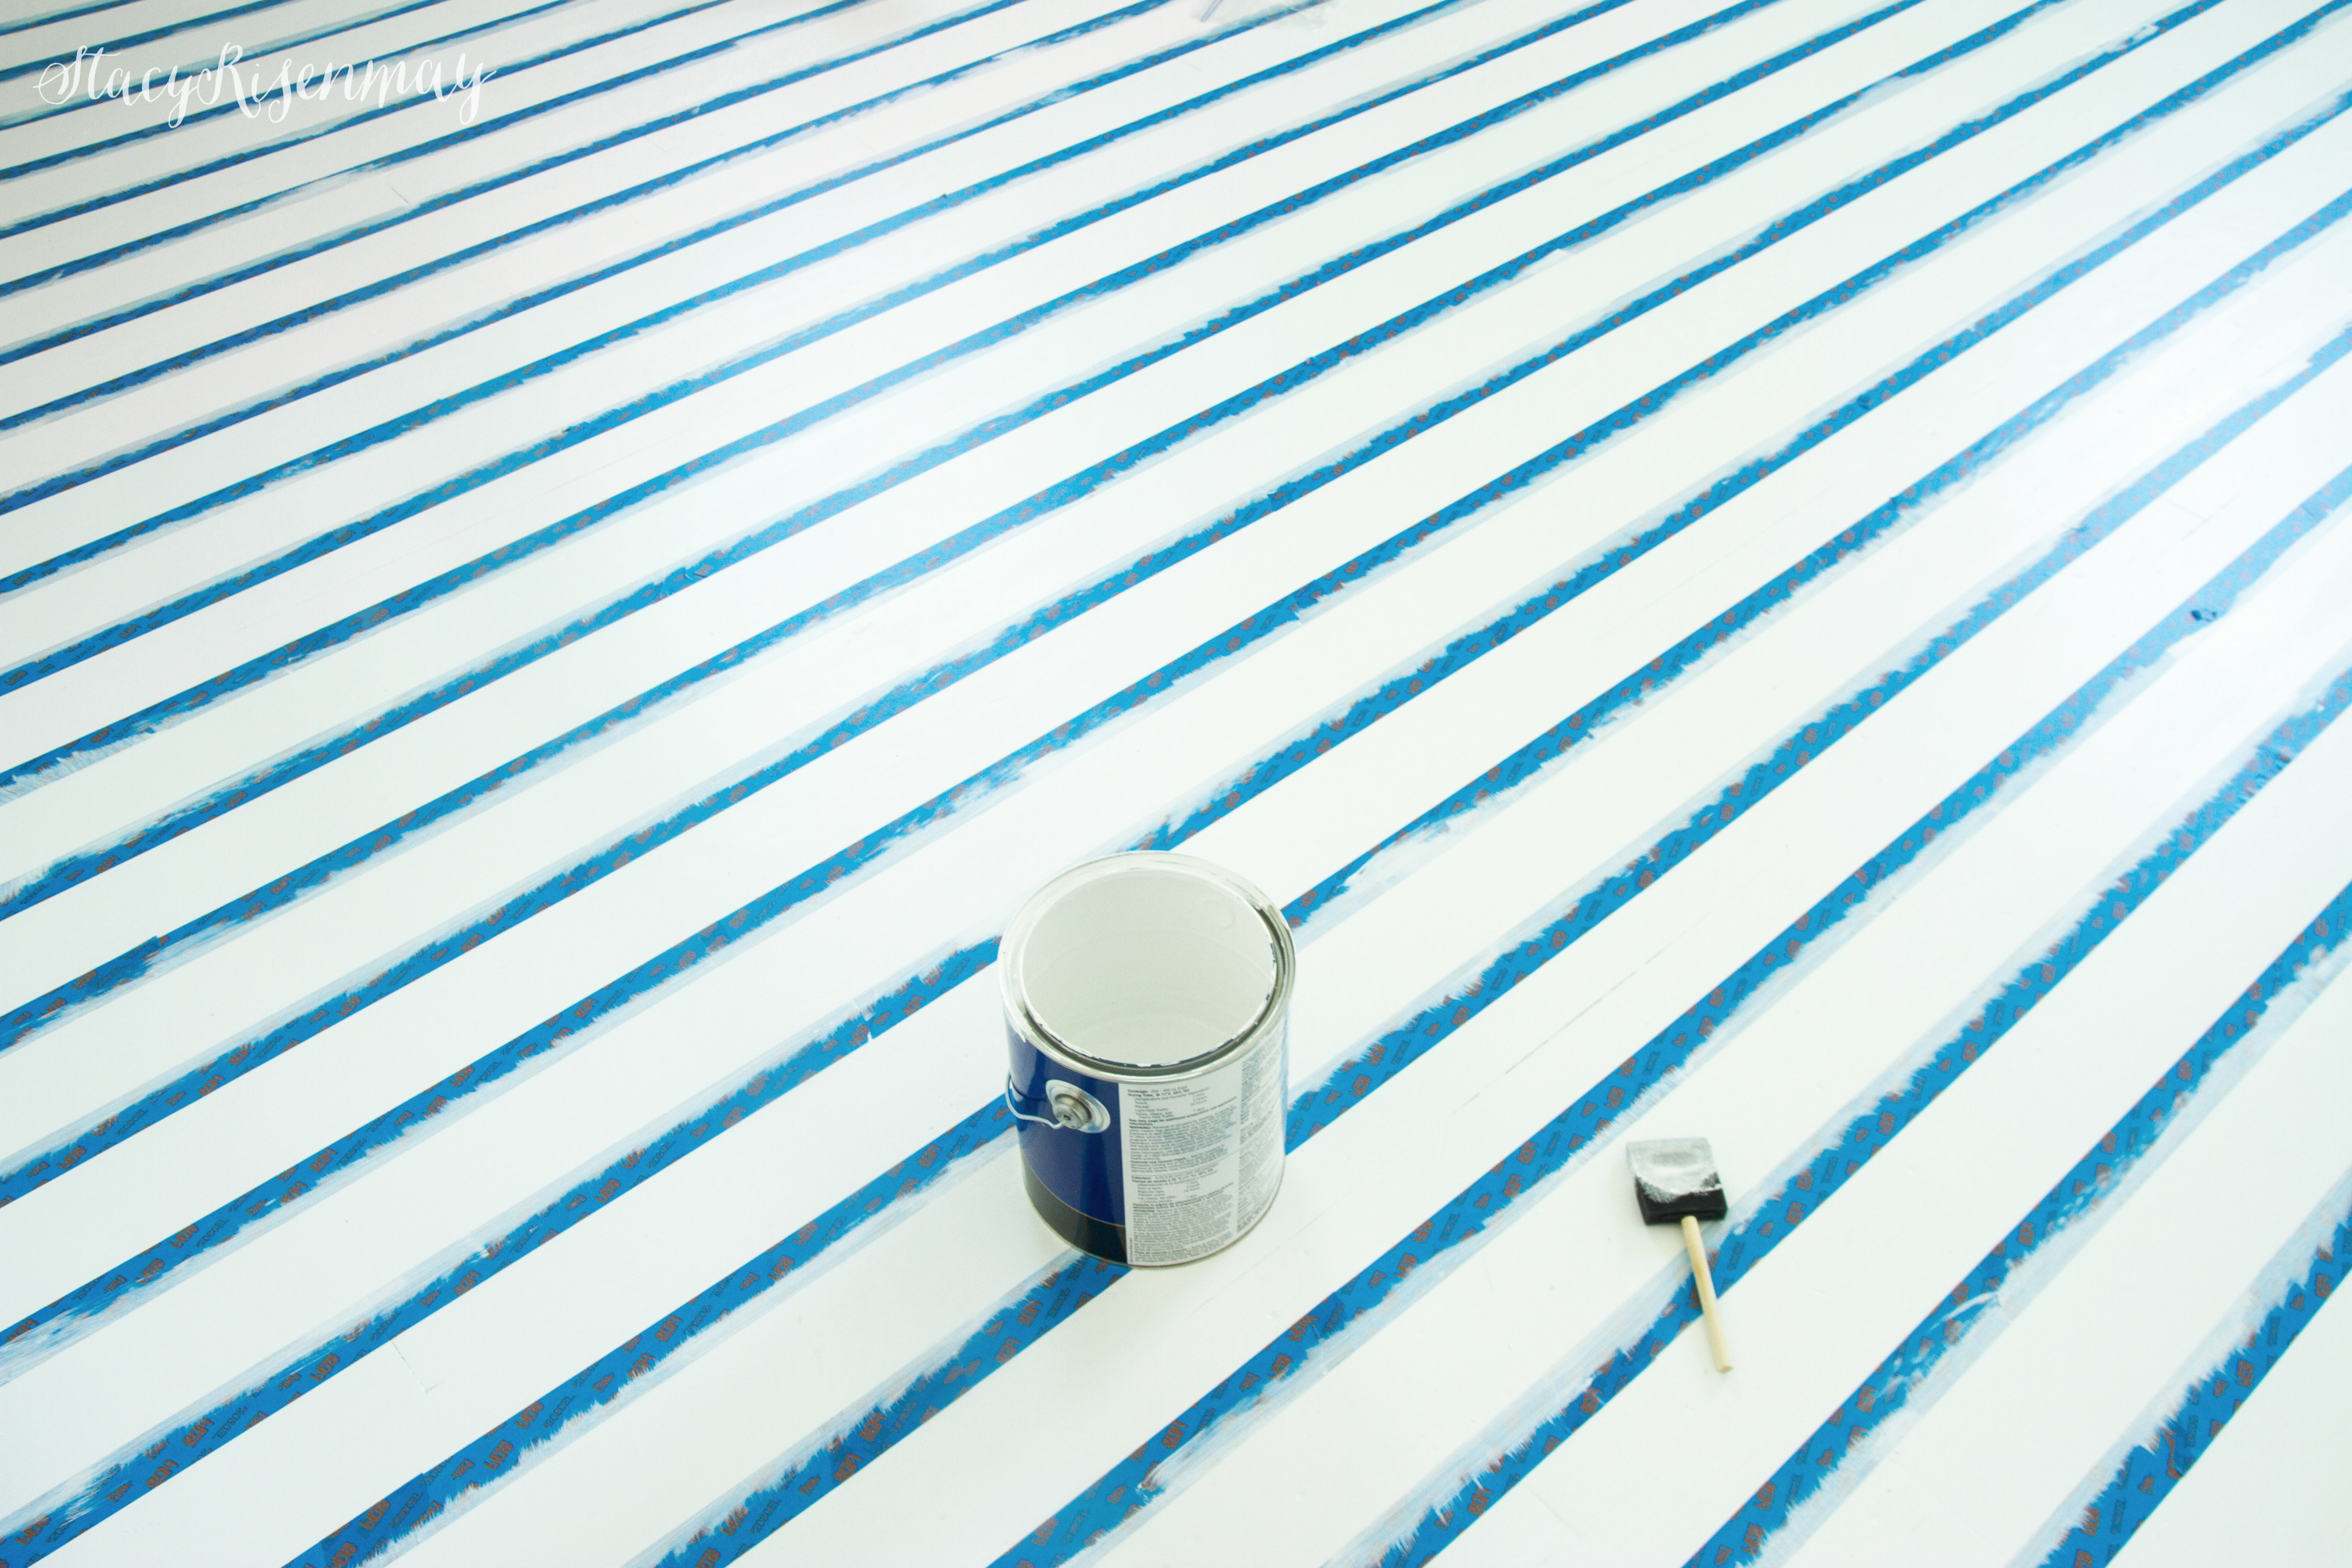
Determine the width of your stripes and place strips of ScotchBlue™ Painter’s Tape Delicate Surfaces with Advanced Edge-Lock™ Paint Line Protector across the floor. TIP: Put a small piece of tape on the stripe you plan to paint black so you don’t get mixed up when you start painting.
Because there is such a contrast between the black and the white, I chose to paint the base color of white along the edges of the tape that would ultimately be for the black stripes. This helps to ensure you get a super sharp paint line.
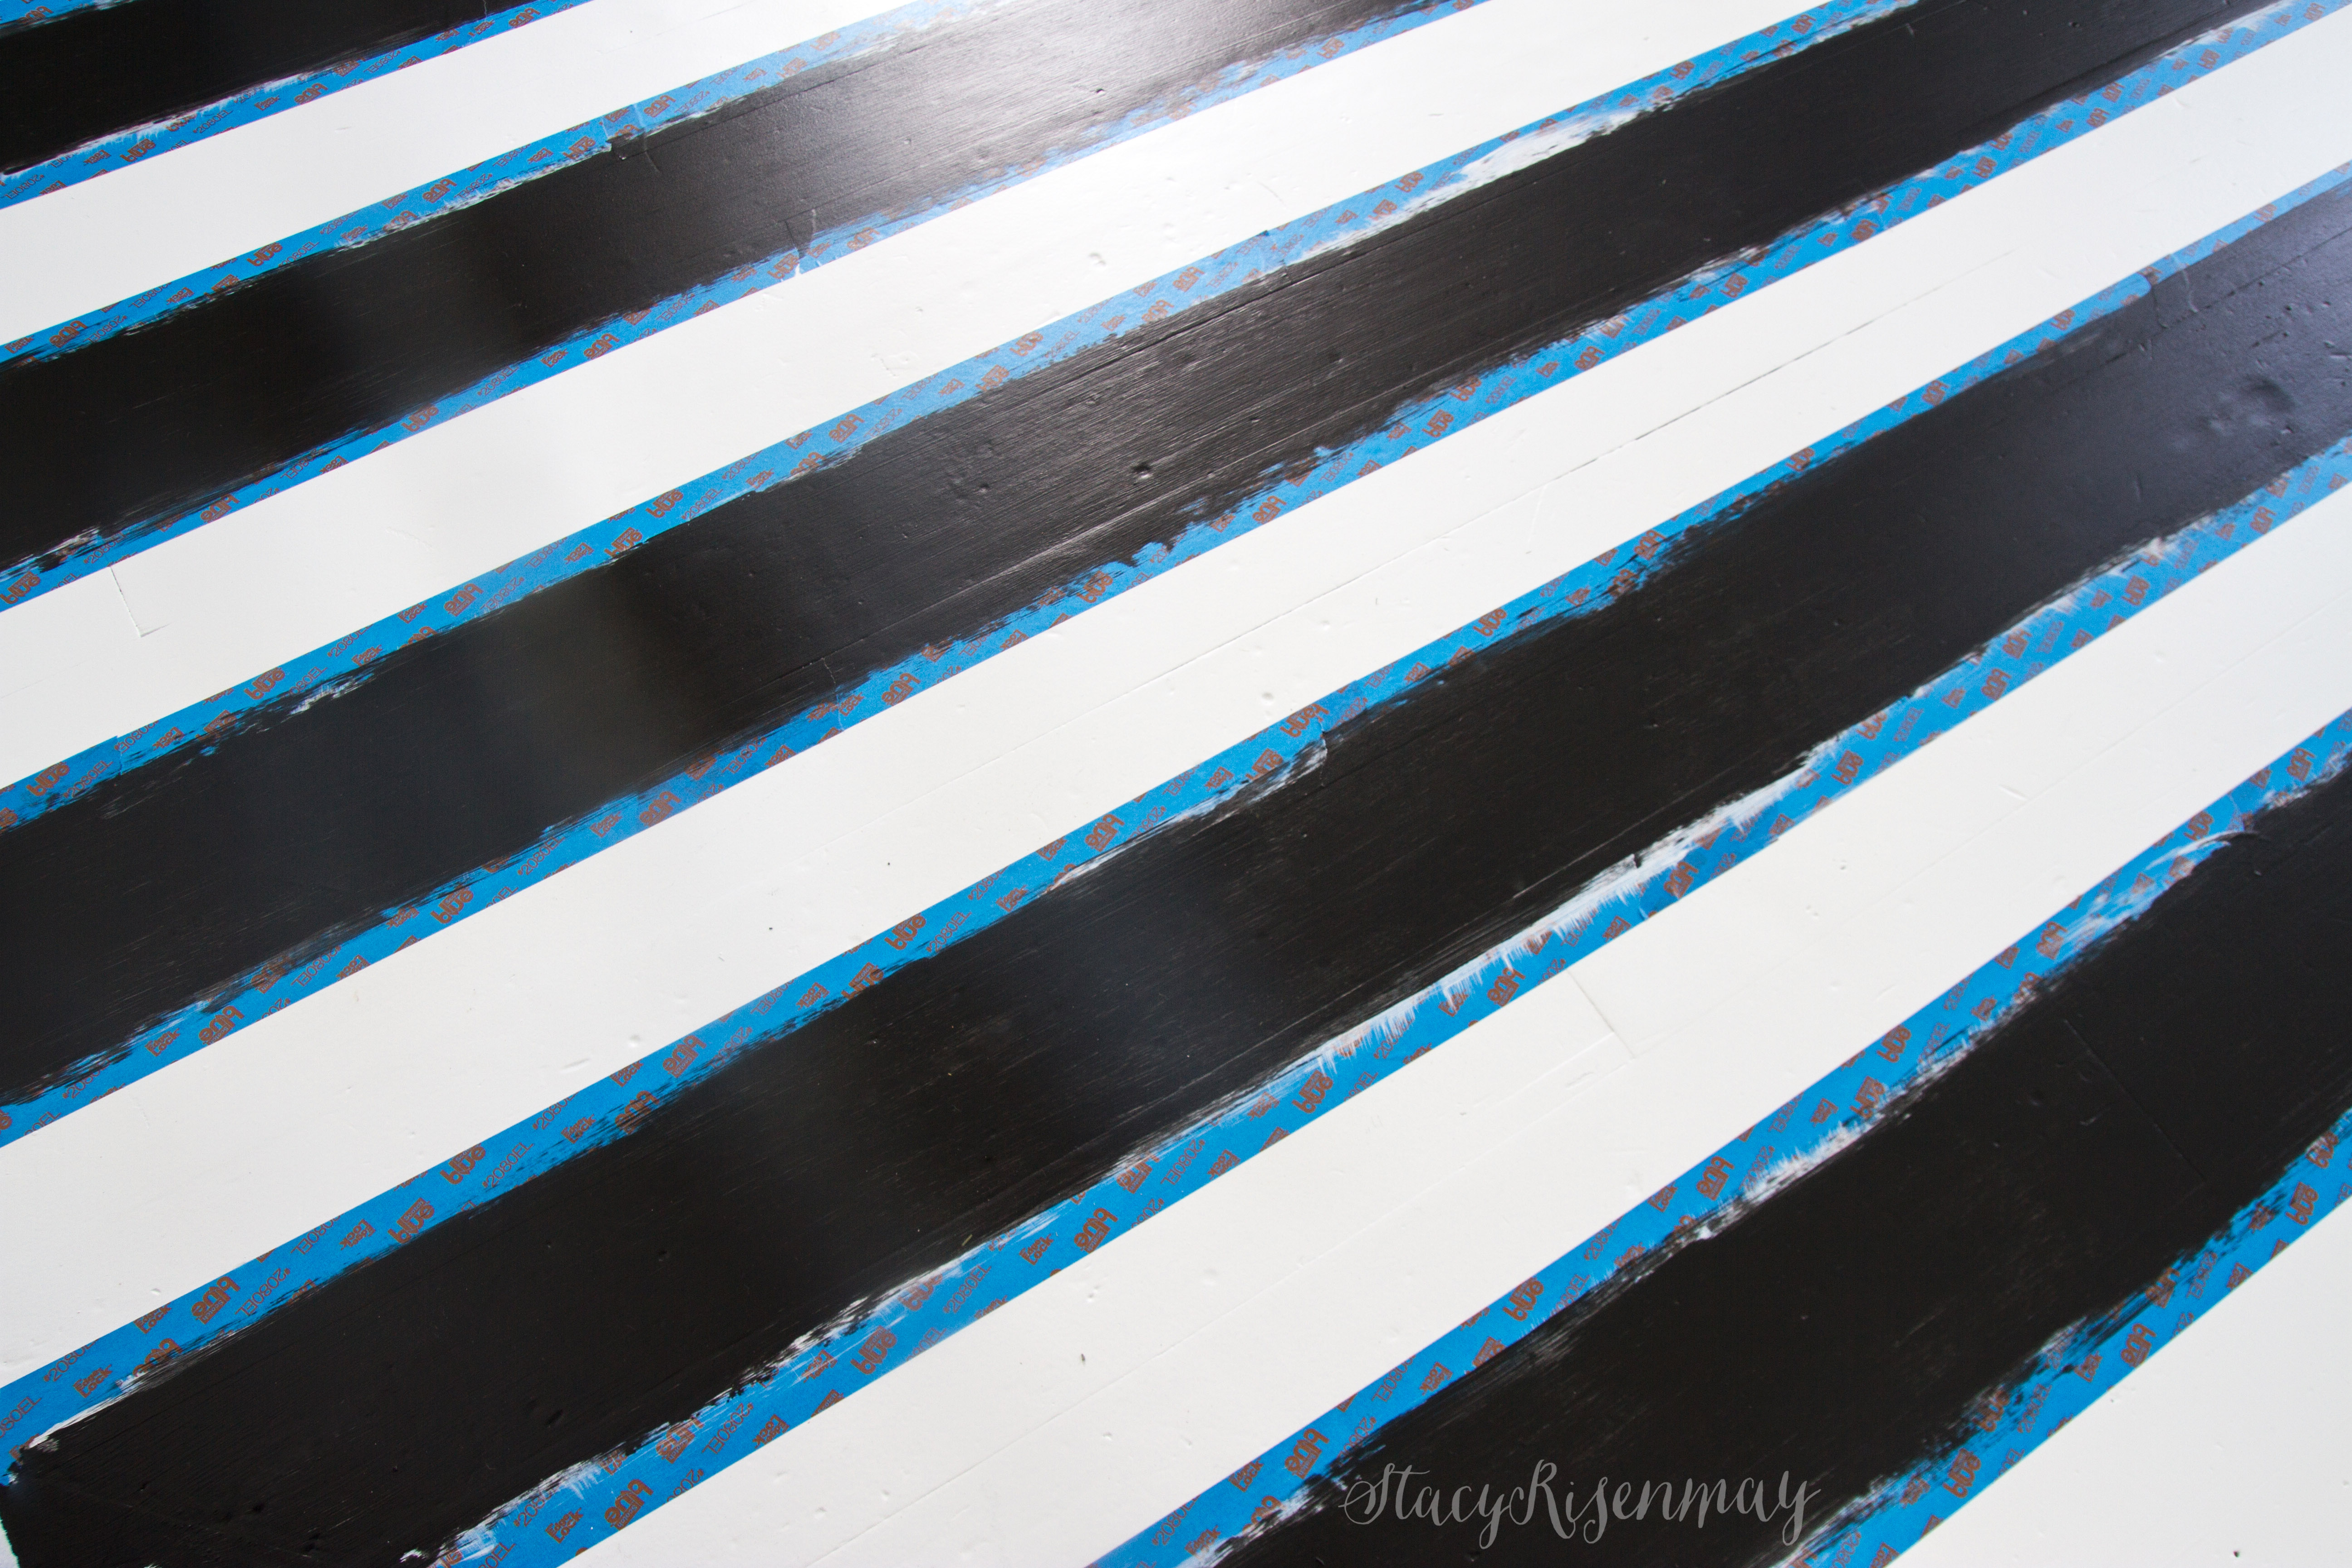
After it dries, paint 3 thin layers of black paint on the stripes you identified in Step 4. It is always better to paint a few thin coats instead of one or two thick coats.
I am going to pause a second here to address the thought "Black and white would be a nightmare to keep clean!". I have lived in many apartments and a few homes over the years. I have lived with forest green carpet, light grey carpet, cream carpet, linoleum in a rainbow of different colors, light wood floors, medium wood floors, dark wood floors, solid colored tile, multicolored tile, and everything else in between. I honestly don't think there is a floor that stays looking clean all the time....especially when you live with 4 little boys. Dark floors show the light things like dust and lint and light and medium floors show dark things like dirt and food spills.
I mop pretty much every day so I have decided to pick my flooring based on what I like and not on what I think would stay looking clean the longest. The office floors have been painted for about a month now and I can honestly say that they have held up well and have not been a pain at all.
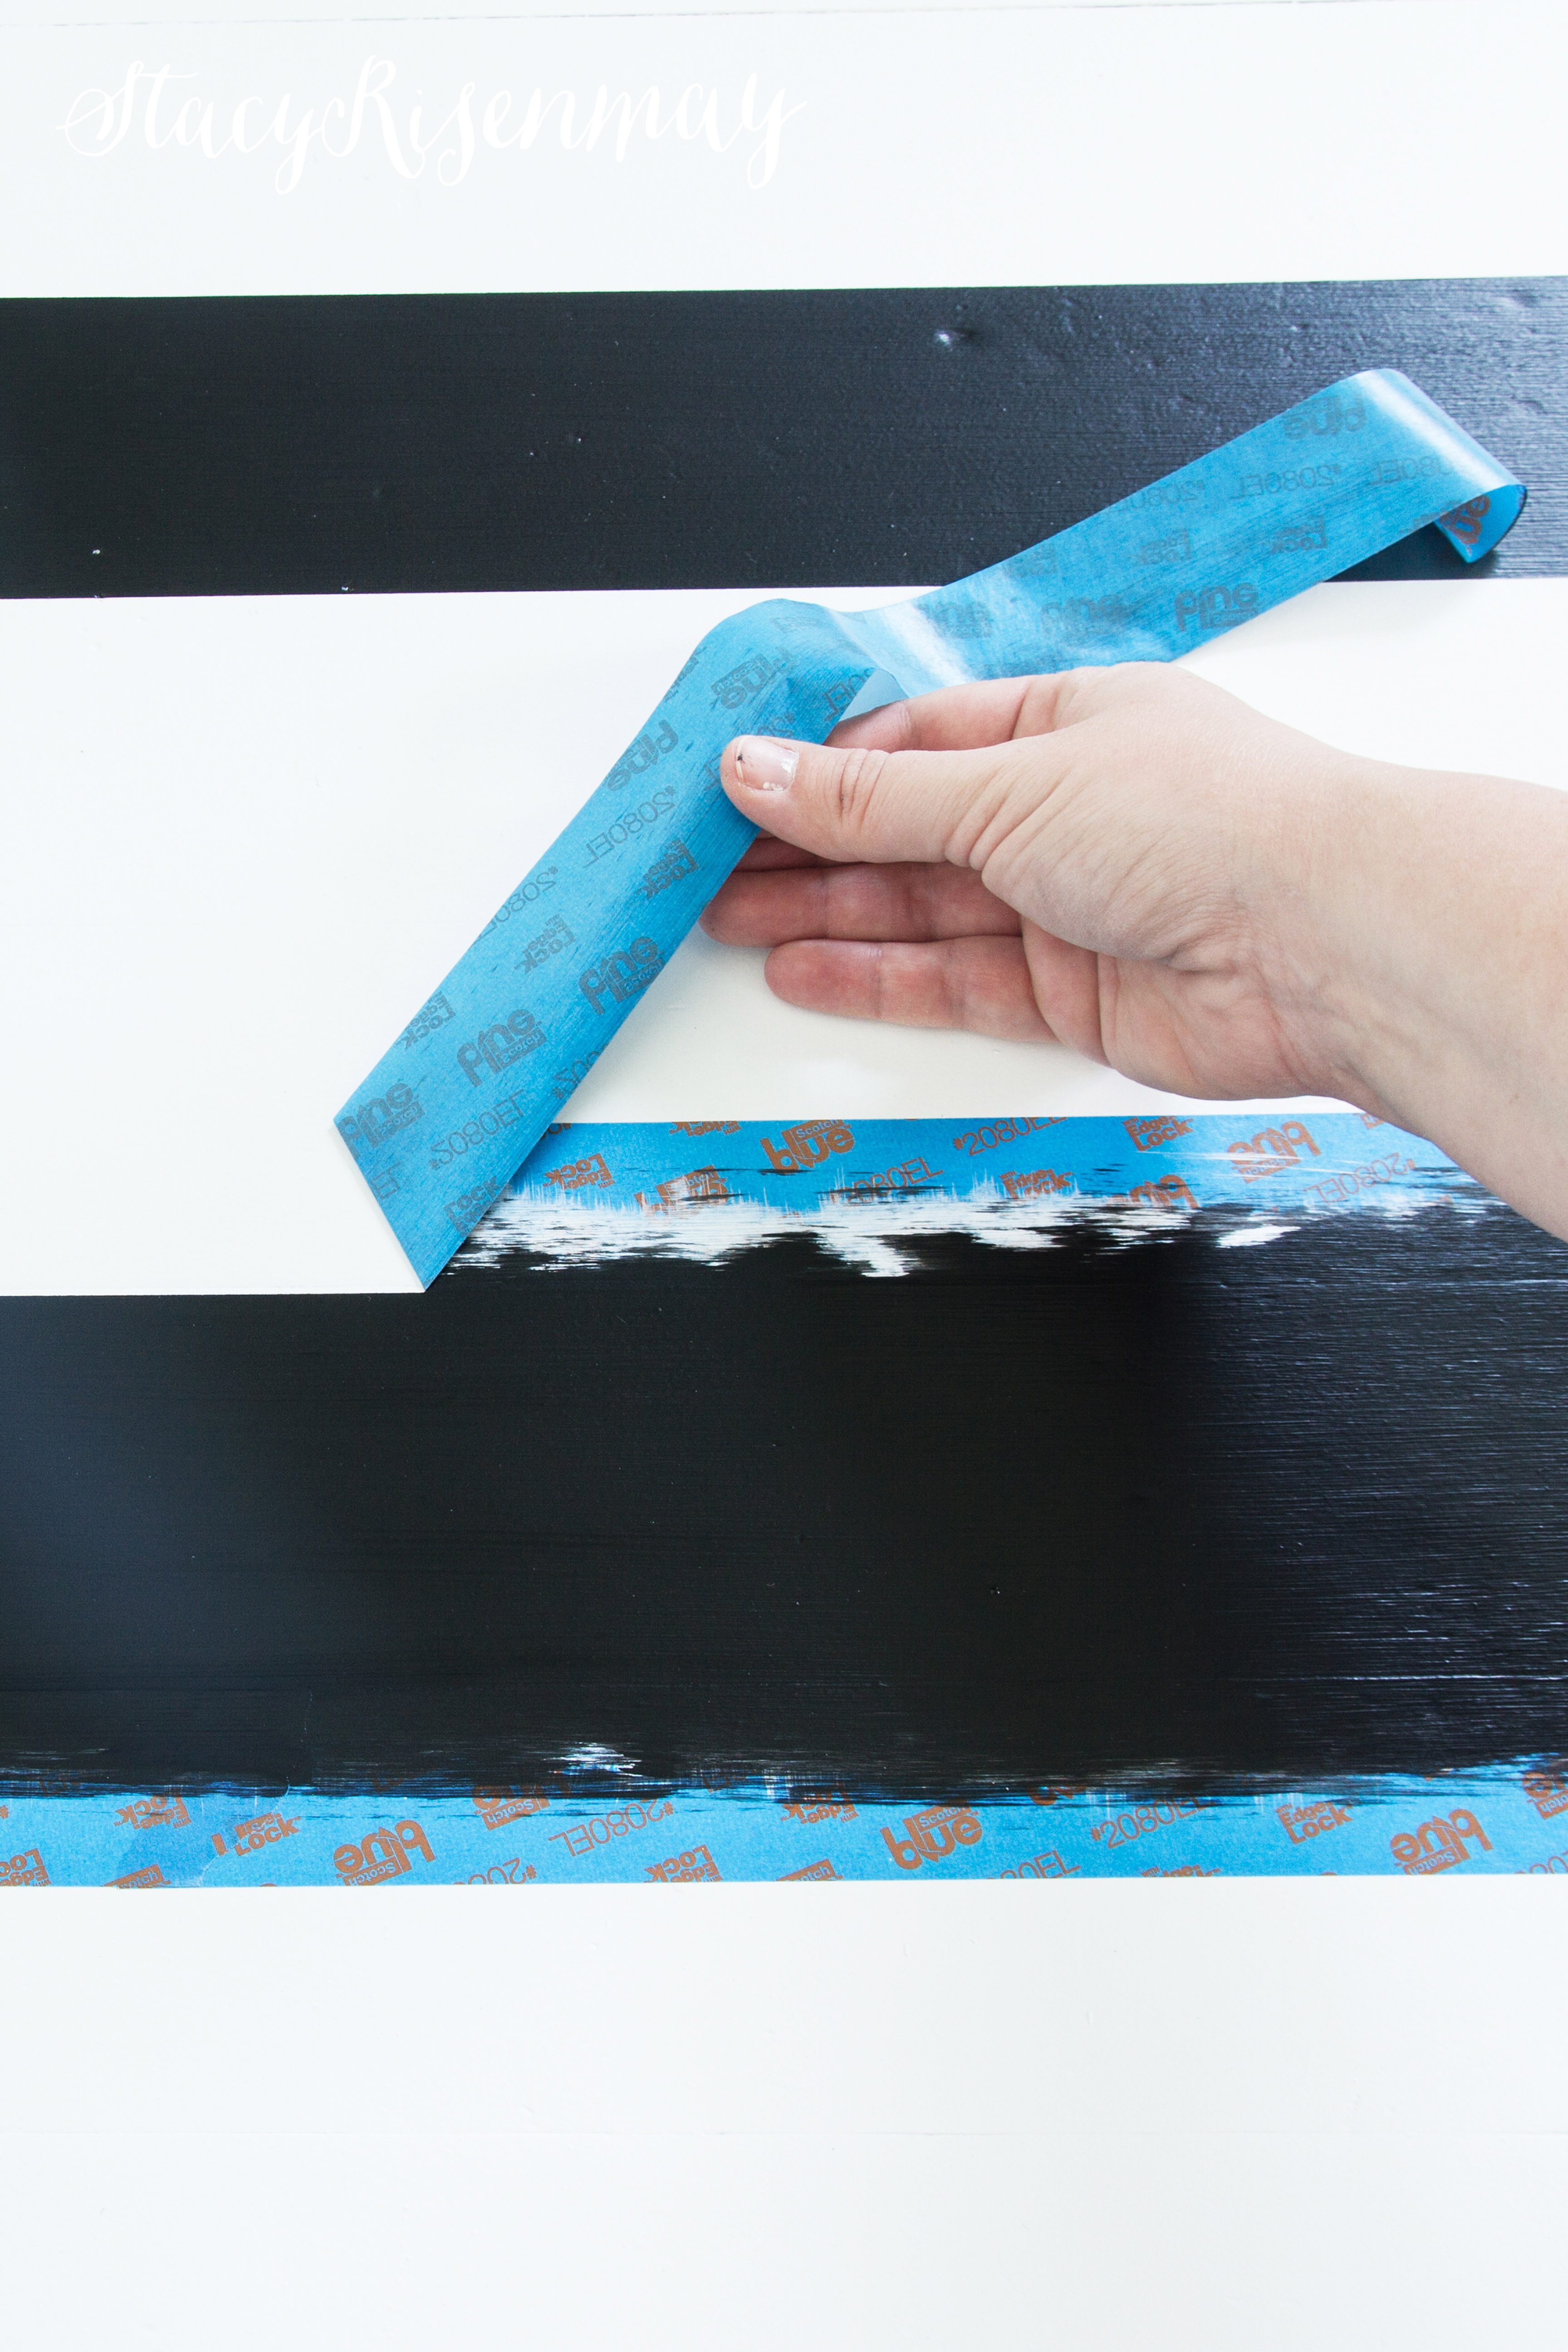
After the last coat dries completely, remove the tape by pulling the tape slowly and back onto itself at a 45-degree angle.
I love the floor! My ultimate goal is to add a flat weave rug, like a Turkish or overdyed rug, in the center of the room to add more texture and color. But while I save up and try to find the perfect one, the stripes alone are making me happy.
Would you ever paint your floors? Or if you have already painted your floors, would you ever do it again?
I have partnered with ScotchBlue™ to bring you projects that have lots of fun patterns! It has been awesome :) I have been compensated for my time. The projects and opinions are 100% my own.


Ive always been hesitant to paint my wooden floors; however, you've tipped my thoughts to be brave and do so! Many people say to varnish over the final when you're done. And others have said to use a good primer (such as Gliddens Gripper). Ill be curious to find out how it holds up, and which brand floor paint you used! They look Fabulous!
I used Sherwin Williams porch and floor enamel. I have many friends who swear by it and the can plus the people at the store swore it didn't need a top coat which is good because with white paint it can yellow it. I'll be sure and do a post a year down the road with an update :)
At first I thought you were crazy. My idea would be restore the floor, but when I saw it I can totally understand why you painted it. Not only that, an excellent job on the new paint job. If the next people want the floor restored they can do it. See it done on make over shows all the time.
Haha! At first I questioned whether I might be crazy too. Our plan is to one day add on to the back of our house (the office is on the back) so we would need to get new flooring so it would all flow and match. The wood floors we have now are actually subfloor boards. So they dent easily and are not quality. We will eventually cover them with hardwood. But they totally work for now.
That looks amazing and I absolutely love it!
This is AMAZING! I've never painted floors before, but this gave me some courage to hopefully attempt it:) It looks so great!
Looks amazing and perfect stripes!
I have never painted floors before but after seeing how well yours turned out I might give it a try. It looks amazing! I love the whole room.
Gorgeous! I wish I had the courage to do something bold and beautiful in my home! Very inspiring!
I LOVE it! I would absolutely do this. It looks so great in your room. I totally agree with picking your flooring based on what you like. You have to clean whatever you have.
They are amazing!!! Love it!!!
They look fantastic - we painted ours in the old house as they were a bit of a mish mash of originals and recent replacements and the irregularity worked better painted. I love the light it brings into the room.
WOW! That looks amazing!!! Especially after seeing the original! Way to go!
I'd paint my floors! Do you think you can only paint hardwoods . . . or can you paint laminate, too?
I know other bloggers have done that. I'm not sure how it holds up though.
That floor is stunning, Stacy!! So pretty!
WOW this is amazing! I love how crisp the lines are.
I love how this turned out! Great job.
Love your painted floor! It looks awesome!
Wow, that looks amazing! The tape did an amazing job!
And paint wood floors? I always say, it's only paint, it can be removed or painted over!
Nancy
I love scotch blue and i love your floors!!
Nice job! I'm all for painting, with the caveat that you won't necessarily be able to go back to plain wood.
Our front room floor was in horrible shape. I painted a few boards in a hidden corner, using Annie Sloan chalk paints to simulate wood. It looked good. Then we got the contractor's quote and ended up having the floors professionally redone...and the boards I had painted look different. Maybe because it's maple, maybe because it's nearly 100 years old, but all the paint did not come out. Since I'd mixed colors to look like wood, the color doesn't jump out, but if I'd used white, I think it would be a different story. The rest of the floor looks awesome, and the contractor did an equally great job on a friend's house, so it's not a matter of skill. If the floor is beyond salvaging, I say go for it. If you think you'll want it refinished in the future, I'd test a spot first.
I painted the pressed-board floors in an outbuilding and turned the space into a guest house. Used tons of painters tape (?) but it was worth it.
I painted our front living room floor in our previous home, and loved how it turned out. However, now that we have the house for sale, potential buyers are commenting that they don't like the painted floor. My thought is that they are not DIY inspired. Wish I could post a photo. It really did turn out nice.
How do you keep them from getting scratched up?
If you use a special floor enamel paint the chances of it scratching go way down. This room is one of the most used room in our house since it is a mudroom and office and where the kids play piano, do homework some days, and craft. It has yet to get a scratch and is holding up really well so far. It has gotten scuffed on the white part since we have a chair I painted black that the kids drag across the floor. Nothing a little magic eraser can fix in a couple of seconds.
Very pretty I like it. And is a lot of work too.