
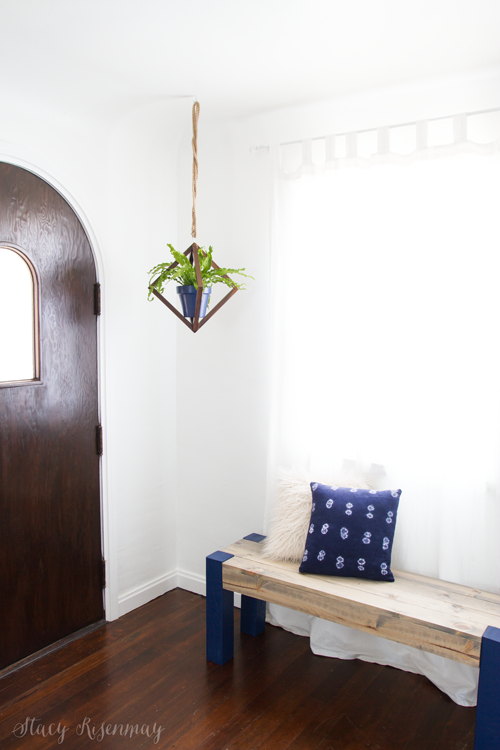
Remember the bench I made for the little girl's makeover? I had a hard time handing it over because I fell in love with it. I finally got around to making one for myself and I have photos to share of the process! I have partnered with Minwax to bring you the tutorial.
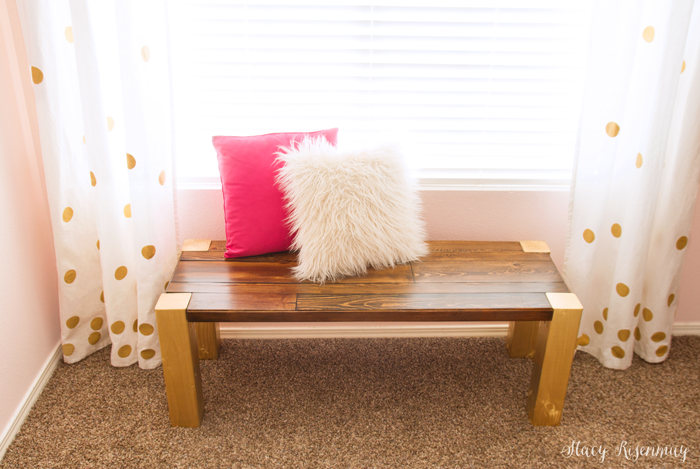
My bench is a bit different from the first one I built since when I built the other one I was working with all scrap wood. I also went with a different color scheme.
I am so happy with how it turned out!
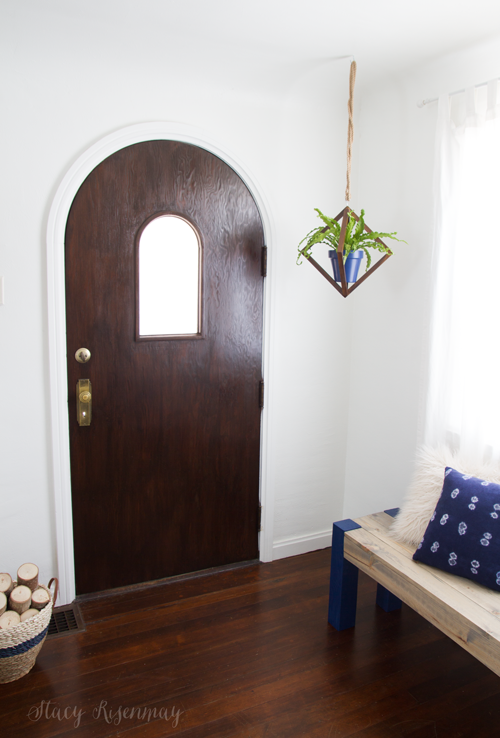
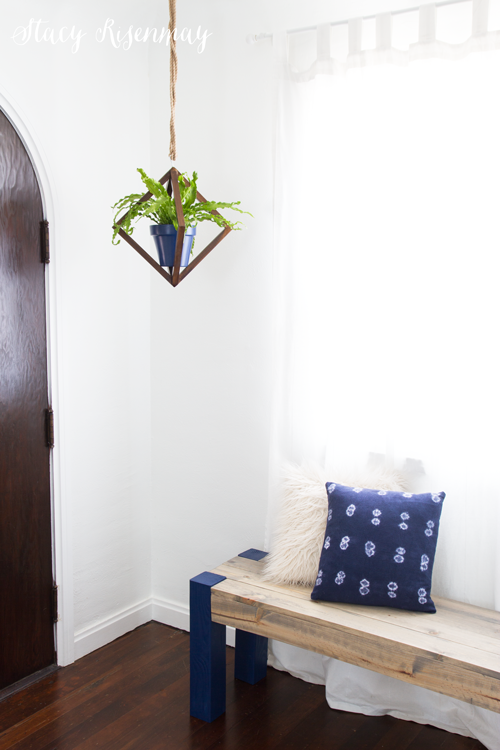
The entry way was too white for my taste and it needed some color. The hanging plant also helps fill in some of the white space. It is one I made for my book, Natural Accents.
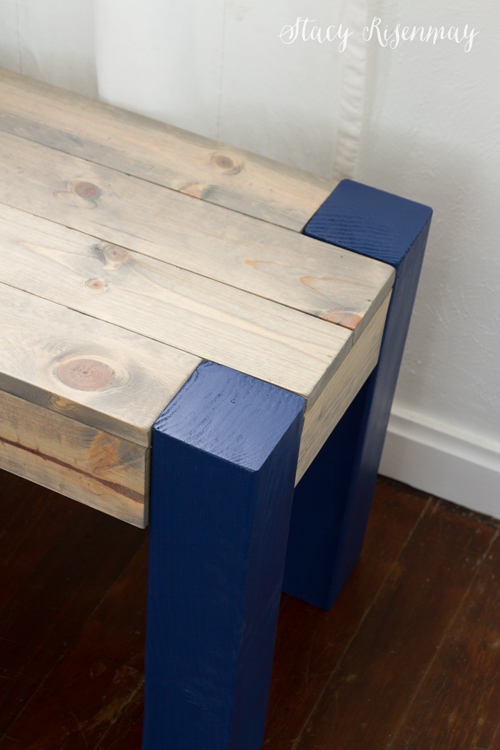
I used 1x4 boards for the top and 4x4s for the legs.
The cut list:
1x4 boards
(3) 12.5" - braces for the underside
(4) 41"
(2) 48'
(2) 7"
4x4 boards
(4) 18"
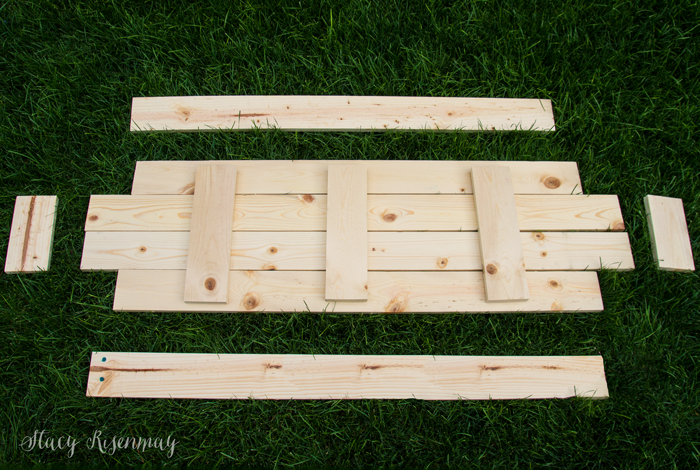
I drilled pocket holes to be able to attach the boards together.

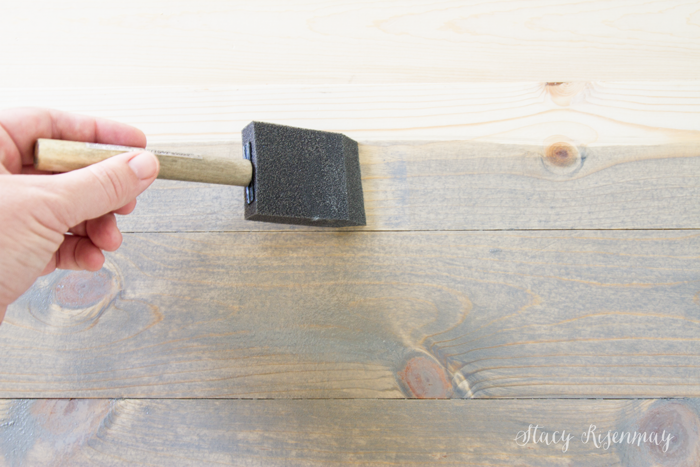
Once they were all screwed together (including the three wood braces), I stained it using Weathered Oak from Minwax. I have used Classic Gray in the past and I really like it but it has a cooler undertone and I worried it would come of light blue against the blue painted legs. I wanted a warmer gray. I only used one coat and it really gave it that reclaimed wood look I was going for.

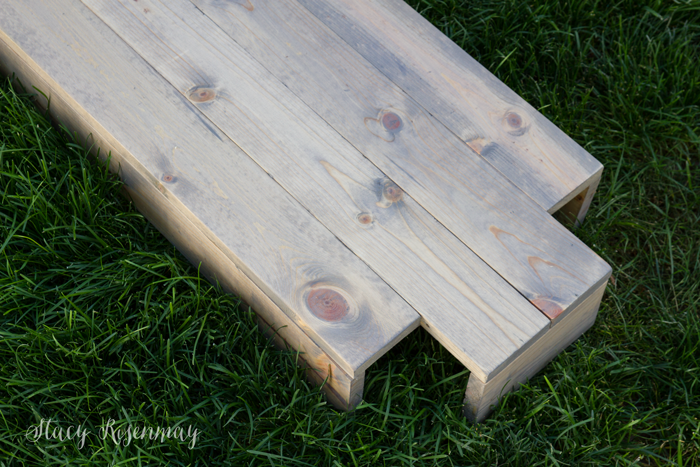
Here is what the bench top looked like before I attached the legs. The sides, front, and back piece go under the top boards so that they won't add width. The 4x4 leg would not be flush if you added it the other way.
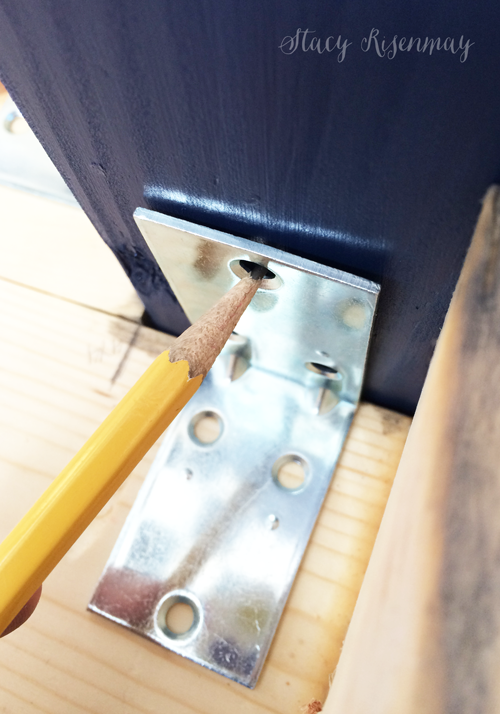
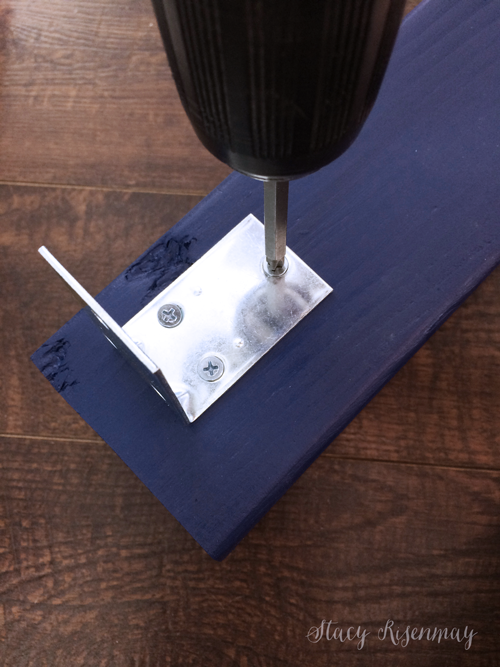
I used wide metal braces to attach the legs. Make sure your bench is on a flat, level surface when you add the legs.
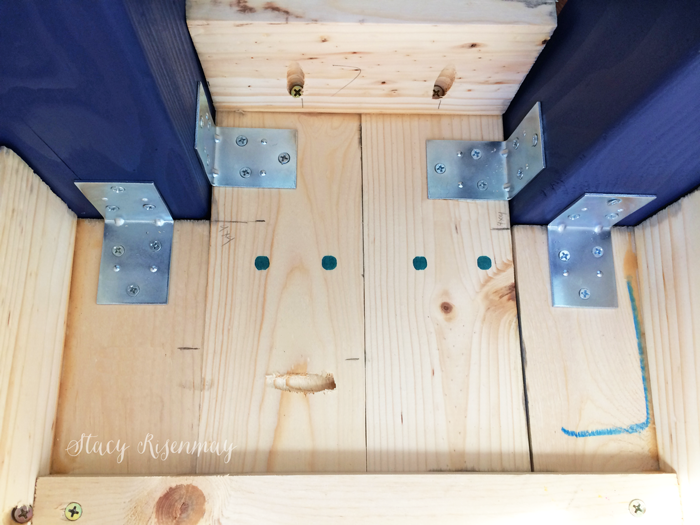
Since it is a tight space, the drill couldn't fit in between the legs on the end. I marked where the brace needed to go and then screwed it in place white the leg sat on the floor next to the bench.
Not only is this a cute entryway bench, but it can be used as extra seating or as a coffee table. We don't need a coffee table all the time. It tends to get in the way of my active boys if it is there all the time, but every now and then we have need of one during movie night or something and it is nice to be able to move it over.
Here are the other Minwax projects I have done this year:
This post was sponsored by Minwax but the thoughts, ideas, and opinions are all mine :)


The bench is very nice ... are you planning on putting nice baskets below for a bit of storage?
I love this and that blue is really grabbing my attention. Great project!!
Thanks for that tutorial looks super easy.
I love both versions. Love the combination of paint and stain and the fact that you can pull together design elements in any space with creative pairings. Such a simple design I feel confident I could do this myself. Thanks for the how to.
LOVE this! It looks (relatively) easy and the contrast between the stain and the blue legs is perfect! Thanks for all the details.
Love each bench. I think I will be able to make one. Fingers crossed.
I like this one even better than the first version. The pop of blue is so pretty!
awesome post really i like all designs
Love this!
Thanks for sharing this week at the Merry Monday link party!
We hope to see you again next week!
Kate | TheOrganizedDream.com
Oh my gosh I love that you painted the legs blue! Pinning to my Build Projects board!! The Wednesday "To Grandma's House We Go" link party just started over at grandmashousediy.com and I thought you might be interested in joining it, thanks!
That is a VERY cute bench! Love it! Thanks for sharing at #HomeMattersParty!
What did you use for the blue paint?
Hello,
What color of paint did you use for the legs?
I love this color scheme! Beautiful work!
Hello,
I have a couple questions about this project. They look great by the way and have caught the eye of my mother who has contracted me (pretty much just told me) to make her some.
About how much weight do they support? Could two fully grown adults, say 300 - 350 lbs sit on it?
Second, what did you use for the stain on the legs? It is a very pretty blue but I can see the grain so I assume it isn't paint.
Thank you so much for sharing.
You are so sweet to build this for your mom! Here are the answers you requested.
I'm not sure exactly how much weight it can hold. I stand on it occasionally to reach things (sorry but I'm not telling you my weight ;) ) and my husband sits on it (he's 225). We've never both sat on it at the same time.
The blue on the legs is paint. The wood grain only shows when light shines on it since the grain "sticks out" kind of like when something is embossed. 4x4s tend to be like that.
Good luck on your project!
Thank you!!! I just moved into an apartment with a really weird 4 foot dining area. I am going to make this but extend it and make it taller to become a tall skinny eating table. <3
What kind of wood do you use ?
my teenage grandson is looking for a woodworking project. What type of wood did you use for the 1x4 boards and what type of wood for the 4x4 boards?
I have made the bench for my son. It matches a table that was given to him. I made the bench 150 cms long and it is very sturdy. I left the finish just sanded - for his wife to add the finishing touches. They are both very pleased as I made it just the right size to fit under their table. Thank you very much for the idea
I love this simple and stylish bench. I scrolled through the comments hoping someone mentioned the color of blue used… would love to know the particular blue, thank you!
Thank you! It is Rich Navy by Glidden. It is an old paint color so I am not sure if it is still made.
I love it! but I do have one question: do you have a picture of the entire bottom? I can't see how the front and back boards are attached I want to make this, this weekend for my front porch and I'm going to paint the legs purple.