• Skip to primary navigation
  • Skip to main content
  • Skip to primary sidebar
  • Skip to footer
Stacy Risenmay
  • Home
  • About me
  • Subscribe
  • Shop
  • Contact Me
  • My Book
  • PRESS
    • Facebook
    • Instagram
    • Pinterest
    • Twitter
menu icon
go to homepage
subscribe
search icon
Homepage link
  • Home
  • About me
  • Project Gallery
  • Our House
  • Shop
  • PRESS
  • Contact Me
  • Privacy Policy
    • Facebook
    • Instagram
    • Pinterest
    • Twitter
  • ×

    Dresser Makeover

    By Stacy 10 Comments

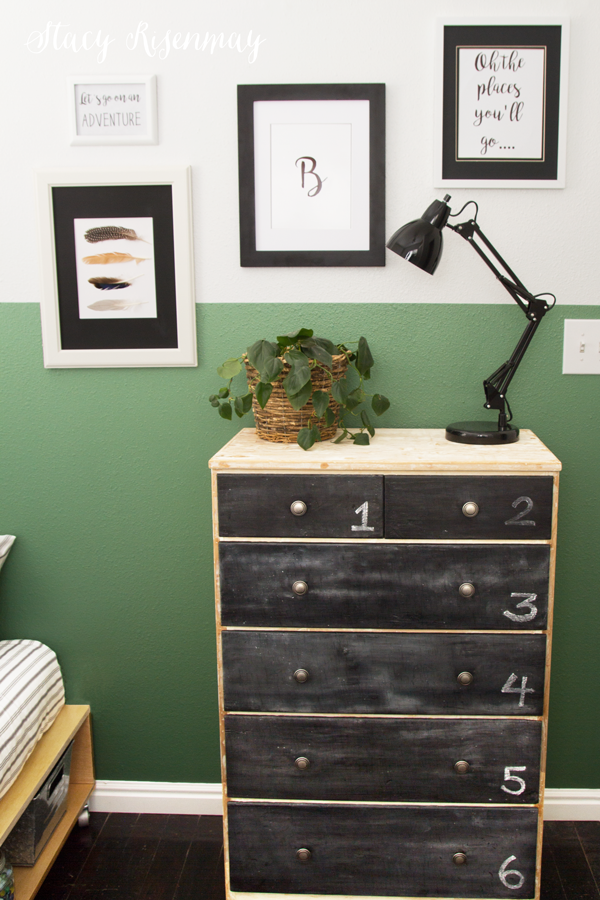
    Sometimes makeovers don't turn out how you envisioned them. They kind of take you in another direction. Not worse, or better, just different than what the picture was in your head. This was one of those projects.

    I had planned on going thrifting and finding a dresser I could refinish for the room makeover I did for my cute neighbor boy. After talking to my neighbor, she said she had one already that we could use. I later found out that it her husband's dresser when he was growing up. That made me want to use this dresser even more :)


    dresser-before


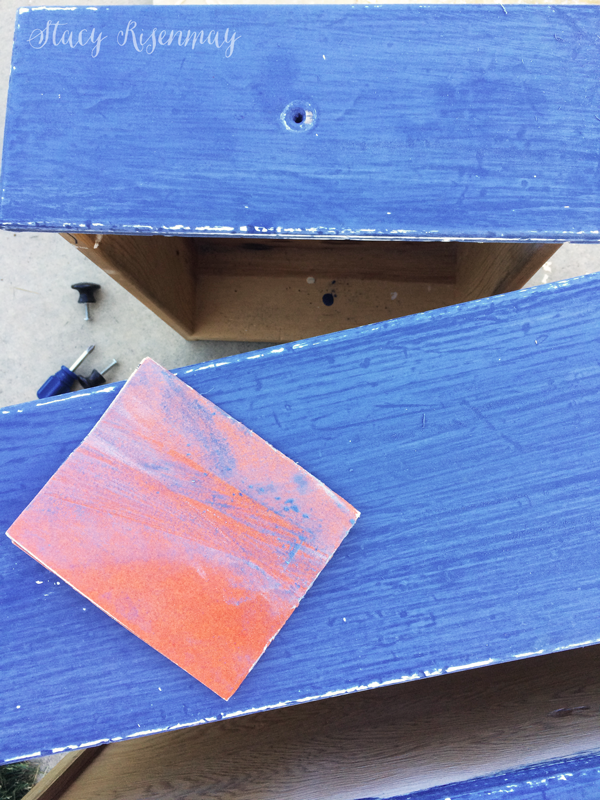
    I had planned on stripping the paint and staining it but ended up doing this.


    dresser-after


    When working with pieces that have old paint, always do a lead paint test. The kits are inexpensive and easy to use.


    lead test kit


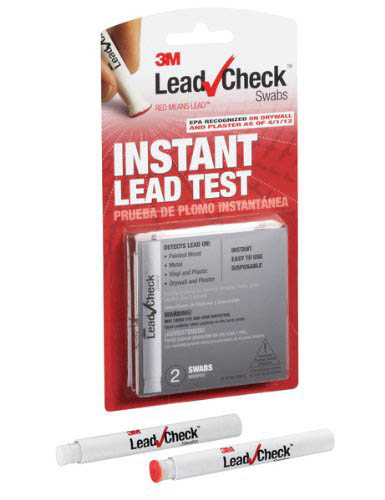
    Lead Test Kit (affiliate)


    When I starting stripping off the paint, I noticed two things. One, there were a lot of places where there had been damage filled in with putty and some damaged that never was fixed. I started to realize that staining it was not going to be a good option since the putty used was not stainable. The other thing I noticed was that since the first layer of paint was white, and it left a white washed look that I really grew to like.


    scraping-old-paint-off-dresser


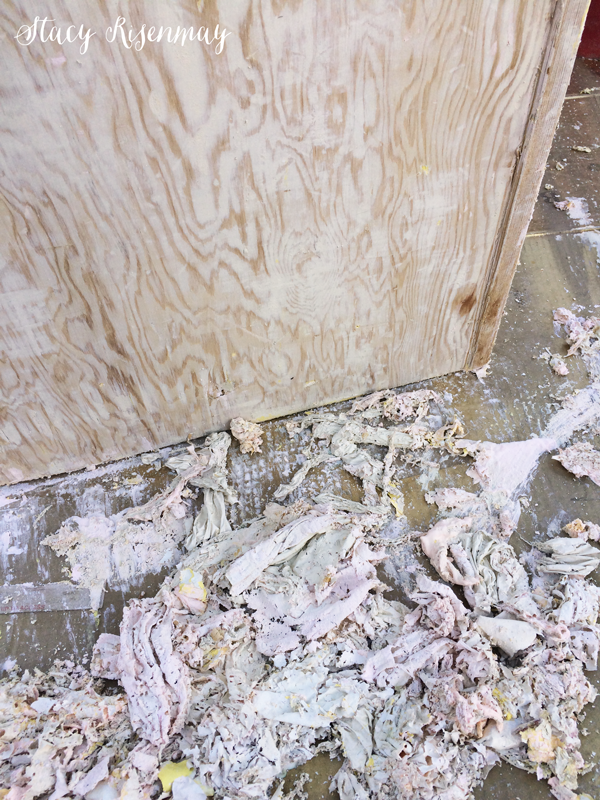
    There are two ways I like to strip paint. One is the heat gun method and if I used a stripper, I always use the Citristrip gel.


    ways-to-strip-paint


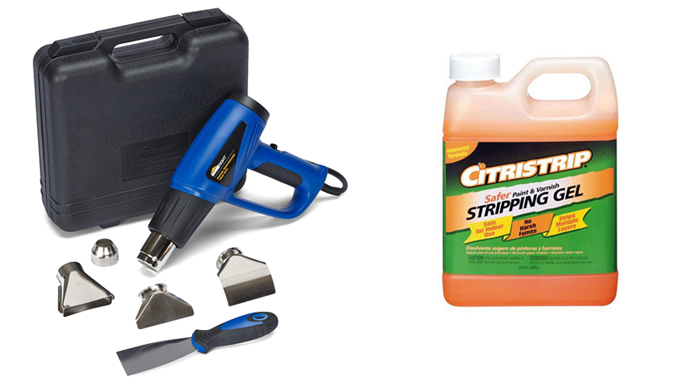
    Heat Gun with scraping tools (affiliate)                  Citrus Paint Stripper (affiliate)


    After stripping the paint off the dresser, which took two days, I was not as thrilled with the idea of stripping the drawer fronts. This happened one of the weeks we had a heat wave of well over 100 degrees. I also worried if that would be too much of the white washed look. I decided to paint the drawer fronts black. I used chalkboard paint because it is matte and also so my neighbor could label the drawers.


    sand-before-painting

    Chalkboard Spray Paint (affiliate)


    After stripping the dresser of the paint I scrubbed it clean with soapy water and the hose. Then after it had dried I sanded and sanded. I wiped the dust off with a damp cloth.


    white-washed-dresser

    framed-feathers


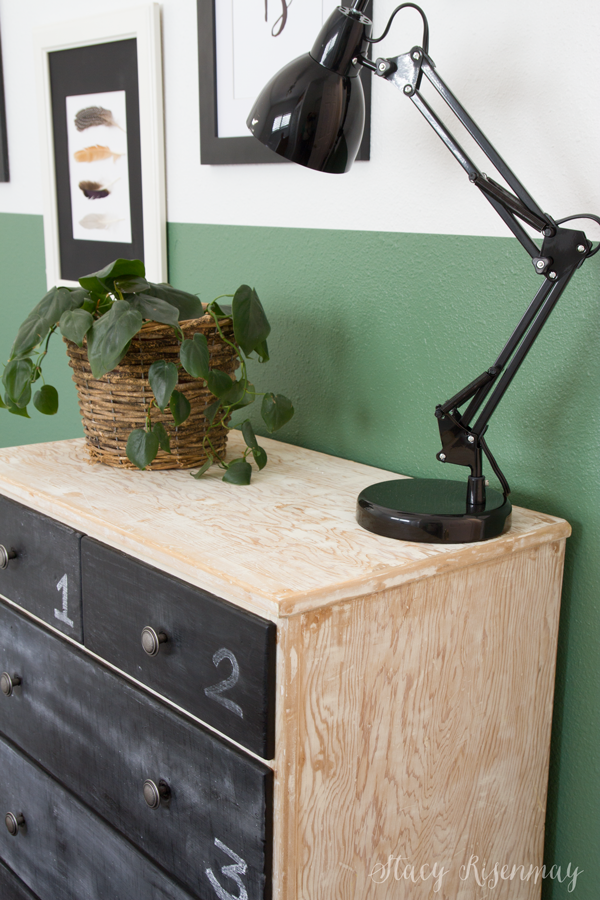
    Before adding the chalk to the drawer fronts it was a bit to contrast-y. The chalk dust softened it and makes it work.


    chalkboard-painted-dresser


    Have you ever had a project take an unexpected turn? 


    .

    « Modern Industrial Bed with Storage
    Simple DIY Frame »

    Filed Under: DIY Projects & Tutorials, Furniture, Painting 10 Comments

    Subscribe

    for your weekly DIY fix.

    Reader Interactions

    Comments

    1. angie church

      August 23, 2016 at 3:51 pm

      great makeover love it. Lead paint can be so dangerous and we may not even realize that something has lead paint. So glad there is a test for it

      Reply
    2. Beth

      August 24, 2016 at 7:23 am

      Is that actual chalk dust, or white paint?

      Reply
      • Stacy

        August 24, 2016 at 10:00 am

        On the black drawer fronts? It is chalk dust :)

        Reply
    3. Carole @ Garden Up Green

      August 24, 2016 at 7:26 am

      Love a good makeover and this is fantastic - natural wood is the BEST - just my opinion.
      I use to strip paint off furniture when I was younger - oh it took forever but the reward was so great!

      Reply
    4. doodletllc

      August 24, 2016 at 7:28 am

      A very nice makeover - the idea of the chalkboard fronts is brilliant. Love it!

      Reply
    5. Amy

      August 24, 2016 at 8:00 am

      I love how it turned out! That whitewashed wood with the chalkboard black really pops.

      Reply
    6. Dawn Jones

      August 24, 2016 at 8:27 am

      I love your dresser re-do. I think I might have to try this. Thank you for the inspiration. Have a great day!

      Reply
    7. Noreen

      August 24, 2016 at 9:33 am

      I like the result. Did you put any kind of finish over the main part - or just leave it bare wood?

      Reply
      • Stacy

        August 24, 2016 at 10:00 am

        As of right now no. I worry if I do the wood part will darken and it will look like an animal print! I'm still toying with different ideas.

        Reply
    8. Lauree Sayne

      September 01, 2016 at 2:45 pm

      Very creative and perfect for a little boy! Love your helpful tips, too.

      Reply

    Comment Below! Cancel reply

    Your email address will not be published. Required fields are marked *

    This site uses Akismet to reduce spam. Learn how your comment data is processed.

    Primary Sidebar

    stacyHey! I'm Stacy and am a DIY addict. I love to get my hands dirty, whether it's sawdust, paint, or dirt. My goal is to help YOU learn to fix up your home and yard. No matter the style or size, I think everyone should love their home. And it doesn't takes a big budget to get there. Let's DIY together!

    Search this site

    categories

    Subscribe to my newsletter!

    Footer

    Welcome! I'm sharing our adventures as we fix up our 1938 cottage. Whether it is big or small, I think everyone should love their home and I don't think it takes a lot of money to make a space your own

    About Stacy

    • Facebook
    • Instagram
    • Pinterest
    • Twitter

    My Favorites

    copyright

    All images and content are copyrighted via Stacy Risenmay unless otherwise stated. If you'd like to share my work, please link back to this blog.
    Thank you for visiting!


    Footer

    ↑ back to top

    About

    • Meet Stacy
    • Privacy Policy
    • Contact

    Categories 

    • Home Decor
    • Outdoor Projects & Gardening
    • DIY & Tutorials
    • Kid Activities
    • Recipes
    • Travel
    • Cleaning
    • Houseplants
    • Staining
    • Painting
    • Power Tools
    • Holiday Ideas

    Newsletter

    • Sign Up! for emails and updates

    As an Amazon Associate I earn from qualifying purchases.

    Copyright © 2020 Brunch Pro on the Brunch Pro Theme


    Privacy Policy
    Welcome! Thanks for visiting.
    Hi! I'm Stacy and I want to help YOU become a DIY rockstar! Sign up for my email list so each project, tip, and trick will go directly to your inbox :)
    Your information will *never* be shared or sold to a 3rd party. Pinky promise :)
    Welcome!
    Hi! I'm Stacy and I blog about fixing up our 1938 cottage. Join the thousand of others who get my posts sent to their inbox for FREE!
    Your information will *never* be shared or sold to a 3rd party.