I had an amazing time at SNAP! I conquered some fears and learned a lot. I will write a post about my personal experience at the blogging conference later this week but I wanted to share the information from my talk. I went first so I introduced the topic and spoke about the beginning tools and then Brittany from Pretty Handy Girl talked about the more advanced tools. ALL the tools we talked about (plus the router) are the only tools I really use. She did an awesome job :)
I started out the talk with a little video......... (P.S. I know I have a terrible singing voice. I am okay with that.)
I think the biggest thing with getting started with tools is just getting over that initial fear. Once you have some hands on training and do it a few times you will gain the confidence to do more.
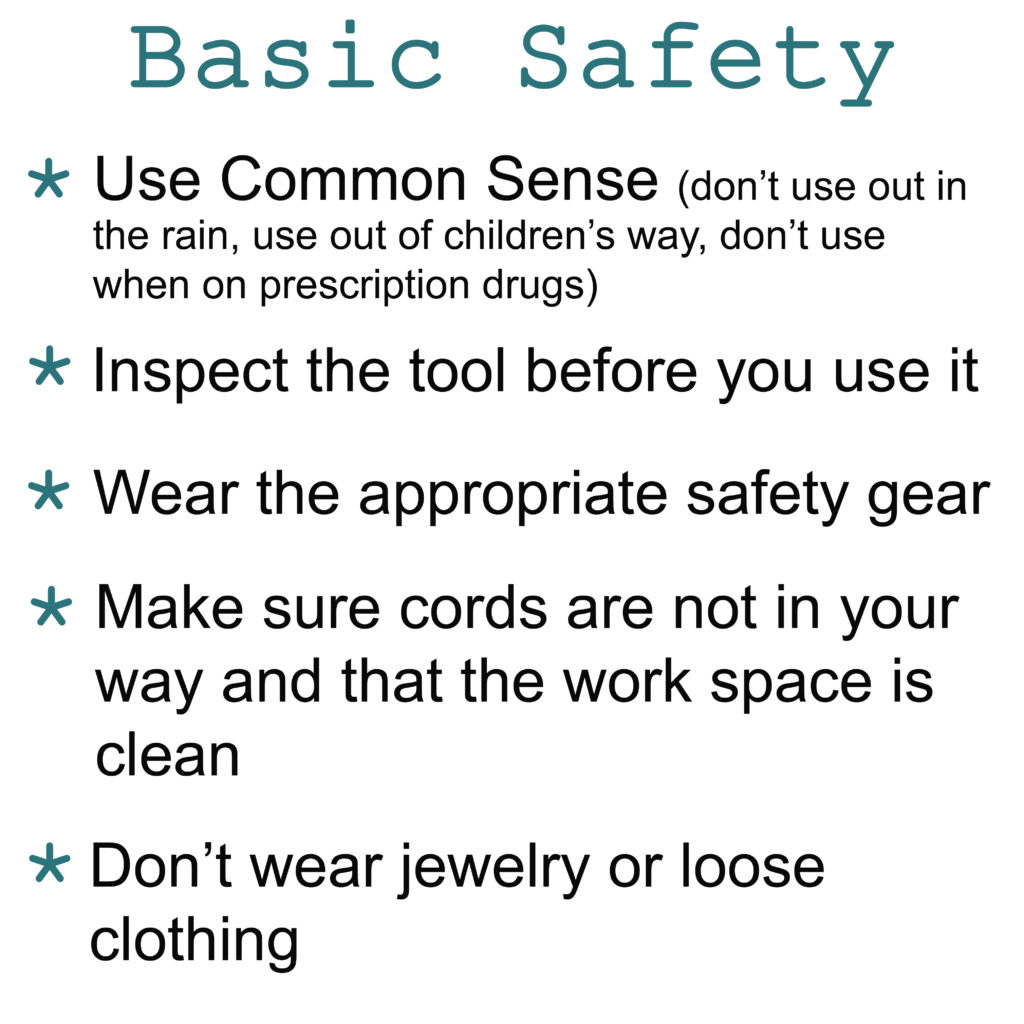
I think the slide says it all. Don't be distracted when you are working with tools. Focus on what you are doing.
The biggest safety violation is getting TOO comfortable with a tool. A little fear is healthy. If you are too comfortable with it you won't respect its power and you will be complacent. That is when you don't pay attention and you WILL get hurt.
You can read the manual and watch/read tutorials online, but working one on one or in a small group with someone who knows the tool is really the best way to learn. Find someone who you know that can give you a hands on lesson about the tools. If you don't have a neighbor, relative, or friend you can go to home improvement stores (like Home Depot) and attend workshops. Or you can contact your local community college to see if they have classes. But however you do it, educate yourself about the tool before trying it out yourself.
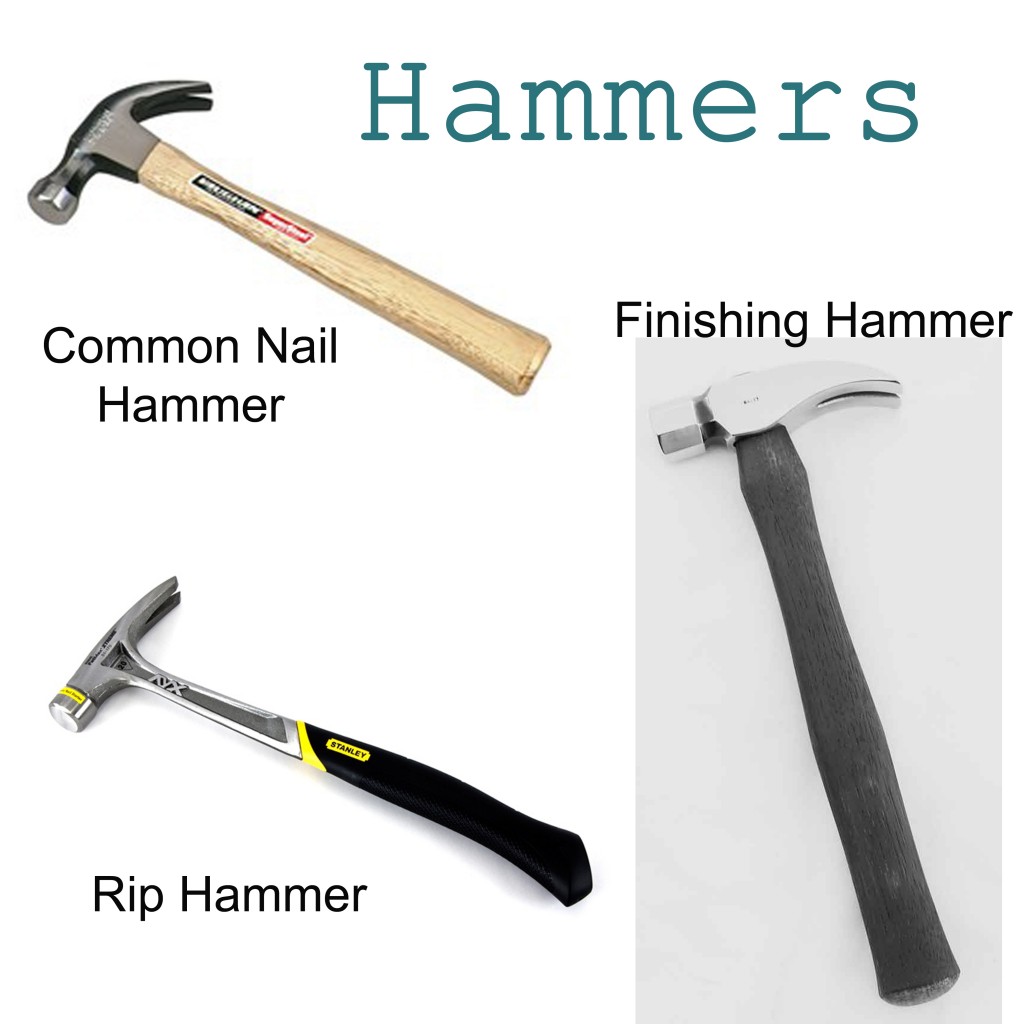
The common hammer is just that.....the most commonly used hammer. Everyone should have this one! It is curved so it is easier to remove nail. The rip hammer is generally made of all steel and is for contractors. The finishing hammer is smaller and is for use with finishing nails.(See below)
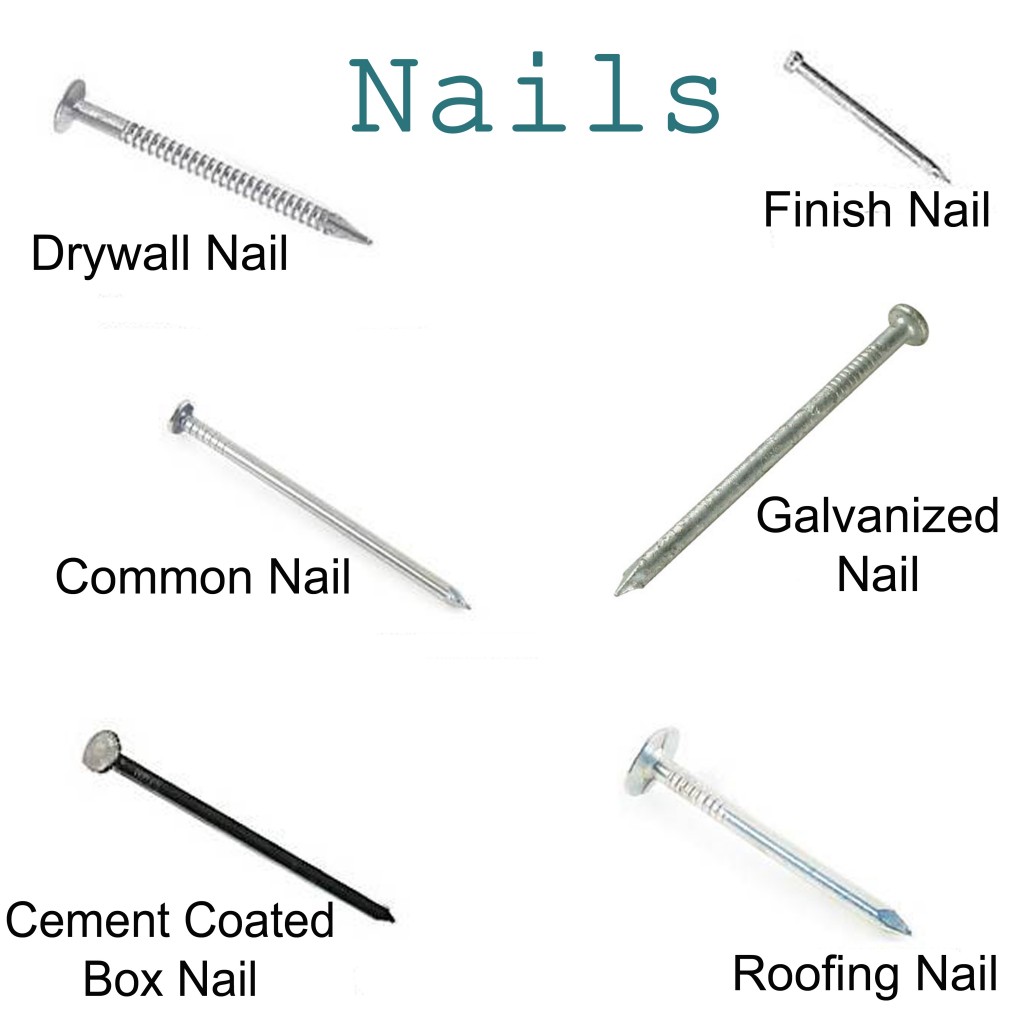
There are more nails out there than what I have shown here but these are the most common. Each nail is designed to be used for a specific reason. And you will get the best results if you use them for their intended use.
The drywall nail has ridges to give it grip (anyone else saying "Rrrrrrrruffles with Rrrrrrridges" in their mind??? Just me? Okay.) The common nail is the most commonly used nail and is used in general construction. The box nail is skinnier (smaller shank) than the common nail so it is coated with either cement or a vinyl to compensate for that and give it more grip. It is used for smaller projects (examples: crate, wood flower box, etc) The galvanized nail is meant for exterior projects because they do not corrode. Roofing nail are for, wait for it....... roofing. Weird right? They have a big flat head that hold the shingle on well. The finishing nail is for if you do not have a nail gun and you need to put up trim and such. You would also need to use a finishing hammer with them.
When you are nailing into wood you are essentially splitting the wood fibers apart and sometimes the wood will crack or split. There are ways to avoid this.
If you are nailing near the edge of the board your chances go up that it will split. So be careful if you need to nail on the edge. You may want to drill a pilot hole first ( a hole that is smaller that the nail). Stay away from knots in the wood as well. They are hard to nail through and your chances go up that the wood will crack and split. Also the quality of the wood is a factor. If you are using 2x4s to build a bench for example, then buy the nicer 2x4 that are sanded and not the rough cut cheaper ones. The rough cut ones split more easily ( at least in my experience).
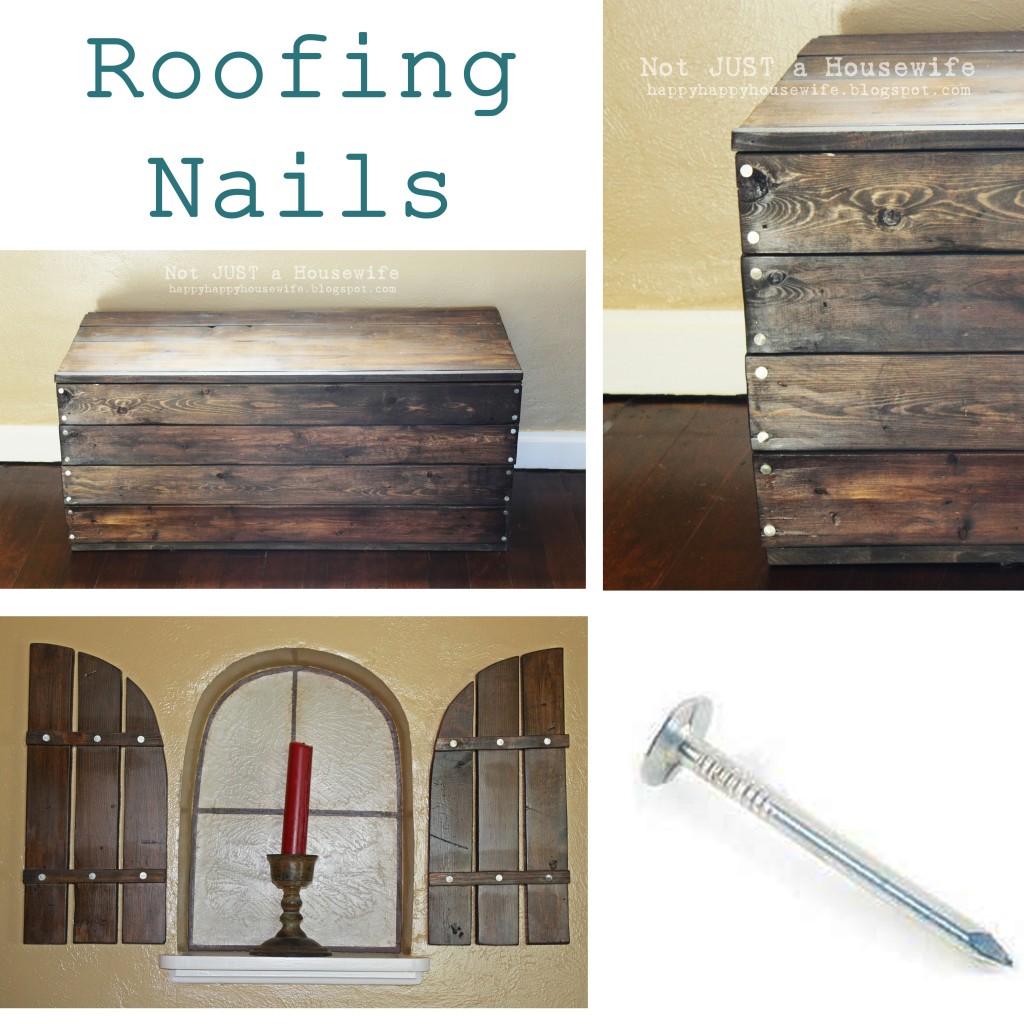
Sometimes I am a big fat rebel. I used roofing nails for a couple of projects because i wanted their big heads for decorative purposes. If you are going to do this, then just be careful because the chances of splitting the wood are higher.
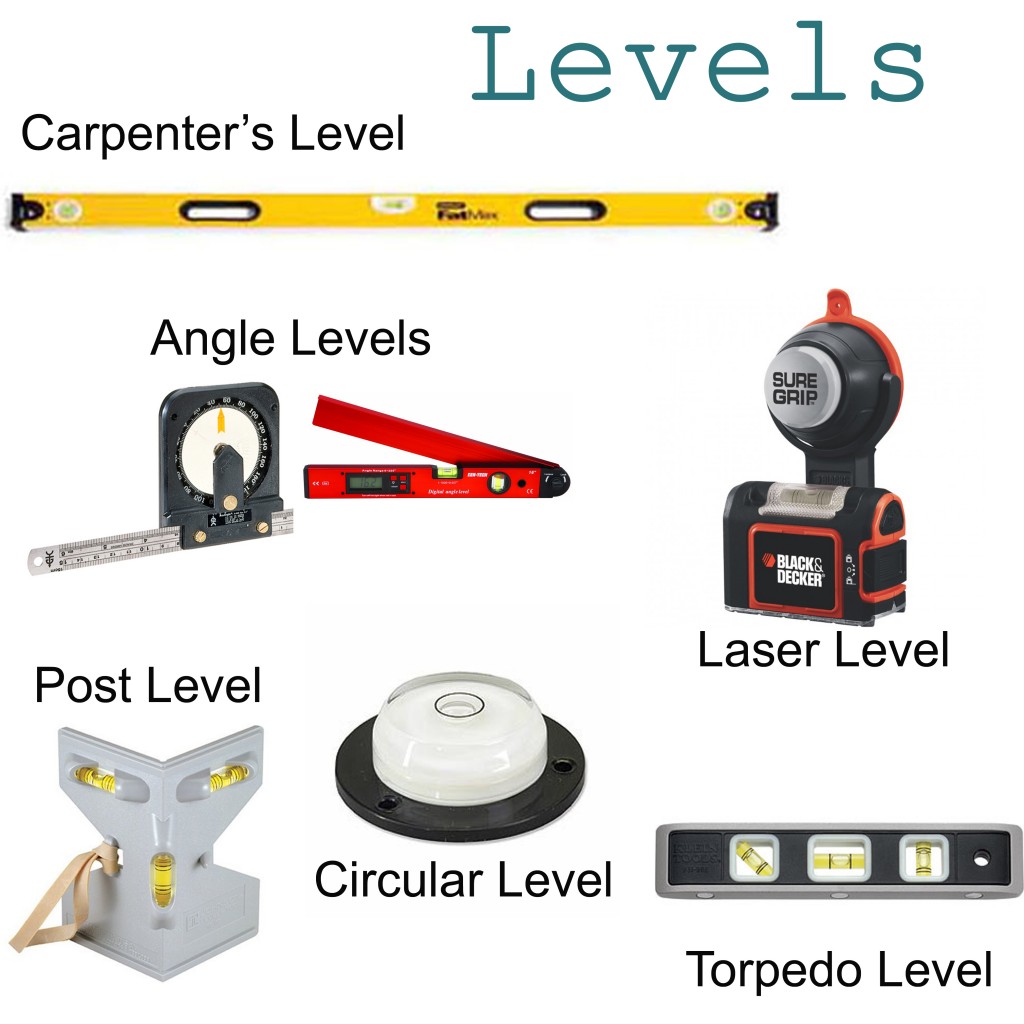
There are like a gajillion different kinds of levels. Not really, but there are way more than I have listed here.
The carpenter's level is the longest one because the length of a level affects its accuracy. Contractors need everything to be super accurate, right? The torpedo level is usually 6 to 8 inches long and is for those tight spots that a longer carpenter's level can't get to. The laser level is probably most commonly used for hanging pictures straight. It is great for long distances ( like my ceiling shown below). A circular level is for leveling surfaces like counter tops, tables, etc. An angle level is for just that, when there are two pieces of wood joining at an angle. I left off an image I meant to have on my slide. It is a line level. It is small and skinny and you attach it to string tied to 2 posts for when you are installing a fence. And there is also a post level you can attach to the post to make sure it is level. I have not used that one before. I used my carpenter's level for our posts. But I am sure this one would have been great too.
I really only use 2 of these on a regular basis. The laser level and the carpenter's level.
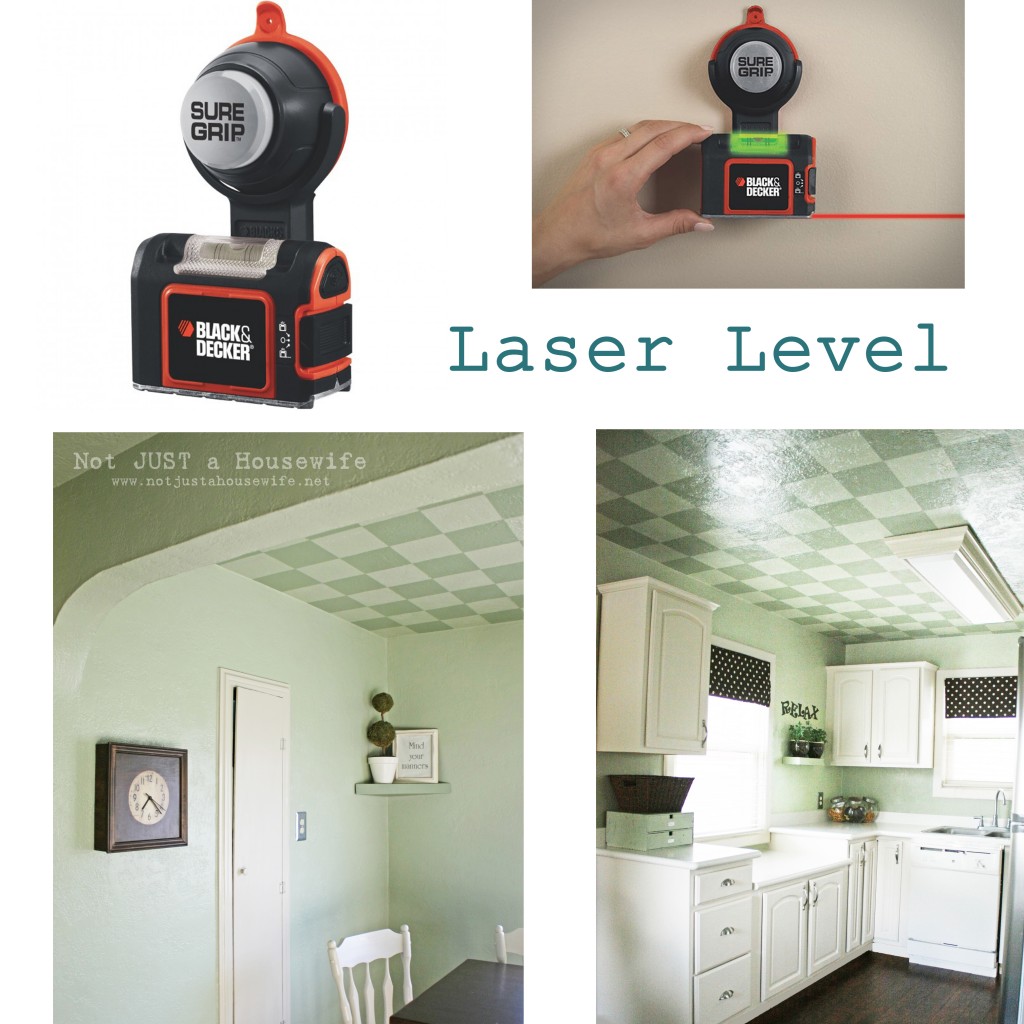 My kitchen/dining room ceiling
There is no way I could have done my ceiling and had it turn out as even as it did without the laser level. It attaches to the wall or ceiling and went the whole distance so I could tape.
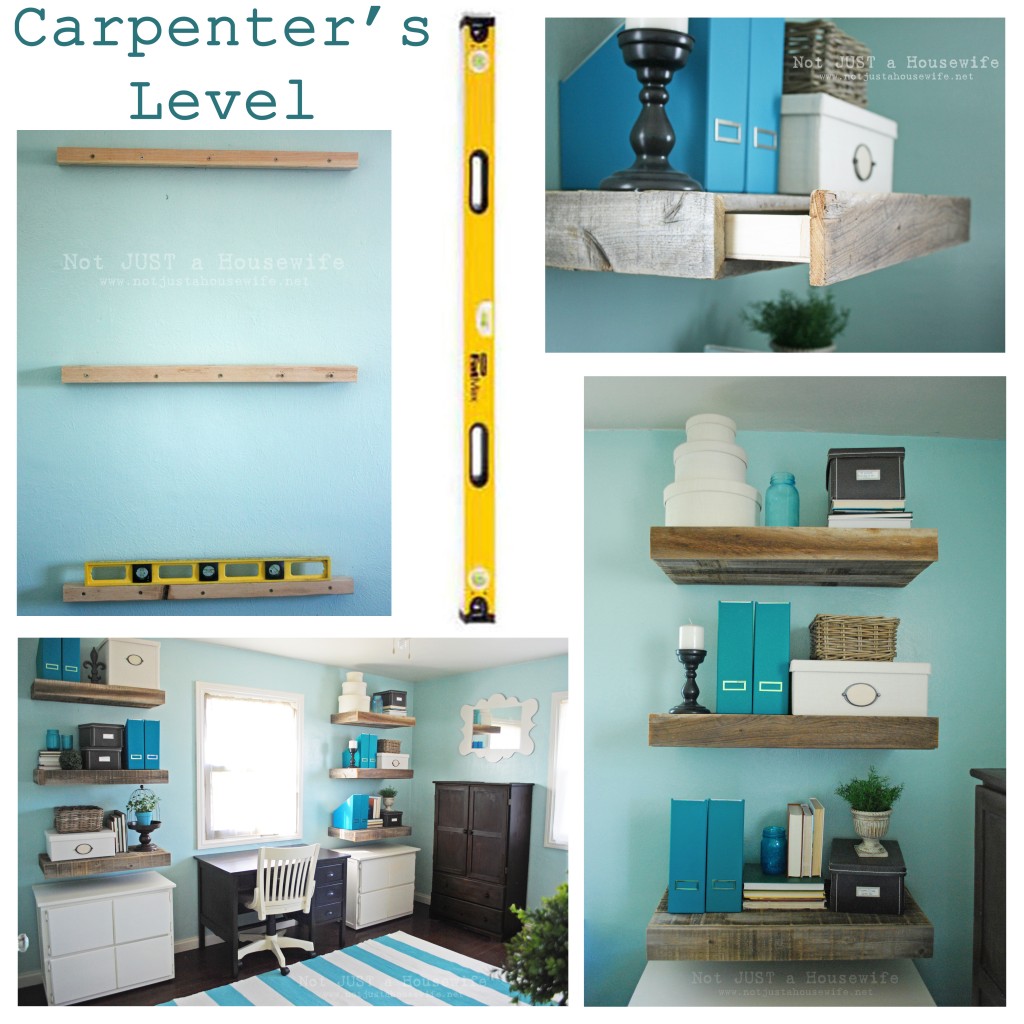
My reclaimed wood shelves from my office
I use the carpenter's level for building walls, furniture, hanging shelves, building fences, and so much more. And as a added bonus mine has a ruler on one side. I also use it as a straight edge sometimes when drawing a line to cut.
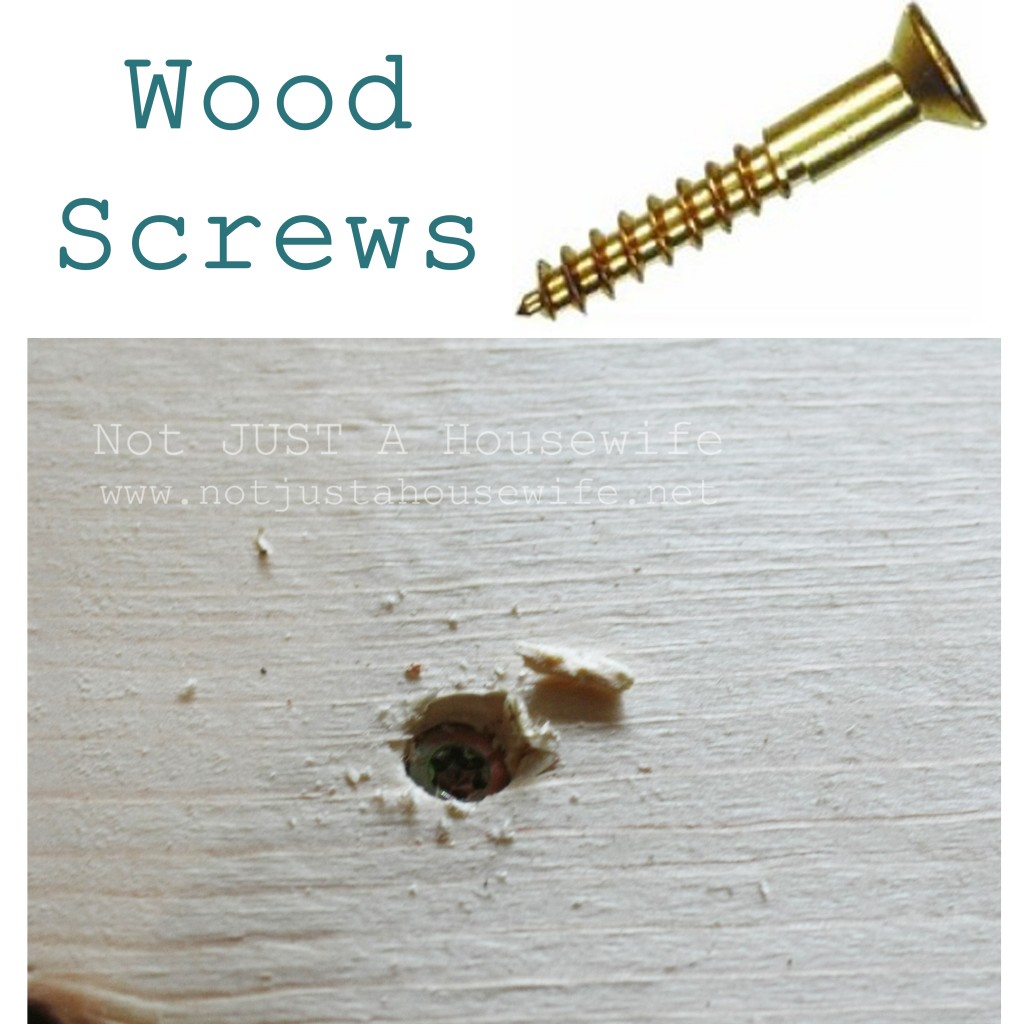
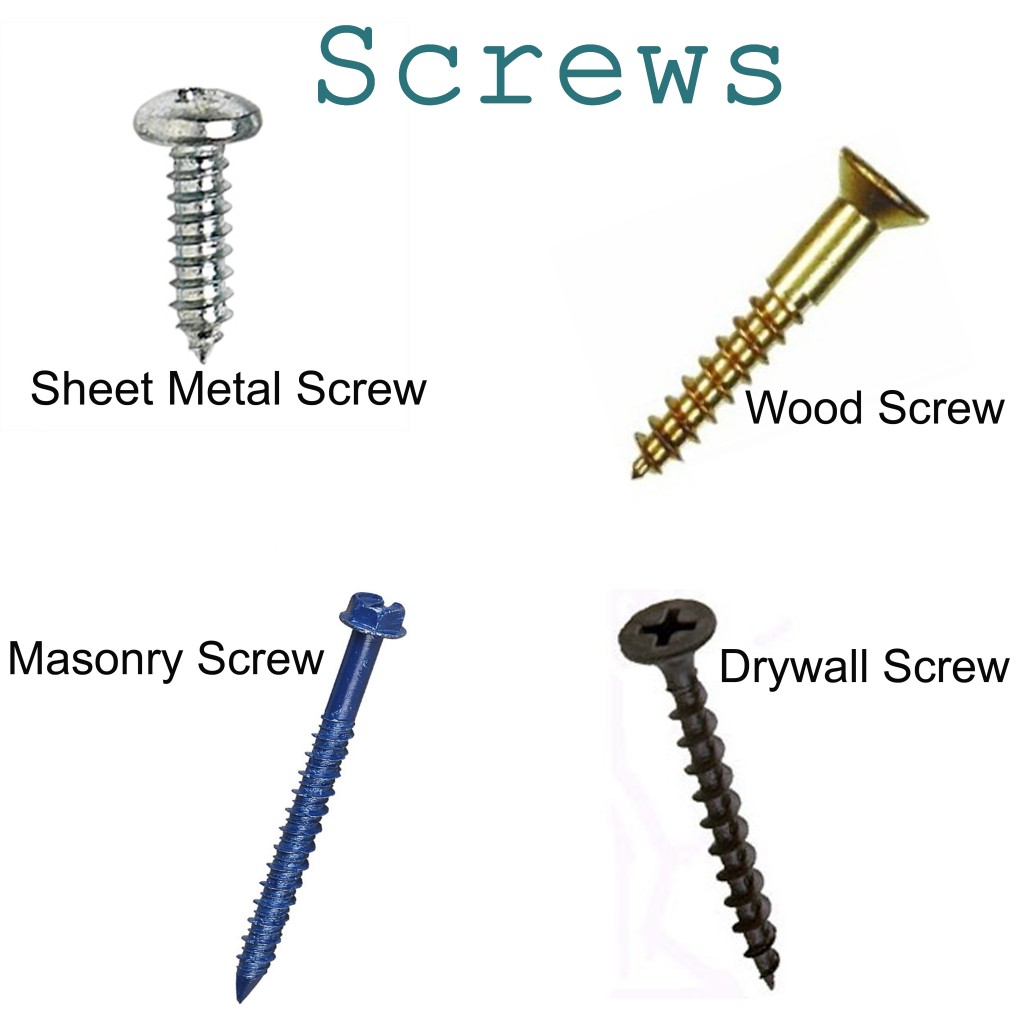 Just like with the nails, you need to choose the right one for the right job. Masonry screw are used for cement and brick. They are often used for hanging cabinetry to walls as well. Drywall screws are coated to make them grip better. And wood screws are designed so they go into the wood easily and countersink down into the wood.
You want to sink the wood screws so you can putty over them. Be careful when using a soft wood like pine that you don't sink it too far down. You just need it deep enough to be below the surface of the wood so you can putty. Always use a stainable, paintable, sandable wood putty.
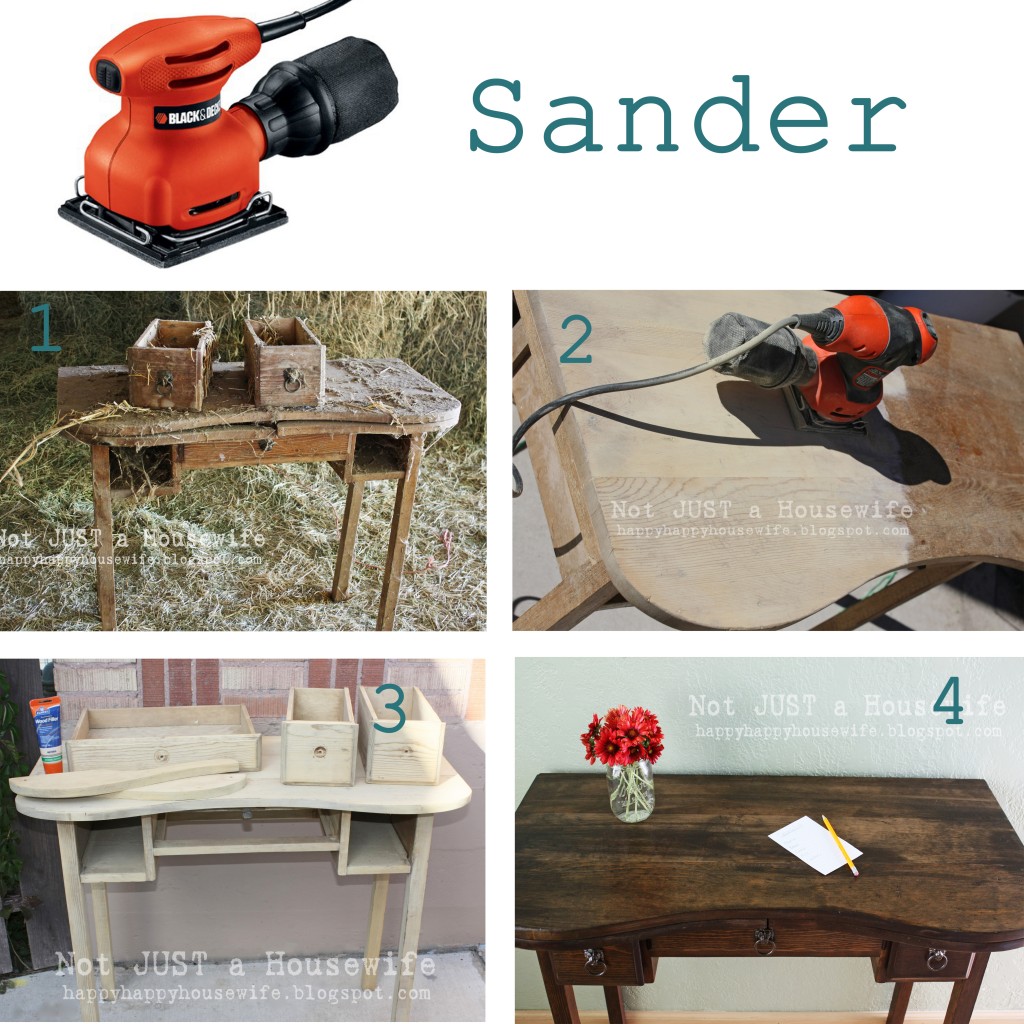
I love my sander! There are a few things you need to remember when using one in order to be safe. Always unplug it before you replace the sandpaper. It is a good idea to wear a mask and safety goggles/glasses. Use in a place where you have good ventilation. Empty the bag that collects the dust frequently. And you can use it to sand metal, but DO NOT have the bag attached if you do. It is a fire hazard.
When sanding wood all the way down to the bare wood to refinish it, start out with gritty sandpaper. The grittier the sandpaper, the lower the number. That will eat through faster and get off the existing finish. The you want to use a less gritty sandpaper like a 100 to smooth it out a little. Then to finish it off use a fine grit sand paper (150 or 220). This way you will not have lines that will show up when you paint or stain.
Now onto one of my favorite tools!!!
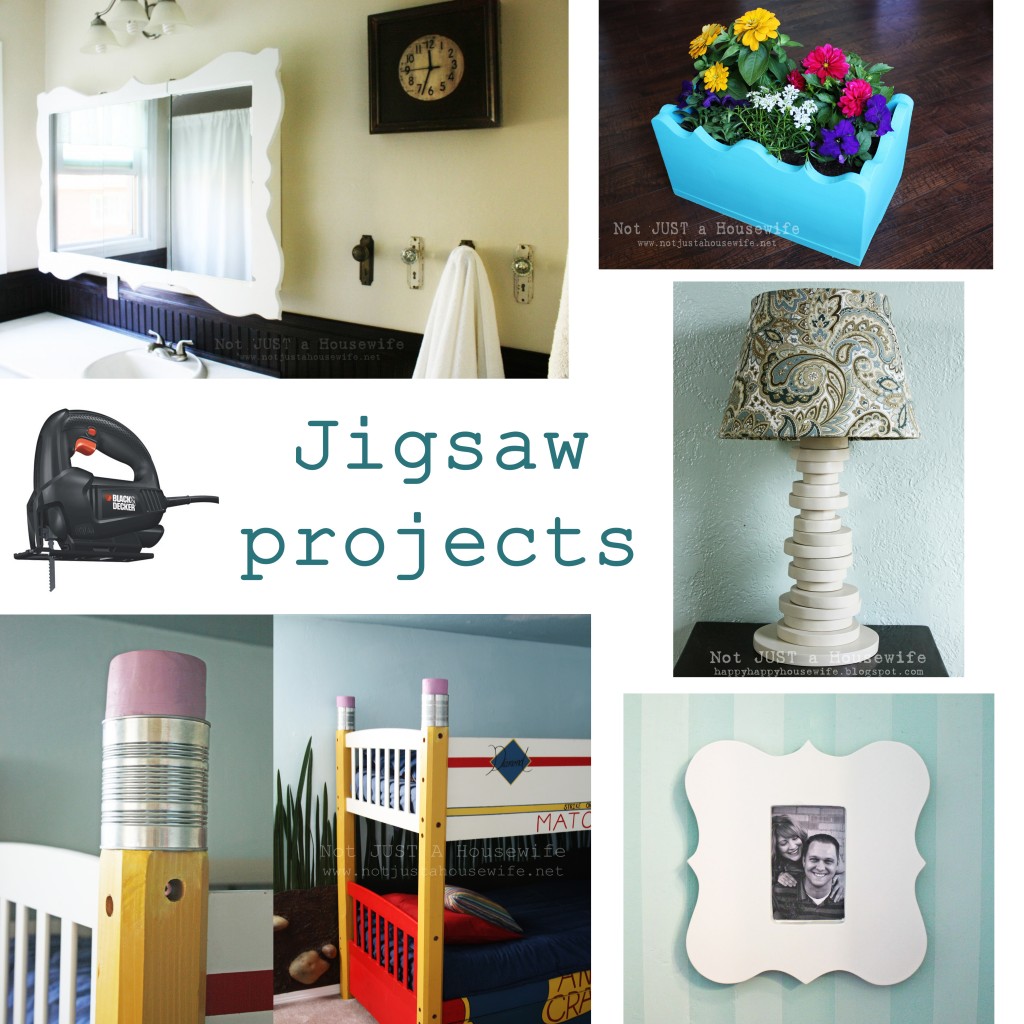 Kids bedroom, funky frame, circle lamp, planter box, bathroom mirror
The jigsaw is one of my favorites because it is not as intimidating to use as other saws, it is inexpensive, and it is so VERSATILE! If you do not have other saw you can use it for straight cuts as well as rounded ones. I have a cheap $20 one made by Black and Decker and all the projects on my blog have been made using that. I would like to upgrade one day when my husband gets a job and I feel like I can afford it. But this one works for me now.
Things to know as far as safety goes.... Always have a firm hold on it. It is a POWER tool. Always unplug it if you are going to changes the blade. It is a good idea to wear safety goggles if you are having a lot of dust blow in your face. You can also wear a mask if you want. Sometimes when you are cutting there will be a kickback. Especially if you are trying to cut near a knot in the wood. That is why it is important to have a firm hold. It isn't anything major. Just be aware. Also, because of the friction, the blade will get very hot. If you need to change the blade after you have been using it then wait for it to cool down.
Basically the whole point of my talk was to share with everyone how ANYONE can use these tools. And I wish more women would use them. It is so addicting and rewarding to build and make things with tools. It is like any other new skill. There is a learning curve and it takes time to perfect it. But it is fun!
I would be happy to answer questions anytime if you just shoot me an email. There are also a ton of other resources online like how to videos. I always try to have my tutorials on how to build things be as simple as possible. I never want anyone to feel intimidated. Because tools are not just for men. Tools are for ladies!!!!
You will also like:








You were awesome in the video, Stacy! And were those your kids?!
Thank you for posting on power tool safety! My husband is an OSHA safety inspector and says so many people do not follow safety rules at home and end up injured as a result! My mother nearly cut off her finger with hedge clippers... so if you don't know how to use a tool please get someone else to help you who does! Thanks!
Haha! Loved the video -- I skipped that session since I'm already good friends with several power tools and like to shoot nails into things, but I'm sort of sad now that I did! You even had the microphone scarves... LOVE it.
You are AWESOME!!!
XO
Kristin
Fun Video!!! This post is a great reference for tools! Thanks for posting it. I have a jigsaw and a sander, but I'm scared to used them. Seeing some of the things that you've done with a jigsaw has me excited!! I wish I could have gone to the conference and heard your whole talk, but it sure was fun to meet you at the queen bee market!
Ooh, love getting new tools! Carpentry freaks me out, but I'm a sucker for a plumbing project!
Loved the video! Your boys did a good job jamming that out!! And fun to see your neighbor!
oh man, that was awesome!! I missed your class, so I LOVE that you put this online!
Thank you so much for this post! This is just the kind of information I needed! My husband works long hours and I have been dying to have him teach me how to use tools so I'm not constantly stopping a project to have him cut something on his day off. I am saving this post and getting some basic tools and supplies. Thank you thank you thank you!
You have inspired me. I want to go to Home Depot right now and overcome my fear of tools... if only the budget would allow it right now! Who knew there were so many types of nails/screws/levels, etc.! What good information to know for future projects I may tackle... Loved the video, wish I had been able to hear you speak!
LOVE the video!!! :)
You are a riot!! Awesome information.
Crazy funny video!
I used router, circular saw and sander last week helping with our house facelift (i have a post up about the progress if you are interested). It was fun actually getting to use some tools instead of being the go-fer all the time!
HOLY AWESOME! You have to link this up to our #Bloggerdance on May 7th! I love this and I love you!
Kerry at HouseTalkN
Thank you so much for sharing this! I honestly just used the drill all by myself in a project yesterday. I am definitely the one who defaults to asking my husband to finish projects and put pieces together. I am determined to start doing more on my own. This guide will help me tremendously. Thanks!
Awesome post! I especially appreciated when you said that having SOME fear is good- it helps you respect the tools. My Daddy is a custom cabinet builder who still has all 10 fingers after 50 years in the business. He made sure we had a very healthy respect for the tools. Too healthy I think in some ways as I'm rather terrified of saws even though I've always been handy. Lately I decided to just get over it and I"ve pushed myself to try new stuff (even bought my own router!) Still, your advice to never get too comfortable is spot on! Wish I could have been in that session- sounds like you ladies did an amazing job!
This post is awesome! It must have taken forever to construct! LOVE IT! My father is a builder and my hubby grew up without a dad, long story short, I wear the tool belt in the family! ;)
I LOVE the video! Was just having a conversation with my oldest son yesterday as we pulled into the local lumberyard parking lot about how the guys who work there are finally getting used to the fact that I come in by myself and know what I'm talking about.
Thanks for all great information. My 4 year old daughter is walking around singing "Tools are for ladies!" So we loved the video. I love your blog!
What a great post! Thanks!
Adorable Stacey, It was such a thrill to meet you at SNAP. Your video is so fun. Thank you for being so sweet & for helping to make the conference fabulous! I blogged about the conference today {and you, of course were in my post}.
Warmly, Michelle
Hey Stacy,
It was awesome meeting you at SNAP! I laughed about your video while we were buying a mower on Sunday and all the Lowe's employees kept ignoring me. I was going to ask you to email me the name of the guy that does your hosting but it's right here at the bottom. Thanks!
Oh my gosh! You are adorable! What a great intro :) Thanks for all of the tips. I think you have given me the courage to try the jigsaw.
Totally love the videos-LOL!! Great tips. My favorite is that a little fear is healthy...too true. Don't want to forget that if it will cut wood it will cut your fingers too. Tools are totally for ladies.
Best. Video. Ever. I'm pretty sure I got a stomach ache from laughing so hard! So fun to meet you!
That was so great! You guys have an awesome sense of humor! Seriously though, I'm glad that you did your talk on power tools. I started using them (with hubby's guidance!) because of your blog! Thanks!
I love love love this. You were so great! I'm going to link to this in my wrap up.
I loved the video, and this session was definitely one of my favorites. Thank you so much for putting together all of this information for us! I totally walked away thinking I need to get my hands on a jigsaw. ;)
Love this post. I just bought a dry masonry saw (to use for a patio and to score lines in concrete). My two boys are convinced I'm going to cut off my hand or something! Nice to hear from someone else that knows that ladies can use power tools too!
That video is awesome!!!!! i LOVE it!!!
You are so dag-on cute I can't stand it! I am really glad I got to see you at SNAP! We need to get together soon! Big hugs!
I just pinned this as a reference. Great info, and something I'll refer back to often, since I'm a total newbie when it comes to tools. Usually, I get my one handy relative (a brother-in-law) to do even basic projects ... but I'm ready to take some of this on myself!
Oh lordie, you just brought #BloggersDance to a whole new level - sister!
It's on now. It's on. Drill em up!
LOVE this! found you via the bloggers dance link up! So glad to see you had those safety glasses on ;-) And my 3-yr old is now singing your song, too! LOL
Came here through #BloggersDance and am so glad you linked up. Tools are for ladies! It drives me nuts when we have workman here and they need something and they go to my husband. They walk right past me, despite the fact that I'm the one who hired them and gave them instructions. And he is like, "Uhh, ask my wife."
All the tools are mine and my 11 y/o and 13 y/o daughters have already done projects with me using the chop saw, jigsaw, and drill. The women in this family rock the tools.
Without being too weird, I must say, I am so very glad to have found your site!!!!! (And the ending of your video was awesome!) Ellen
That is very attention-grabbing, You're an overly professional blogger. I have joined your rss feed and look ahead to in search of extra of your magnificent post. Additionally, I have shared your site in my social networks
Goggled different types of nails, and your site was the only one that got to it, showed pictures and was easy to understand. Not that you dummied it down - you are really good explaining things, simply, that insures I will read and follow your instructions.
Now I know I need to charge my drill because I am putting a finish nail into the back of a bookcase to hang a picture. And I'm using one of those plastic holders so I don't hit my hand.
Women rock with tools.