
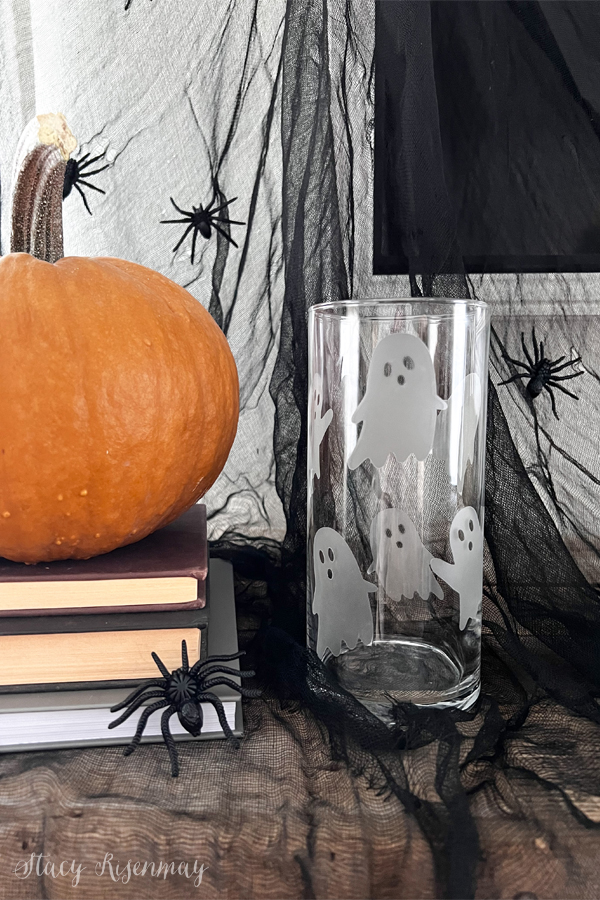
It is spooky season! And it is time to break out the Halloween decorations. If you have been around for awhile, then you know I love to glass etch! Everything from mirrors, to vases, to Christmas ornaments. As I was thinking about how to decorate my mantel this year, I knew I wanted to incorporate ghosts with cute spooky faces. That then led to this fun DIY ghost candle holder! It is a super easy project for this Halloween season.
This post contains affiliate links
DIY Ghost Candle Holder
These DIY halloween candles could also be used as a vase as well! Fill them with branches that were spray painted black or with some fall leaves. Add candy to them and place them on your Halloween table for a sweet centerpiece for your next Halloween party. They would be cute on your mantel, the perfect addition to your porch, or great party favors to give to your guests. Wherever and however you choose to use them, they are super easy to make. Just follow the full tutorial below!
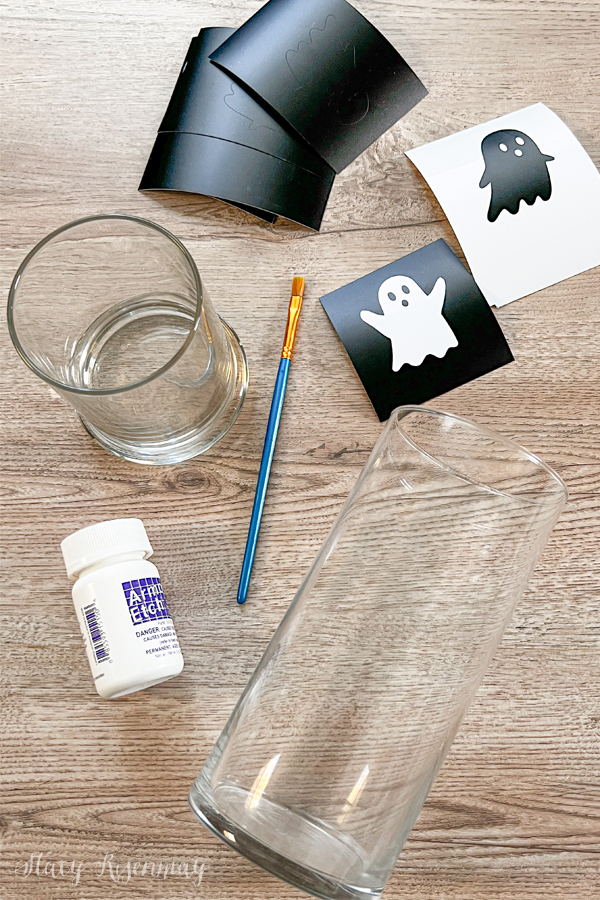
Supplies:
Vases or Candle Holder
Vinyl or Stickers
Candles or Tea lights
Step 1: Gather Supplies
I bought this vase and candle holder from the dollar store. They have a lot of options, but these tall, clear vases are my favorite. You can also find a TON at your local thrift store. I have a vinyl cutting machine so I cut out some ghosts out using that but if you don't have a Silhouette or Cricut machine, you can either use stickers, or you can cut out by hand a simple ghost shape. I have used painter's tape instead of vinyl in the past and it works great. Contact paper is another thing that works well.
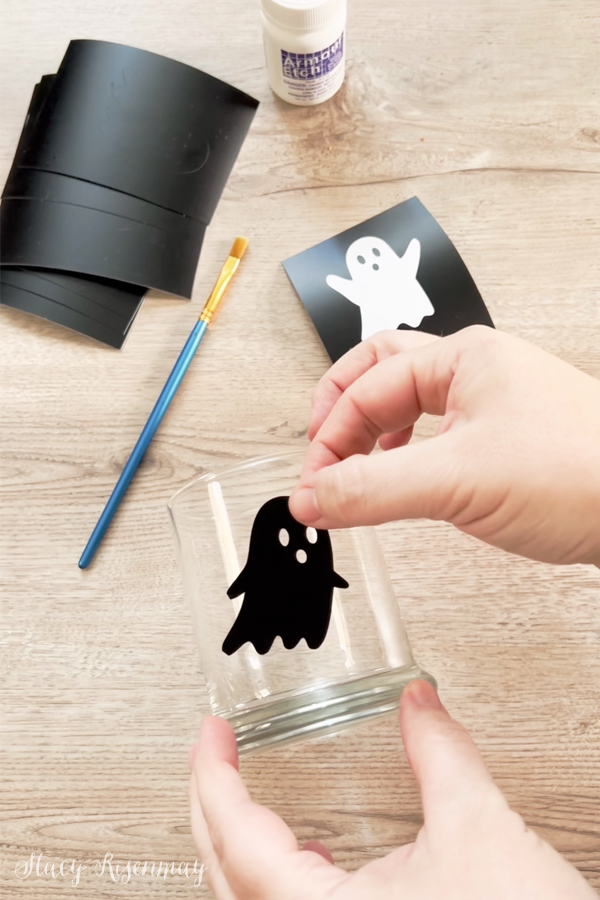
Step 2: Add Vinyl Or Stickers
Add your stickers or vinyl to the vase. Make sure to press down and rub the edges so no cream will get underneath. I didn't create a pattern, but I did make sure they were spread out pretty evenly. I decided since I had two glass candle holders, that I would do two different versions. Then I added the ghosts to one and then create stencils out of the negative space with the leftovers. One way will create frosted ghosts and the other version will have clear ghosts with a frosted background.
Step 3: Etch!
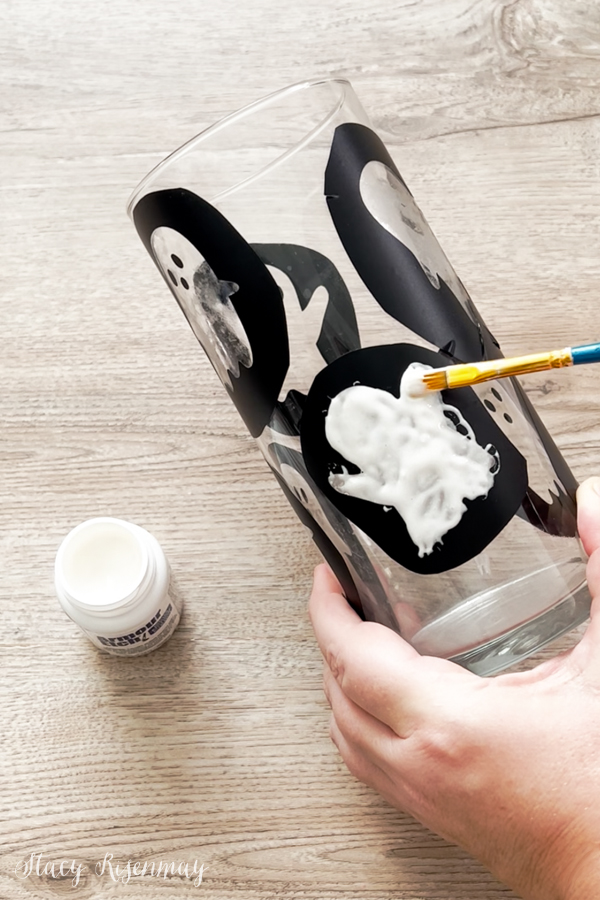
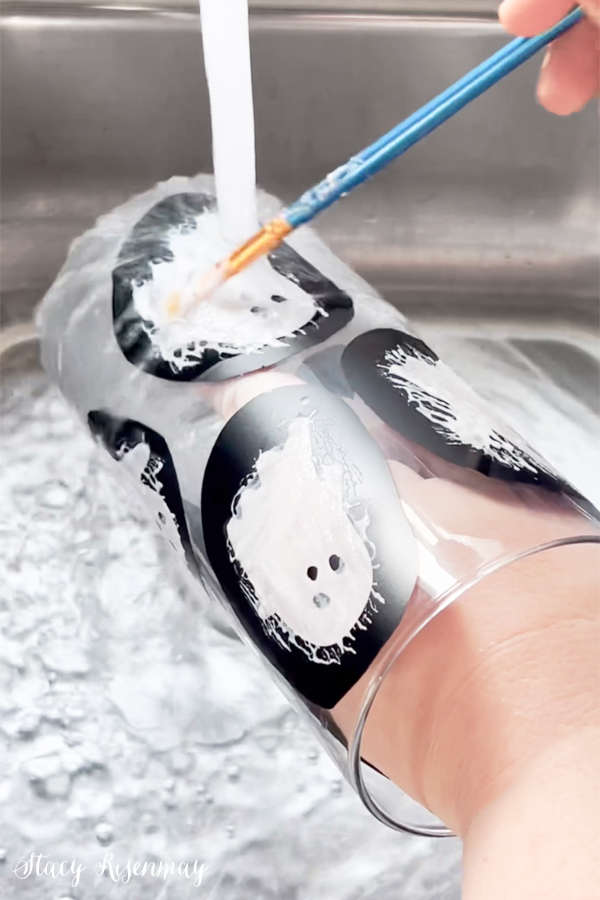
Once the vinyl is n the glass, it is time to add the cream. You can purchase etching cream at any craft store or on Amazon. You may want to wear latex gloves if you are worried about it getting on your hands. It will irritate your skin if it comes in contact. Use a cheap craft brush to apply the glass etching cream. I like to dab it on. However you choose to apply it, just make sure it is thick enough to completely cover the glass.
Step 4: Rinse
Wait a few minutes (however long the instructions on the bottle say) and then rinse the cream off. I use the brush to rub the cream off. It cleans the brush at the same time. When it is wet, it will not look as if the etching cream worked. But once it starts to dry, you will see the frosted look.
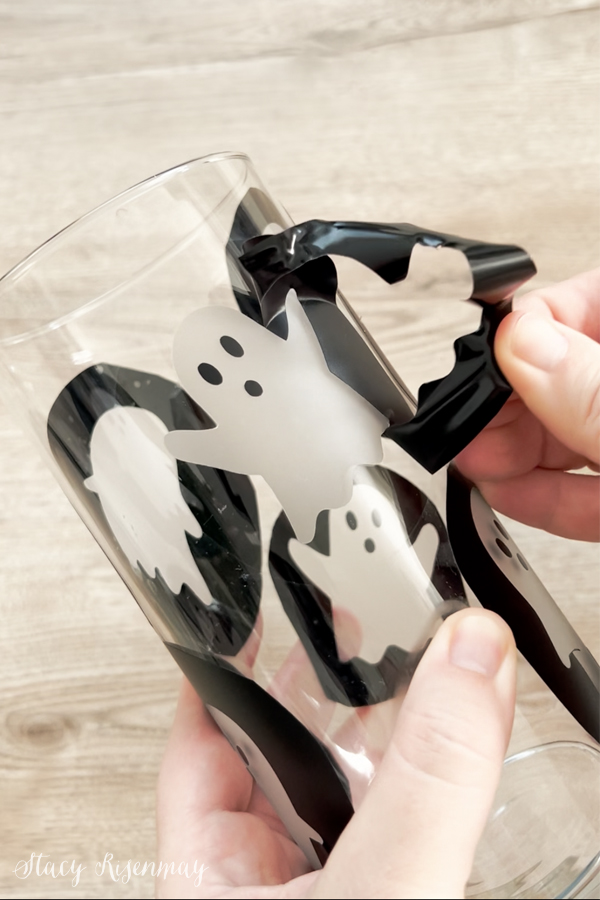
Step 5: Remove Vinyl
After patting it dry with a clean kitchen towel, I peel off the vinyl or stickers. This is the best part! You get to see your finished design!
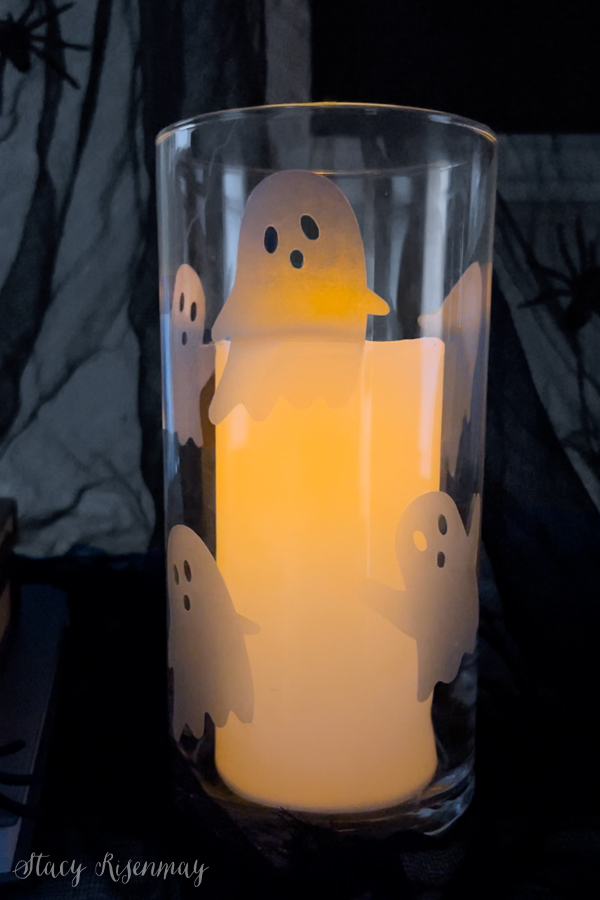
I can't decide which version is my favorite. Either way, I love the little ghost face design. I now kind of want to buy a colored glass vase to try this on! Once you try glass etching, you will be hooked. It is such a fun and easy DIY project.
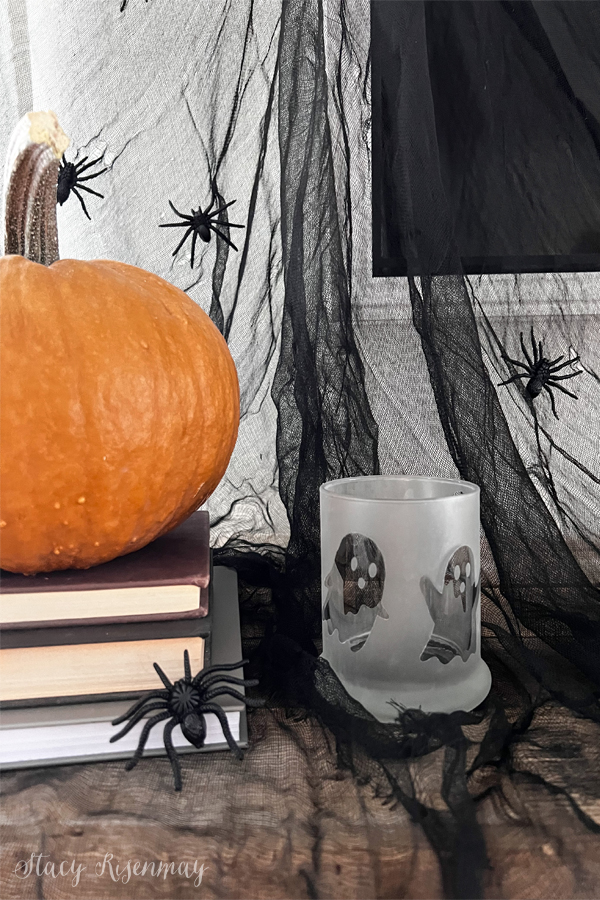
You can add a traditional wax candle or use an LED battery powered light. Both make the ghosts glow!
Have you ever tried glass etching? Do you make your own DIY Halloween decorations?


Hi Stacy! I love your blog, but I haven't been here for a while. I saw this idea for these candles and I LOVE them. I have everything to make them, but I need to know what machine you used to make the stencils. I have a Silhouette machine but I cant find this ghost and it is so adorable. Can you tell me where you found it?
I have a cricut and I just found a ghost I liked online as free clip art. Then uploaded it to the cricut design studio. I used to have a silhouette and would do the same thing for their design studio. If you want, I can send you the images I used to your email :)