
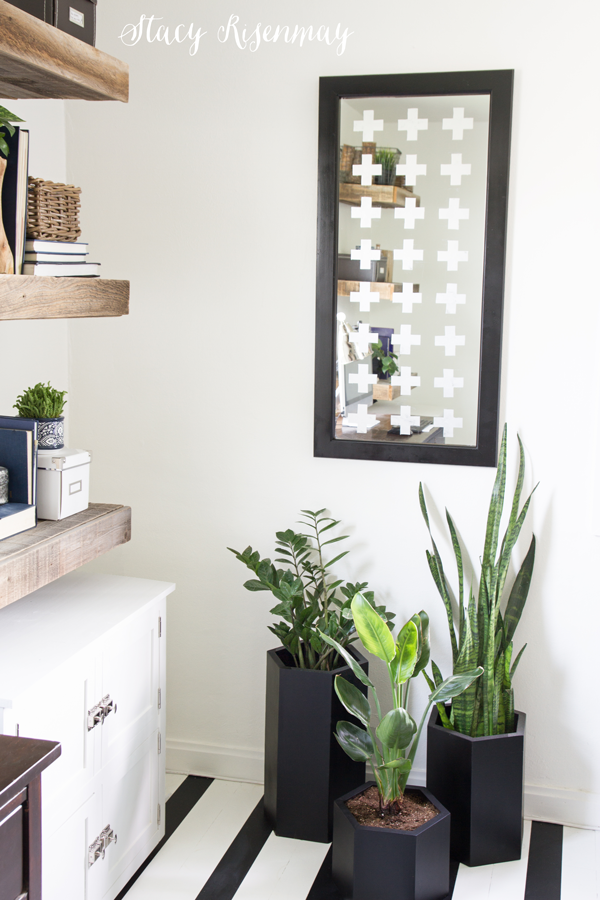
I have a fun new project for you today! How many times have you been to a thrift store or yard sale and come across an ugly or plain mirror for a steal? You have probably passed it by. Well after today you will want to snag them up!
This is my second project this summer that is part of my partnership with ScotchBlue and is one of my favorites! Mirrors don't just have utilitarian uses like getting ready in the bathroom. They help add and reflect light making your space appear bigger and brighter. I have mirrors all over my tiny house to help with that effect! And if a mirror is acting as a "second window" to add light, then why not dress it up a bit? It can become a piece of art!
Materials Needed:
ScotchBlue Delicate Surfaces Painter’s Tape
Sand paper
Spray paint
Glass etching cream
Small paintbrush
Ruler
Razor blade knife
Cardboard
Paper towels or rags
Note: Follow all ScotchBlue™ Painter’s Tape package instructions for proper surface cleaning and prep, adhesion and removal.
Here is a video of the process
Step 1
If you will be painting the frame of the mirror, lightly sand it and then wipe it down.
Step 2:
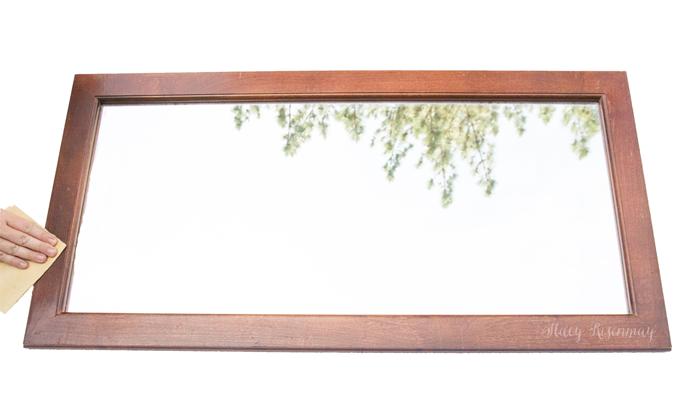
Tape off the front of the mirror completely with ScotchBlue Delicate Surfaces Painter’s Tape.
Step 3:
Paint the frame of the mirror and let it completely dry.
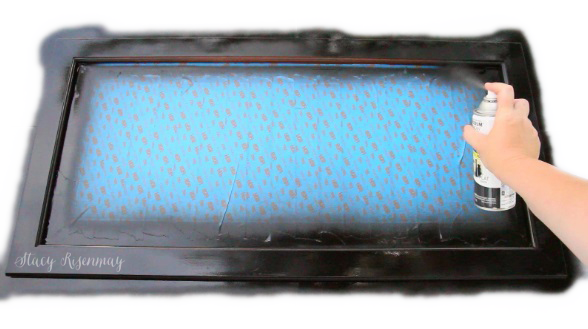
Step 4:
Use a ruler to mark a grid pattern on the tape based on the size you want your pattern to be and the size of your mirror. If you look closely in the picture below you can see the pencil marked grid.
Step 5:
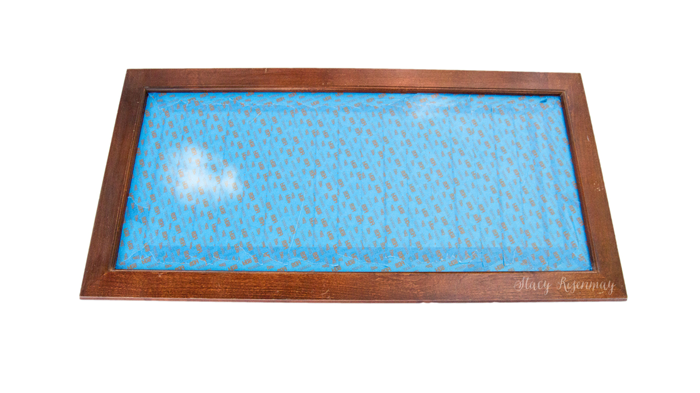
Cut out a cardboard template. Place the cardboard template on the tape and cut around it using the razor blade knife.
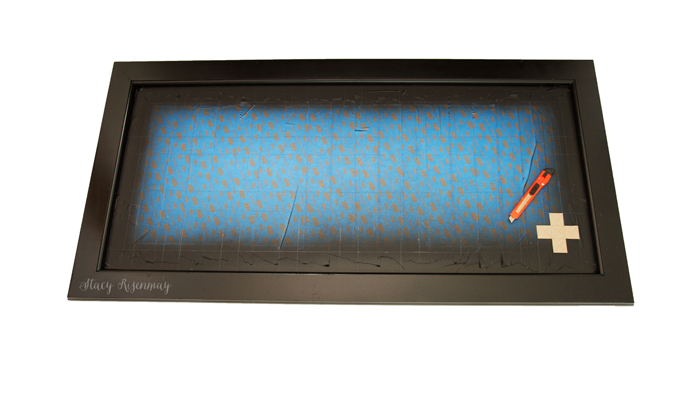
Repeat this as many times as you need to fill the mirror with your pattern.

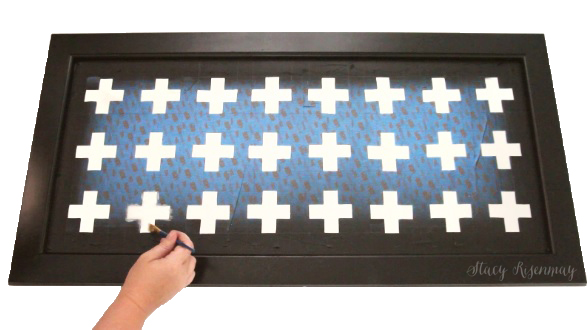
Step 6:
Once the shapes are cut out, brush on the glass etching cream. The cream needs to be thick and cover the whole area well. Wait the recommended amount of time and then wipe it off with damp paper towels or old rags.
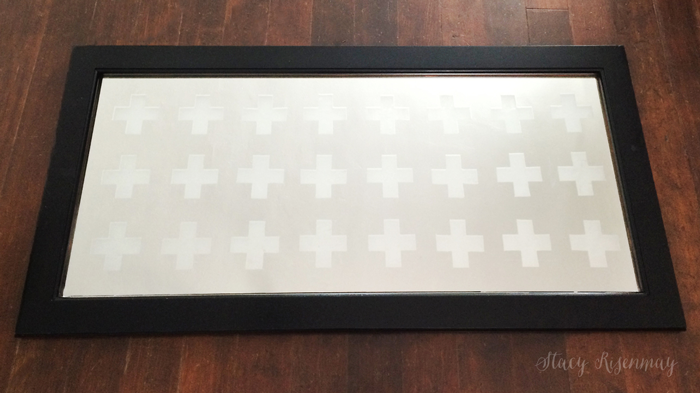
Step 7:
Remove the rest of the tape. Pull the tape back on itself and pull from the surface at a 45-degree angle. Clean the mirror really well to remove any remaining etching cream.
It is really hard to photograph a mirror and have it look the way it does in real life. The plus signs look much cooler in person. What I love about this idea is that you could create any design you want or even lettering. The possibilities are practically endless. So next time you are at the thrift store and you see a sad mirror no one wants, take it home and etch it up!
For more inspiration visit their project page!
I have partnered with ScotchBlue again this year to bring you fun projects. I was compensated by ScotchBlue for my time but as always, my thoughts, project ideas, and opinions are 100% mine :)


Cool!
Wow love this idea. So many different things can be etched on a mirror. Thanks to you and Scotch Tapes for the idea. You're rocking lady.
Beautiful! What a great design! I'm totally inspired now!
Neat idea--you make it look really easy. Great video! Short and sweet.
Great way to add light and style to a room!
I've done glass etching once and I LOVE it! Yours looks awesome!
I did not think of using mirror as a way to light up a room never mind going this far.Very creative!
I've always wanted to do that and now you've inspired me. It looks fairly easy, guess I'll find out for sure once I start the project, LOL!
Thanks for the great video!
Blessings,
Elizabeth
Love love love this!! I thought it was a stencil. I'm gonna have to try this with the scotch blue tape!!!
Love this idea, Stacy! So creative
This is so cool! Perfect project for a thrift store mirror!