
Every year we try to tackle at least one big outdoor project. Building and staining a backyard arbor was one of those projects we had on our list. It will help with privacy as well as the overall look of our yard. The project is 95% done but I did get stuck on one thing and I need your help so read to the end.
This post is sponsored by HomeRight but all project ideas and opinions are 100% my own. Some links are affiliate links.
Before the Arbor
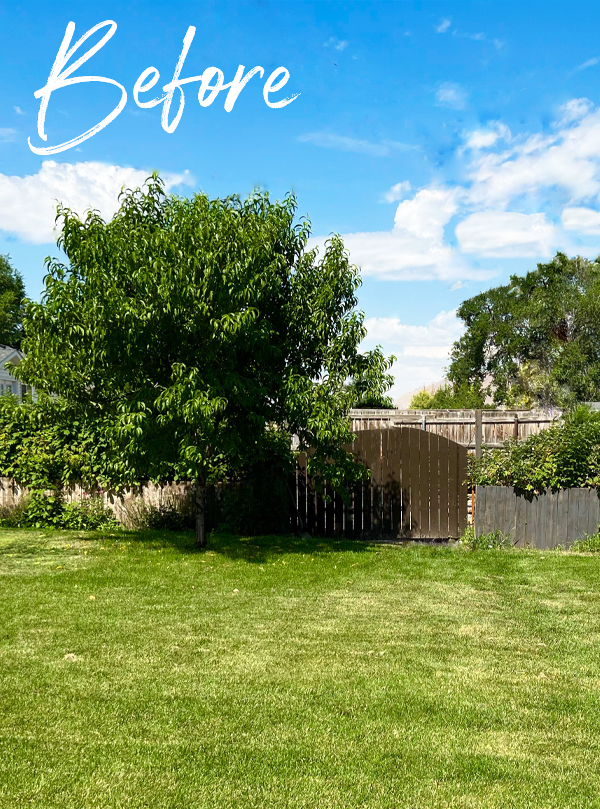
At the back of our yard there is an easement that allows us to drive into our yard from the street. This is where we park our trailers, store our firewood, place our composter, and put anything that we don't want to see from our yard. All that stuff is hidden by the raspberry raised planter boxes that are 3 feet tall. When the raspberries are at peak, they are about 3-4 feet tall making a great "fence" and hiding that section of our yard. That part of the yard is about 76 feet by 27 feet.
The gates only had pickets on one side and were kind of flimsy. We also didn't have a latch, so when we got heavy wind, it would open and close which eventually made the gates split where the hinges were attached. We needed to rebuild the gate and add pickets to the other side.
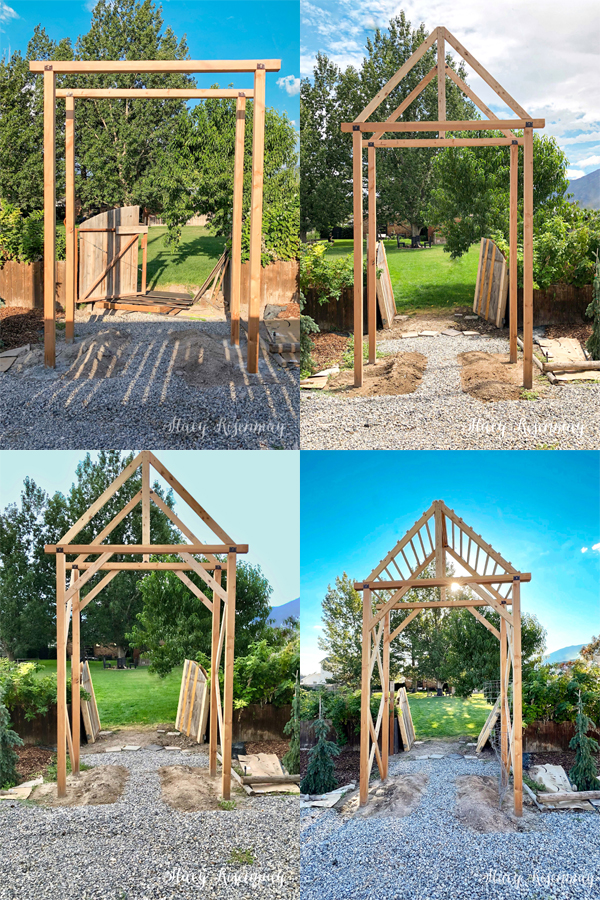
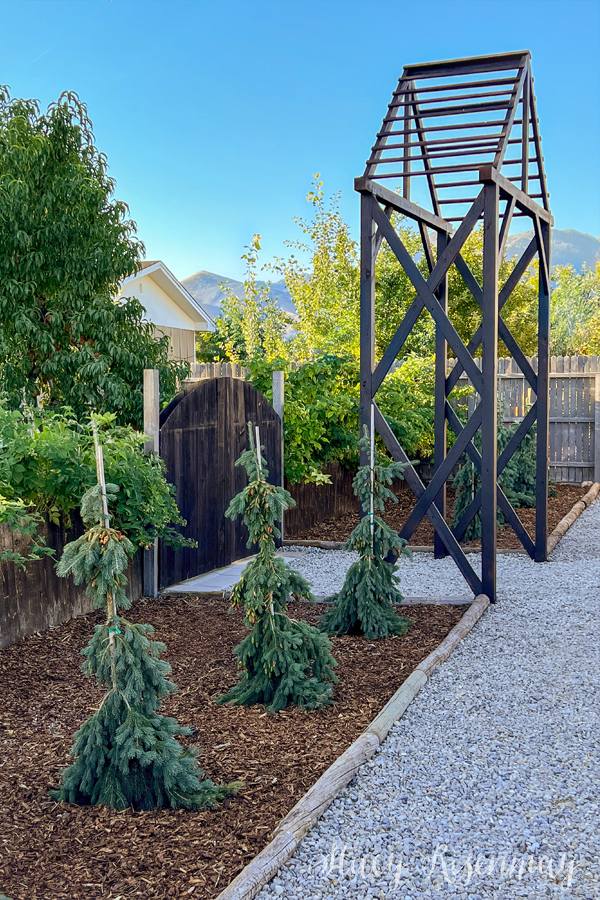
Building and Staining a Backyard Arbor
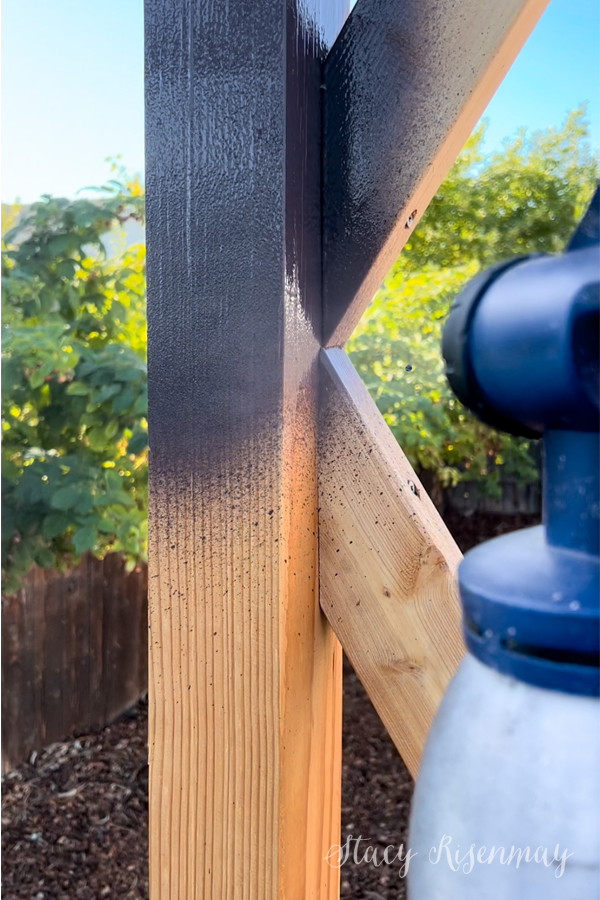
Since I am afraid of stepping on the ladder more than just a few steps high, Shane was very instrumental in this build. I drew up plans and created a shopping list. I cut some of the wood too. But man, Shane saved the day by doing the build on this one. It stands 13 feet high!
He also helped with the staining for the same reason. He stained the top part with the Super Finish Max. He has only used the sprayer a couple of times before (Remember the garage eaves he painted?) so he was excited to apply the stain and see it transformed so quickly.
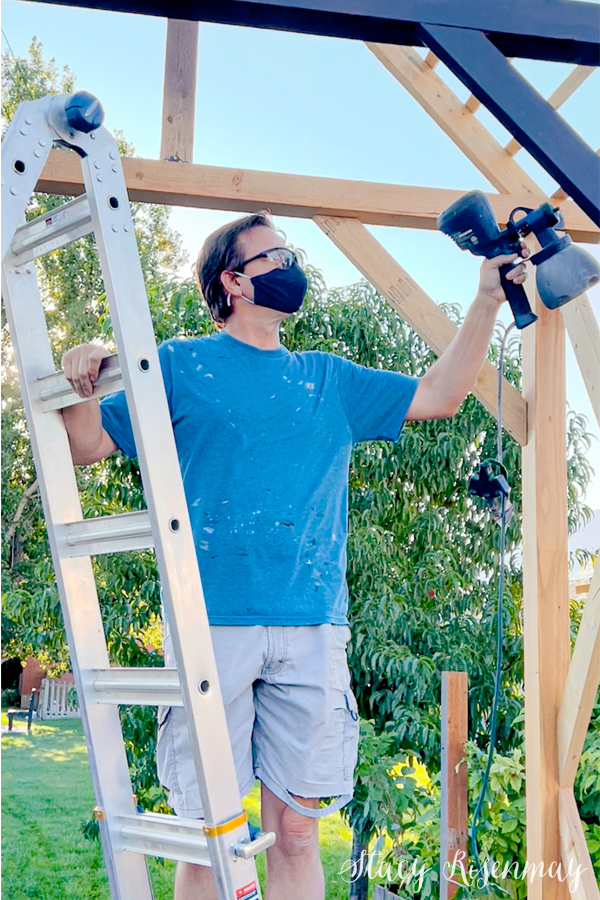
I didn't want to be left out of the fun part of this project. I sprayed everything I could reach from the safety of the ground.

I used the same stain color as the other gates in our yard (the secret garden gate and the entrance gate) as well as the sliding planter wall that hides our electrical boxes.
The dark color really helps the arbor stand out!
I can't wait to plant the vines that will grow up this structure. It will one day be lush and green and help give us more privacy.
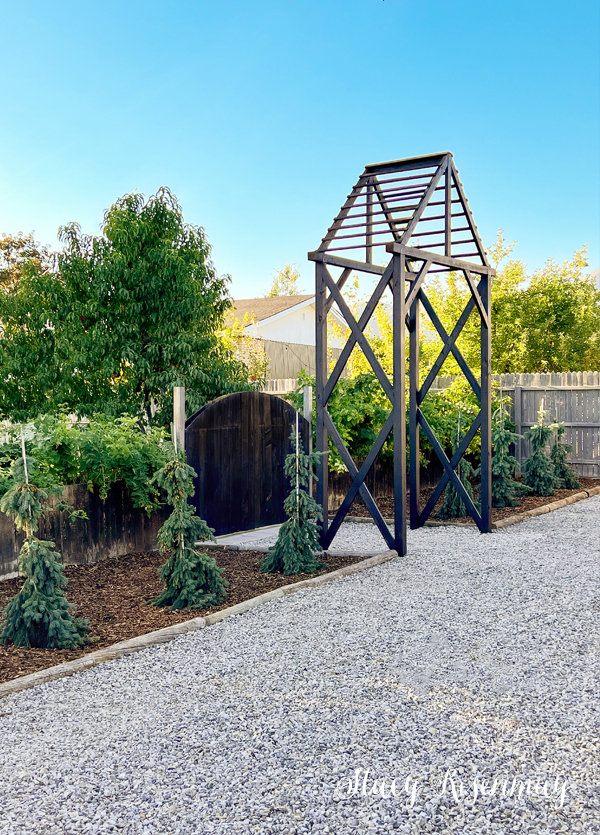
We also planted 4 weeping white spruce trees on each side. They are relatively fast growing trees that will get 20-30 feet tall but only about 4 feet wide. Once they grow tall, they will be a great privacy screen. Since we have a gate, we couldn't plant trees in front of it, which is where the idea for building a backyard arch came from.
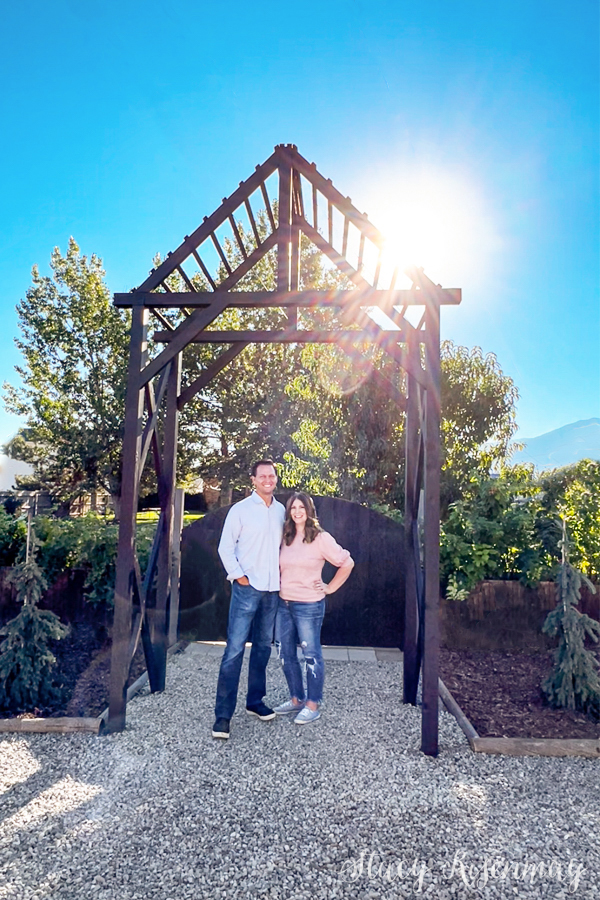
To give you an idea of scale, I made Shane pose with me under it. I told him he had to since he was such a big part of this project :) It is 13 feet tall and 7 feet wide. The gate is 9 and a half feet wide.
We laid pavers down in between the planter boxes. We bought wheels for the gates and we needed something hard and flat for them to roll on.

I love the look of the bark around the trees!
We made sure and planted them far enough away from the planters so that even when they are fully grown, we can walk between them and the boxes to be able to pick raspberries. It is hard to gauge distance in photos, but there is 6 feet right now between the trees and the planter boxes.
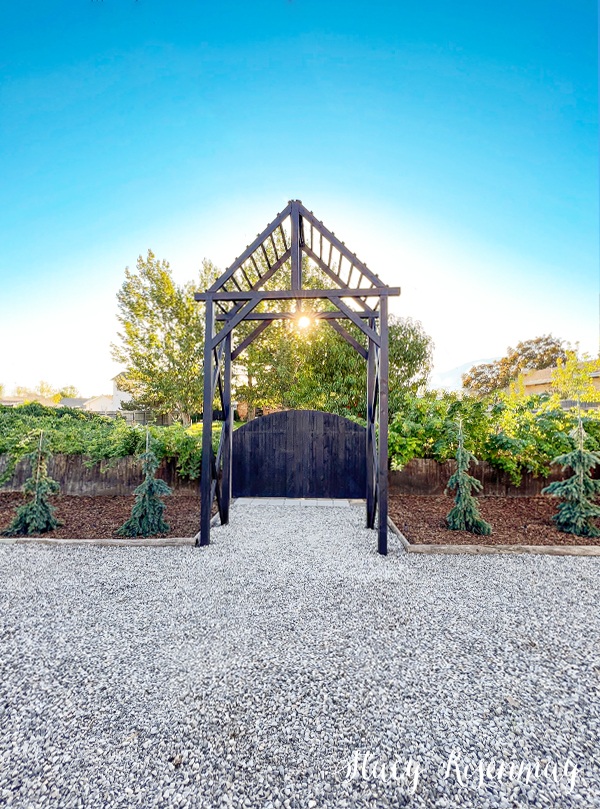
I need your help.....
I had planned on spraying the planter boxes gray like the front. But I kind of like how the brown matches the bark. Should I spray them gray? Or leave them brown? Also, I stained the gate posts gray (thinking the planters would be gray) and was planning on adding a solar light/ post cap on them. But now I am thinking I don't love them being so tall. Should I stain them to match the gate and cut them to the height of the gate?
That was probably confusing. Here are the options:
*Planters gray with tall gray gate posts + lights
*Planters gray with short gray gate posts
*Planters gray with short dark gate posts
*Planters stay brown (refresh the stain since it's blotchy) with tall dark posts + lights
*Planters stay brown with short dark gate posts
Vote for your favorite option in the comments below! And let me know if you have any projects you are working on. I love hearing about what you are up to!


I vote to keep the posts tall and add solar lights on both the front and back vertical sides as well as the caps, and to stain the planter boxes dark grey to match. It’s a beautiful project! Thank you for sharing! We’ll done!
I would keep the tall posts, but make them brown and add lights. I like how the tall posts play off the tall arch. I would stay with brown all the way rather than gray. You can always cut the posts shorter later, but you can't easily make them tall again. Just.live the whole project.
Planters stay brown (refresh the stain since it's blotchy) with tall dark posts + lights
Wow! Shane and you knocked this project out of the park! As far as finishing the posts and the boxes, I vote for :Planters stay brown with short dark gate posts.
I had a super crazy summer! My MIL was ill at the beginning and I had to care for all her cats, so I had 7 cats running in my house! Sadly she passed in early Aug. I also had my granddaughter the last two weeks of Aug. so I have really been busy. We have found forever homes for the 4 kittys that needed adopting. And my husband and his sister are a good team working on the rest of their Mom's house. I have been giving support where I can. Lots of prayers for sure! Take care and I hope to see what you harvest from your garden. We have already put away all the zucchini and tomatoes. All my best! Hugs!
Brown stain, short gate posts.
Love the new garden arch. Good work!
Planters stay brown (refresh the stain since it's blotchy) with tall dark posts + lights
do you plan to grow vines on the structure?
I do! Similar to what is growing on the other arch at the entrance gate and also on the fence by the secret garden gate.
Brown planters with short brown posts and lights
Wow Stacy - this looks great! You have a big beautiful yard! I love that you included the picture of you and Shane standing in the arch to give a size reference.
I would vote for brown planters, shorter posts stained dark to match the gate with the addition of lights.
We had to have a new roof put on our house this summer and also got our house power-washed. My flower beds took a hit from all that work and the chemicals from the power wash…. So my focus has been replanting perennials and amending the soil. I may try to paint an older fountain I have, since a new one is not in the budget, thanks to the roof!! It’s small projects around here for awhile! I’ve been looking back at your flower bed posts for ideas! Thanks!!
What a great project. Looks awesome! You guys are super. Brown with short brown posts. Love all your projects!
Looks great! I vote for *Planters stay brown (refresh the stain since it's blotchy) with tall dark posts + lights