
I have been needing a better way to store my root vegetables and butternut squash. In the past they have been on the wire pantry shelves with my canned goods but the wires can dig into the veggies and bruise them. Especially if they are all stacked up. I have had the same experience with wire baskets. Plus they are taking up valuable space that could house more bottles of canned goods. I have seen cute vegetable storage bins in gardening magazines and online shops and they are super pricey. This DIY vegetable storage cabinet was a fraction of the cost and looks better too!
This post is sponsored by HomeRight but all ideas and opinions are 100% my own. This post contains affiliate links.

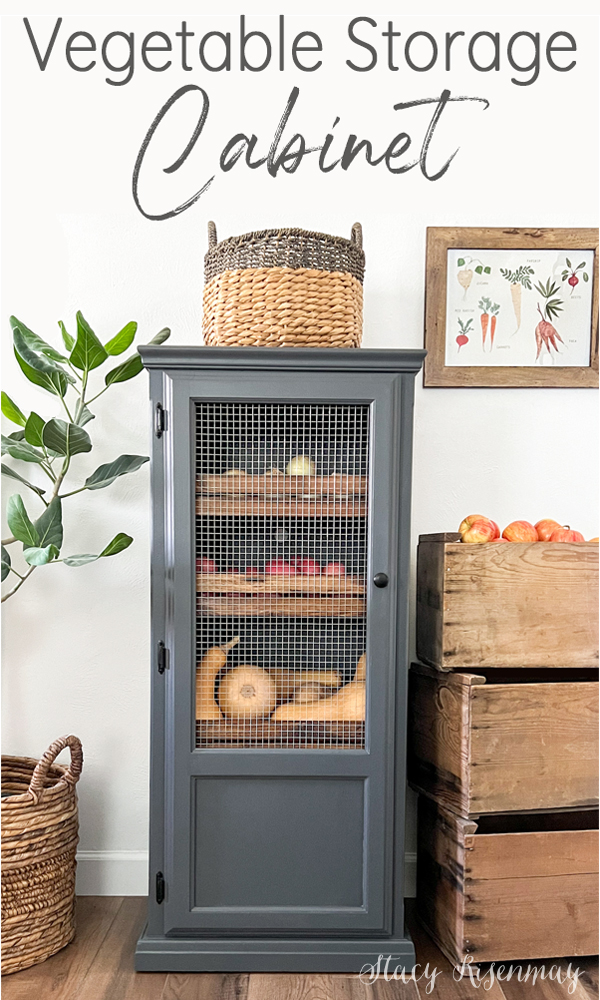
DIY Vegetable Storage Cabinet
I browse the online classifieds and Facebook marketplace regularly and decided that if I could find a tall cabinet I would convert it into a vegetable storage cabinet. I would cut the center of the door out and add wire for ventilation. Well what do you know but I found one! Not only were the dimensions pretty much exactly what I wanted (almost 2 feet wide and a little taller than 4 feet), but the cabinet already had wire! The previous owner had taken out the glass doors panel and added wire mesh. It was more than the $15-40 I normally pay for second hand furniture, but I was willing to pay more for the convenience of not having to cut and convert the door. Plus, what were the odds that I would find another one this perfect that was also solid wood?
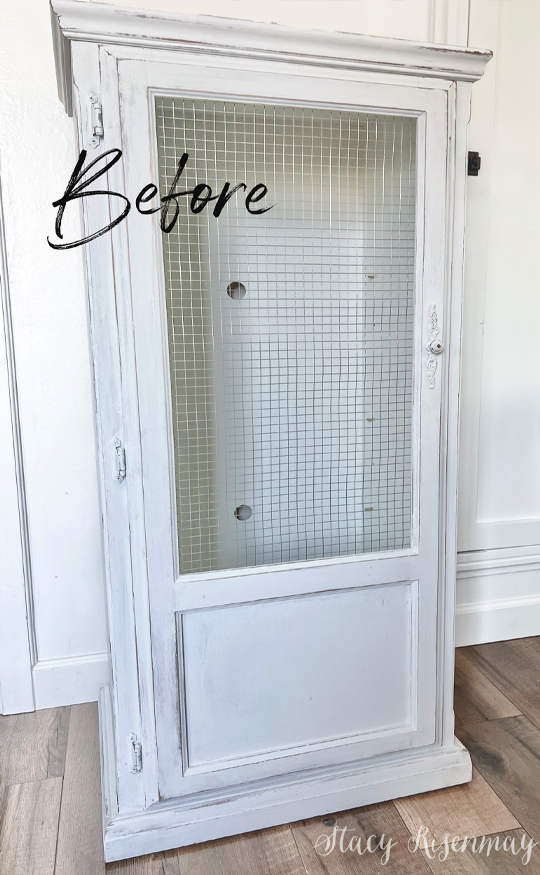
Now often times a "before" and "after" is also an "ugly" and "pretty" situation. But not always. Sometime you have a piece that is just fine as it is, but you make it over to fit your home and your style. This piece was lovingly made over for a wedding and had a shabby chic feel. But I wanted a different look. Fortunately, the previous paint job was done well which made my experience so easy. Remember the last piece of furniture I made over? That was a nightmare to refinish!
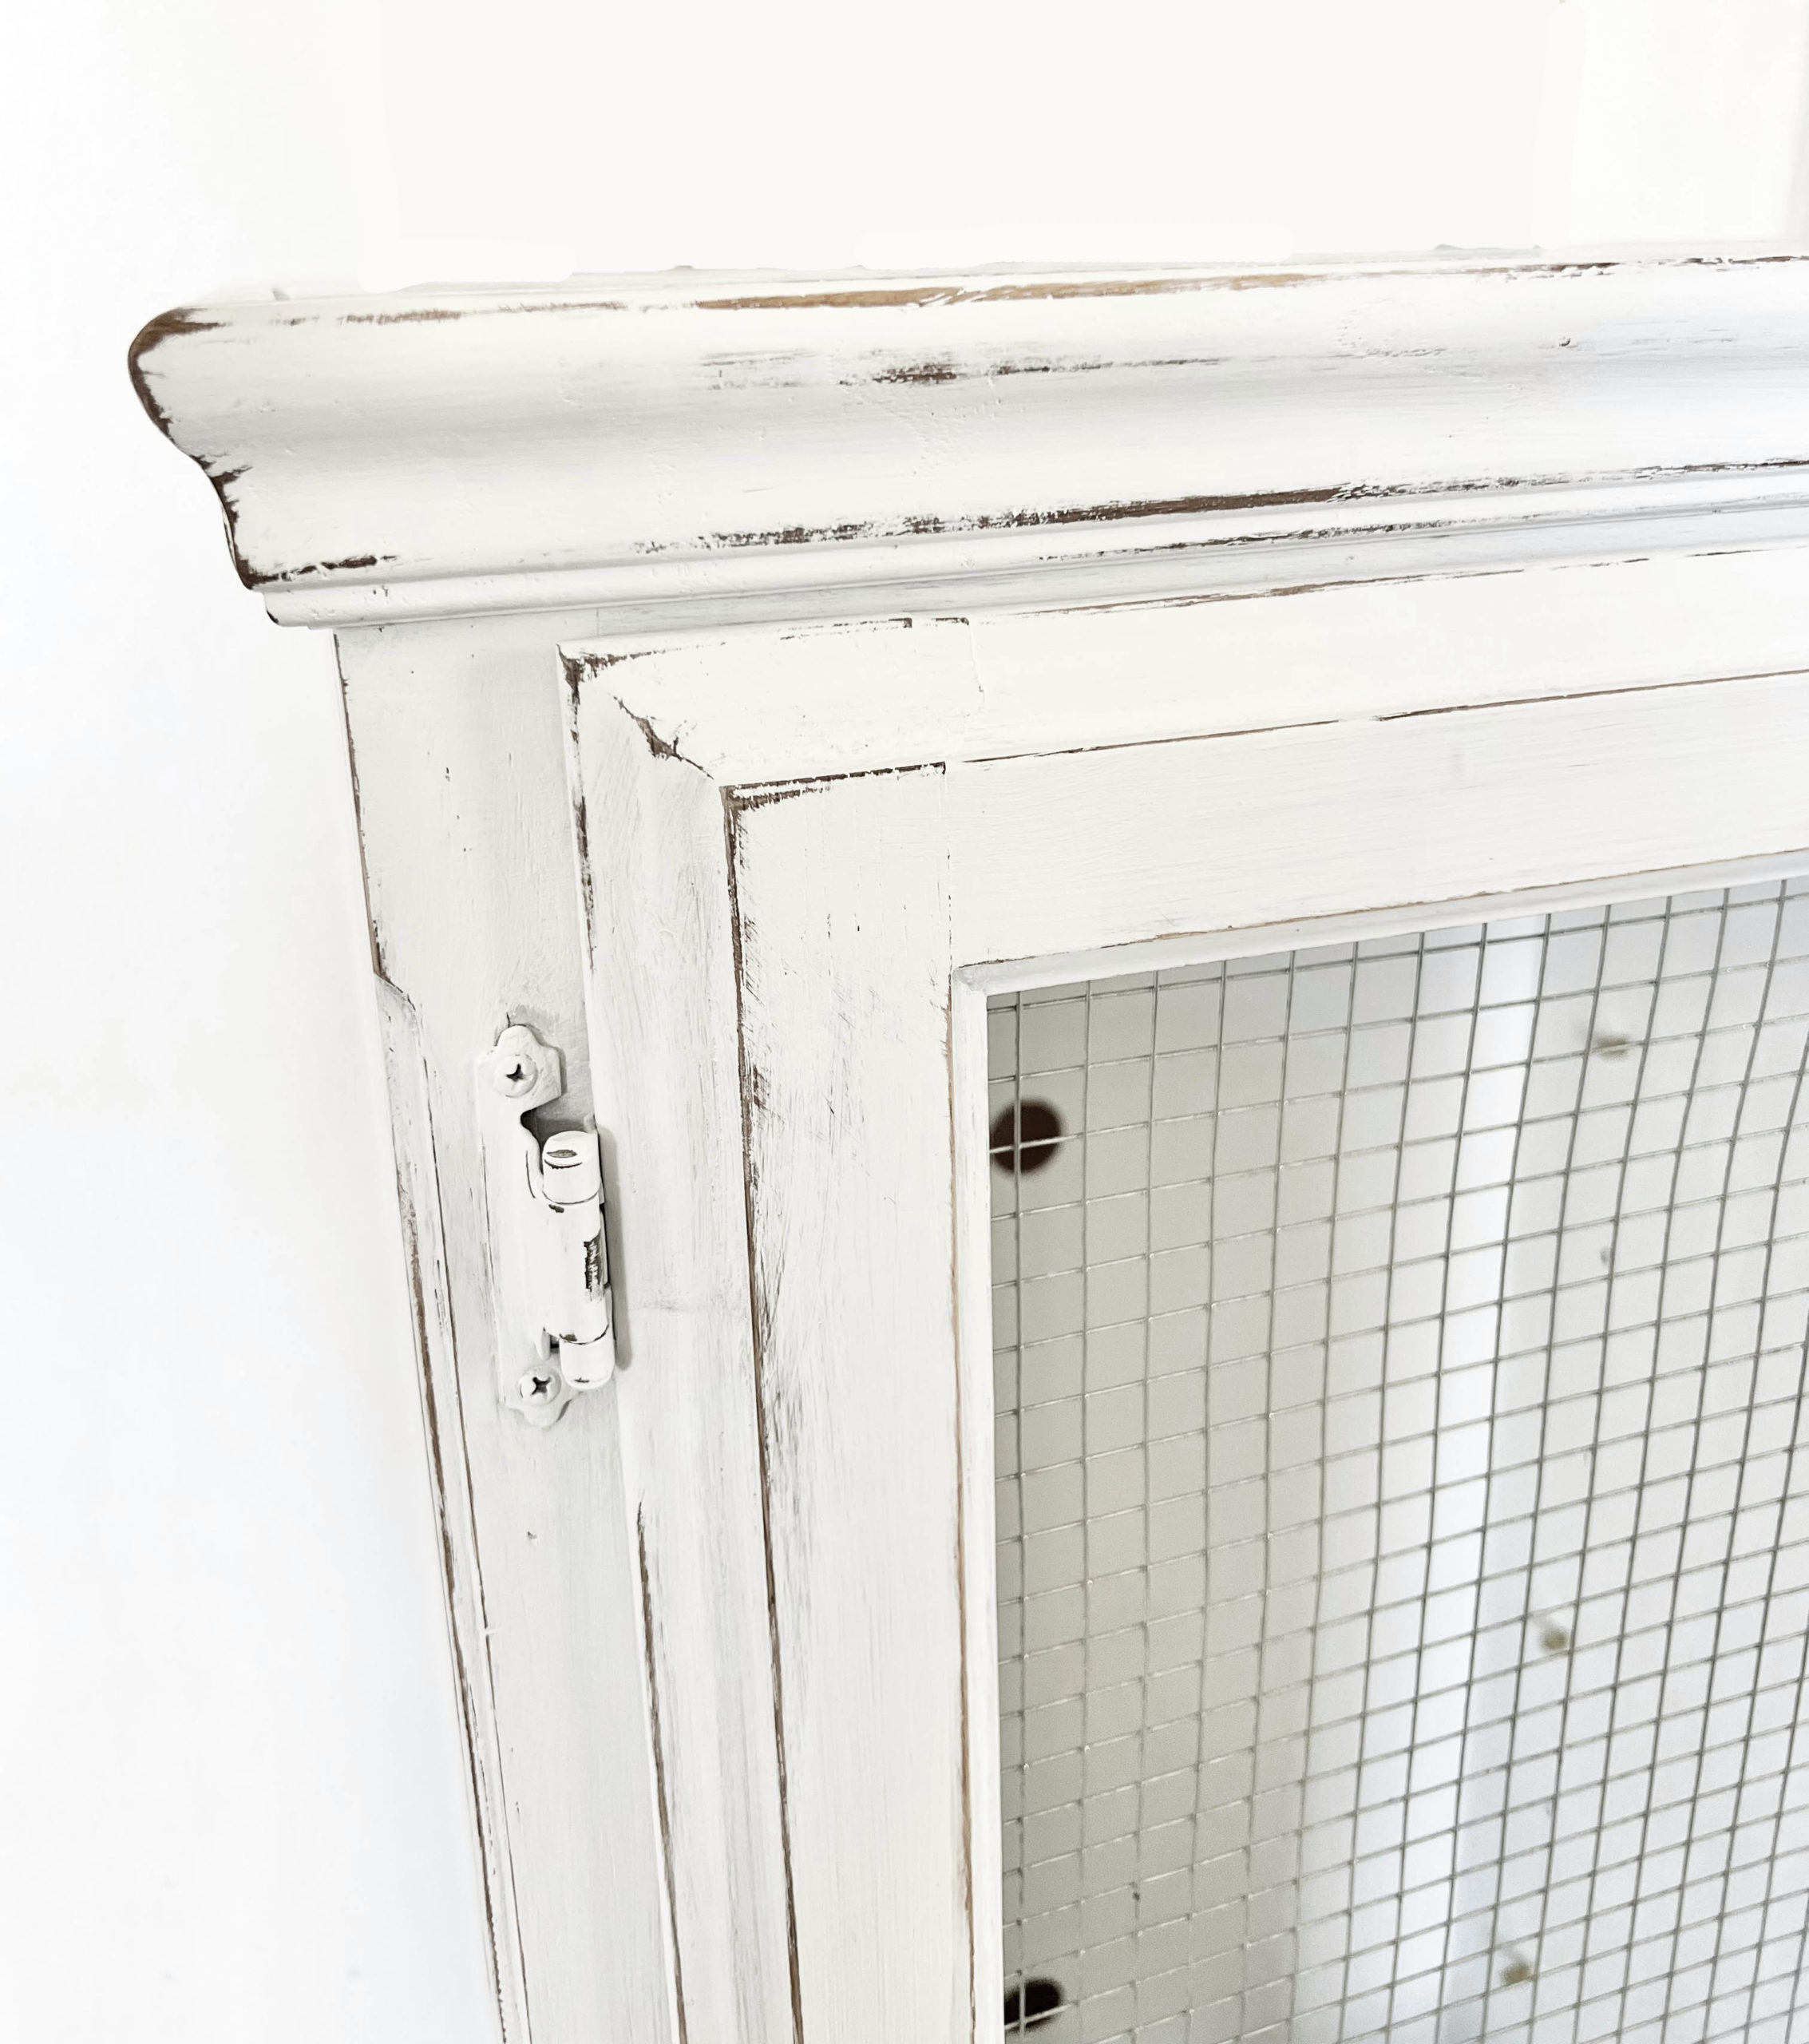
All I had to do was lightly sand and clean it well. It really only took about 10 minutes. I decided rather than taping all the wire mesh, I would just remove the staples and take it off. Then I could just staple it back on when I was done.
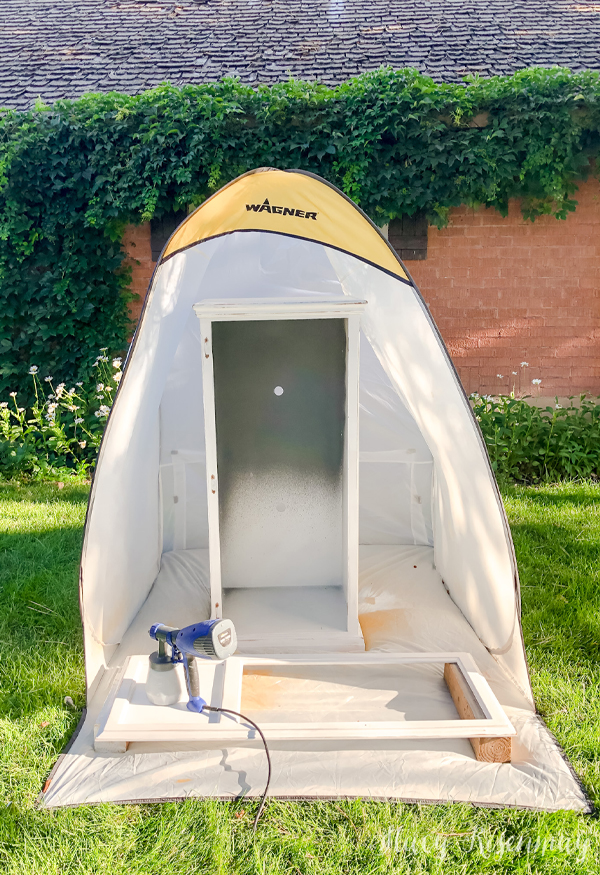
Then I was ready to paint! I set up my spray shelter and filled my Quick Finish paint sprayer. I chose a dark, charcoal gray color. My laundry room/storage room has stained gray tongue and groove walls. I thought a dark gray would go well down there.
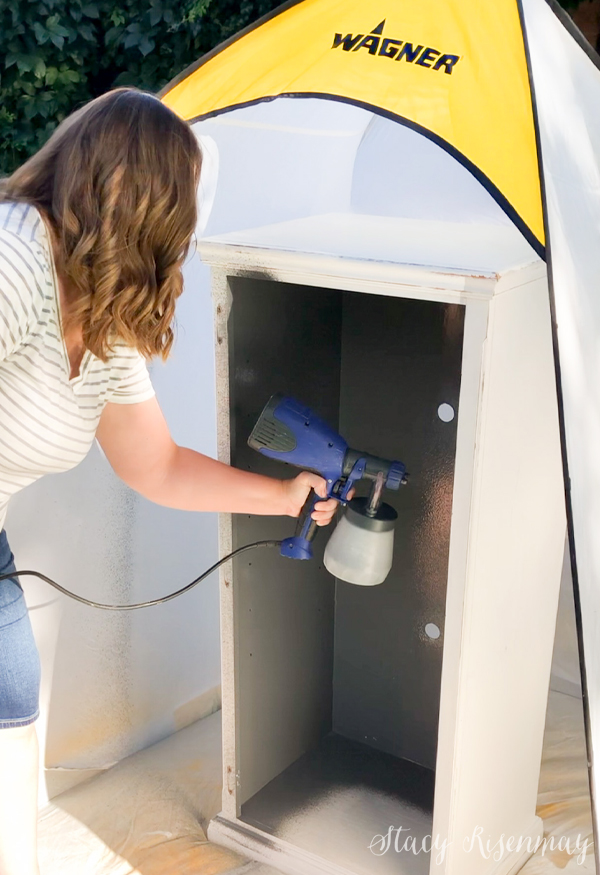
It was a nice warm evening and the thin coats of paint dried pretty quickly. Shane and I are working on another BIG outdoor project, so while the paint dried, I helped him in the very back of the yard.
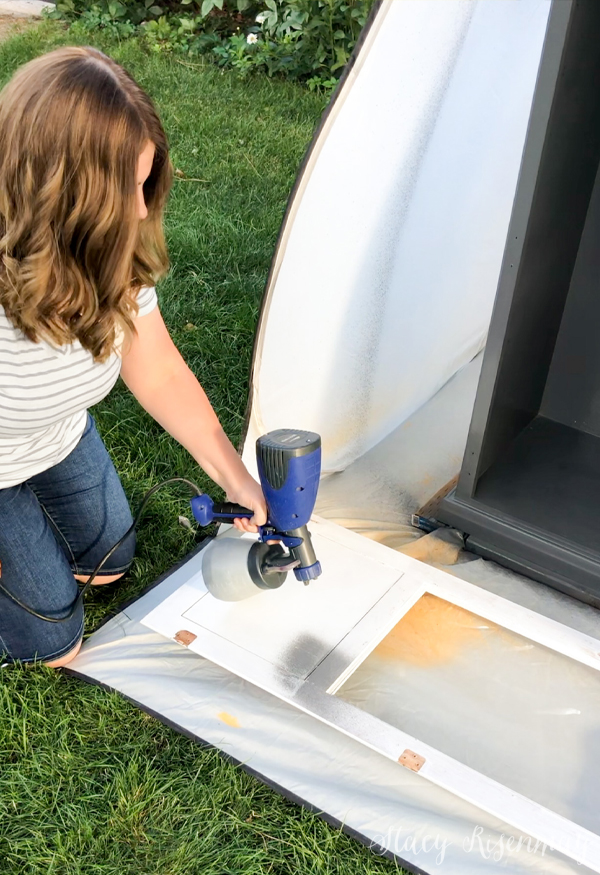
The cabinet was painted in about an hour. Clean up is a breeze too. That is my favorite thing about the Quick Finish sprayer. It detaches from the motor and scrubs up fast.
The shelves for the cabinet were particle board. I had a very specific look I wanted for the shelves but since I had paid more than usual for this piece, I didn't want to pay for new lumber. Using the old shelves would save me money and time. Instead, I covered them in contact paper that looked like real wood. I got mine at Walmart but you can find lots of options on Amazon as well.
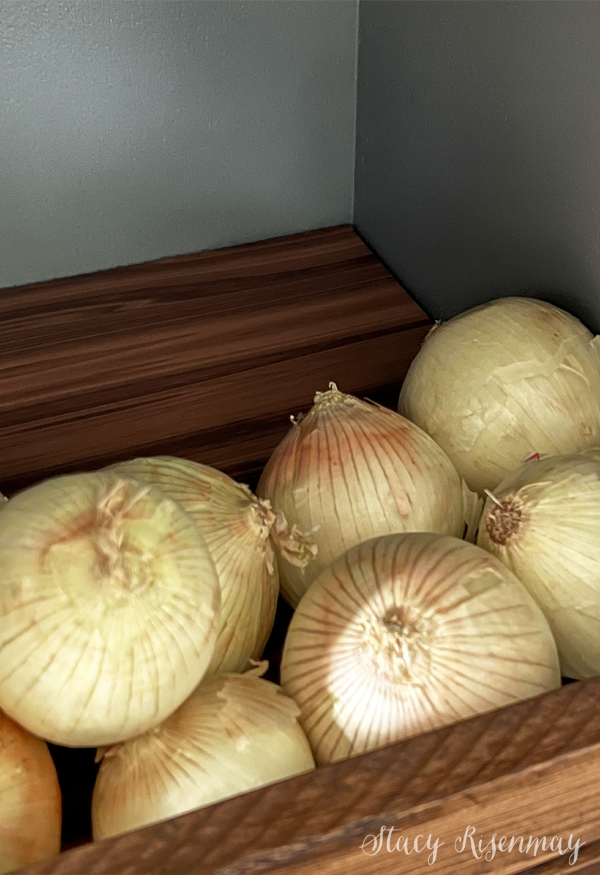
Since the vegetables stored on the shelves could potentially roll off, the shelves needed a ledge. I decided to make the shelves look like little crates! So I stained some scrap 1x2 to match the contact paper. I had 2 long pieces per shelf plus 2 little pieces for the corners - the little short pieces were what the long ones would get attached to. Then I used brad finish nails and wood glue to create the crate-like shelf front. They are now more like bins or storage compartments than shelves :)
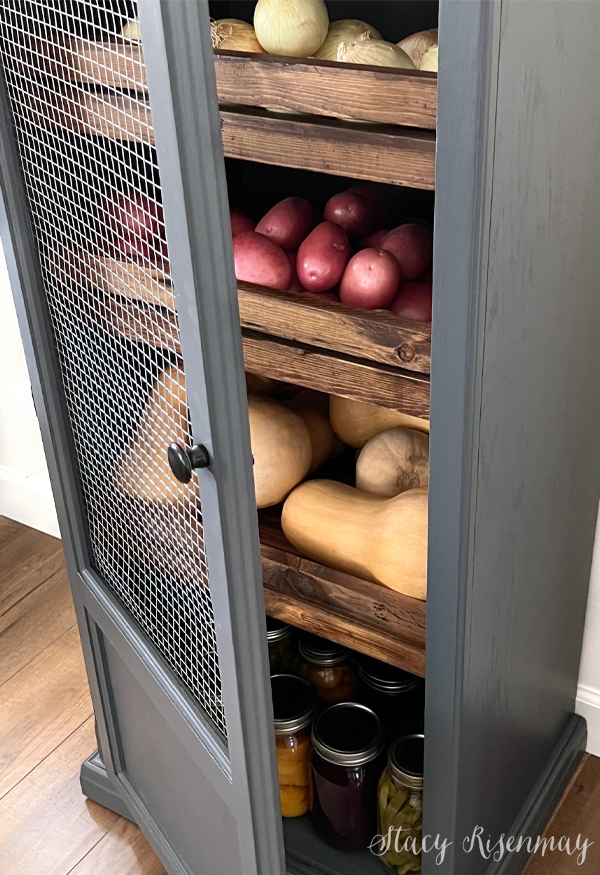
I added new black hinges and a knob to complete the look of this vegetable bin! It will happily reside in my basement where the room temperature is cooler. It is big enough to hold all of our produce without taking up too much space.
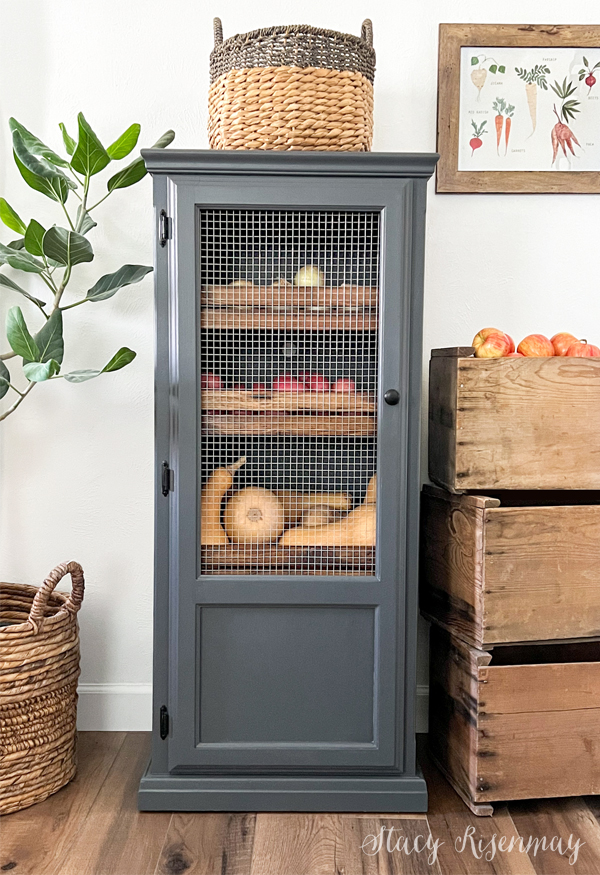
Since we are currently doing a giant reorganization and purge in the whole house, I styled it in my living room. The attic, basement, and office are all torn apart while we sift through tote after tote of STUFF. But I know this root vegetable storage bin will be cute down in it's permanent home and be a great addition to our storage room. It just gives me added motivation to get all that cleaning done.

How do you store your root vegetables? On the kitchen counter, pantry shelves, a hanging fruit basket, or a kitchen cabinet? I'd love to hear what works for you. Especially if you are a gardener like me with lots of extra fresh produce to store.
PIN For Later:


What sheen of paint do you use on furniture?
I love satin :) Shiny but not too shiny. And still easy to scrub and clean.
I am not handy but I do enjoy seeing your projects. My potatoes and onions always start to grow so I'm looking for better ways to store them.
Thanks!
Love this bin! ???? So functional and GORGEOUS!
This looks awesome! I don't have a specific space for my veggies - and this looks like a good idea!
Kelly