• Skip to primary navigation
  • Skip to main content
  • Skip to primary sidebar
  • Skip to footer
Stacy Risenmay
  • Home
  • About me
  • PRESS
  • Contact Me
  • My Book
    • Facebook
    • Instagram
    • Pinterest
    • Twitter
menu icon
go to homepage
subscribe
search icon
Homepage link
  • Home
  • About me
  • Project Gallery
  • Our House
  • PRESS
  • Contact Me
  • Privacy Policy
    • Facebook
    • Instagram
    • Pinterest
    • Twitter
  • ×

    DIY Wood Burned Chargers {Personalize Your Thanksgiving Table!}

    By Stacy 5 Comments

    Thanksgiving might look a bit different this year for some families. I know ours will be smaller. But that doesn't mean you shouldn't be festive! Decorate your table and personalize it with these incredibly easy wood burned chargers. Add a few pumpkins, light a smelly candle, and you will be ready for a feast :)

    This post was sponsored by HomeRight. All project ideas and opinions are 100% my own.

     

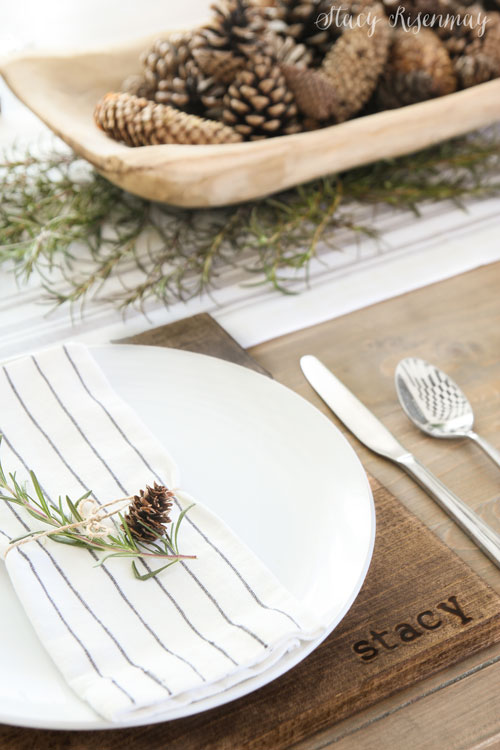
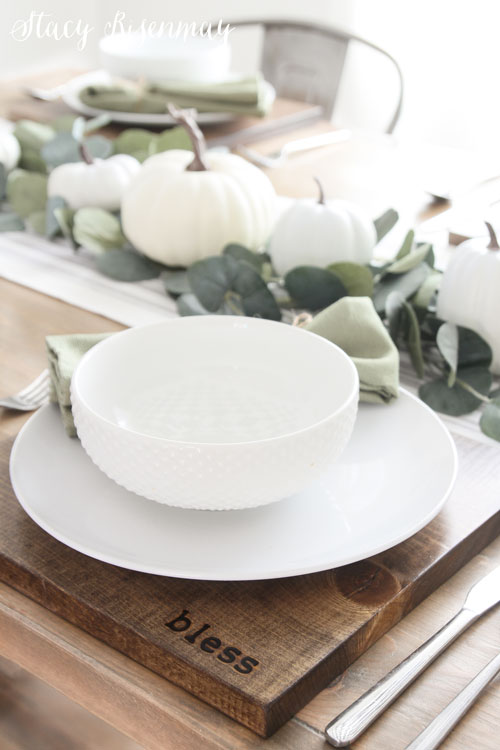
    wood burnered chargers on table

    Wood Burned Chargers

    Some links are affiliate links :)

    Supplies:

    1x12 boards

    Wood Conditioner

    Wood Stain

    Foam Brushes

    Paper Towels

    Wood Burner

    Lettering Set

    HomeRight Quick Finish Sprayer

    Polyacrylic 


    I used a sis foot 1x12 board but this would be a perfect way to use up scrap wood. If you do not have a table saw or a sliding miter saw, you can have Home Depot make the cuts for you in the store. Since 1x12s are actually 11.25" I cut them to 11.25" long to create a square.

    Once they were cut, I sanded them really well. Sanding helps open the pores so it will accept stain better as well as softens the edges.

    After I wiped off the dust, I applied some wood conditioner. If you are using a water-based stain, use a water-based conditioner. Same goes for oil based. The conditioner makes it so the stain will go on more evenly. Pine tends to be super blotchy so you can use all the help you can get!


    Staining
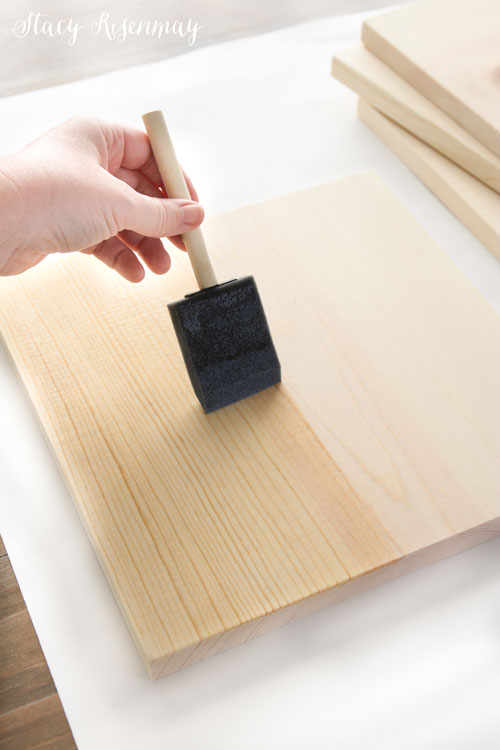
    using wood conditioner on board


    Let the condition sink in for a bit and then wipe off any excess. You are now ready to stain! I chose this nice warm color that would be slightly darker than my table but still light enough that the wood burning would show. I used a foam brush for these but did you know you can also use a sprayer to apply stain? It is especially helpful on larger stain projects!
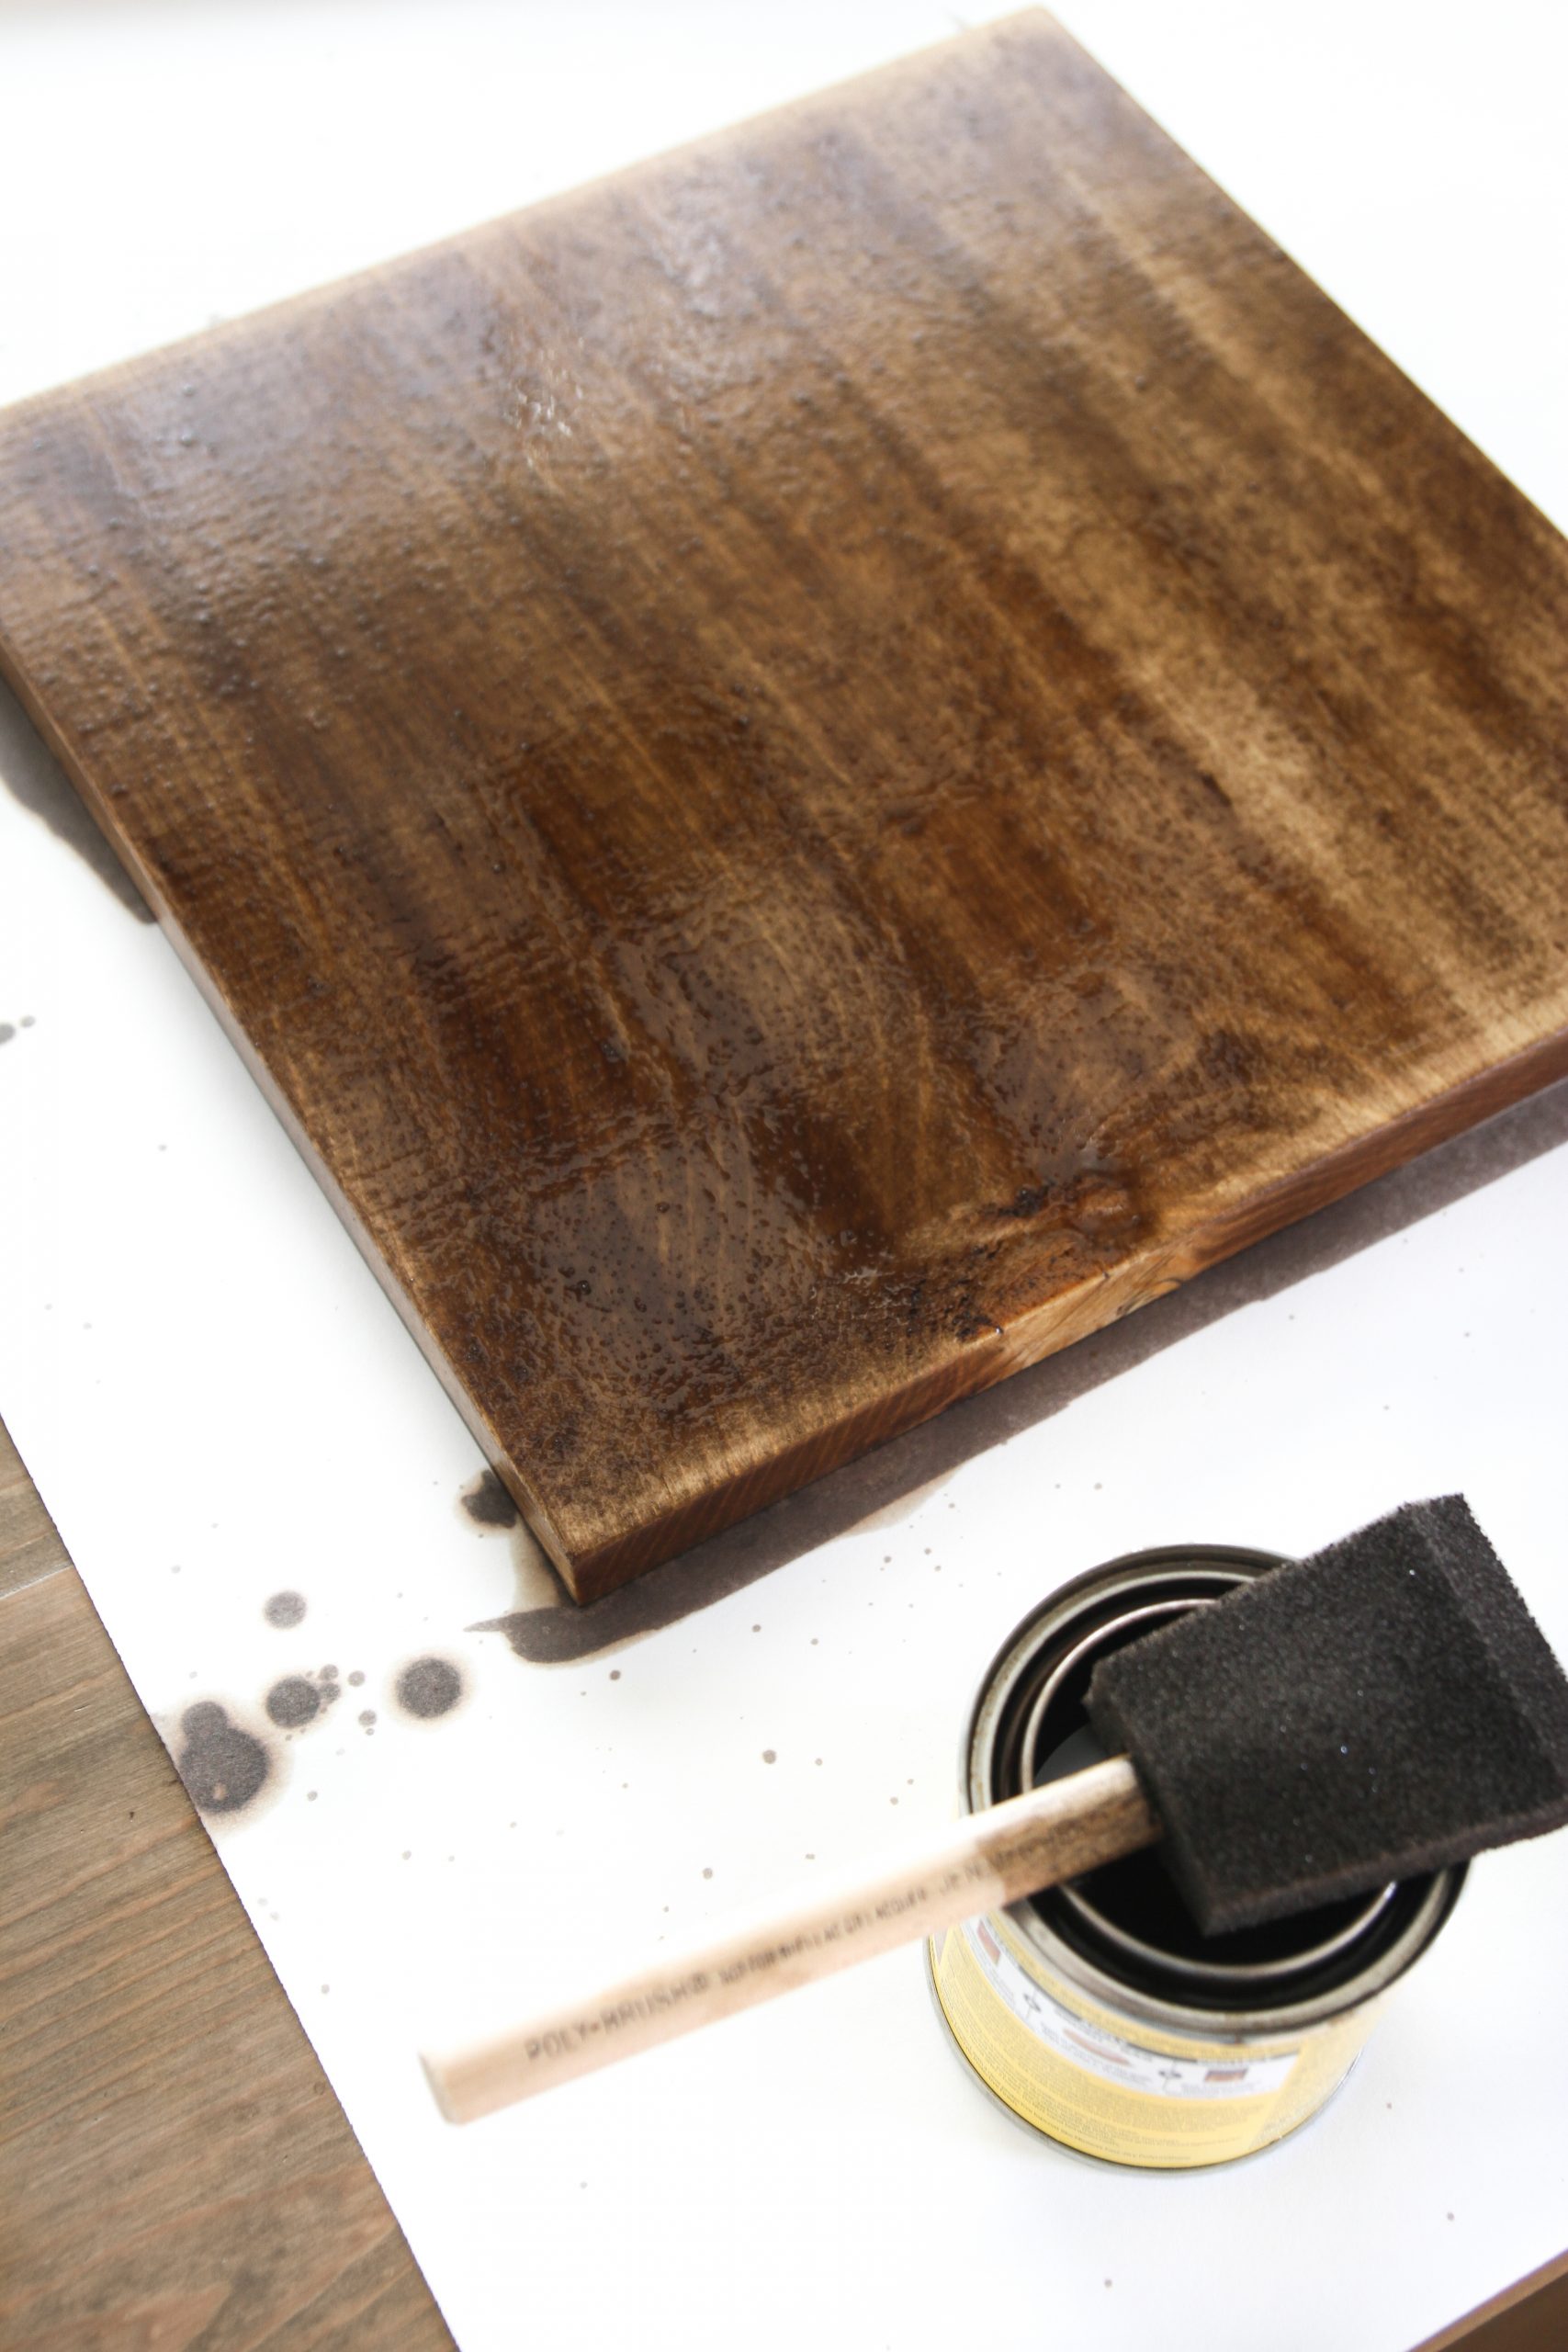
     

    staining wood chargers


    I let the stain sit for about 10 minutes before wiping off the excess with paper towels. If it is not as dark as you would like, apply a second coat once it has dried to the touch.


    Wood Burning

    When the stain is dry, it is time to wood burn! You can pick up a wood burner at any craft store or on Amazon. They are very inexpensive and I use mine quite often. They would make a great gift for the crafter in your life. I bought the lettering set as well and have used that more than the regular tips. I made wood reusable name tags last year for Christmas!

    I couldn't decide if I wanted to personalize them or have a holiday themed word so I did both! Why not make them reversible?! Then you can use them all year.
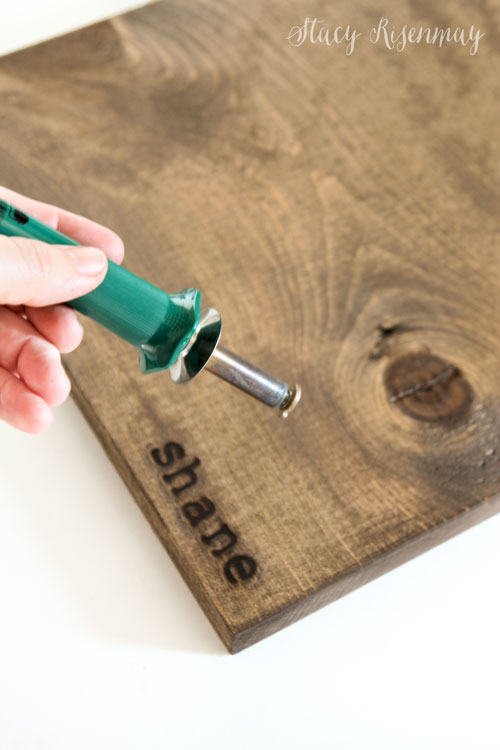
     

    wood burning the chargers with burning tool


    Sealing

    I sealed them with a polyacrylic sealer. Did you know you can use polyurethane and polyacrylic in the HomeRight Sprayers? You will get the perfect finish every time.

    I am about to use the sprayer to seal our new kitchen door...eeek! That will be coming to the blog soon.
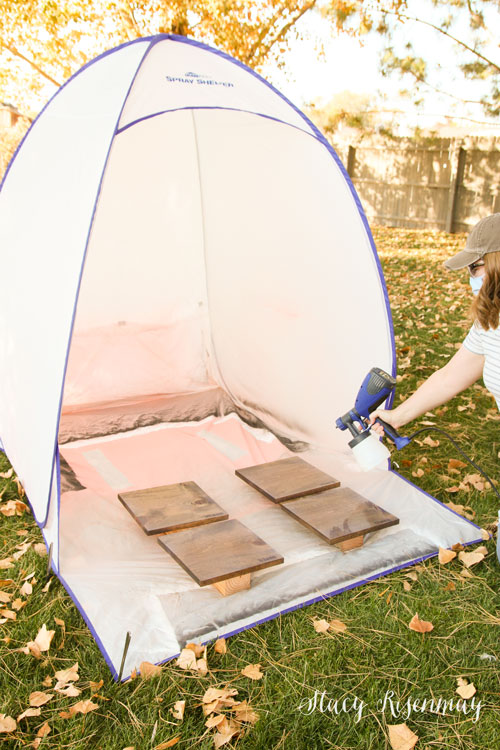
     

    Spraying a sealer on the wood chargers

    I love the satin sheen!


    wood burned chargers on table


    Instead of bless(ed) & Thank(ful), you could also do Christmas words like joy and noel for these wood burned chargers. I kind of like the idea of white washing them too so the letters stand out even more. What do you think?

     

    wood burned chargers on table


    Instead of name card, you could have personalized chargers!
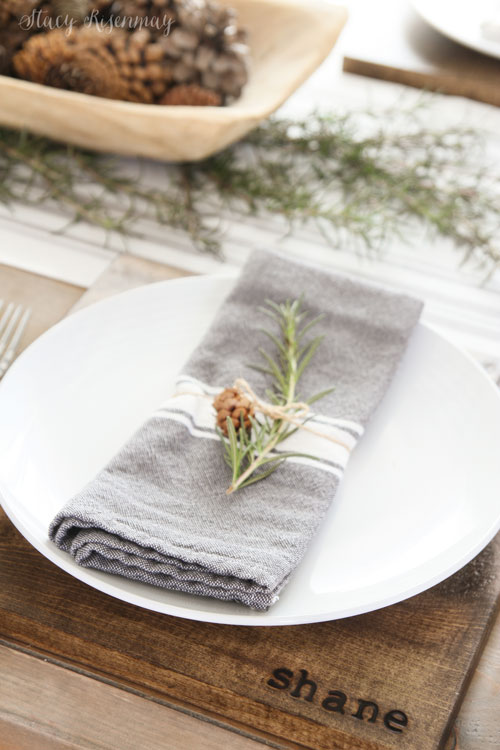
     

    wood burned chargers on table


    It is such an easy DIY and one that your kids could help with. You could whips out a ton of them in no time. I only had one board on hand but I will be making some for my whole family this weekend (since it will be warming up again)!

    What are your Thanksgiving plans this year?


    PIN For Later:
    wood burned chargers

    You will also like:

    • Simple Fall Decor {Home Tour}Simple Fall Decor {Home Tour}
    • Fall and Thanksgiving DecorFall and Thanksgiving Decor
    • Home Office Makeover! {Create A Home Office}Home Office Makeover! {Create A Home Office}
    • DIY Bench {Knock off Challenge}DIY Bench {Knock off Challenge}
    • Preparing Your Yard For Fall {Mini Makeover!}Preparing Your Yard For Fall {Mini Makeover!}
    • Fall Patio DecorFall Patio Decor
    • Fall Mantel {Pink and Magenta!}Fall Mantel {Pink and Magenta!}
    • White Painted Pumpkins {Outdoor Fall Decor}White Painted Pumpkins {Outdoor Fall Decor}

    « Preparing Your Yard For Fall {Mini Makeover!}
    Growing and Storing Butternut Squash »

    Filed Under: DIY & Tutorials, Home Decor, Staining 5 Comments

    Subscribe

    for your weekly DIY fix.

    Reader Interactions

    Comments

    1. Sue

      November 04, 2020 at 11:46 am

      These are so cute! And so easy. I think I could make them too. Thanks for the idea!

      Reply
    2. Elise Laney

      November 04, 2020 at 1:37 pm

      Those are amazing! I love the idea of using a theme word so they can be used again!

      Reply
    3. Decor Craft Design

      November 06, 2020 at 8:15 am

      Beautiful personalized chargers! And you can use it for next year again or for any other dinner party. Thanks for linking up at Happiness Is Homemade, I will be featuring you on Happiness Is Homemade 348. Stay safe and well!

      Mel
      Decor Craft Design

      Reply
    4. Julie Briones

      November 09, 2020 at 10:34 pm

      Stacy, thanks so much for sharing your lovely wood-burned chargers at Tuesday Turn About! They are gorgeous, and I love how you can make them personal or just put inspiring words on them! Pinned to two boards, and I'm delighted to be featuring you tomorrow at Tuesday Turn About!

      Reply
    5. Denise

      November 13, 2020 at 7:57 am

      The wood burned chargers turned out so pretty. You just reminded me that I bought a wood burner last year and still haven't used it. I'm going to have to give this a try.

      Reply

    Comment Below! Cancel reply

    Your email address will not be published. Required fields are marked *

    This site uses Akismet to reduce spam. Learn how your comment data is processed.

    Primary Sidebar

    stacyHey! I'm Stacy and am a DIY addict. I love to get my hands dirty, whether it's sawdust, paint, or dirt. My goal is to help YOU learn to fix up your home and yard. No matter the style or size, I think everyone should love their home. And it doesn't takes a big budget to get there. Let's DIY together!

    Subscribe to My Blog!

    Search this site

    categories


    Subscribe

    Footer

    Welcome! I'm sharing our adventures as we fix up our 1938 cottage. Whether it is big or small, I think everyone should love their home and I don't think it takes a lot of money to make a space your own

    About Stacy

    • Facebook
    • Instagram
    • Pinterest
    • Twitter

    My Favorites

    copyright

    All images and content are copyrighted via Stacy Risenmay unless otherwise stated. If you'd like to share my work, please link back to this blog.
    Thank you for visiting!


    Footer

    ↑ back to top

    About

    • Meet Stacy
    • Privacy Policy
    • Contact

    Categories 

    • Home Decor
    • Outdoor Projects & Gardening
    • DIY & Tutorials
    • Kid Activities
    • Recipes
    • Travel
    • Cleaning
    • Houseplants
    • Staining
    • Painting
    • Power Tools
    • Holiday Ideas

    Newsletter

    • Sign Up! for emails and updates

    As an Amazon Associate I earn from qualifying purchases.

    Copyright © 2020 Brunch Pro on the Brunch Pro Theme


    Privacy Policy
    Welcome! Thanks for visiting.
    Hi! I'm Stacy and I want to help YOU become a DIY rockstar! Sign up for my email list so each project, tip, and trick will go directly to your inbox :)
    Your information will *never* be shared or sold to a 3rd party. Pinky promise :)
    Welcome!
    Hi! I'm Stacy and I blog about fixing up our 1938 cottage. Join the thousand of others who get my posts sent to their inbox for FREE!
    Your information will *never* be shared or sold to a 3rd party.