
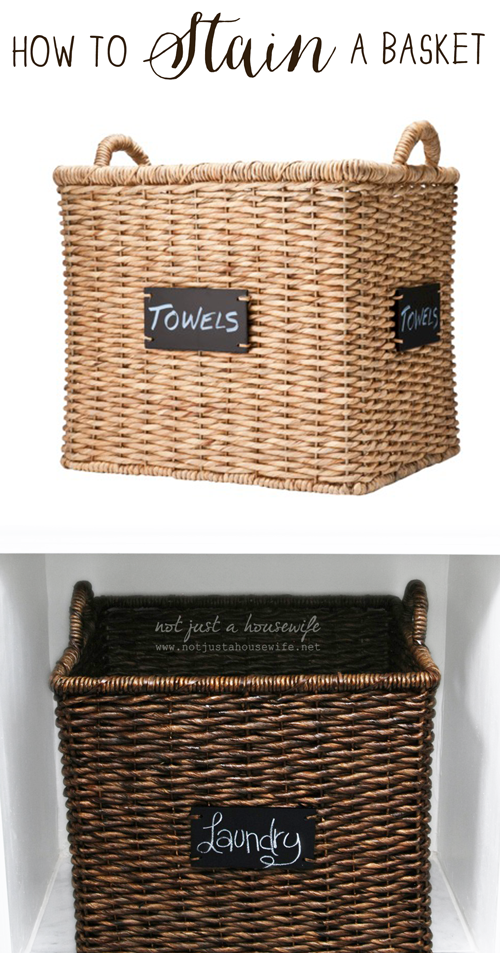
Stain a basket? I know this may sound a little weird, but every once in a while I find the (almost) perfect basket...the right size, perfect style, a good price (baskets can be pricey!) but the wrong color! I have painted baskets before but I have also stained them.
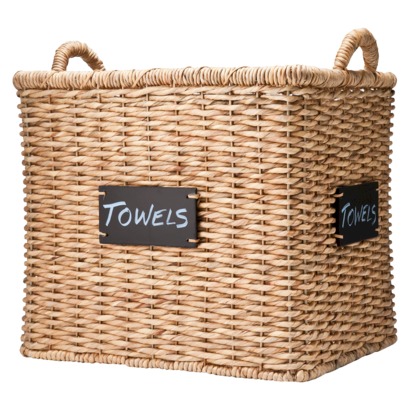
I was building some shelves in my new bathroom downstairs and I knew I wanted a large basket with handles to put on the bottom for dirty laundry. While at Target I spied the (almost) perfect basket. It even had a chalkboard tag! It was part of the Smith and Hawkin product line. But it was a light tan and I really wanted it to be dark brown.
I didn't get it that day.
I kept looking online and around town. I couldn't find one that worked. They were either too big or too small to fit the space in my bathroom.
I went back to Target for some Christmas stuff and the baskets were on sale. I decided to go for it :)
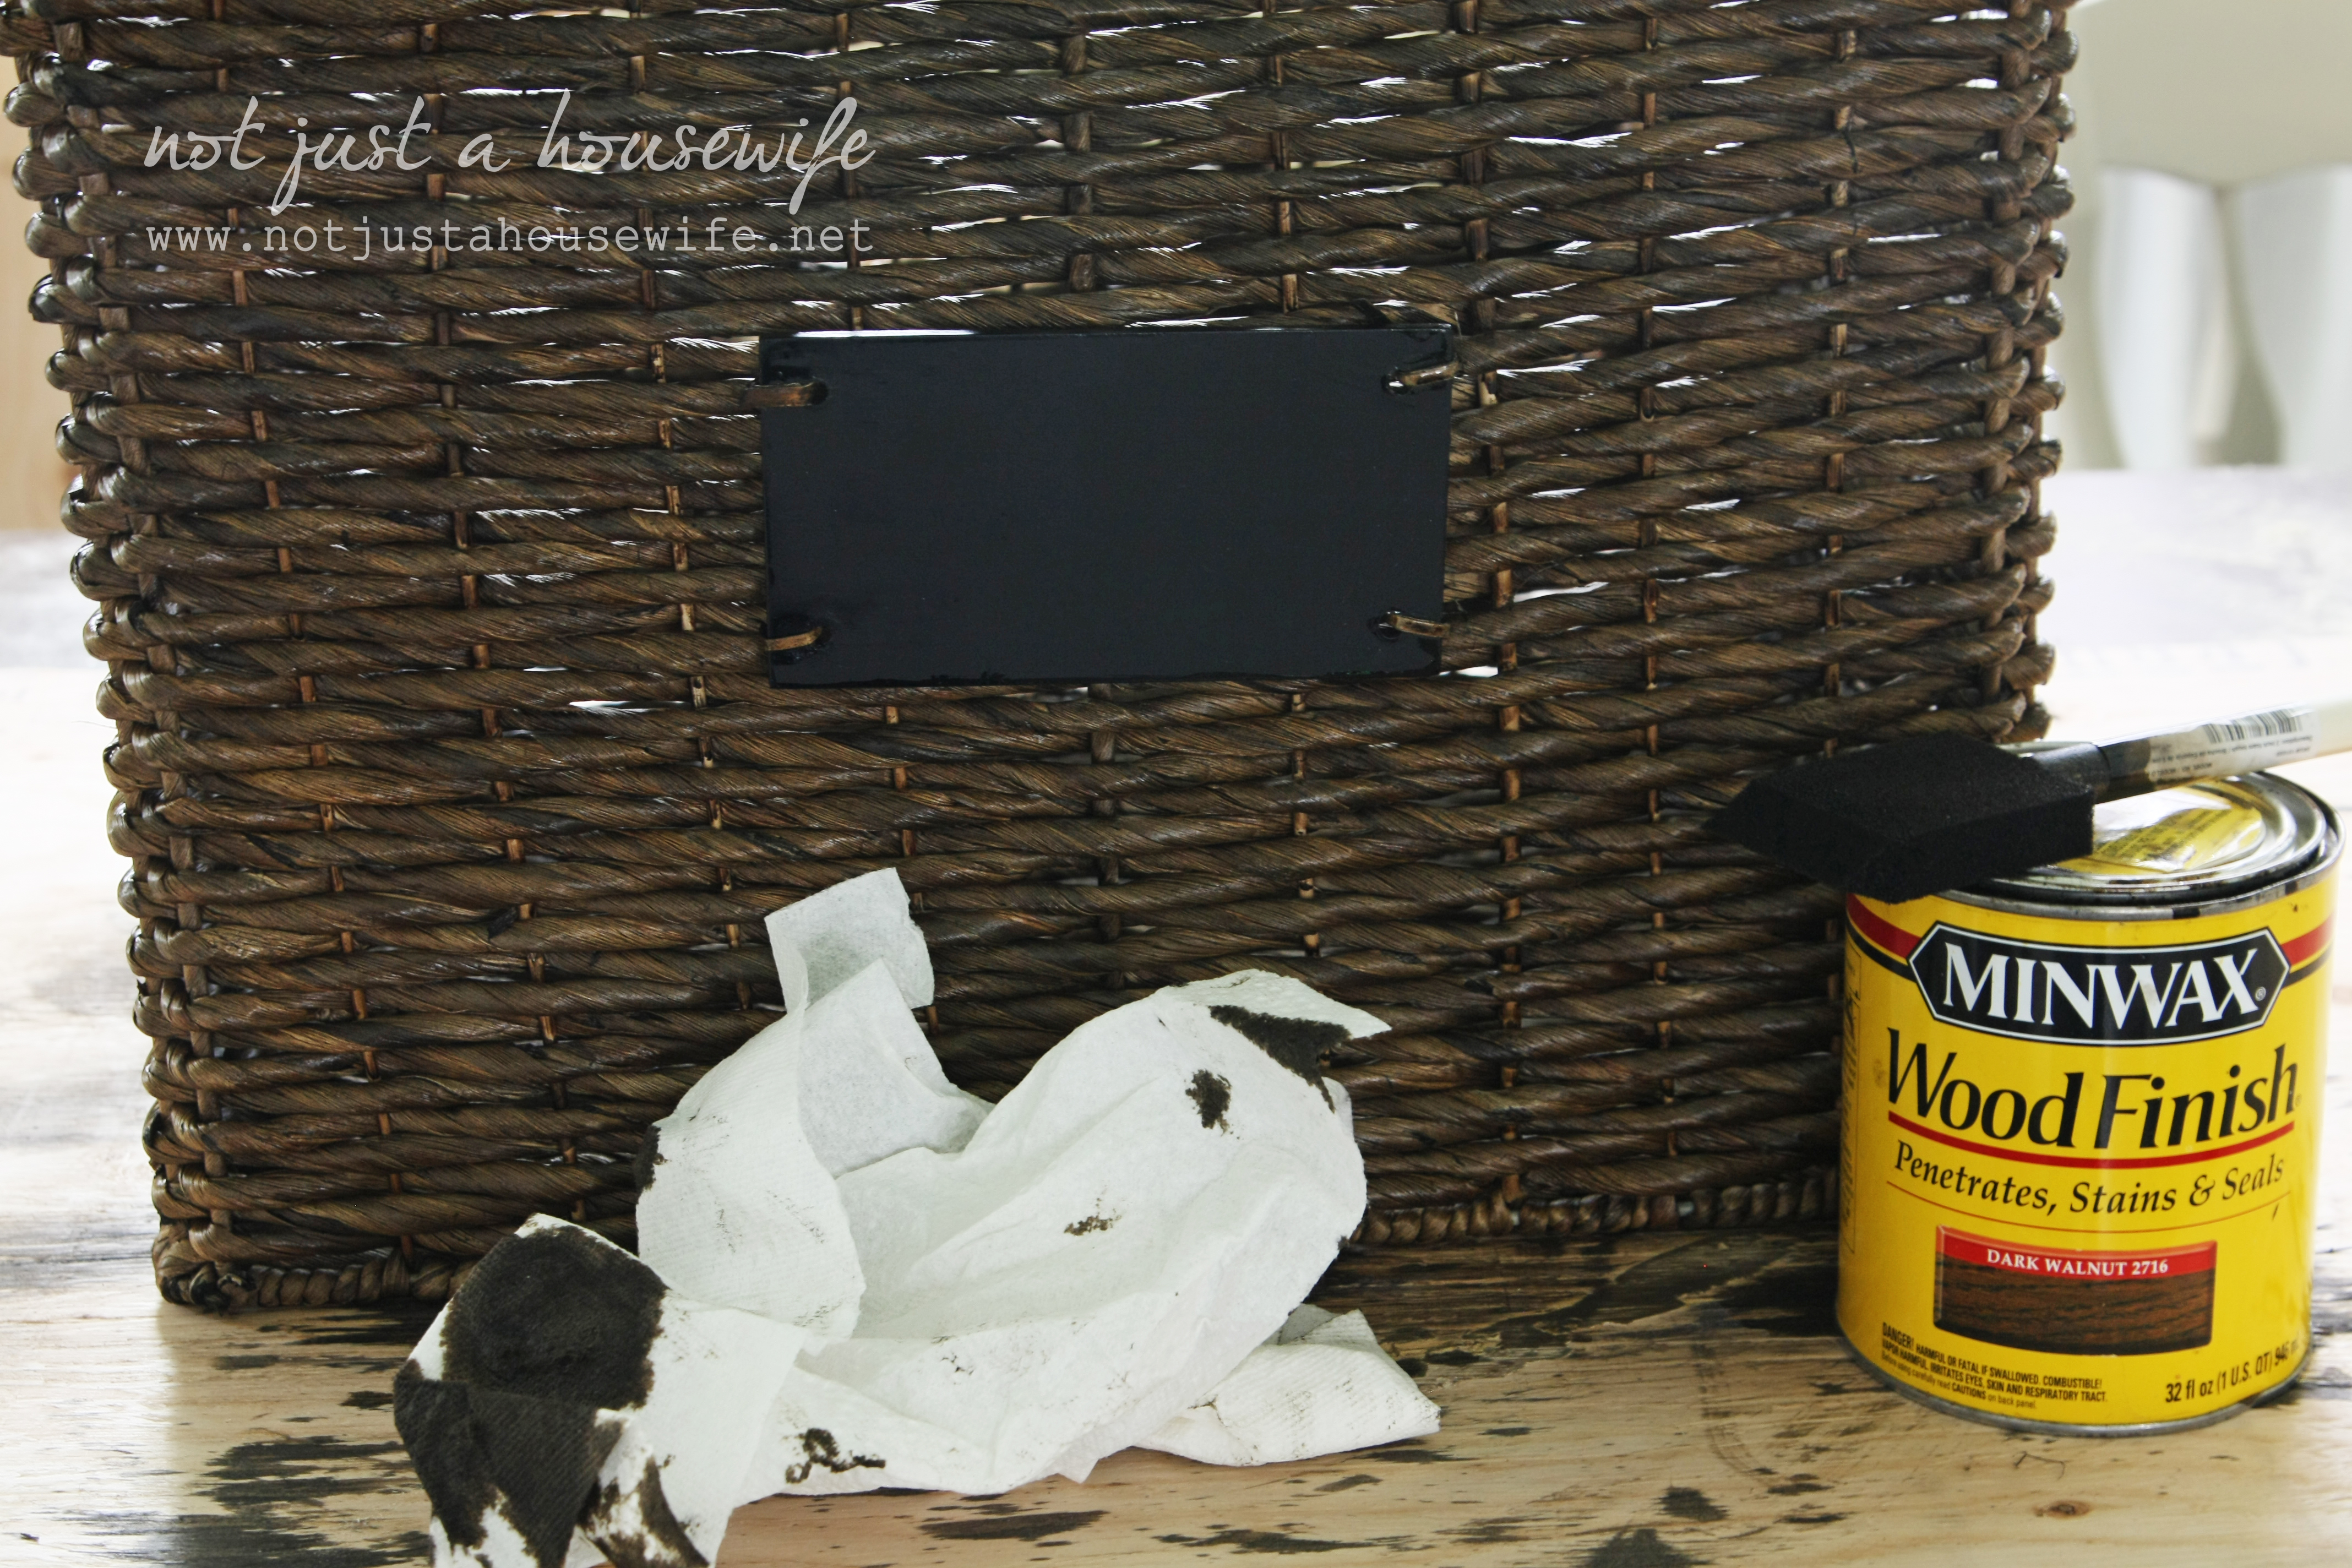
I chose my "go to" stain color which is Minwax's Dark Walnut. I actually remembered to put gloves on this time too! I used a foam brush to apply the stain.
TIPS:
*This is messy. Make sure the basket is on a tarp, piece of plywood, or thick cardboard so your work surface is protected. My work surface happened to be my kitchen table so I used a scrap piece of plywood.
*Only baskets made of natural material can be stain successfully.
*This basket sucked up the stain like a sponge. I had to do three coats. The more stain used, the LONGER THE DRY TIME. It took this basket 3 days in our dry Utah winter air to fully dry. It may take longer if you have humidity. If you live in a humid area, it is best to stain on a day when the humidity is low. That goes for any staining project really. Make sure the basket is completely dry before using it.
*Make sure you work in a ventilated area. I opened my door that is right next to the table. I also opened a window. The fumes are not super strong but this is always a good habit when working with paint or stain.
*I ALWAYS have paper towels handy when I am staining. And ideally you should wear gloves to protect your hands.
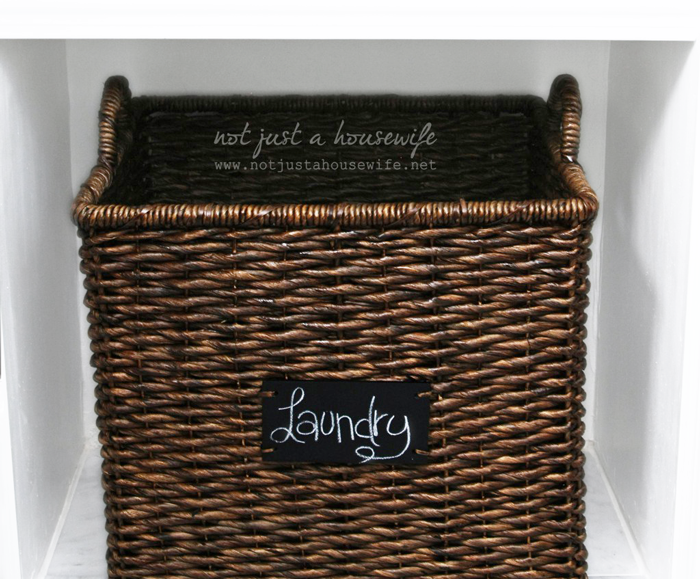
Here it is all finished! I can't wait to show you the rest of the shelves tomorrow!

PIN FOR LATER:


What a cute basket! Thanks for the tips. :)
Nice job. I'm excited to see the bathroom. I will be tackling mine as soon as I finish my kitchen. Fun times!
Love this idea! Those baskets are my favorite and I'm always looking to spice one up!
I found some awesome, big, lined baskets on clearance for pennies once, but they were white. So I took a rattle can of black paint to them. Voila. They turned out super cute. I think being poor is the mother of most great ideas. :)
Such a good idea! I'd heard of painting them, but not staining them…
Are you worried about the stain staining your laundry at all if the laundry is wet or anything?
Once the stain is 100% dry it won't get on clothes- wet or dry :)
I have that same basket! But hmmm... I'm thinking I like your darker version better. hmmm.
Hi Stacy! I'm trying to decide if I should paint some wicker baskets I bought for my daughter's nursery but I'm not sure how to do it. They're tan and I'd like them to be white. What would you recommend?
Sometimes when you spray paint, the paint doesn't get into all the nooks and crannies. So I would paint it with a foam brush first with either craft acrylic paint or latex paint and then do a final coat of spray paint for a smooth finish.
I hope that helps :)
OMG..! Brilliant! I have been eying those same baskets myself forever but hated the blonde color of them since everything in my house is dark. Not a fan of spray-paint because I like the natural look of them but I never once considered staining them. My mind is whirling with ideas now. Only concern I have is if the stain bleeds onto damp things or onto painted surfaces under it if its humid?
Don't use the basket until it has dried 100%. Once it is dry, it should not bleed.
Beautiful results. I love the new color and the cute tag. Gives you a little boost on wash day. I imagine that it will stand up to being banged around better than a coating of paint would. I wonder if using a fabric dye might be another alternative.
Beautiful! I so love the color and how smashing it looks. :)
I've seen those baskets at Target! I love the darker stain finish on them... I wonder if they are on sale at my location!
I have a few baskets that could use some stain, thanks for this great tip!
It looks great! I weave baskets to sell and I use Minwax spray stain. It might be a little faster and easier than brushing it on.
I can't tell for sure from the pics but is the finish matte or does it have a little sheen? I'm wondering if a spray or acrylic sealer would be a good idea?
Your basket turned out so great. Thanks so much for the wonderful tips.
As a basket maker, just thought I'd let you know you can also dye baskets. RIT dye works great, or you can use basket dye.
Was it seagrass? Im excited to try. But I read seagrass is difficult to stain
I'm not sure the material. But baskets that are made from natural materials absorb easily :)