• Skip to primary navigation
  • Skip to main content
  • Skip to primary sidebar
  • Skip to footer
Stacy Risenmay
  • Home
  • About me
  • PRESS
  • Contact Me
  • My Book
    • Facebook
    • Instagram
    • Pinterest
    • Twitter
menu icon
go to homepage
subscribe
search icon
Homepage link
  • Home
  • About me
  • Project Gallery
  • Our House
  • PRESS
  • Contact Me
  • Privacy Policy
    • Facebook
    • Instagram
    • Pinterest
    • Twitter
  • ×

    Painting Our Old Windows

    By Stacy 14 Comments

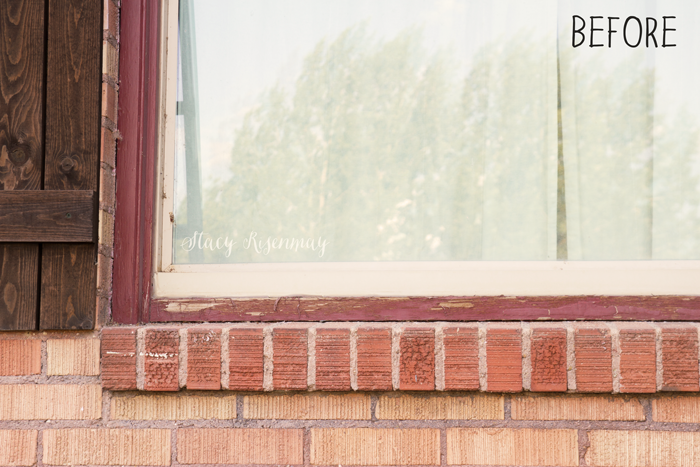
    We are currently in the process of painting the exterior trim of our house. We haven't done it since we moved in over 9 years ago and we were ready for a change. Plus the old paint was starting to peel and look tired. I picked the hottest week of the summer to do this project when the temps outside were in the 100's. Apparently I like to torture myself. Anything above step number three terrifies me so there was that too. But I will say, if you use the right products, and follow all the steps (no cutting corners!) then it isn't so bad. I have partnered with ScotchBlue to show you how to do it right :)


    BEFORE window with peeling paint


    Materials Needed:

    ScotchBlue Exterior Painter’s Tape, Sand paper, Wire brush, Exterior paint, Paintbrush

    Note: Follow all ScotchBlue™ Painter’s Tape package instructions for proper surface cleaning and prep, adhesion and removal.
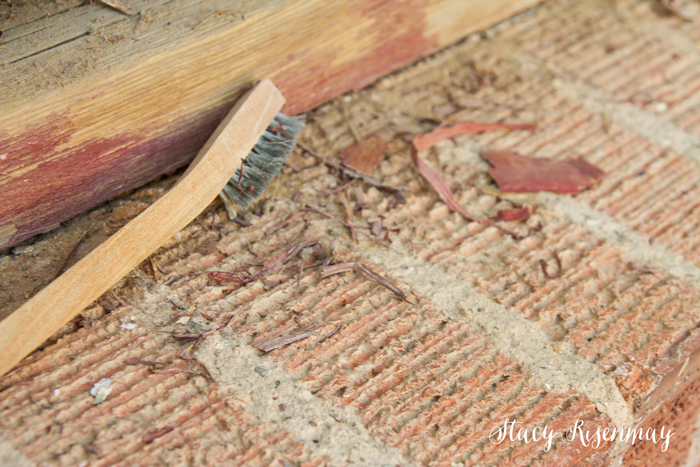
     

    Step 1

    Use a wire brush to remove the peeling paint and any dirt.
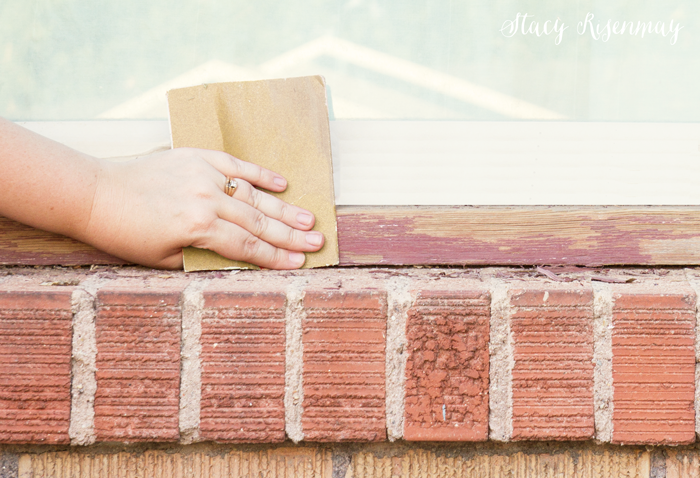
     

    remove peeling paint with wire brush


    Step 2

    Sand the trim smooth. If needed, use putty to fill in dents or cracks


    sand the trim


    Step 3

    Clean the window trim with a soapy rag and a garden hose.
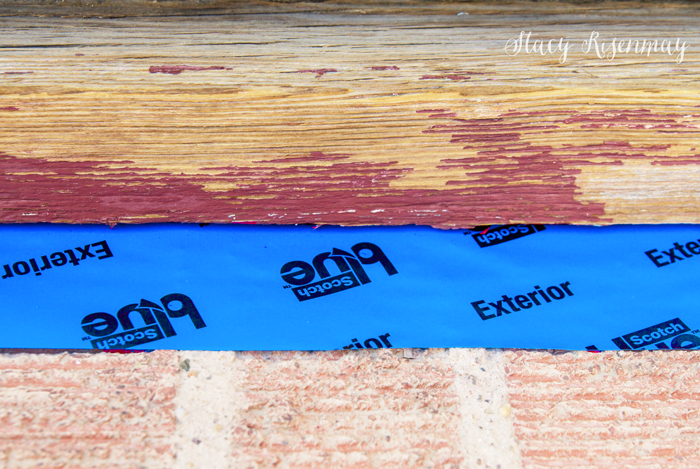
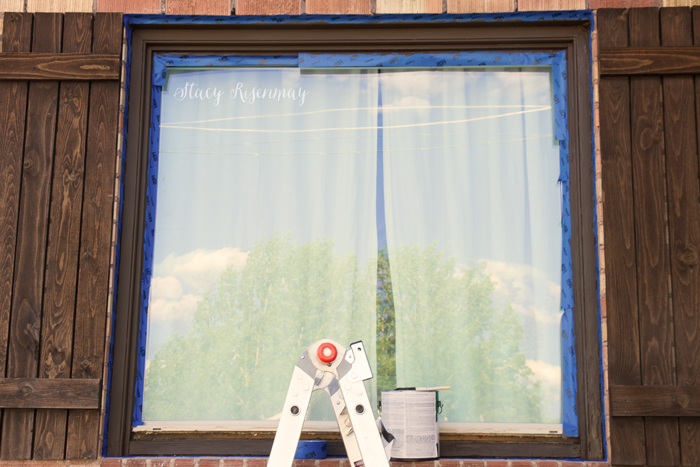
     

    Step 4

    After the trim has completely dried, tape around the trim with ScotchBlue Exterior tape.  If you are having trouble applying the tape to concrete, I recommend using the Scotch® Masking Tape for Hard-to-Stick Surfaces.


    tape around the trim with exterior tape


    Step 5

    Paint the trim in your desired color. We are going with a dark brown like the garage door and kitchen exterior door.
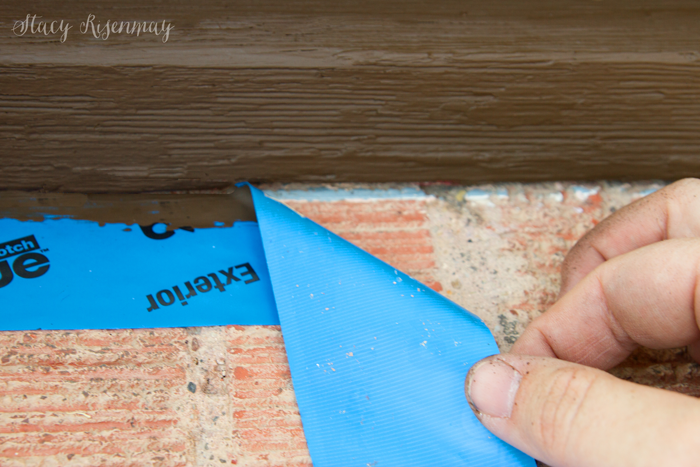
     

    paint exterior window trim


    Step 6

    Once you are done paining, remove the tape by pulling it back on itself at a 45-degree angle.


    tear off tape at 45 degree angle


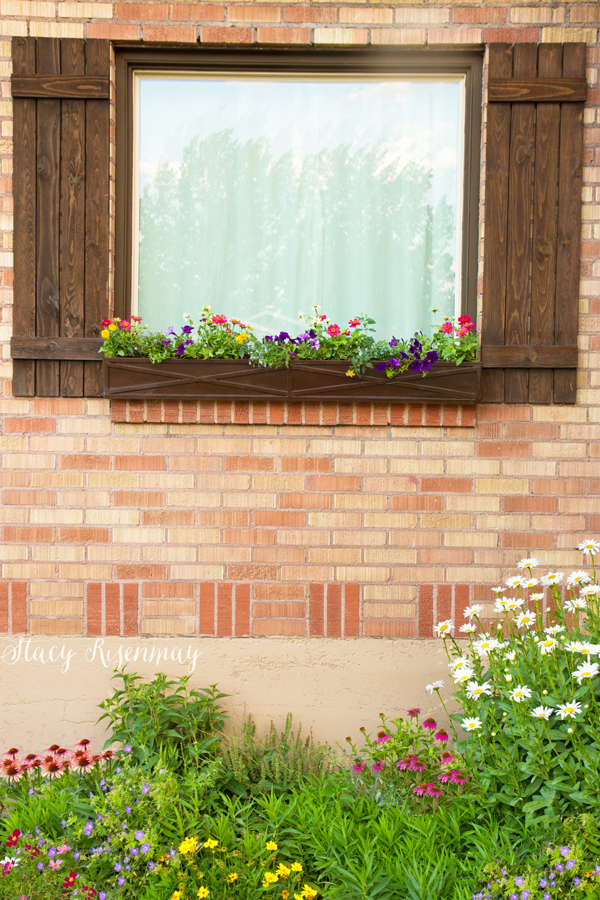
    I added a window box and I really like how it all came together. I need to build anther box for the other large front window. I have been waiting for the temperatures to dip below 95 since it was pretty brutal working outside in the 100's.


    window with flower box


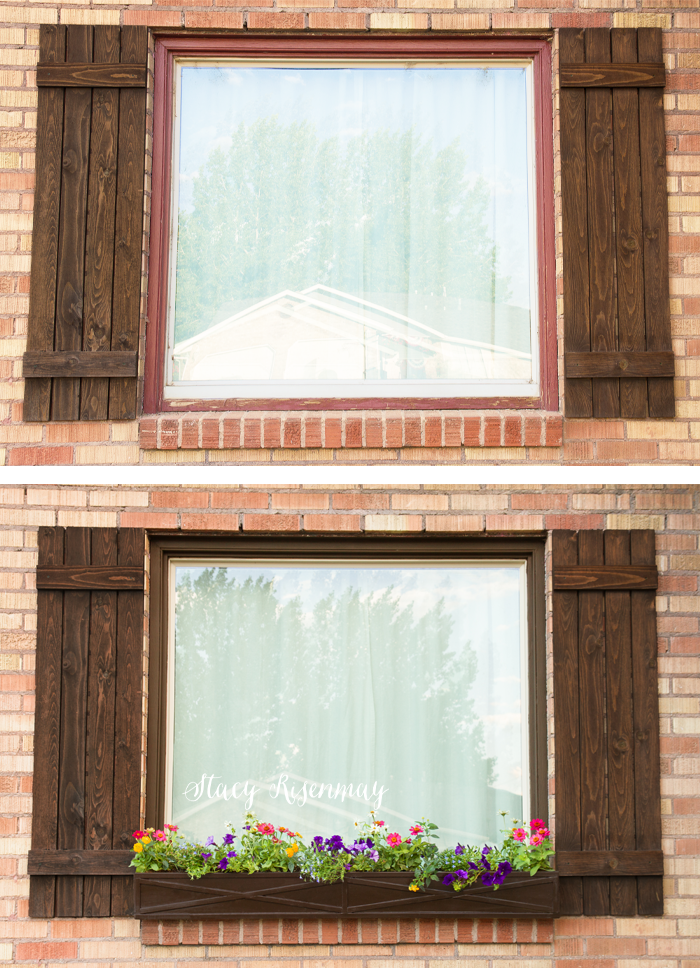
    And here is the before and after together! What do you think of the brown?


    window before and after


    To see more projects, visit the ScotchBlue inspiration hub!


    I have partnered with ScotchBlue again this year to bring you fun projects. I was compensated by ScotchBlue for my time but as always, my thoughts, project ideas, and opinions are 100% mine :)

    You will also like:

    • Crushing On: Wall MuralsCrushing On: Wall Murals
    • How To Clean And Sanitize Reclaimed WoodHow To Clean And Sanitize Reclaimed Wood
    • Pumpkin TopiaryPumpkin Topiary
    • Under Bed Storage DrawersUnder Bed Storage Drawers
    • Almond Joy Popcorn and an Outdoor Movie!Almond Joy Popcorn and an Outdoor Movie!
    • MY OFFICE REVEAL!!!!!!!......finallyMY OFFICE REVEAL!!!!!!!......finally
    • My Vintage Bathroom gets and UPDATEMy Vintage Bathroom gets and UPDATE
    • Simple Fall Holiday TableSimple Fall Holiday Table

    « Custom Painted Curtains
    Modern Industrial Bed with Storage »

    Filed Under: DIY & Tutorials, Uncategorized 14 Comments

    Subscribe

    for your weekly DIY fix.

    Reader Interactions

    Comments

    1. Dianne

      August 16, 2016 at 7:08 am

      I love the new brown colour!

      Reply
    2. Carole @ Garden Up Green

      August 16, 2016 at 7:58 am

      Our brick is very similar so we went with Barn Red trim but I have to say I love your brown and the shutters are awesome!! That was something I wanted to include but placed those efforts elsewhere. That planter box is a fantastic addition too.
      Kudos!!

      Reply
    3. Jeanne

      August 16, 2016 at 8:43 am

      I like the brown - it unifies the window. A very neat job...and done in 100 degree temps...impressive and just a little nutty(!)

      Reply
    4. mickie mclaughlin

      August 16, 2016 at 9:02 am

      Great job on this project.....you must love punishment to work outside when it is 100...ha ha The one thing I learned from your post is that the tape needs to be pulled off at an angle....Wish I had known that when I taped off some walls in the house. NOW I KNOW.... The window box really ups the results. mickie

      Reply
    5. Lucinda

      August 16, 2016 at 9:55 am

      Before I read your post I thought, "the trim would look nice in dark brown, like the shutters." It does!
      I love the low profile of the window box. It makes a statement without dominating.

      Reply
    6. Noreen

      August 16, 2016 at 10:10 am

      Your finished window looks really nice. Painting windows is the worst painting job - especially the prep work.

      Reply
    7. Dana Herbert

      August 16, 2016 at 6:02 pm

      Wow, didn't know you added shutters. The brown with the shutters looks wonderful! Love the little flower box too.

      Reply
    8. Beth

      August 16, 2016 at 8:44 pm

      Looks great! I really like the brown.

      Reply
    9. cmt

      August 16, 2016 at 8:56 pm

      Looks terrific. Hats off to you for working in the heat. Well worth it, though. Looks so sweet with all the flowers.

      Reply
    10. Deb C.

      August 17, 2016 at 2:28 pm

      I like the way the brown trim and shutters frame the window. Also, the flower bed under the window is beautiful!

      Reply
    11. Crystal Green

      August 27, 2016 at 12:43 pm

      That is such a lovely transformation. I love the fact that you added flowers to your window bases.

      Reply
    12. Doug

      February 05, 2018 at 10:57 am

      Looking great! Amazing what a little bit of cheap paint can do.
      This has a very "old world" European feel to it. I like it.

      Reply

    Trackbacks

    1. DIY Home Improvement Projects - Live Laugh Rowe says:
      August 31, 2016 at 6:46 pm

      […] Celebrate Farmhouse Master Bedroom via Lauren McBride Blog DIY Kitchen Remodel via Chatfield Court Painting Old Windows via Not Just a Housewife Shiplap Floors via On Fern Avenue Modern Coffee Table Plans via Love […]

      Reply
    2. Meet my Haven Conference Blogger Friends! - Design Asylum Blog | by Kellie Smith says:
      September 6, 2016 at 6:17 am

      […] Stacy at Not Just a Housewife […]

      Reply

    Comment Below! Cancel reply

    Your email address will not be published. Required fields are marked *

    This site uses Akismet to reduce spam. Learn how your comment data is processed.

    Primary Sidebar

    stacyHey! I'm Stacy and am a DIY addict. I love to get my hands dirty, whether it's sawdust, paint, or dirt. My goal is to help YOU learn to fix up your home and yard. No matter the style or size, I think everyone should love their home. And it doesn't takes a big budget to get there. Let's DIY together!

    Subscribe to My Blog!

    Search this site

    categories


    Subscribe

    Footer

    Welcome! I'm sharing our adventures as we fix up our 1938 cottage. Whether it is big or small, I think everyone should love their home and I don't think it takes a lot of money to make a space your own

    About Stacy

    • Facebook
    • Instagram
    • Pinterest
    • Twitter

    My Favorites

    copyright

    All images and content are copyrighted via Stacy Risenmay unless otherwise stated. If you'd like to share my work, please link back to this blog.
    Thank you for visiting!


    Footer

    ↑ back to top

    About

    • Meet Stacy
    • Privacy Policy
    • Contact

    Categories 

    • Home Decor
    • Outdoor Projects & Gardening
    • DIY & Tutorials
    • Kid Activities
    • Recipes
    • Travel
    • Cleaning
    • Houseplants
    • Staining
    • Painting
    • Power Tools
    • Holiday Ideas

    Newsletter

    • Sign Up! for emails and updates

    As an Amazon Associate I earn from qualifying purchases.

    Copyright © 2020 Brunch Pro on the Brunch Pro Theme


    Privacy Policy
    Welcome! Thanks for visiting.
    Hi! I'm Stacy and I want to help YOU become a DIY rockstar! Sign up for my email list so each project, tip, and trick will go directly to your inbox :)
    Your information will *never* be shared or sold to a 3rd party. Pinky promise :)
    Welcome!
    Hi! I'm Stacy and I blog about fixing up our 1938 cottage. Join the thousand of others who get my posts sent to their inbox for FREE!
    Your information will *never* be shared or sold to a 3rd party.