
If you are having a drought I have the perfect solution. Invite me over to do an outdoor DIY project. It is bound to pour buckets and buckets of rain as soon as I start. It may even break some records. Like maybe one day it will rain more in two hours than it has all year. I may mumble under my breath, thank the Gods that someone invented plastic tarps, and consume large quantities of chocolate, but eventually the project will get done and your grass will look amazing.
Have you ever had one of those projects that should have taken a couple days but because of unforeseen issues.... and mother nature throwing a hissy fit, it took more like two weeks?
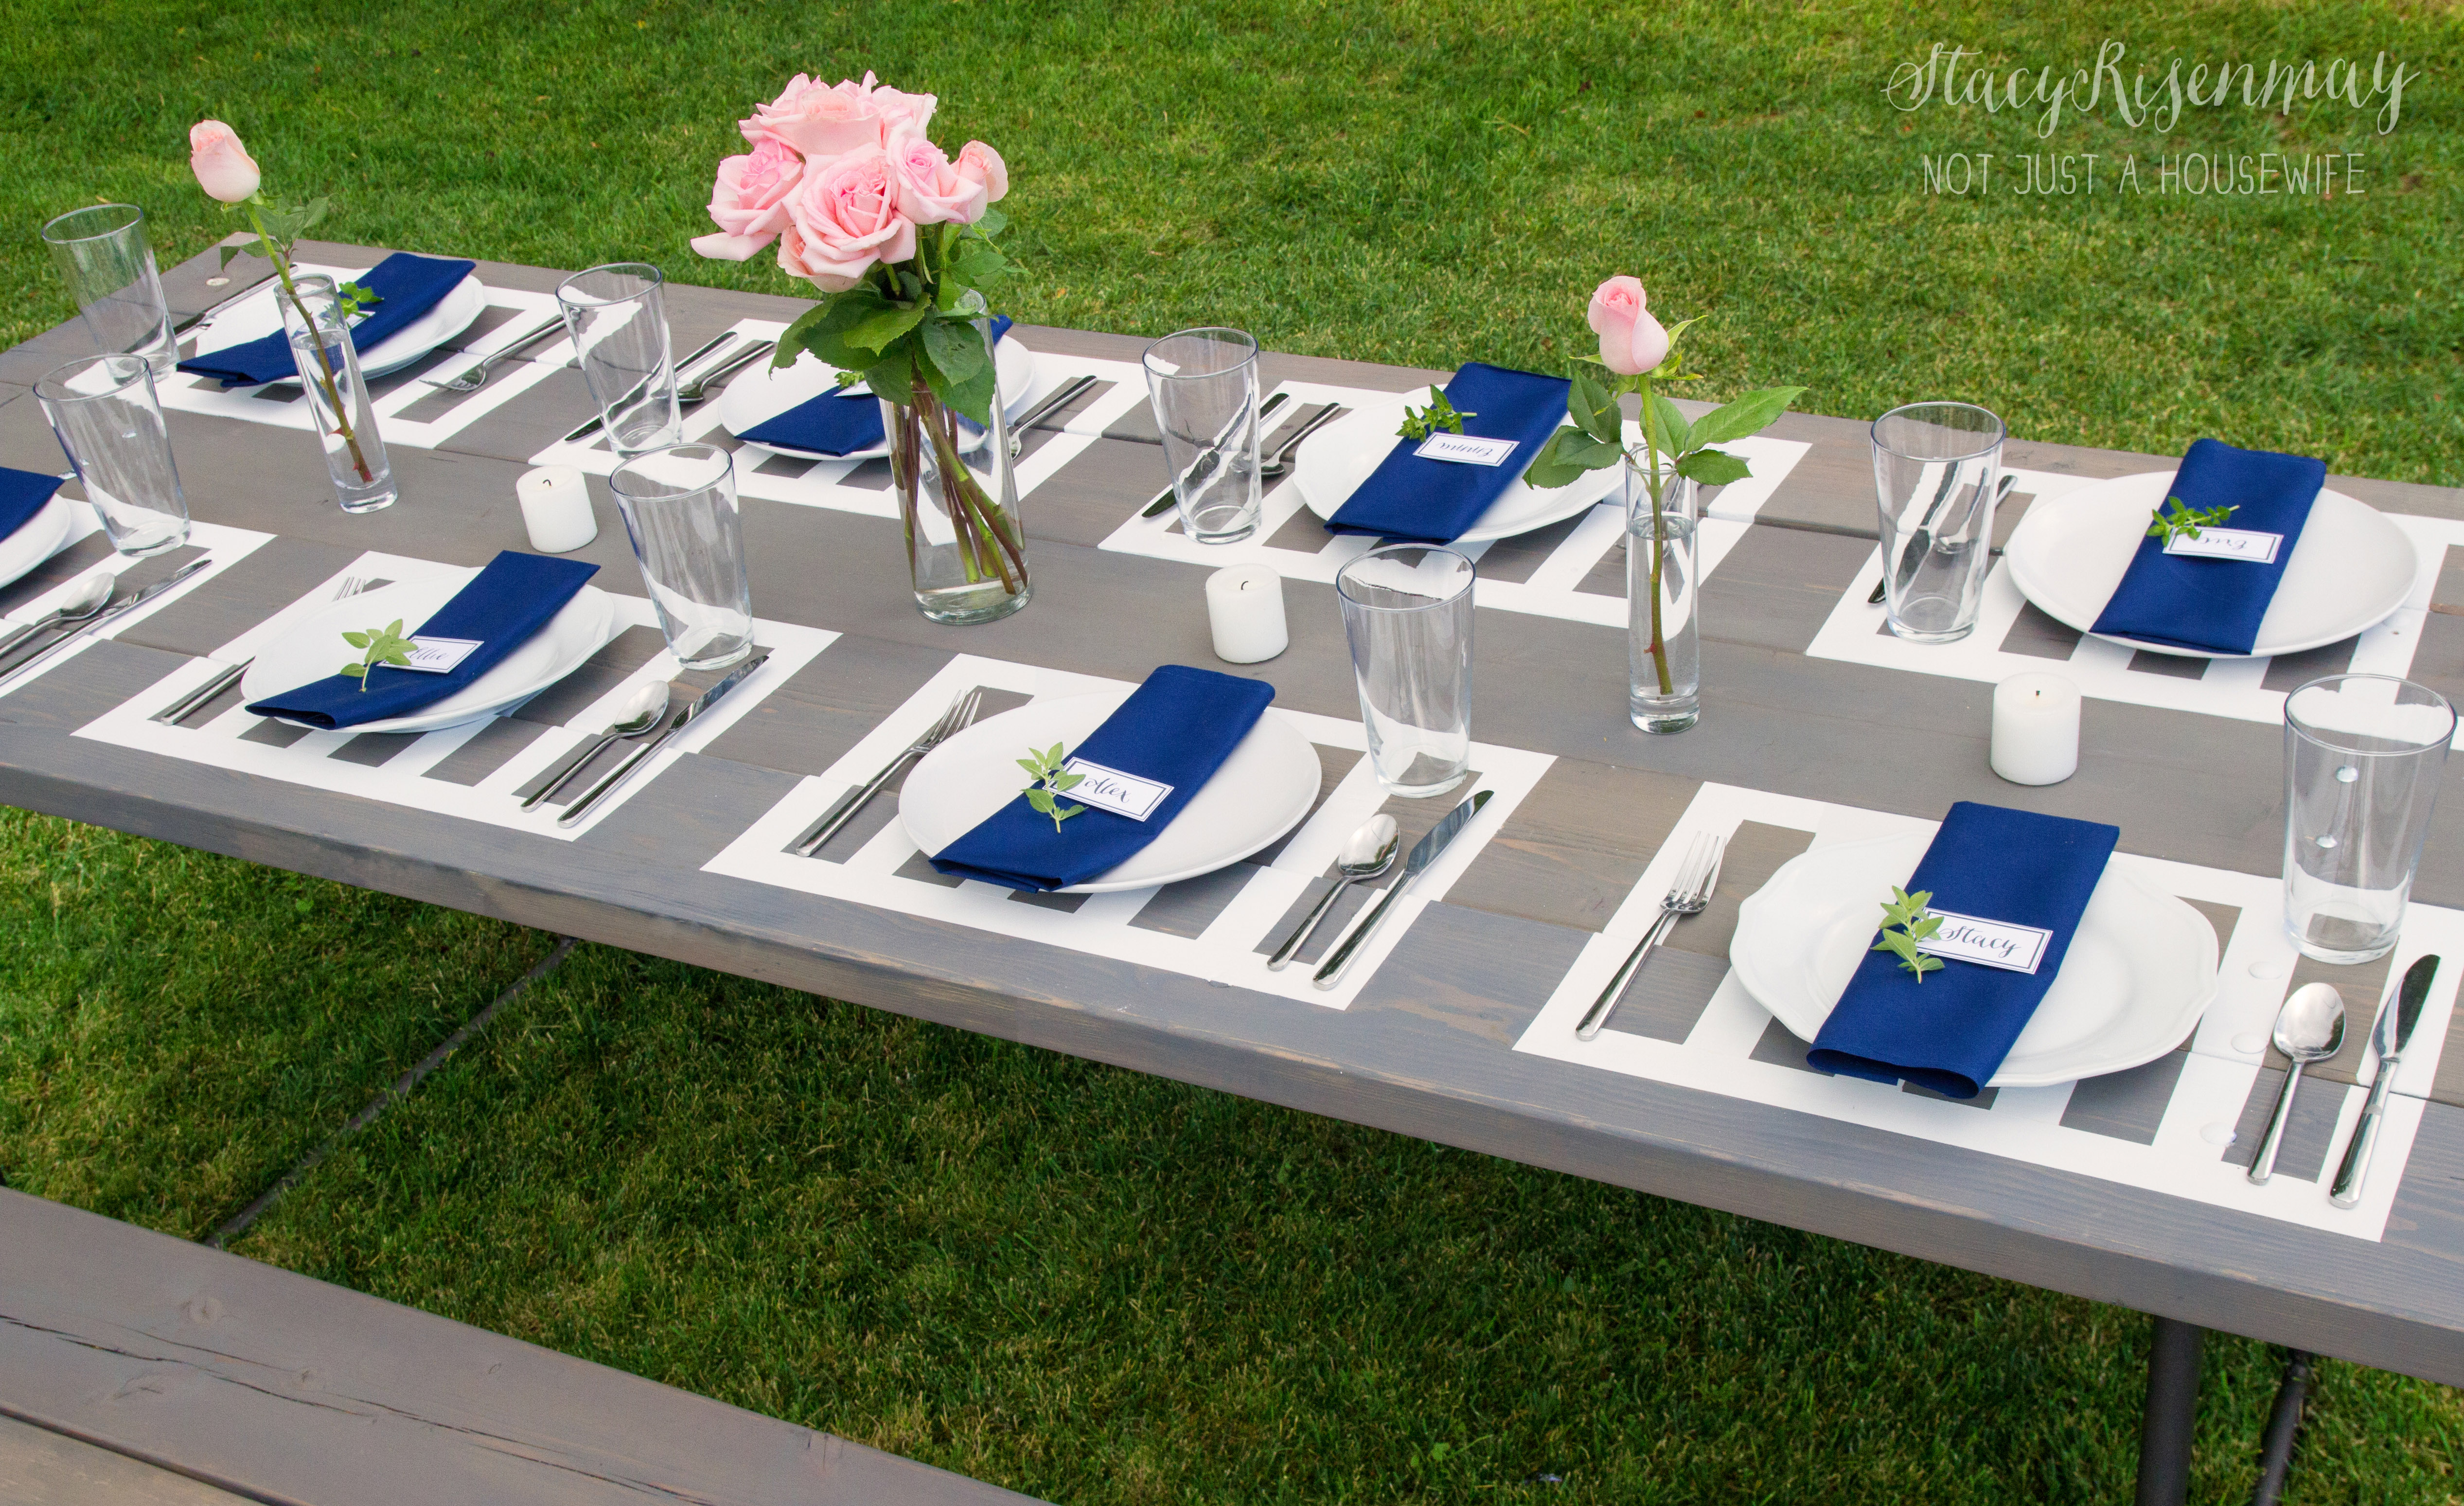
I present you with my picnic table.
I had been throwing around the idea in my head of fixing up and painting a design on my picnic table. When ScotchBlue™ asked if I wanted to partner with them I knew that this was a perfect project!
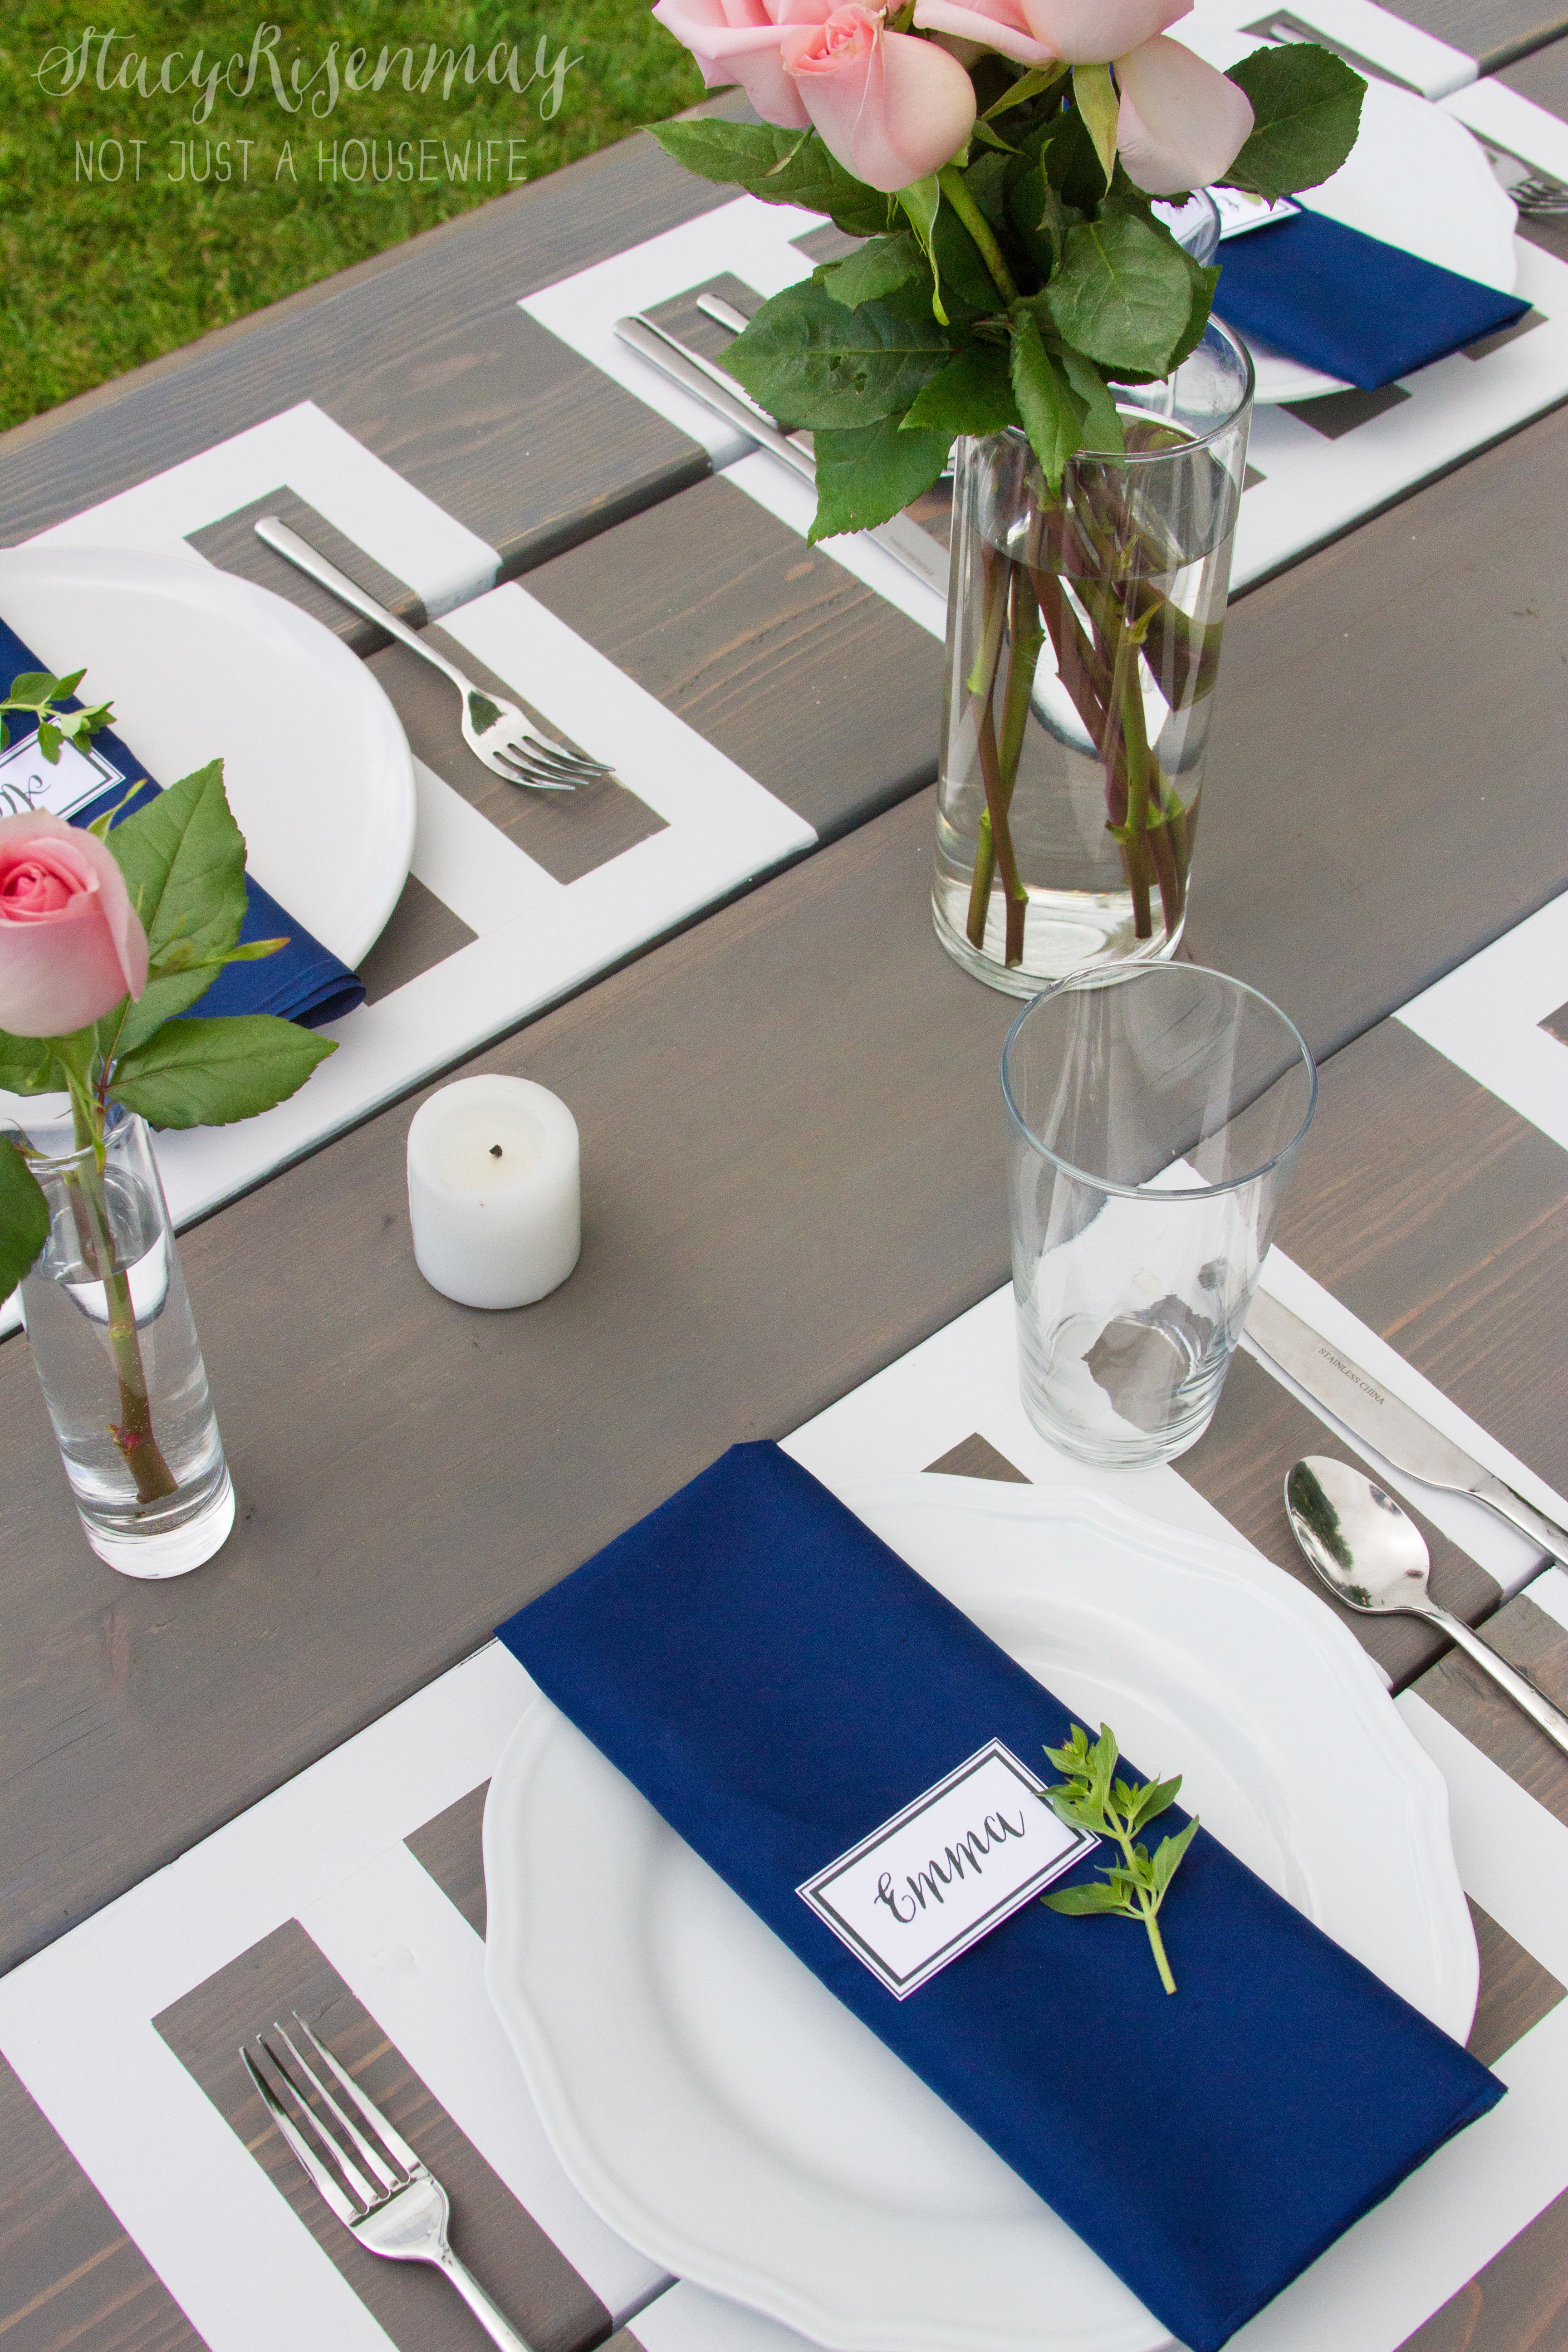
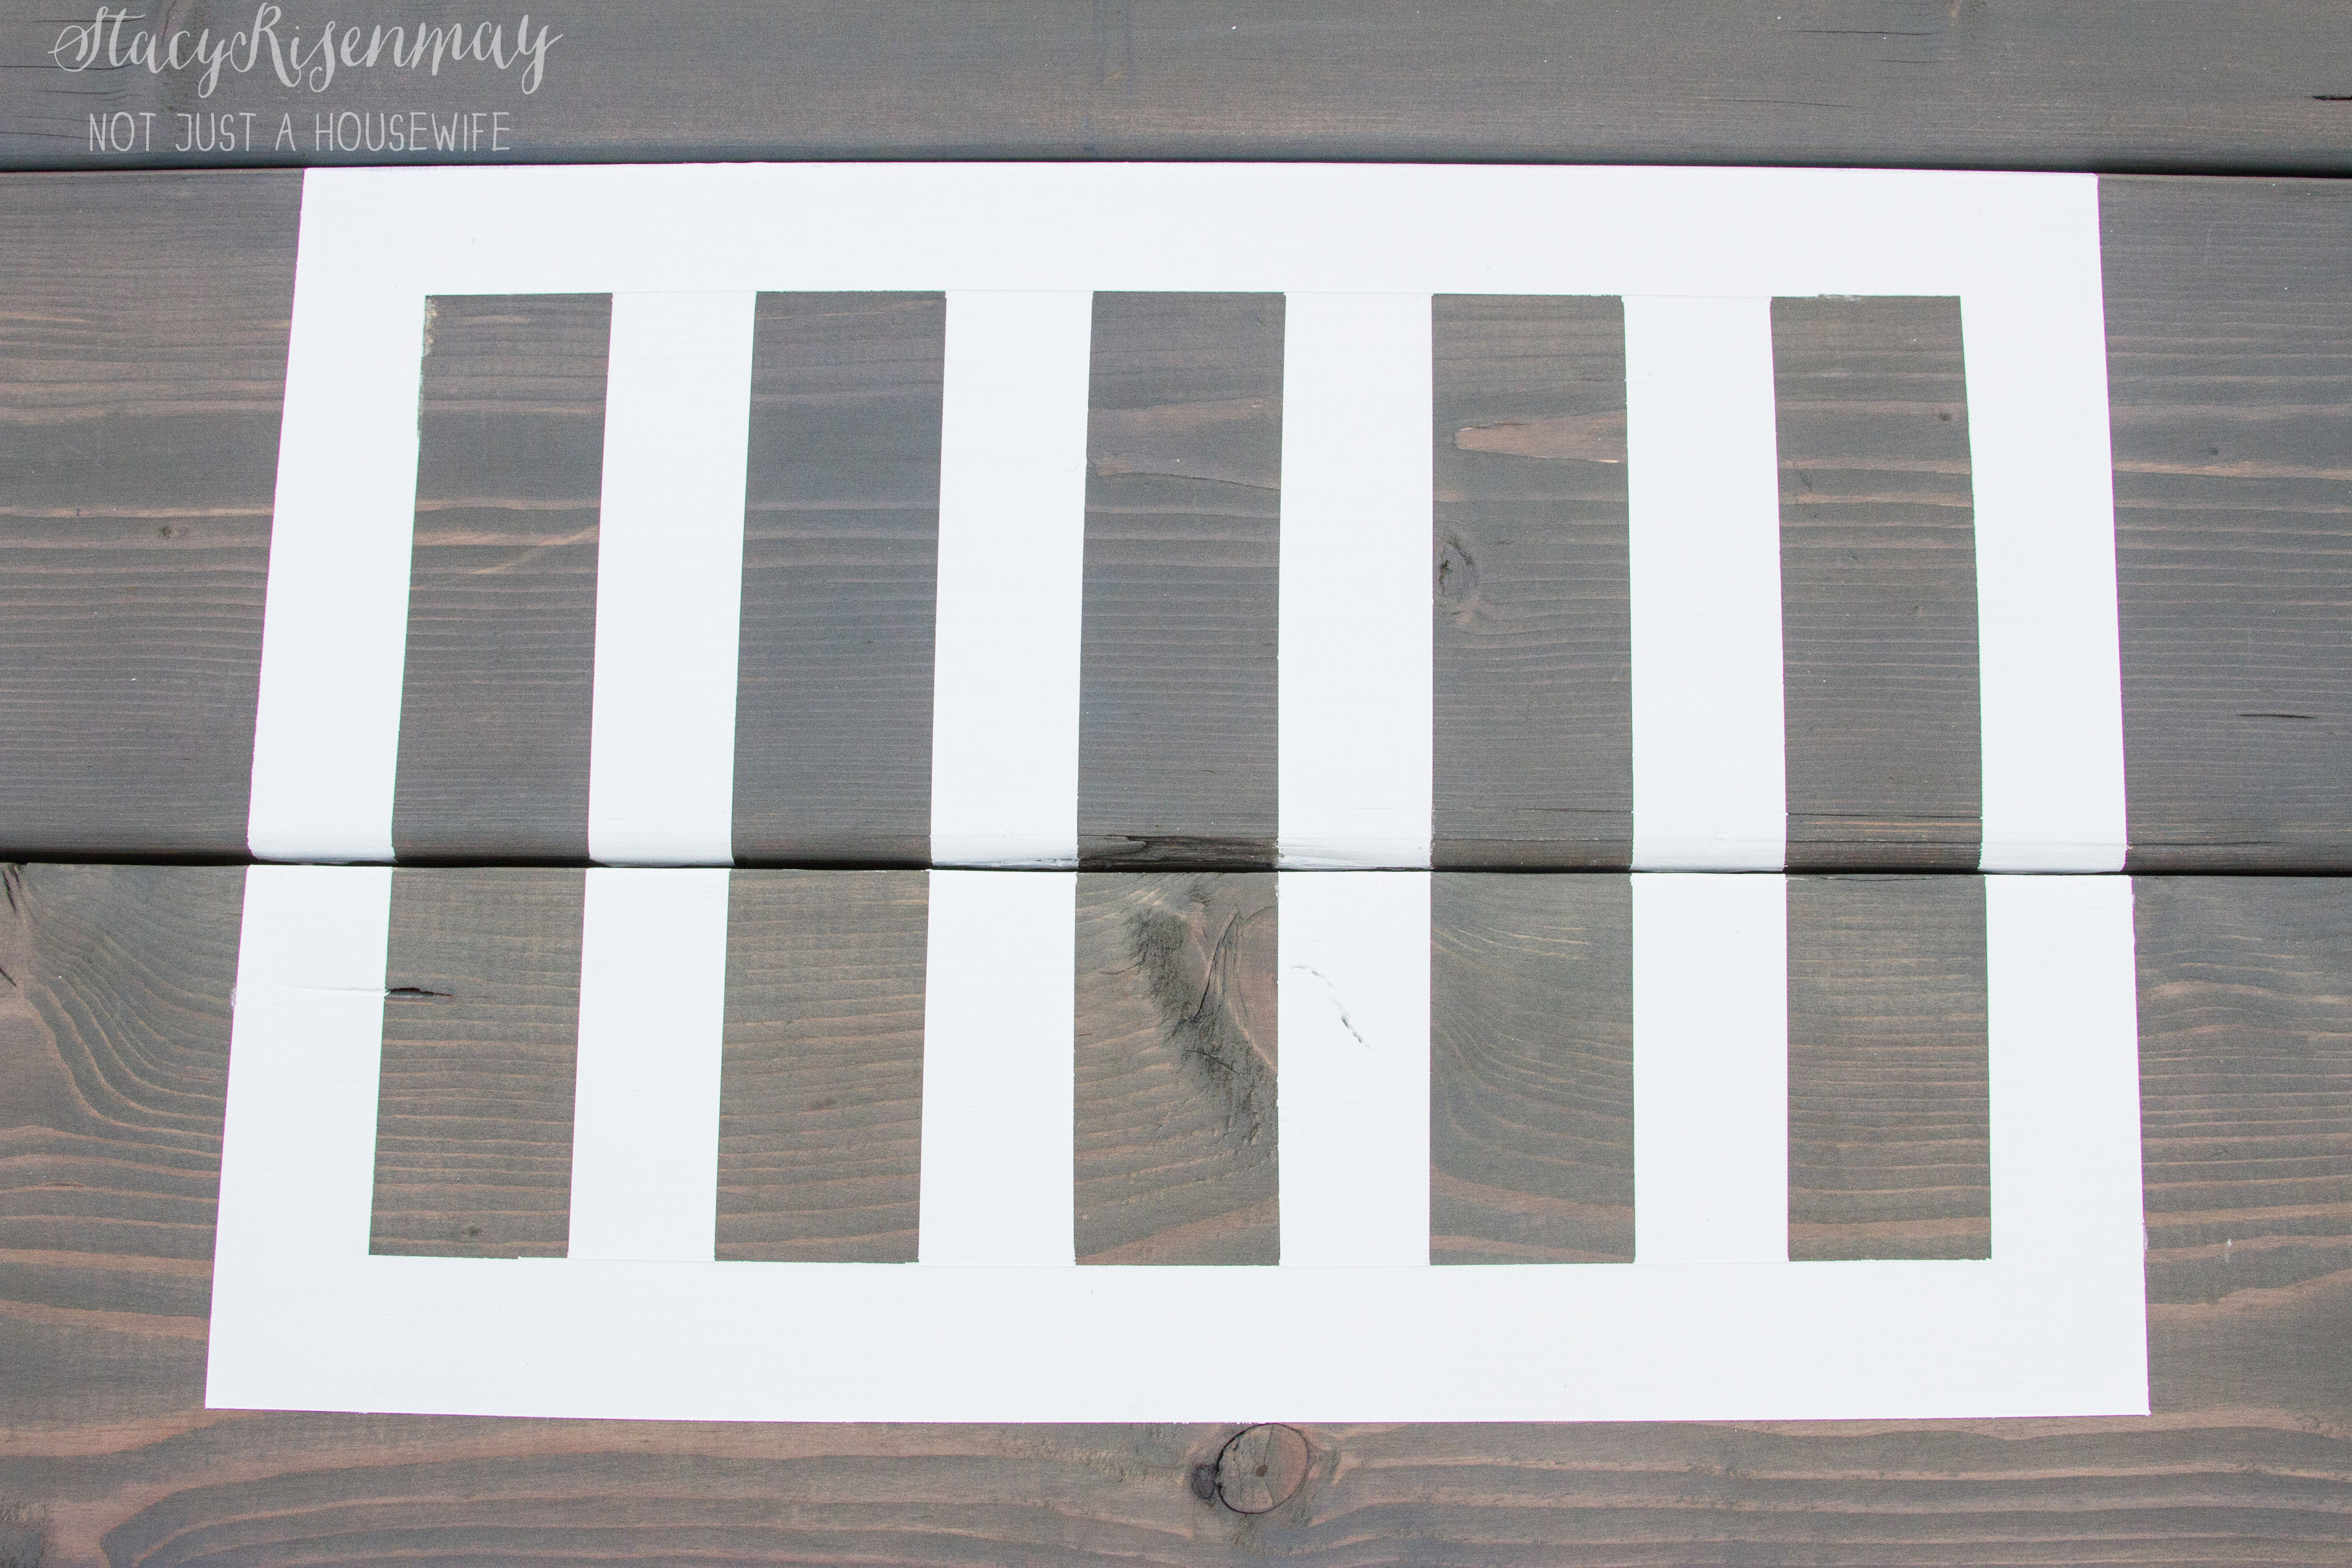
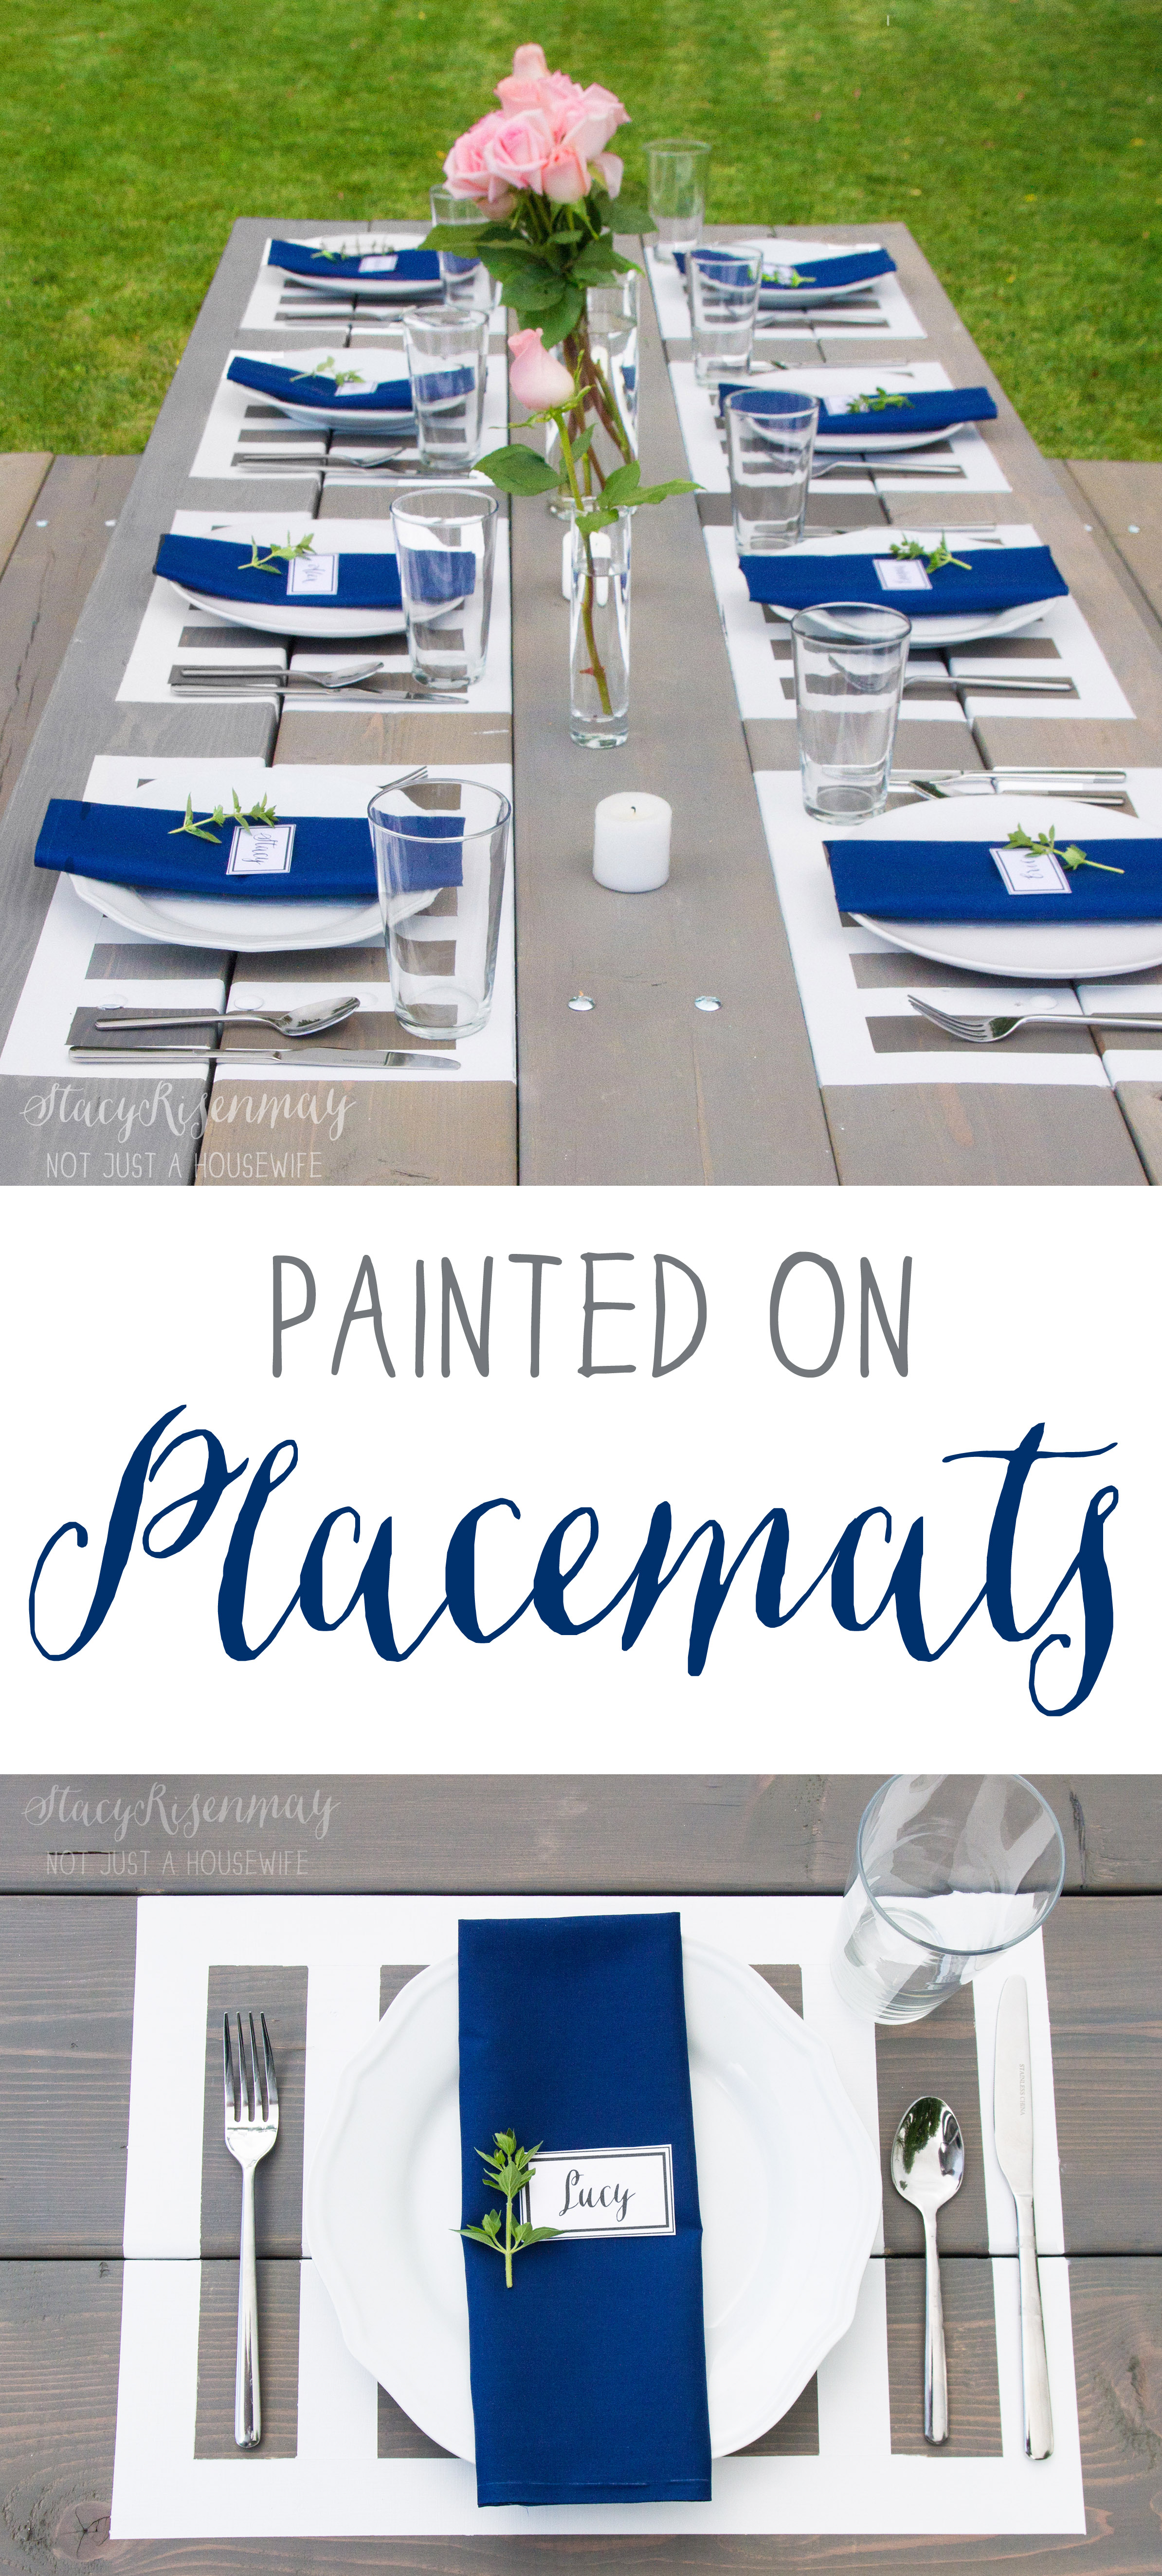
I painted placemats!

Let's take a gander at what it looked like before....

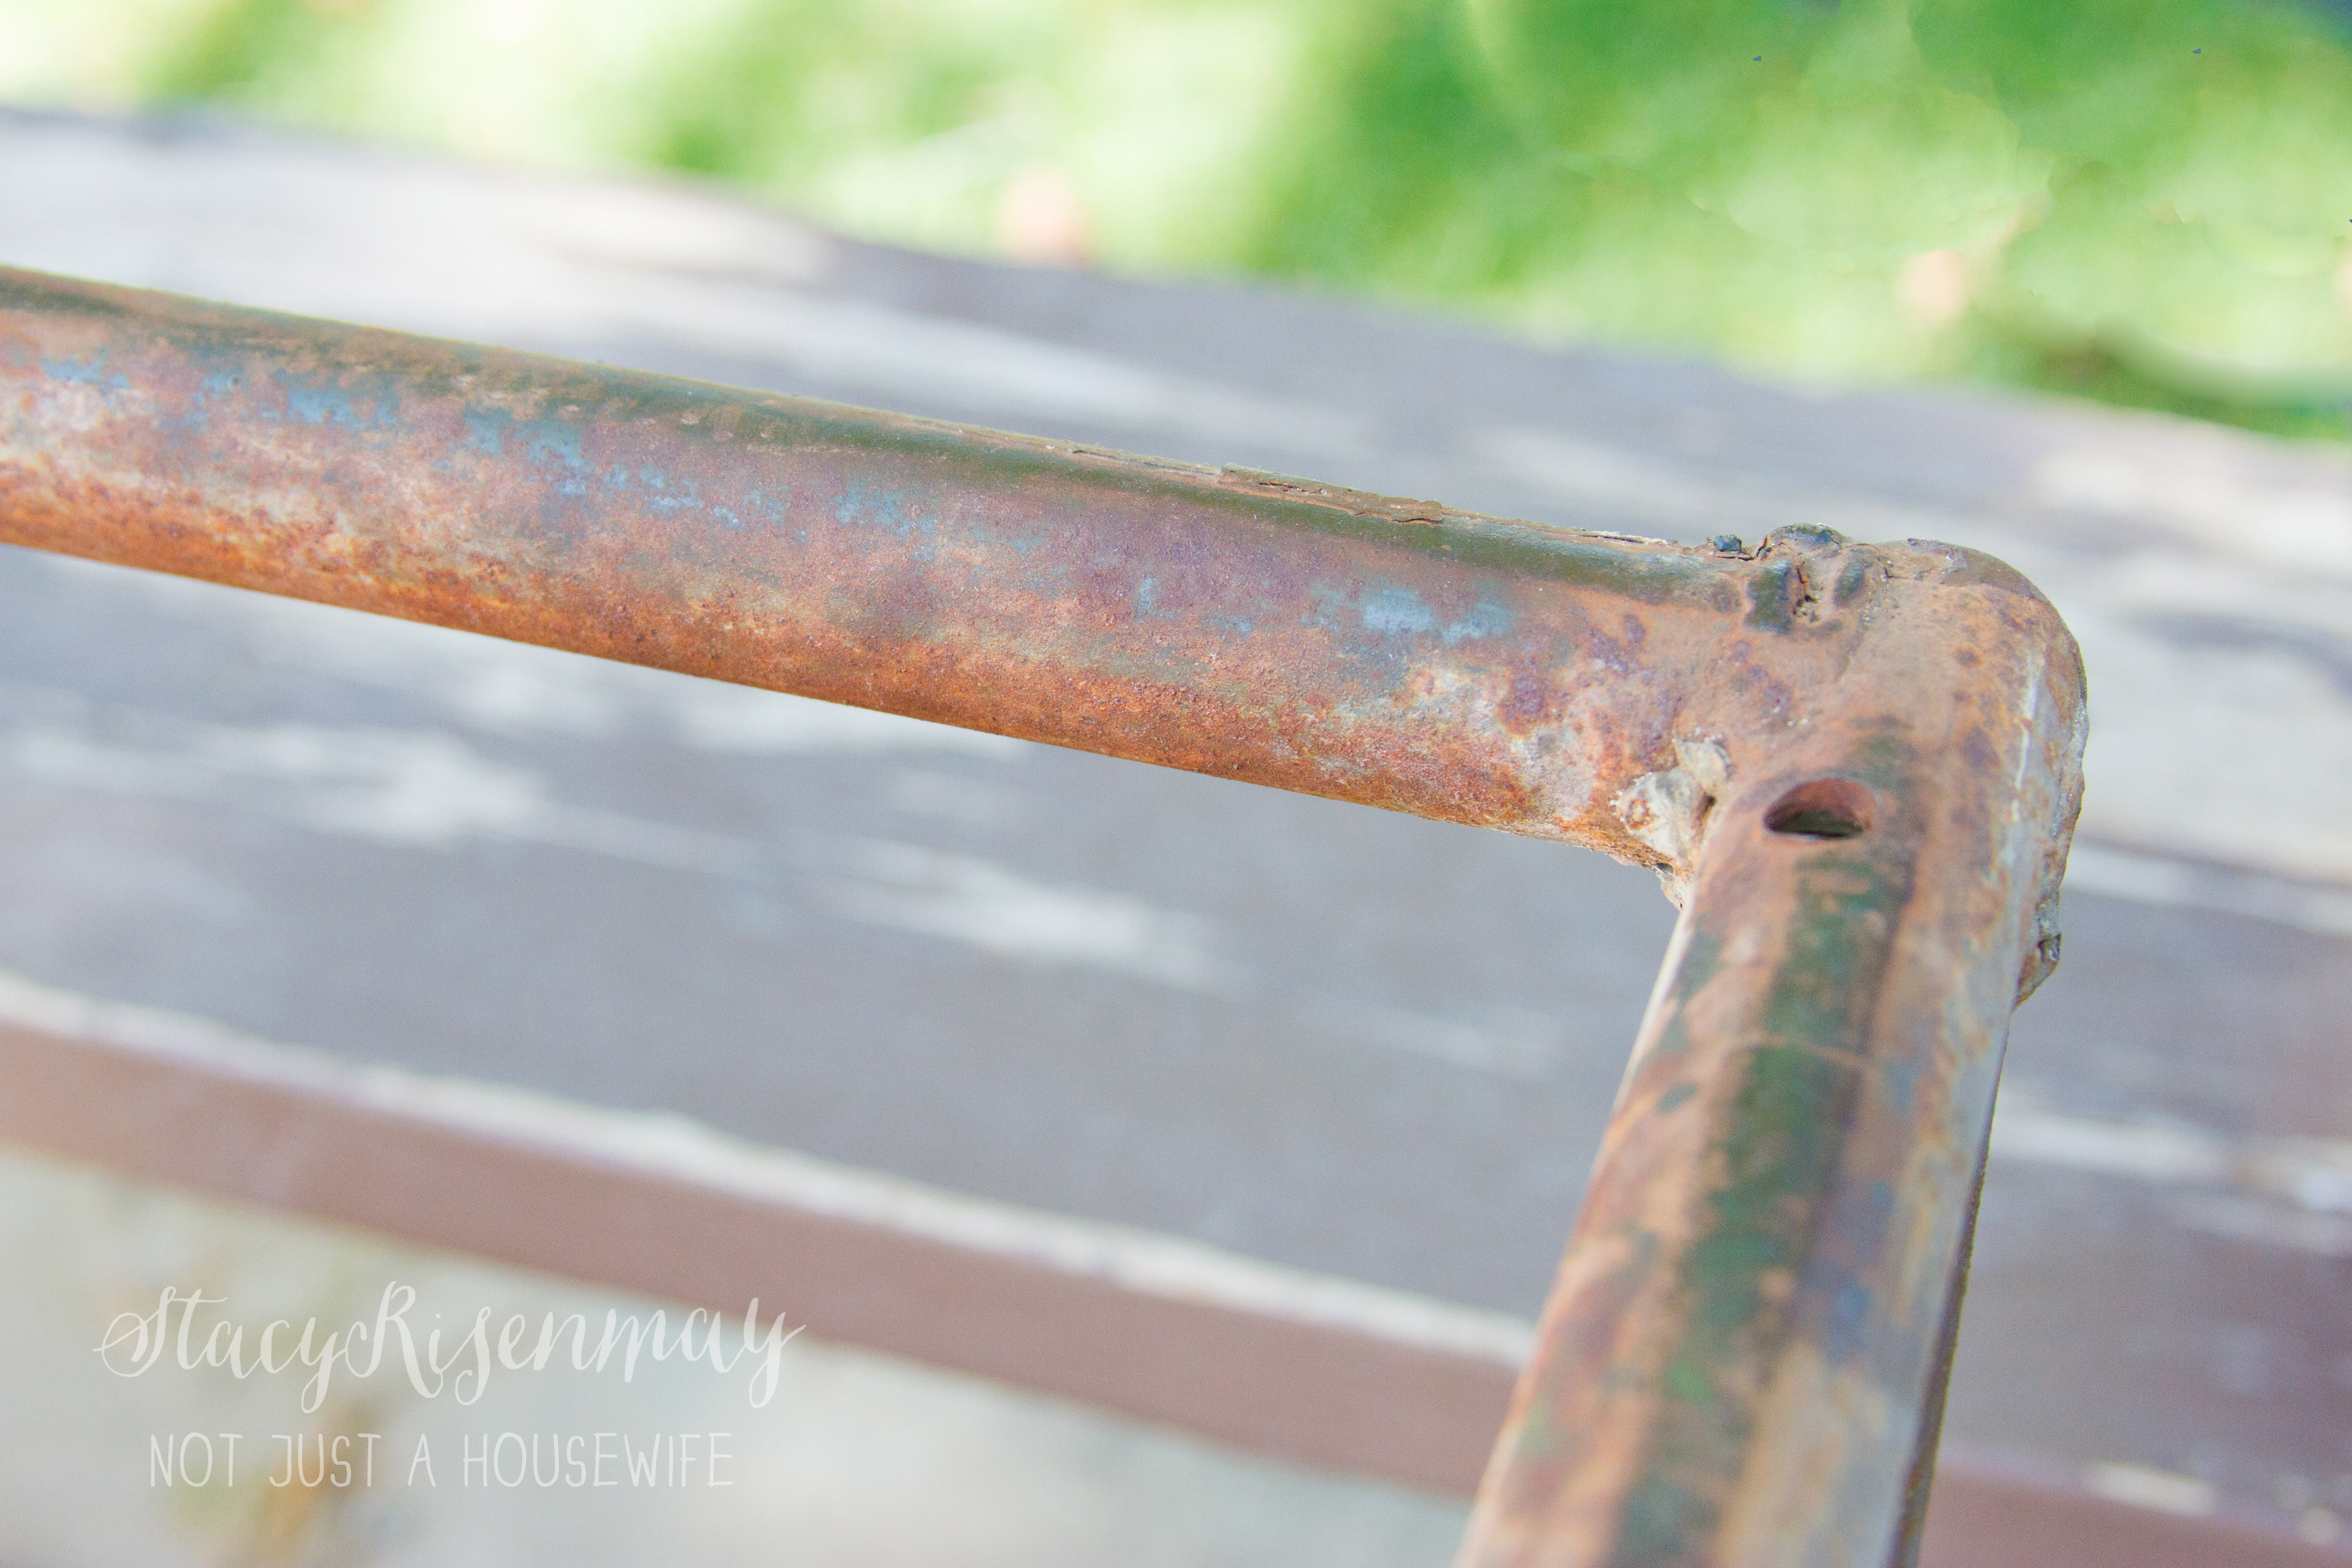
We bought this hand made picnic table soon after moving here. I like the fact that it was really long and the base was metal. It needed some major TLC. Fast forward 7 years.... I am just now getting to it. The paint had almost all peeled off the very old and rotted wood. The bolts were rusted on. It took Shane and I two days, a can of WD-40, and multiple vice grips to get them all off. There were 40 total in case you were wondering :)
The base was very rusty. I had to sand the crap out of it, clean it well, and prime and paint it with paint meant for rusty metal.
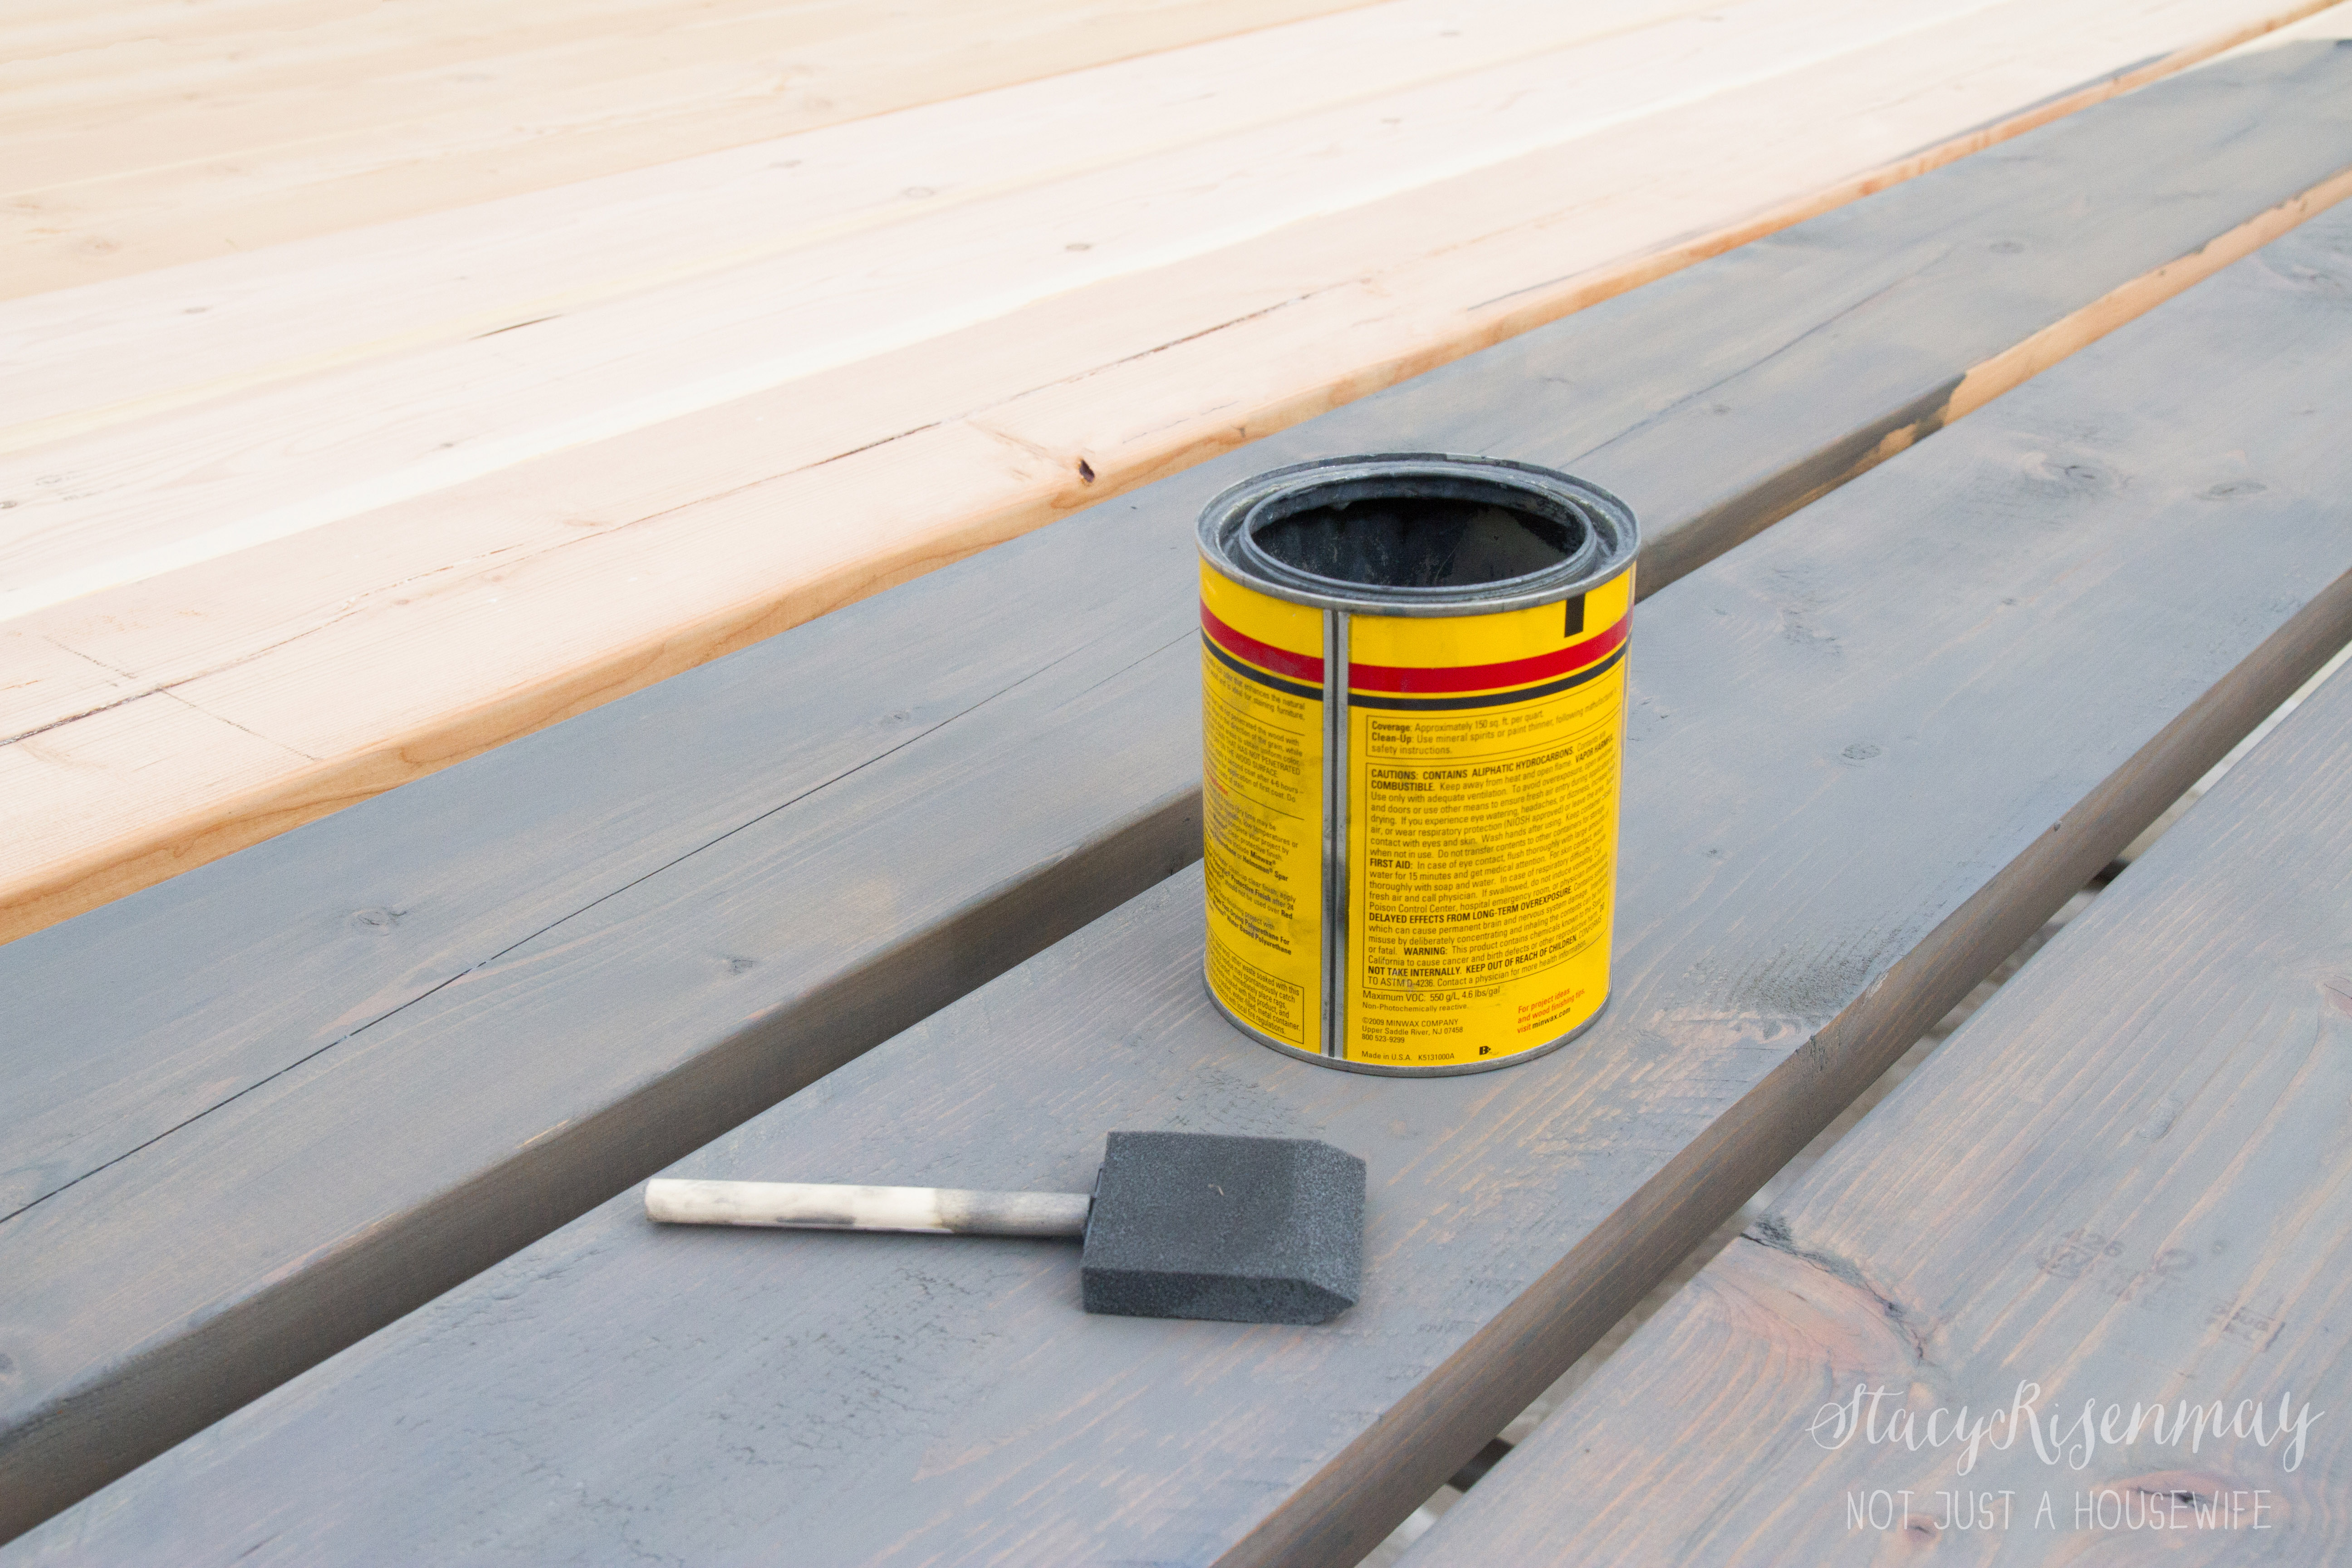
Once all the old wood was removed and the base was freshly painted with a nice gun metal finish, I was ready for new boards.
Materials Needed:
- Stain
- White paint
- Sand paper
- Foam brush
- Ruler or carpenter’s square
- Paper towels
- ScotchBlue™ Painter’s Tape Exterior Surfaces
I stained them in Classic Grey from Minwax. It is one of my favorite! Remember the plank wall in my laundry room?!
Start by sanding the table panels really well and then wipe them down with a damp cloth to remove all the sawdust. Using a foam brush, apply the stain. Let it sit for a few minutes before wiping off the excess with paper towels and allow to dry completely following the manufacturer’s instructions on the stain can.
Once the boards were completely dry, and I had attached them to the base, it was time to paint!
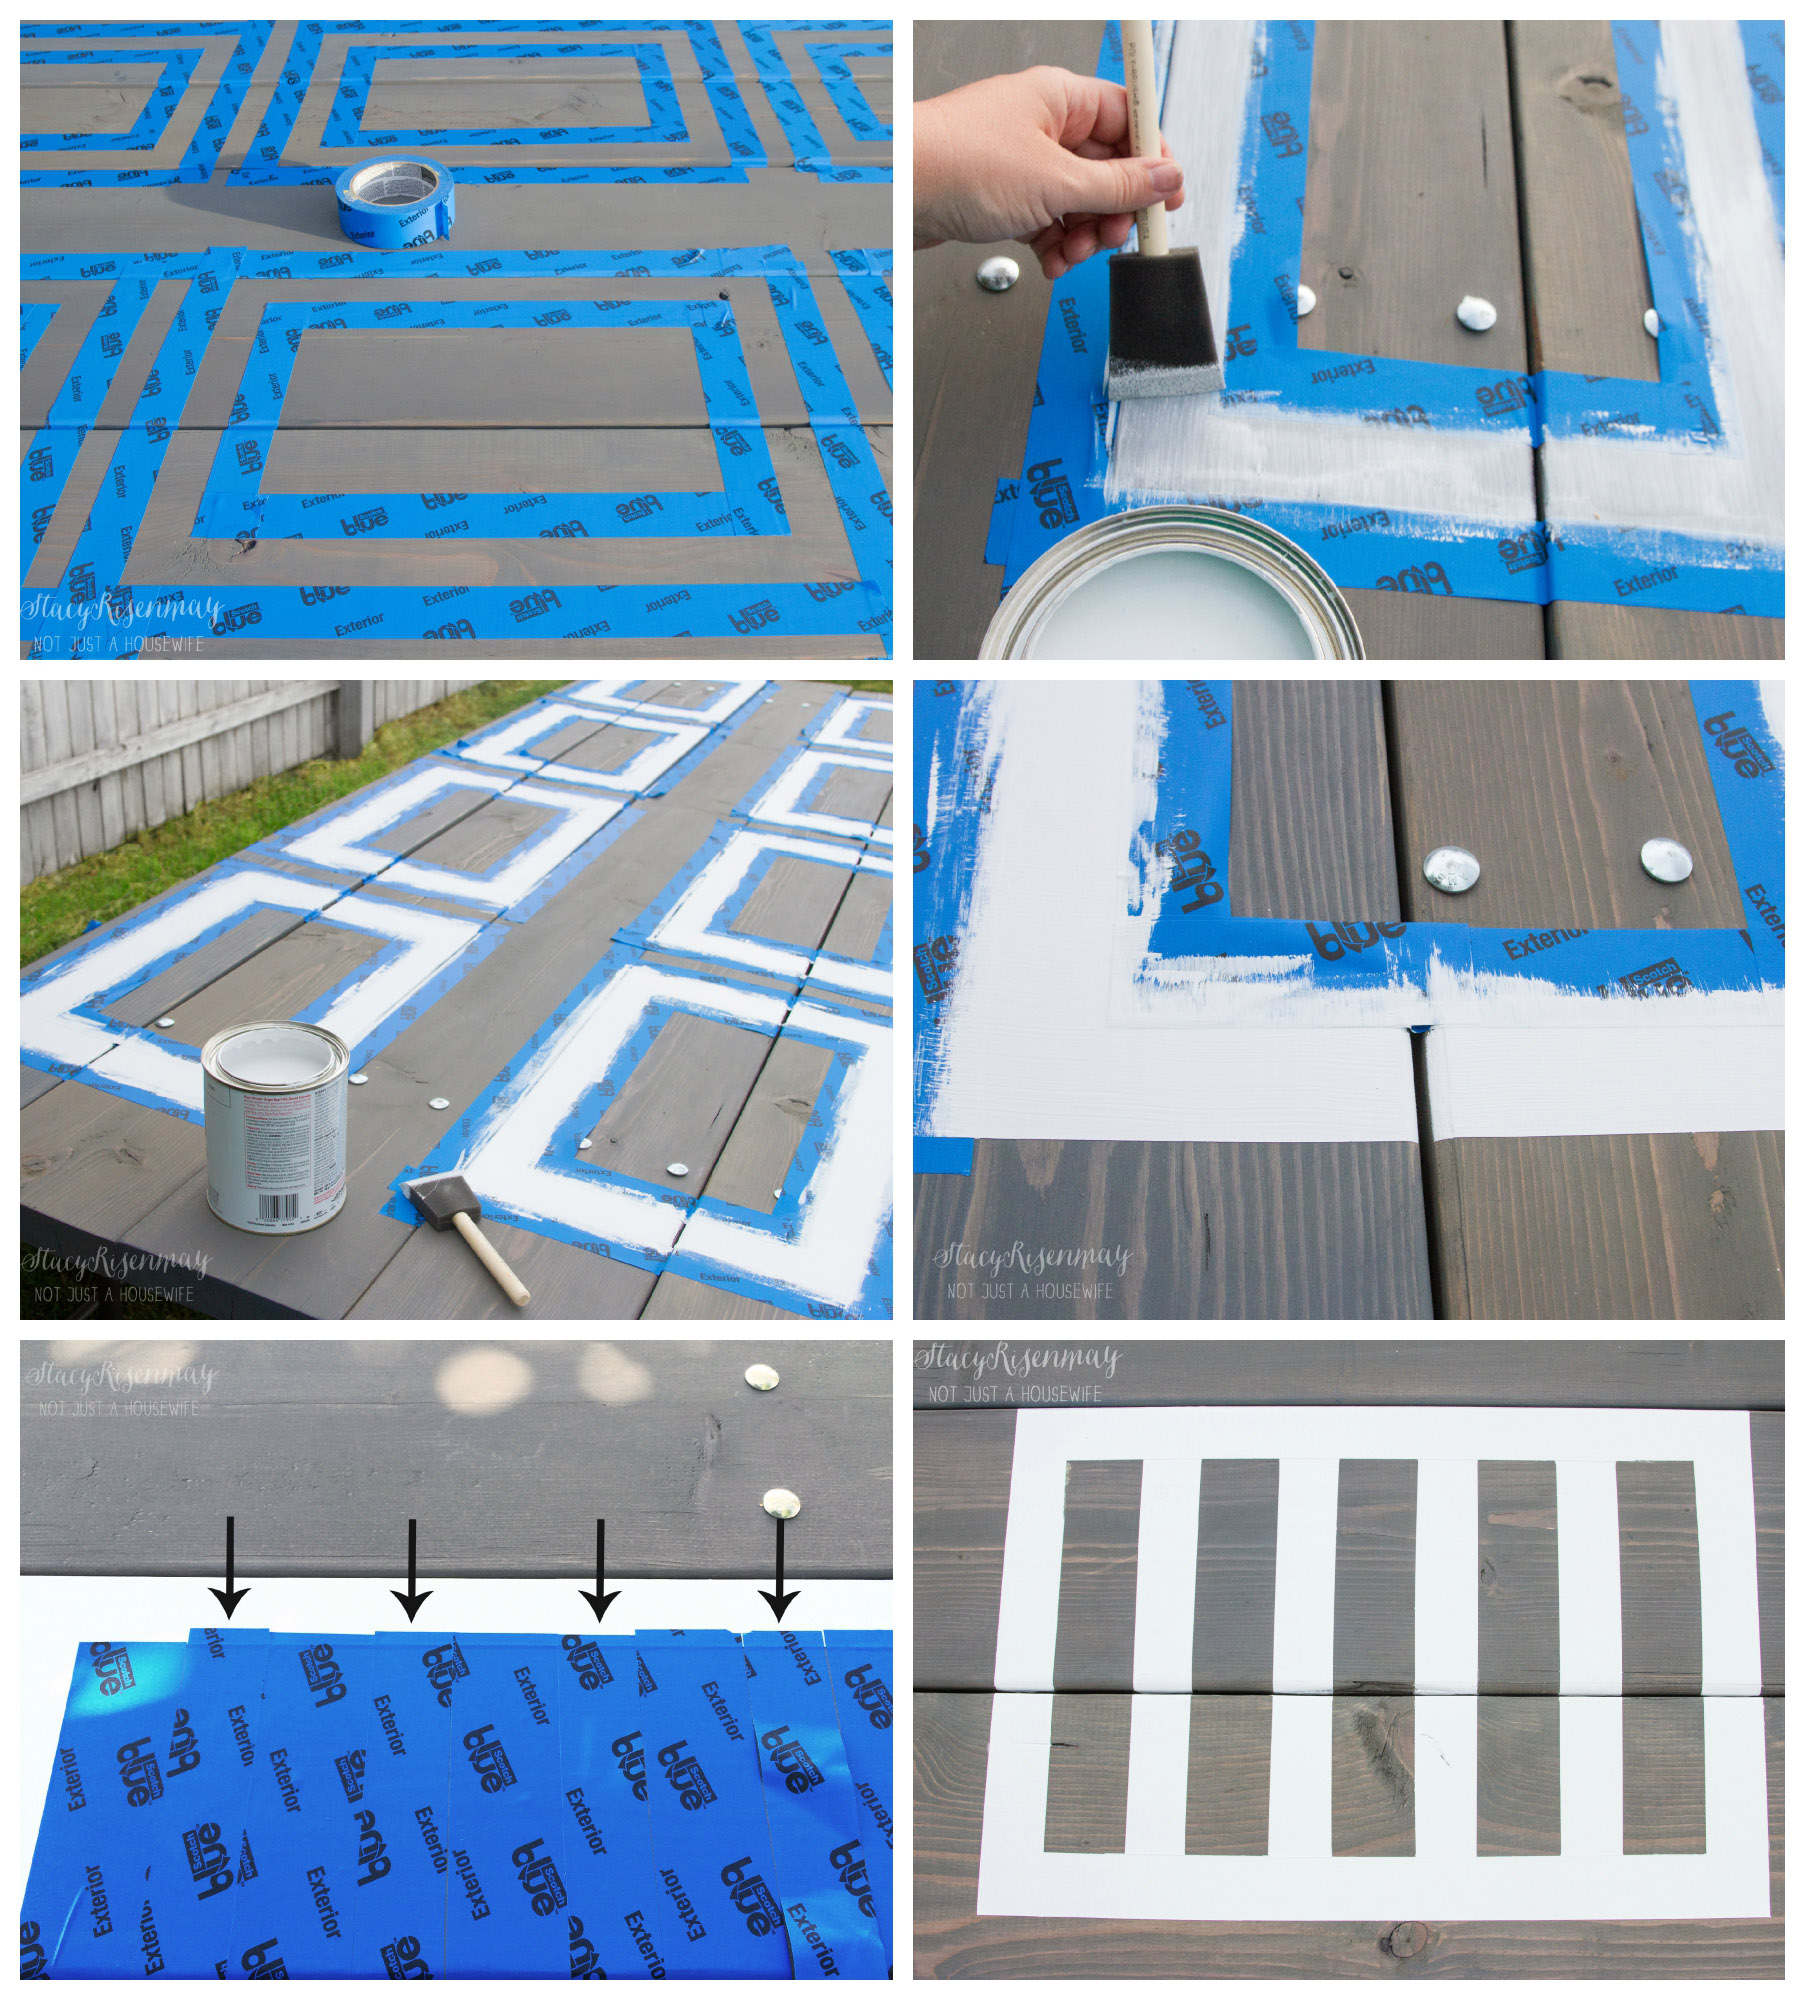
1. To create the painted placemats, apply ScotchBlue™ Painter’s Tape Exterior Surfaces in a rectangle sized to your liking. Tape another rectangle within it approximately one inch from the outer frame.
2: Using a foam brush, lightly apply a thin coat by dabbing on the paint. Repeat until you have full coverage. I did three coats of the oil based paint.
3: Remove the tape while the paint is still wet. Pull the tape off at a 45 degree angle for best results.
4: Once the border is dry, apply strips of painter’s tape side-by-side within the center of the painted rectangle. To get evenly spaced stripes without a ton of measuring, cover the entire center with tape and then remove every other piece.
5: Paint the stripes using the same technique as before.
You could do any pattern, any color. The possibilities are endless! I loved the classic feel of the grey and white. I feel like this could be dressed up or down depending on the occasion
.
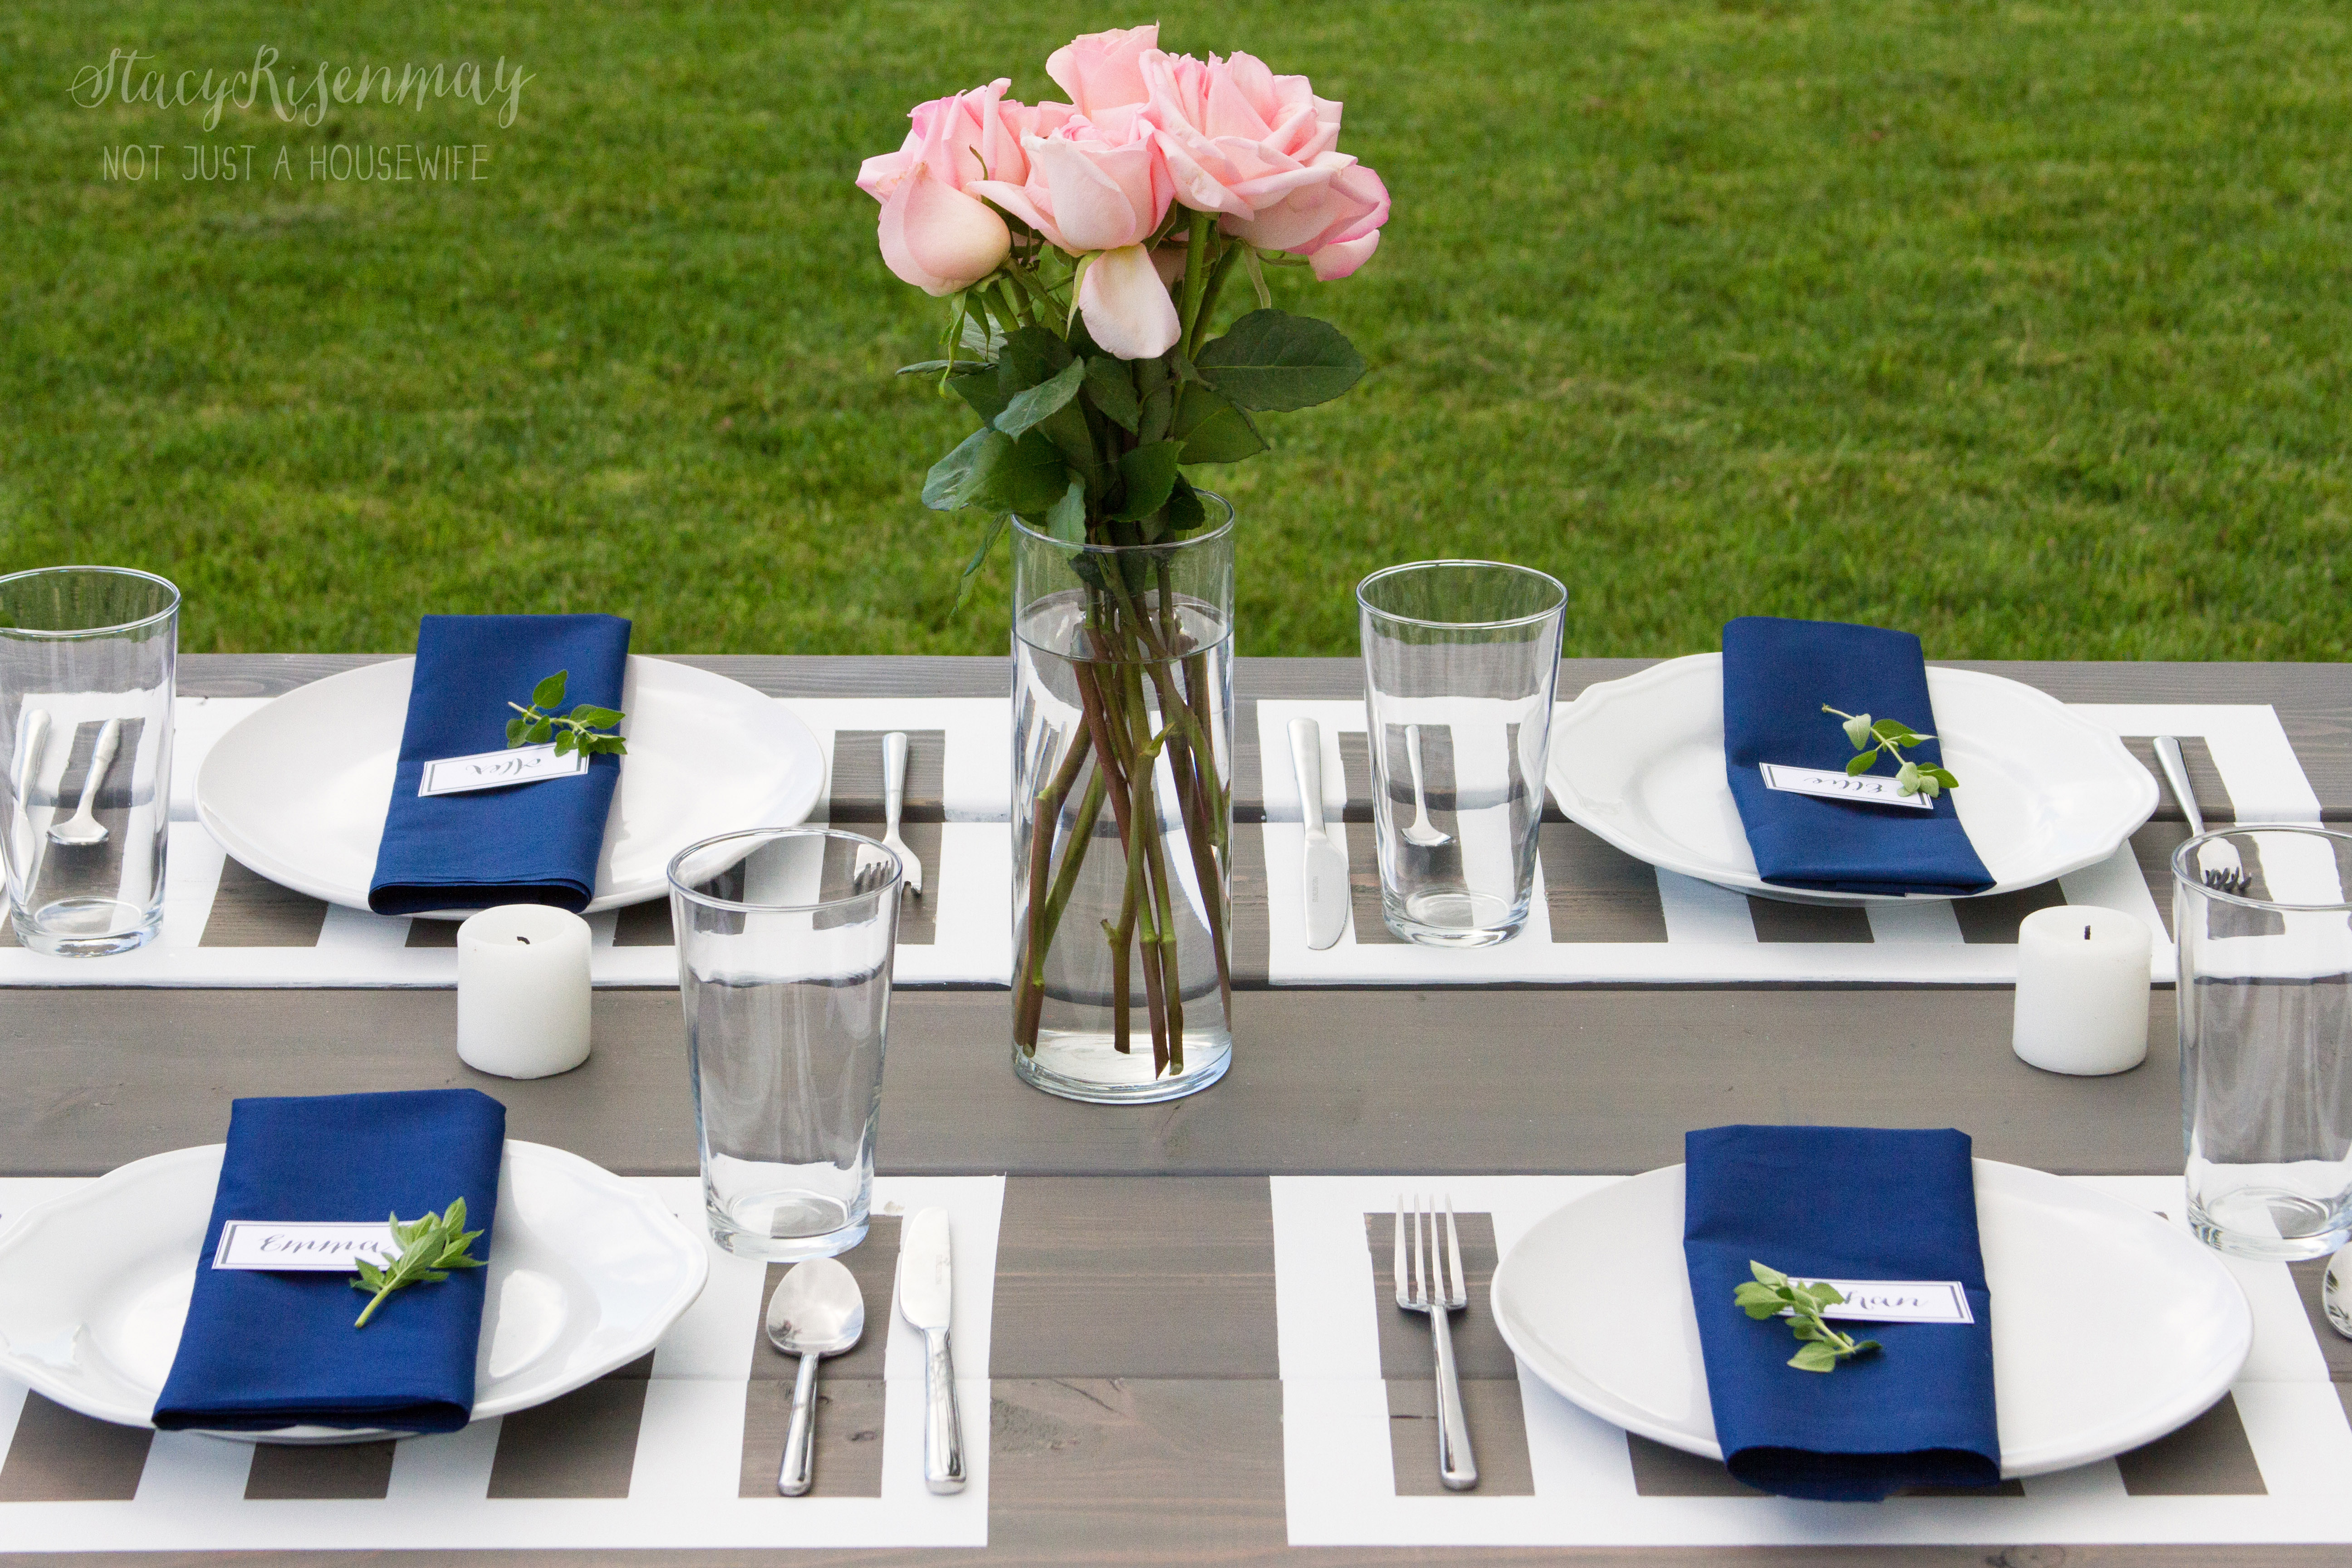
When I saw the pink roses at the grocery store, I knew they would look great with my recent obsession with cobalt.
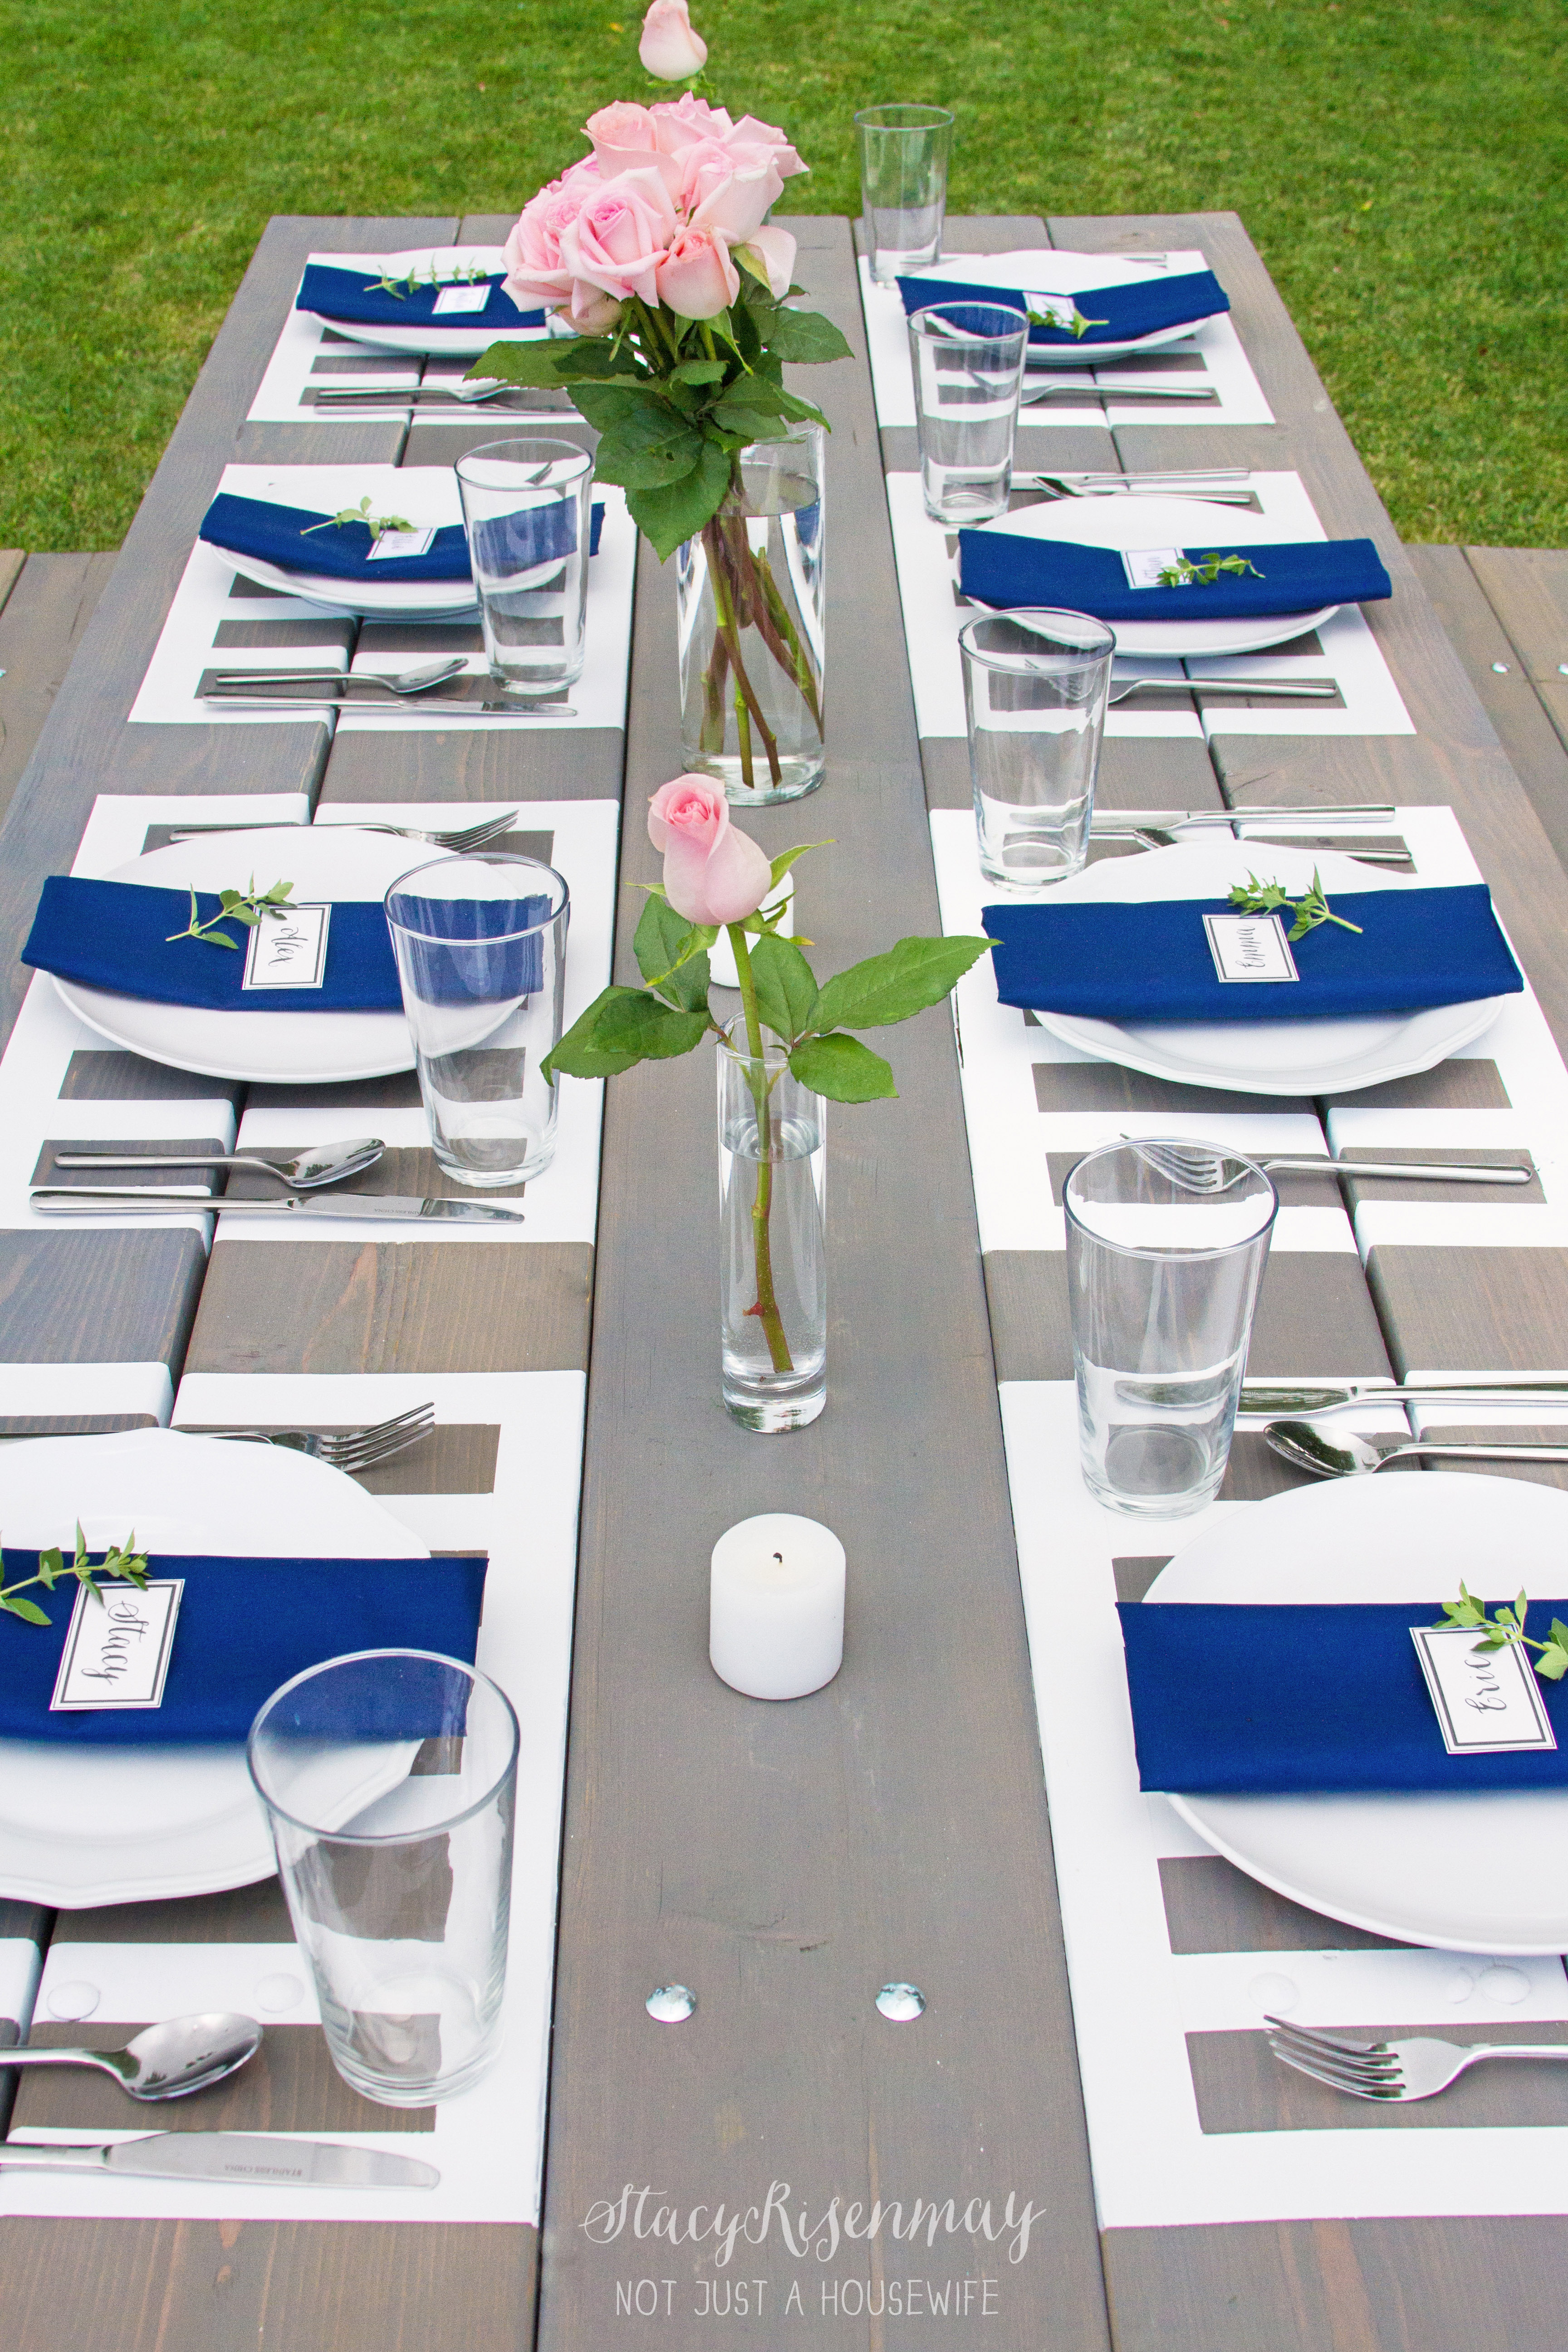
And doesn't my grass look fabulous ;)
A quick story about the photoshoot. I was running out of light by the time the paint was dry and the table was ready to style. I hurried and styled it with the help of all 5 of my guys. I grabbed the camera, set it up, and it started to rain before I could even take one shot. We scurried and took it all back inside. I waited until the next day. It was cloudy and threatened to rain again. Shane was at work but my boys helped me style it again. I got done with the shots just as it started to sprinkle. I'm not sure if it is going to help them at all in life, but for the record, my kids can style a table like nobody's business and set up and take down a shoot lickety split.
More than likely "photoshoot skills" will fall into the same file in their brain as algebra but this momma loves her assistants!
PIN for later:
Do you eat outdoors? Do you have a picnic table? Would you ever consider painting placemats?
I have partnered with ScotchBlue™ to bring you projects this summer that have lots of fun patterns! It is going to be awesome :) I have been compensated for my time. The projects and opinions are all my own.


Oh, this is super cute & fresh!! I don't think I've ever seen something like this before!! I loveeee it!! Happy Monday friend!
Paige.Rose
from
http://www.TheQuaintSanctuary.blogspot.com
This looks great and I love the gray. I made a centerpiece last fall for Thanksgiving using that same gray stain. We've got a picnic table in our backyard that could use some new stain, we went dark though but adding the place mat spots would be neat. Great idea!
Wow, what a lot of work prepping this project! Super cool idea. Love your finished project, it means so much more when the entire family is evolved and will be able enjoy it together for years to come. And, yes your lawn looks great :)
Stacy, you just crack me up. I love this DIY project! Soooo clever! And your grass looks fab.
{I've been absent for too long from reading your blog! I hope you guys are doing well}
I love this idea. I still haven't done my back deck which we finished last year. I was just looking at our picnic table and thinking it's in pretty bad shape...now I know just what to do with it! Gonna sand that baby and paint it!
Love the '"placemats." how did you find time to mow the lawn AND do the photo shoot in between downpours?
My oldest mowed while I painted. Having a 13 year old comes in handy :)
This is so fun! I love how you transformed it. :)
What an awesome large picnic table. I love the gray and the painted place mats! It looks great!!
You are so clever. I didn't realize at first that the placemats were painted ~ very cool!
Such a clever and fun idea. You did a great job! So smart.
This is a great idea and a great look! :)
Stacy,
I think this is so fun and creative! You're lucky to have all those worker bees! I've drug stuff in and out so many times due to weather, and I'm a solo act. :)
pinning!
gail
Love this and think it looks great!
You're a genius - I love this!
Oh my goodness what a great idea!! This turned out looking awesome and I love that it looked fairly easy to do. That's the kind of projects that I like!!
This is just beautiful Stacy! I love the color of the picnic table and those placemats are such a great idea!
This is such a cute idea!
This turned out so cute. I would have never thought of painting placemats on my table. Thank you for sharing at Waste Not Wednesday.
Stacy, you did a fabulous job on the table ~ worth the wait. Painting on the placemats is the cutest idea. Pinned to several boards because it needs to be shared.
What a fabulous idea! I love it!