
I have partnered with 3M DIY to create this project. I have been compensated for my time and efforts but the ideas and opinions are all mine!
Remember how when I was in NYC I was challenged by 3M to find something to serve as my inspiration for a DIY project? I chose the picture I took of the relief stone detail on the side of a building in Soho.
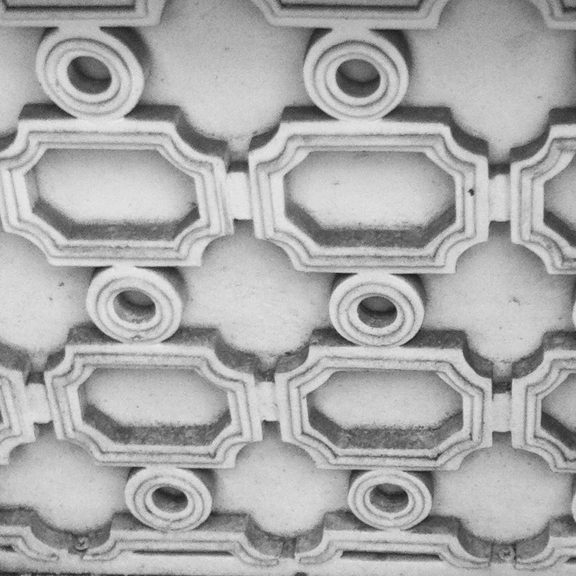
I had a million ideas of what I could do! Molding on a wall, a giant stencil painted on a rug, and so many others. But what I ultimately decided to do was build a planter and add the relief detail to the sides. I combined my love of plants and my obsession with the pattern to create this fun project!

To make it a bit more modern, I went with a bright white paint.
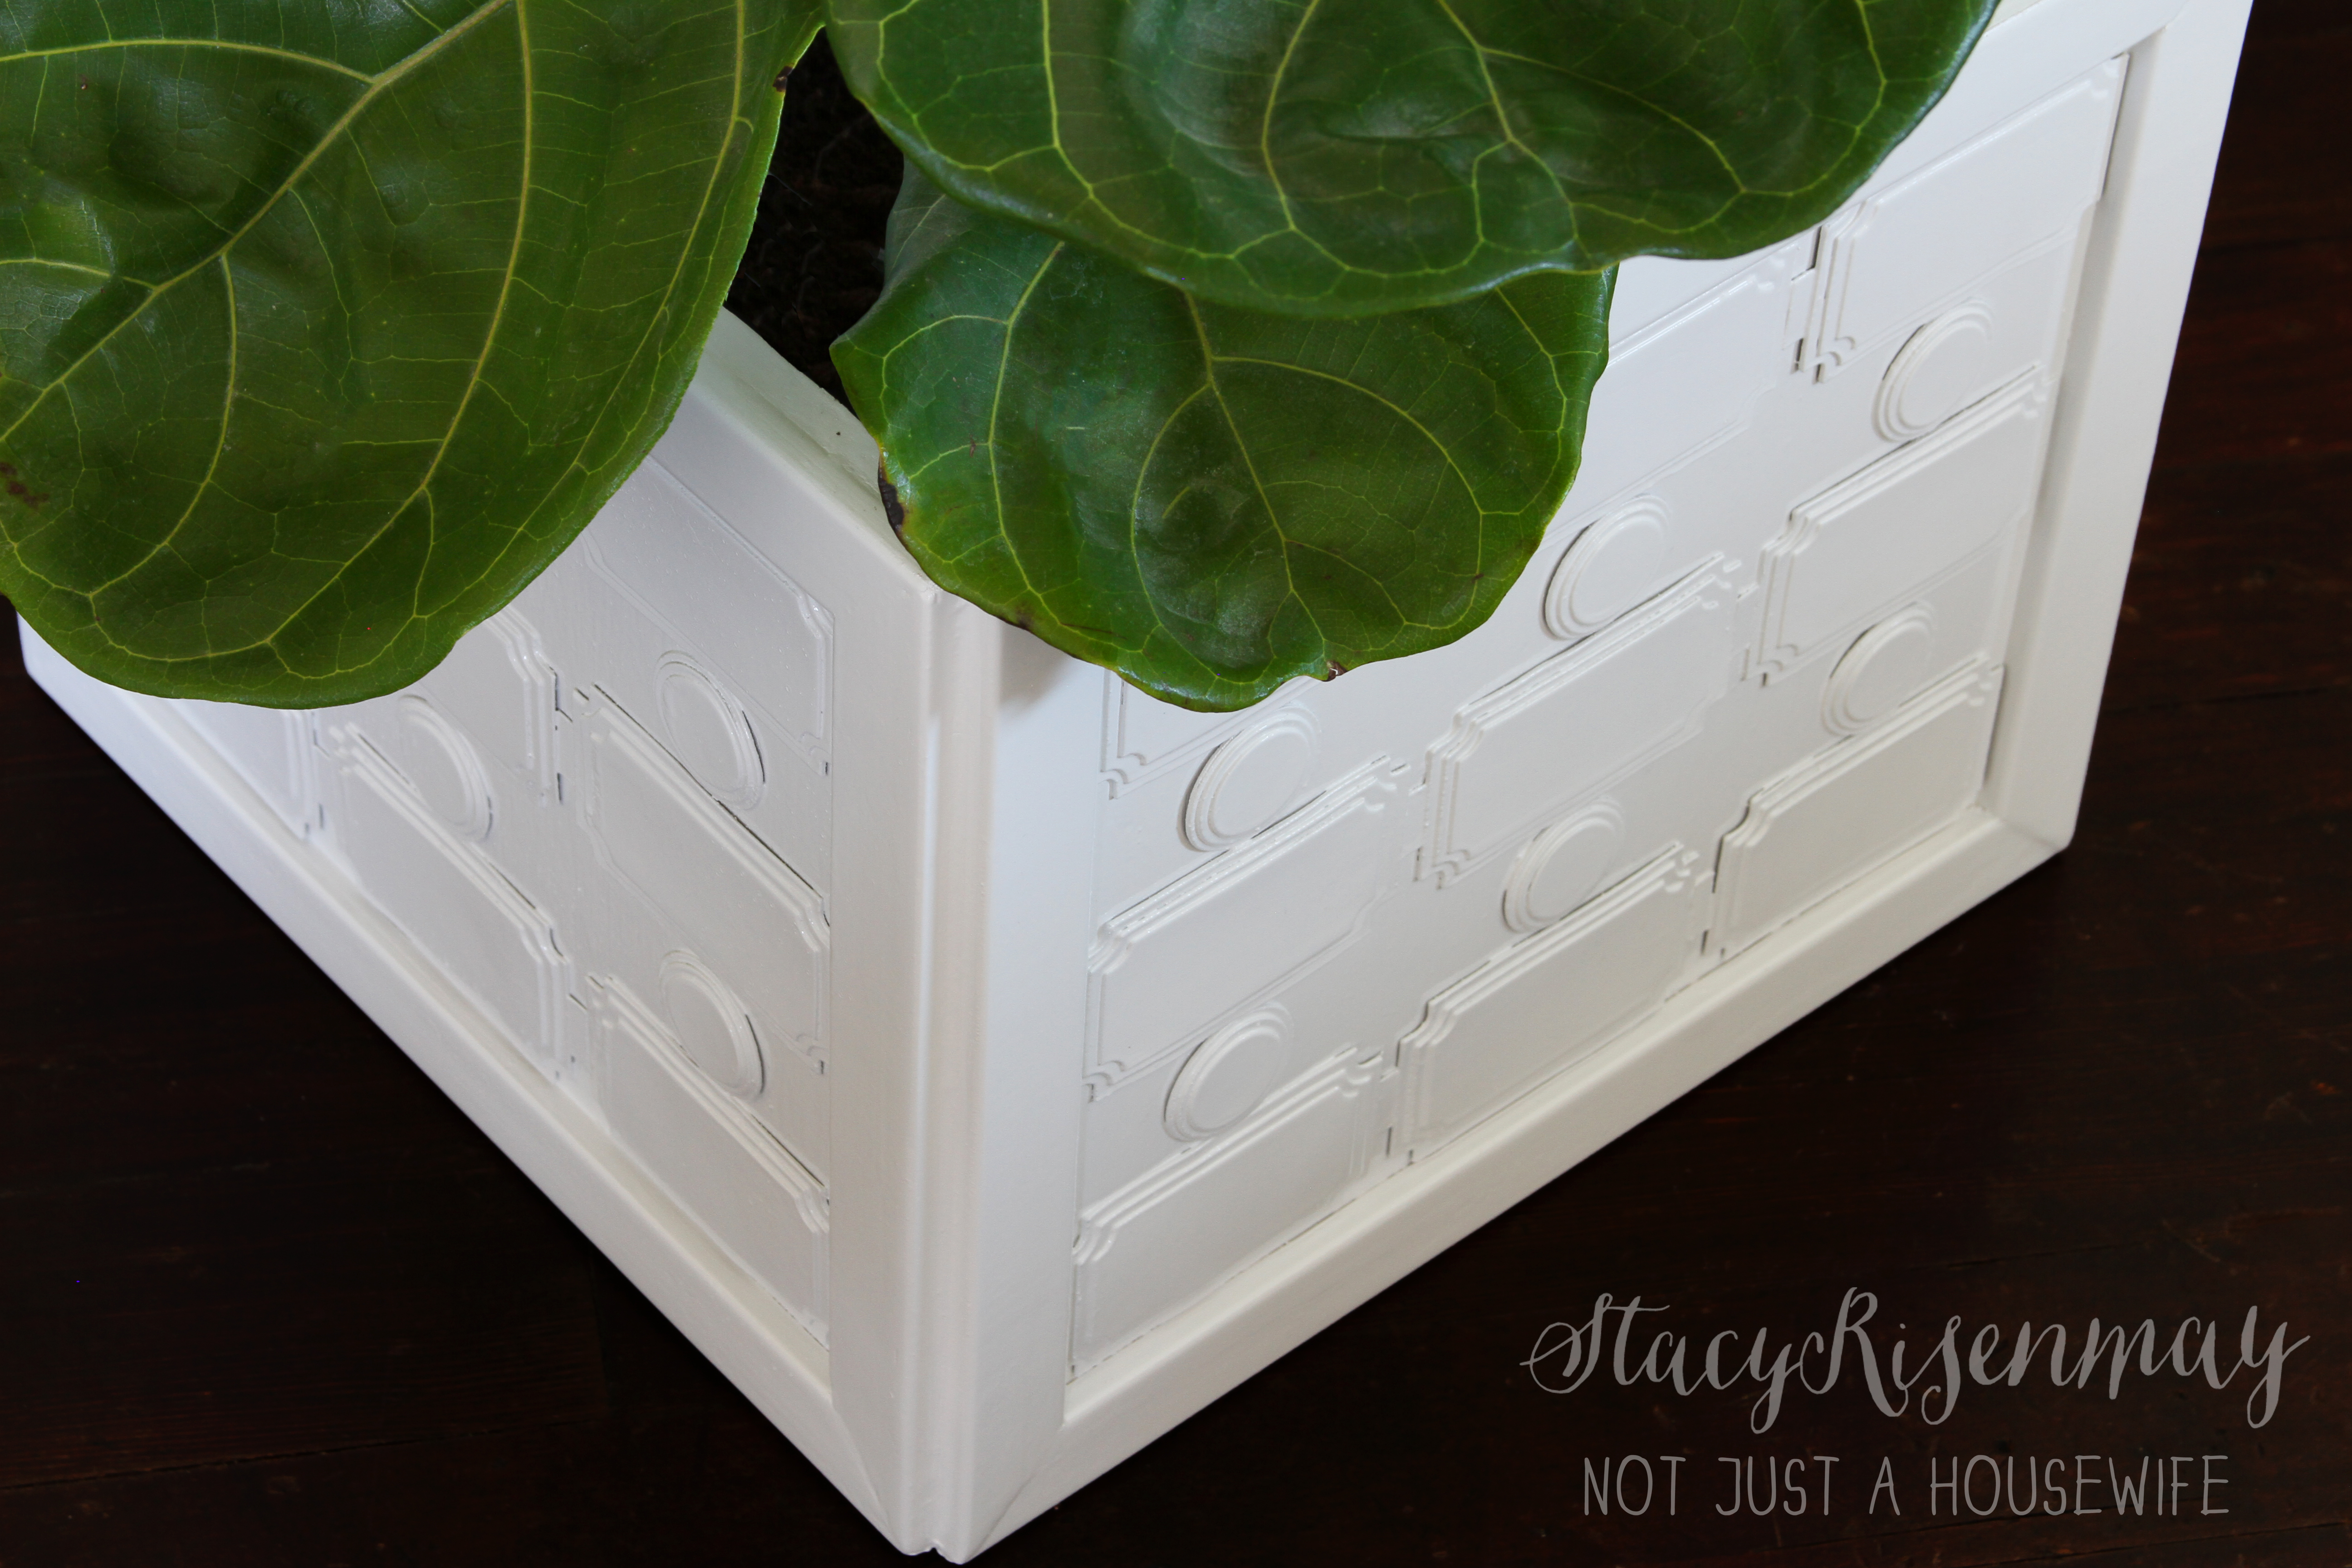
This planter will go in my future master bedroom (the one I keep doing projects for but have no idea when it will even have walls). But until then, it gets to find a home in my upstairs. I think I will keep my fiddle leaf tree in it but I think these fall flowers look pretty good in there too.
Alright, let's get down to business.
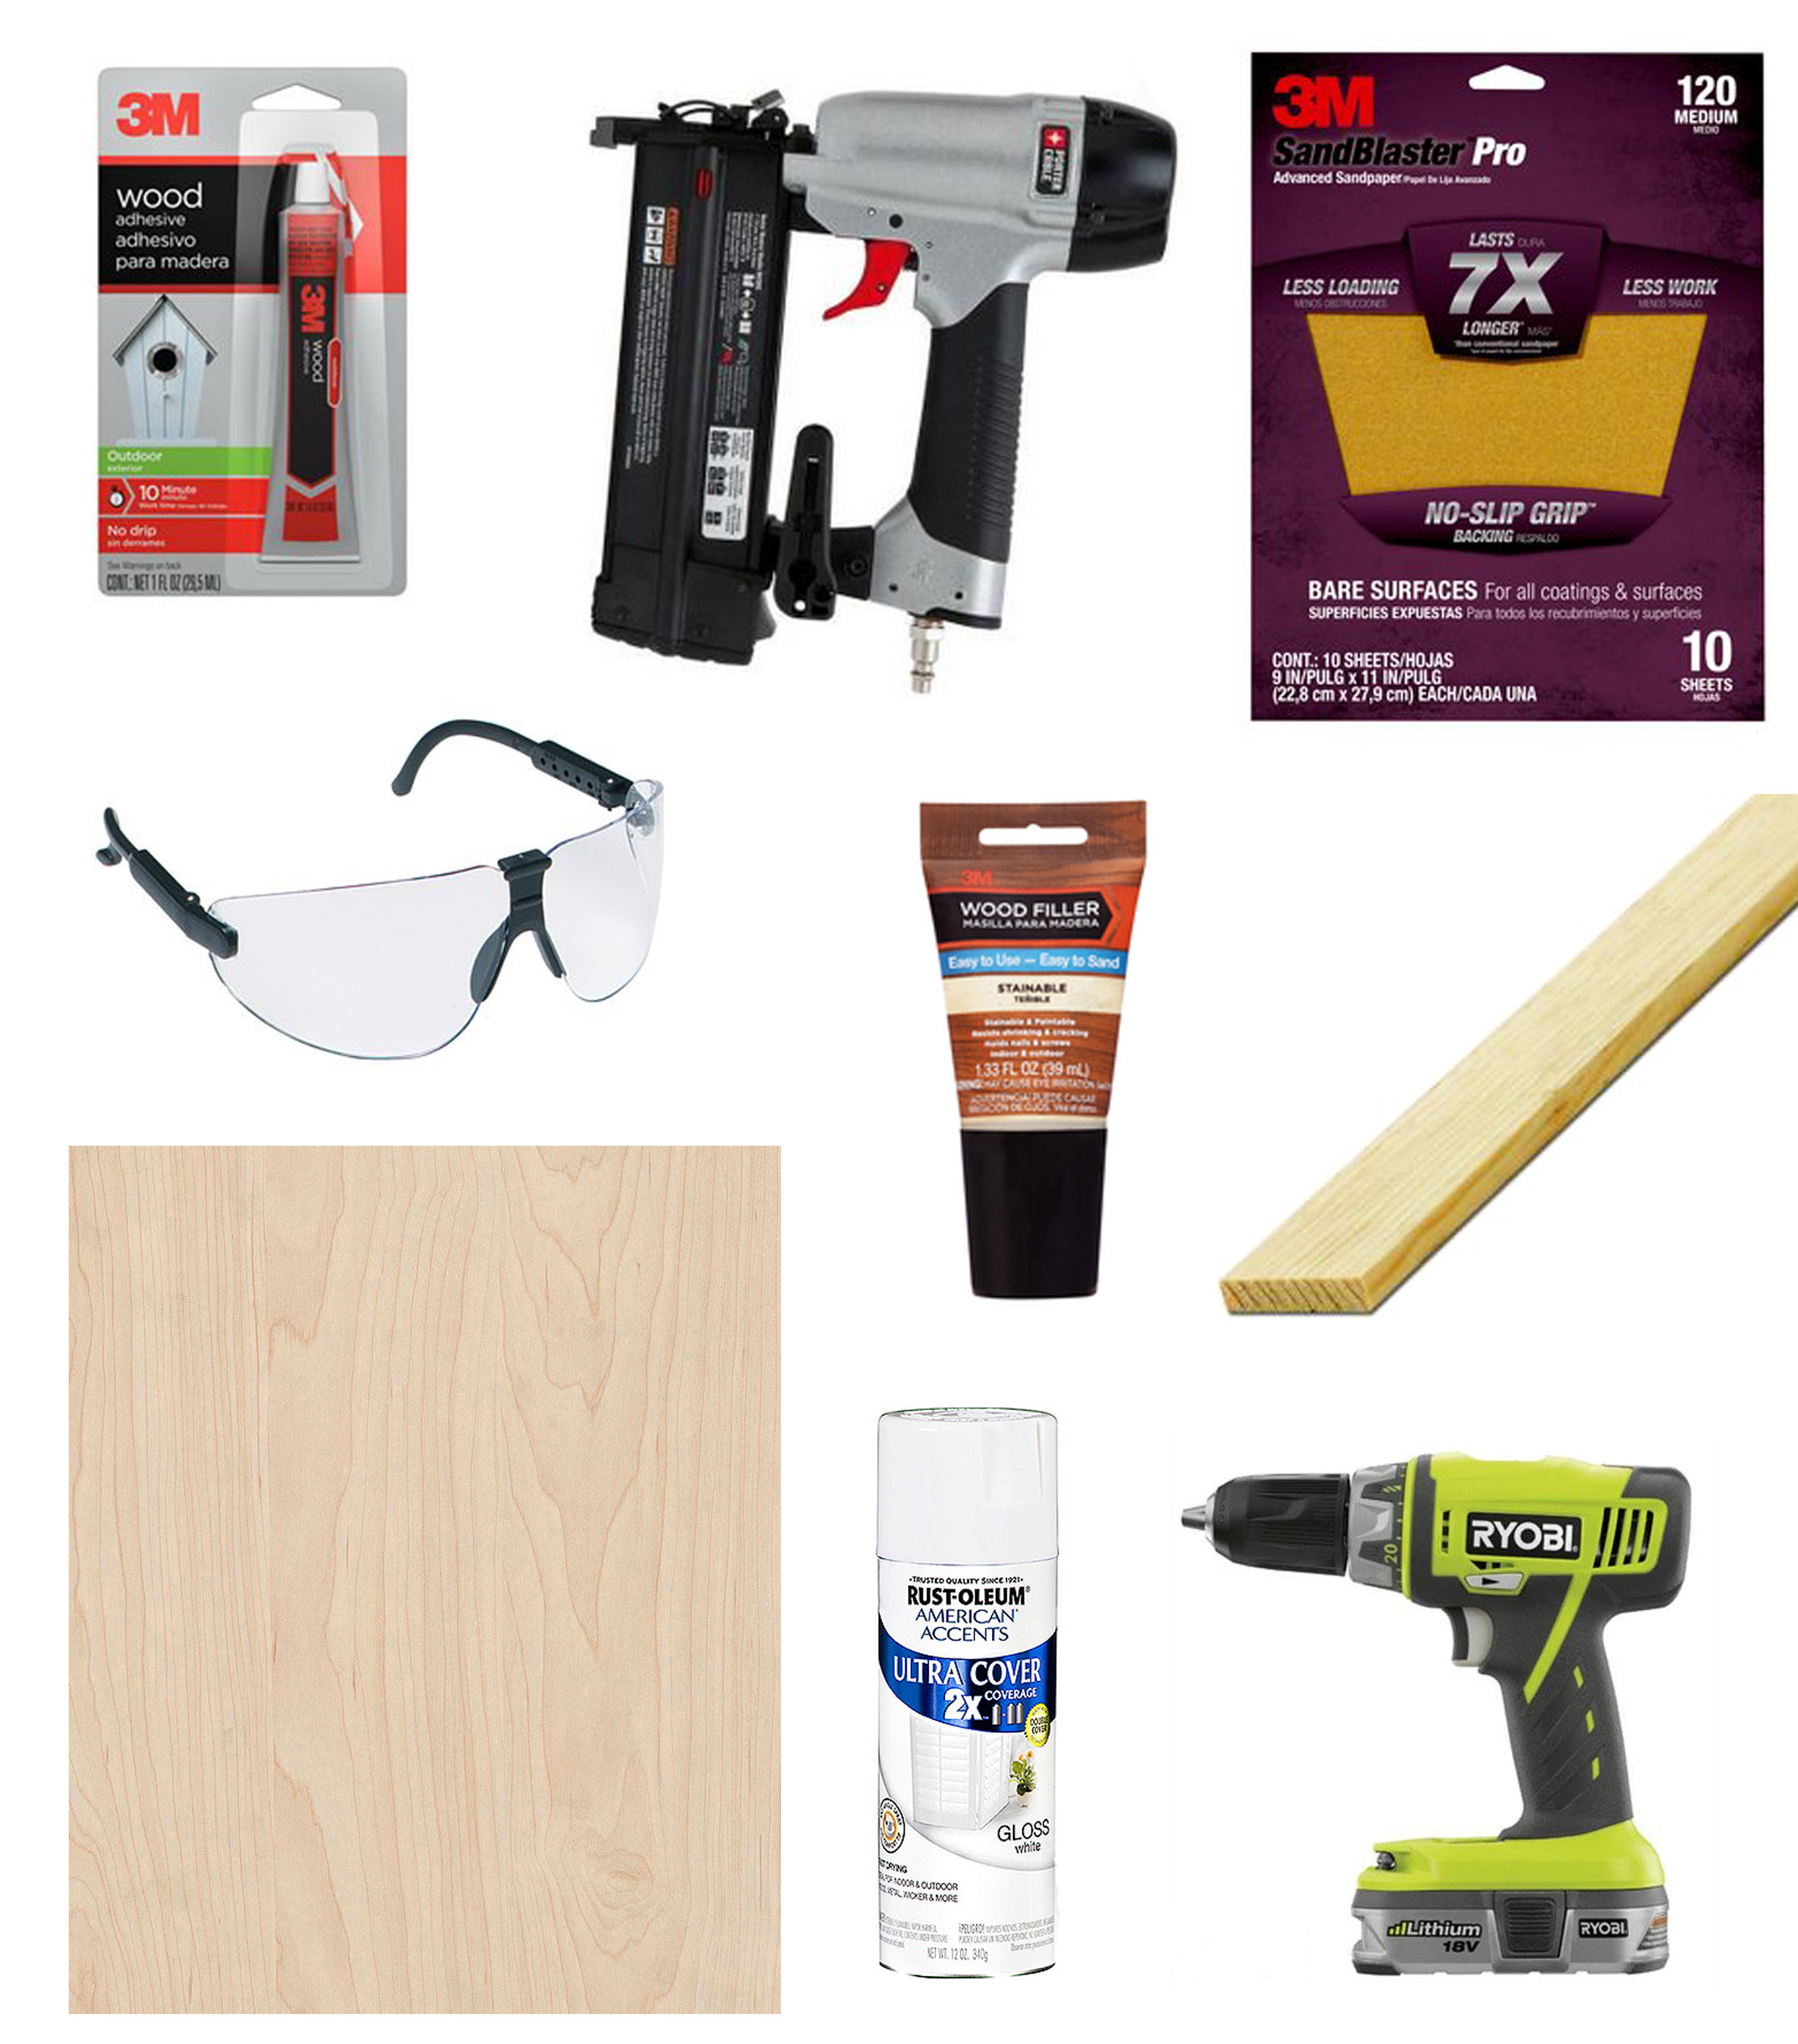
Supplies needed:
Plywood, Lattice Molding, Brad nailer, 3M™ Advanced Abrasives, Drill and Screws, 3M™ Wood Filler, Safety Glasses (3M™ Safety Products), Wood shape cut outs, 3M™ Wood Adhesive, Paint of your choice
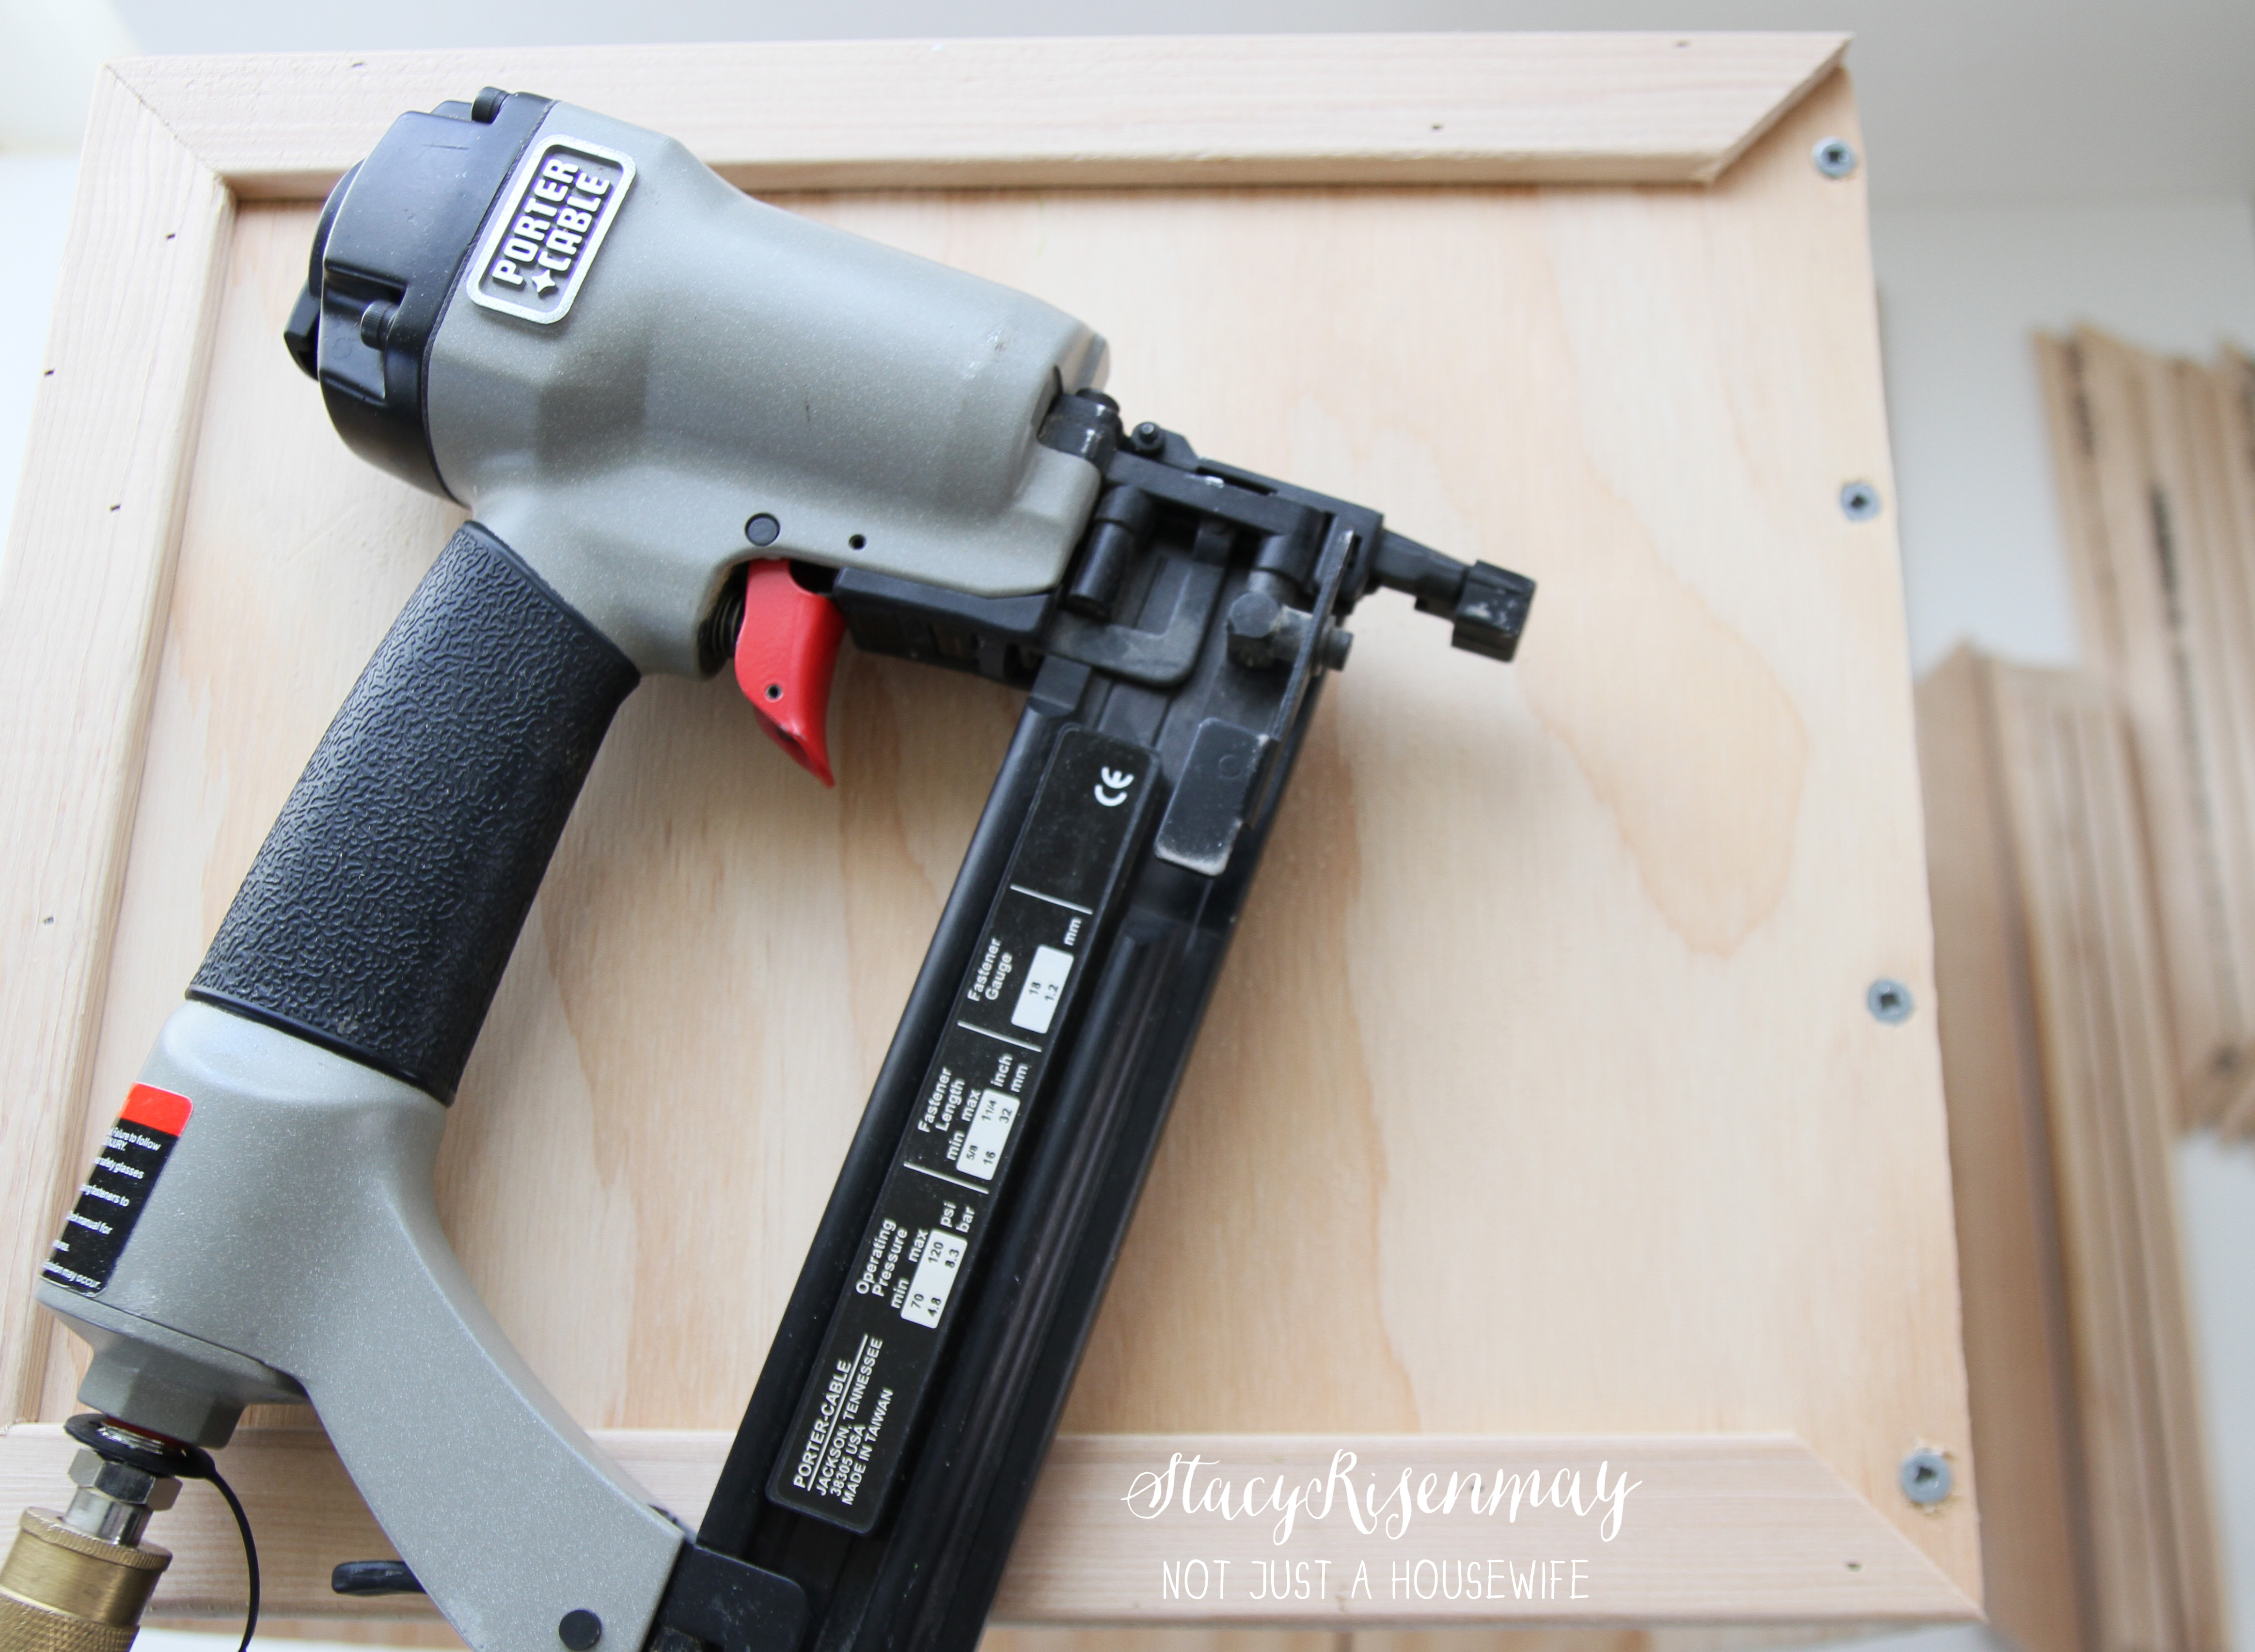
If you have your measurements ahead of time, you can have the people at Home Depot cut your plywood for you before you leave the store. Or you can cut them yourself on a table saw. You will need for side and a bottom. The size depends on your preference. You will also need some molding cut the same length as the sides and cut on a 45 degree angle.

Screwing the pieces together will make for a stronger hold. I recommend doing this for planters instead of brad nails (when possible) if you are adding dirt directly intot he planter. Wood when moist will eventually pull apart if only help by brad nails. Use outdoor wood screws.
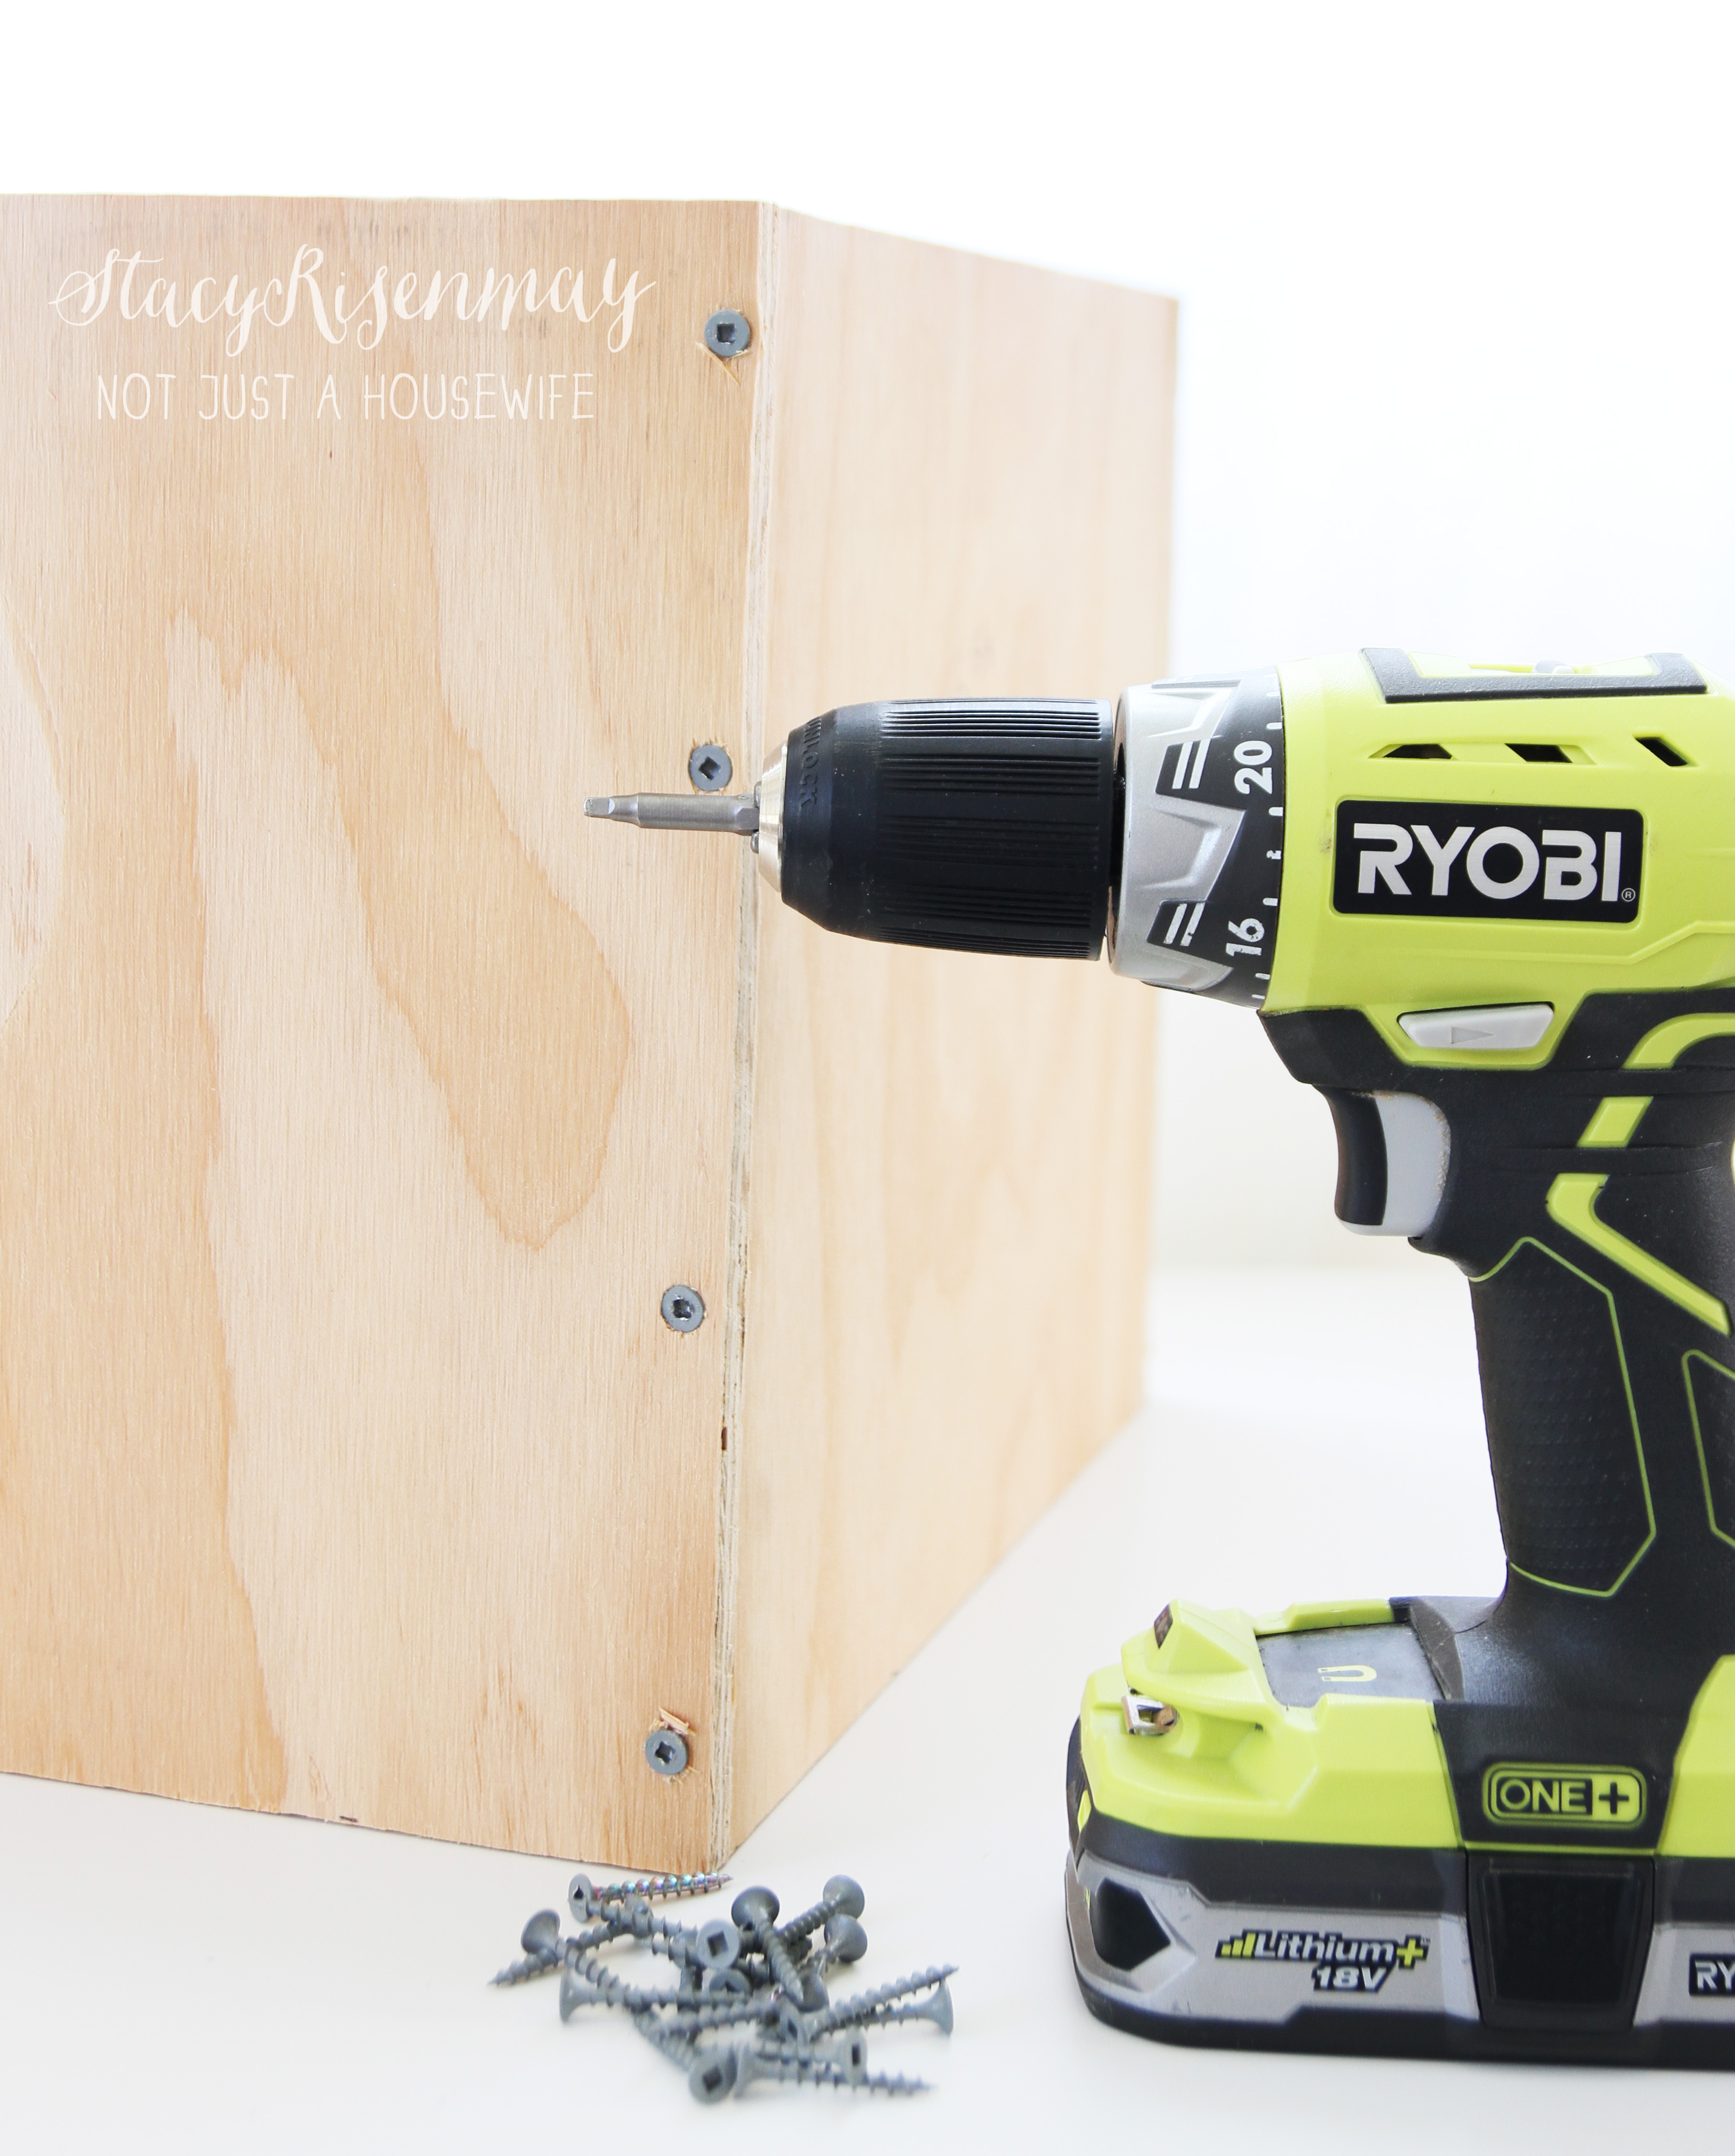
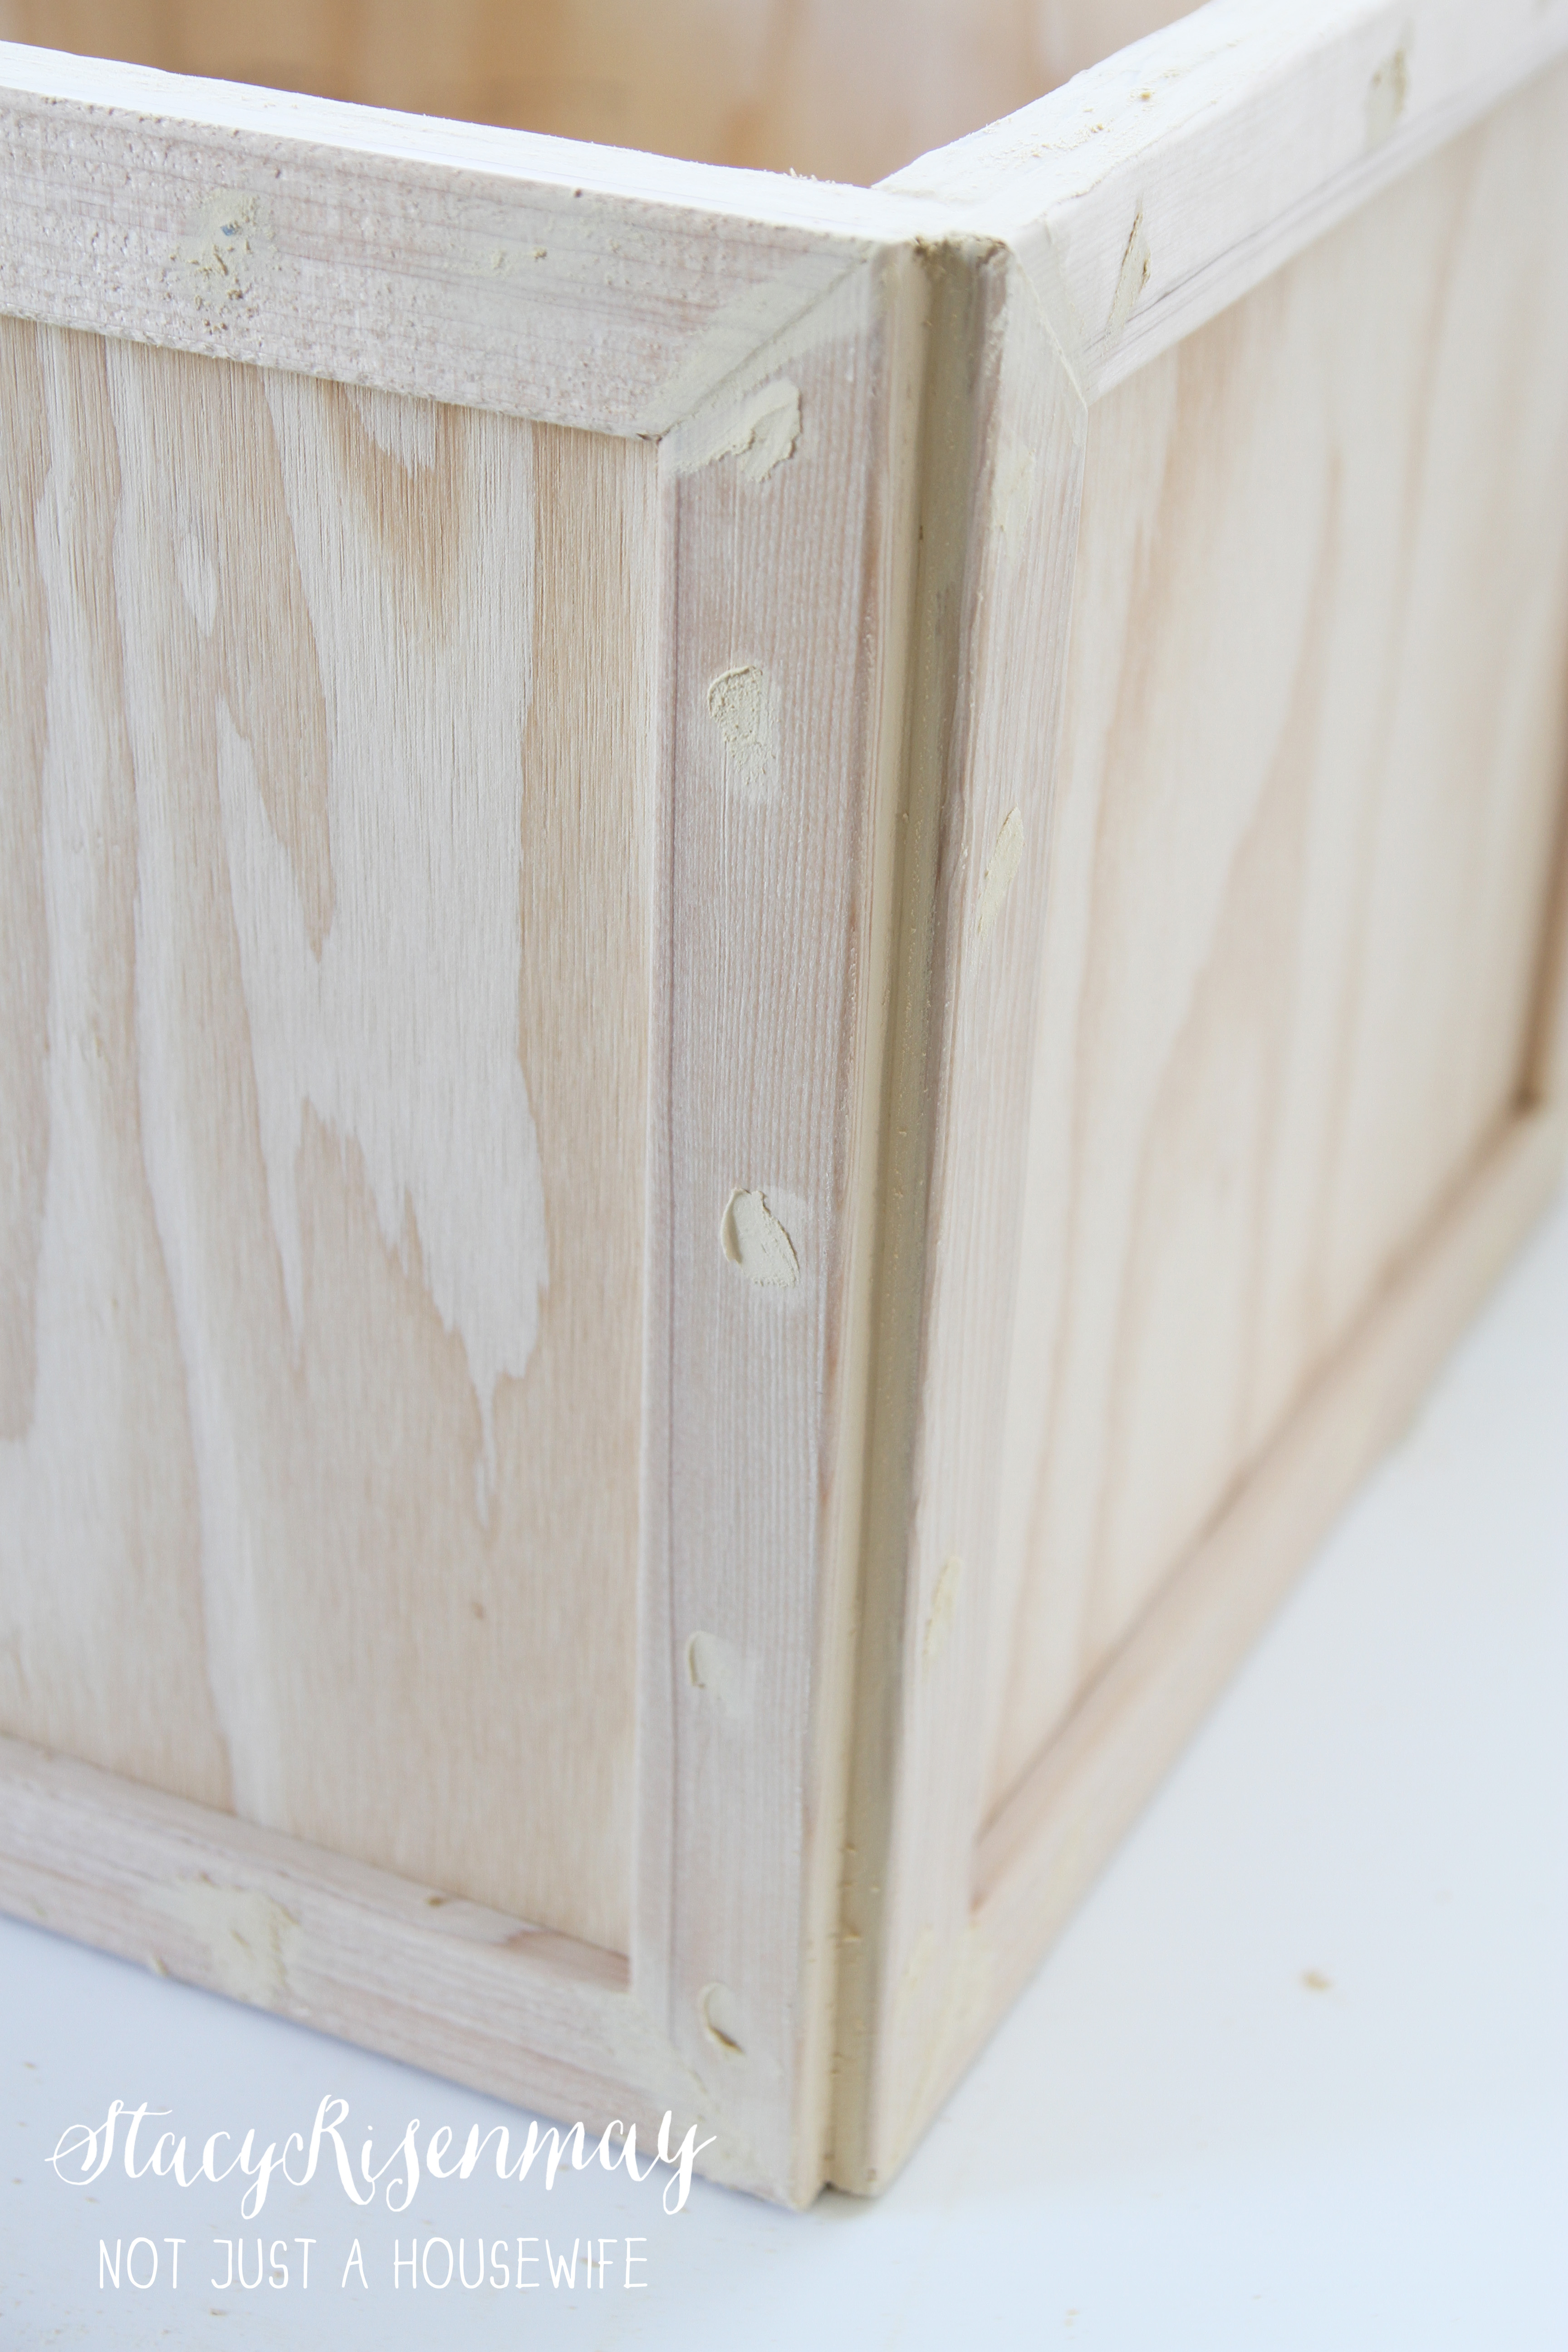
The molding will cover the screw. I nailed them on.
Putty the nail holes and then once the putty is dry, sand smooth with a fine grit sandpaper.
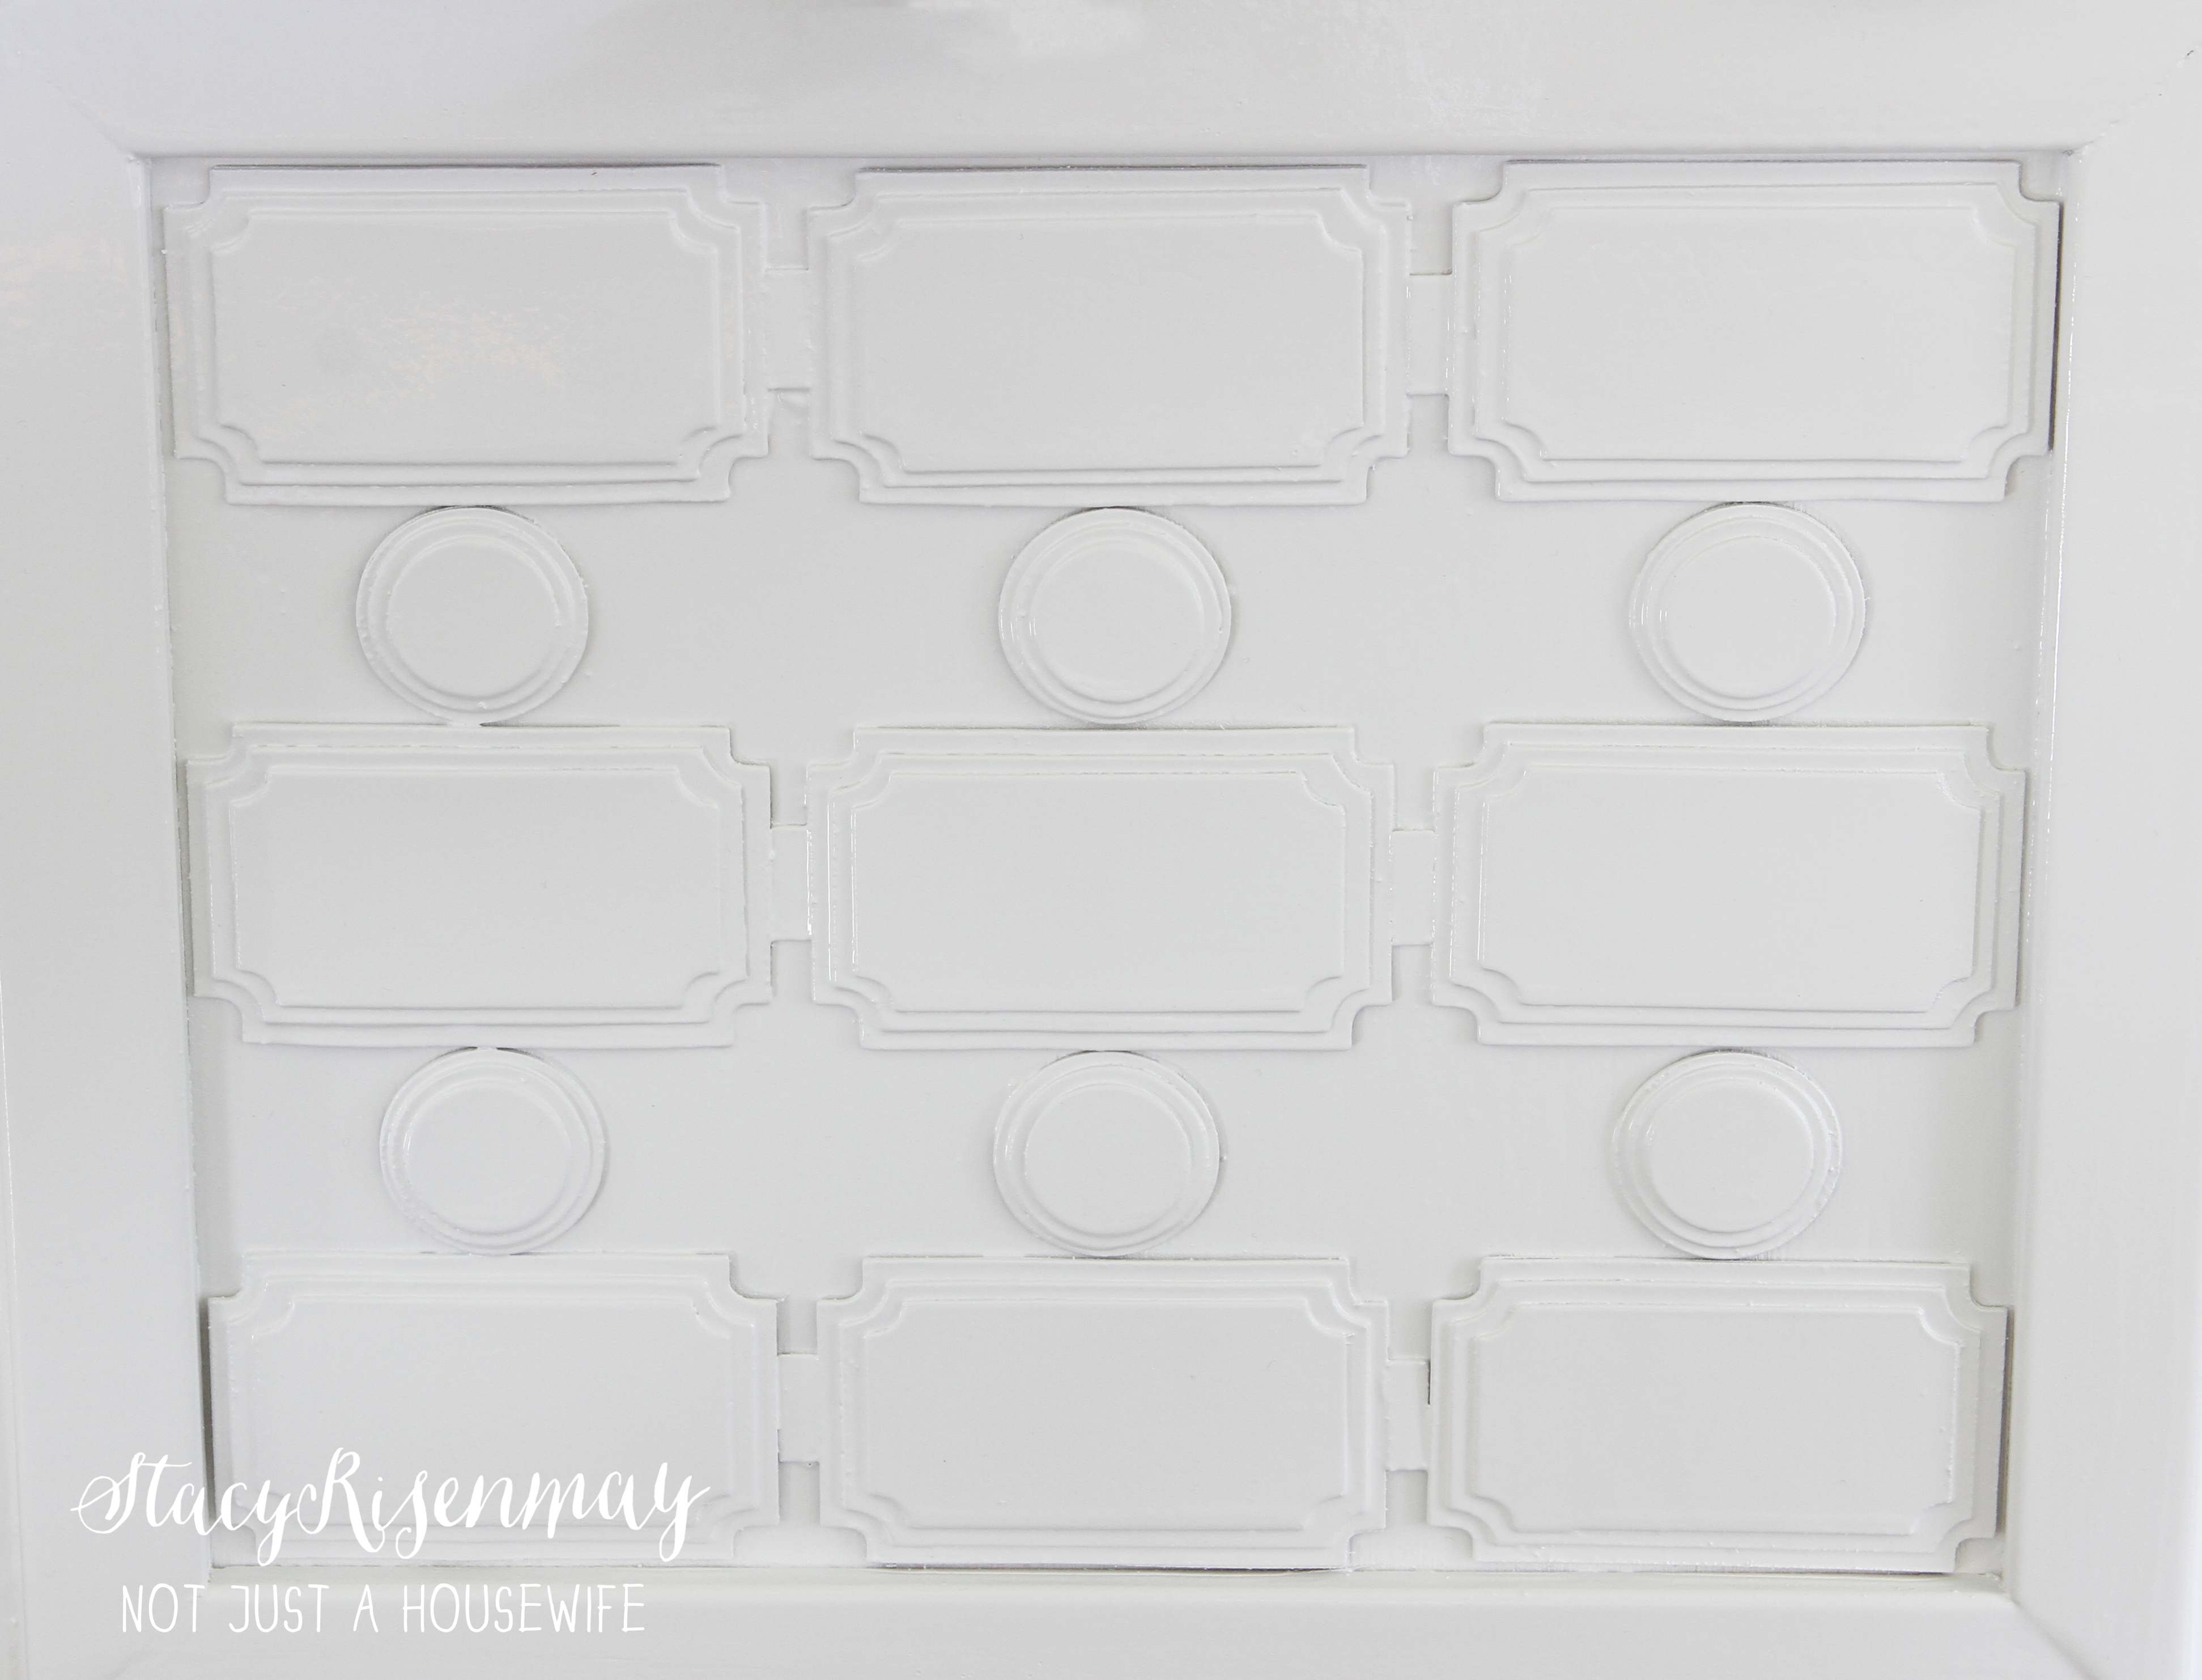
Now, since I was trying to replicate a certain pattern, and I needed a bajillion of these little pieces, I had to get creative on the material. Normally if I had been building this without a very specific pattern in mind, I would have bought pre-cut balsa wood shapes from a craft store. They can come in large pack for very little money. I recommend going that route if you want to create a fun relief pattern.
I cut my shapes out of chipboard using my Silhouette cutting machine. Then I glues the small, medium, and large pieces together to create the 3D pattern. I stacked some books on top while they dried so they would not warp.
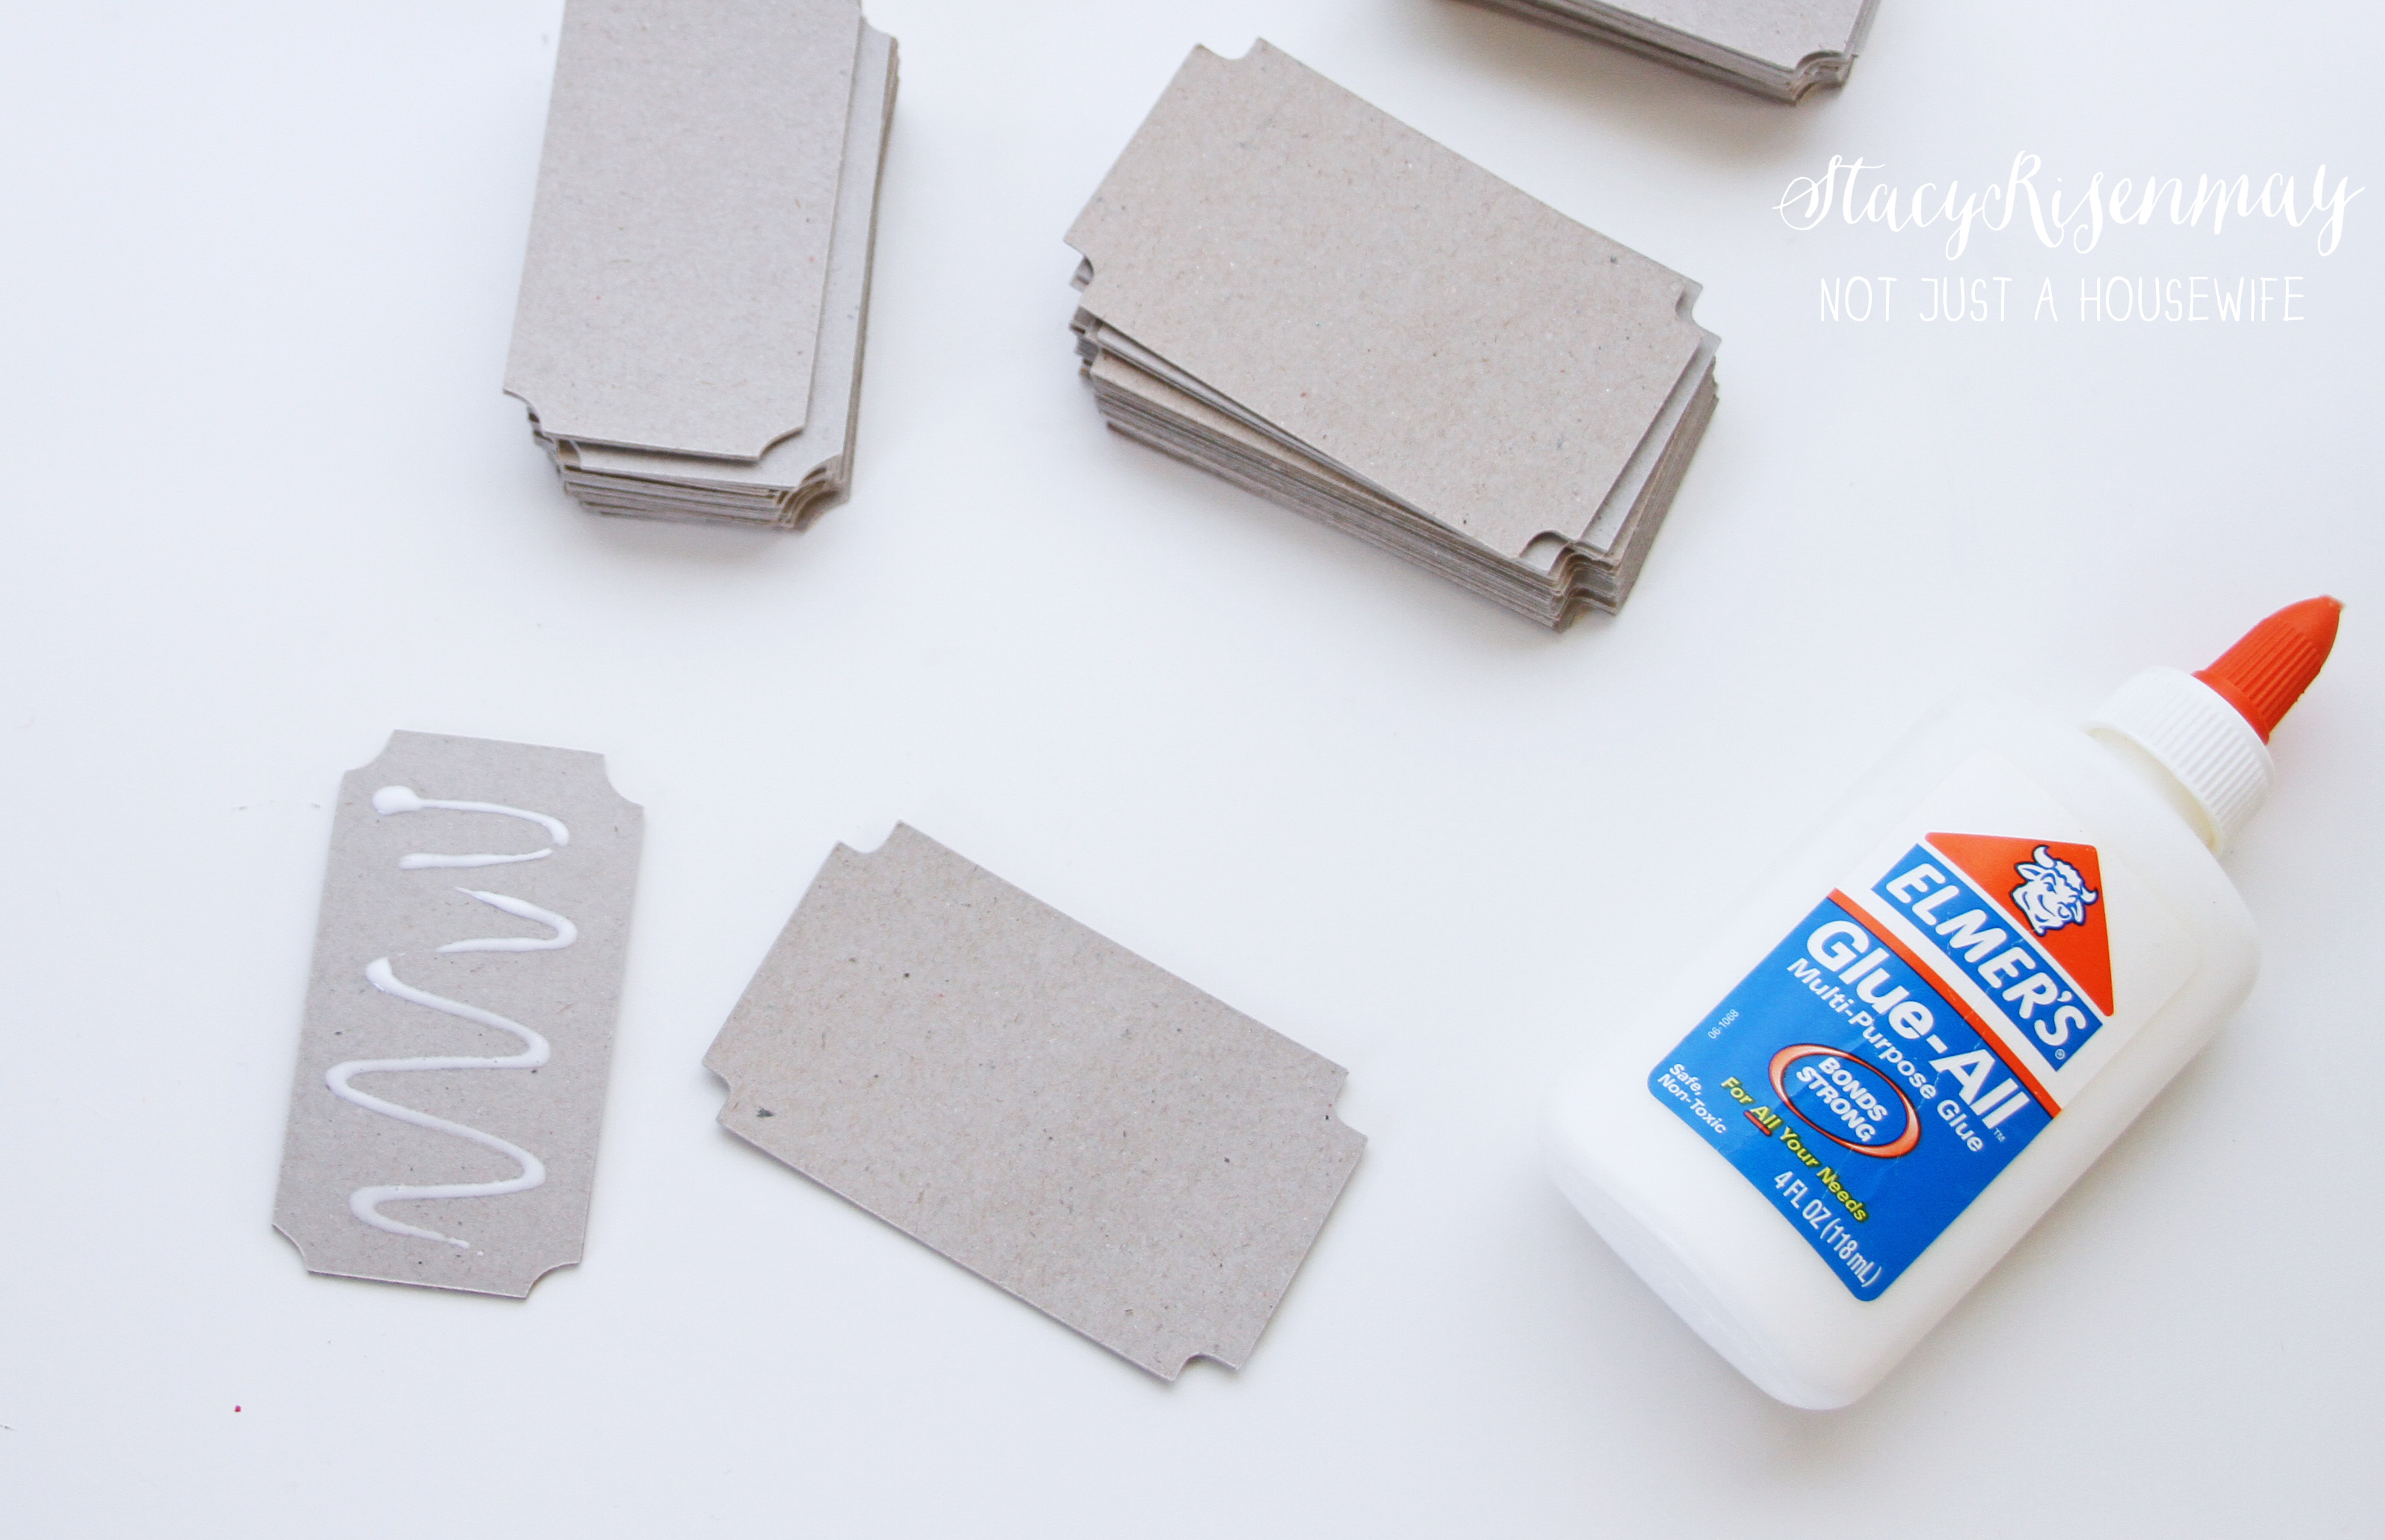
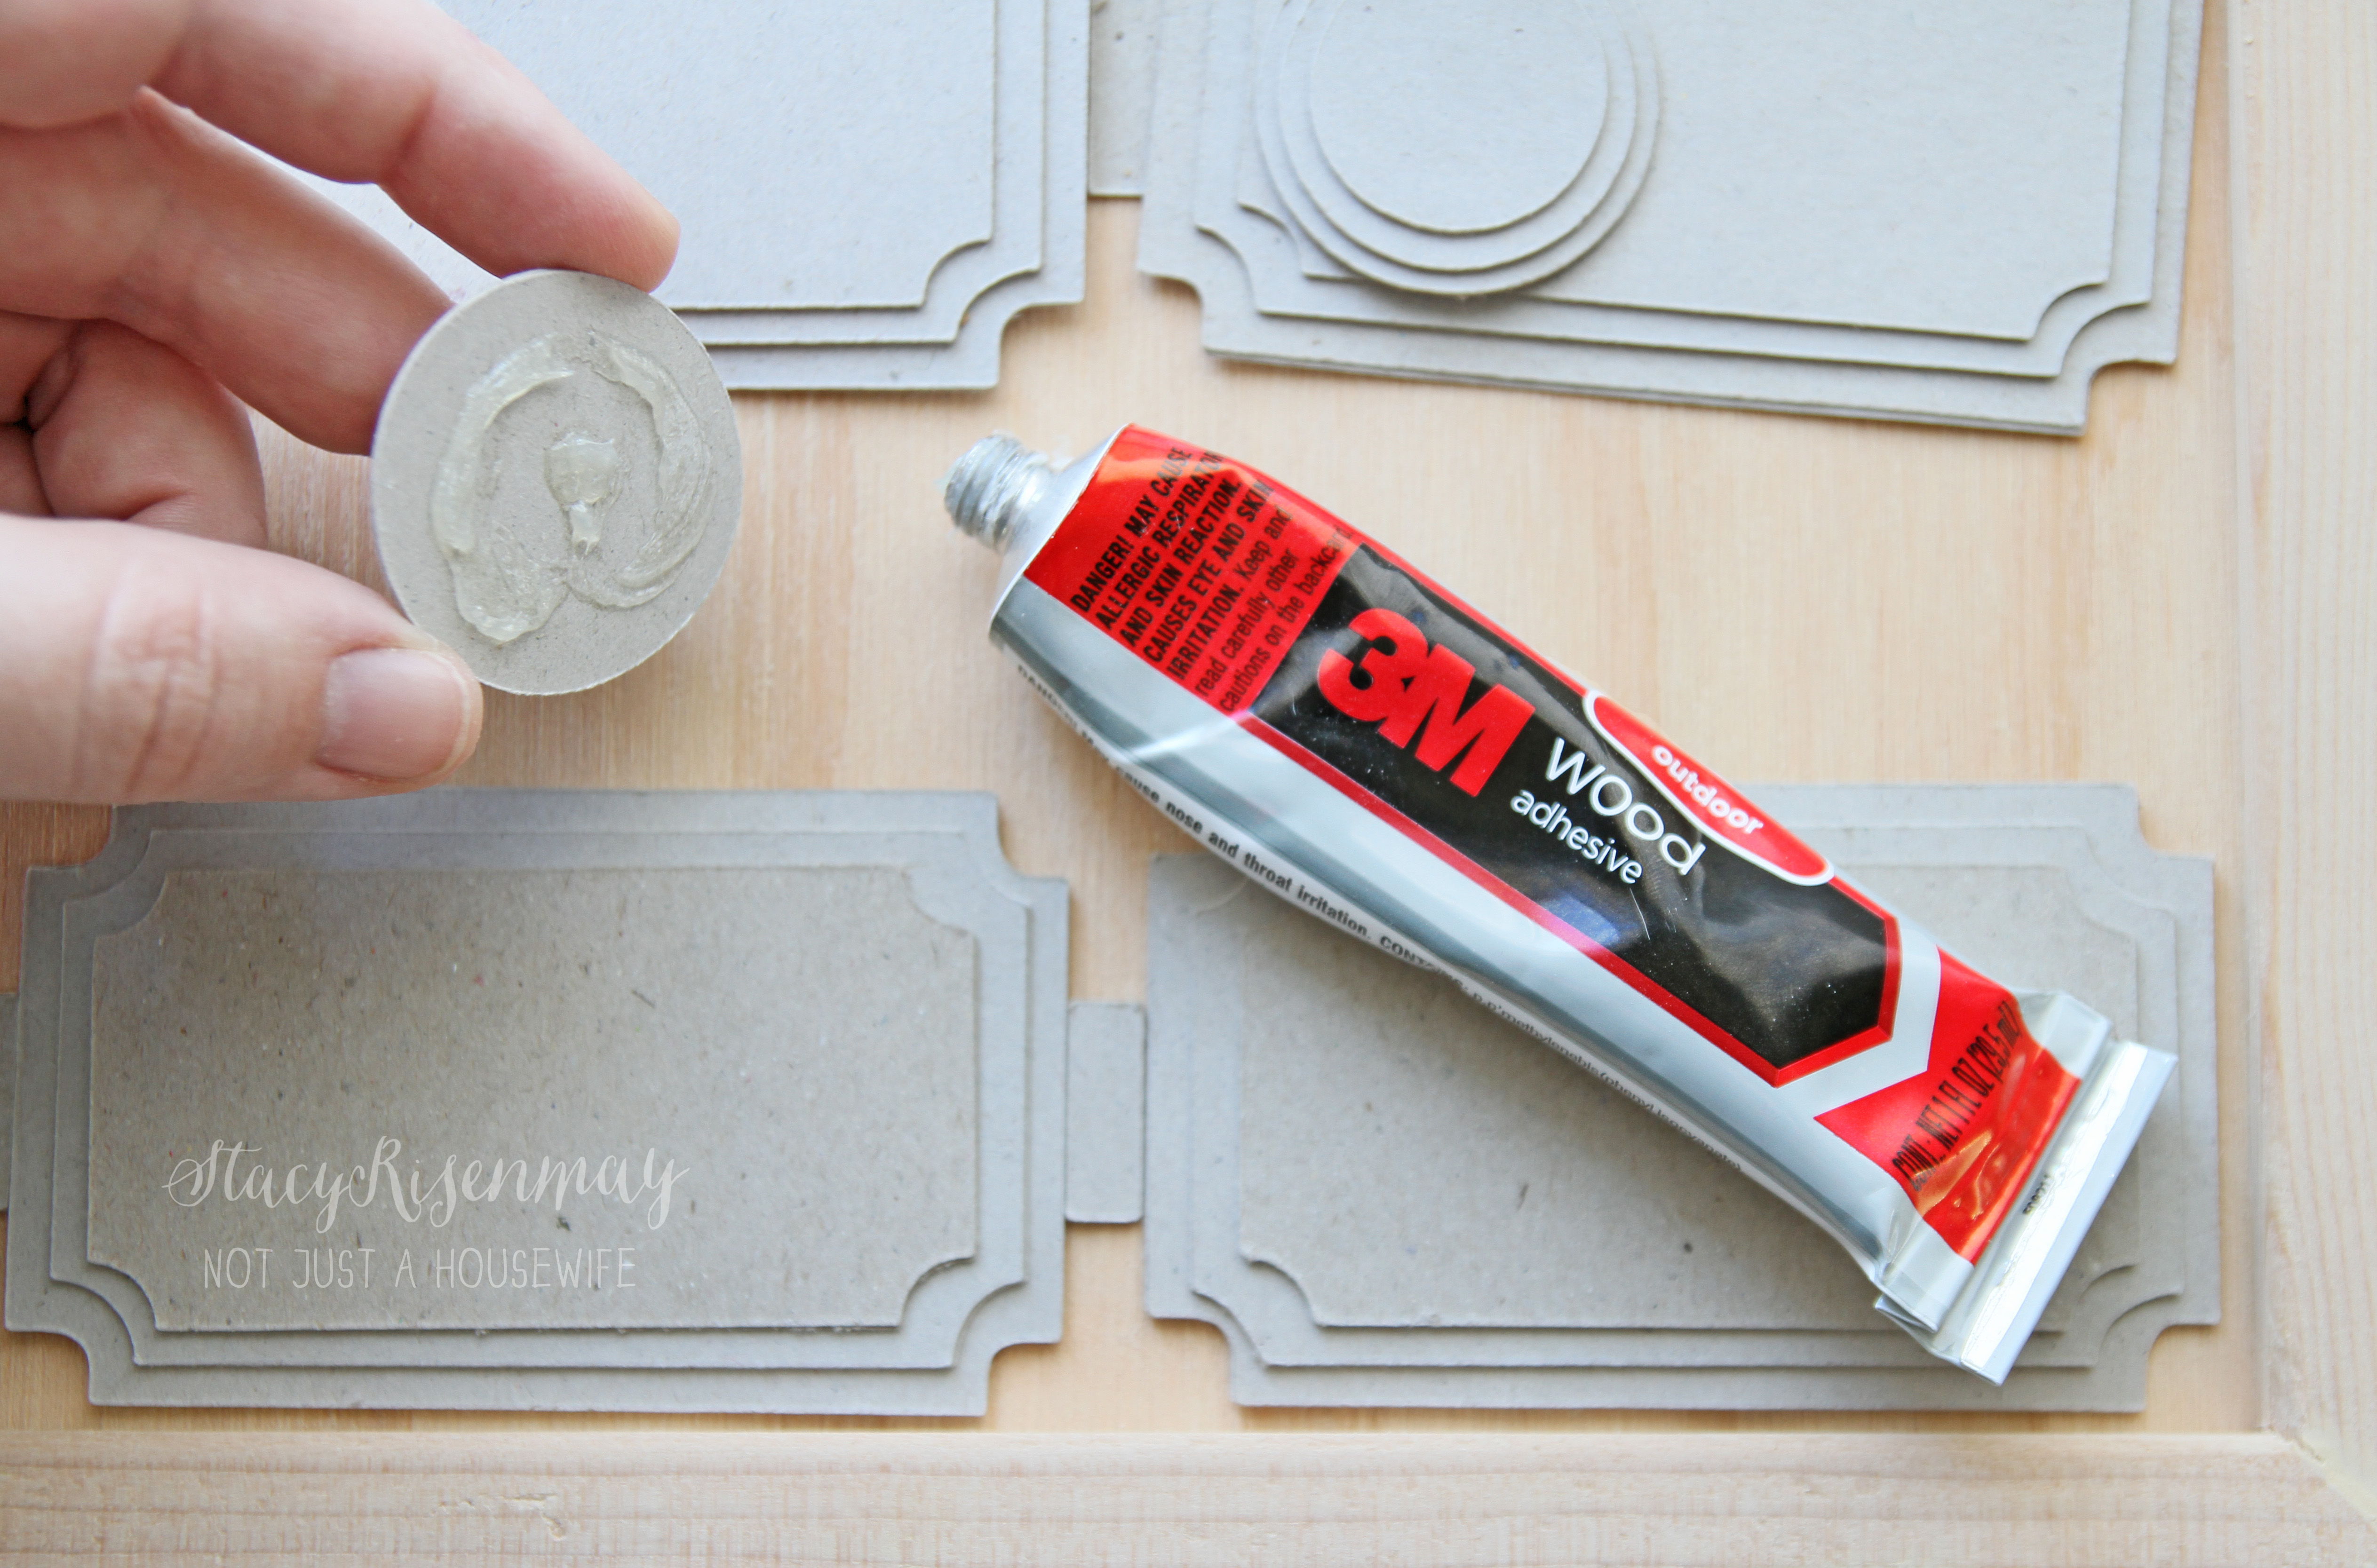
Once the shapes were dry, I used special wood glue meant for the outdoors to adhere them to the planter.
Since chipboard is not as strong as wood, I added a layer of polyurethane to it before I painted. The poly soaked into the chipboard and when it dried, the chipboard was so hard! You wouldn't have to do that step if you buy the pre-cut balsa wood shapes however.
Once the adhesive dried, I primed and then painted the planter. I went with a gloss finish. I wanted it to be sleek and shiny.
It is so hard to tell in pictures. I have learned that white is hard to photograph. It looks so much better in person :)
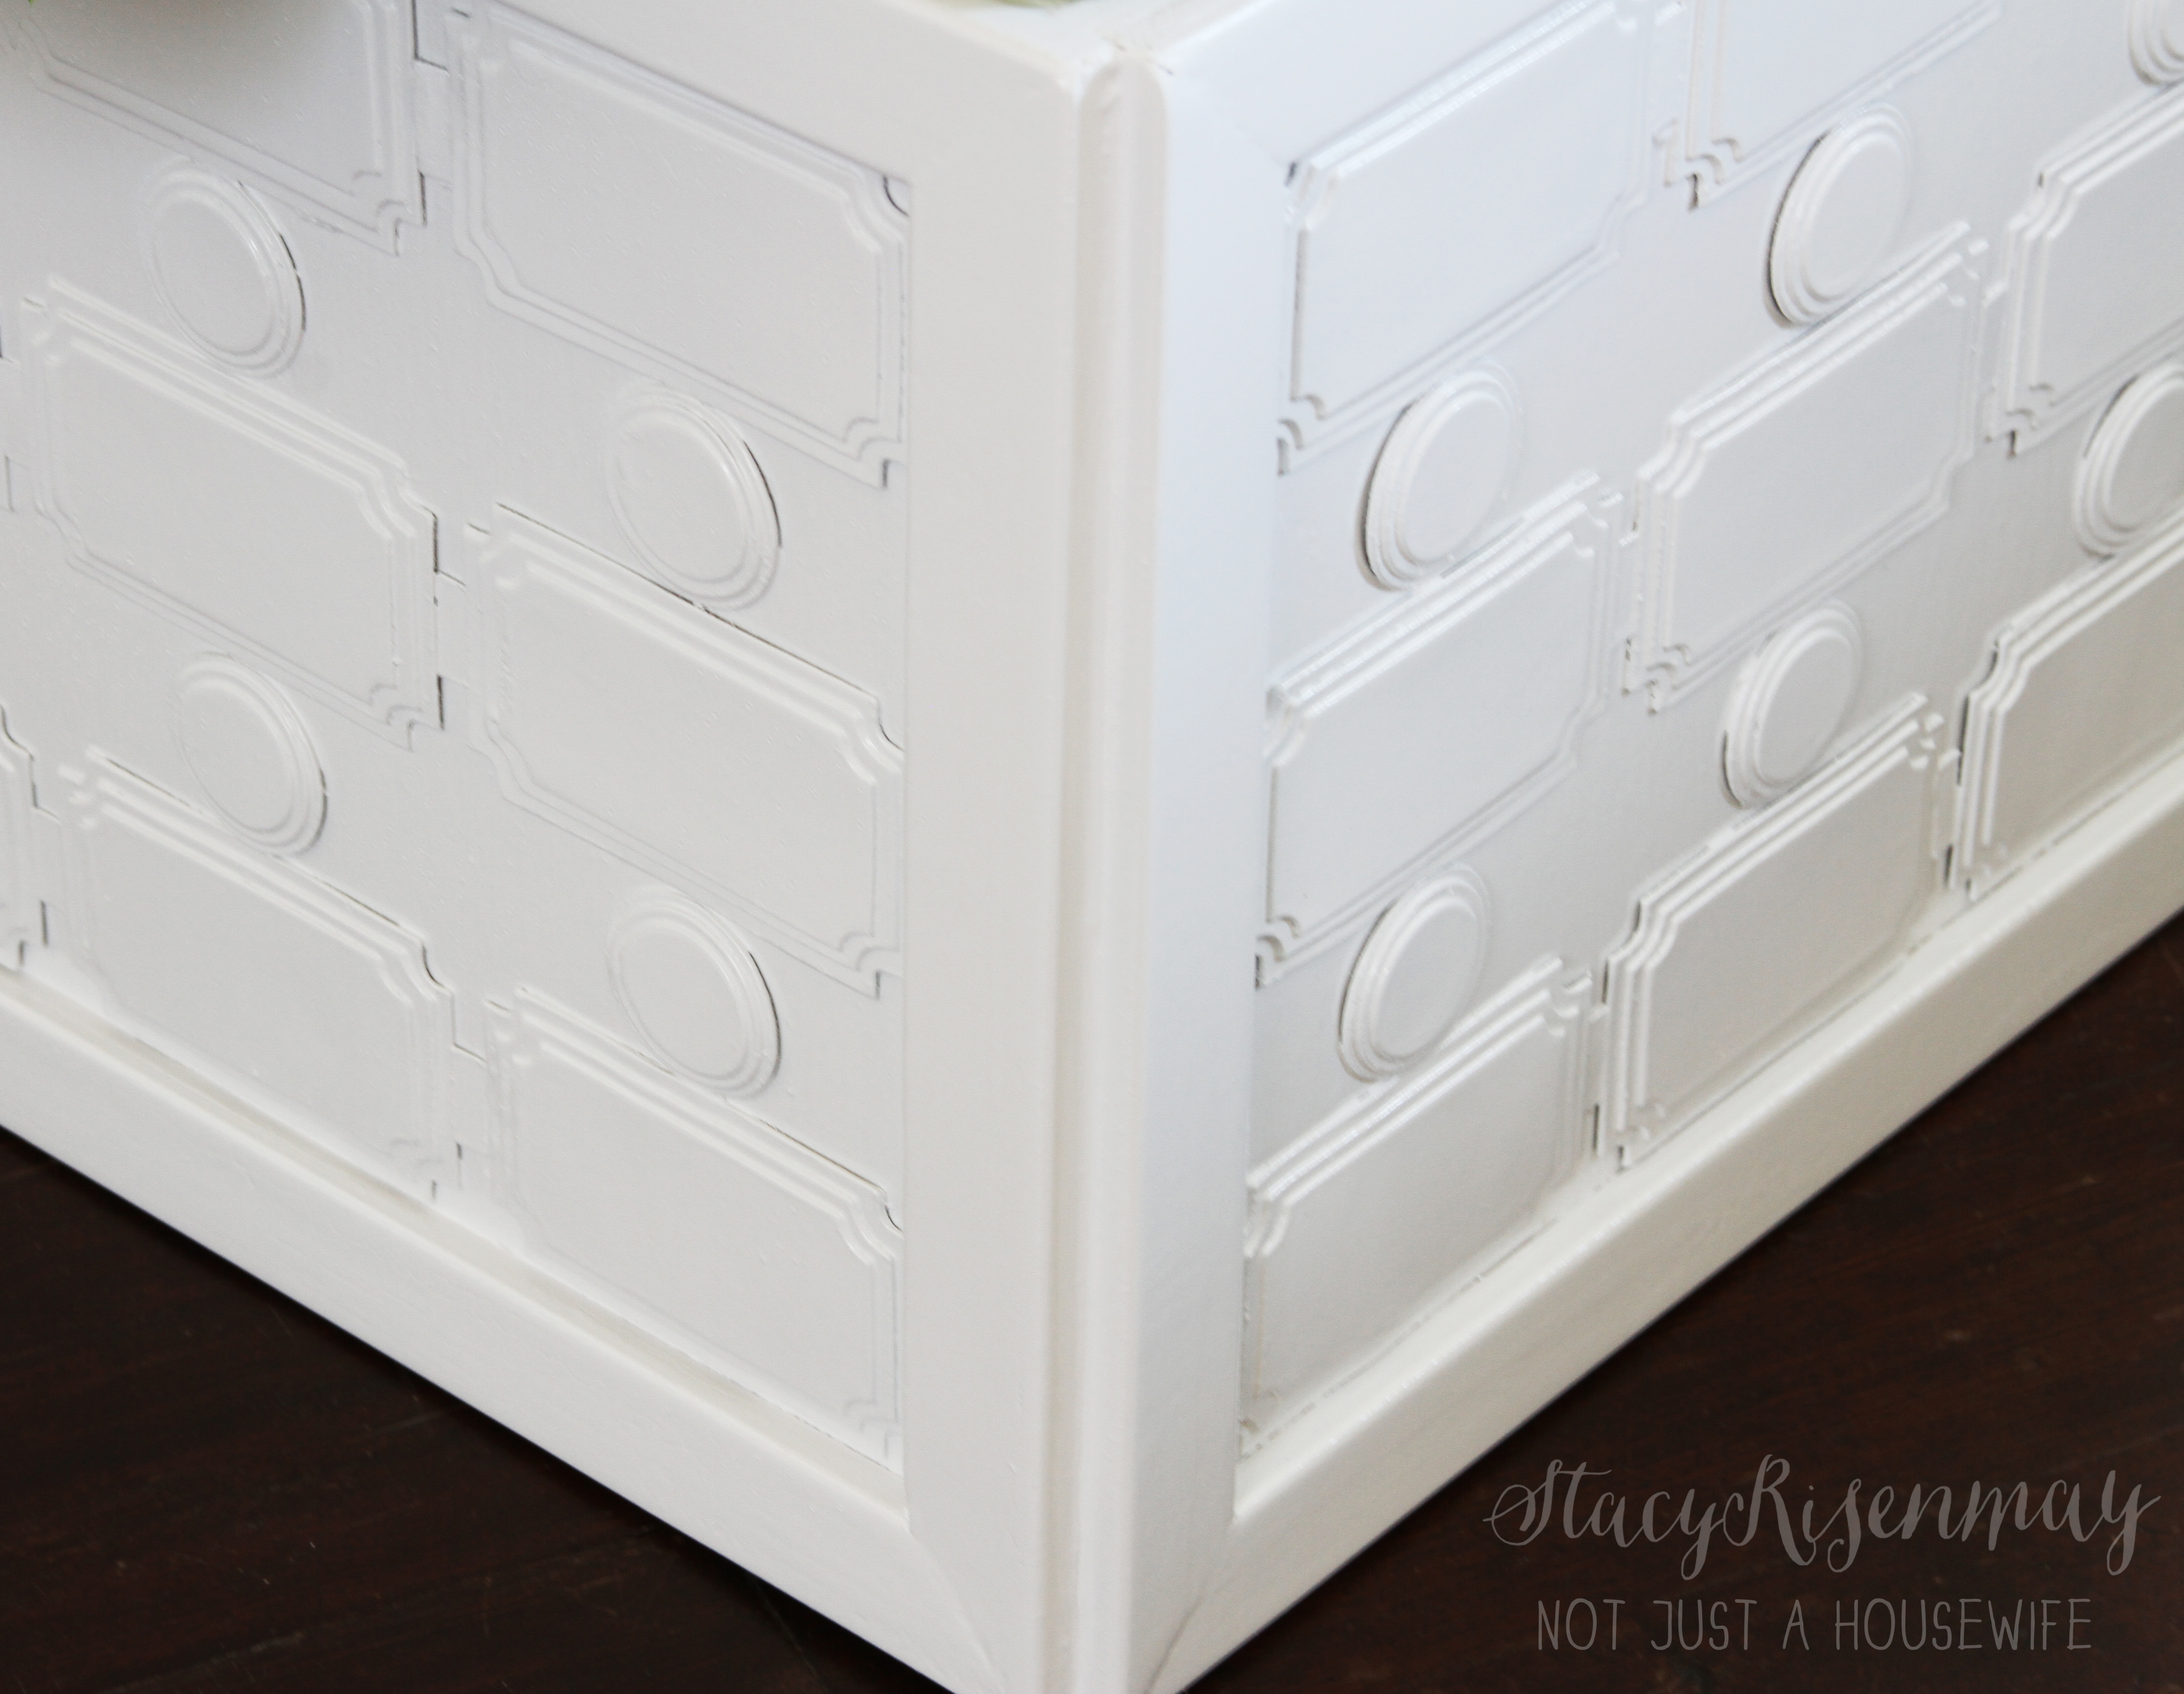
I am kind of loving the glossy white against my "aged" wood floors (AKA beat up by 4 boys).
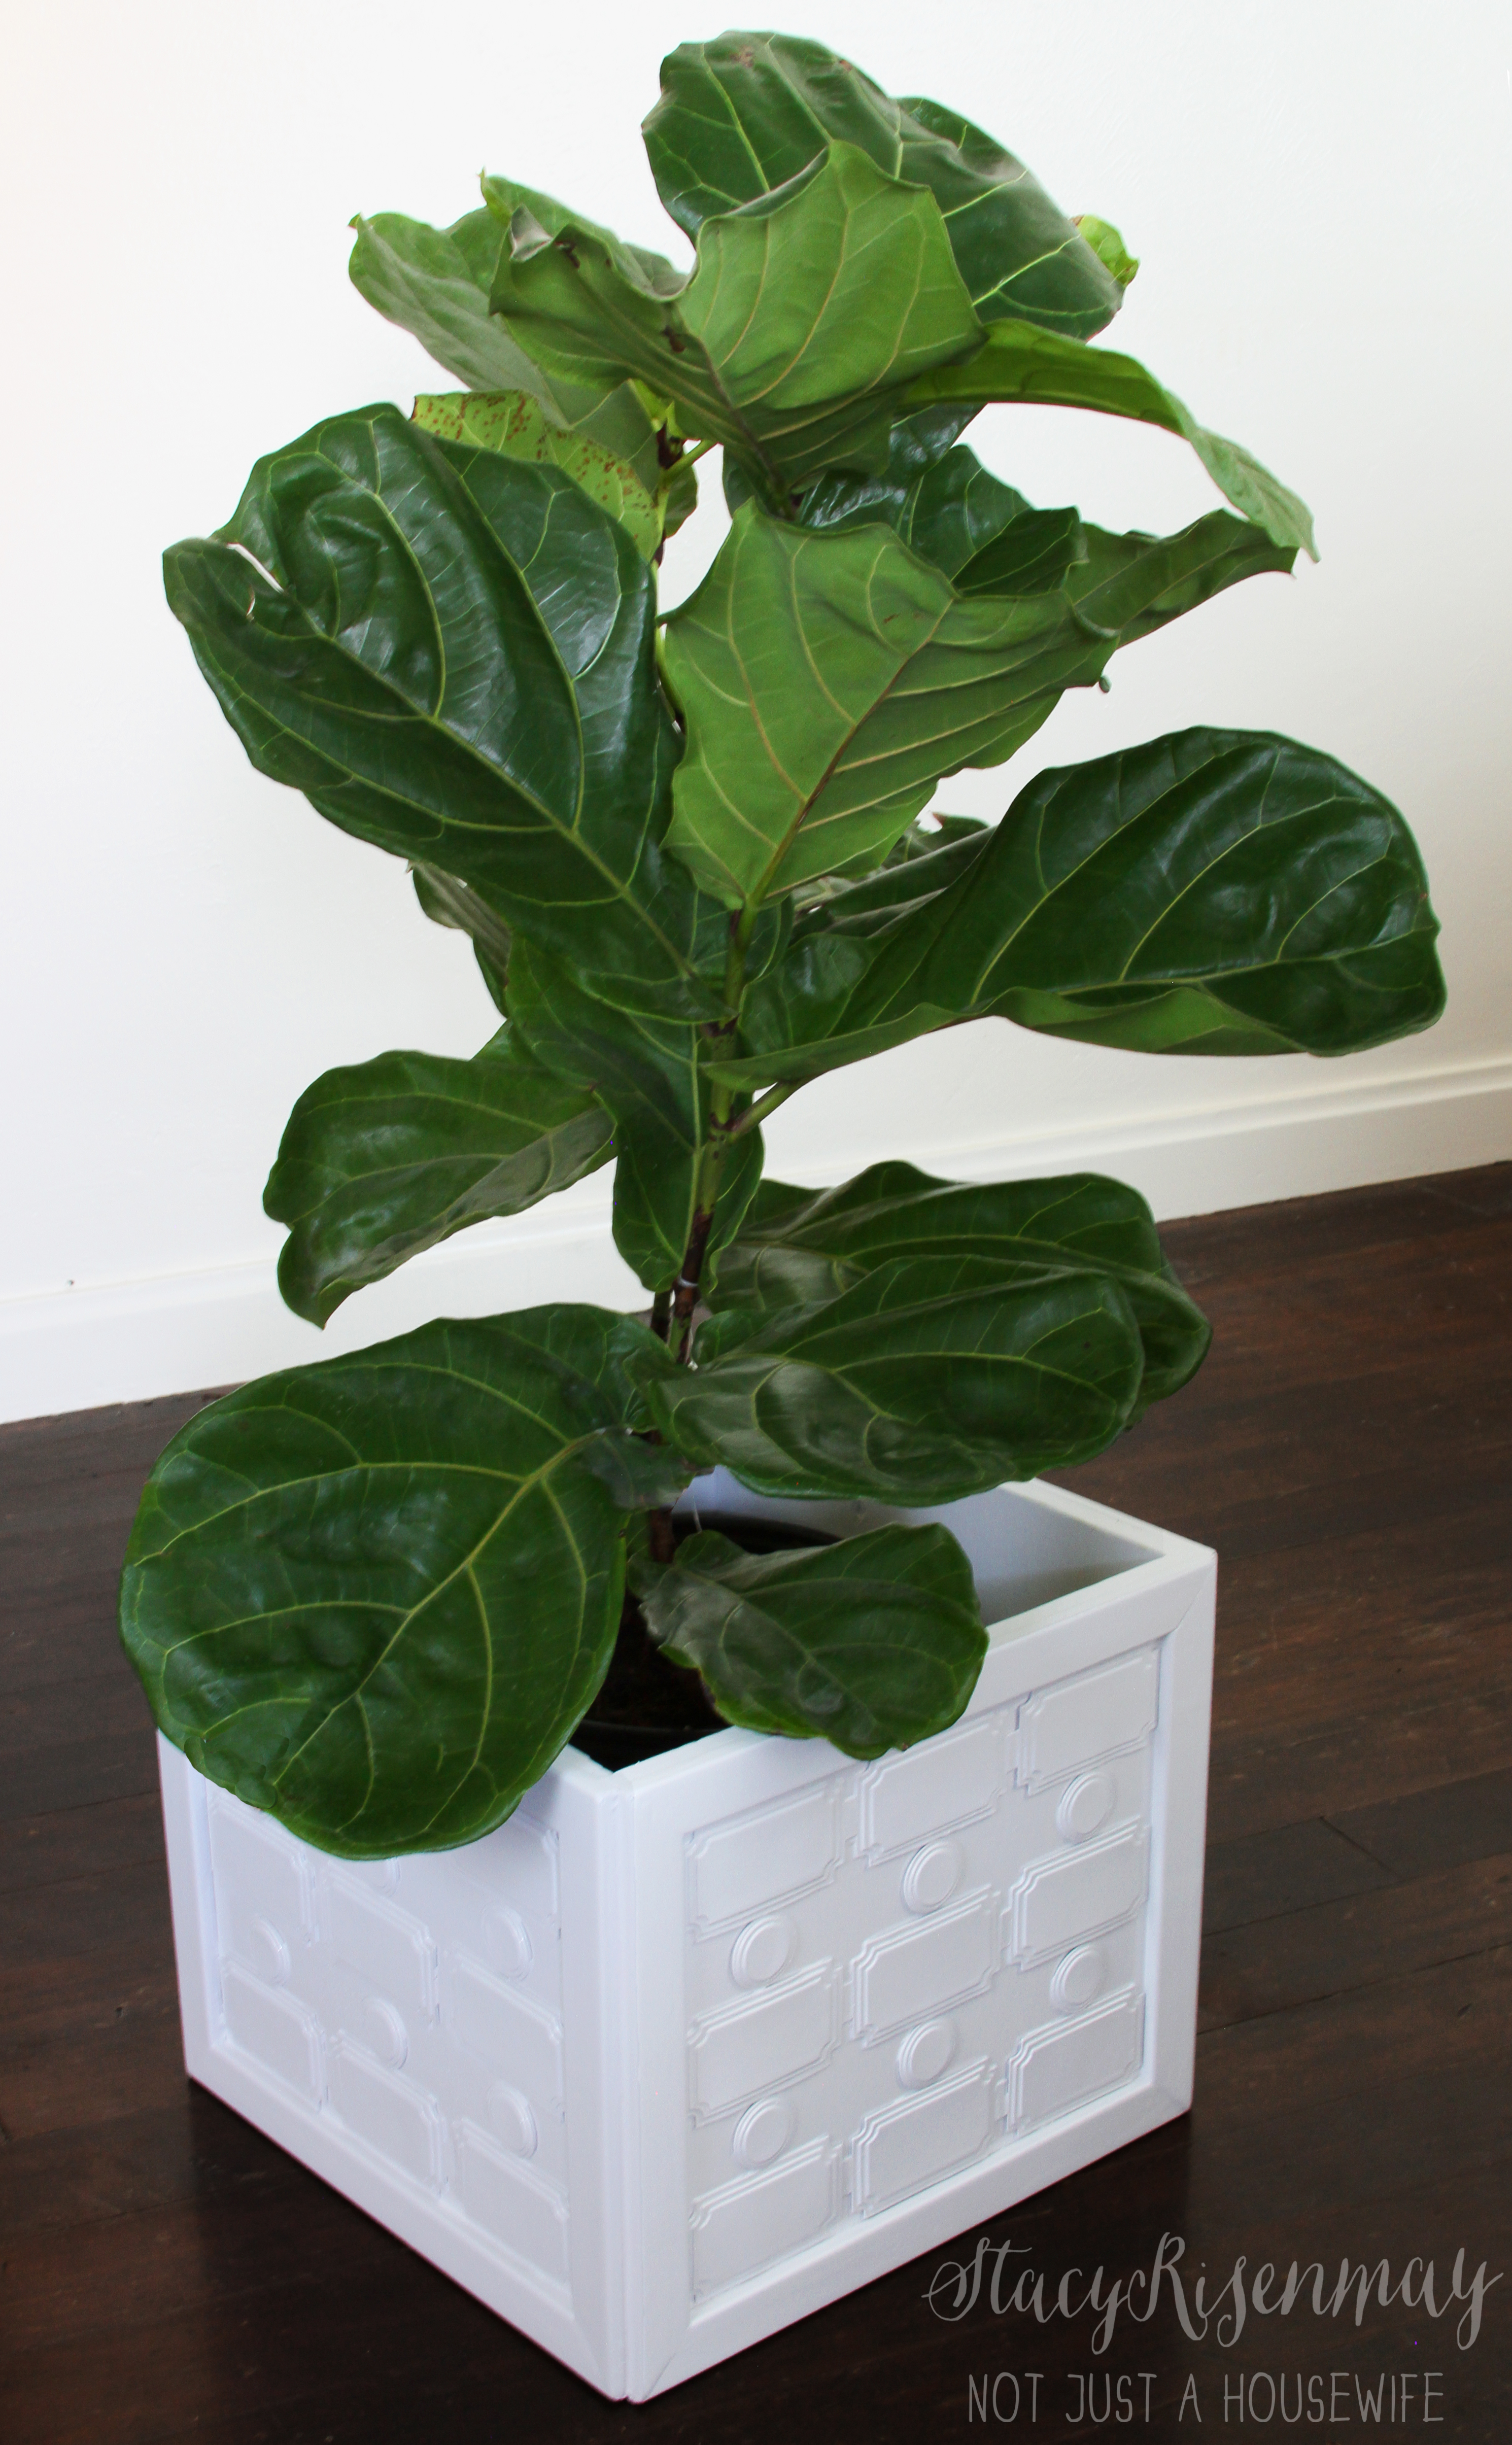
And the greenery looks amazing with the white as well.
I can't wait to see it and my blue card catalog bedside table in my new room. Momma's praying for a large tax return!
I am proud to be a 3M sponsored blogger, and, as part of my responsibilities, I get the opportunity to evaluate products from 3M DIY. Opinions are my own and additional product used in the project were selected by me.


WOW! I LOVE the way it turned out. Amazing job!
So pretty! I love it Stacy!
Oh, Stacy, I love the geometric designs and the stark white color you chose. Perfect for making a statement.
Oh I absolutely love this! White geometric is totally my style and I love how this looks. Great job!
At first glance I thought this was ceramic! It looks amazing!!!
So creative! I love this!
This looks great! So many color combos could be used for this. Very versatile.
This looks gorgeous. When I saw the picture I totally thought it was store bought. Amazing job.
That is so awesome Stacy!! What a creative and cool way to make a planter! Love that geometric look.
Wow! That looks fabulous!
This is amazing!!! It is so high end looking for little money! I have a Silhouette so really looking forward to giving this project a try. ~Christy
This is freakin' amazing! Seriously. At first glance I figured you spraypainted it, but you built the WHOLE DANG thing?!? Wow, girl. Skills. Vision AND skills.
Very, very cool.
That is such a neat idea. Thank you for the tutorial I need to build some planters myself.
I NEVER would have thought to layer your chipboard like that! So smart!! Love the way this turned out. I'm a huge fan of bright white against dark wood! Great job!
This is so cute. I love how it turned out. Thanks for the great instructions on recreating it too.
This is gorgeous!! Absolutely lovely!!
What a fun project ... and so creative to use chipboard!!
Beautiful job Stacy, and a great tutorial! I love your diy planter.
gail
Love the look of this - super unique and great tip on the poly and chipboard!
This came out so great! Love your creativity creating your own 3D design.
LOVE this project! Definitely pinning it!
I am loving the layers and how you utilized your wood and glue. The high gloss white is the icing on the cake!
That is really cool!! Love it!!
Seriously, I can't believe you made that pattern with chipboard! You are AWESOME!!!
Super clever, Stacy! Love it...and white was the perfect choice!
That is awesome!!!!! Never would have thought of using cardboard cutouts!
You did a beautiful job on this! I love all the layers. It's such a beautiful piece.
This looks amazing! I love the white and I love how you used the chipboard! Very clever.
I need one of those plants! So cute!
Love the planter! Well done!
What a beautiful planter! I think white was the perfect color choice! (And it is so hard to photograph! But you did great.) It contrasts perfectly with your floors.
Such a great idea Stacy!!