I know, I know. Another mason jar project :) I can't help it! I have then on my mind with all this canning. I have now moved on to green beans. But I took a break to do this next project.
Blue jars can be hard to find and pricey. I like that I have figured out a do-it-your-self- version
I an LOVING how they turned out!!! Do you want to know how to turn a regular jar into a vintage looking blue jar???
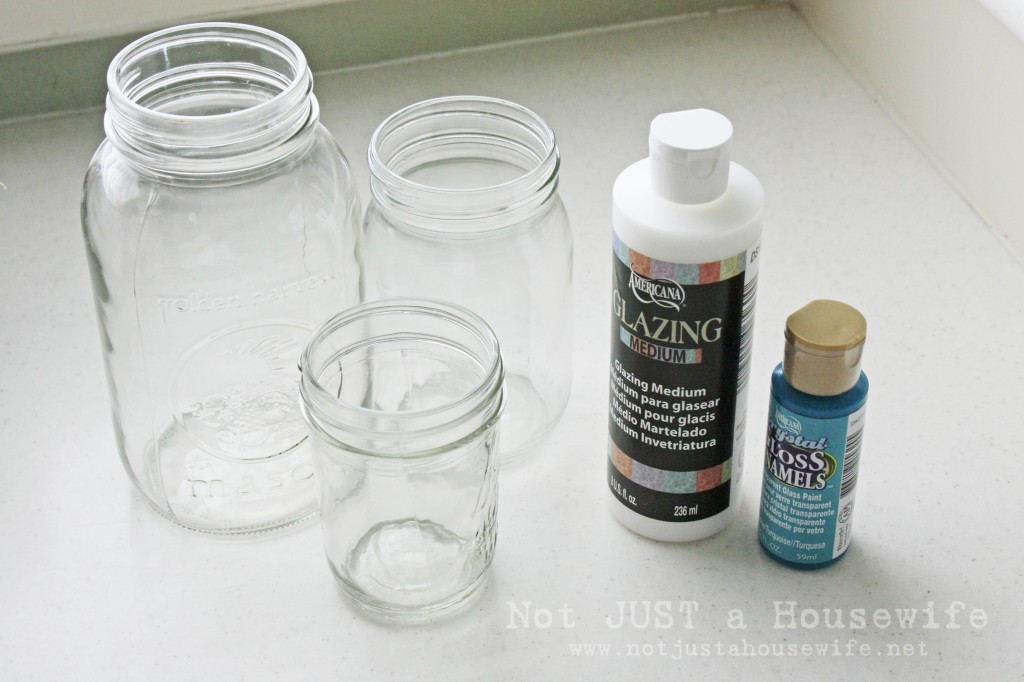
Supplies Needed:
(affiliate links)
Mason Jars
Glazing Medium
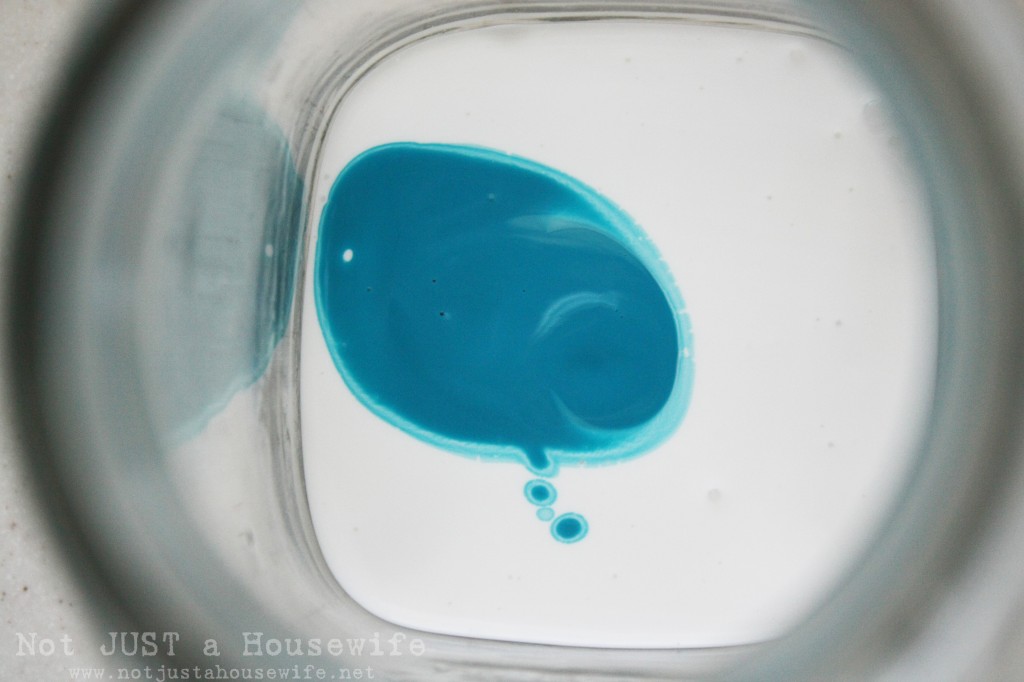
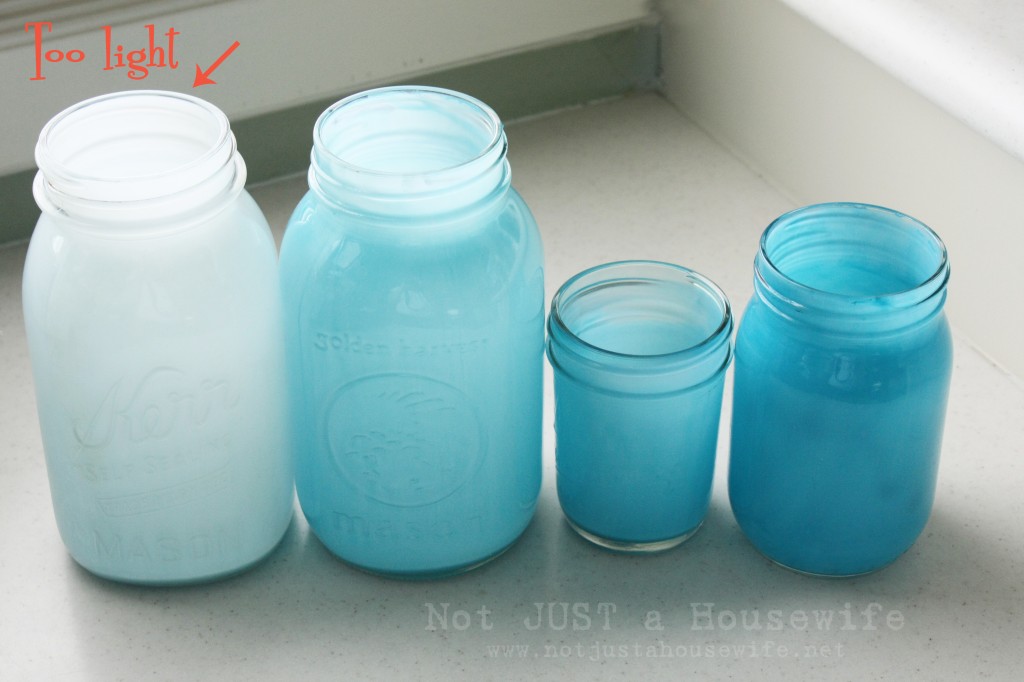
I experimented with different amounts of each the glaze and the paint. The more glaze, the lighter the jar. Add them both to the jar. Swish it around until they have completely mixed together.
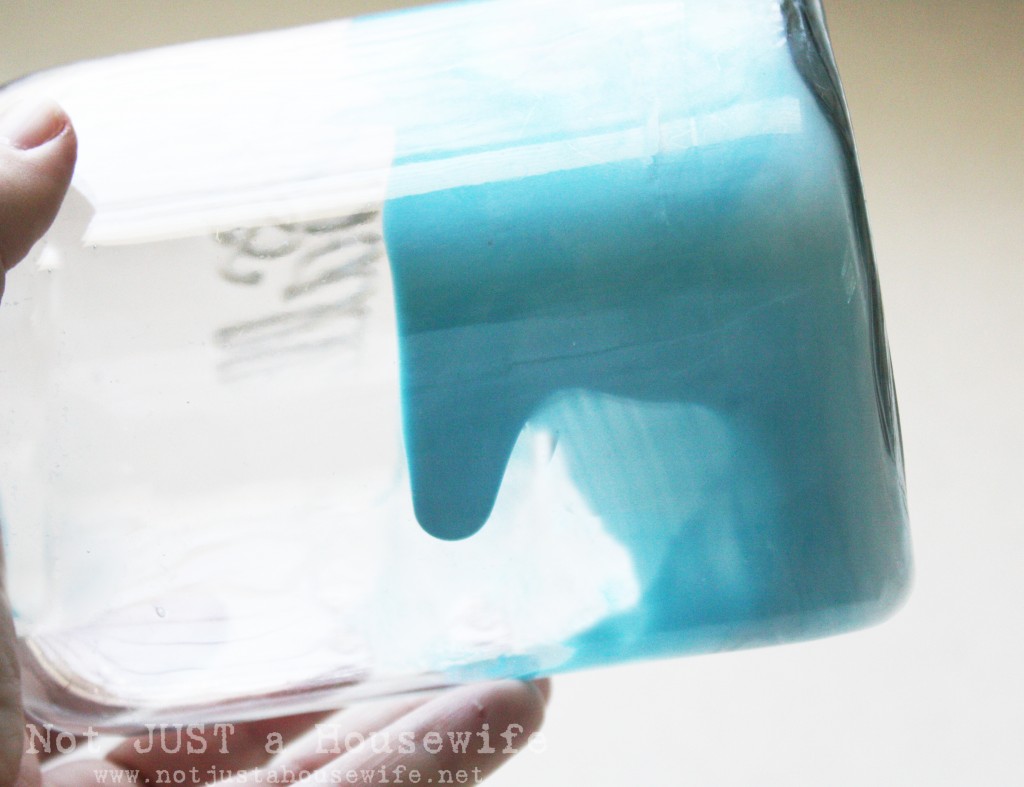
The slowly twist the jar while it is on its side until the paint has covered all of the jar. If there is a lot of extra paint/glaze you can pour it into another jar or into the garbage. I hold it upside down until it stops dripping. Then I wipe the top so there is only paint IN the jar and none on the outside. ***IMPORTANT*** After you have let it drip upside down and most of the extra paint has dripped out you need to set it on the counter and WAIT. You need to let the extra paint that did not drip out, settle to the bottom. I waited about an hour. More time wouldn't hurt. I screwed up my one and only square mason jar ( :( ) because I was too antsy. If you stick it in the oven too soon it will start to get hot and the paint that is making its way down the side of the jar will harden in a wavy, drippy, pattern.
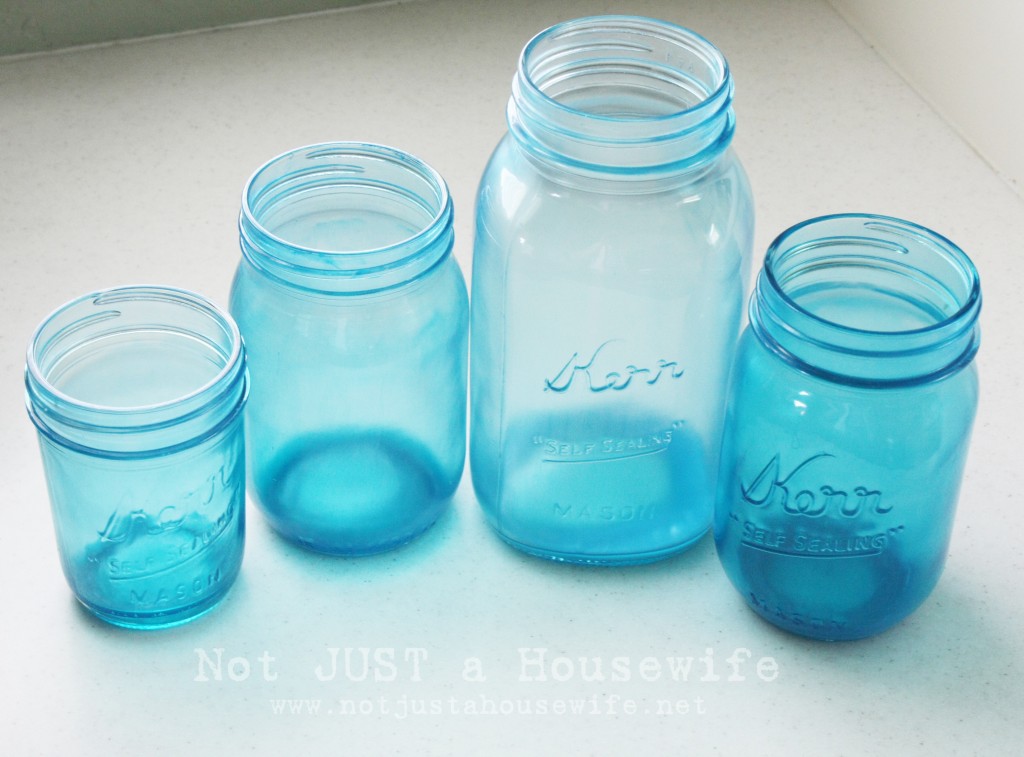
Like I said before, I tried different amounts of glaze and paint. The lightest one ended up not really working. It just looked milky.
The you bake them in the oven at 200 degree F for 30 minutes. There are more (important) detailed instructions on the back of the bottle. Just follow those and you will be good to go!
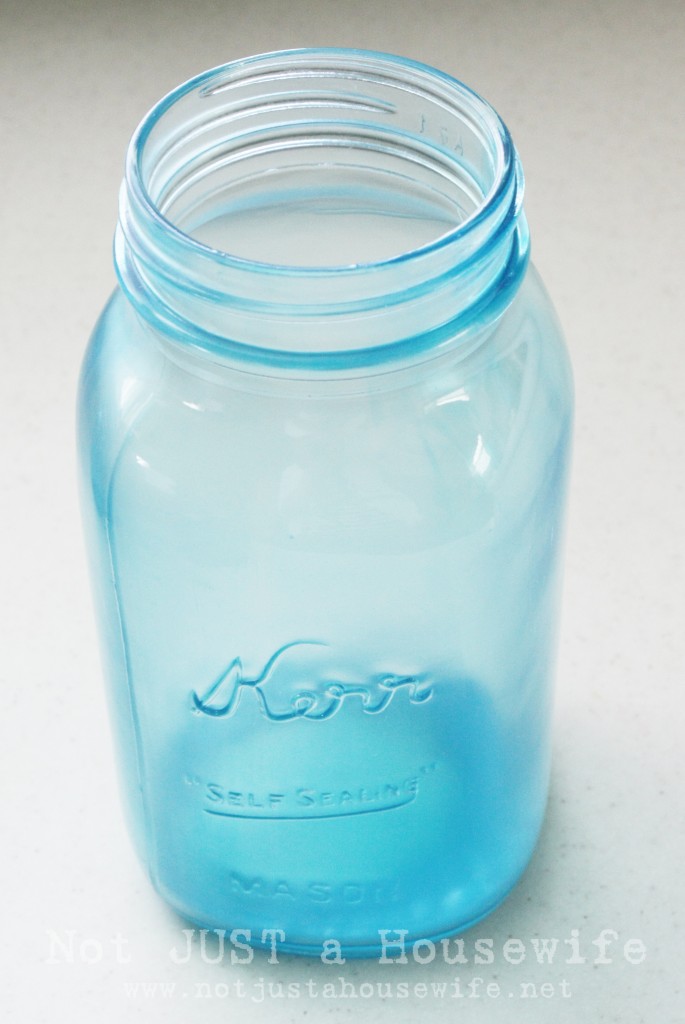 Don't they look amazing! The color is so even and it bakes so crystal clear! I love them. They will be making an appearance in my bathroom and office :)
You will also like:





These are just beautiful! I will be on the look out for extra jars to try this with :)
Wow..who would have though?! I love this idea and love you creative mind! You have the funnest blog ever..I look at it everyday! Thanks for the inspiration to try new things! I did a little project on a dresser(I got for free) It turned out pretty good! The dresser was free so I was thrilled! I wanted to glaze it like I learned from you, but I was a little nervous. If you have time ck it out and tell me what you think!!! Thank you:)
Hi! I was curious after you do all the steps painting the jars blue and baking them in the oven are they ok to use as candle jars?
Sure!
sorry for the misspellings..I get excited!
That is so cool. I'm assuming you could use other colors? Like hot pink?
very cool
What an awesome idea ~ thanks for sharing how to do this!
I pinned it ....just too good not to share. : )
Have been wanting to make my own for our bakery! Pinned this! Thanks so much for sharing :)
That is so pretty! I really must do this
This really caught my eye. Can't wait to share it on my little blog. Looove the blue, but can I do it in a green too? thanks!
This is brilliant! Thanks for sharing!
They turned out great! I pinned this to try!
Love these! They turned out terrific! Thanks for sharing.
Great idea! I always look at those jars in the shops and just can't make myself pay their prices, but this I can do. Thanks for sharing.
If y'all don't mind me asking, how much are the vendors charging? I have found oodles of blue jars at the flea market. By the time I bought these materials and new mason jars, I think I'd be back to the price of the blue/aqua jars. But I could be a lucky gal with a lucky flea market.
You can see my blue jars on the first post at my blog.
FYI, I know this is old but vintage aqua mason jars are SUPER pricey if you don't run across someone who is selling them and doesn't know their value. If you look on ebay, most are going for 10 jars for over $100.
Stacy, these are absolutely adorable!!! They make we want to get my craft "area" (no chance of dedicating a whole room) ready and actually DO STUFF instead of just dream :D. I think they would make beautiful in a beach theme or in a blue garden (which I hope to accomplish next year) - you have a pin it link, I don't yet have that account but I think i'm going to open one NOW ;D - thanks for contributing to my "i'mma make these one day list".
Best, Mercy of MB_WOO.MOM
I love, love blue glass and this is such a great idea! I had no idea you could make it from regular jars - I'll be trying this for sure :) Can't wait to check out the rest of your blog!
These are lovely!! I will definitely be trying this!!
http://photographernaturally.blogspot.com
Come on over and enter my giveaway. Win a $30 Target Gift Card! Ends 9/10
wow, great job! they look like the real things! love it.
i would love for you to come link up this or any other amazing project at my creativity party going on right now!
letbirdzfly.blogspot.com
thanks so much for sharing!
Love, love, love them! I am actually doing some of these for a baby shower coming up and was needing a good tutorial! Thank you!
I posted in July about this but used Elmer's Glue and Food Coloring and painted the outside.
Wow! I have wondered how to do that. Thanks for the letting me know and how to do it. Appreciate it. Love the jars. Karie
I love your blue jars so much! I've been looking for ways to bring color into our apartment. Someone suggested finding colored jars at garage sales but I never ran across any. I do have several regular mason jars though. Thanks for the great idea!
Just out of curiosity... when you get them wet, does the glaze stay on?? Or will it wash away? I've loved the look of the ones that use elmers glue or modge podge, but it washes off... and I want to use the jars as vases and such! Thanks :)
Melissa, I have been wondering the same thing. I would want to use mine for vases as well. Did you ever try it to see if the glaze stays on with water?
I was wondering the same thing as well. Any luck with an answer? I'd like to use them on patio as vases.
I have used mine as vases. They are water proof. But when they are wet for a long time the blue turns opaque. When it dries out again it is clear again. I am thinking it is because of the glaze but I am not sure.
i have a tip to pass along. if you use mod podge dishwasher safe after then you can use them as vases without the worry of the glass coming back off after all the work and wait. hope this helps
Great tutorial. I have been wanting to do this. I want greenish jars. I featured it on my blog tonight.
YAY! I've been wanting to try this for my shabby chic room project. Super excited. Thanks for the great tutorial!!
Kelly @ http://www.livelaughrowe.com
Awesome! What a neat idea - and they look so darn real!!! :)
xoxo laurie
I love this how to post! I can not believe how good they turned out! I too love blue mason jars, so I am going to have to give this a try!
i accidentally bought "americana gloss enamel" not "crystal gloss enamel". will it still work?
mix mod podge dishwasher safe in with your gloss enamels and then it can be used like a clear glaze and even waterproof. hope this helps
So you know if they are safe to use as water glasses once baked? I would LOVE LOVE LOVE to have these in my kitchen!!
this is fantastic.....but i challenge you to take it one step further to increase the versatility of the jar...what if you attached a loop to the lid or punched 2 holes in it and strung a string through to make a loop...then suspended the lidded jar and dunked it into another container where the mixed glaze was waiting...and then hung to dry...then removed lid and place in oven upside down so the glaze doesn't stick to oven rack....that way the interior of the jar is left un-painted and you can add water for a vase, use for food storage.....worth a try!
I purchased the Same glaze you have in the picture. I don't see further instructions for the baking part. What else has to be done besides the 30 min baking?
Thanks.
Absolutely, brilliant... I love them, I love mason jars for everything. so excited to try. "Thank you"
Did anybody ever figure out if you can put water in the jars as I wanted to use them for vases as well for my wedding. Everywhere i looked the kerr and ball blue jars are vintage and about $4-$5 each jar so this is a perfect alternative as clear jars are cheap. Also were there any other instructions after baking as asked above ?Thanks for your help!
Worth a try. I also have used and blogged about the glue and modge podge way of doing this craft. You are not able to put water in the jar, will wash out the color. I do question if this technique is used can you put water in the jar? Please update I am very interested. Great looking project!
I was wondering if these were waterproof, too. The DecoArt website had this to say on their Crystal Gloss Enamel product:
Bake in oven for a durable, dishwasher-safe finish
https://www.decoart.com/Merchant2/merchant.mvc?Screen=PROD&Store_Code=D&Product_Code=DAGT12-3&Category_Code=DAGT
So I guess that means these babies are solid!
Ok, has anyone else actually done this? Cause I followed the directions exactly and it was a disaster! The paint only cleared on one side and on the other was still regular old paint - did not clear at all. We let them drip for an hour before putting them in the oven but the paint still caused quite a thick ring around the rim and was impossible to completely remove. Ughh...waste of lovely jars and time!
Help! Would love to know what we did wrong.
I have been testing this and the first time the color was perfect but didn't let drip enough upside down and had sticky goop at bottom, it caused the glazed baked paint to peel off glass and come out. Second time I left too long upside down and too much came out, washed jars clean. Today I left them upside down about an hour then right side up another hour then baked 60 minutes to help set. Instructions say to cool with oven door open, did that too. One problem I'm having is that putting water in dried, baked and cooled jars causes milky fog to begin then the color just peels off like film. Tonight I'm leaving jars out two days after baking to see if they will set further. I may ask my ceramics friend if there is another mixing medium to use with glass paint to tone color down but that will set solid and can be used with water... If not I am going to mix and paint outside by hand and bake upside down.
@katie there were quite a few acrylic paints that look the same, did you get crystal transparent glass type? I had to use brush and mix glaze and paint thoroughly at bottom of jar before twisting and covering inside.
So I tested a theory and it worked nicely using same glaze and paint, I covered cookie sheet in wax paper, turned jars upside down, mixed glaze and painf in little cheap Tupperware and painted outside with nice sized acrylic paint brush, had to out in oven immediately because allowing dry time will cause streaks. I made sure to paint evenly and not leave thick paint anywhere. Baked at 200 for 30 mins and they are gorgeous. And I can put water inside for wedding flower centrepieces. Might still go find a spray on sealant to ensure outside stays set and sealed :)
Wow... I am so glad I ran across your blog today!! Now I have multiple projects that I HAVE to do!! I am excited about these - thanks so much for sharing!
I saw this on Pinterest (of course) and thought this was a pretty neat idea. So I tried it and used different colors and thought I would use them outside with candles in them. I followed the directions but they did not turn out right. They are not transparent. They are still a solid color. They look neat, but not right. Is there something I am missing? Can anyone help?
it's really good Idea! looks great! but I'm just curious what is going to happen if you use the brush and paint them outside of the jar. Is it safe to use these jars for food do you think? I think heavy painted one looks best!
Thanks for sharing great Idea!
These do look amazing! I have seen so many knock-offs of this project in Blogland. But yours look the best, they are permanent (unlike the ones with Elmer's Glue), and yours have the best quality and look the most like the real blue Mason jars!
Do you know if there is a way to remove the glaze if one wanted too? I have just bought this amazingly shaped glass vase. But it has some glaze on it that is scratched and I would like to try and do the mercury glass painting.
this is my first time here ... and i already love you! You literally saved me money and a headache!
If you're not going to fill them with water, I have an easy, cheap, even kid-friendly way to do this.
Mix gel type school glue (the clear stuff) with a couple drops of food coloring and a little water to thin it. Pour it into the jar, pop on a lid, and roll it around to coat the inside. Take the lid off and pour out the excess, then set upside down on a cooling rack (Dollar Tree sells them 2 for a dollar) to let the rest drain out while it dries. You can put little battery operated tea lights in them or set them in a window. It's really fun to make different colors for holidays. If you use regular white school glue, you get a really cool frosted glass effect too. :)
Can you put a candle in one of these jars? Will
the candle make the paint run or melt?
Can you put these in the,microwave for like,a minute instead of the oven?
Could you drink out of these!
You can also use food colouring mixed with mod podge gloss to get the same effect... and probably cheaper too! But love the way they look :)
Will the paint stay the jars if used outdoors?
I love the idea of glazing jars blue. I have quite a few glass jars sitting in my cupboard, and I know if I put a bit of effort into making them look nice I could use them as decorative vases. I thought it would be difficult, but I just need to go out and get the supplies. I do have a question as to whether it would stay if put through the dishwasher? If I glazed glasses, could I drink from them, would it be safe?
Just out of curiousity, are these waterproof??
Thanks. They look great!
This looks like a wonderful project for several areas of the house, and I love translucent glass colors! No spraying, you can use paper towels for less mess, and get deeper colors by using less coloring! I want a rich amethyst, a blue like hers, a leaf green, and a soft fairy pink and maybe a fuschia, as well. This depends on the colors available, of course! I wonder if they are mixable? (For teals, and aquas, and all sorts of rich lavenders, plums, flags, and purples. I get so tired of trying to find interesting pieces at the store, let alone really useful one! Mason jars are pretty sturdy (just try not to drop them on a bare cement floor!) One for my bathroom, at least two to three for my bedroom, two to three for my kitchen, and a pretty coordinated set for the living room! I could also change the look with decals and gold or silver spray paint, but I'm more of a purist--either unadorned or with just a simple label suits me fine. Love it, love it, love it!
What I let them sit all the excess paint settles in the bottom but then this paint isn’t drying out in the baking process... what did you do about this? I tried very hard to use as little paint as possible but there is still a layer that settles to bottom. I also tried baking for longer... still not working.
Also, wod you be able to wash these after?