• Skip to primary navigation
  • Skip to main content
  • Skip to primary sidebar
  • Skip to footer
Stacy Risenmay
  • Home
  • About me
  • PRESS
  • Contact Me
  • My Book
    • Facebook
    • Instagram
    • Pinterest
    • Twitter
menu icon
go to homepage
subscribe
search icon
Homepage link
  • Home
  • About me
  • Project Gallery
  • Our House
  • PRESS
  • Contact Me
  • Privacy Policy
    • Facebook
    • Instagram
    • Pinterest
    • Twitter
  • ×

    Easiest Way To Paint Walls

    By Stacy 6 Comments

    I am excited to announce that I am doing another room makeover! It is for my nephew and I am thrilled since kid and teen spaces are my favorite to design. After taking photos and measurements, I chatted with my sister and nephew to get an ideas of their wants and needs. I have a plan that I am super excited about and will show you the mood board in this post. I have left the bed off the mood board because I want it to be a surprise! The first order of business was to paint the walls. Today I will also be sharing with you the easiest way to paint walls.

    This post is sponsored by HomeRight and contains affiliate links.

    The Easiest Way To Paint Walls (and Ceilings!)

    Step 1

    Before you buy a whole gallon (or more) of paint, make sure that you like the color in the space by buying sample cans and testing them on the walls. Paint large patches and see which one looks best in the space.

    Step 2

    Tape off the baseboards, ceilings and any door and window trim. Add a tarp to protect the flooring.

    Step 3

    I love to use a paint stick to paint walls and ceilings. I have accidentally kicked and bumped my fair share of paint trays and awkwardly tried to hold them as I climbed up a step ladder. The HomeRight EZ Twist PaintStick makes painting practically mess free! Simply suck up paint into the handle of the paint stick and slowly twist to push paint up into the roller!

    One handle full will paint a large section. No more bending down constantly to wet the roller in the paint. No more drips. No more moving the paint tray around with you praying you won't spill it.

    I like to use a foam brush to paint along the baseboards and ceiling where the roller doesn't reach.

    EZ Twist Paint Stick

    Step 4

    Before the paint fully dries, remove the painter's tape at a 45 degree angle. Clean up any tarps and the used tape and you are ready to move furniture back in place!

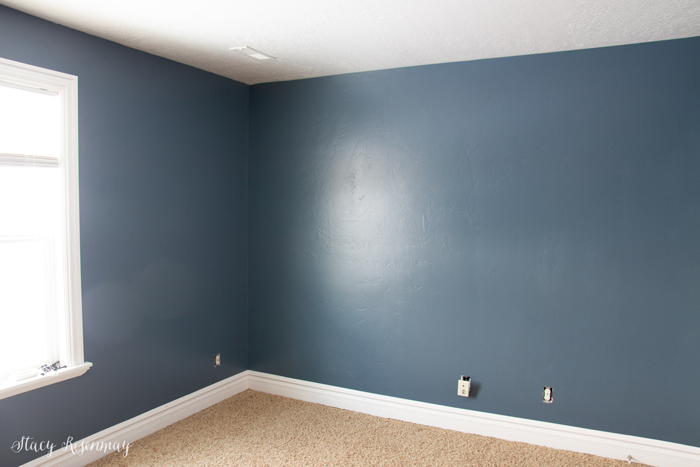
    I went with the color called NYPD by Behr. It felt more grown up than the lighter blue and wasn't too dark. It is the perfect backdrop for his soon to be new space!

    I will be sharing the reveal of his room after the holidays.

    Here is the vibe and some of the ideas I am hoping to bring to the space. He lives for baseball and loves other sports as well. I wanted to reflect that without having it be too "themey".  I am so excited to share the finished room next month!

    Gray blinds  *  Plaid Blanket  *  Laundry Basket  

    Some of the other boy rooms I have designed are the vintage green boy room, mountain room, and modern music room.

    PIN For Later:

    The Easiest Way To Paint Walls! #painting #DIY #Paintstick #paint #behrNYPD #blue #paintingwalls #paintingtips

    You will also like:

    • Pulling Things Together {Coral & Gray Teen Room}Pulling Things Together {Coral & Gray Teen Room}
    • Tips For Painting DoorsTips For Painting Doors
    • Tips for Painting Kitchen CabinetsTips for Painting Kitchen Cabinets
    • Garage Door MakeoverGarage Door Makeover
    • Gray Paint for Kitchen Cabinets {Help Me Decide!}Gray Paint for Kitchen Cabinets {Help Me Decide!}
    • L Shaped Kid Beds with StorageL Shaped Kid Beds with Storage
    • Fireplace MakeoverFireplace Makeover
    • The Easiest Way To Paint Closet ShelvesThe Easiest Way To Paint Closet Shelves

    « Reusable Wood Gift Tags
    Terrarium Ornaments »

    Filed Under: DIY & Tutorials 6 Comments

    Subscribe

    for your weekly DIY fix.

    Reader Interactions

    Comments

    1. grace

      December 18, 2019 at 8:39 am

      Hi Stacy, thank you for sharing this. We are about to repaint several rooms in our house. Questions tho (maybe you could help us) - 2 of the walls in our rooms are dark and we want to paint it lighter colors. I have seen that Behr now carry interior paint-and-primer-in-one, we haven't try them and thinking maybe this is the way to go. Don't want to cover our old walls with too many paints :-) Thank you!!!

      Reply
      • Stacy

        December 18, 2019 at 5:10 pm

        I love the Behr paint that has the primer mixed in! It is thick and has great coverage. While it does not guarantee that you won't need a second coat, you will have less touch ups for sure!

        Reply
    2. Lisa Smith

      December 18, 2019 at 8:58 am

      I've got a question for you....do you use the roller all the way to your tape on the top and bottom of the wall? Or do you use a brush to "cut" in?

      Reply
      • Stacy

        December 18, 2019 at 5:13 pm

        It depends. If there isn't much of a color change and i I put two layers of painter's tape (side by side so it is wider) then I turn the roller sideways and run it along the ceiling. But most of the time I use a foam brush to get the thin area right next to the ceiling and baseboard. I use to not tape and just cut in with a brush, but you get such a cleaner, more even line along the ceiling and baseboard if you use tape.

        Reply
    3. Brooke Walters

      December 04, 2022 at 7:53 pm

      I love that blind you have posted! Do
      You have a link for it by chance?
      Thanks!

      Reply
      • Stacy

        December 07, 2022 at 9:25 am

        I added the link for it to the post :)

        Reply

    Comment Below! Cancel reply

    Your email address will not be published. Required fields are marked *

    This site uses Akismet to reduce spam. Learn how your comment data is processed.

    Primary Sidebar

    stacyHey! I'm Stacy and am a DIY addict. I love to get my hands dirty, whether it's sawdust, paint, or dirt. My goal is to help YOU learn to fix up your home and yard. No matter the style or size, I think everyone should love their home. And it doesn't takes a big budget to get there. Let's DIY together!

    Subscribe to My Blog!

    Search this site

    categories


    Subscribe

    Footer

    Welcome! I'm sharing our adventures as we fix up our 1938 cottage. Whether it is big or small, I think everyone should love their home and I don't think it takes a lot of money to make a space your own

    About Stacy

    • Facebook
    • Instagram
    • Pinterest
    • Twitter

    My Favorites

    copyright

    All images and content are copyrighted via Stacy Risenmay unless otherwise stated. If you'd like to share my work, please link back to this blog.
    Thank you for visiting!


    Footer

    ↑ back to top

    About

    • Meet Stacy
    • Privacy Policy
    • Contact

    Categories 

    • Home Decor
    • Outdoor Projects & Gardening
    • DIY & Tutorials
    • Kid Activities
    • Recipes
    • Travel
    • Cleaning
    • Houseplants
    • Staining
    • Painting
    • Power Tools
    • Holiday Ideas

    Newsletter

    • Sign Up! for emails and updates

    As an Amazon Associate I earn from qualifying purchases.

    Copyright © 2020 Brunch Pro on the Brunch Pro Theme


    Privacy Policy
    Welcome! Thanks for visiting.
    Hi! I'm Stacy and I want to help YOU become a DIY rockstar! Sign up for my email list so each project, tip, and trick will go directly to your inbox :)
    Your information will *never* be shared or sold to a 3rd party. Pinky promise :)
    Welcome!
    Hi! I'm Stacy and I blog about fixing up our 1938 cottage. Join the thousand of others who get my posts sent to their inbox for FREE!
    Your information will *never* be shared or sold to a 3rd party.