• Skip to primary navigation
  • Skip to main content
  • Skip to primary sidebar
  • Skip to footer
Stacy Risenmay
  • Home
  • About me
  • PRESS
  • Contact Me
  • My Book
    • Facebook
    • Instagram
    • Pinterest
    • Twitter
menu icon
go to homepage
subscribe
search icon
Homepage link
  • Home
  • About me
  • Project Gallery
  • Our House
  • PRESS
  • Contact Me
  • Privacy Policy
    • Facebook
    • Instagram
    • Pinterest
    • Twitter
  • ×

    DIY Floating Bathroom Shelves

    By Stacy 9 Comments

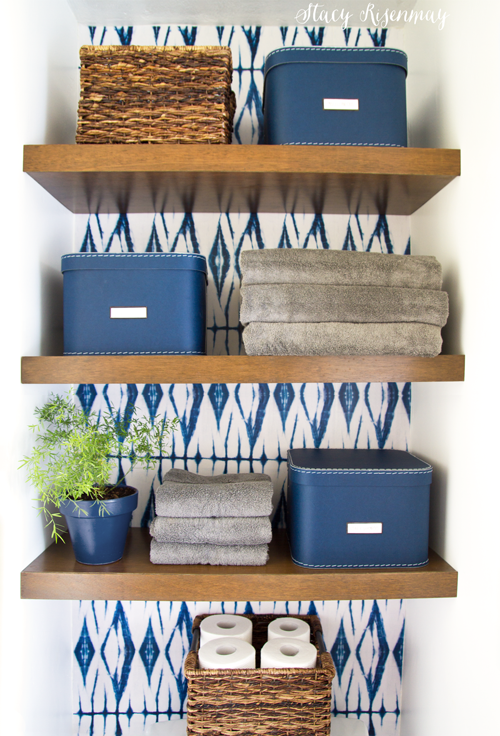
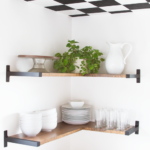
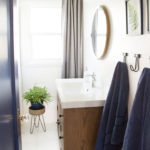
    YOU GUYS!!! I finally have a bathroom update! Actually, I just finished the whole bathroom after waiting, and waiting for the last thing to arrive. That is a story in and of itself, but the important thing is, it is done! Today I am sharing how I built these DIY floating bathroom shelves above the toilet. This post is sponsored by Minwax :)


    I built these shelves the same way I built the shelves for my friends laundry room. I used plywood for the outer part. Normally I would build the shelves and then stain them but this time, after cutting the pieces for the shelves, I stained them first before assembling them. I was worried about getting stain or polyurethane on the gorgeous wallpaper. Unlike with painted walls, I would not be able to do any touch ups.

    I used one of my favorite go to stains, Provincial, by Minwax.


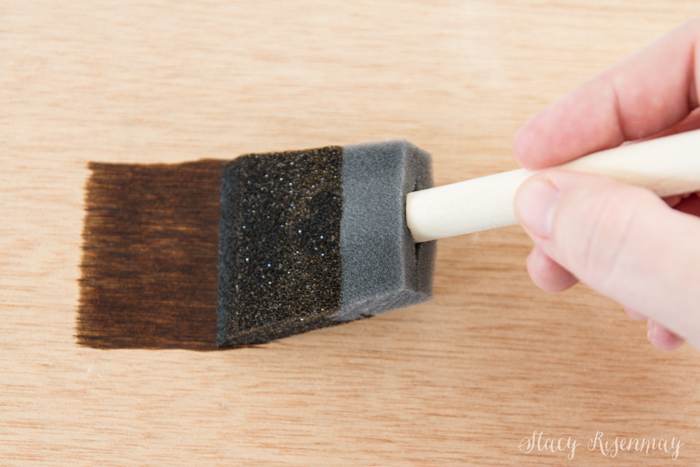
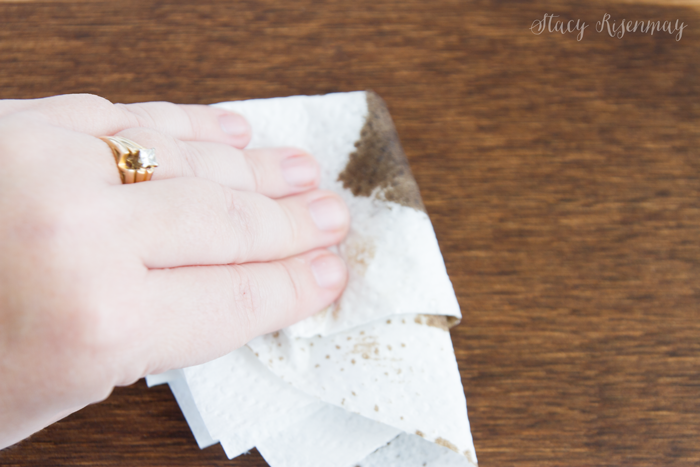
    Once I wiped on the stain and let it sit for a bit, I used paper towels to wipe off the excess.


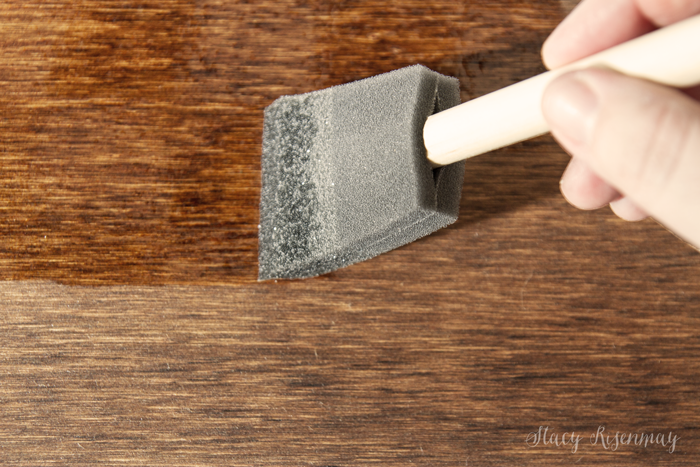
    Once the stain had dried, I sealed it with two coats of satin polyurethane. I sanded in between coats with 220 grit sandpaper.


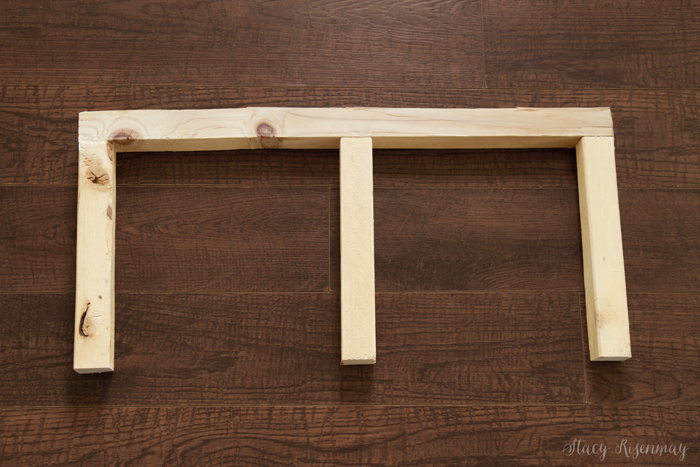
    Since these shelves were on the small side, I used 2x2s instead of 2x4s to build the support frame. Once it was screwed together, I attached it to the wall making sure to screw into studs. The pieces of plywood were then attached to the top, bottom, and front with a brad nailer.


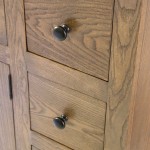
    Normally I use stainable wood putty but since I had already stained and sealed the wood, I used this wood putty.


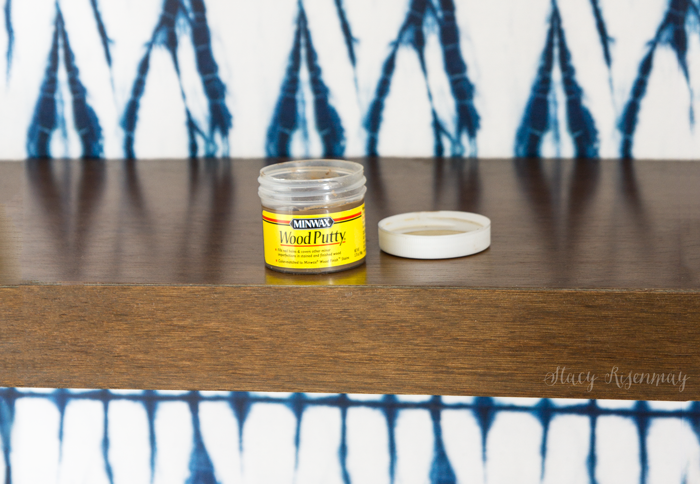
    Look closely. Along the front of the drawer under the jar of putty is a hole that was filled. It is hard to see since the putty blends in so well!


    Choose a color that is close to the stain color. It is soft and waxy and goes into the nail hole easily. I used an old rag to buff off the excess. You can't even tell there were nail holes!


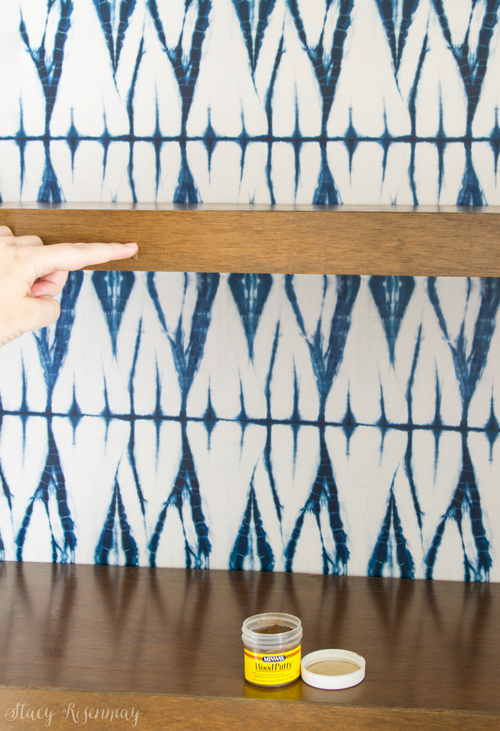
    You don't have to wait for the putty to dry. Once the holes were filled I was able to fill the shelves up!


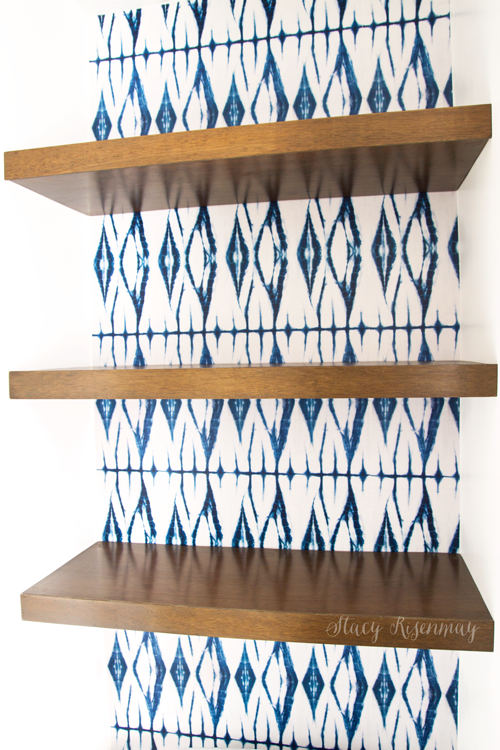
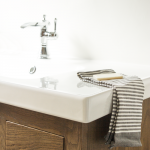
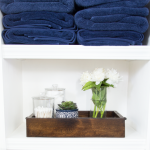
    I love how the towels, baskets, and bins look against the wallpaper! You can read about the wallpaper installation and where I bought it in this bathroom post.


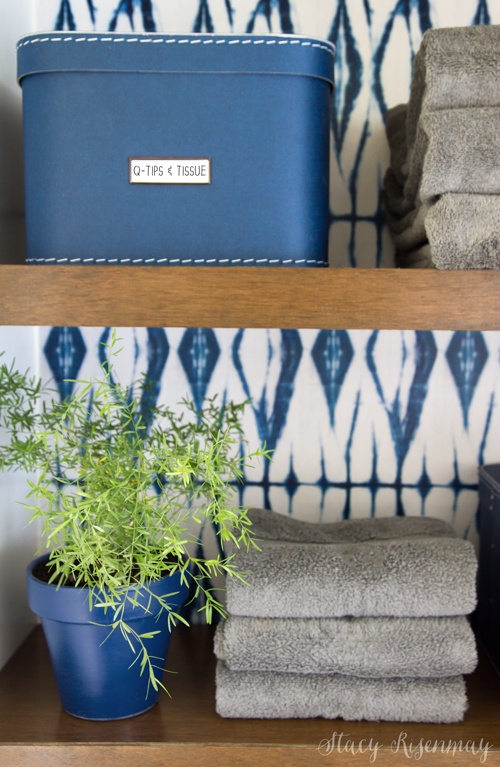
    I'll be photographing the rest of the bathroom to share this week. I am SO HAPPY with how it turned out, even if it took forever to finally get there.


    Pin for later:


    This post was sponsored by Minwax but all the ideas and opinions are all mine.

    You will also like:

    • Open Shelves In The KitchenOpen Shelves In The Kitchen
    • Upstairs Bathroom: Part 1Upstairs Bathroom: Part 1
    • Round Sliding Bathroom MirrorRound Sliding Bathroom Mirror
    • Blue and White Bathroom MakeoverBlue and White Bathroom Makeover
    • Laundry Room Makeover!Laundry Room Makeover!
    • DIY Bathroom VanityDIY Bathroom Vanity
    • Upstairs Bathroom Renovation: One Step CloserUpstairs Bathroom Renovation: One Step Closer
    • Downstairs Bathroom RefreshDownstairs Bathroom Refresh

    « Crushing On: Concrete
    Warming Up The Kitchen »

    Filed Under: DIY & Tutorials, Favorites, Home Decor, Power Tools, Staining 9 Comments

    Subscribe

    for your weekly DIY fix.

    Reader Interactions

    Comments

    1. Melissa Willbanks

      October 24, 2017 at 9:16 am

      Very cute!

      Reply
    2. Shannon Fox

      October 24, 2017 at 1:16 pm

      These are so pretty, and the perfect compliment to that wallpaper!!
      Love the stain color & the styling!!

      Reply
    3. Debi

      October 24, 2017 at 5:45 pm

      Love the wallpaper and shelves. do you know who makes the wallpaper?

      Reply
      • Stacy

        October 24, 2017 at 9:42 pm

        The wallpaper is from a company called Milton & King. I have a link to the wallpaper in this post: https://www.notjustahousewife.net/2017/05/upstairs-bathroom-renovation-part-2.html

        Reply
    4. Danita

      October 24, 2017 at 8:09 pm

      So organized and beautiful! I love it!!! Great job, Stacy!!!

      Reply
    5. Amy Anderson

      October 24, 2017 at 8:32 pm

      That stain is such a beautiful color. Gorgeous!!

      Reply
    6. cmt

      October 24, 2017 at 8:57 pm

      Love the shelves, the wallpaper and the whole arrangement. Really beautiful!! What hole? Seriously. Impressive product. Would be great asset for so many projects that get stained.

      Reply
      • Stacy

        October 24, 2017 at 9:42 pm

        It was my first time using that putty and I was so impressed!

        Reply
    7. Jenny

      July 01, 2018 at 5:14 pm

      Hi,
      I am writing for a unusual request. Do you have extra of your Shibori Diamonds wall paper that you want to sell? I have a small section of my kitchen (22x88) that I'd love to accent with this amazing wallpaper. I have to buy a full role otherwise, not quite in my budget.

      Reply

    Comment Below! Cancel reply

    Your email address will not be published. Required fields are marked *

    This site uses Akismet to reduce spam. Learn how your comment data is processed.

    Primary Sidebar

    stacyHey! I'm Stacy and am a DIY addict. I love to get my hands dirty, whether it's sawdust, paint, or dirt. My goal is to help YOU learn to fix up your home and yard. No matter the style or size, I think everyone should love their home. And it doesn't takes a big budget to get there. Let's DIY together!

    Subscribe to My Blog!

    Search this site

    categories


    Subscribe

    Footer

    Welcome! I'm sharing our adventures as we fix up our 1938 cottage. Whether it is big or small, I think everyone should love their home and I don't think it takes a lot of money to make a space your own

    About Stacy

    • Facebook
    • Instagram
    • Pinterest
    • Twitter

    My Favorites

    copyright

    All images and content are copyrighted via Stacy Risenmay unless otherwise stated. If you'd like to share my work, please link back to this blog.
    Thank you for visiting!


    Footer

    ↑ back to top

    About

    • Meet Stacy
    • Privacy Policy
    • Contact

    Categories 

    • Home Decor
    • Outdoor Projects & Gardening
    • DIY & Tutorials
    • Kid Activities
    • Recipes
    • Travel
    • Cleaning
    • Houseplants
    • Staining
    • Painting
    • Power Tools
    • Holiday Ideas

    Newsletter

    • Sign Up! for emails and updates

    As an Amazon Associate I earn from qualifying purchases.

    Copyright © 2020 Brunch Pro on the Brunch Pro Theme


    Privacy Policy
    Welcome! Thanks for visiting.
    Hi! I'm Stacy and I want to help YOU become a DIY rockstar! Sign up for my email list so each project, tip, and trick will go directly to your inbox :)
    Your information will *never* be shared or sold to a 3rd party. Pinky promise :)
    Welcome!
    Hi! I'm Stacy and I blog about fixing up our 1938 cottage. Join the thousand of others who get my posts sent to their inbox for FREE!
    Your information will *never* be shared or sold to a 3rd party.