
We are probably the most un-tech savvy family ever. Everything we have is old. I just got my first cell phone a year and a half ago. And we still have a land line. So it was big deal for us to upgrade and get a new computer!
Our computer was almost 10 years old which in computer years is like 12,587. Sheesh! No wonder why it didn't work. My hubby and are were not super picky but we definitely wanted something with a lot of storage. Between taking pictures of my 4 kids to the blogging pics, I need STORAGE baby :) We got an HP and I am still trying to get used to Window 8 though. Please tell me it grows on you!
So our new computer was going to need a home.....
When I finished my office over a year ago, the plan was to turn our old armoire into a computer hutch. Yeah...... It has sat there this whole time, almost empty. Why are the little, easy projects the ones I always put off? Getting the new computer was a much needed kick in the pants to get this project done.
This armoire was the very first piece of furniture my husband and I bought together. We had been married for a month. We used it for clothes since our tiny apartments had tiny closets.
Ever since we moved to this home (about 6 years ago) it has been kind of useless. It held random things. So I am happy to have it actually functioning now!
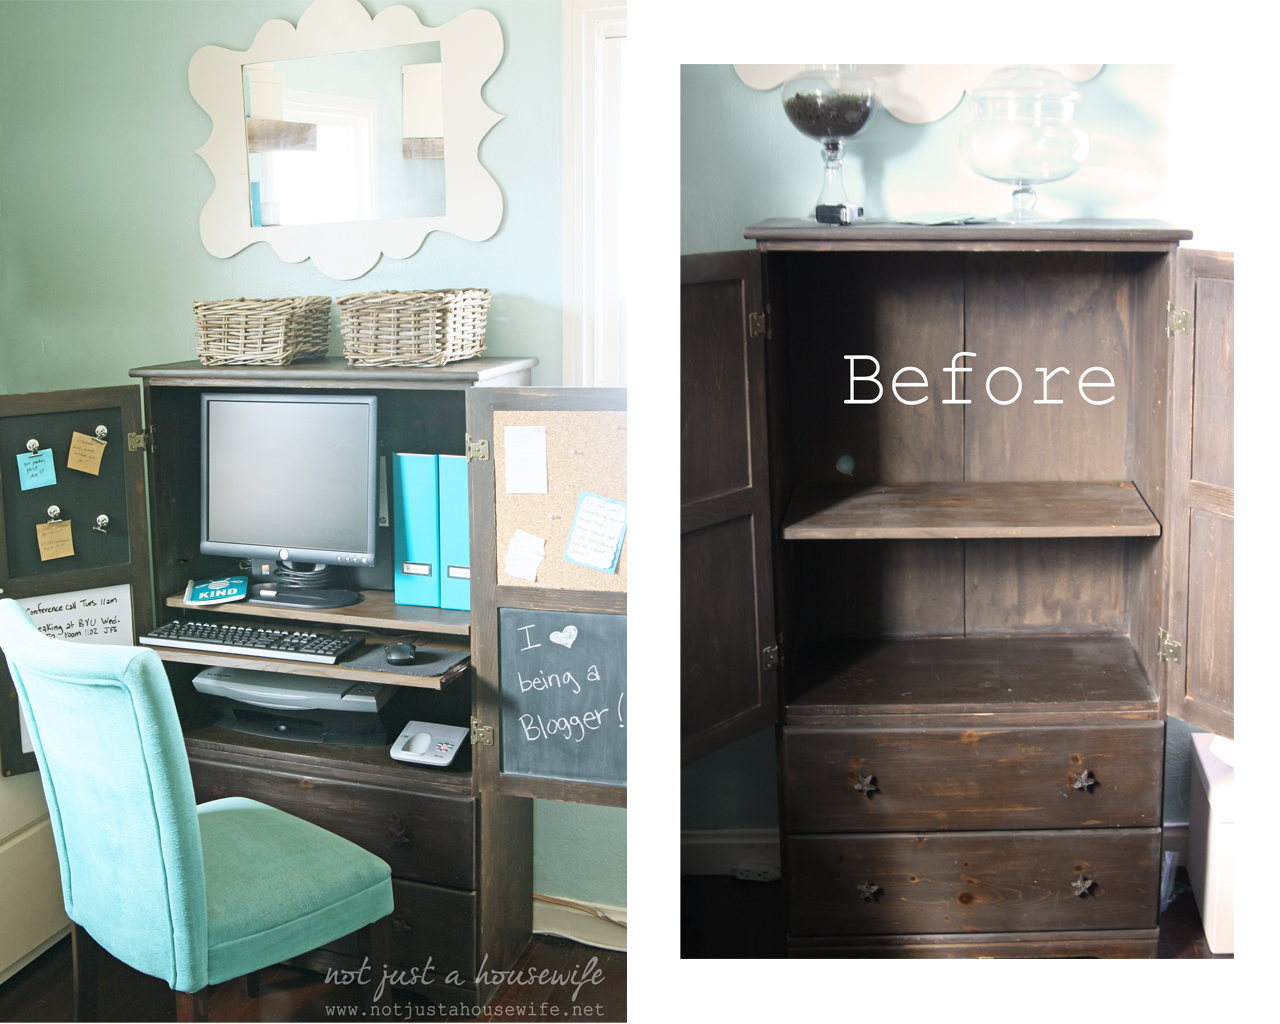
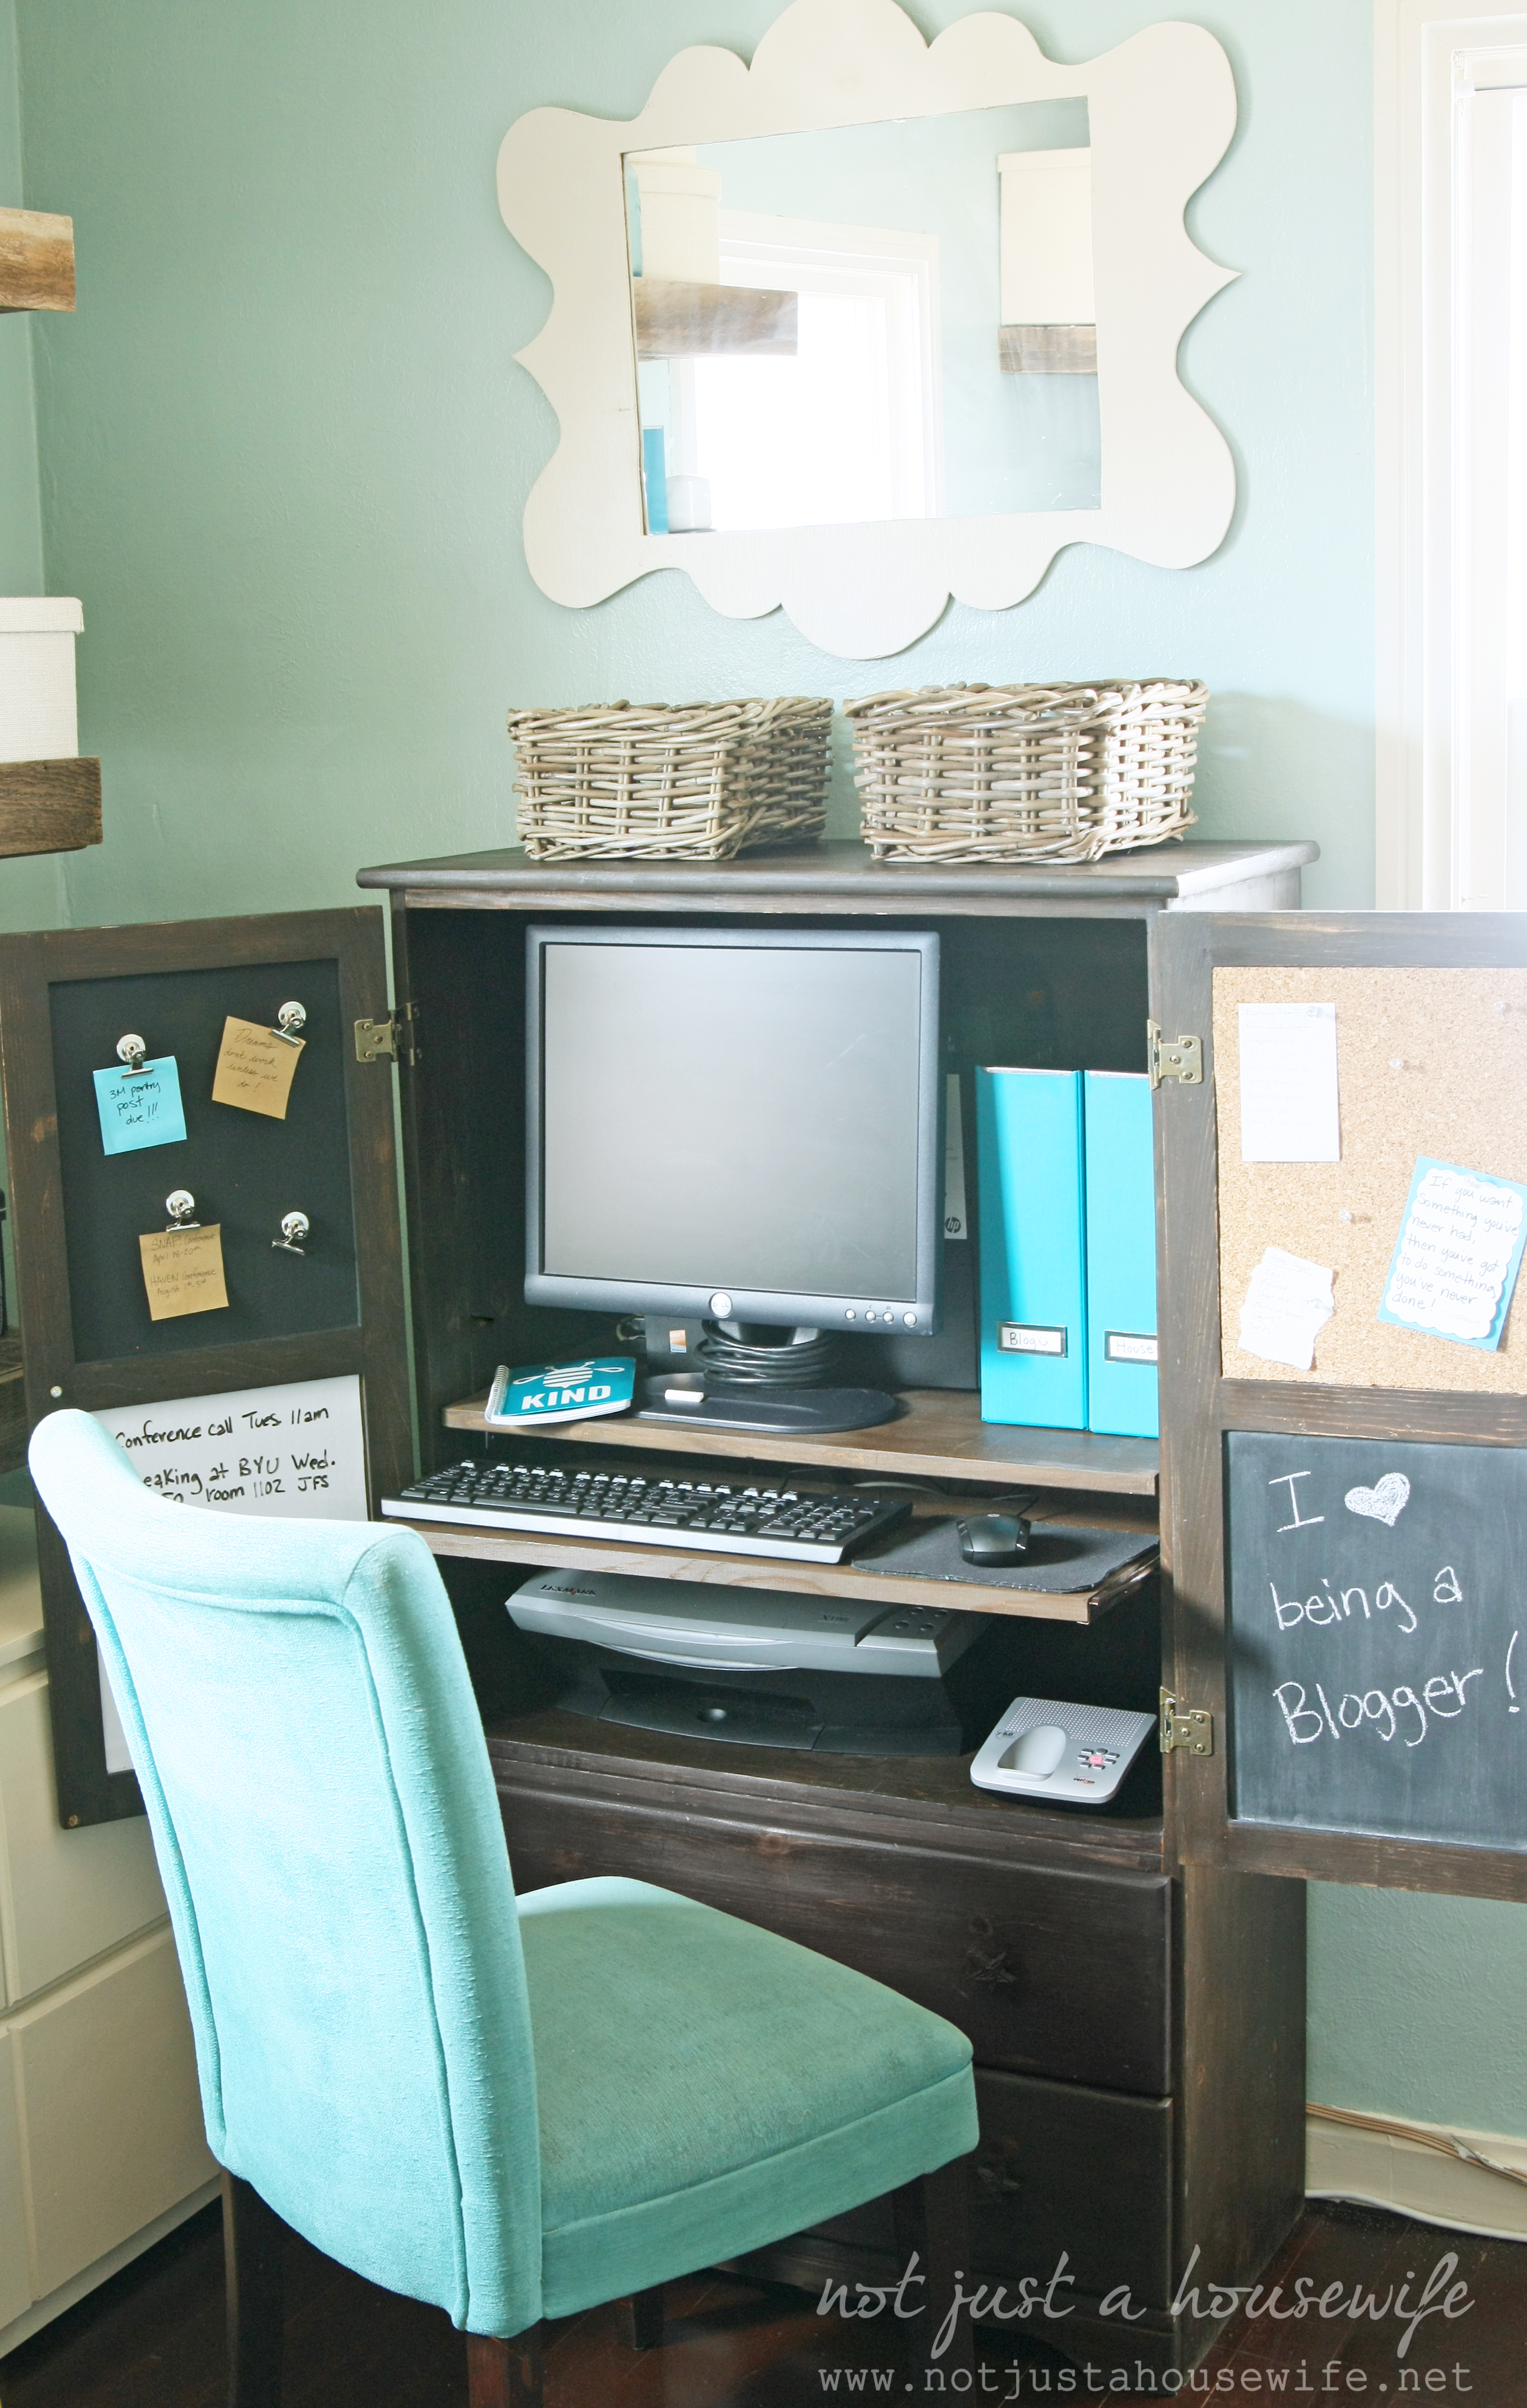
The only thing I really had to do was add a sliding shelf for the keyboard and cut a hole in the back for cords. Easy, right?
I cut a 1"x12" board to the right width, stained it to match, and added drawer slides to the sides. The drawer slides are about a ½ inch each so I subtracted an inch from the width of the inside of the hutch to figure out the width of the board.
One easy change and it has a whole new function!
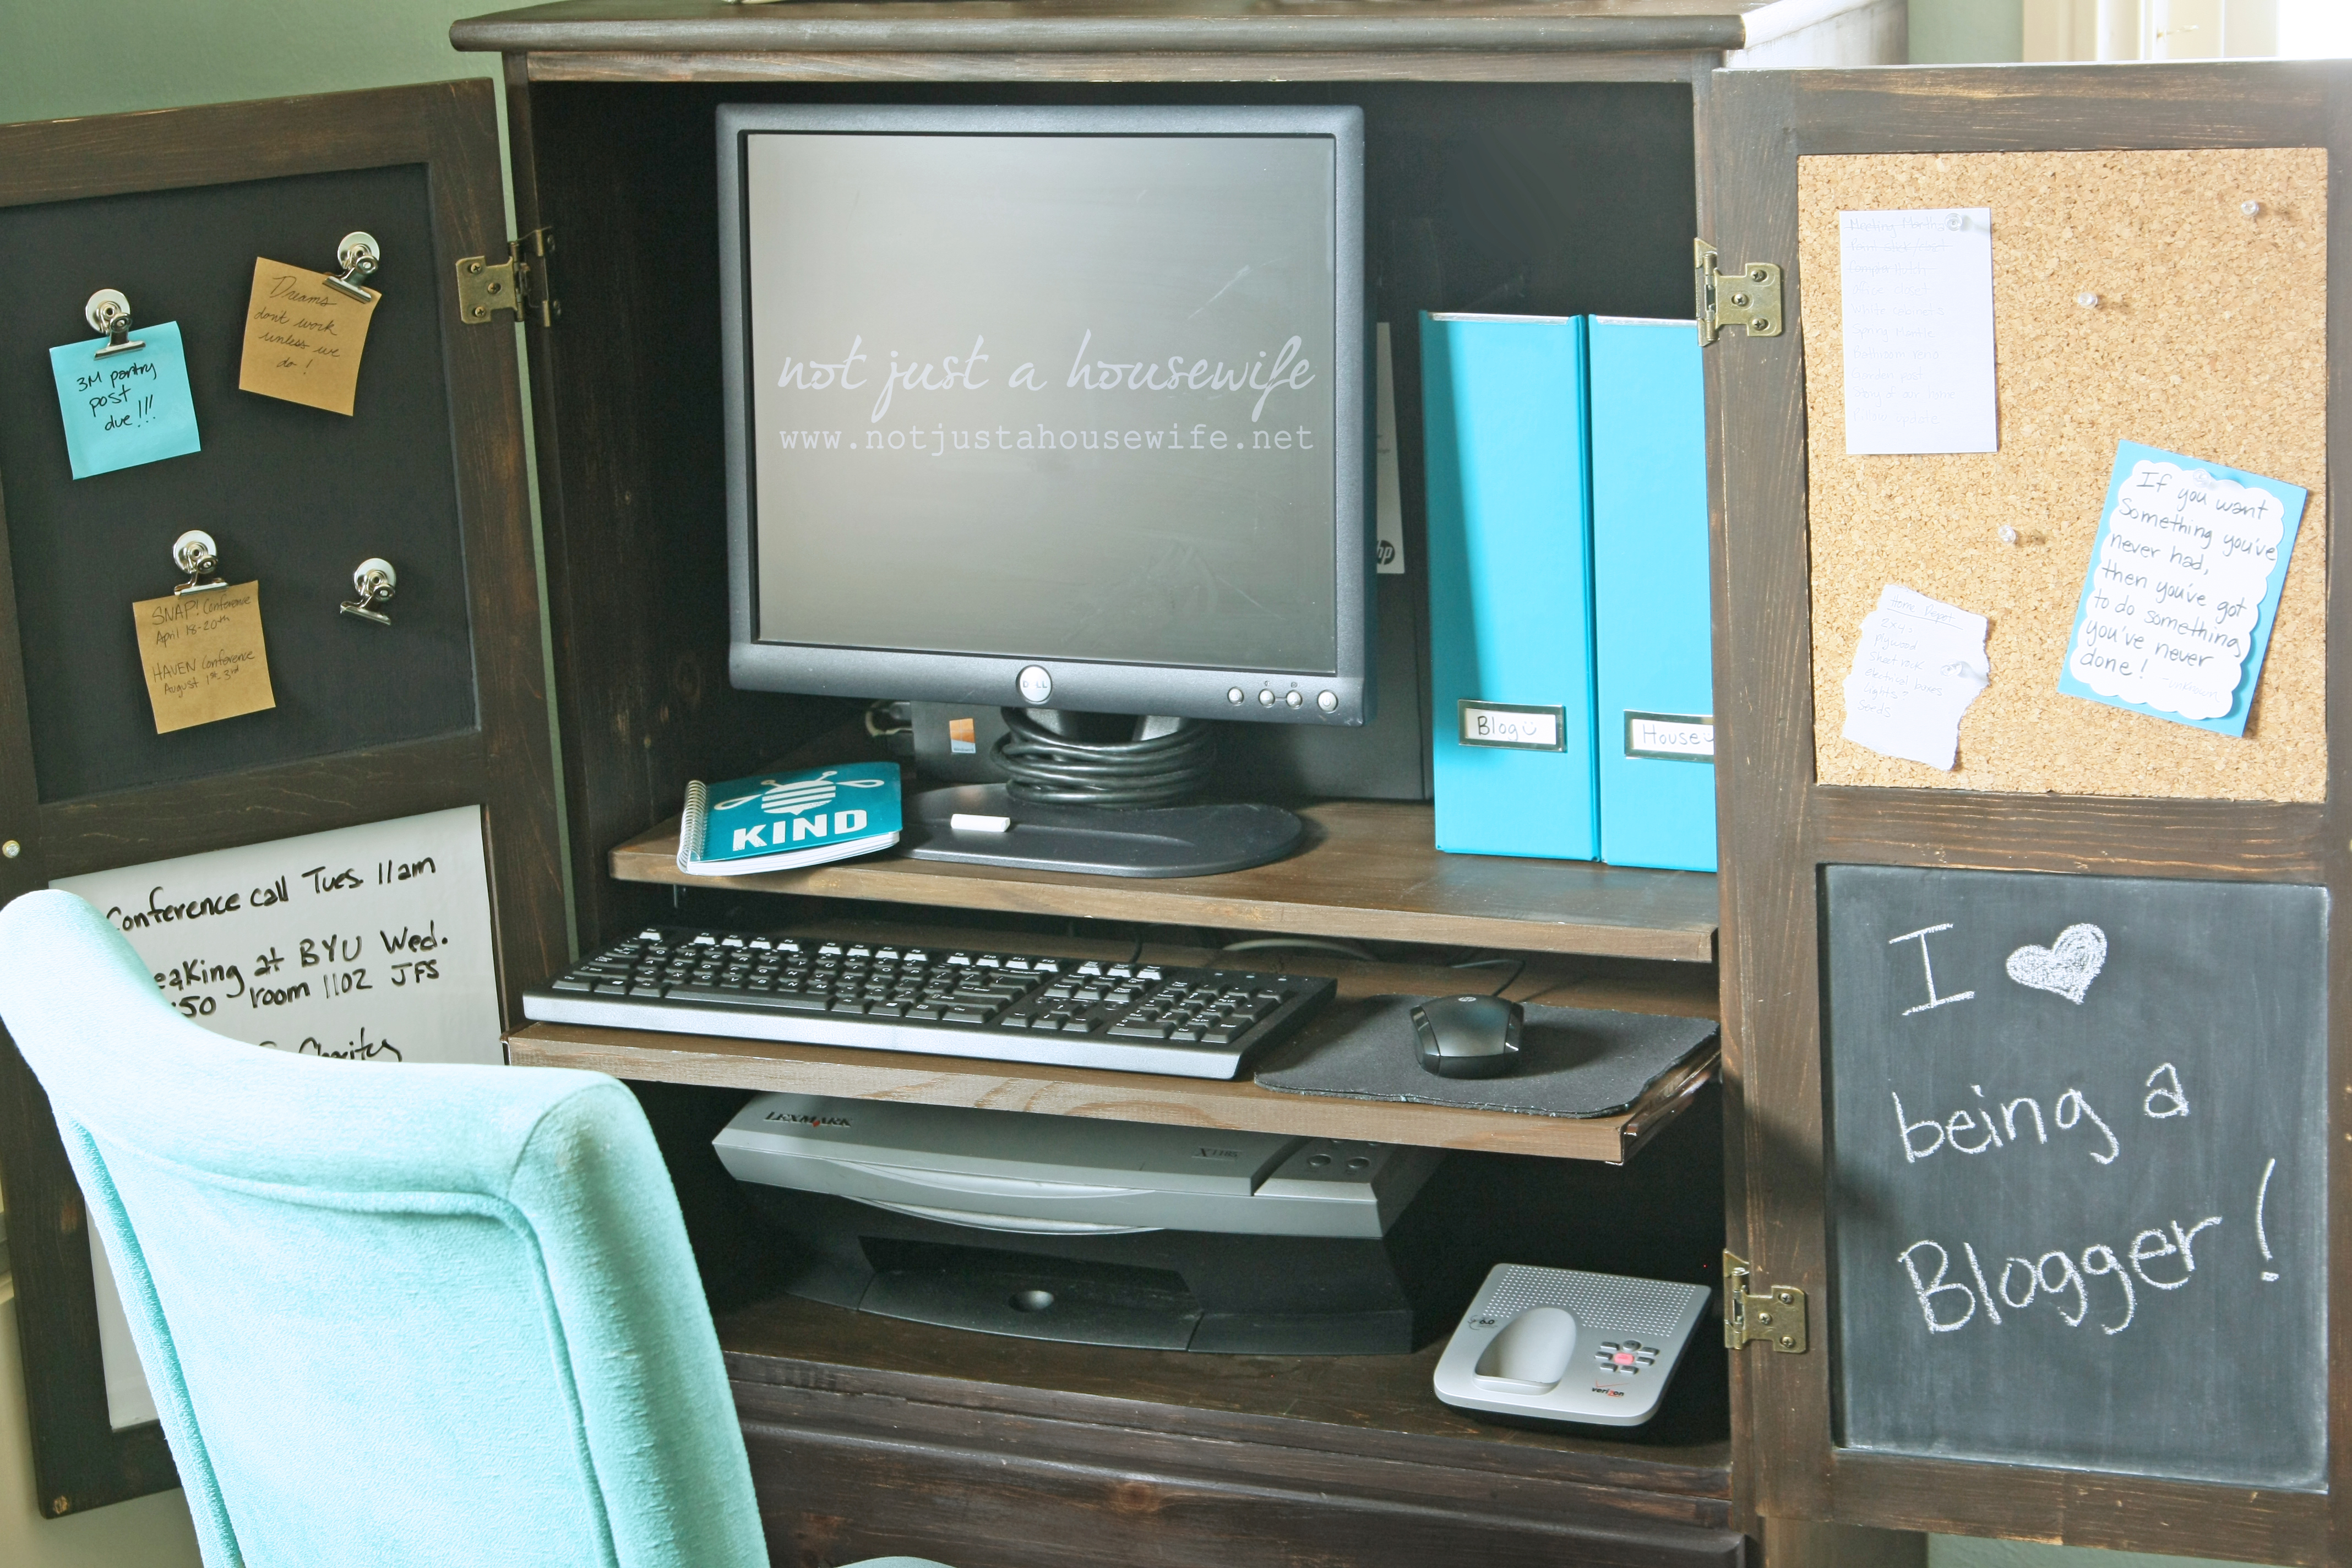
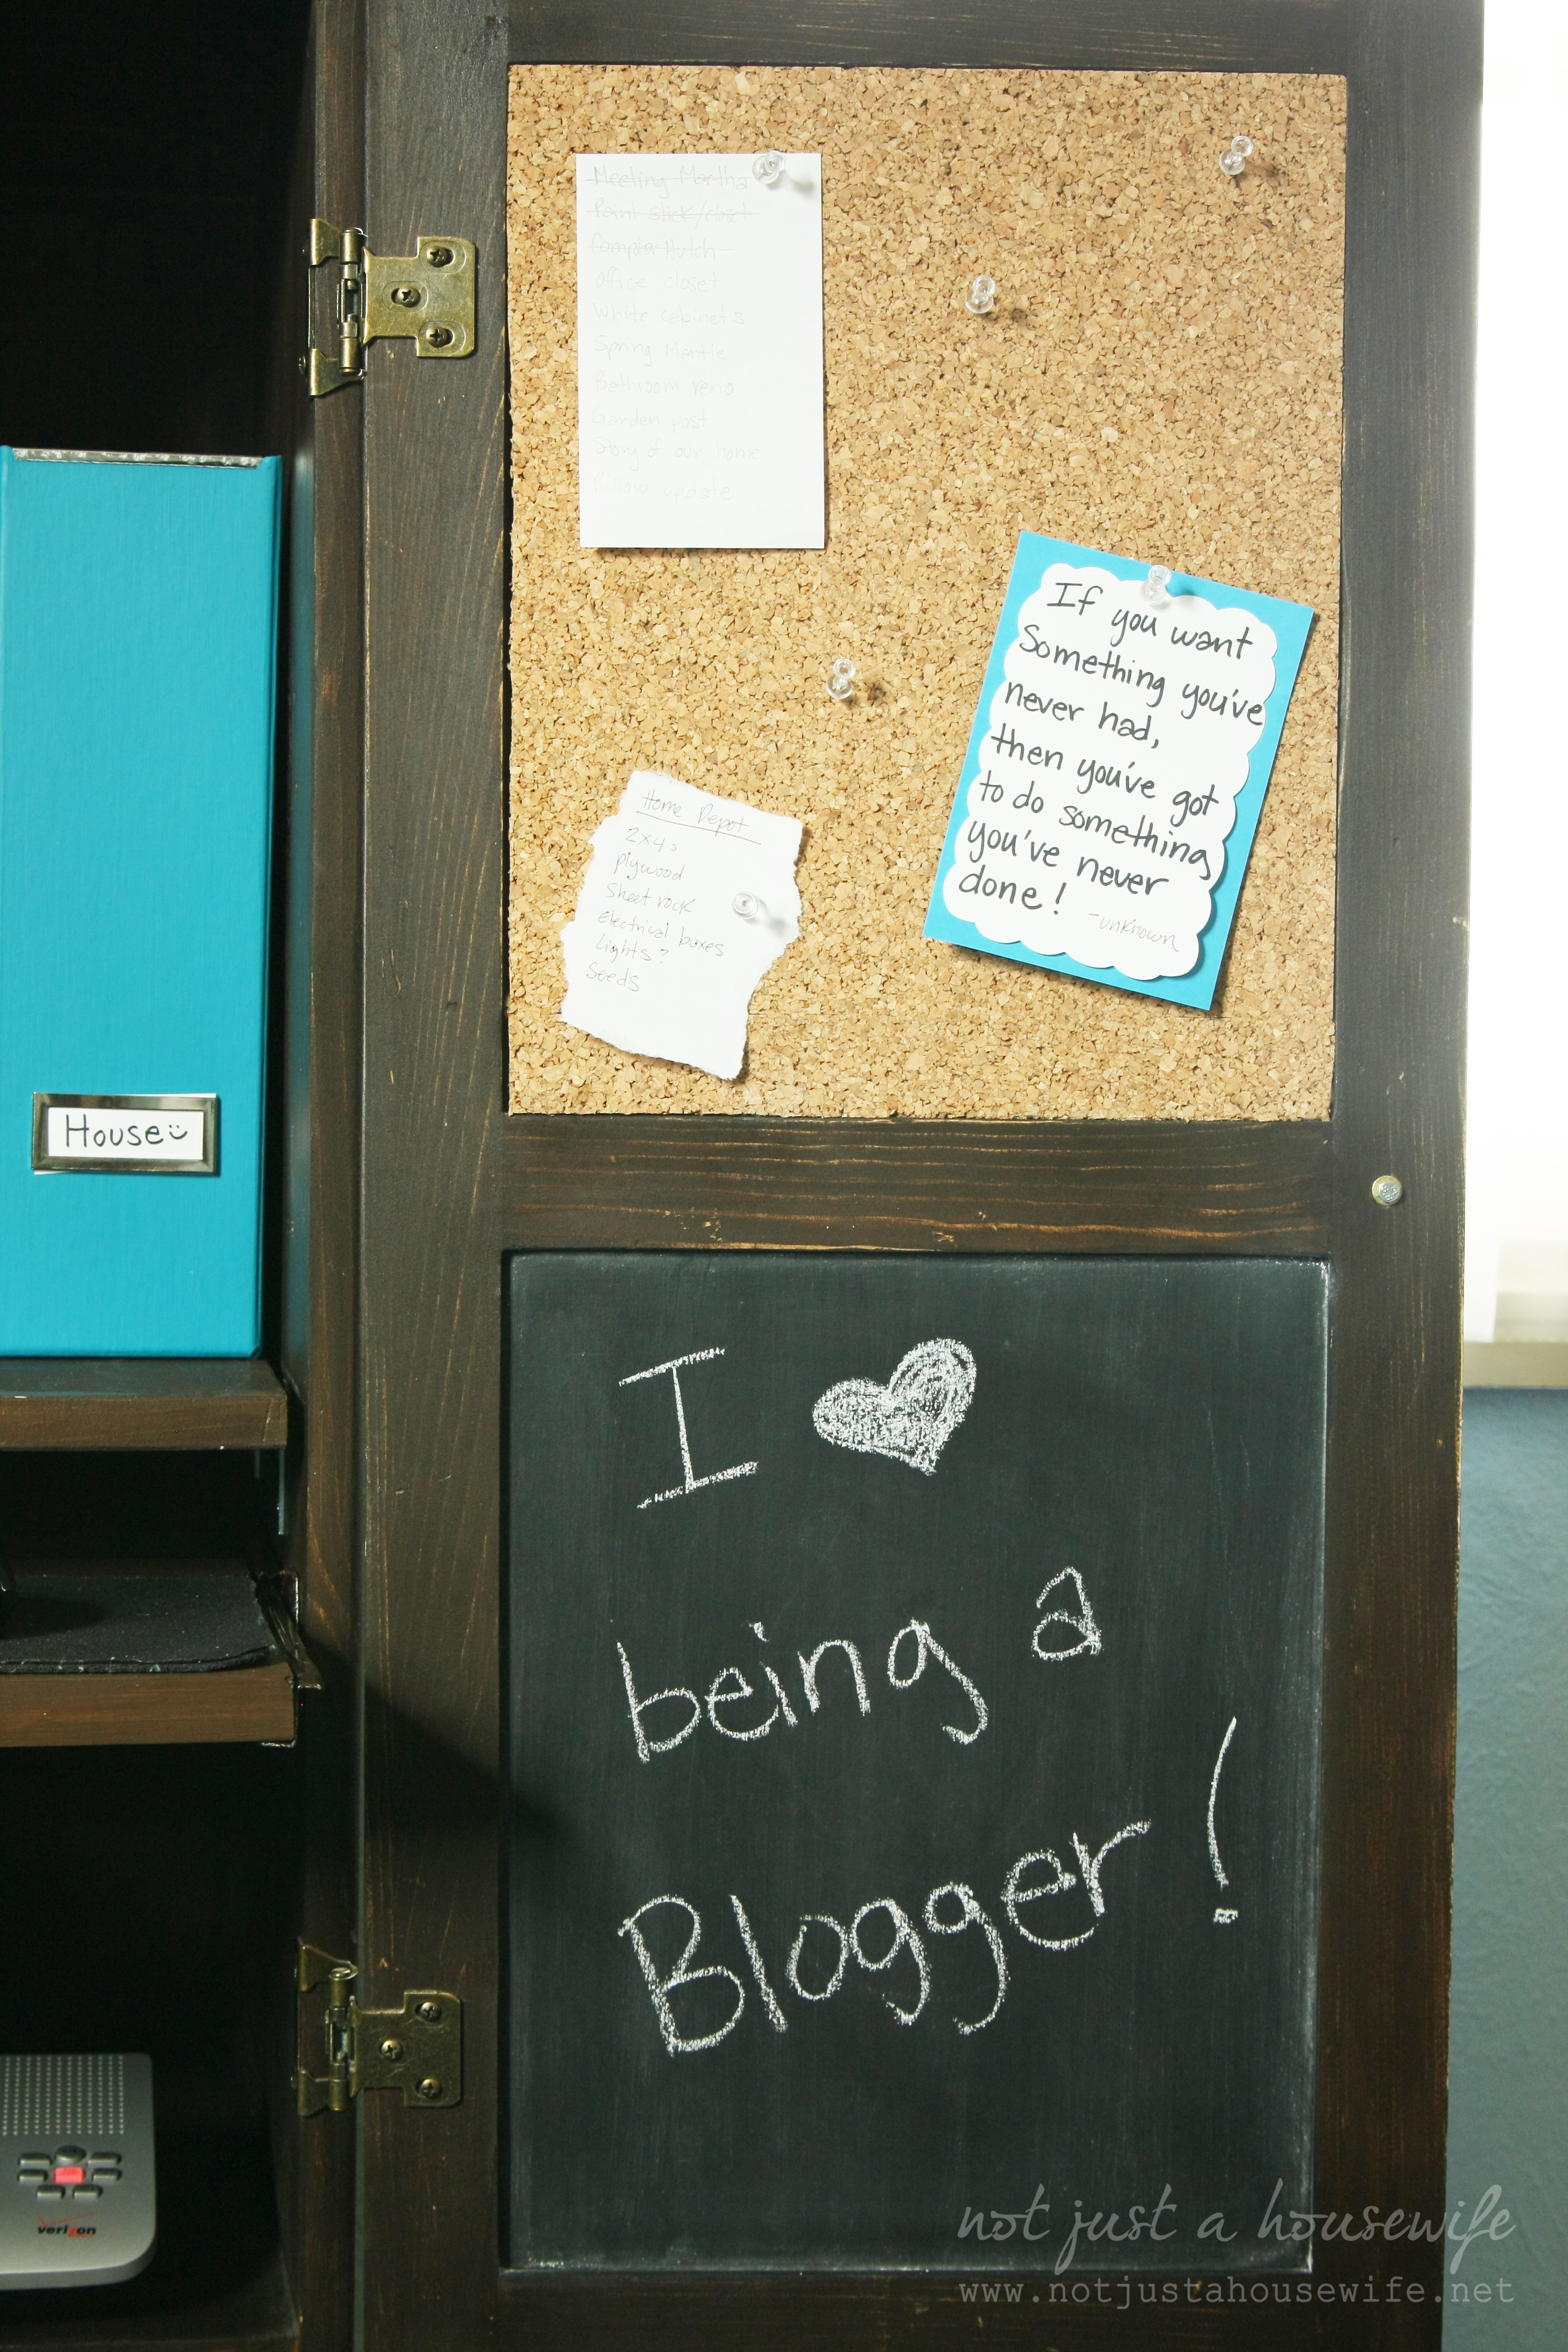
I also decided to add some magnetic paint, chalkboard paint, cork board, and dry erase vinyl to the inside of the panel doors.
(See our home phone? We are probably one of the last people in America to still have a land line :P)
The chalkboard section I put at the bottom because I figured my 3 year old would want to use it too. It is right at his level. I try hard to not be on the computer during the day very much, but if I am, he can be a little helper.
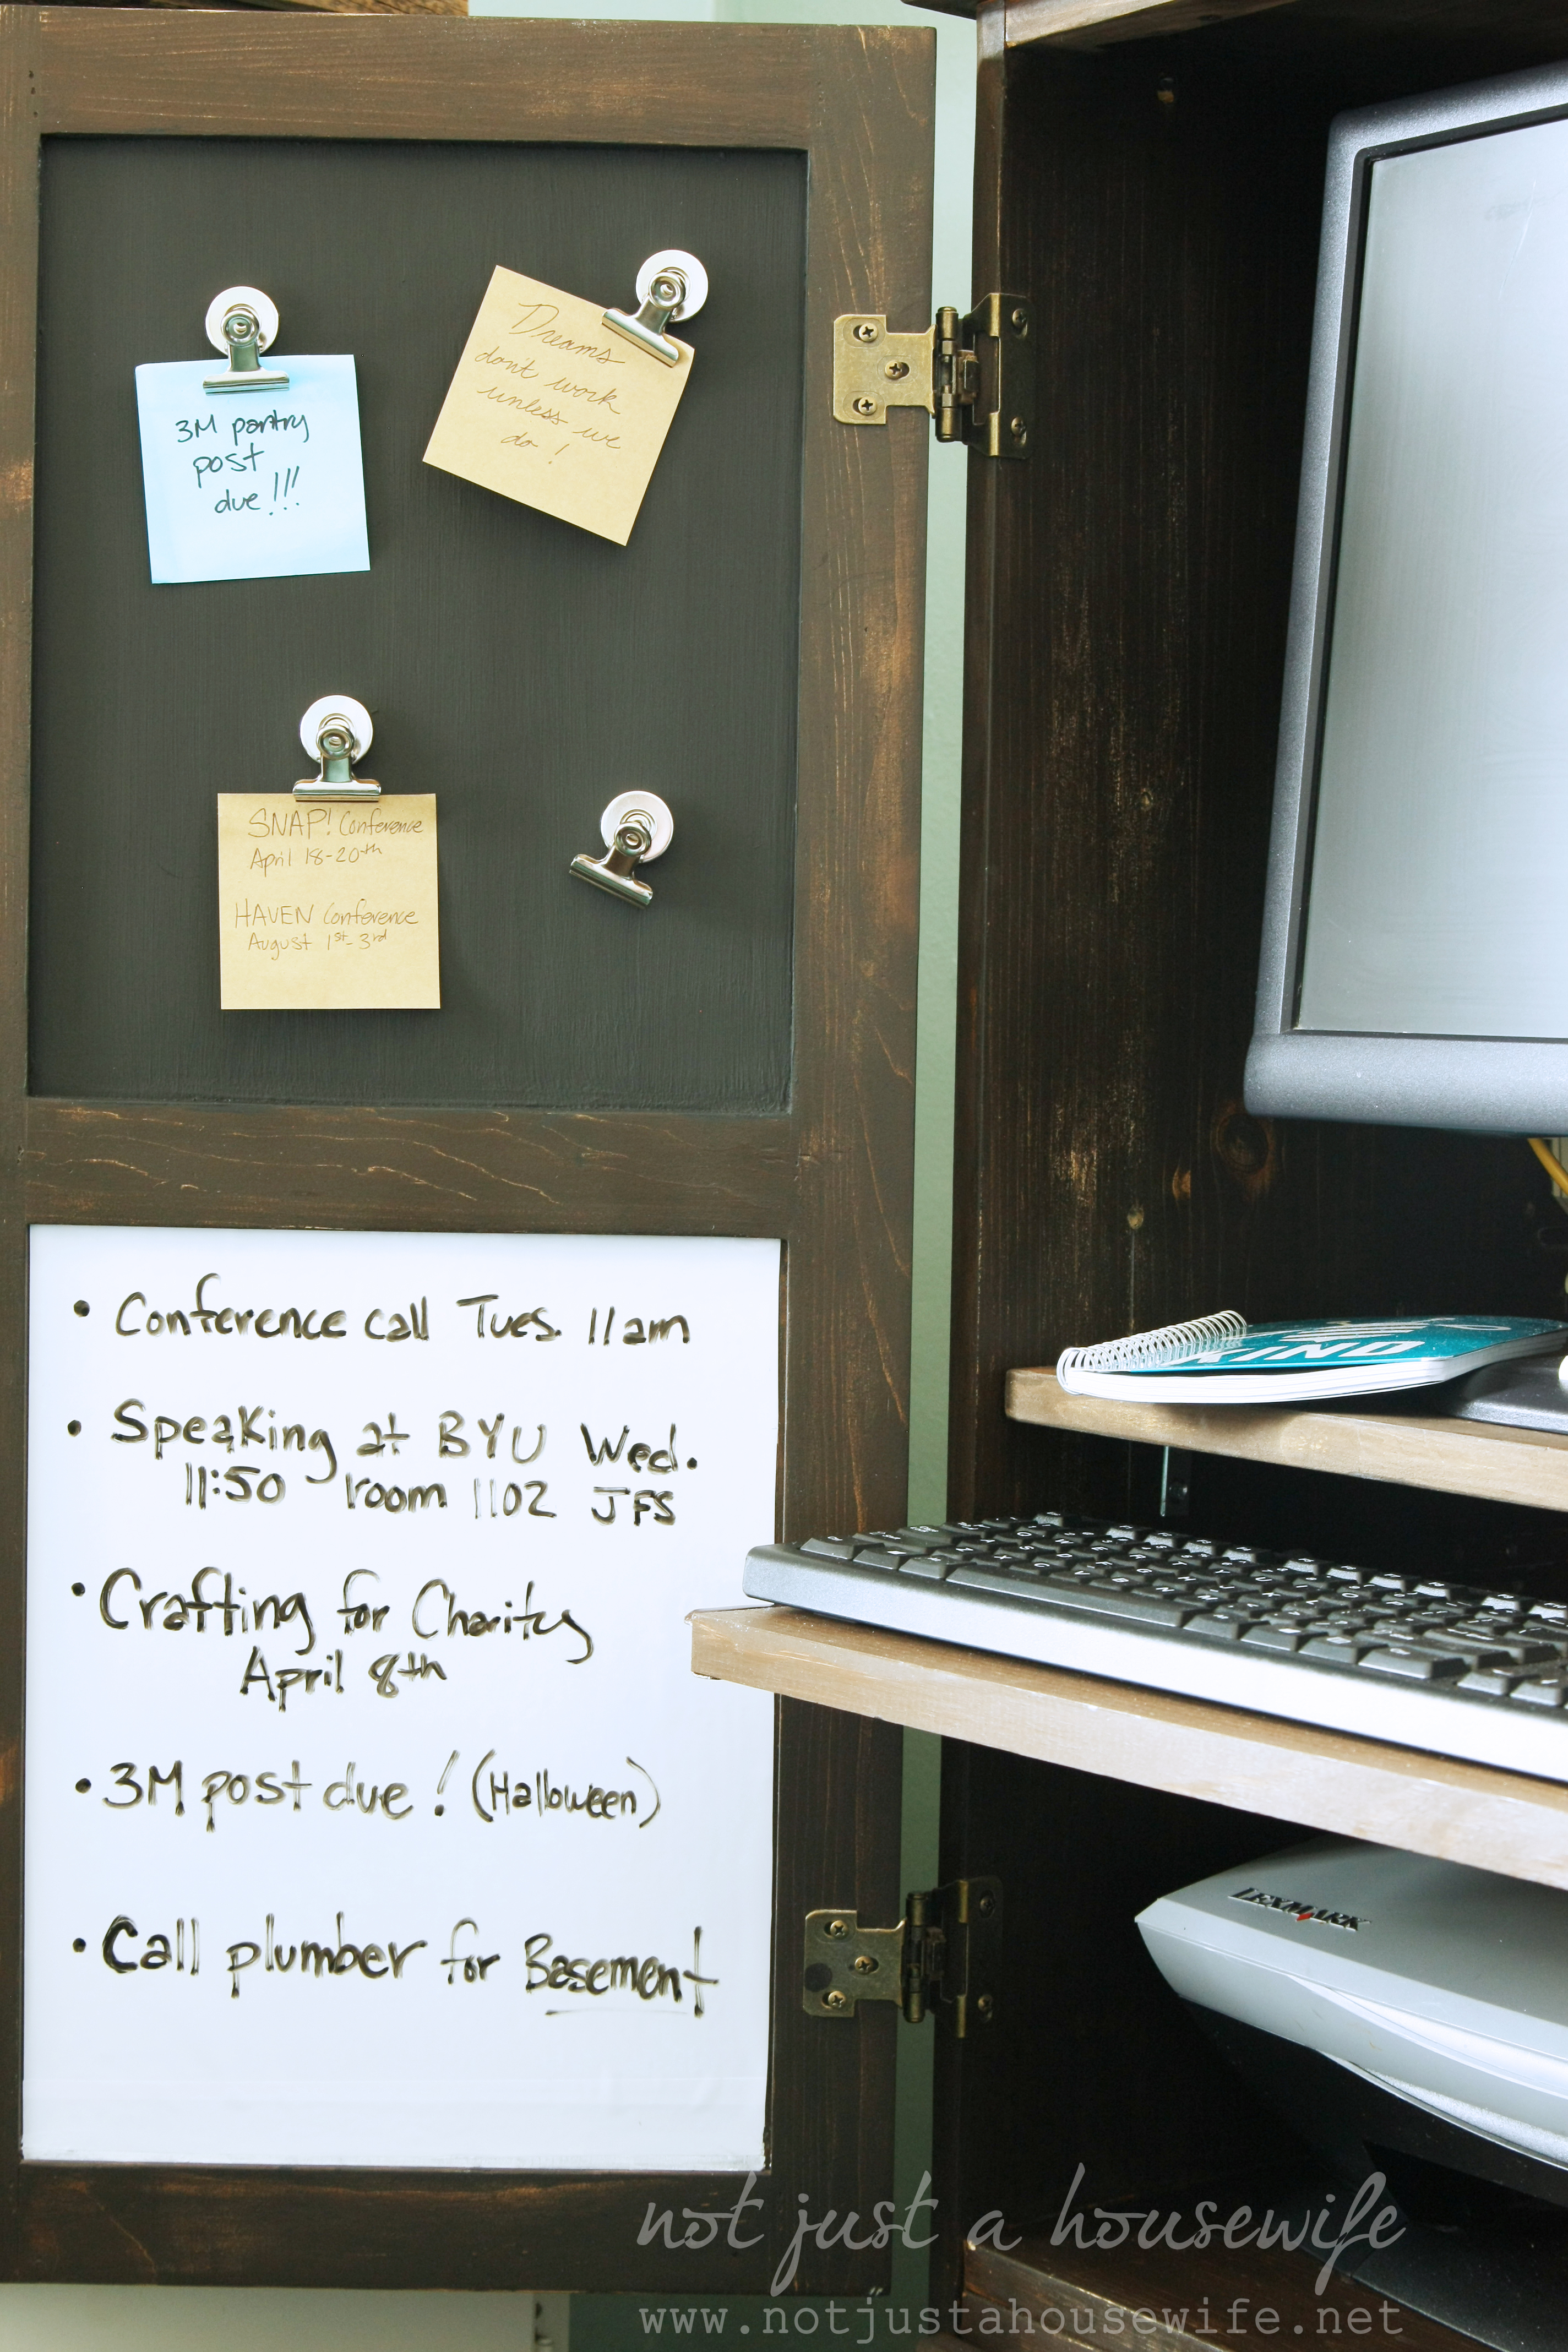
I happened to have some dry erase vinyl on hand but they also sell dry erase paint. Rustoleum is the brand, which is also the same brand as the chalkboard and magnetic paint. I had to paint 6 or 7 coats of the magnetic paint to get it to hold the big heavy magnet clips.
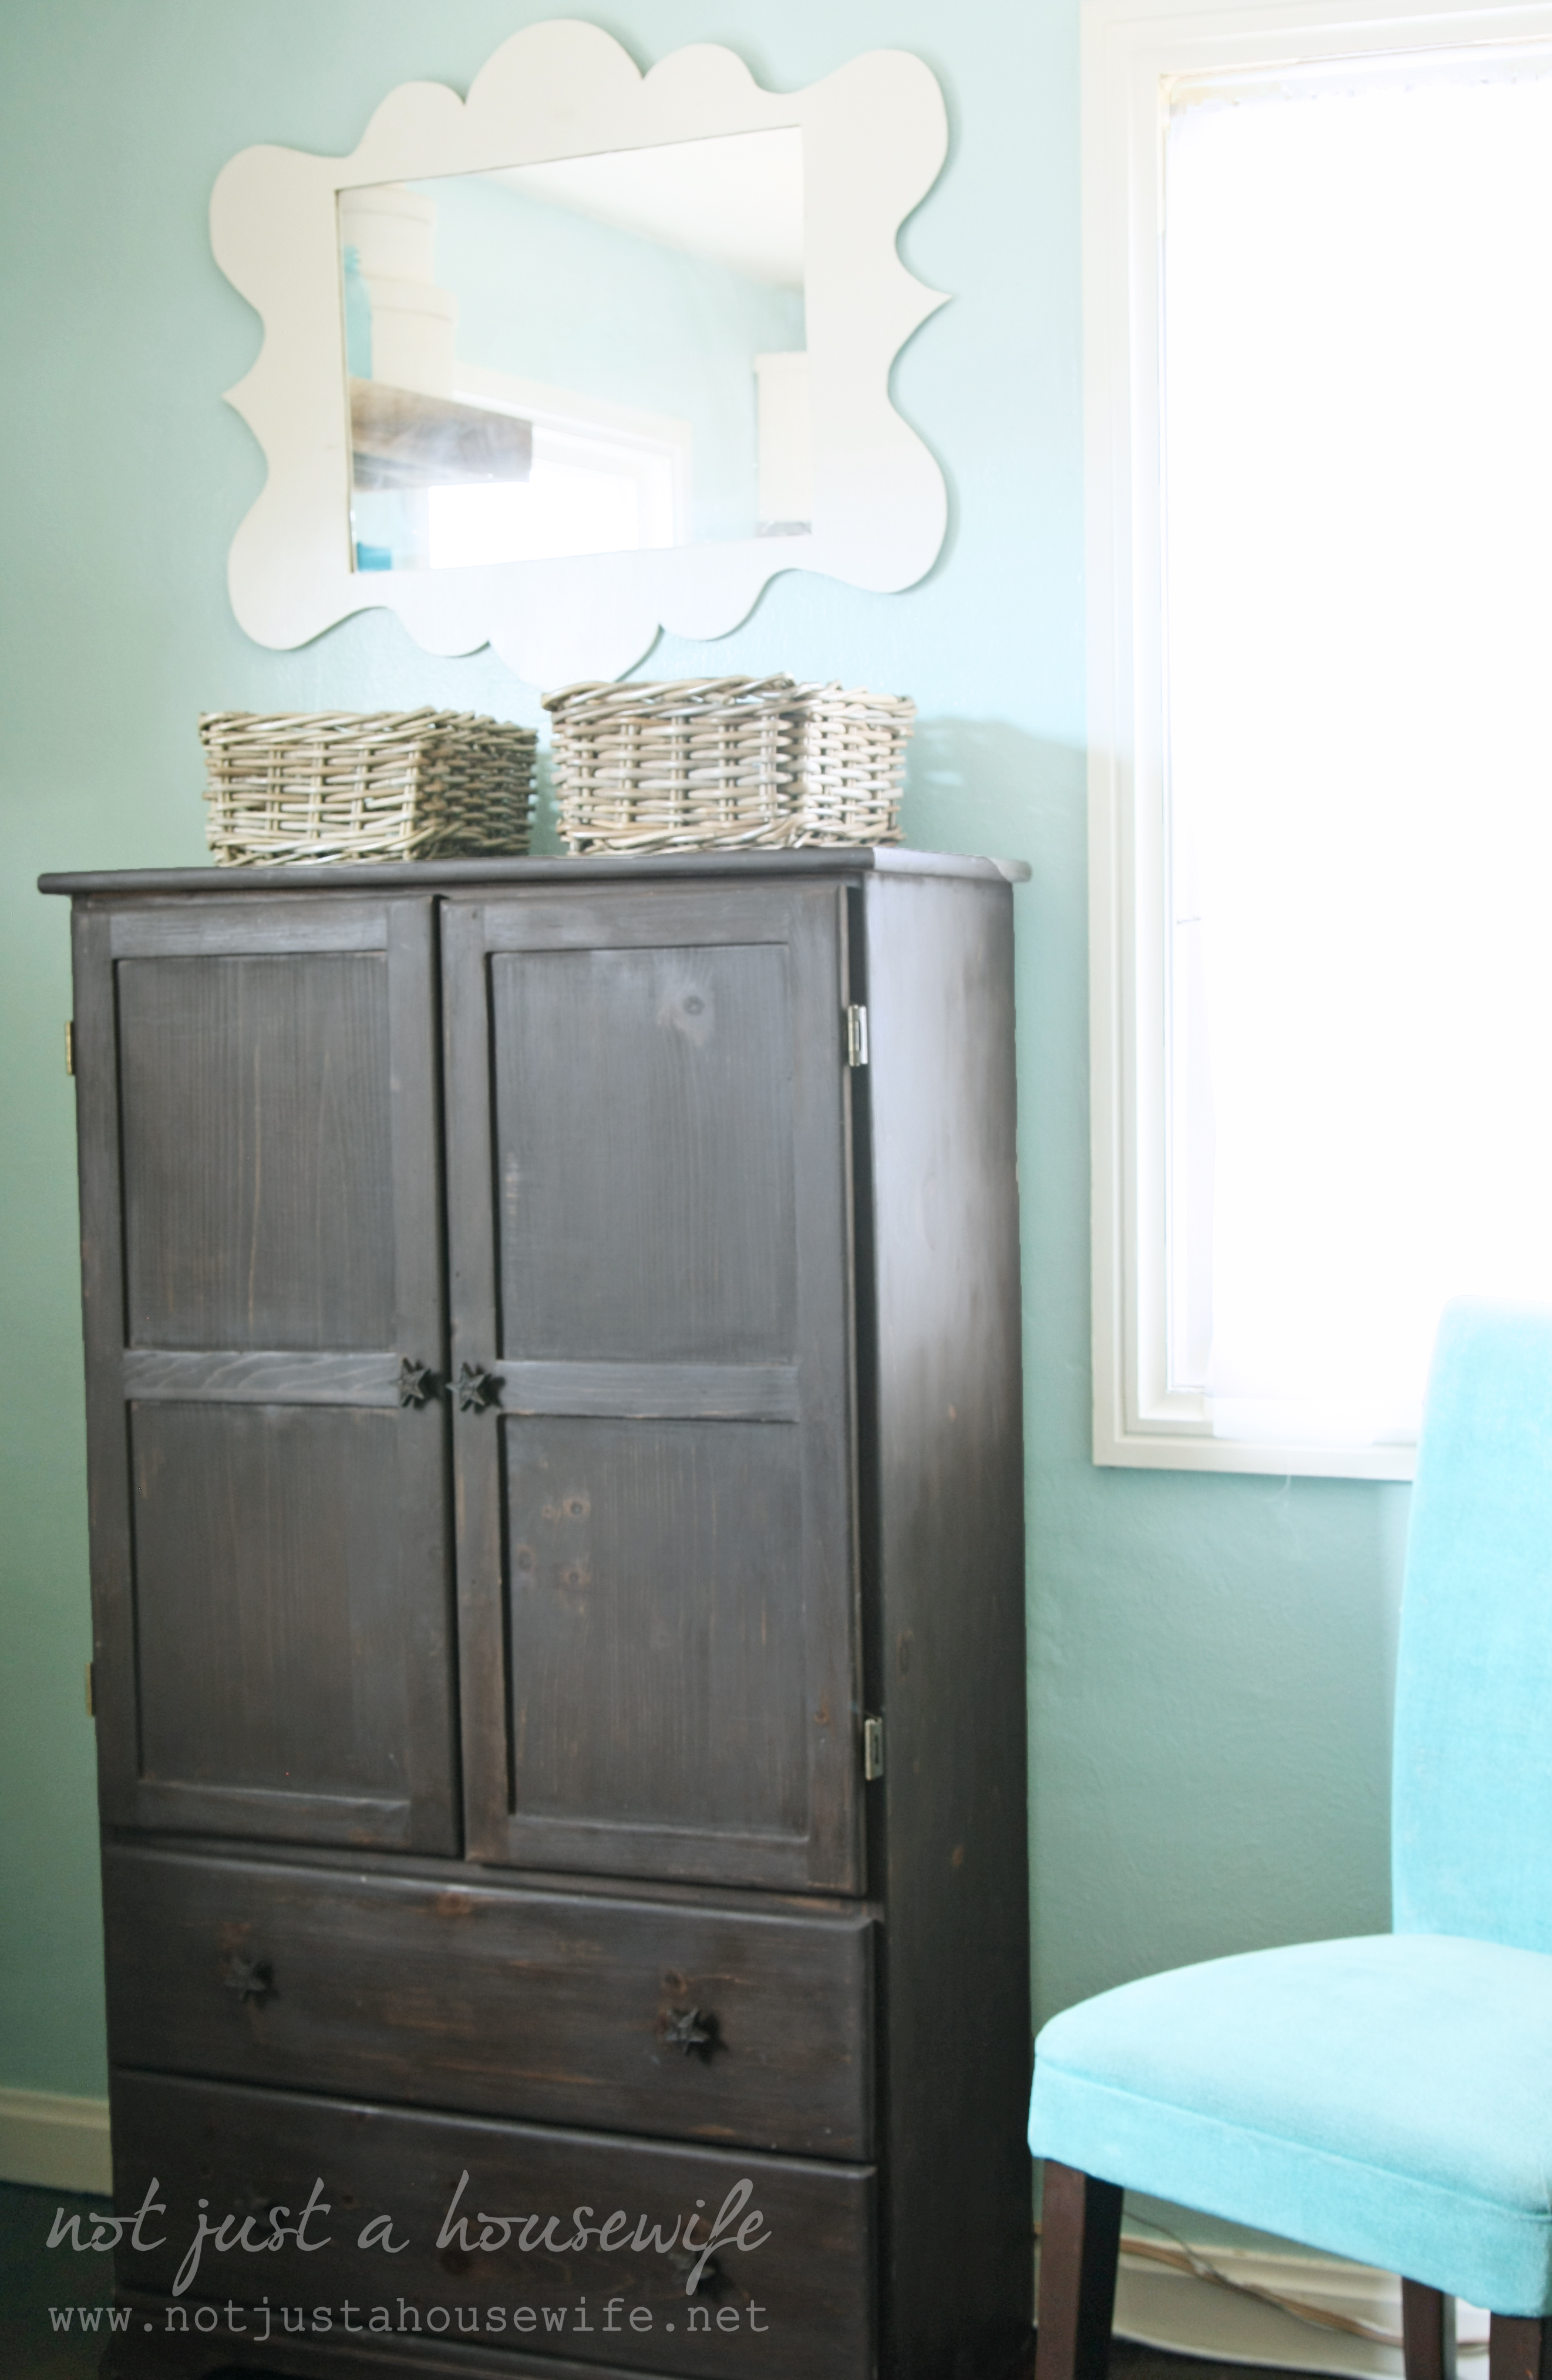
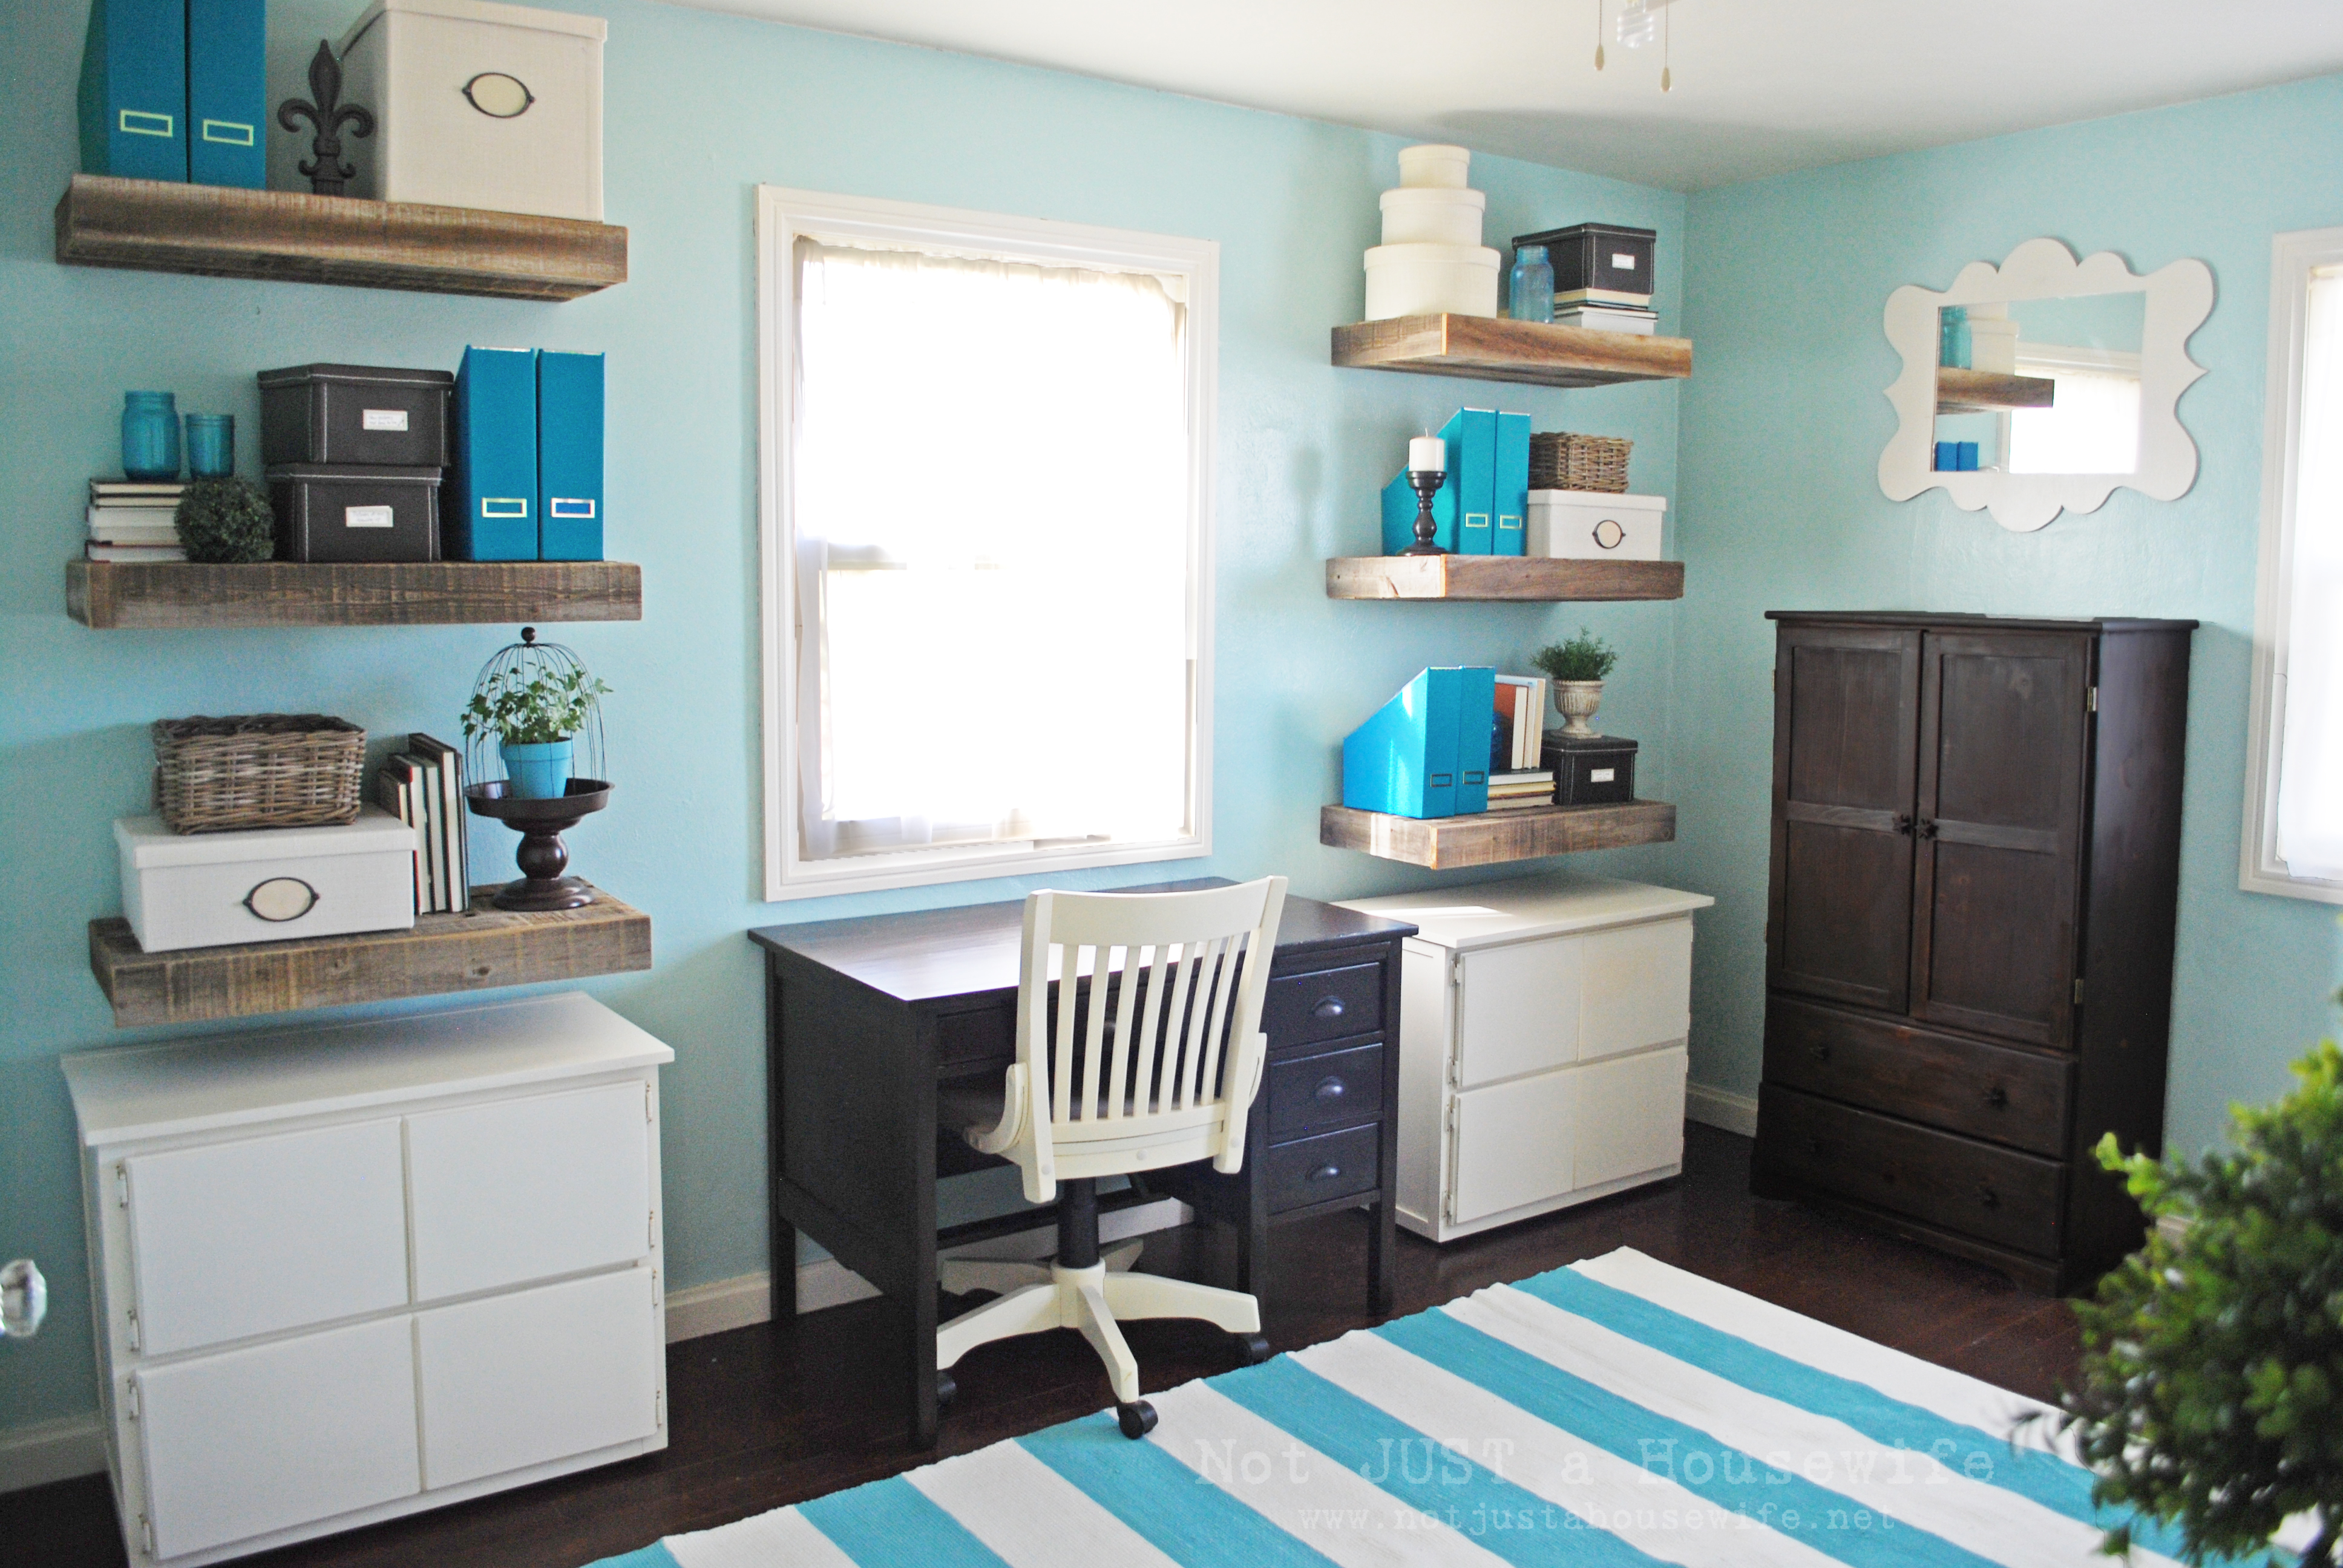
The baskets on top and the file folders (I painted them blue) are from IKEA and the chair is the chair I painted. It has held up really well! The drawers hold printer paper an other supplies.
I am sure as I use this more and see what works and what doesn't, that I can make little changes. But for now I am having fun with my new blogging space. I love that I can close the doors and the mess and work is hidden. I am kind of OCD like that, hence the desk with nothing on it! What about you? What is your work space like?


I like your rustic armoire. And I'm with you on the landline. We cannot get a cell signal anywhere in our house, and it will likely be years, if ever, before there is a tower close enough to change that.
I love it! I've been looking for an armoire for a while now...they're so hard to find!
We have a landline too.
Oh, and where is the computer tower?
The tower is behind the screen :) The front faces the side with the blue magazine files. That way if I need to put in an SD card or something I can access it.
That's where I thought it was.
I love what you did with this amore! Your entire office looks awesome! Would love to have you show it off at our link party:
http://www.marriedfiling-jointly.com/2013/03/give-me-goods-party-1.html
~Chelsea @ Married Filing Jointly
This is awesome Stacy! I like closeing the doors on mess too. Makes the room instantly clean. You always get the wheels in my head turning on how I can make that work in my house too! Thanks!
I love it. the teal is such a fun accent. where did you get the magazine files?
Oh! I forgot to mention that. I will add it to the post. I got them from IKEA. They were white so I painted them to match my office.
I love this. We have a vintage armoire that I was planning on doing something similar with. Yours is fantastic!. :)
I love this! I am thinking of doing something similar for our computer because right now it is out in the open in our living room and it drives me crazy! I was going to ask about the tower as well, but I see you already answered where it was hidden! So clever! :)
How is it to sit at? Don't your knees bump against the drawers? Just curious cause I love the idea but not sure it would work for my long legs.
I am 5'5" and I don't have a problem. But I will ask my 6'3" husband and see what he says :)
Holy wow, I love it! As I'm sitting here in my cluttered craft room, I'm wishing I could move in. Everything is gorgeous!
Thanks so much for your post. I love how it turned out. This might be just what I'm looking for in my living room! We're putting the computer in the front room and I want it somewhat hidden. Our house is very small and I just had to give up my craft room/office for one of our children. So, I need somewhere to store office supplies, and a better look to where our computer is. Thank you for posting this, you just gave me a great option!
I absolutely love this idea! I had to look and look to find your computer tower, love how it's hidden behind your flat screen monitor :-)
Hubby just recently set up a computer in the playroom for our kids (my 5 year old uses for his "Reading Eggs" computer homework). Currently, the computer is set up to use the tv as the "monitor" - but it isn't positioned ideally. I actually have an armoire in our garage I may be able to repurpose something similar. I love functional pieces, that are also beautiful in form, and hide all the electronics when not in use.
BTW, we are "techie" type people in our household. And while we don't have a landline, we do still have "dumb phones", lol!
That's a wonderful transformation! Gorgeous!
But i would worry as well, how you sit there. I need to stretch my legs while sitting at the computer…
Love, Midsommarflicka
It pulls out 12 inches and allows for leg room in a normal sitting position. There are drawer slides that come all the way out and would allow for much more leg room.
Great job on the armoire. BTW, we still have a land line, too :-D. Hubs won't give it up,, lol.
Janet
Great job! Did you know that if the power goes down, you will only be connected to the outside world with your land line? Those cell phones do not work without those towers.... No power for towers, no cellphone!
Your office is so charming; love the color scheme. Great looking cabinet. Someday I need to put in slides. Right now the keyboard shelf just slides on two strips of wood--vveerryy low tech. Interesting to read about all those paints with special properties. I think I'd be tempted to put a sheet of metal in the cabinet instead of so many layers of magnetic paint. Re the land line: I still have one AND I still use my old rotary phone from the days (for you young folk) when we used to "rent" phones from the phone company (and I bought mine when they stopped doing that). It was built to last, and has. (I also have a touch tone because the rest of the world works that way.) And I'm still holding out against buying a cell phone. My DH told me what a friend of his pays in service fees for all his technology (cell phones, computers, etc). It's about four times what we pay. Technology is wonderful and amazing, but it does cost a pretty penny.
This turned out beautifully. I wanted to say that a landline is still important, as some others have mentioned. Having survived both 9/11 and hurricane Irene this year, I can tell you that the cell towers DO go down and you cannot reach anyone without the landline. So don't feel badly for still having one it is smart!
I have a secretary desk that I have used for years now for my MAC and I love being able to close it up and hide everything away!
I love your office (your desk is great too). The colors and organized open shelving are perfect. Definitely pinning for inspiration!
That's very clever and beautifully done. I don't think Windows 8 will ever grow on me. I can't stand it.
Good for you! Upgrading to a new computer... I don't have Internet at home, so that's make me feel better when I see you still have a land line... Cuz not having Internet at home also makes me feel like I'm still in the dinosaur age. :) Nice, savvy project! Gold star.
Wow, what an amazing office space! Just gorgeous ;) I love what you did with the cabinet!
Jamie @ somuchbetterwithage.com
What a wonderful home office.... Oh my!
Have a terrific week….
hugs x
Crystelle
Crystelle Boutique
I love that idea! It looks wonderful and very functional! Great idea for the inside doors.
I love it! I've been thinking of doing this in my office!
Christine
after reading about the questions re making room for knees and feet, I had assumed that the keyboard was a pullout shelf so I would imagine this allowed for plenty of space in that config....???
Yes, the keyboard slides out 12 inches. You can also buy drawer slides that come all the way out and would give you even more room :)
This looks great Stacy! I pinned it to the BHG home project board :)