• Skip to primary navigation
  • Skip to main content
  • Skip to primary sidebar
  • Skip to footer
Stacy Risenmay
  • Home
  • About me
  • PRESS
  • Contact Me
  • My Book
    • Facebook
    • Instagram
    • Pinterest
    • Twitter
menu icon
go to homepage
subscribe
search icon
Homepage link
  • Home
  • About me
  • Project Gallery
  • Our House
  • PRESS
  • Contact Me
  • Privacy Policy
    • Facebook
    • Instagram
    • Pinterest
    • Twitter
  • ×

    Geometric Hanging Vase {Styled X3}

    By Stacy 15 Comments

    I have been anxiously awaiting today! This is the first installment of one of my new series called Styled X3. I asked a couple of my favorite bloggers to be the first to participate and was thrilled when they said they would.

    So after you check out how I styled this month's accessory, head over to Michael's blog, Inspired By Charm, and then go see what Sarah from Sarah M. Dorsey Designs did with hers.


    styled x3


    THE CHALLENGE:

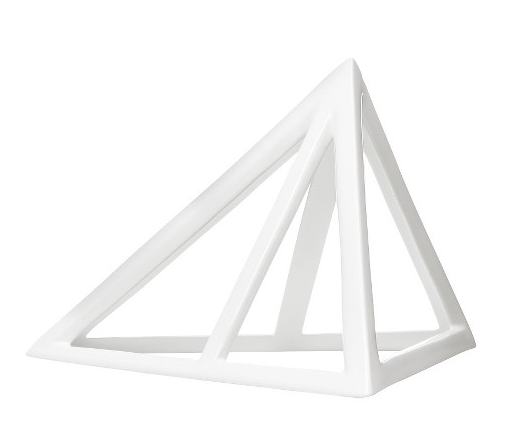
    Three bloggers take the same object and use it in each of their homes. This month I chose the decorative pyramid from the Nate Berkus collection at Target. I sent one to Michael and one to Sarah a few weeks ago and I have been excited to see what they have done!

    decorative pryamid

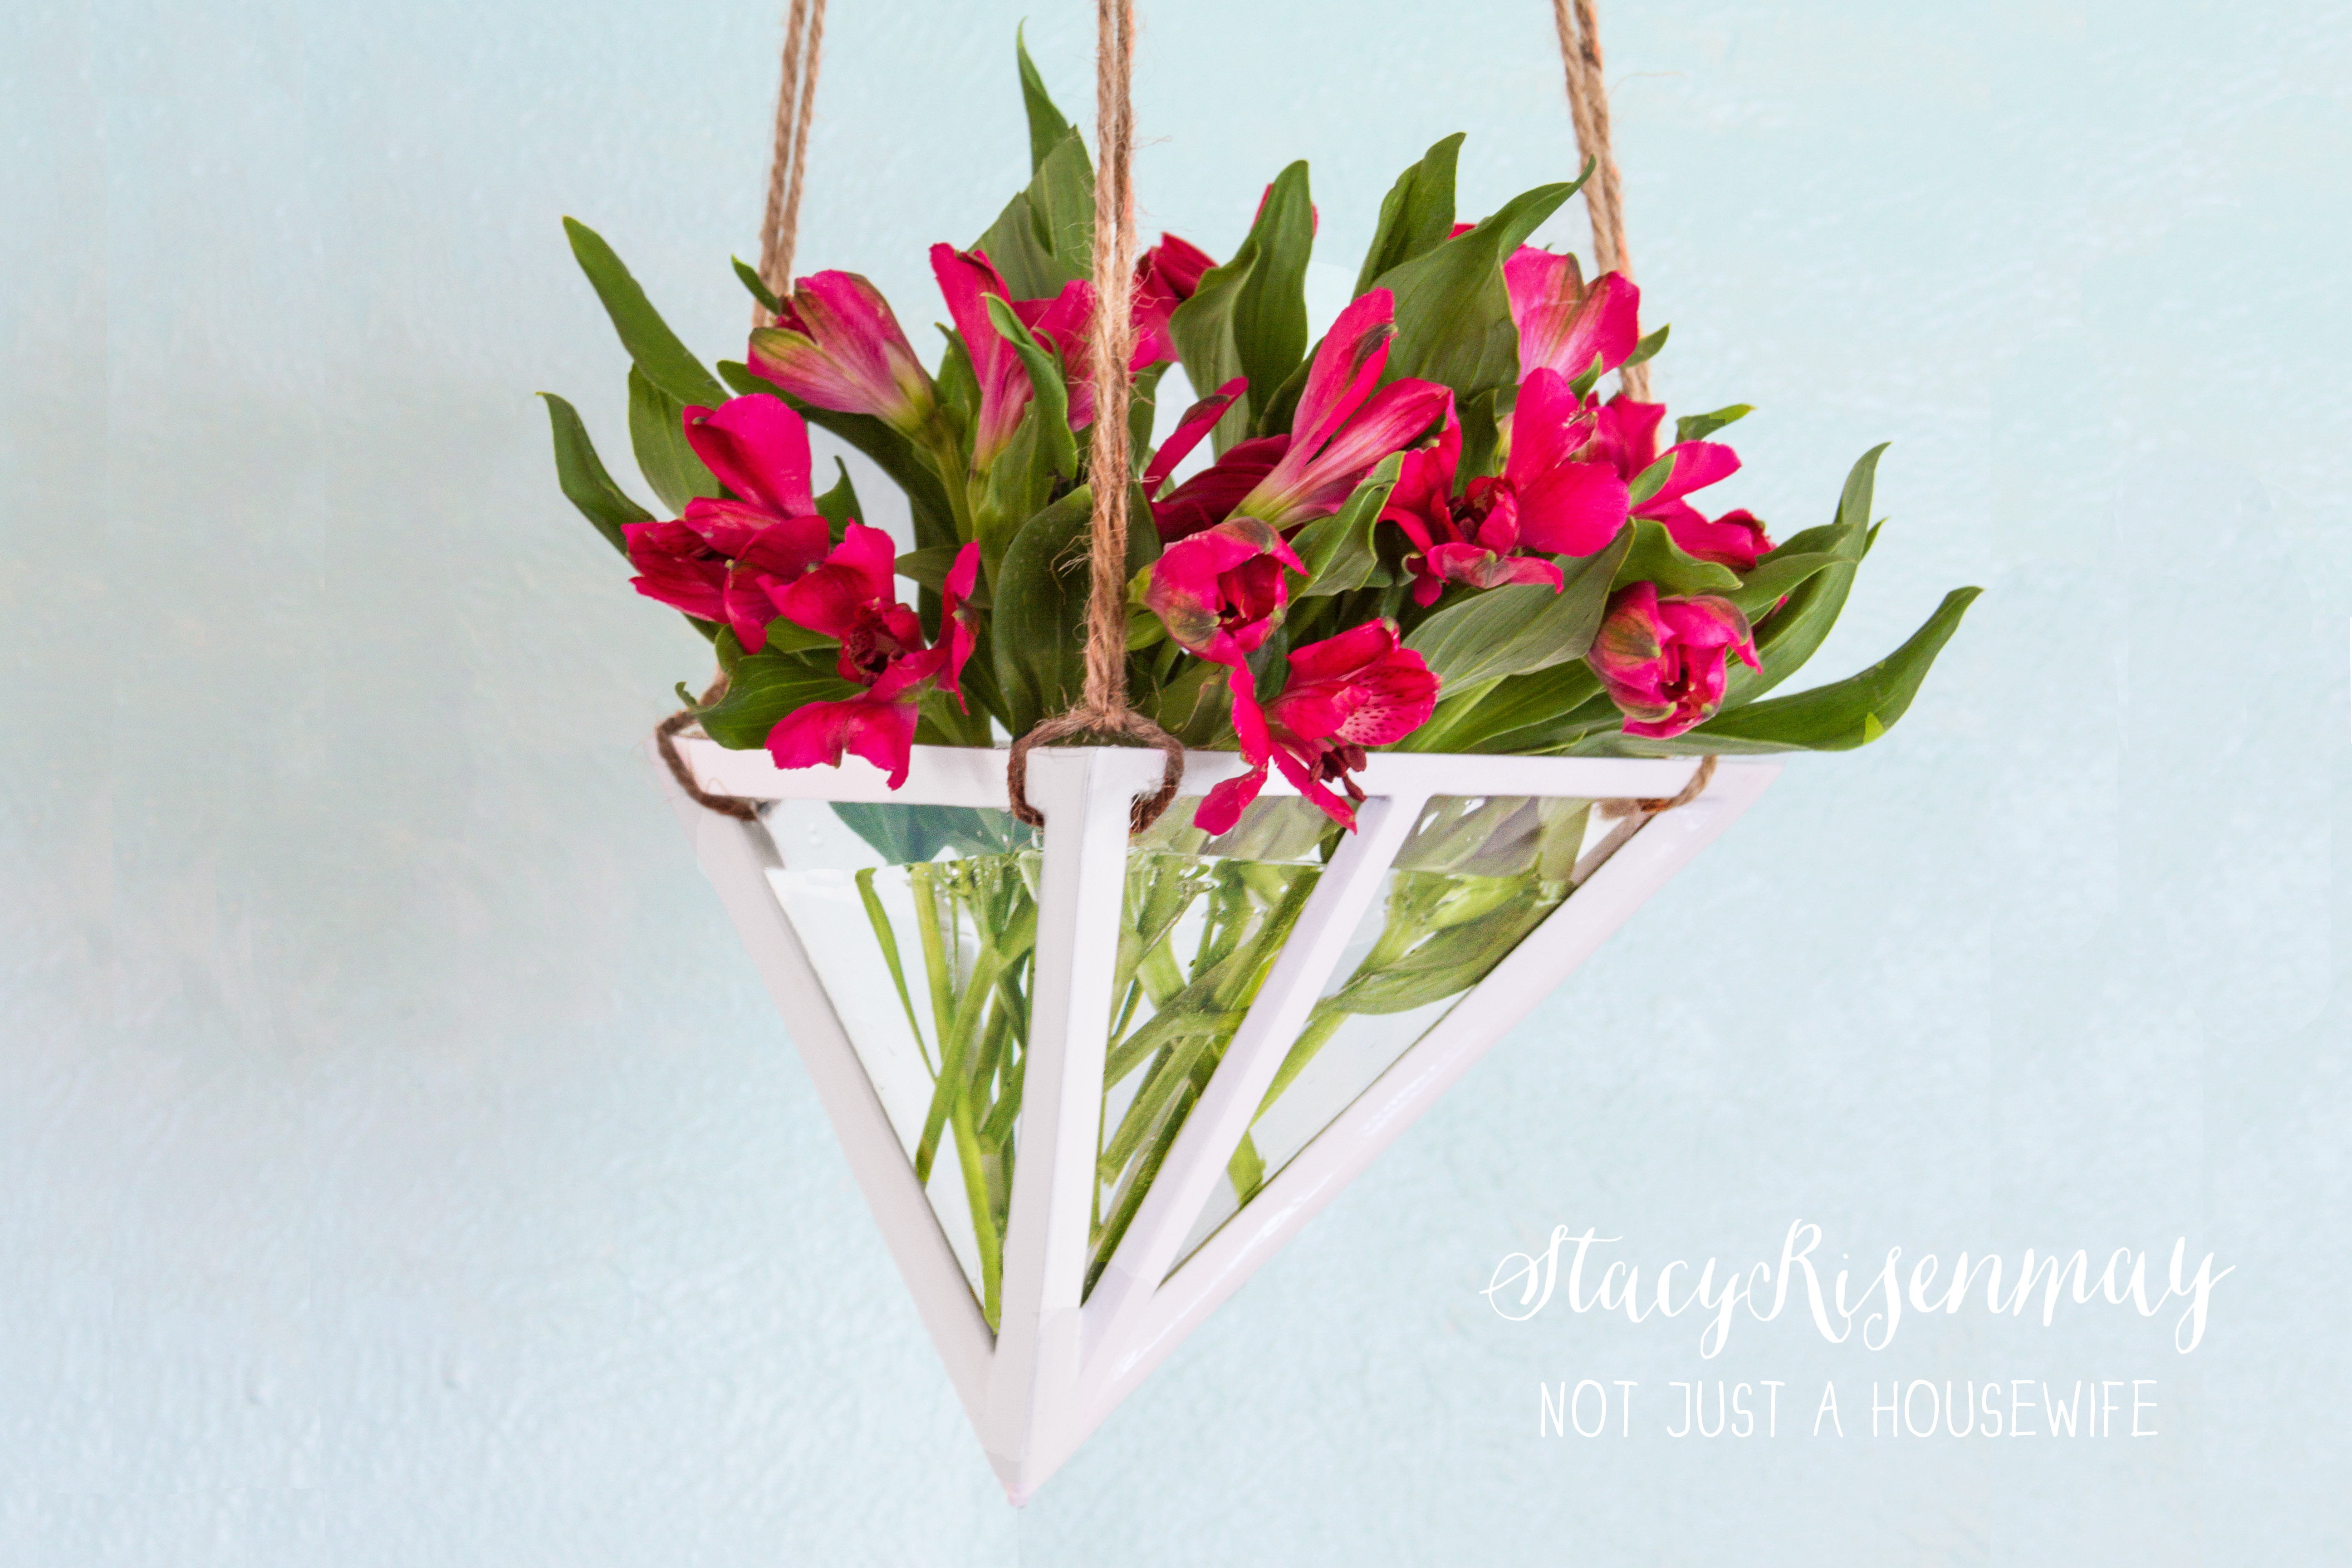
    The first thing I thought of was to cover a potted plant with it sort of like a cloche. I almost did that. And then I decided to add acrylic to the bottom and hang the potted plant in the pyramid.  Who doesn't love a hanging planter? I started cutting the acrylic for the bottom and decided to change gears yet again. Why not add acrylic to the sides and make a hanging vase!


    hanging geometric vase_edited-2

    I am obsessed with how it turned out! It has been hanging for a couple of days.

    geometric vase

    geometric hanging vase_edited-2


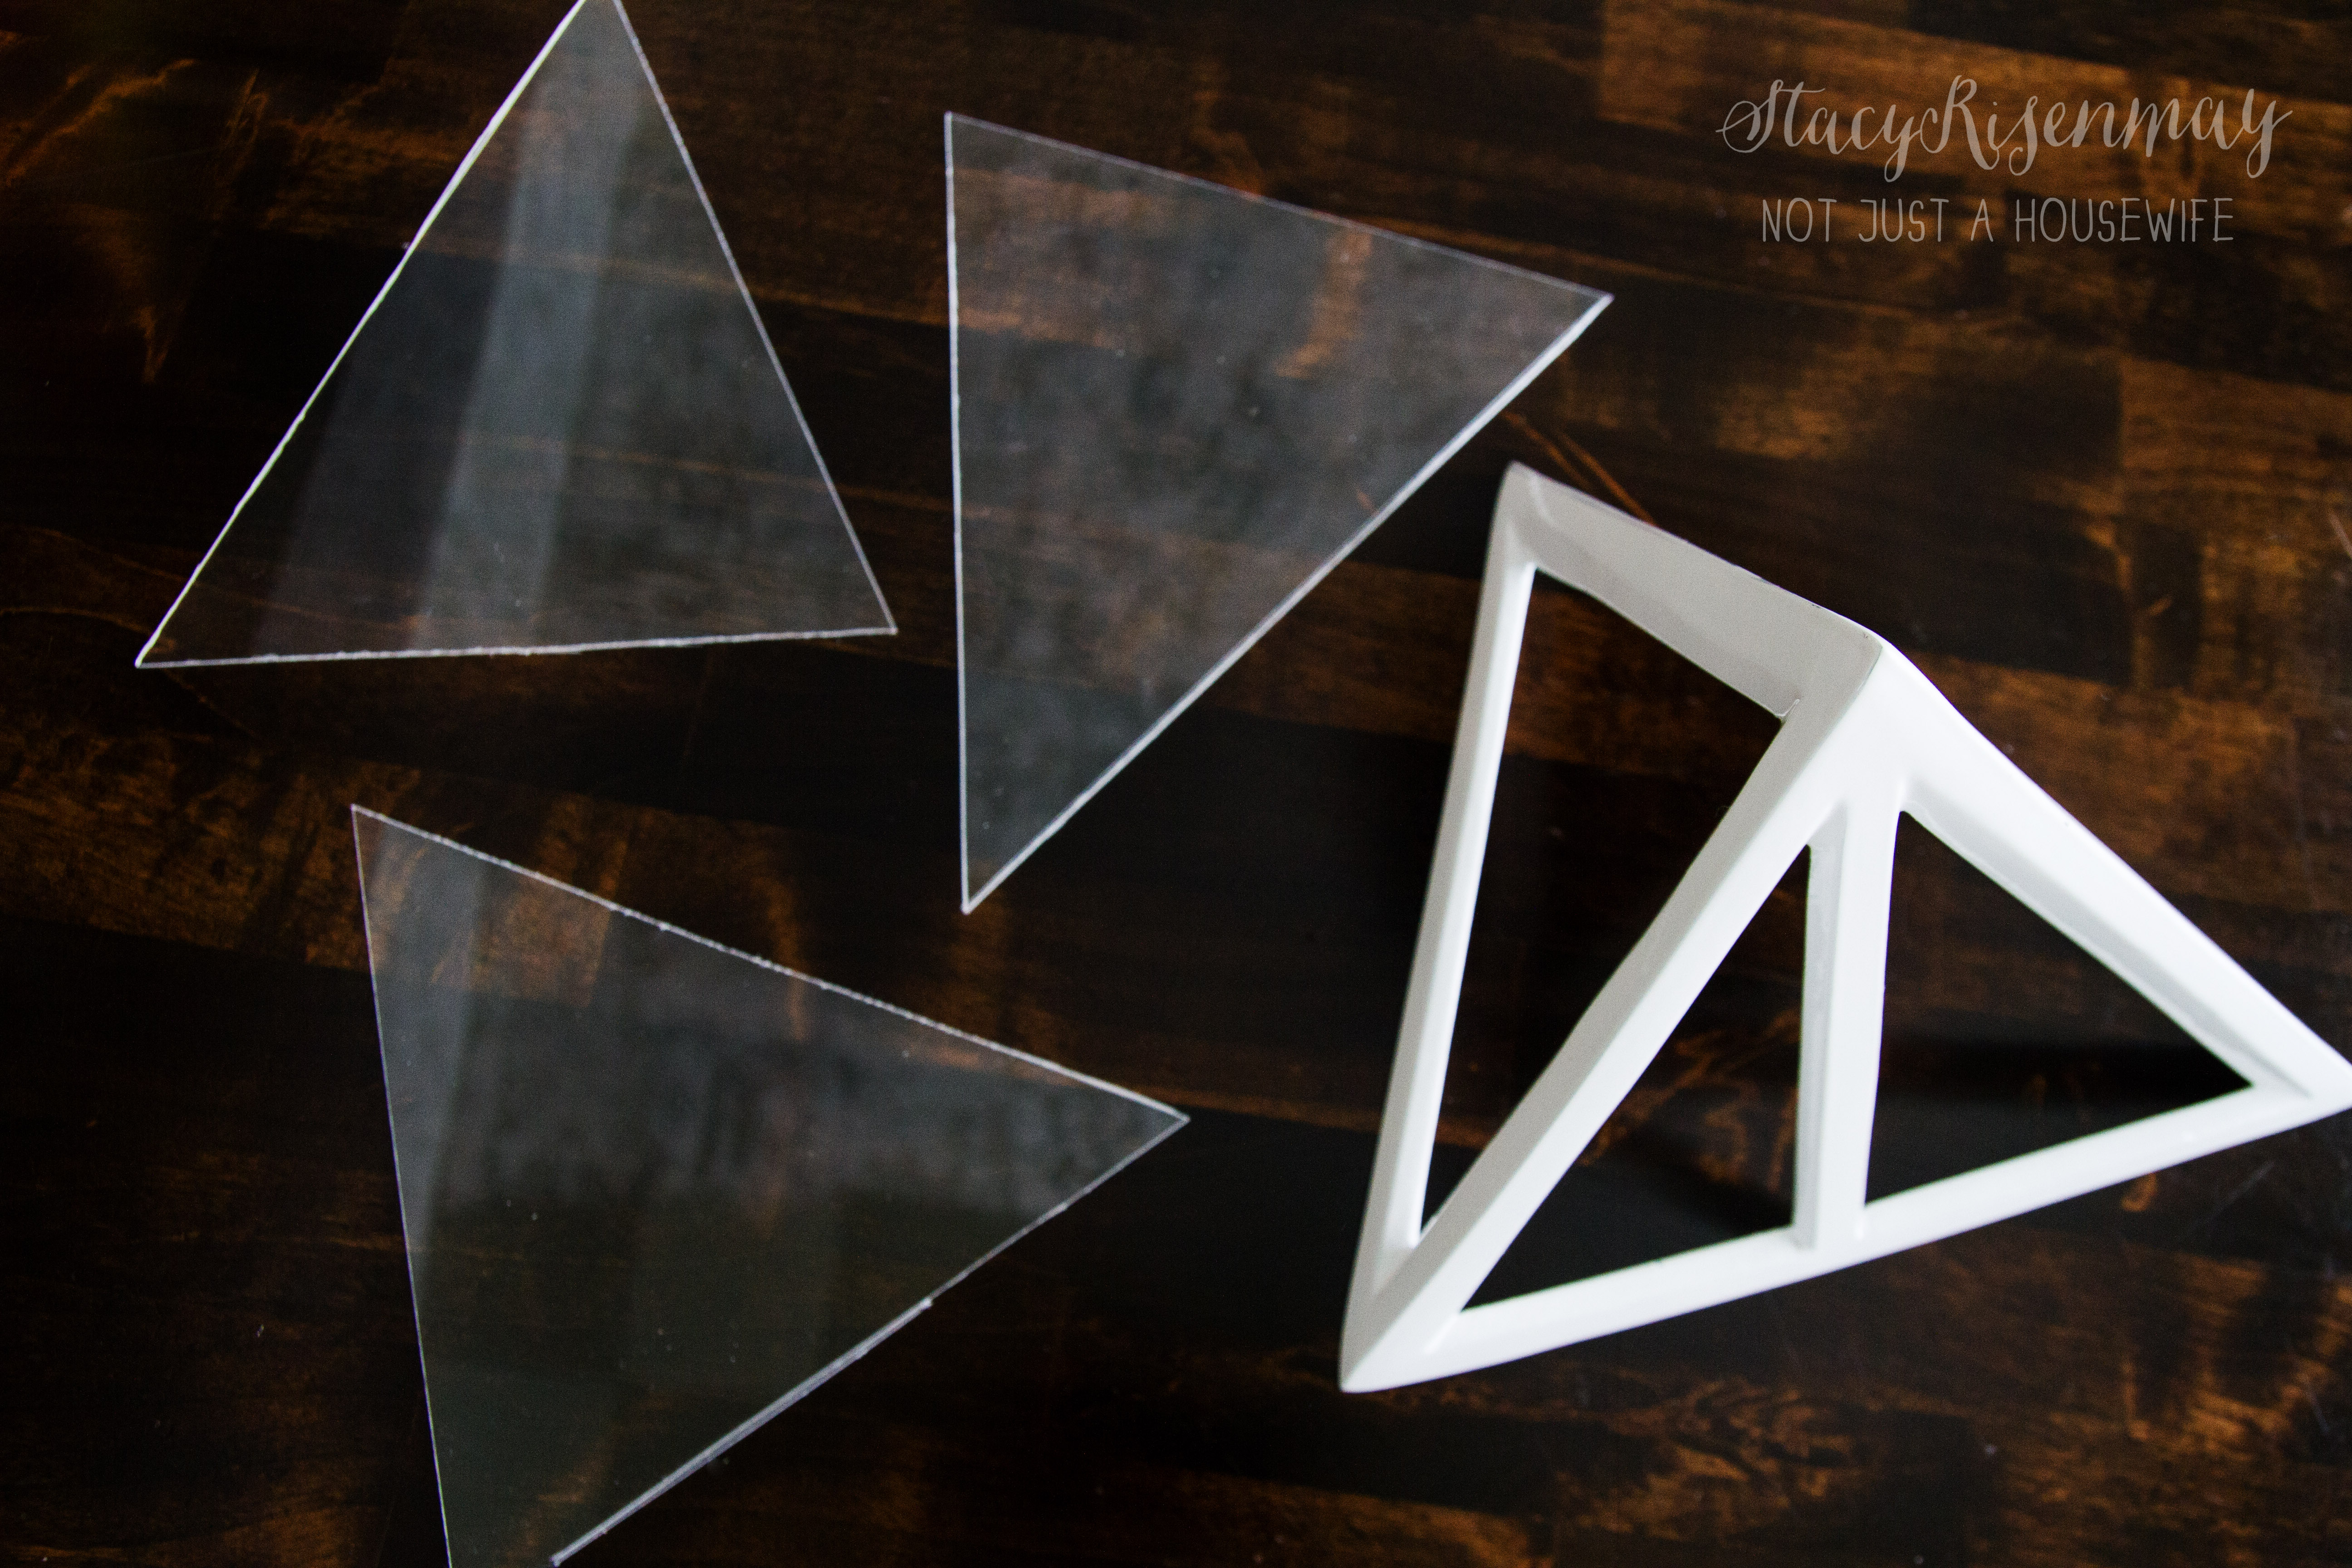
    I traced the sides of the pyramid onto some acrylic I had. I used the acrylic cutter from when I made the icicle ornaments to score the acrylic. Then I snapped them off.

    cut acrylic for the sides_edited-1


    I used clear, waterproof caulk to seal all the seams. Just like when you caulk anything else, after you run a line of caulk down the seam, press your finger along the caulk and smooth it into the seam.

    clear waterproof caulk_edited-1


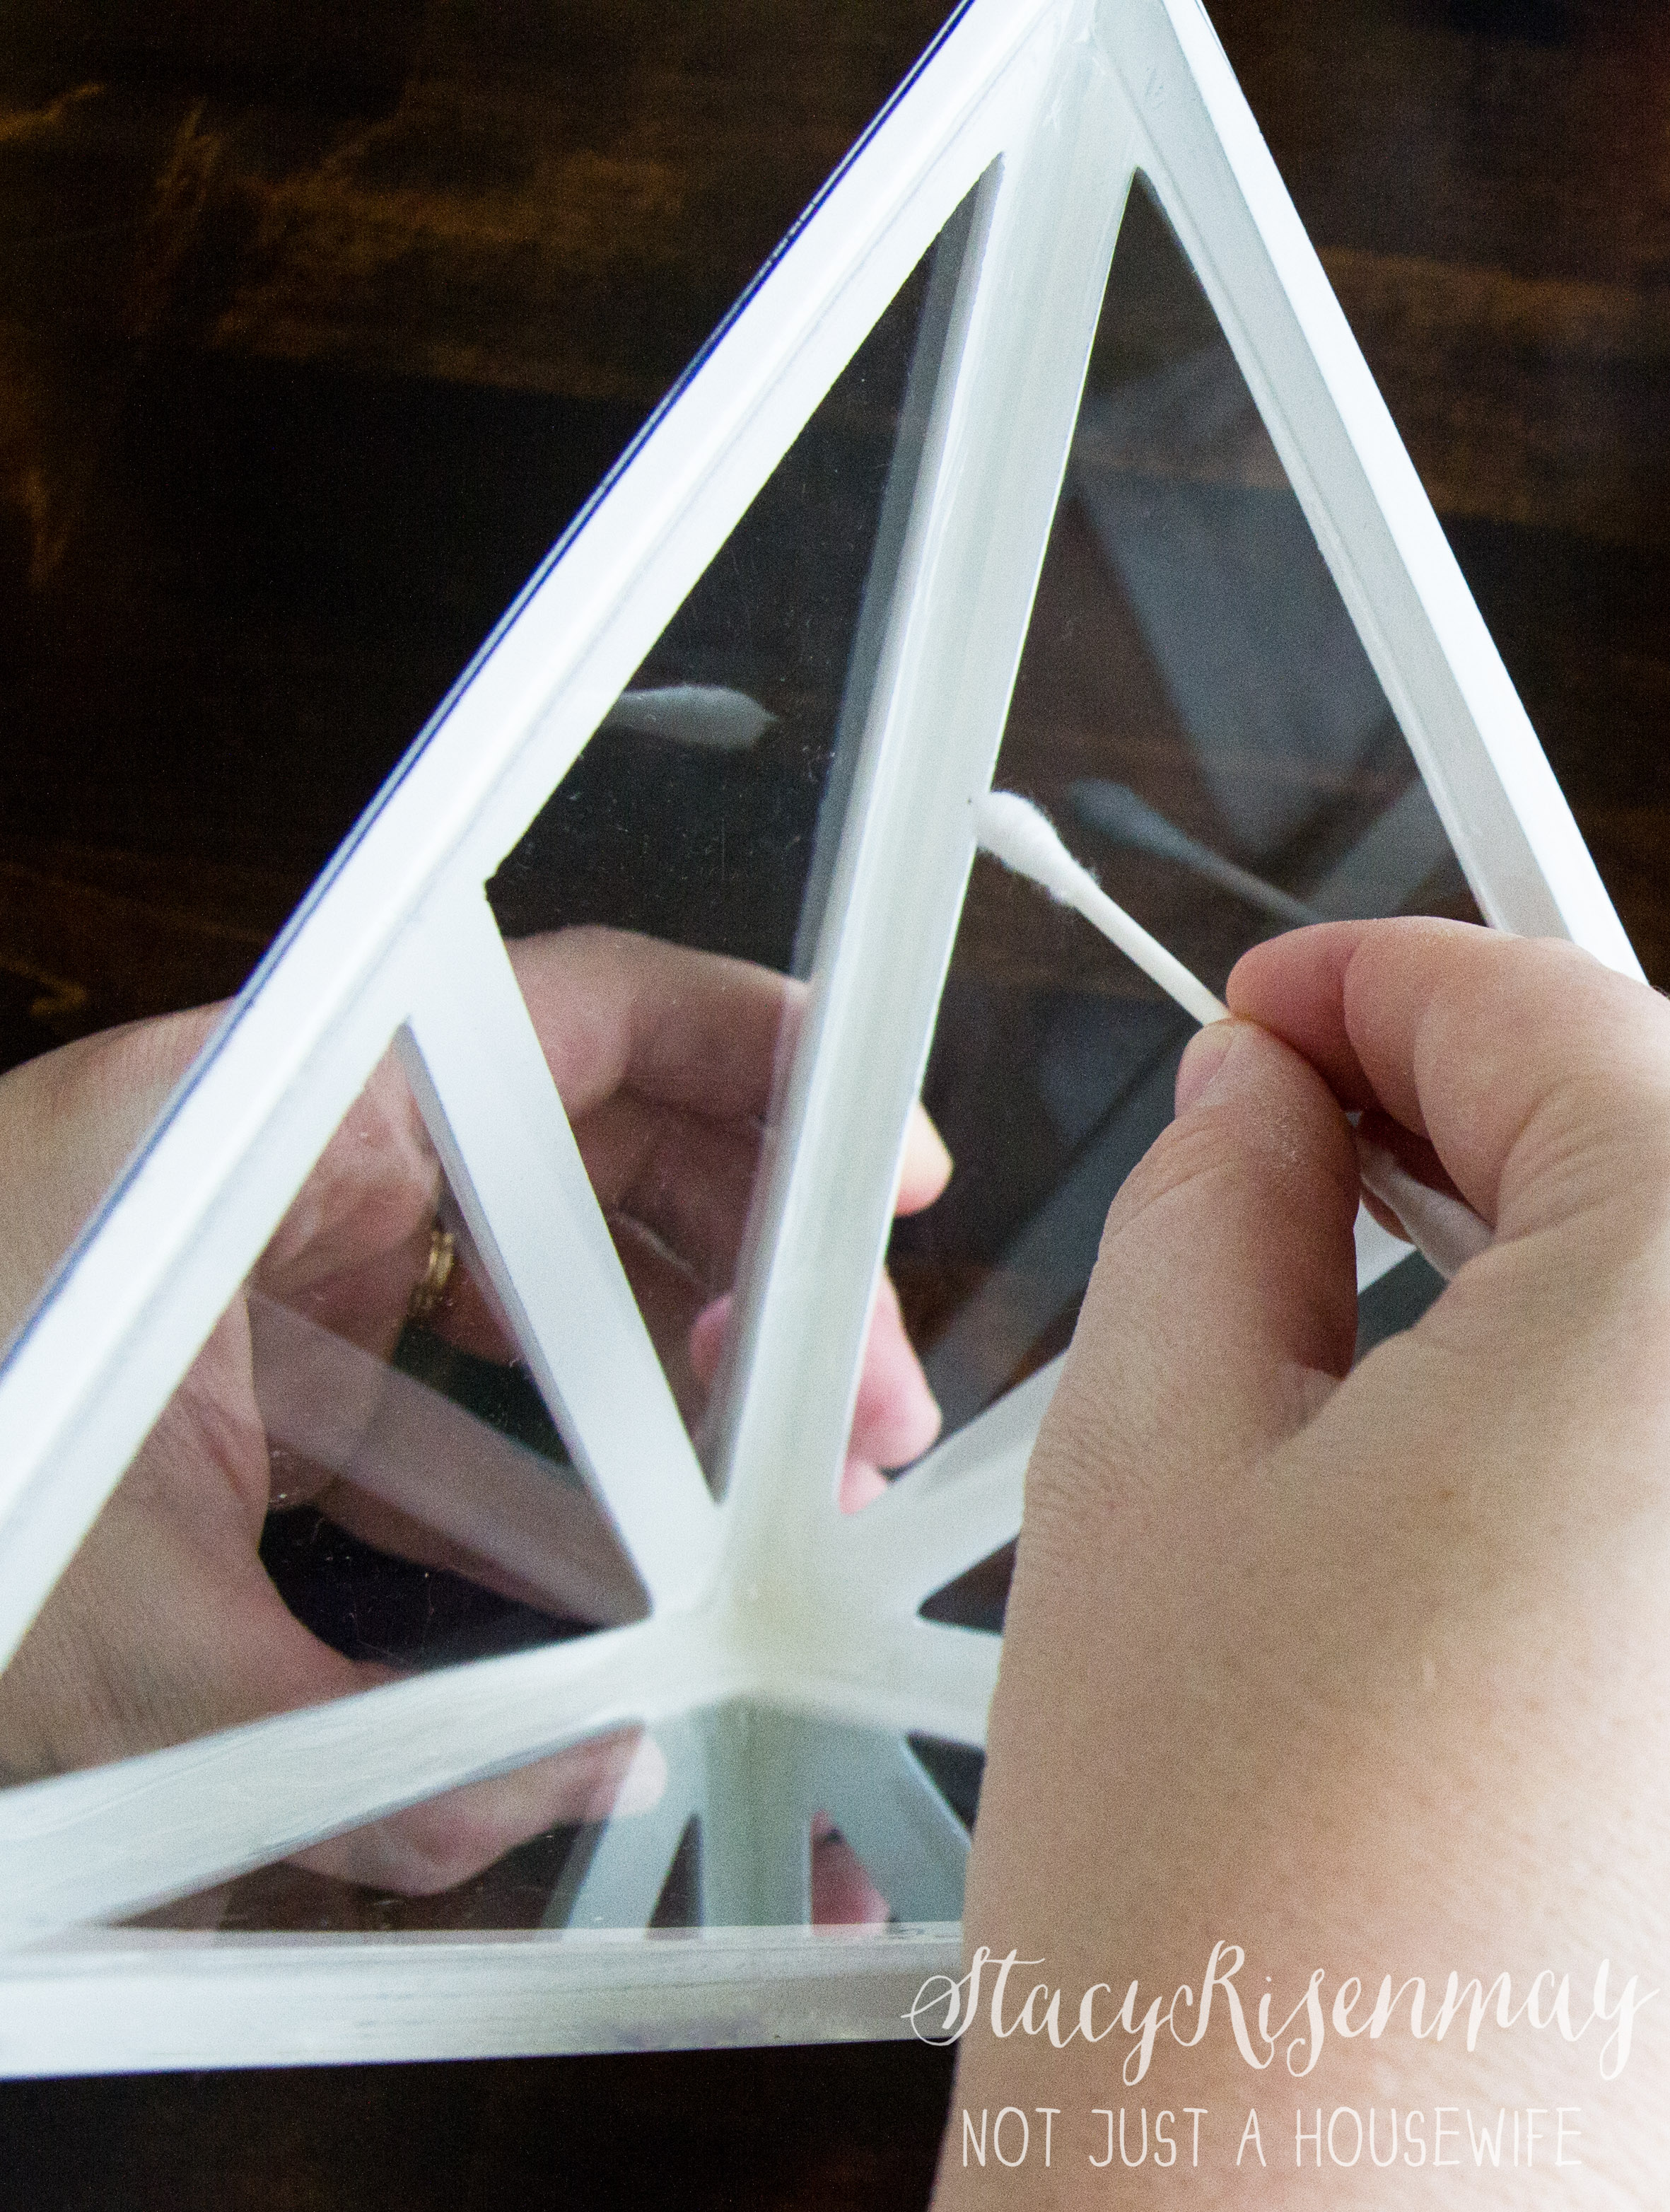
    The white corners hid the caulk well but there were a few places that I accidentally smeared the caulk so I used a damp Q-Tip to clean it off.

    It took 3 hours to fully dry. Fill it with water and check for leaks. I didn't have a problem with leaks and I think you should be just fine. But if there are leaks dump the water out, dry it, and fill that area with more caulk.

    clean acrylic_edited-1


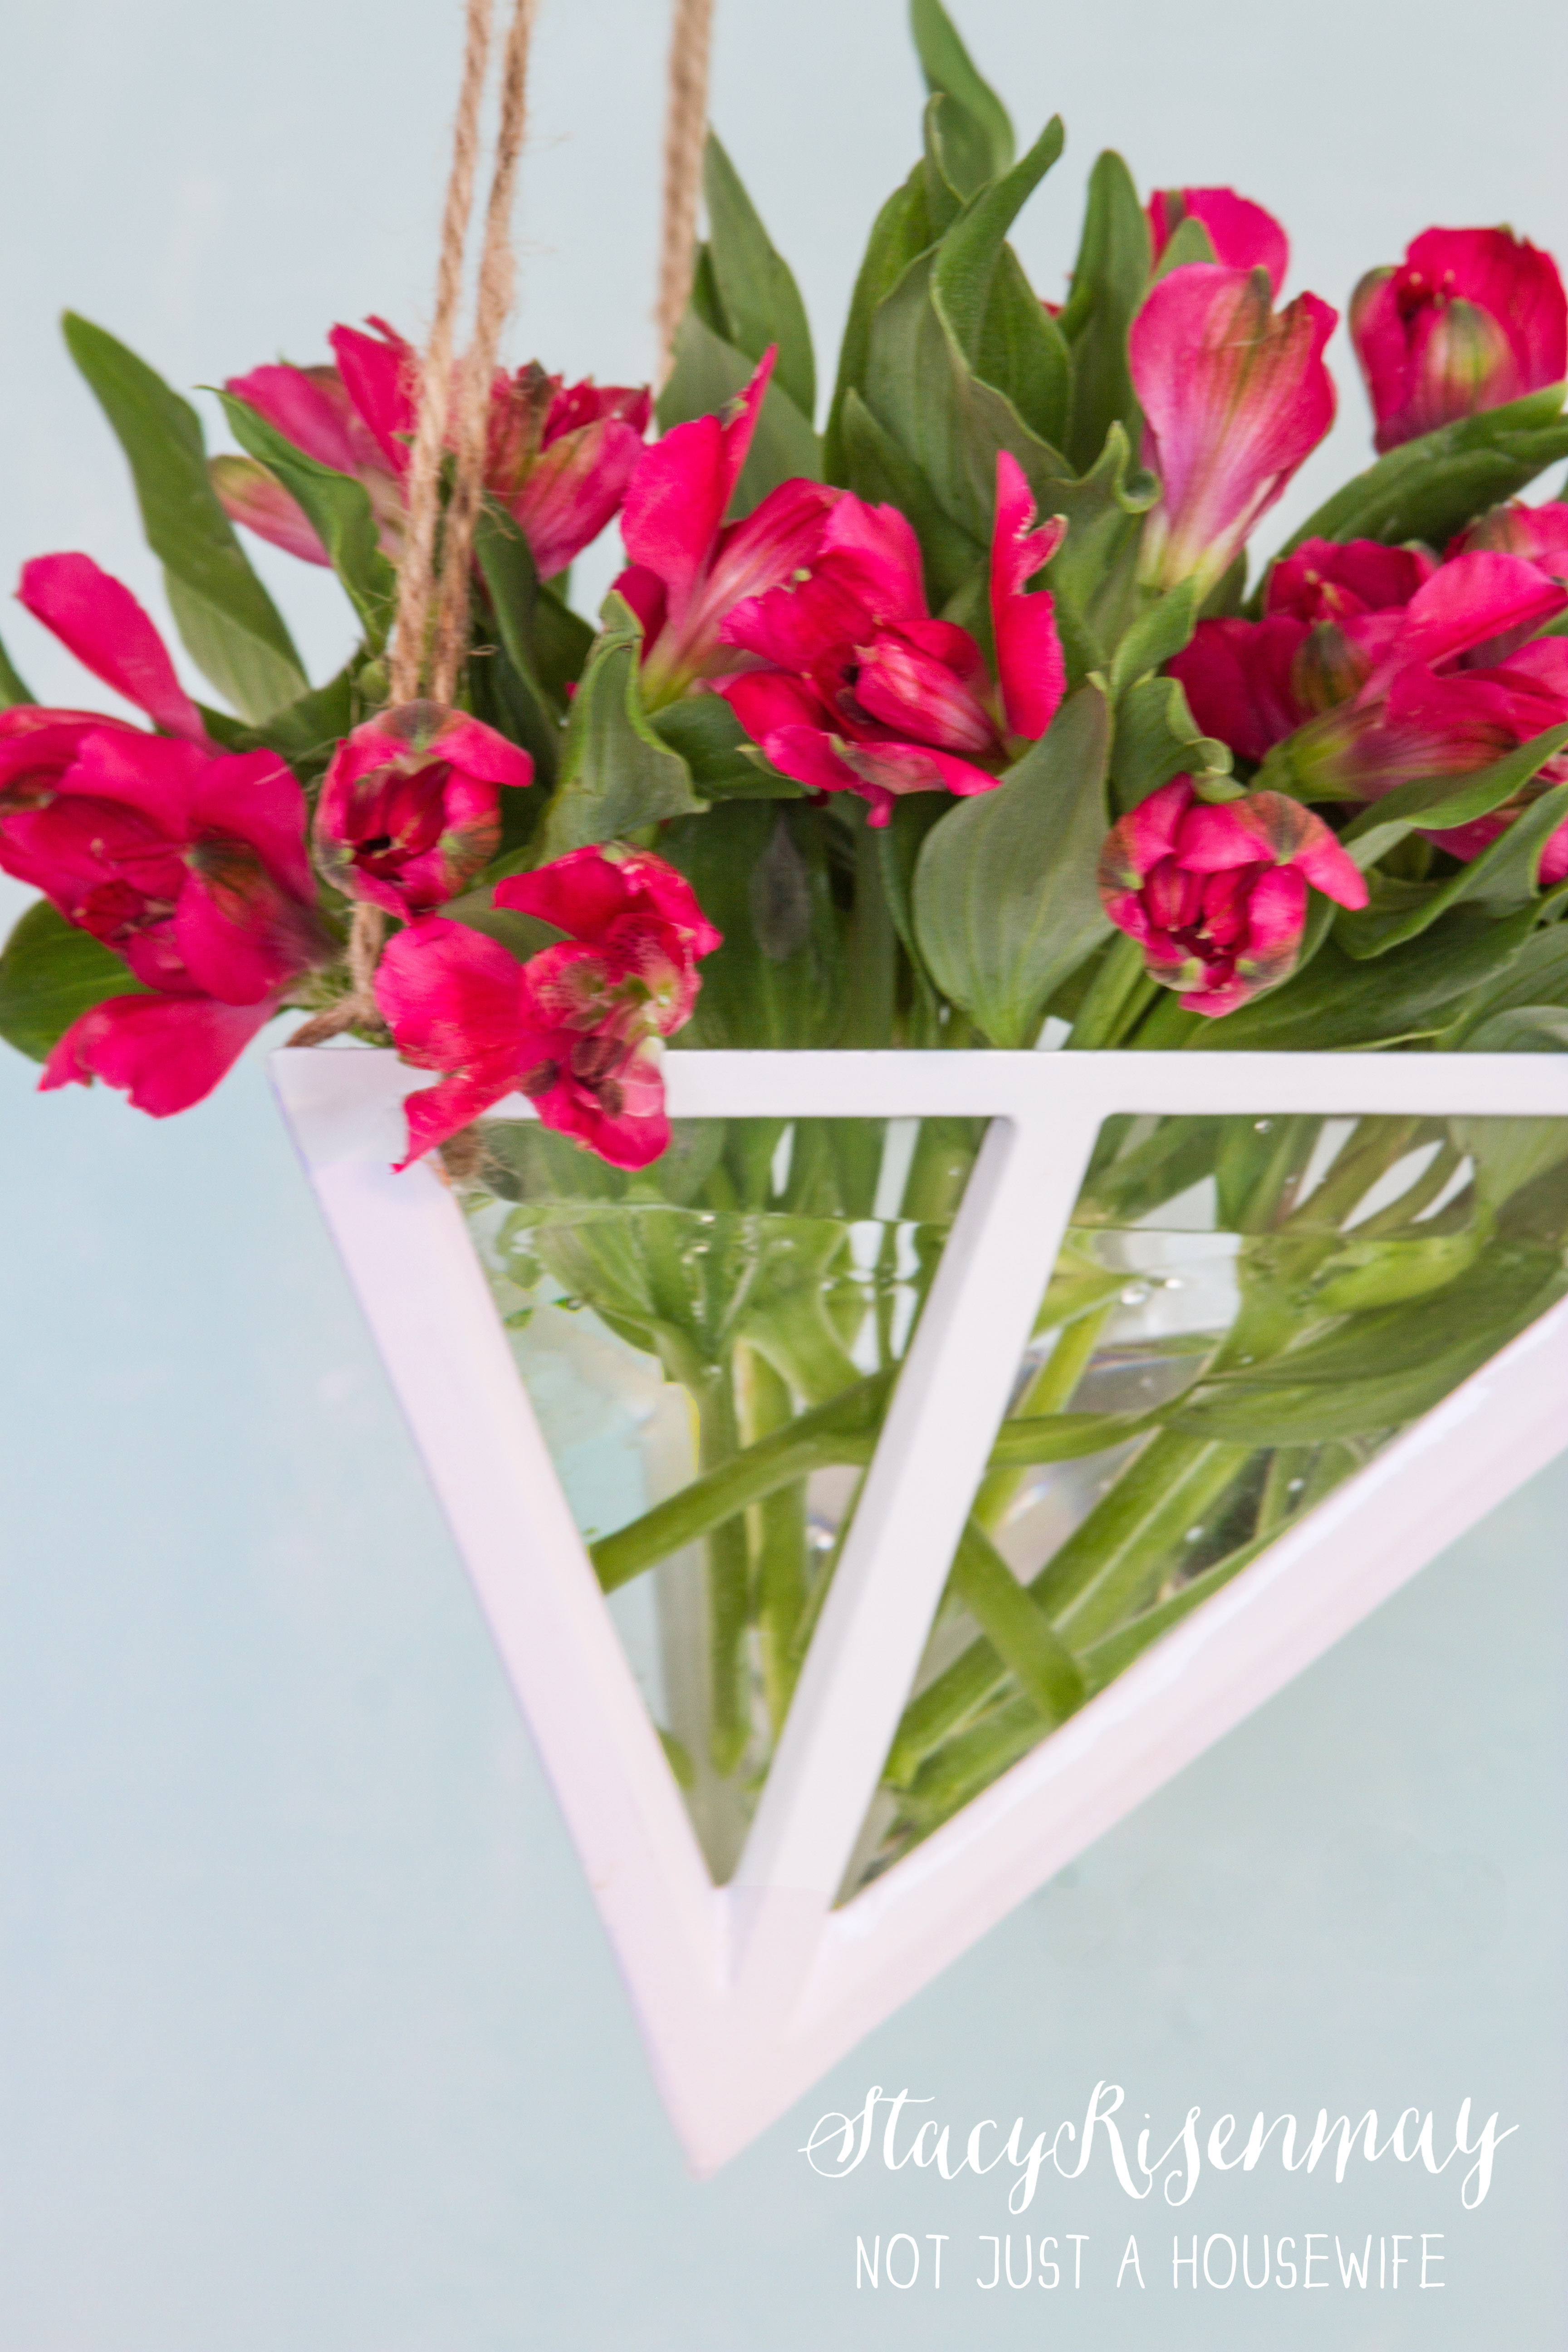
    I drilled holes in the acrylic at the very top at all the corners so I could thread some twine through it. It was awkward because I did it after the caulk had dried. I should have drilled the holes before assembling it. Make sure not to fill the water up clear to the top because of the holes.

    vase geometric_edited-2

    Now that you have seen what I have done with the pyramid, go check out what Michael and Sarah did with theirs! Michael is also doing a giveaway. You can enter to win a pyramid of your own AND a $100 Target giftcard!

    What would you have done with this decorative pyramid?

    stlyed x3 other posts


    You will also like:

    • These are a few of my favorite things.... 2016 Edition!These are a few of my favorite things.... 2016 Edition!
    • Mason Jar Wall PlanterMason Jar Wall Planter
    • Small House Tour {Day 1}Small House Tour {Day 1}
    • Modern Tree Stump PlanterModern Tree Stump Planter
    • Kitchen Makeover Plans! {He Said She Said}Kitchen Makeover Plans! {He Said She Said}
    • Kilim Inspired Painted RugKilim Inspired Painted Rug
    • 45 Organizational Products and Tips! {GIVEAWAY!}45 Organizational Products and Tips! {GIVEAWAY!}
    • I've Got Some Big News!I've Got Some Big News!

    « Healthy Treats and Desserts
    Adding Architectural Interest To Your Home {Part 1} »

    Filed Under: Home Decor 15 Comments

    Subscribe

    for your weekly DIY fix.

    Reader Interactions

    Comments

    1. Kylee Baumle

      February 11, 2015 at 5:59 am

      Stacy, this is outstanding! I'd love to see a photo of it in situ. Sharing with my Our Little Acre readers! :-)

      Reply
      • Stacy

        February 11, 2015 at 8:28 am

        That was the original plan but my poor time management got in the way. I was so focused on working on my kitchen that I recently retextured and am trying to paint that I didn't give myself enough time to properly photograph it. I started taking pictures at 5:30 in the evening (as in LAST evening)! I barely had time to take these and get them edited for the post. But I will try to add some more pictures later. Thanks for sharing it!

        Reply
    2. sarah dorsey

      February 11, 2015 at 6:19 am

      Love it Stacy!! Thanks SO much for having me!!

      Reply
    3. Michael Wurm, Jr

      February 11, 2015 at 6:49 am

      This is awesome Stacy!! So excited to be a part of this series! Can't wait to see future posts with other bloggers.

      Reply
    4. Mindi

      February 11, 2015 at 8:22 am

      Brillant idea! Wow, LOVE it Stacy!

      Reply
    5. Lisa

      February 11, 2015 at 9:21 am

      Great idea! This is an exercise in thinking outside the box.

      Reply
    6. Jennifer @ Dimples and Tangles

      February 11, 2015 at 9:49 am

      Hi Stacy! Hopping over from Sarah's. What a smart idea, I never would have re-imagined that piece as a hanging vase!

      Reply
    7. Stephanie @ Casa Watkins

      February 11, 2015 at 10:11 am

      I love it! I enjoyed seeing how you, Michael, and Stacy all had differing aesthetics with the same item. Thanks for sharing!

      Reply
    8. Ashley @ Cherished Bliss

      February 11, 2015 at 8:47 pm

      I love what you did with yours! : ) So so cute.... and now I'm even more ready for spring! Such a fun series to see how different people use the same thing!

      Reply
    9. Dea

      February 13, 2015 at 9:07 pm

      Interesting that all three of you did something with plants or flowers (or both). Personally, I think this triangle thingy would never make it into my house because I can't think of a thing I would want to do with it. But I do think your idea with filling the spaces with clear acrylic is clever and crafty. I can think of several things I have that are NOT waterproof that would make pretty vases if they were, and your "use acrylic" idea might be the very solution.

      Reply
    10. Chelc | Inside the Fox Den

      February 18, 2015 at 7:09 am

      I just picked this up this weekend! I love what you did with it and turned it into something completely new! I was just gonna put it on my shelf as is but now I want to be creative! :)

      Reply
    11. Amber

      February 18, 2015 at 11:27 pm

      Can you put the link to the pyramids? The one above doesn't take you to it. It's so cute...I want to order one :) but couldn't find it by just searching on target.com. Thanks!!

      Reply
      • Stacy

        February 18, 2015 at 11:49 pm

        It is telling me that it is no longer available online. You might get lucky and find them in the stores. Target cycles through items so quickly!

        Reply
    12. Julie Blanner

      March 10, 2015 at 8:54 pm

      So fun! I love what you created!

      Reply
    13. meg farris

      April 16, 2015 at 2:53 pm

      I am looking to buy one more Nate Berkus white decorative pyramid. I can't find them anywhere and need one more to
      complete a set. Do you have one to sell me please!!!!???

      Reply

    Comment Below! Cancel reply

    Your email address will not be published. Required fields are marked *

    This site uses Akismet to reduce spam. Learn how your comment data is processed.

    Primary Sidebar

    stacyHey! I'm Stacy and am a DIY addict. I love to get my hands dirty, whether it's sawdust, paint, or dirt. My goal is to help YOU learn to fix up your home and yard. No matter the style or size, I think everyone should love their home. And it doesn't takes a big budget to get there. Let's DIY together!

    Subscribe to My Blog!

    Search this site

    categories


    Subscribe

    Footer

    Welcome! I'm sharing our adventures as we fix up our 1938 cottage. Whether it is big or small, I think everyone should love their home and I don't think it takes a lot of money to make a space your own

    About Stacy

    • Facebook
    • Instagram
    • Pinterest
    • Twitter

    My Favorites

    copyright

    All images and content are copyrighted via Stacy Risenmay unless otherwise stated. If you'd like to share my work, please link back to this blog.
    Thank you for visiting!


    Footer

    ↑ back to top

    About

    • Meet Stacy
    • Privacy Policy
    • Contact

    Categories 

    • Home Decor
    • Outdoor Projects & Gardening
    • DIY & Tutorials
    • Kid Activities
    • Recipes
    • Travel
    • Cleaning
    • Houseplants
    • Staining
    • Painting
    • Power Tools
    • Holiday Ideas

    Newsletter

    • Sign Up! for emails and updates

    As an Amazon Associate I earn from qualifying purchases.

    Copyright © 2020 Brunch Pro on the Brunch Pro Theme


    Privacy Policy
    Welcome! Thanks for visiting.
    Hi! I'm Stacy and I want to help YOU become a DIY rockstar! Sign up for my email list so each project, tip, and trick will go directly to your inbox :)
    Your information will *never* be shared or sold to a 3rd party. Pinky promise :)
    Welcome!
    Hi! I'm Stacy and I blog about fixing up our 1938 cottage. Join the thousand of others who get my posts sent to their inbox for FREE!
    Your information will *never* be shared or sold to a 3rd party.