• Skip to primary navigation
  • Skip to main content
  • Skip to primary sidebar
  • Skip to footer
Stacy Risenmay
  • Home
  • About me
  • PRESS
  • Contact Me
  • My Book
    • Facebook
    • Instagram
    • Pinterest
    • Twitter
menu icon
go to homepage
subscribe
search icon
Homepage link
  • Home
  • About me
  • Project Gallery
  • Our House
  • PRESS
  • Contact Me
  • Privacy Policy
    • Facebook
    • Instagram
    • Pinterest
    • Twitter
  • ×

    Pine Tree Topiary Tutorial

    By Stacy 6 Comments

    I love topiaries! I knew I needed to make some for Christmas this year. These pine tree trees are easy to make and you will save money too :)

    Here is what you will need:
    drill, 1/16" drill bit, plaster of paris, 4" pots, burlap, sticks, glue, and fake pine branches.

    The first thing you need to do is tape up the hole in the bottom of your pot. This way the plaster won't get out.

    Mix up the plaster directly in the post according to the directions on the package. Then put the sticks on the pots and let them sit for several hours until they have completely set up. I got my sticks in the backyard. I trimmed them off of one of my pine trees. Any stick would do. I cut them to be three different heights.

    Drill holes in the top of each stick. The a few more at 45 degree angles just below the top of the stick.

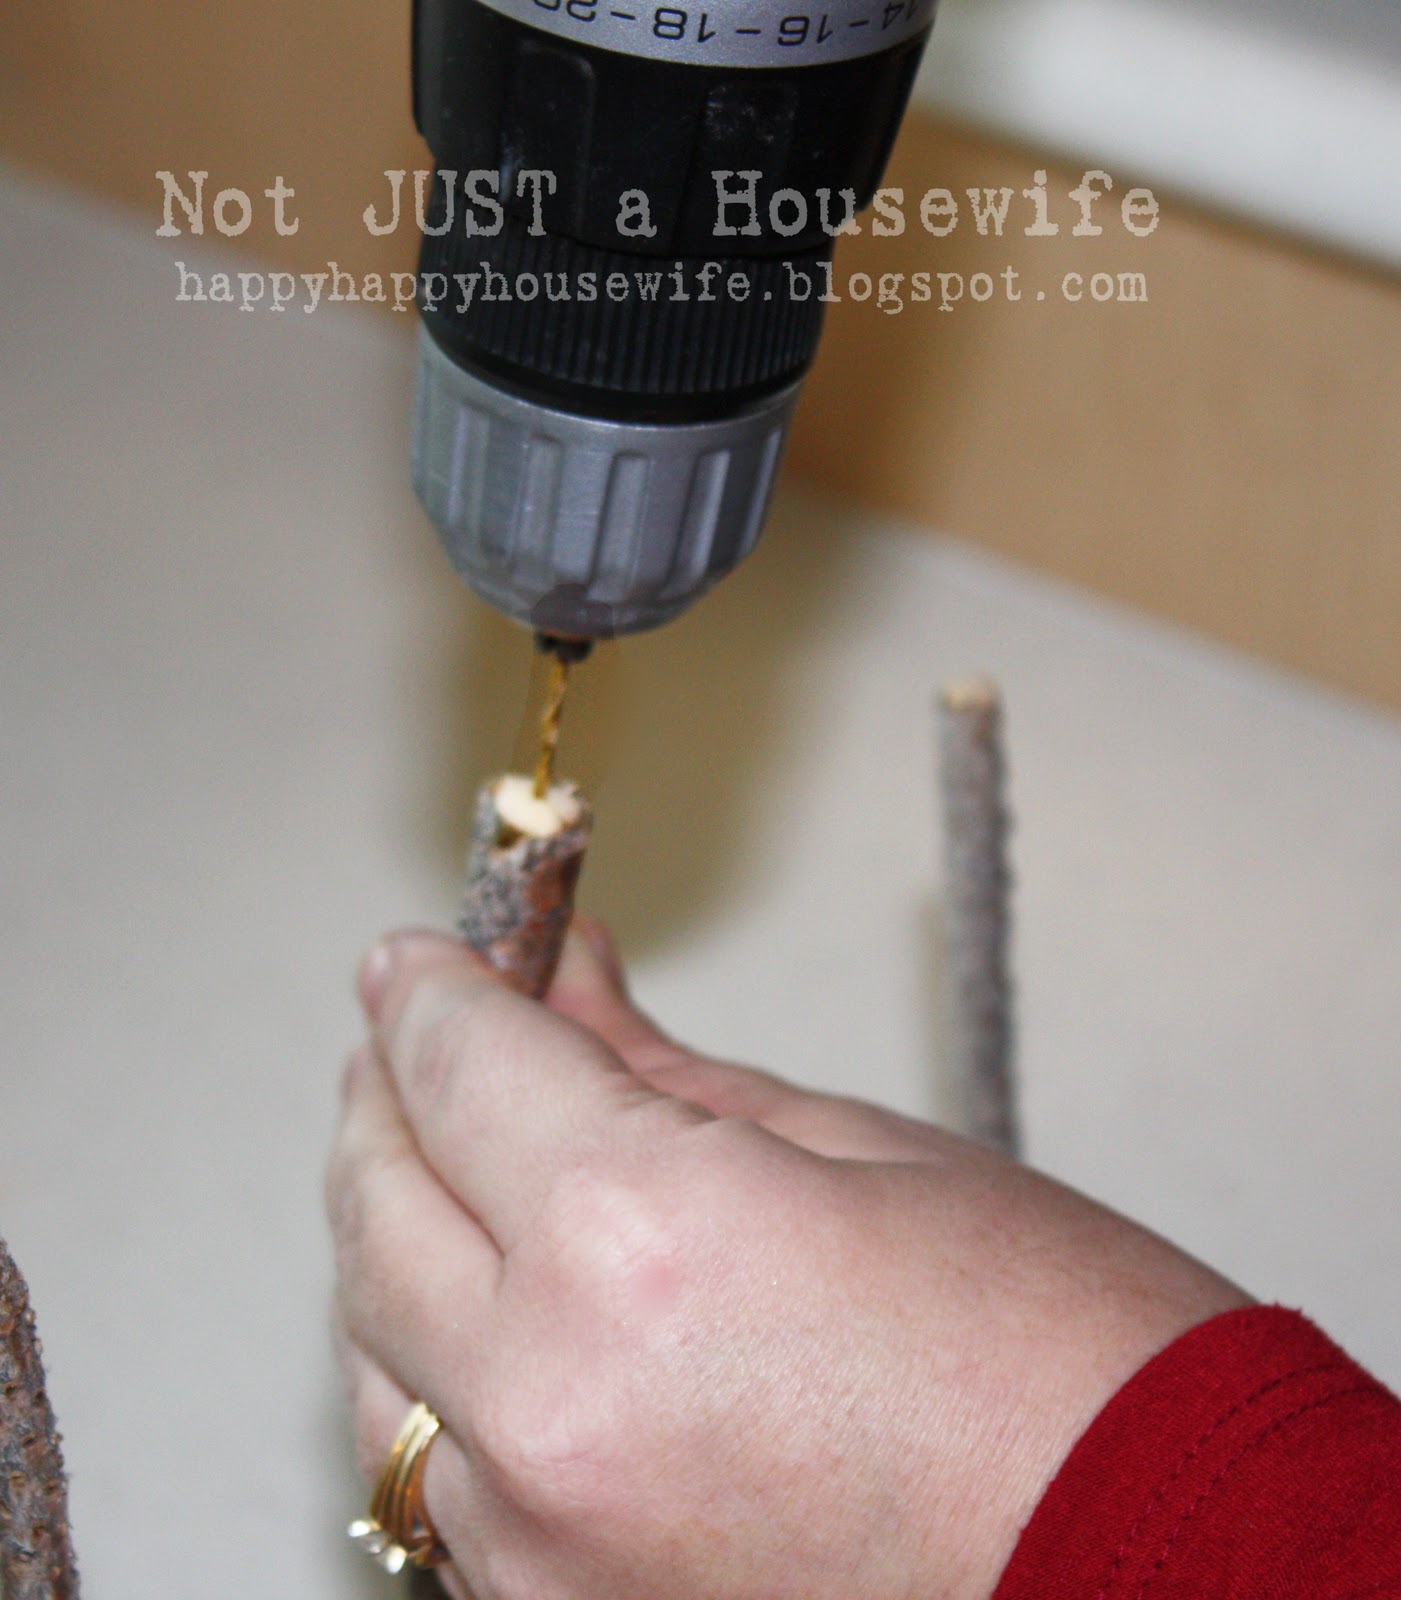
    I stripped the plastic off of the fake pine branches to expose the wire. Then I bent the wire in half until it snapped in half. If you have trouble breaking the wire you can use wire snips.

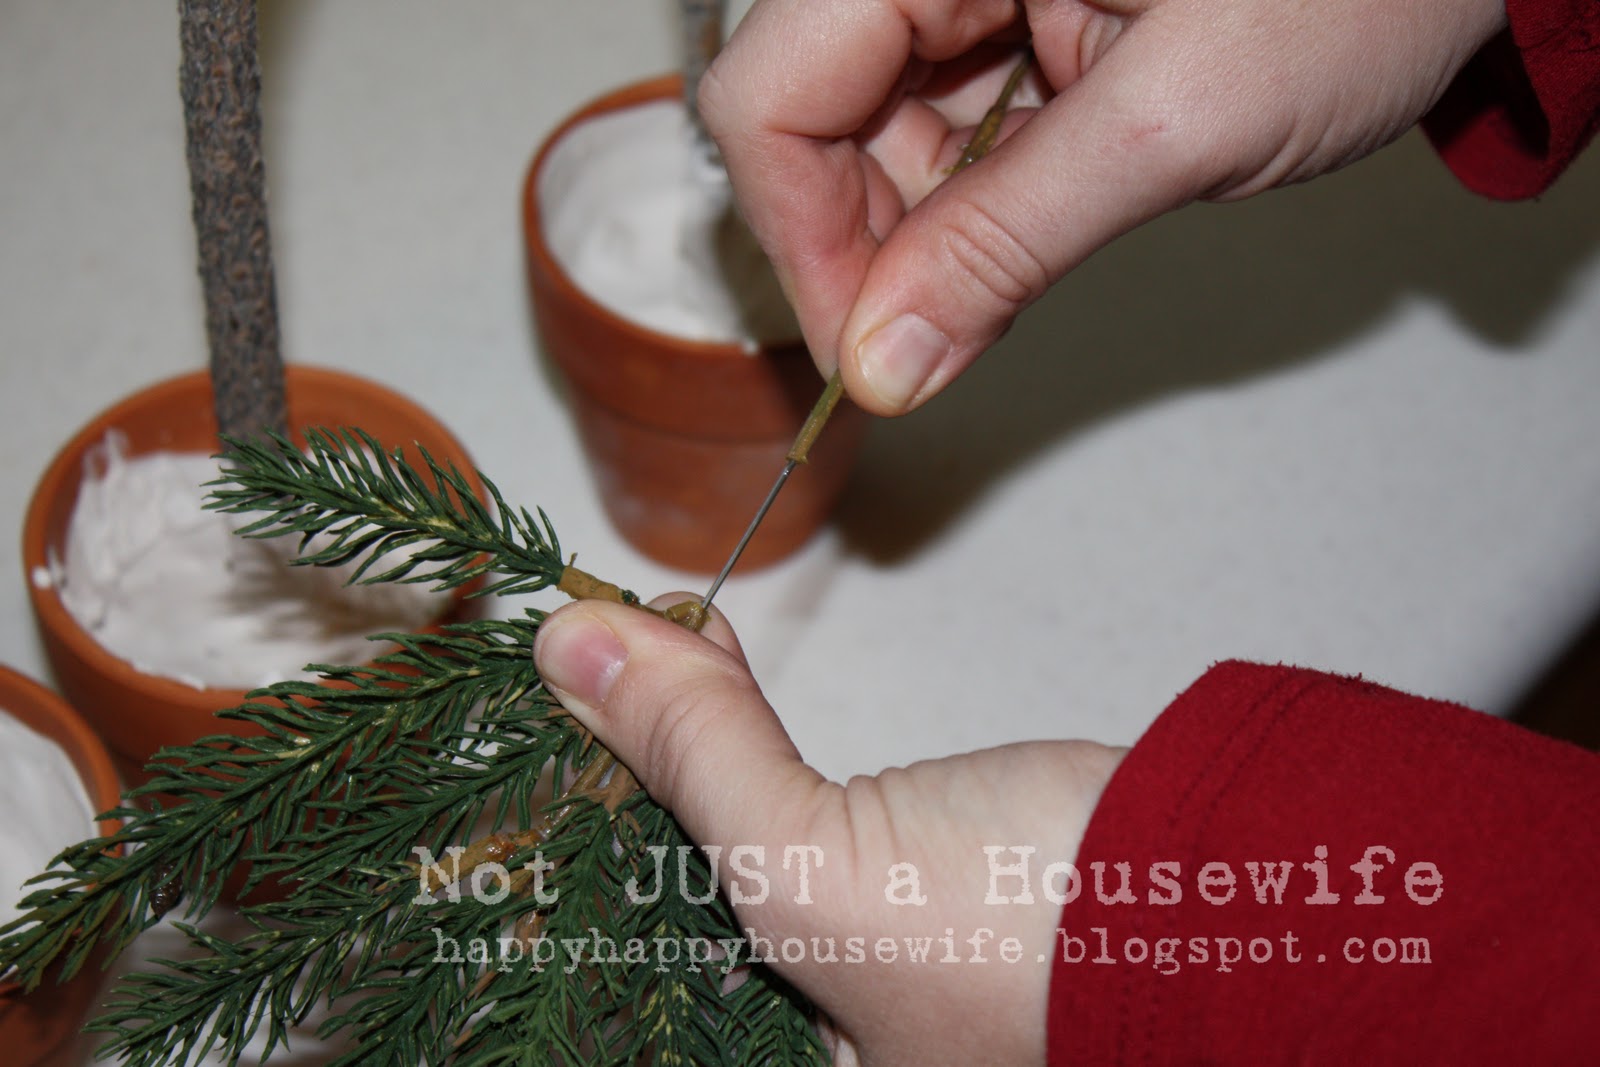
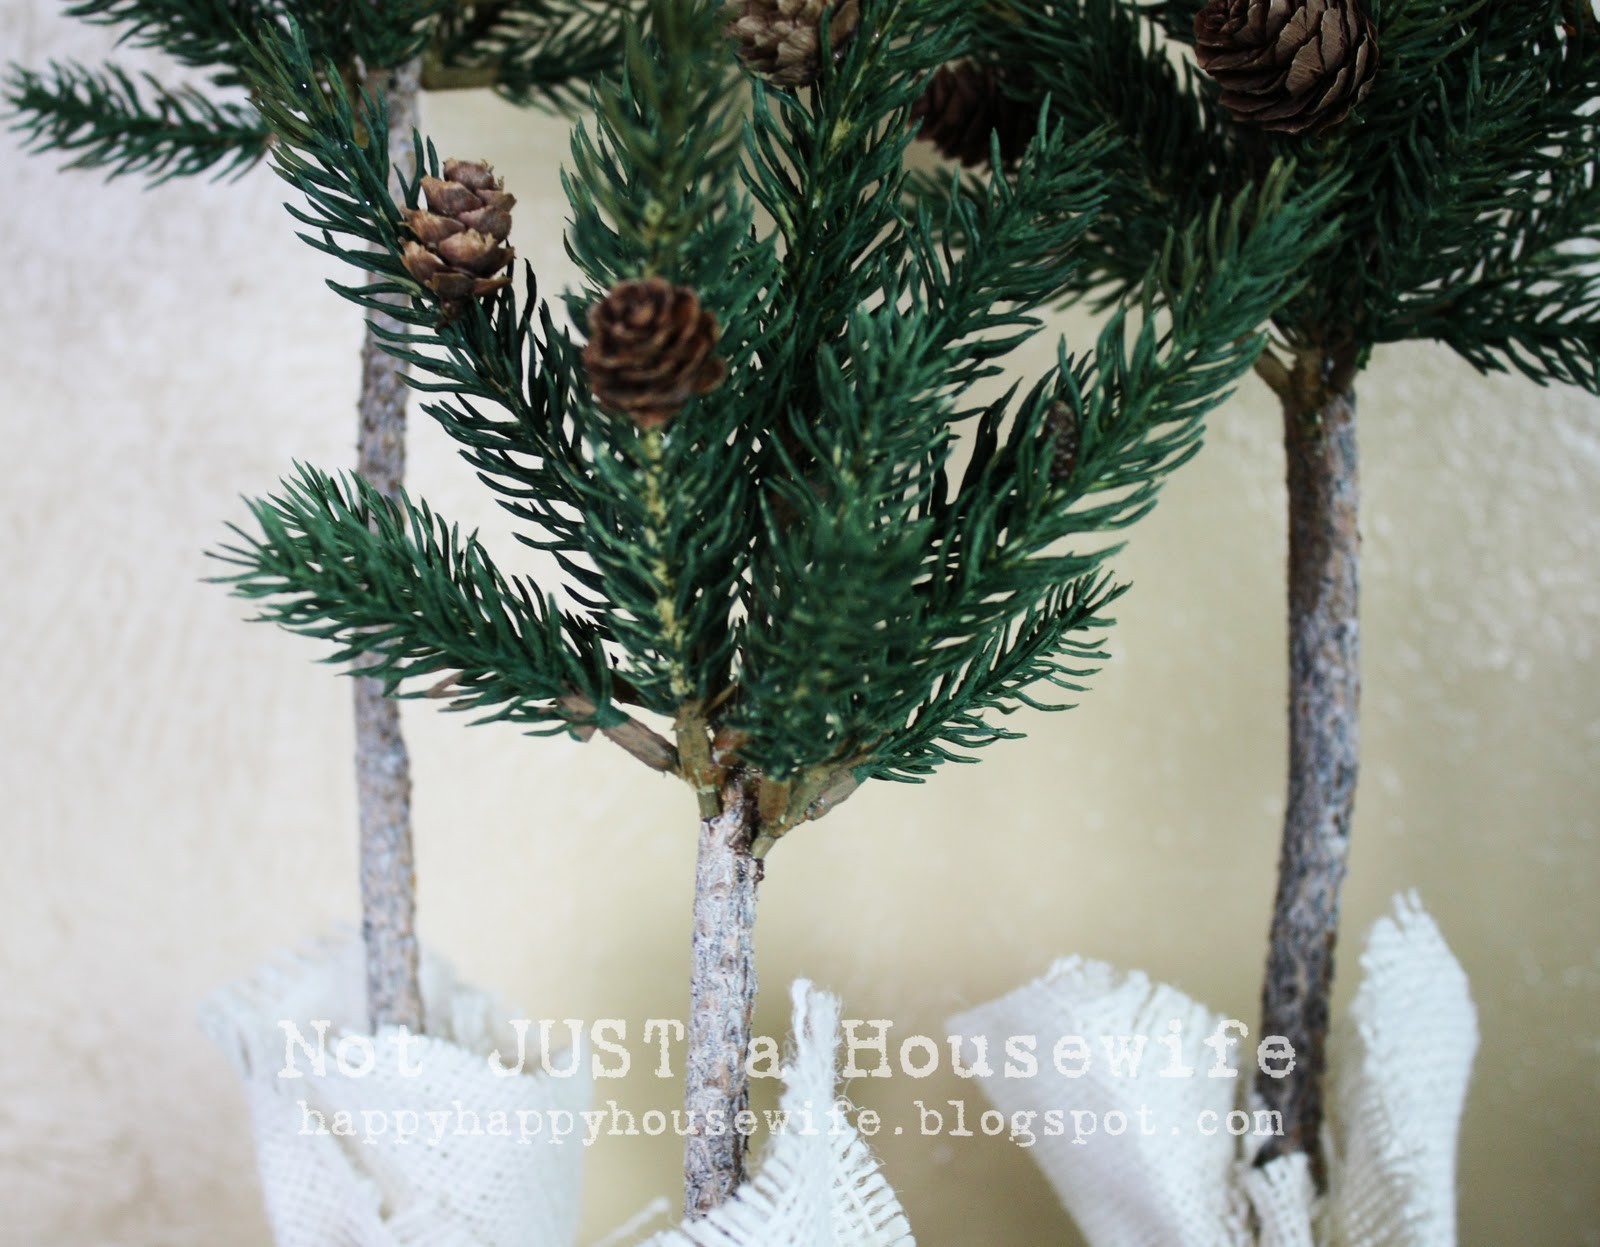
    I put some glue on the hole before sticking the wire in it. Any glue would work.

    Here they are all glued! Just play around with the location of the branches until it looks like what you want. The holes are small enough that if you choose not to use that hole, you can't see it. No one will know :)

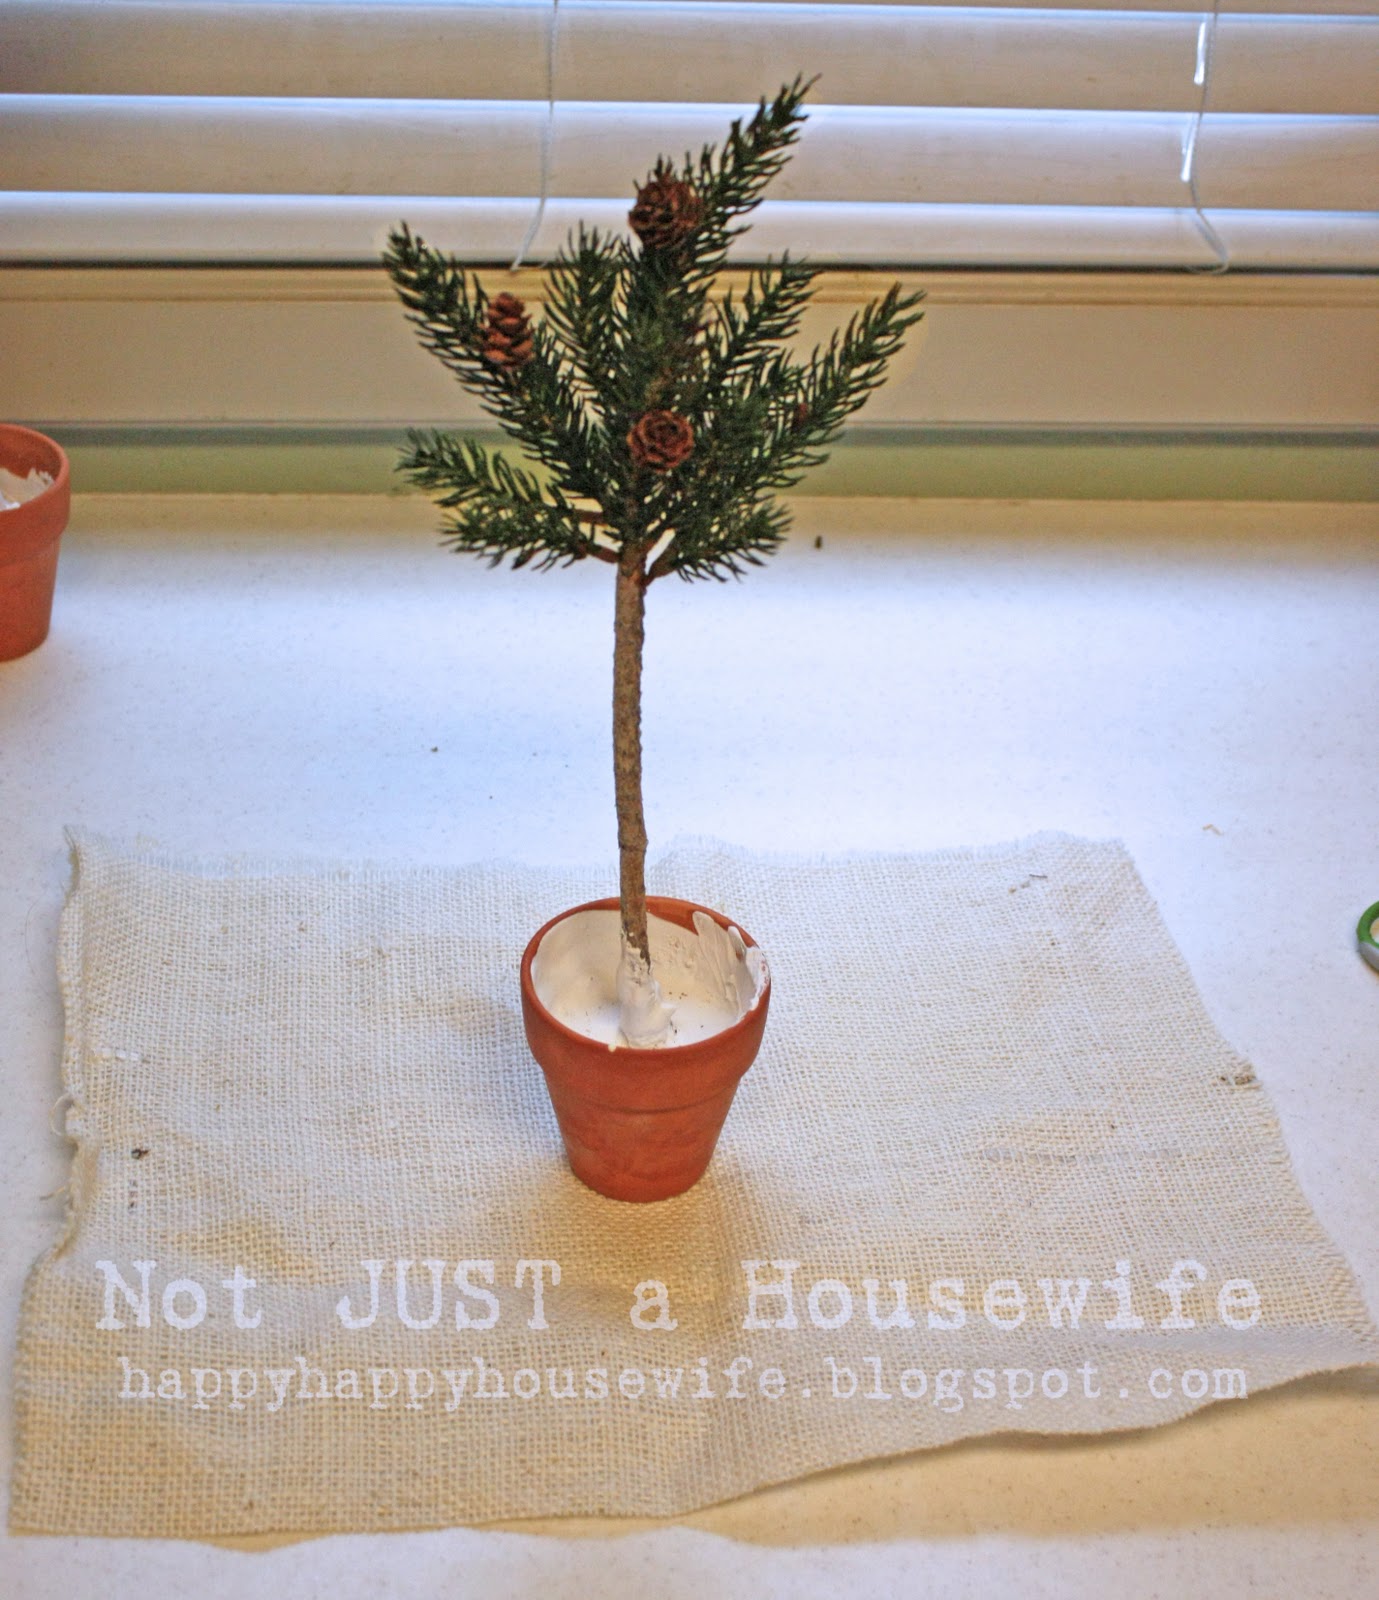
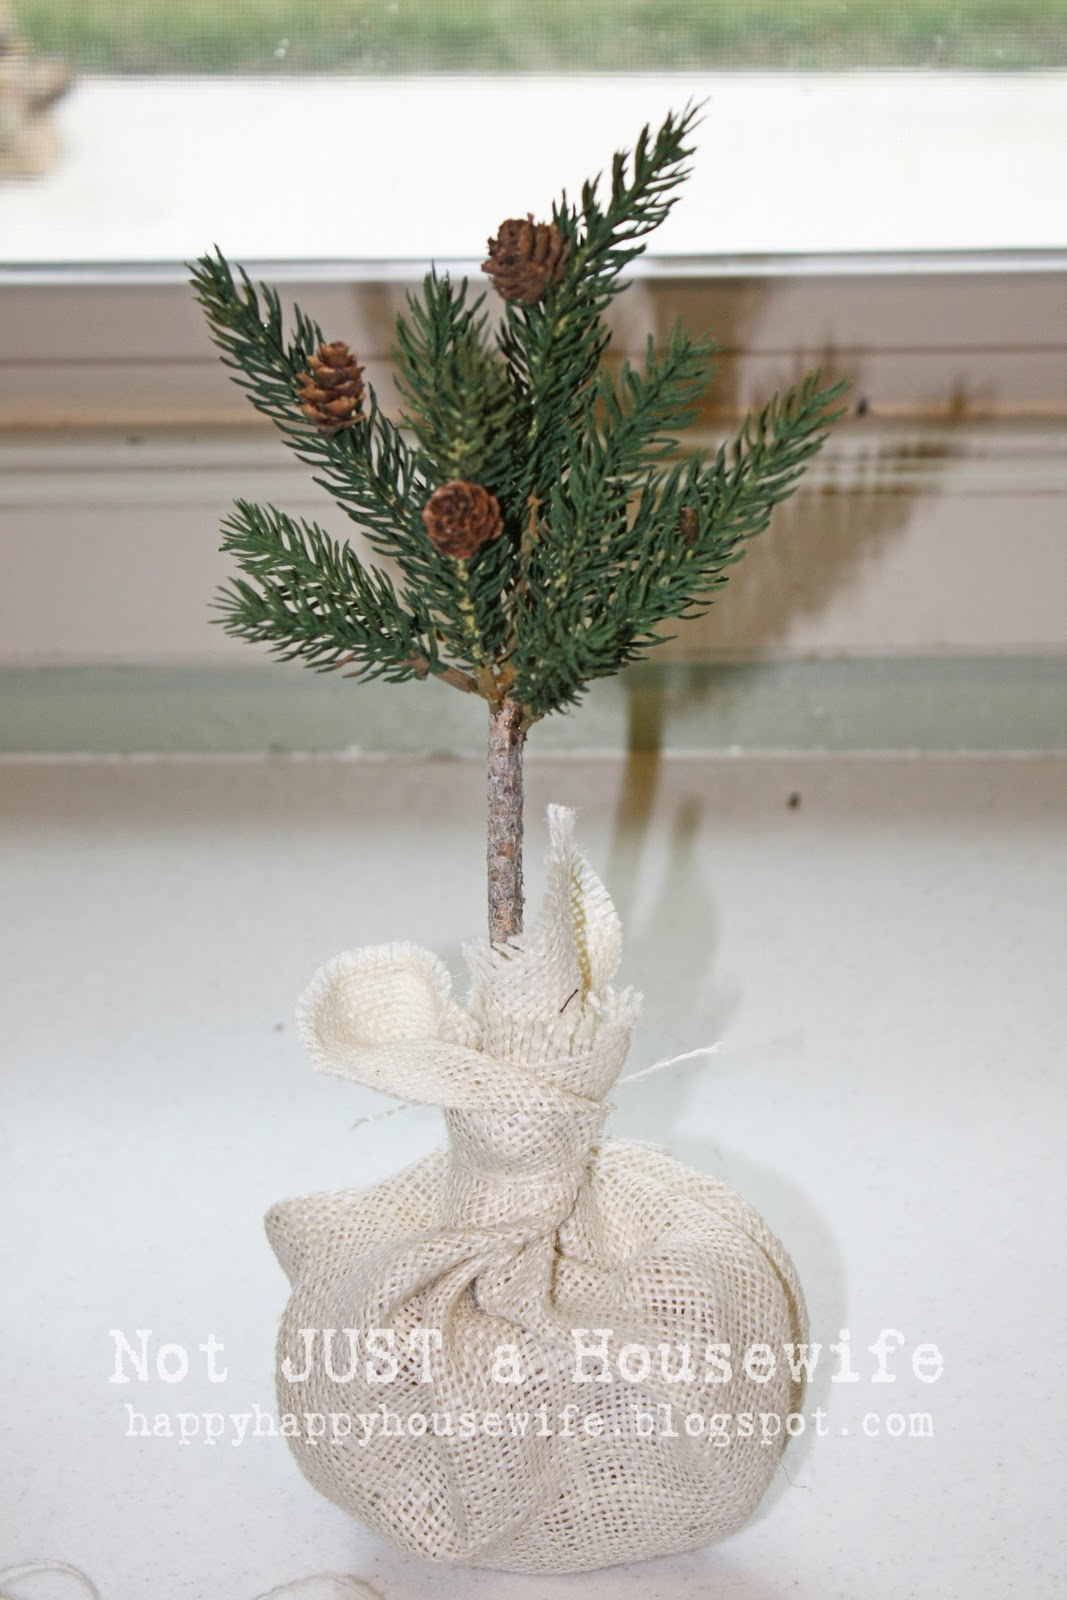
    I used burlap but really you can use whatever fabric you want. Or, you don't have to use any at all. You could add pebbles or moss to the pots to cover up the plaster.
    Set the pot on the fabric and then bring all the side up around the stem. Since burlap frays so easily, I just pulled me of the strings and used those to tie the fabric. You could also use ribbon or jute.

    I love these because they really could stay out all year, or at least all winter. Enjoy!

    You will also like:

    • Painting PillowsPainting Pillows
    • DIY Wood Houses (Christmas Village)DIY Wood Houses (Christmas Village)
    • Tools Are For LadiesTools Are For Ladies
    • Point Of View: April's ProjectPoint Of View: April's Project
    • Simple Fall Decor {Home Tour}Simple Fall Decor {Home Tour}
    • Home Goals For 2023Home Goals For 2023
    • Kitchen Makeover Plans! {He Said She Said}Kitchen Makeover Plans! {He Said She Said}
    • Closet Makeover!Closet Makeover!

    « My scrap wood lamp with hand painted shade
    Christmas Bulbs »

    Filed Under: Holiday 6 Comments

    Subscribe

    for your weekly DIY fix.

    Reader Interactions

    Comments

    1. Bella

      December 18, 2010 at 3:41 pm

      Very cute girl, I so thought those were real.

      Come link up **Amaze me August** you know I would love to have you ANYTIME!!!

      Bella :)

      Reply
    2. Tracy's Trinkets and Treasures/Treasured Moments

      December 18, 2010 at 4:33 pm

      Your way was so much easier than my way!!! Better tutorial too! Looks good.

      Reply
    3. Cheri

      December 19, 2010 at 4:59 am

      What a neat idea! I am a new follower, btw!

      Reply
    4. Brooke

      December 12, 2011 at 10:32 am

      Love these!!!

      Reply

    Trackbacks

    1. 20 $1! Fall/ Winter DIY Room Deco Using Items From the Dollar Shop - Gaazer says:
      November 30, 2015 at 1:10 am

      […] 20. Pine Tree Topiary […]

      Reply
    2. 20 $1! Fall/ Winter DIY Room Deco Using Items From the Dollar Shop | Daily Planet says:
      November 30, 2015 at 1:28 am

      […] 20. Pine Tree Topiary […]

      Reply

    Comment Below! Cancel reply

    Your email address will not be published. Required fields are marked *

    This site uses Akismet to reduce spam. Learn how your comment data is processed.

    Primary Sidebar

    stacyHey! I'm Stacy and am a DIY addict. I love to get my hands dirty, whether it's sawdust, paint, or dirt. My goal is to help YOU learn to fix up your home and yard. No matter the style or size, I think everyone should love their home. And it doesn't takes a big budget to get there. Let's DIY together!

    Subscribe to My Blog!

    Search this site

    categories


    Subscribe

    Footer

    Welcome! I'm sharing our adventures as we fix up our 1938 cottage. Whether it is big or small, I think everyone should love their home and I don't think it takes a lot of money to make a space your own

    About Stacy

    • Facebook
    • Instagram
    • Pinterest
    • Twitter

    My Favorites

    copyright

    All images and content are copyrighted via Stacy Risenmay unless otherwise stated. If you'd like to share my work, please link back to this blog.
    Thank you for visiting!


    Footer

    ↑ back to top

    About

    • Meet Stacy
    • Privacy Policy
    • Contact

    Categories 

    • Home Decor
    • Outdoor Projects & Gardening
    • DIY & Tutorials
    • Kid Activities
    • Recipes
    • Travel
    • Cleaning
    • Houseplants
    • Staining
    • Painting
    • Power Tools
    • Holiday Ideas

    Newsletter

    • Sign Up! for emails and updates

    As an Amazon Associate I earn from qualifying purchases.

    Copyright © 2020 Brunch Pro on the Brunch Pro Theme


    Privacy Policy
    Welcome! Thanks for visiting.
    Hi! I'm Stacy and I want to help YOU become a DIY rockstar! Sign up for my email list so each project, tip, and trick will go directly to your inbox :)
    Your information will *never* be shared or sold to a 3rd party. Pinky promise :)
    Welcome!
    Hi! I'm Stacy and I blog about fixing up our 1938 cottage. Join the thousand of others who get my posts sent to their inbox for FREE!
    Your information will *never* be shared or sold to a 3rd party.