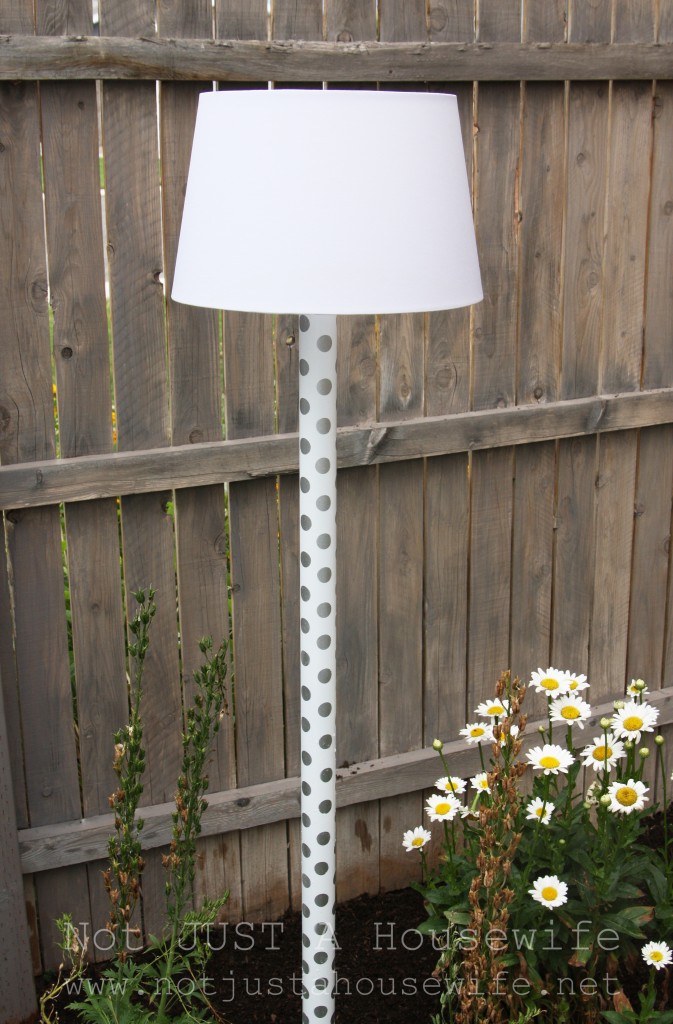
I think one of the key elements in making my secret garden look like an outdoor room was the addition of this solar powered lamp. This lamp was an after thought. Originally I was going to put the mirror behind the bench but when I decided it looked better on the other fence, I needed some height on this "wall".
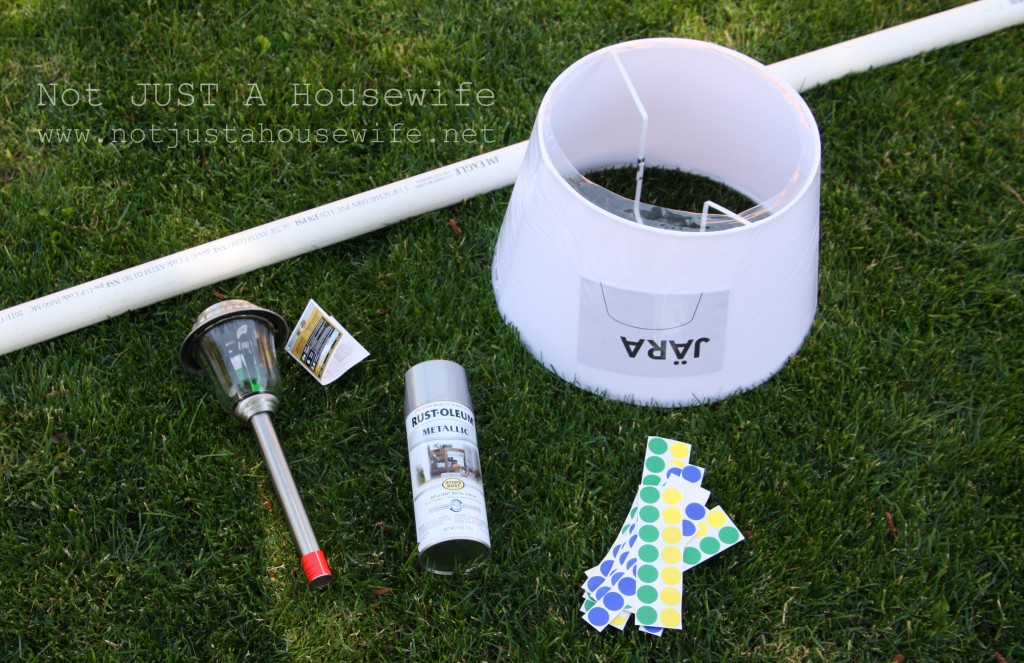
Here is what you will need:
PVC pipe ( there are different thicknesses as well as diameters. I got the thickest because I did not want it bending in the wind)
Lamp Shade ( I got mine at IKEA. I love them because the inside swivels and you can use it up or down)
Heavy gauge Wire ( not pictured)
Solar Light
Spray paint
"Garage Sale" Stickers (*optional)
Electrical tape (not pictured)
The first thing is to figure out how tall you want your lamp. Then add at least 2 feet to that amount (mine was about 30 inches extra). Cut the pipe with pipe cutters or a saw.
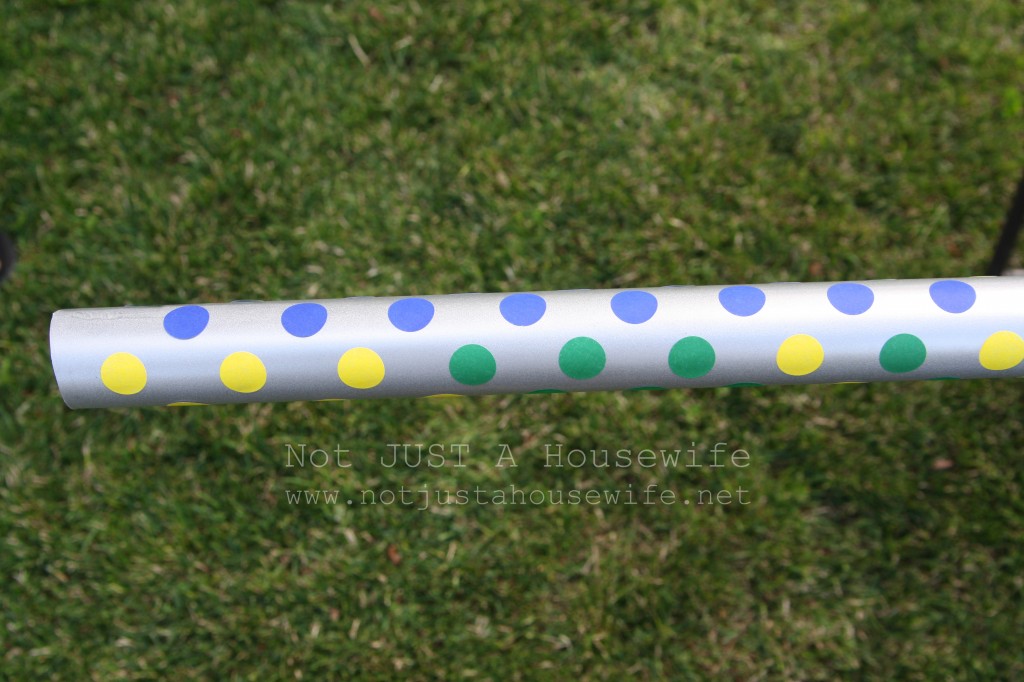
I then cleaned the pipe and spray painted it silver. Once it had a couple coats of the silver spray paint, I covered it in the dot stickers. Rub the stickers really well to make sure they are on there really well. Then I spray painted it white. Wait for at least an hour. You don't want the paint to be tacky or soft. It needs to be all the way hard and dry before attempting to peel off the stickers. I was worried about the paint scratching off but had no problems at all.
I decided where I wanted it placed. Then with the help of my husband, I held it straight while he carefully pounded it into the wet ground with a sledge hammer. Like I said before, my PVC pipe was an extra 30 inches. That is how far we pounded it in.
Now it is time to assemble!
I am not going to lie. This next step is not pretty. But unless you squat down and look up, you can't see this part of the lamp. This step is all about function!
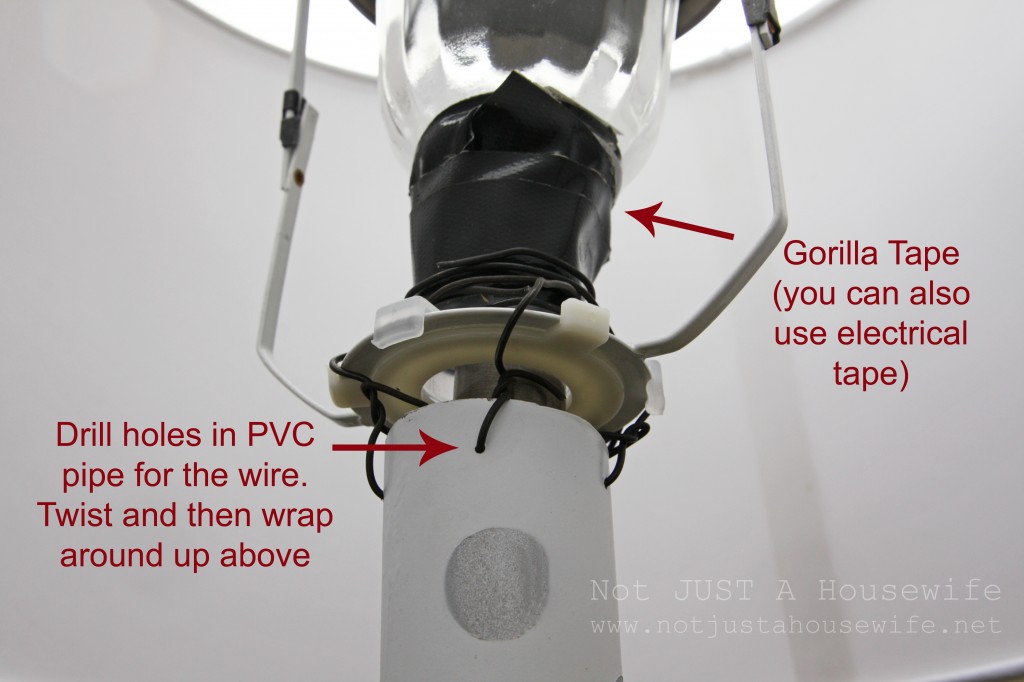
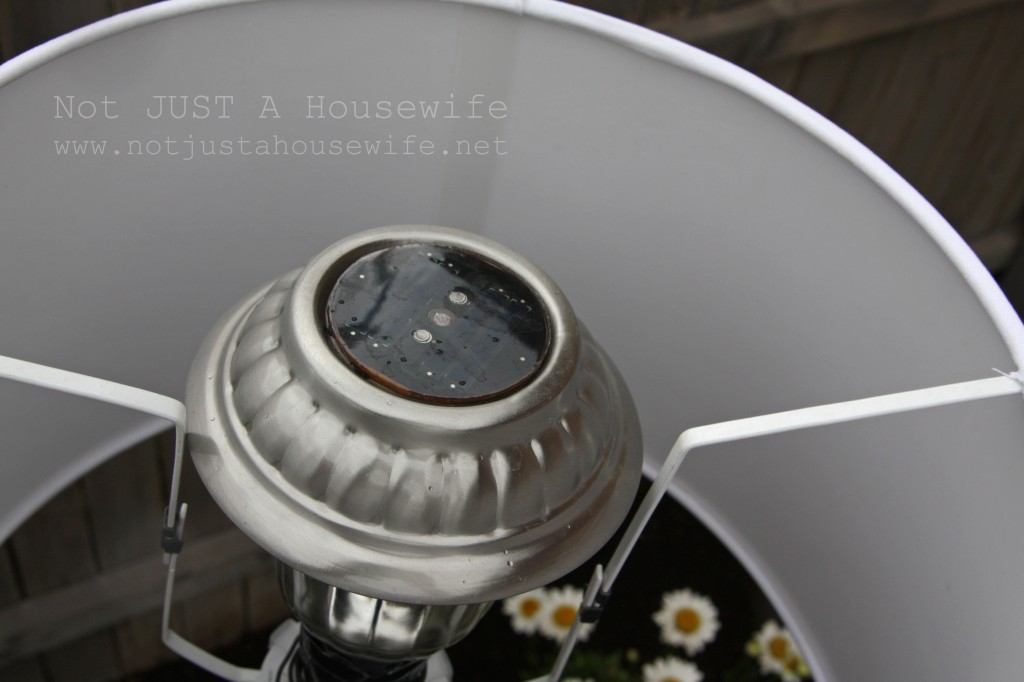
I first taped the solar light to the lamp shade. I swiveled the inside of the lamp down (I love IKEA lamp shades!) and went around with the tape about 3 times. Slide the long part of the solar light (the part that would normally go in the ground) into the hole at the top of the PVC pipe.
I had drilled holes a little bit bigger than the size of the wire all around the top of the PVC pipe. I fed the wire through, twisted it, then took the long end and wrapped it around the light and lamp shade.
Do you want to know if it holds up well? Ha! This lamp has survived 3 horrible wind storms we recently have had. We are talking shingles off the roof, giant tree in our backyard uprooted, and neighbor's trampolines flying over fences. An this lamp stayed strong. The lampshade was a tad bit crooked, but other than that it was solid.
The only thing I wonder about is cleaning the lampshade if it gets dirty. It is plastic with canvas on the outside so I should be able to scrub it. Is there something you can spray on it, do you know? Like a scotch guard kind of thing?
I love my lamp! I have yet to sit out there at night but I love peeking out the window and see the light on :)

You will also like:






Oh, I am definitely going to have to do this! I'm thinking a bunch of them around our picnic area which is "miles" away from our house and/or any electricity.
Awesome idea Stacy! Love it and am going to have to give it a try. My only worry is having the lampshade be destroyed by water from the sprinklers. I'm wondering about some waterproofing....
You can get a water proof spray in the camping section which is used for tents or in the shoe department for water proofing work shoes... I've bought it at WalMart.
There is a product called Camp Dry that can be purchased @ just about any hdwe store & probably Wal-Mart in the sporting dept .
Will you please take a picture of it at night...I would LOVE to see what it looks like! :) Neat idea! :)
Love it! Can't wait to try it!
Awesome! I love that it doesn't look like a typical outdoor light- it looks like it should be in a living room. It makes your outdoor area look really nice! And those dots are so sweet!
Very cute! I love how you used an actual solar garden light! How does it work at night, is there enough light?
The only problem I've had with solar garden lights is that they don't seem to produce sufficient lighting.
Cute! I love the polka dots!
the outdoor lamp is adorable. the polka dots and the lampshade make it look very feminine.
anna
Lovely idea! It turned out great, and I love that it's a solar lamp!
Available at places like Target and WalMart are spray cans of Scotchgard and I think it's KIWI makes spray can protection from elements, etc. for tents, hiking shoes, etc. I would think would help with your lampshade. I used it on my daughter's back pack which probably spent as much time on the ground as anywhere, LOL.
Janet
Great idea. I am working on an idea to bring the solar lights in at night so can use less electrcity in the house. I had not thought of making a lamp, but I want something I can take lights out during day and bring in at night, easily, but you got my mind working. I was going to use just thrift store vases and a tray with holes to carry them in and out of the house.
Charming lamp. Love the silver polka dots; they really give it some pizzazz.
What a cool idea! Love the dots on the lamp - it totally looks like an indoor lamp!
Adorable!!! Neat idea to use a solar garden light :) I'd love to see a picture of it at night too!
Love your secret garden! That is one of my favorite books. I love the way the gate doors are rounded at the top, and a beautiful key hangs next to it. Green is so soothing. Thank you for sharing! And the lamp! What a great idea!
Great job on the lamp Stacy!!! I agree it most certainly sets your "room" up perfectly. Love the garden all put together.
Out here on the Olympic Peninsula in Washington State we usually put Marine varnish on outdoor things. You could spray it with any kind of clear varnish, Krylon sells a good one. I would cover it with something soon because canvas yellows and water stains easily. Your garden is adorable, love the toad too, and it I'll only get better with time. Can't wait to see it in a year.
I love your lamp a d your secret garden! It is truly adorable. Another good way to secure the lamp would be to fill a coffee can with cement and submerge the lamp post in it. I made a flower pot tree a few years ago with rebarb secured in a coffee can and then buried it. I did not have to go down so far to secure it well. And I wanted something that would handle a top heavy item.
Wonderful idea. Your garden is so inviting. I can imagine reading a good book and havind a nice hot cup of Earl Grey tea
Your lamp really pulls it all together. Great job.
Put "never wet " on the lampshade, reples water
Ahaa, its good dialogue regarding this post here at this blog, I have
read all that, so at this time me also commenting at this place.
for the lamp shade could a person use spray water proofing like for shoes; or even the tent spray for water proofing a tent? Then the shade should stay dry and clean longer? If it is a plastic shade how does it hold up to the heat , do you find it starting to crack ? Great project, thanks
I purchased an outdoor lamp on clearance for my daughter. It is a table lamp though.
Just love your ideas, don't have any of my own but I can build things if I have a pattern !!
Thanks for sharing the great idea.
I will make this one of my weekend project. I have all these pieces just sitting in the garage.
One tip for the lamp shade. I would probably, wax the canvas to keep it from rain and sun damage.
I was thinking of maybe applying poly coat on it. too.
Thank you for the inspiration.
clear wax the lamp shade.
I would think you could get a clear matte finish spray paint for the shade, then it should just wipe clean.
I think polycrylic might work. I have told my kids for two years now that i would make us a secret garden. We have a little hole in the woods. But i cant seem to get on with it. Its a small place so it should be easy. I am easily intimidated. Yours is so pretty. I dont want to much live stuff that i would have to keep in check being in the woods i already have enough of that. I need to just jump in and see what i am capable of...
do you have printer friendly directions