• Skip to primary navigation
  • Skip to main content
  • Skip to primary sidebar
  • Skip to footer
Stacy Risenmay
  • Home
  • About me
  • PRESS
  • Contact Me
  • My Book
    • Facebook
    • Instagram
    • Pinterest
    • Twitter
menu icon
go to homepage
subscribe
search icon
Homepage link
  • Home
  • About me
  • Project Gallery
  • Our House
  • PRESS
  • Contact Me
  • Privacy Policy
    • Facebook
    • Instagram
    • Pinterest
    • Twitter
  • ×

    Crate Planter Tutorial

    By Stacy 8 Comments

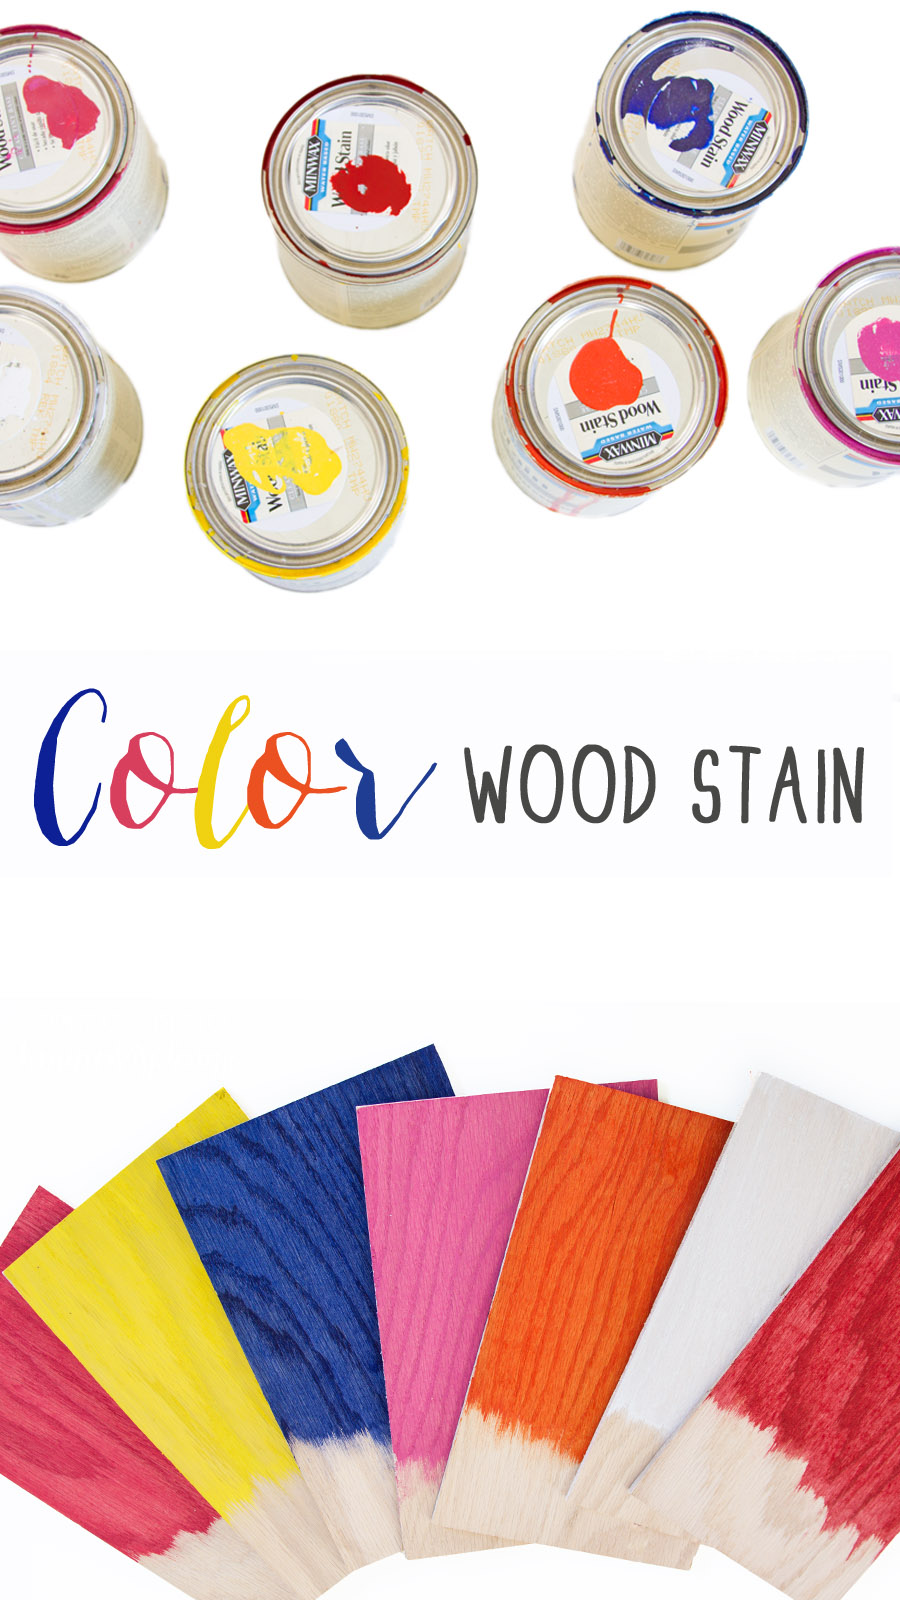
    When I went to SNAP blog conference this year I got to preview the new colored stains from Minwax. They are bright and fun and I snagged some to bring home. I had to wait until they were available in stores though before I could share and projects I used them on. If you love color even a teeny tiny bit, you are going to love them!


    blue crate planter in living room


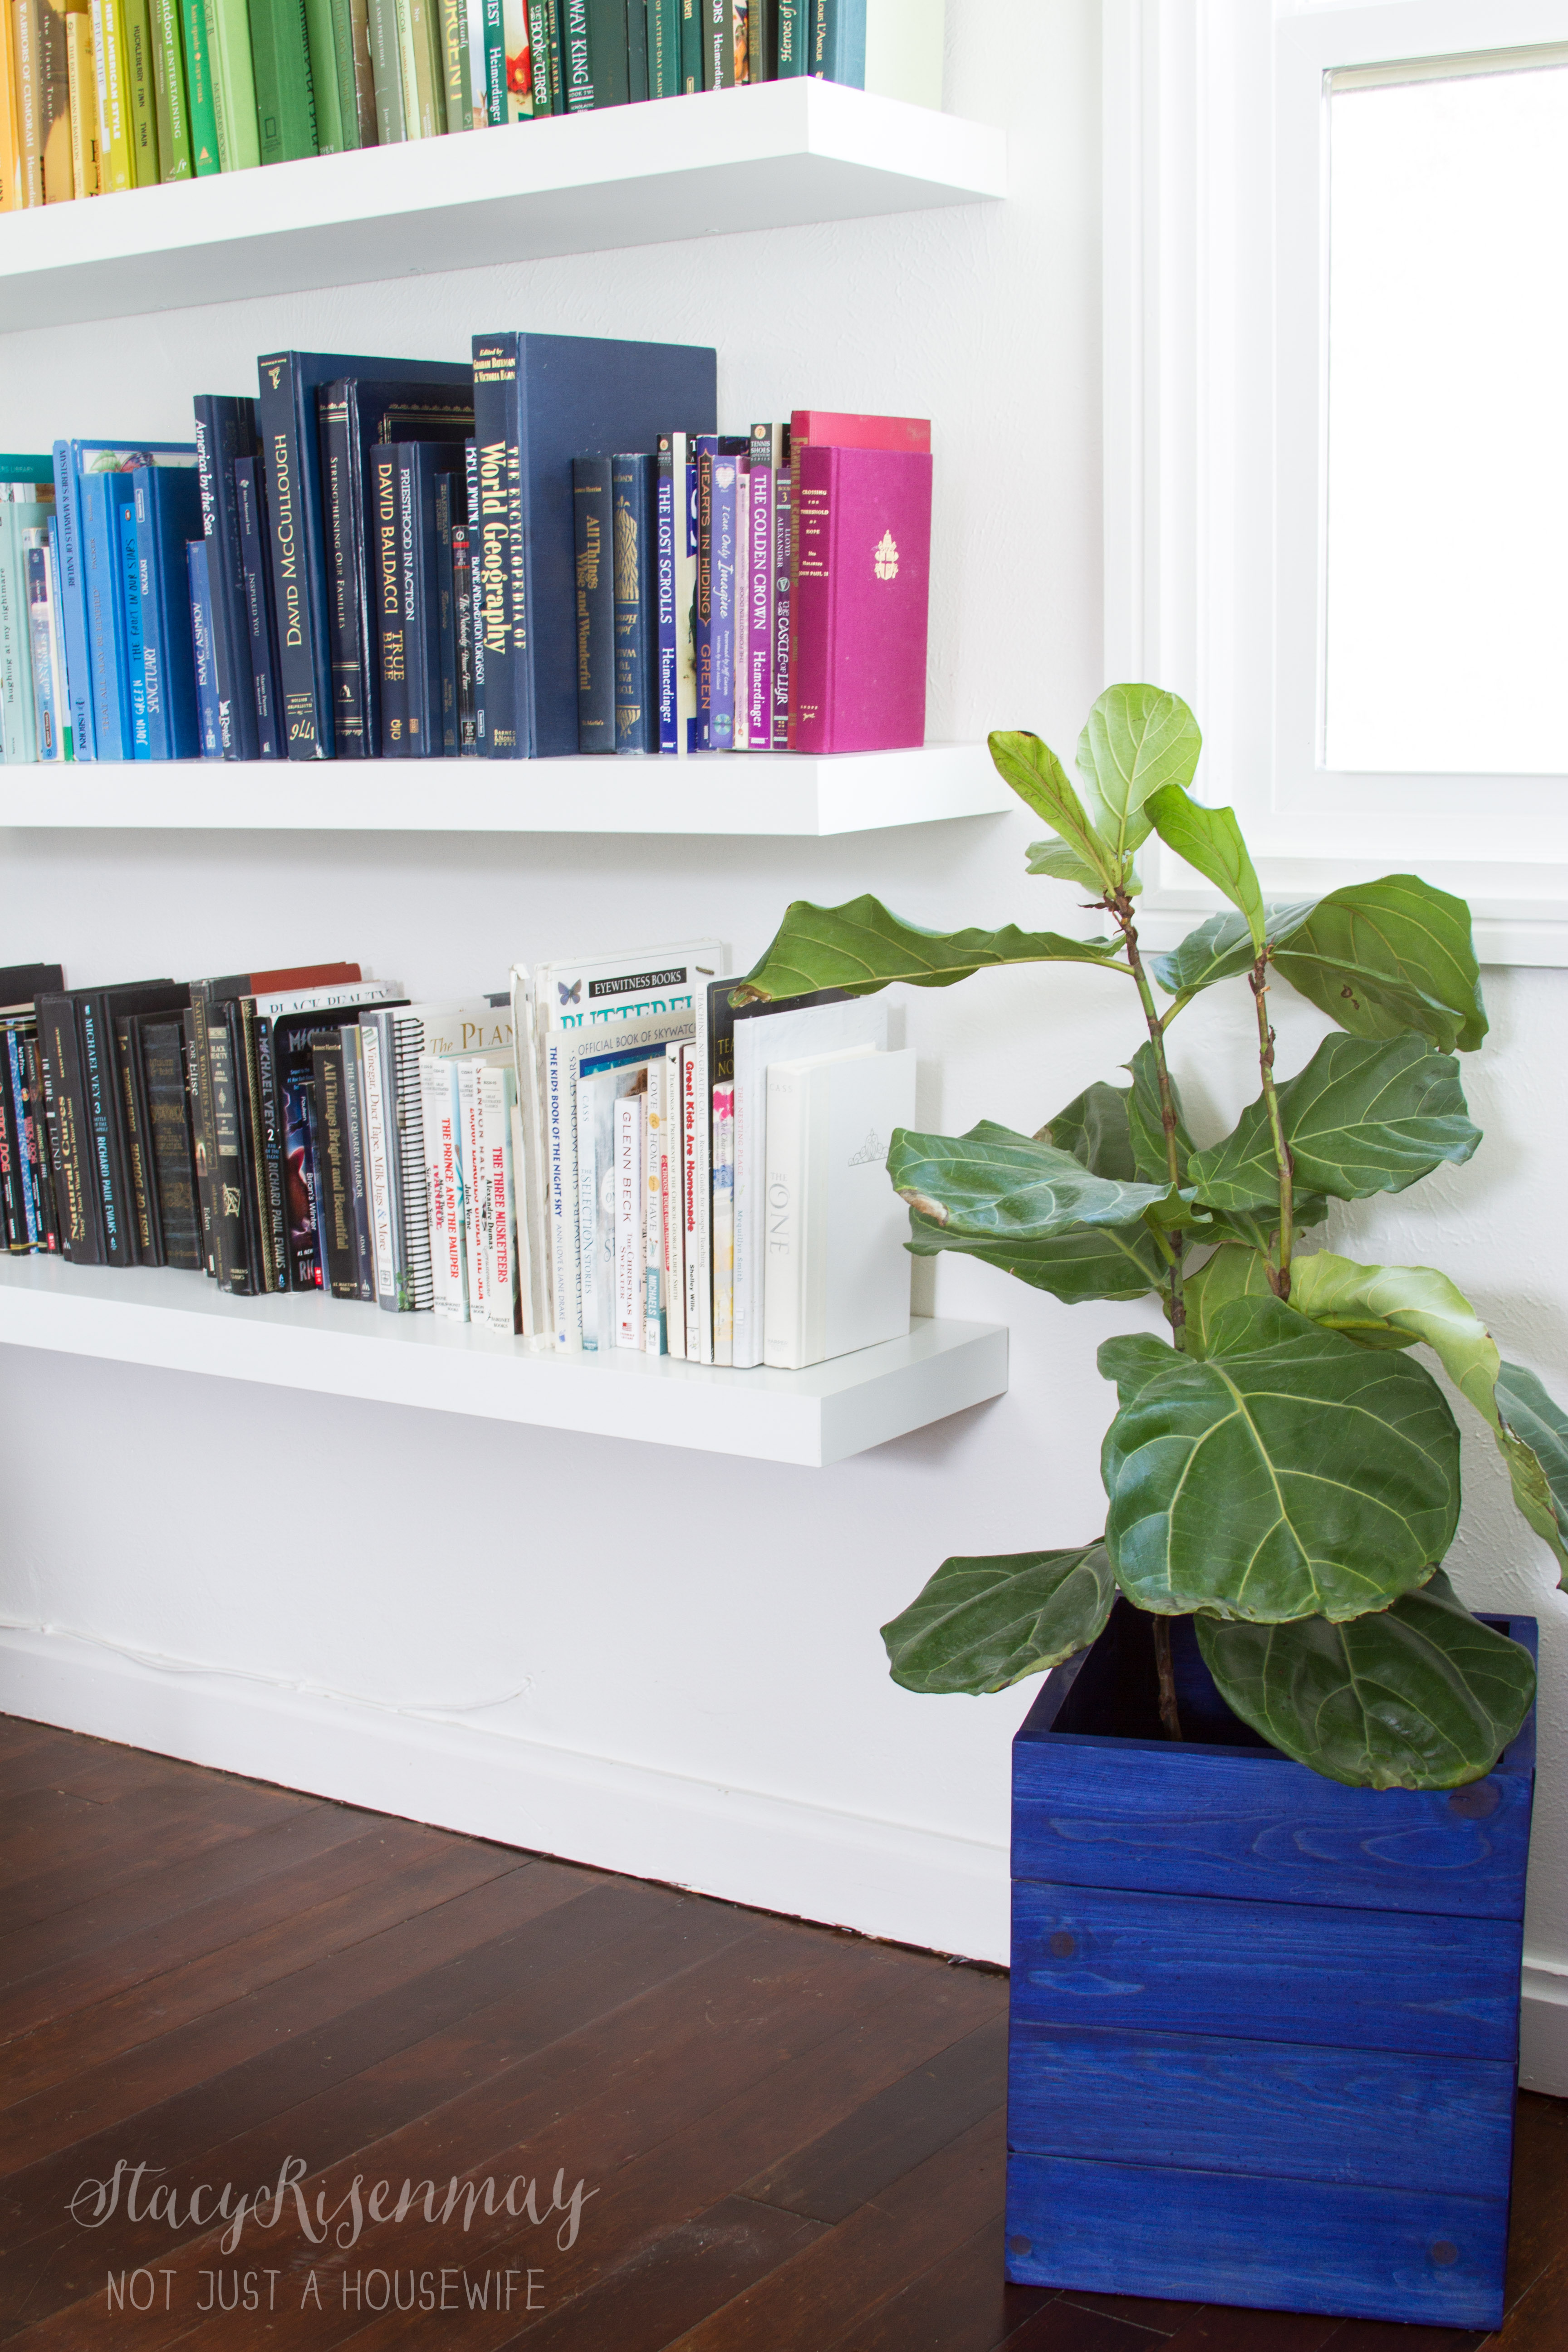
    I had built a crate planter and I wanted it to make a statement, not just blend in. I don't have all the colors that are available but these are the ones I grabbed and had to choose from.


    NEW colored stain from Minwax


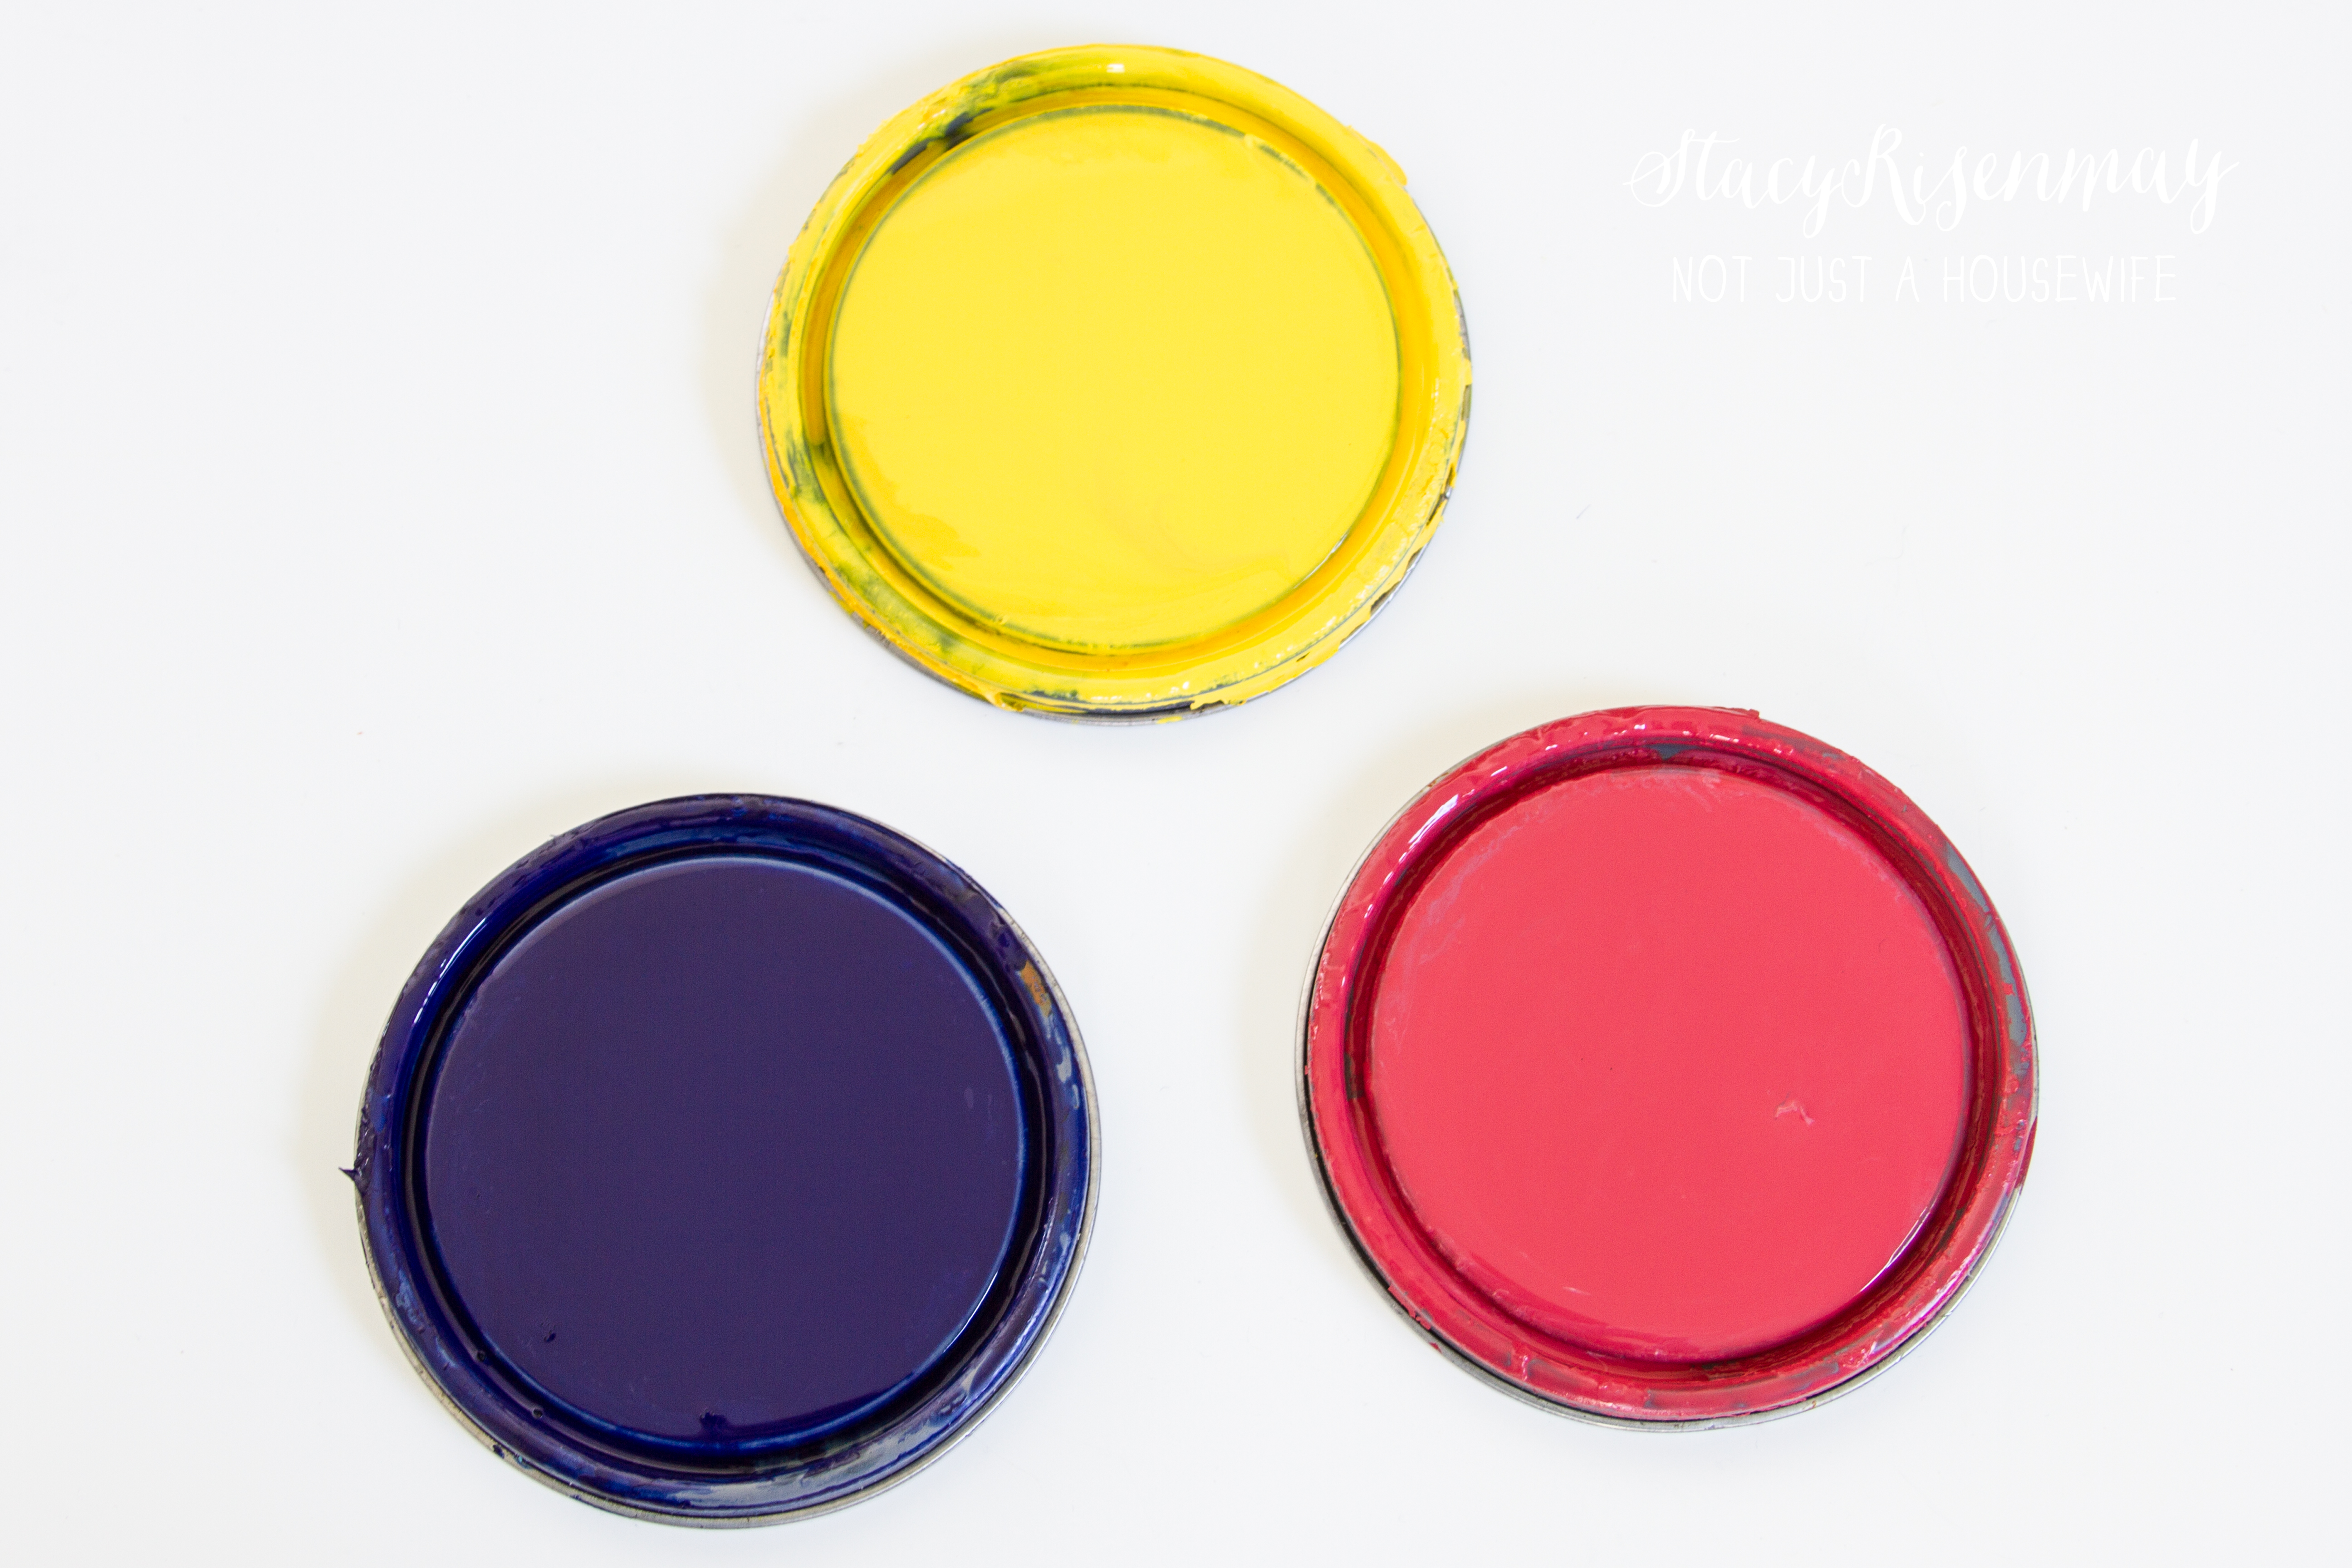
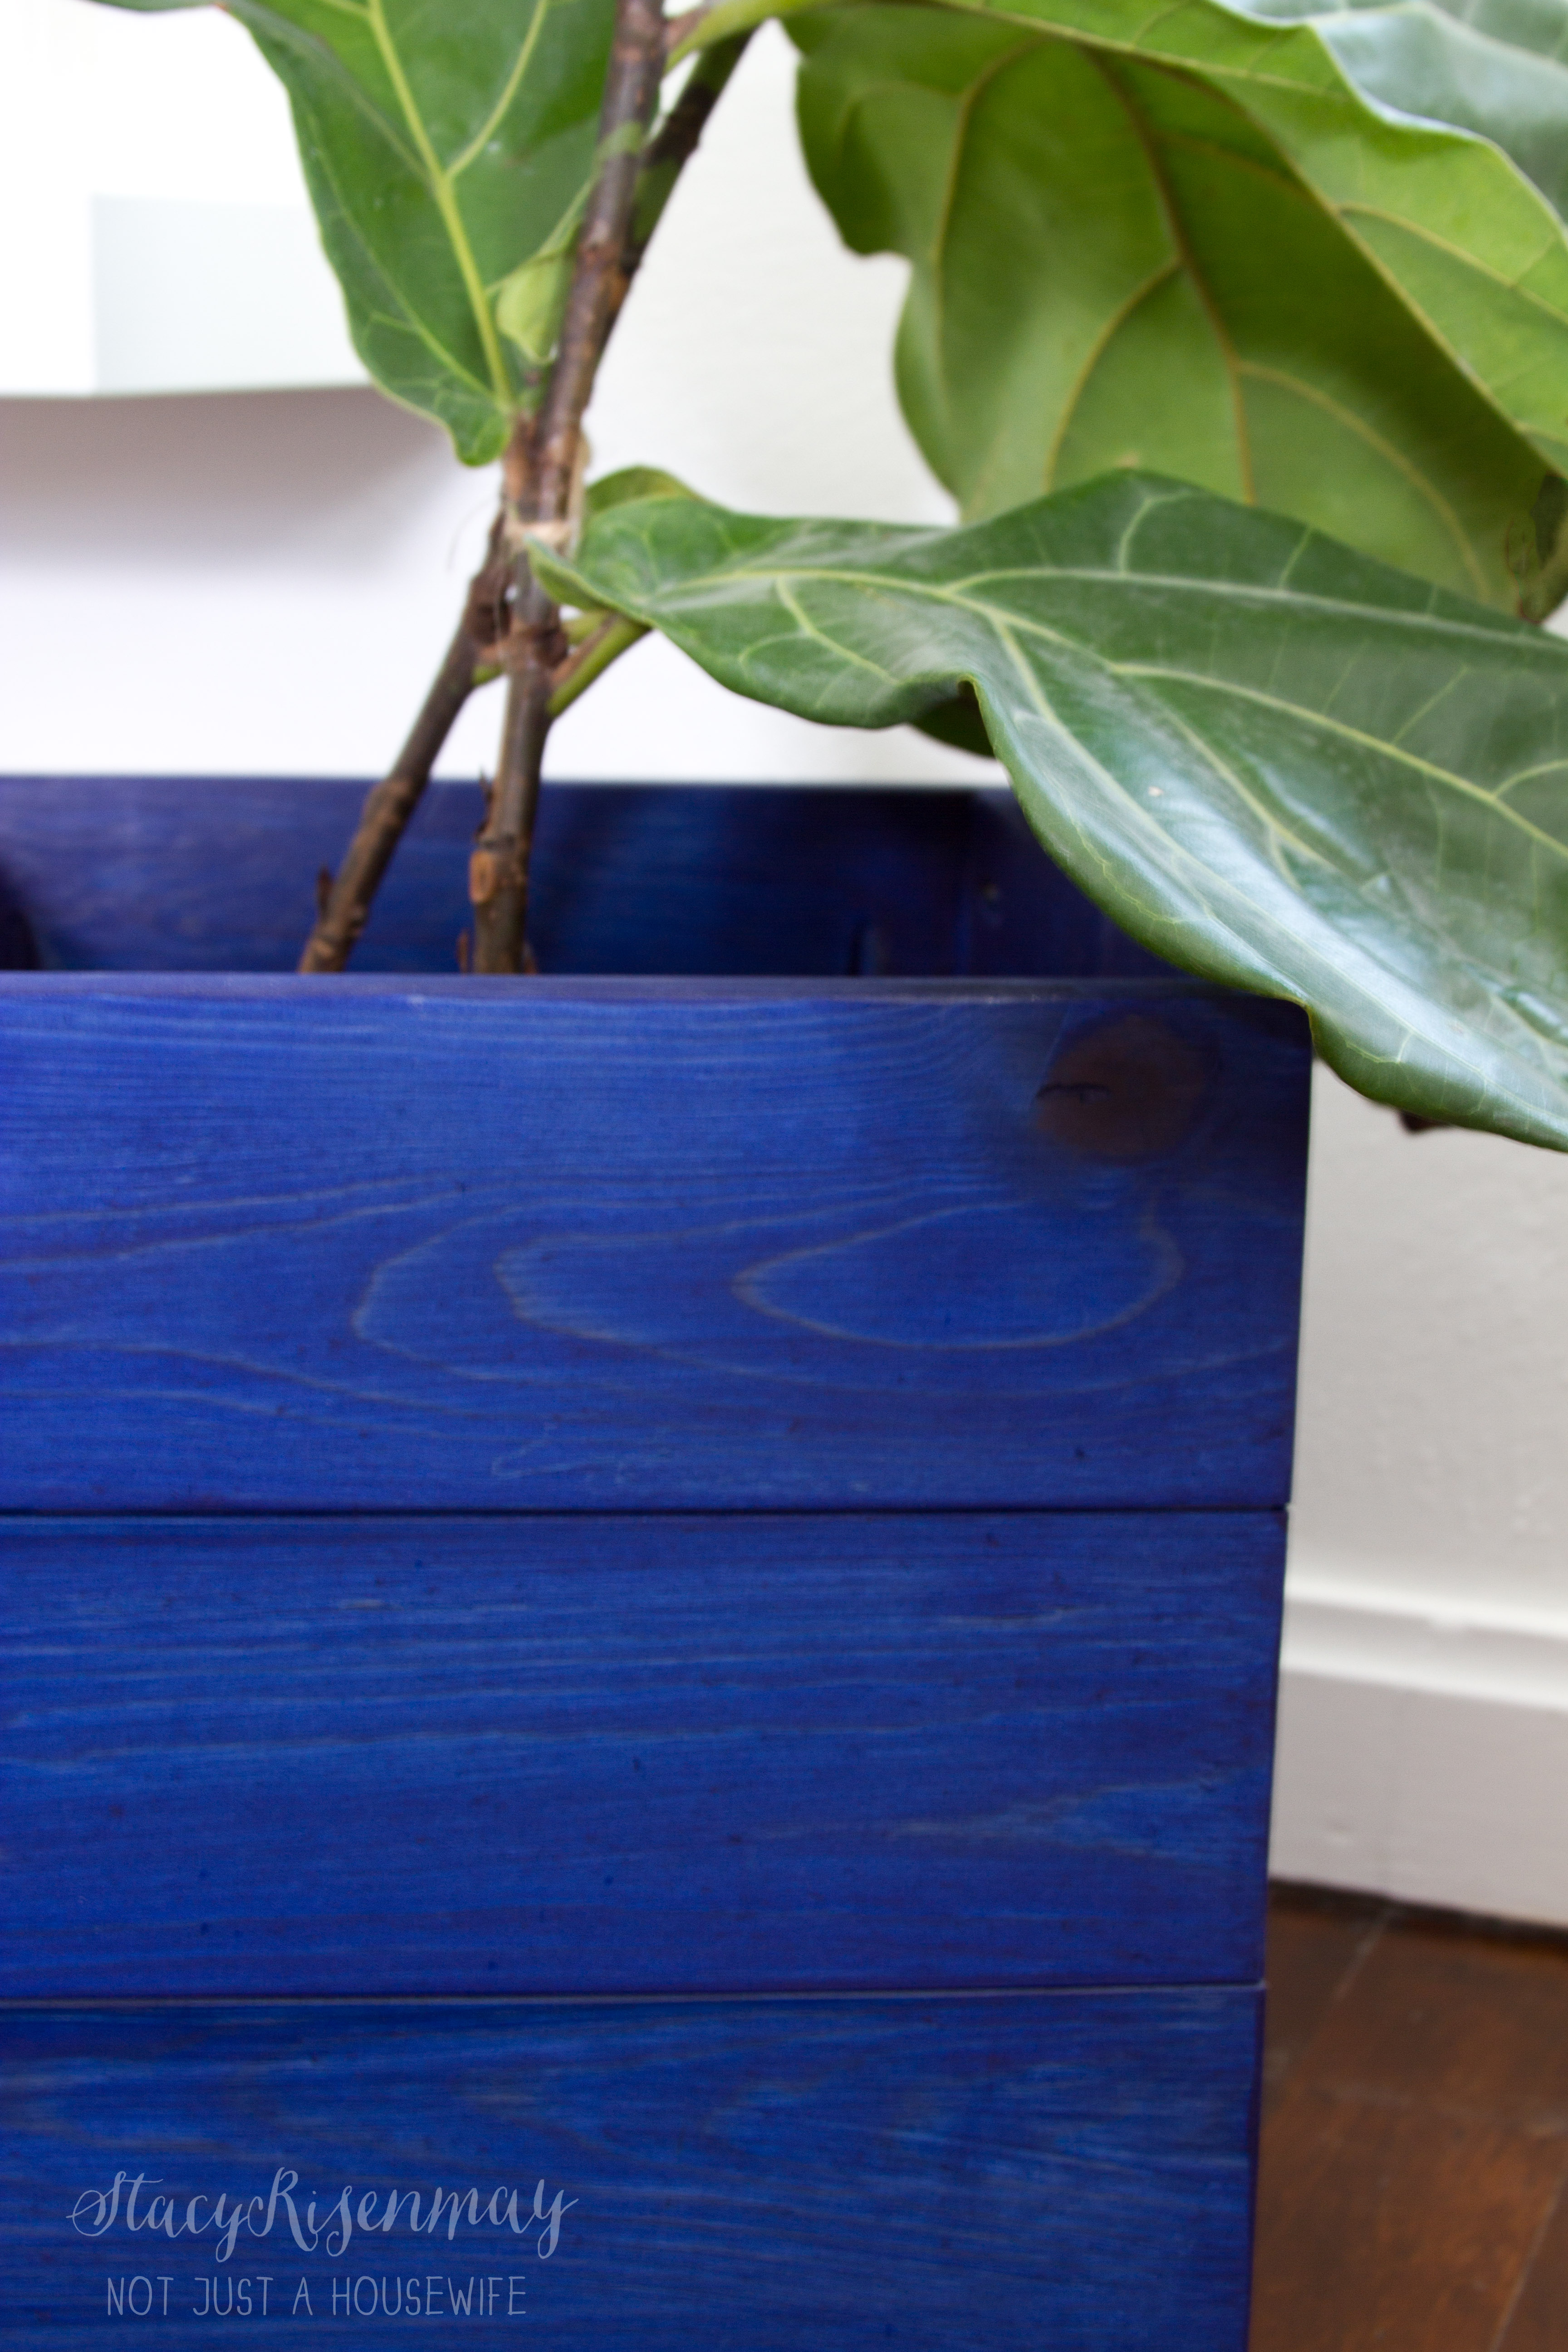
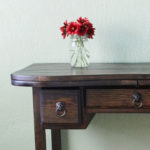
    After testing them on some scrap wood, I chose the Navy Blue but I was really torn between the blue, coral, and yellow.


    colored stain options for planter


    Planter Tutorial

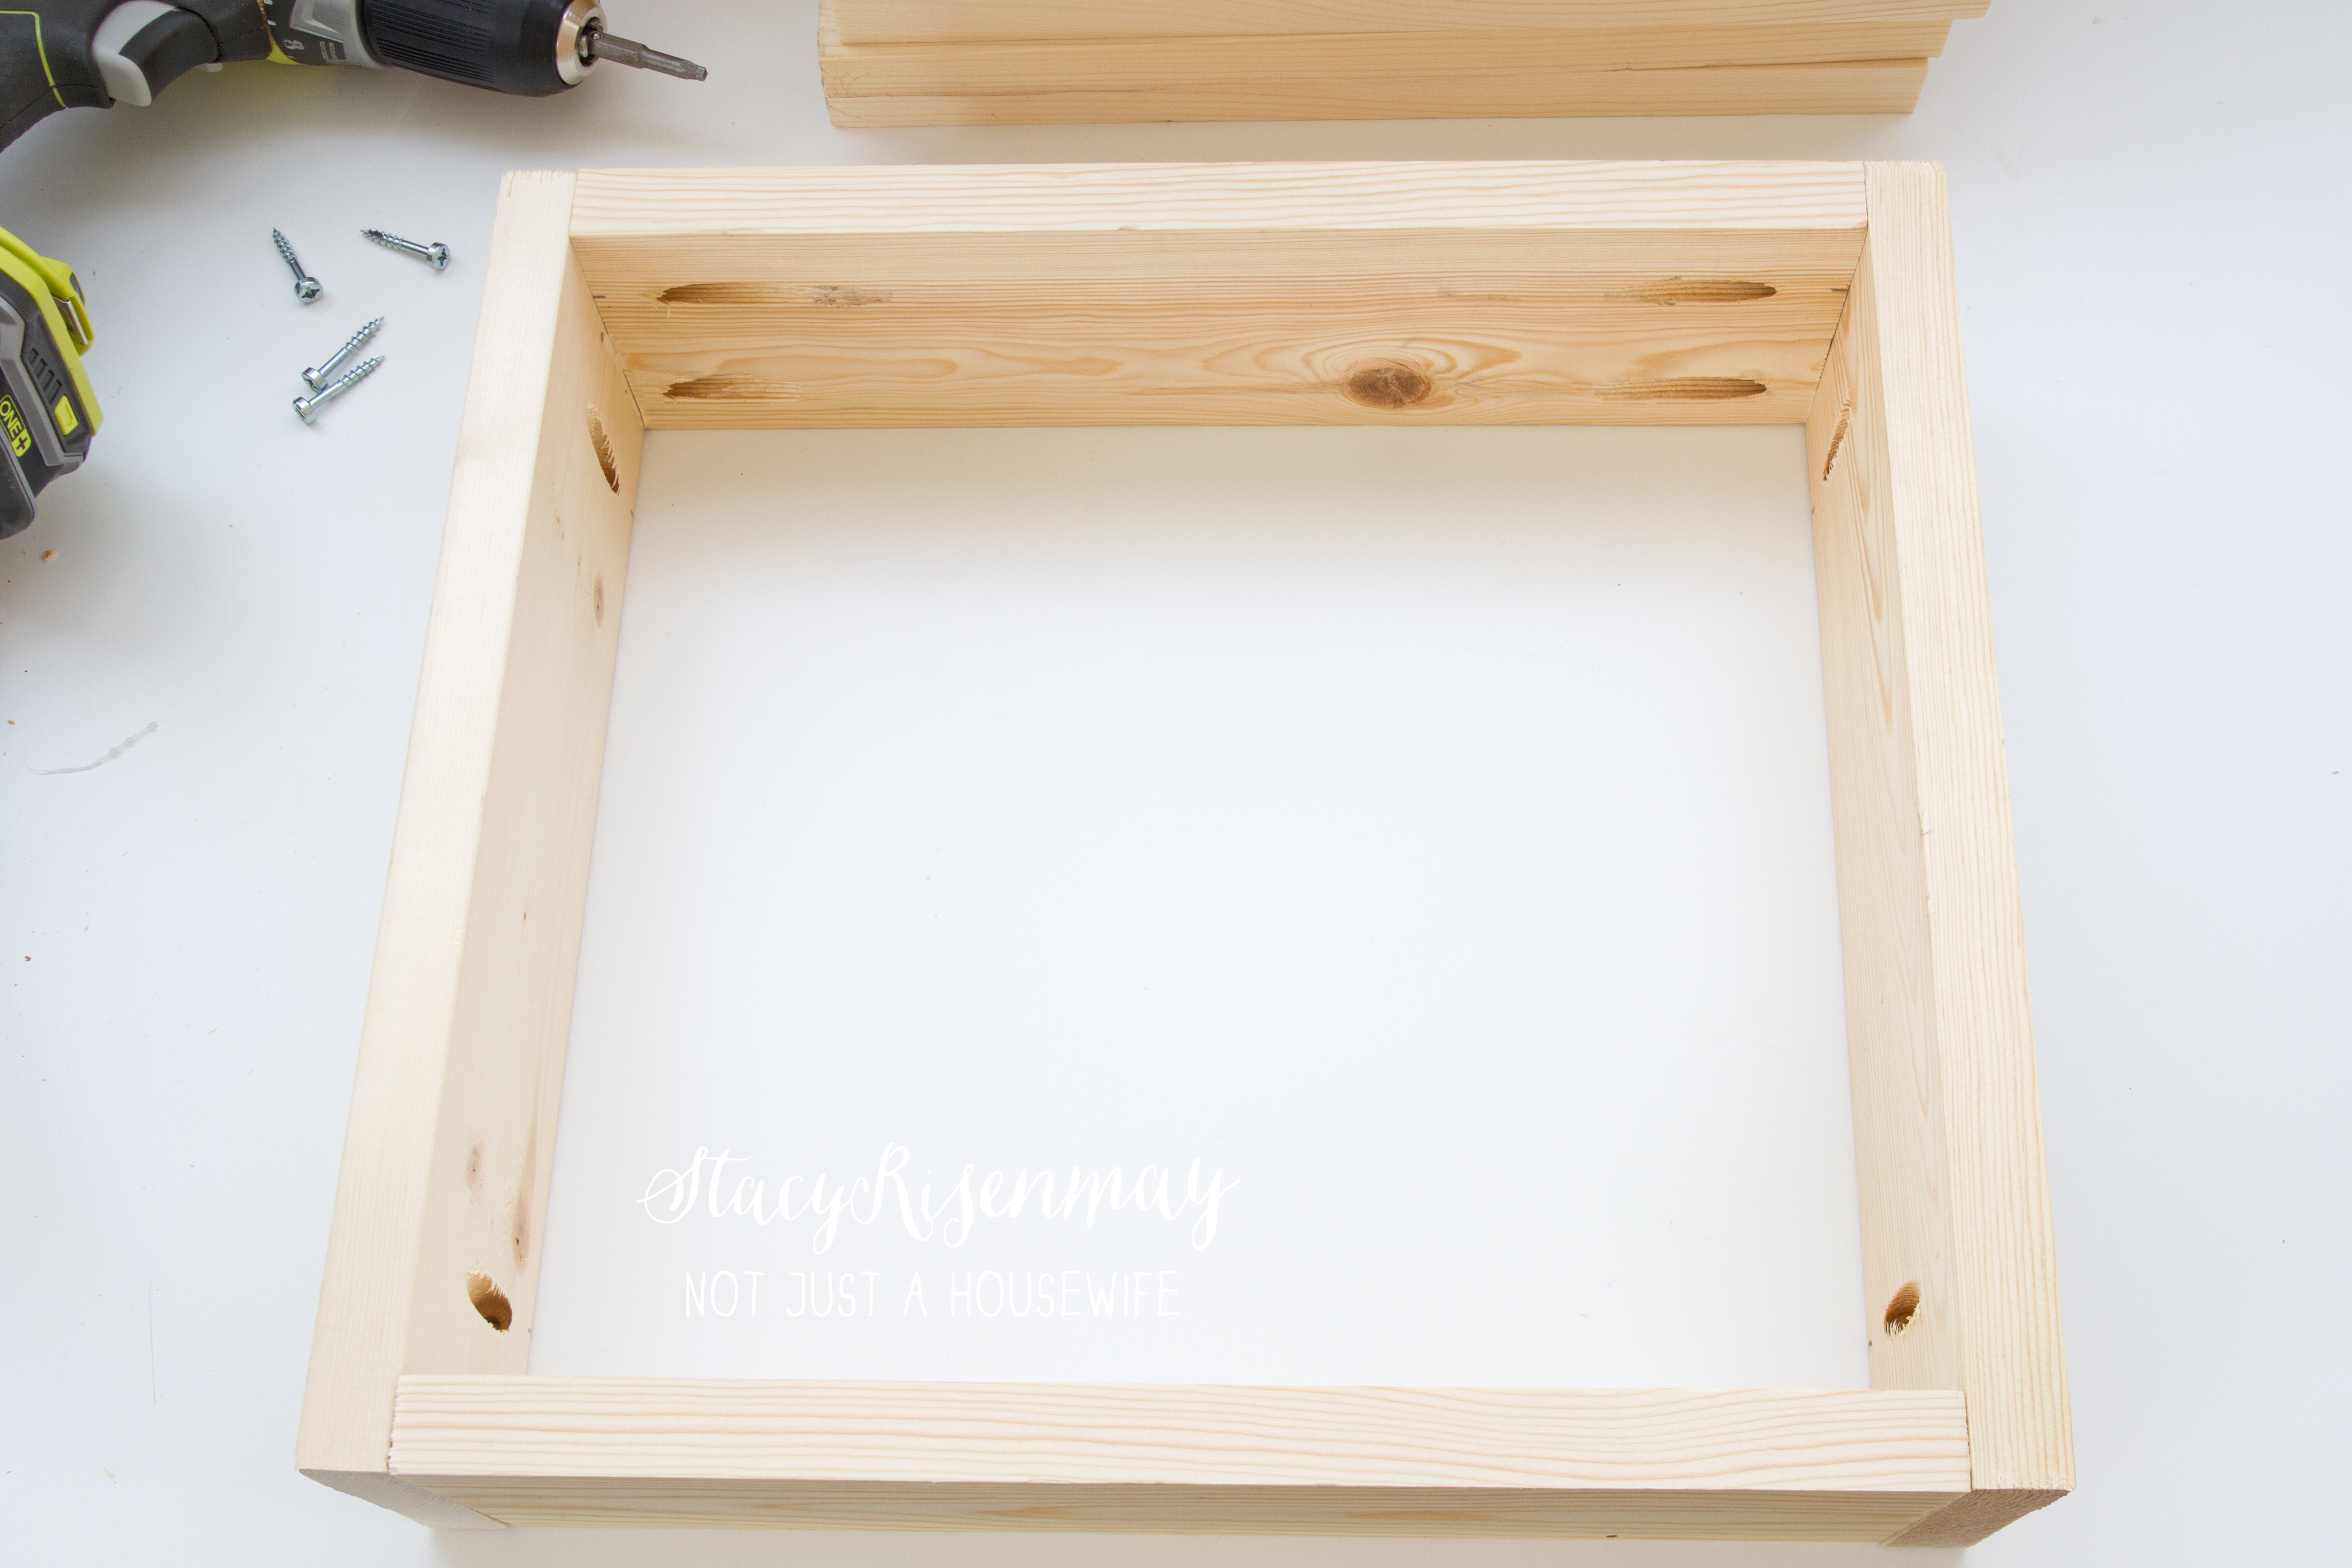
    The planter is very simple to build. Decide how big you would like to make it and cut some 1x4s to that length. Drill some pocket holes using a Kreg Jig. Half of the boards will have pocket holes that will connect the corners together and half will have holes drilled down to connect the boards together. This will make more sense as you see the following steps.


    crate planter pieces


    Screw the boards together at the corners to create a square.


    screwing crate planter together


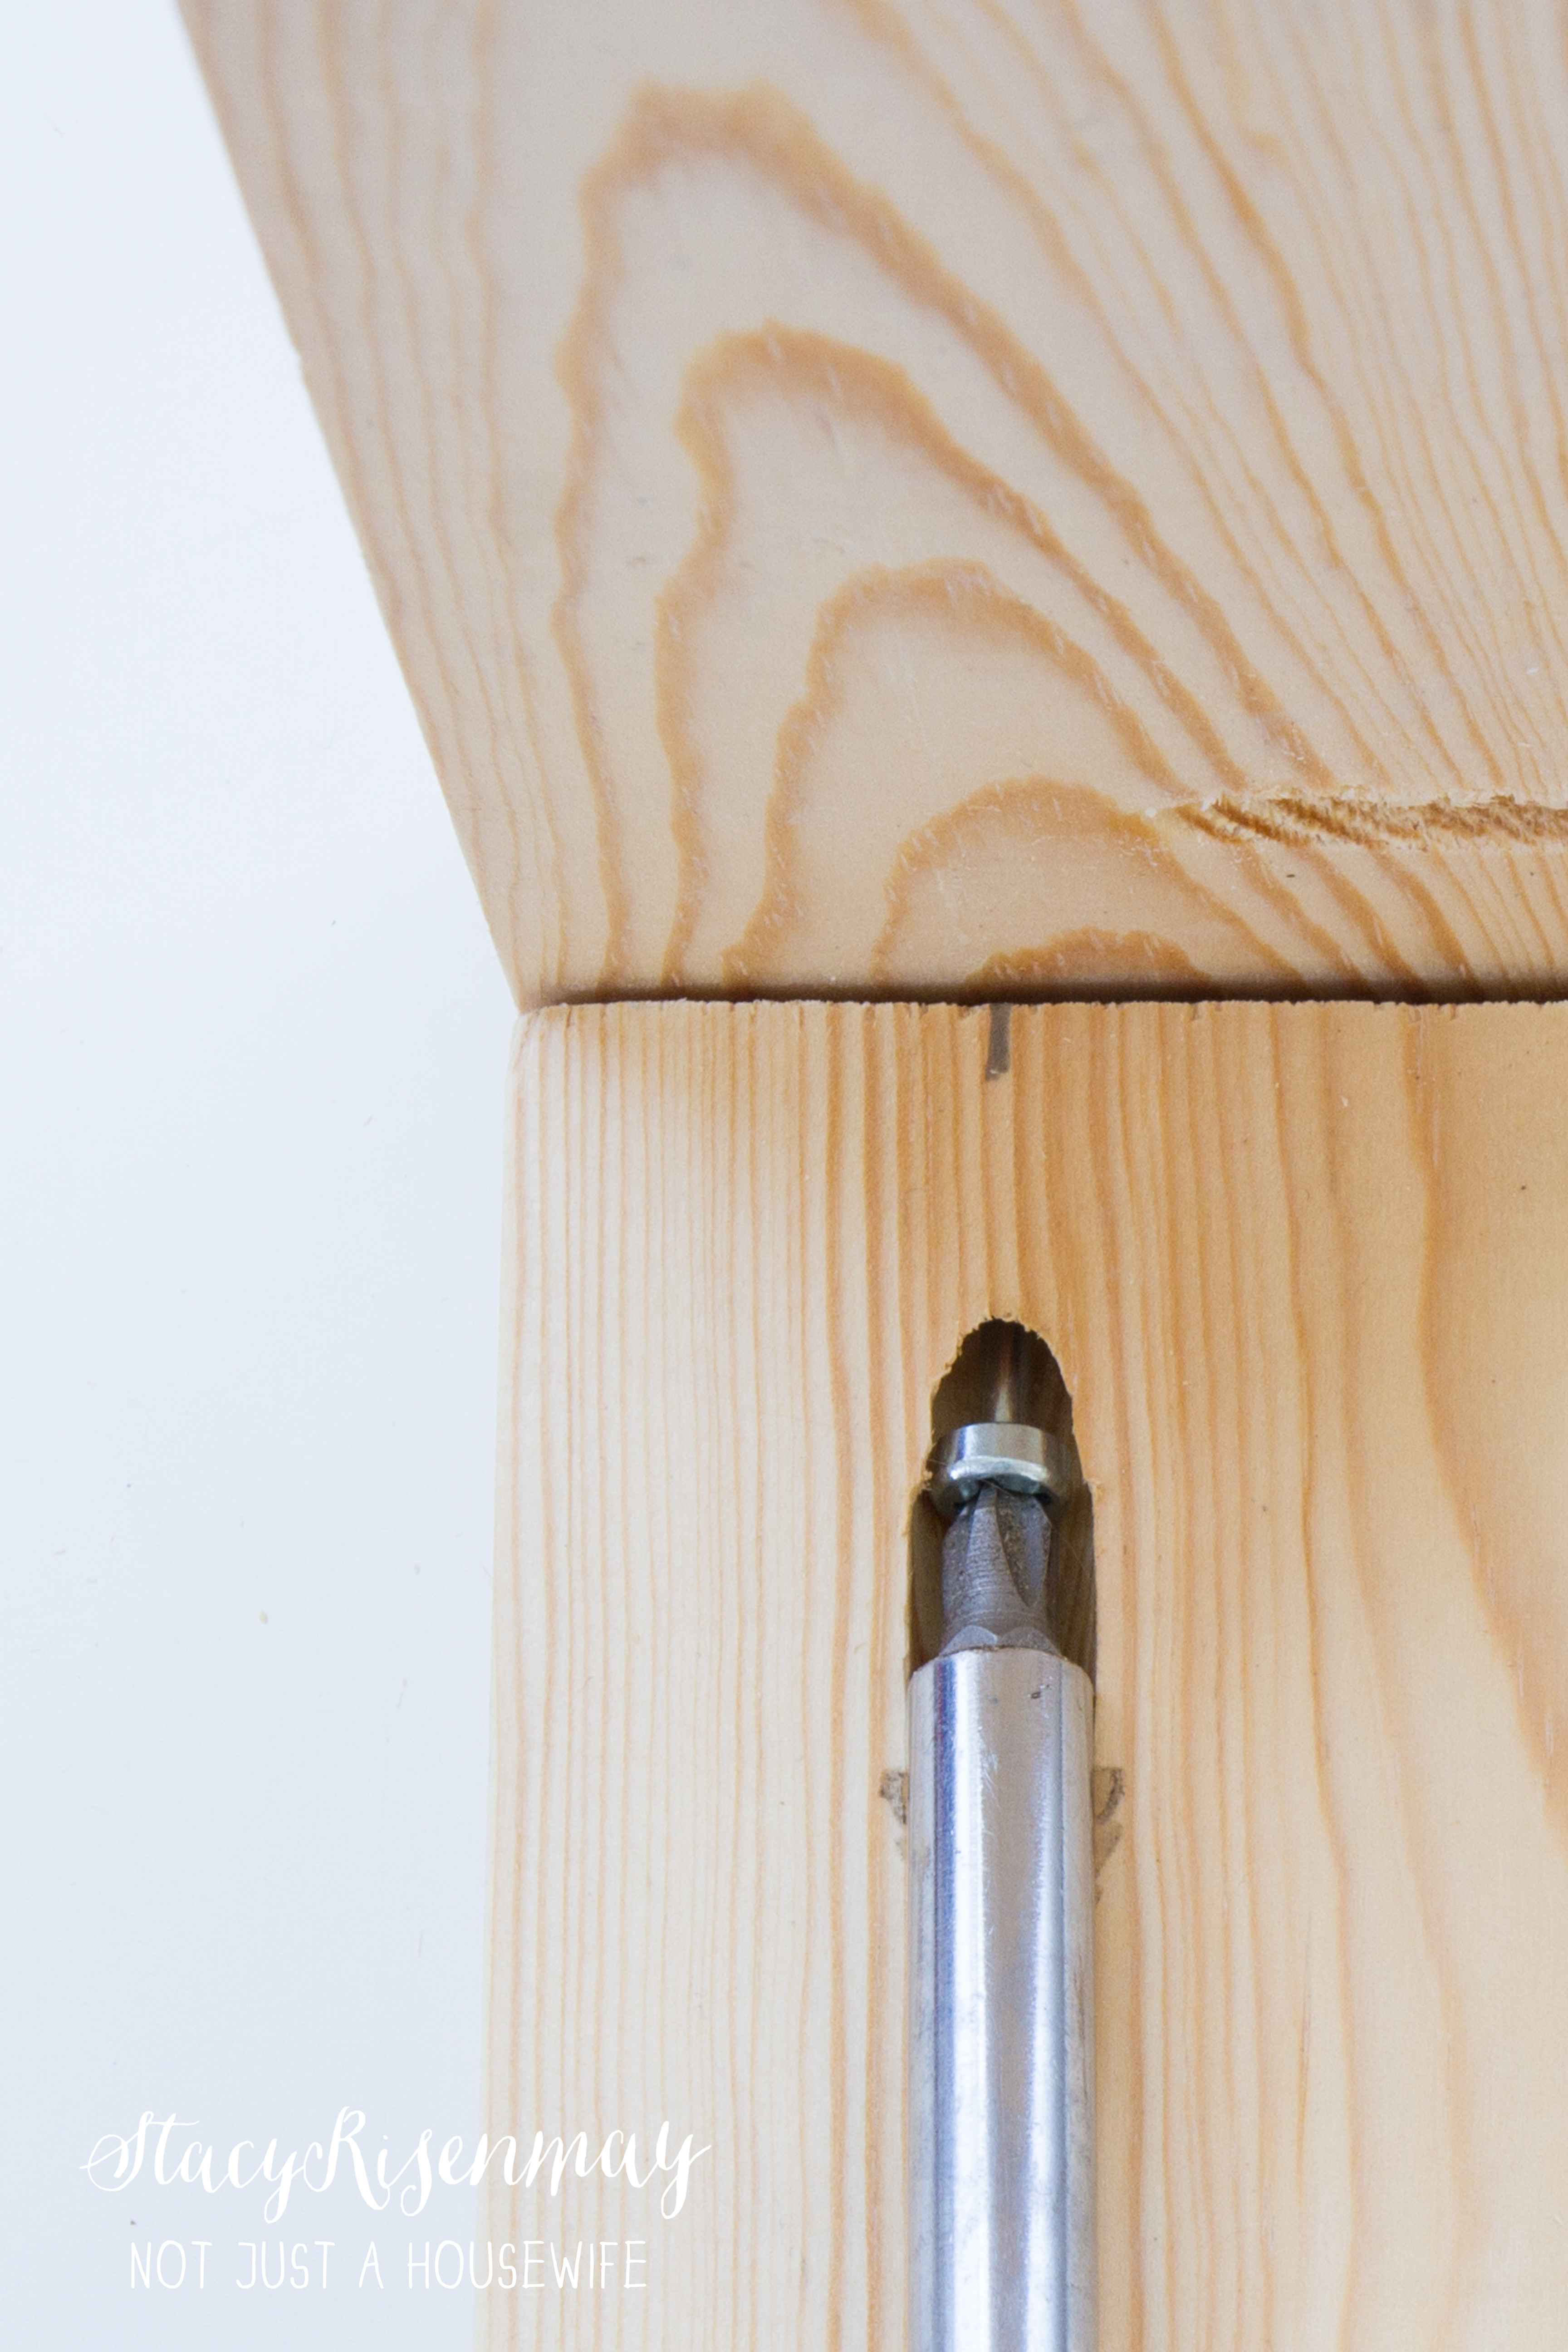
    Repeat the process until you have as many square frames as you want. The more you have, the taller your crate will be.


    crate planter getting assembled


    Then you will screw each of the square frames together through the downward pointing pocket holes.


    crate planter assembled


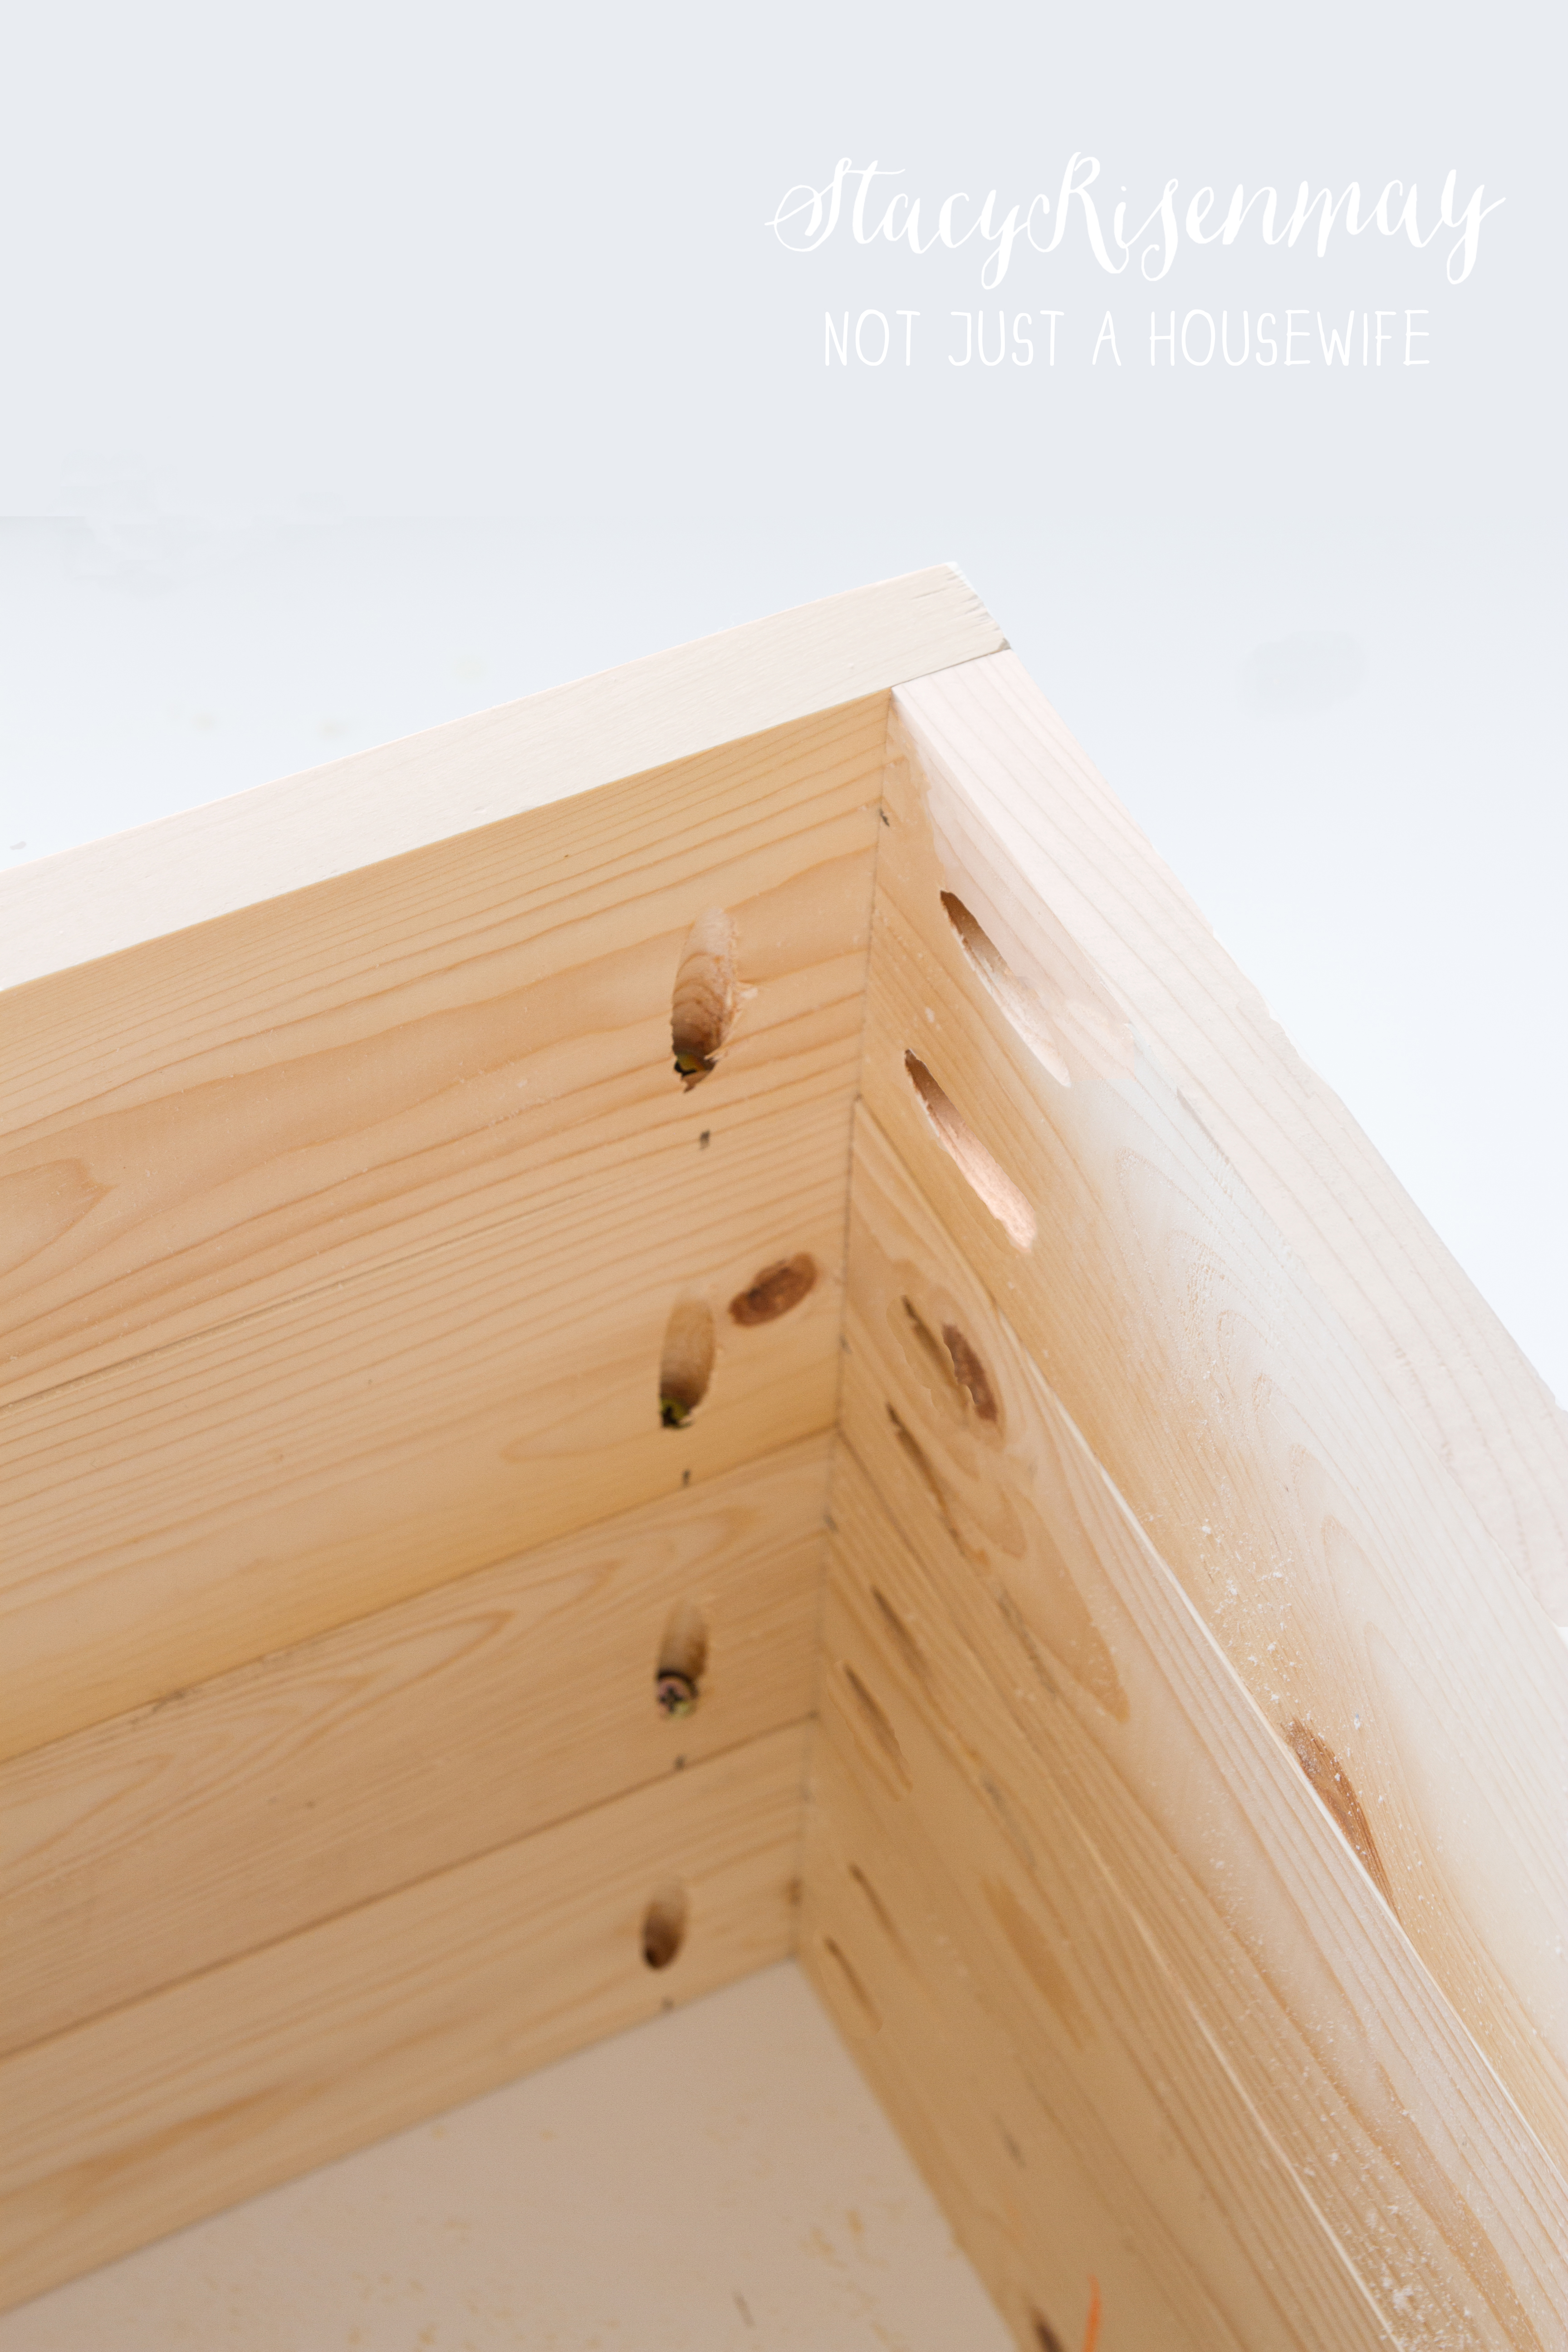
    Creating the bottom of the planter can happen one of two ways. One option: You can trace the outside of the crate onto some plywood and use the pocket holes to attach the bottom to the crate. The downside is you will see the board used for the bottom. Second Option: You can trace the crate on the inside (so the bottom piece will fit snugly on the inside of the crate) and use a nail gun to attach the bottom. You will need to fill the nail holes with sandable, stainable putty.


    trace bottom of  planter


    If you are going to add dirt to this and put the plant directly in this, you will need to add a drainage hole. But I prefer to keep the plant in a regular pot and set the plant inside the crate without a drainage hole. This way when I water the plant, if any water seeps out the bottom, it stays in the crate and doesn't go on my floor.

    I love that I can have a fun, saturated color but still see the wood grain. If bold and bright are not your style, they have a ton of other colors to pick from. The colored stains are water based and are mixed in the store for you.


    blue planter upclose


    Would you ever stain something a fun color? What would you stain?


    Did you notice my books? Does it make you twitch to have books not alphabetized? We are going to dive into that tomorrow!


    I received product and compensation from Minwax for this post but the ideas and opinions are all mine.

    You will also like:

    • Wooden Cheese Crate {tutorial}Wooden Cheese Crate {tutorial}
    • How To Build A Wood Serving TrayHow To Build A Wood Serving Tray
    • Laundry Room ProgressLaundry Room Progress
    • Decorating someone else's house: Part 3 (building an entryway bench)Decorating someone else's house: Part 3 (building an entryway bench)
    • Planter Box FencePlanter Box Fence
    • My Favorite Planter ProjectsMy Favorite Planter Projects
    • How To Build A Card CatalogHow To Build A Card Catalog
    • Refinished Vintage DeskRefinished Vintage Desk

    « Checkered Ceiling In Kitchen {Tutorial}
    "Invisible" Bookends »

    Filed Under: Houseplants, Power Tools, Staining 8 Comments

    Subscribe

    for your weekly DIY fix.

    Reader Interactions

    Comments

    1. Julie Buck

      September 23, 2015 at 7:22 am

      Books organized by color. I sort by genre.

      Reply
    2. Carole West @ Garden Up Green

      September 23, 2015 at 7:31 am

      Cute project, I'm a big fan of box building.

      Reply
    3. Cath M T

      September 23, 2015 at 8:08 am

      Definitely something I've never seen before. Cheerful colors. Not sure where I'd use them. I like your planter and really appreciate the directions on how to build it. I bought a Kreg jig just because I saw you using one and thought it would be really useful. But, alas, I haven't gotten around to using it. I need to start with a basic project like this to get the hang of it and get past my fear of learning how to use it. Watching you do all these projects inspires me. Regarding books, I have no desire at all to alphabetize them. At best, I organize them by subject matter. Mostly I think I have way too many and need desperately to pass them on to their next owner. But it's deeply satisfying to organize a corner of the house in a way that makes sense to you, and it motivates you to move on to the next project. Good luck.

      Reply
    4. Lindsay AFM

      September 23, 2015 at 11:33 am

      Loving how vibrant those colors are!! That blue is stunning.

      Reply
    5. Sherry Fram

      September 23, 2015 at 2:02 pm

      Love the new colors from minwax and I love the blue you chose for the planter! It is so fun and cheerful!

      Reply
    6. Carrie

      September 23, 2015 at 4:32 pm

      Wow! I am a color lover so these stains are right up my alley. Definitely need to find a project to use that navy on!

      Reply
    7. Erin @ DIY on the Cheap

      September 23, 2015 at 7:38 pm

      How fun! I love Minwax products. I'll have to try out some of these fun colors!

      Reply
    8. amy @ one artsy mama

      September 24, 2015 at 7:22 am

      Wow! Now I want colored stain! All the colors!

      Reply

    Comment Below! Cancel reply

    Your email address will not be published. Required fields are marked *

    This site uses Akismet to reduce spam. Learn how your comment data is processed.

    Primary Sidebar

    stacyHey! I'm Stacy and am a DIY addict. I love to get my hands dirty, whether it's sawdust, paint, or dirt. My goal is to help YOU learn to fix up your home and yard. No matter the style or size, I think everyone should love their home. And it doesn't takes a big budget to get there. Let's DIY together!

    Subscribe to My Blog!

    Search this site

    categories


    Subscribe

    Footer

    Welcome! I'm sharing our adventures as we fix up our 1938 cottage. Whether it is big or small, I think everyone should love their home and I don't think it takes a lot of money to make a space your own

    About Stacy

    • Facebook
    • Instagram
    • Pinterest
    • Twitter

    My Favorites

    copyright

    All images and content are copyrighted via Stacy Risenmay unless otherwise stated. If you'd like to share my work, please link back to this blog.
    Thank you for visiting!


    Footer

    ↑ back to top

    About

    • Meet Stacy
    • Privacy Policy
    • Contact

    Categories 

    • Home Decor
    • Outdoor Projects & Gardening
    • DIY & Tutorials
    • Kid Activities
    • Recipes
    • Travel
    • Cleaning
    • Houseplants
    • Staining
    • Painting
    • Power Tools
    • Holiday Ideas

    Newsletter

    • Sign Up! for emails and updates

    As an Amazon Associate I earn from qualifying purchases.

    Copyright © 2020 Brunch Pro on the Brunch Pro Theme


    Privacy Policy
    Welcome! Thanks for visiting.
    Hi! I'm Stacy and I want to help YOU become a DIY rockstar! Sign up for my email list so each project, tip, and trick will go directly to your inbox :)
    Your information will *never* be shared or sold to a 3rd party. Pinky promise :)
    Welcome!
    Hi! I'm Stacy and I blog about fixing up our 1938 cottage. Join the thousand of others who get my posts sent to their inbox for FREE!
    Your information will *never* be shared or sold to a 3rd party.