• Skip to primary navigation
  • Skip to main content
  • Skip to primary sidebar
  • Skip to footer
Stacy Risenmay
  • Home
  • About me
  • PRESS
  • Contact Me
  • My Book
    • Facebook
    • Instagram
    • Pinterest
    • Twitter
menu icon
go to homepage
subscribe
search icon
Homepage link
  • Home
  • About me
  • Project Gallery
  • Our House
  • PRESS
  • Contact Me
  • Privacy Policy
    • Facebook
    • Instagram
    • Pinterest
    • Twitter
  • ×

    My *new* Old Crate!!!

    By Stacy 22 Comments

    I love old things! I grew up with a mother who collected antiques. Our house was filled with beautiful old furniture and I loved that they all had a history.

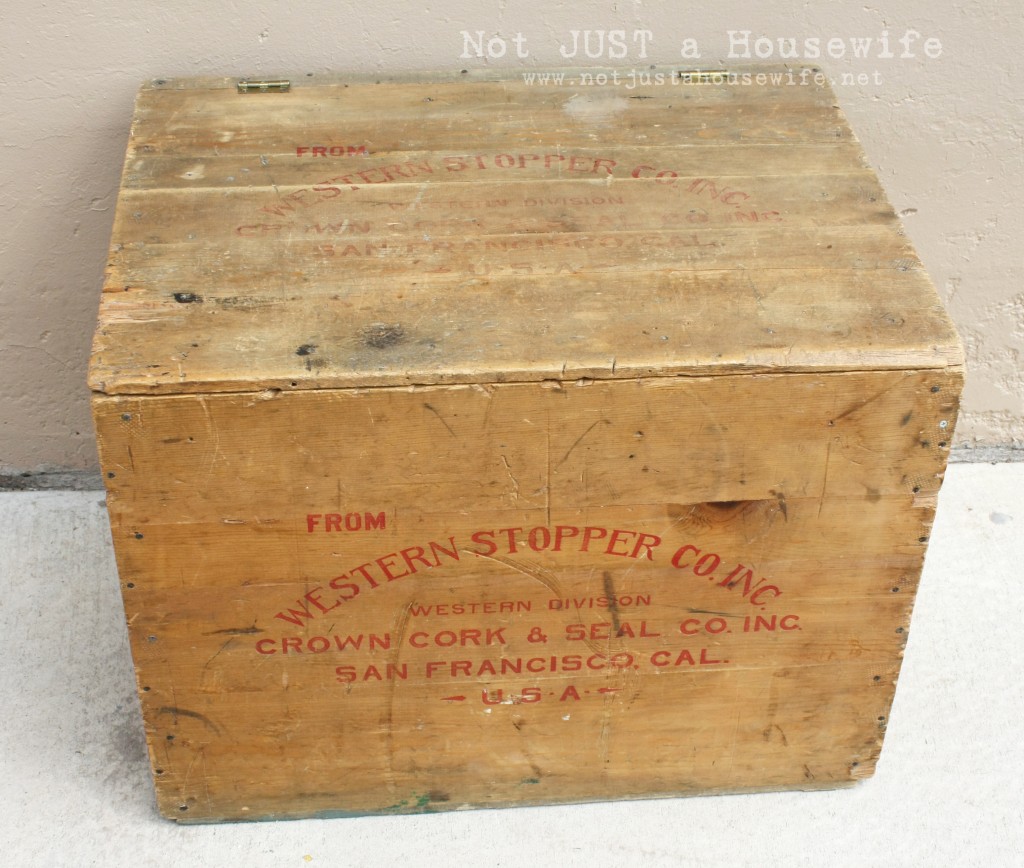
    My Aunt called me the other day to ask if I wanted an old crate that used to belong to her Grandpa. Umm, yes please! Her grandpa use to work for a brewery in Salt Lake City in the 1920's. This was a shipping crate that came from there.

    This is it all fixed up. It didn't take much. I'll show you the before and what I did.

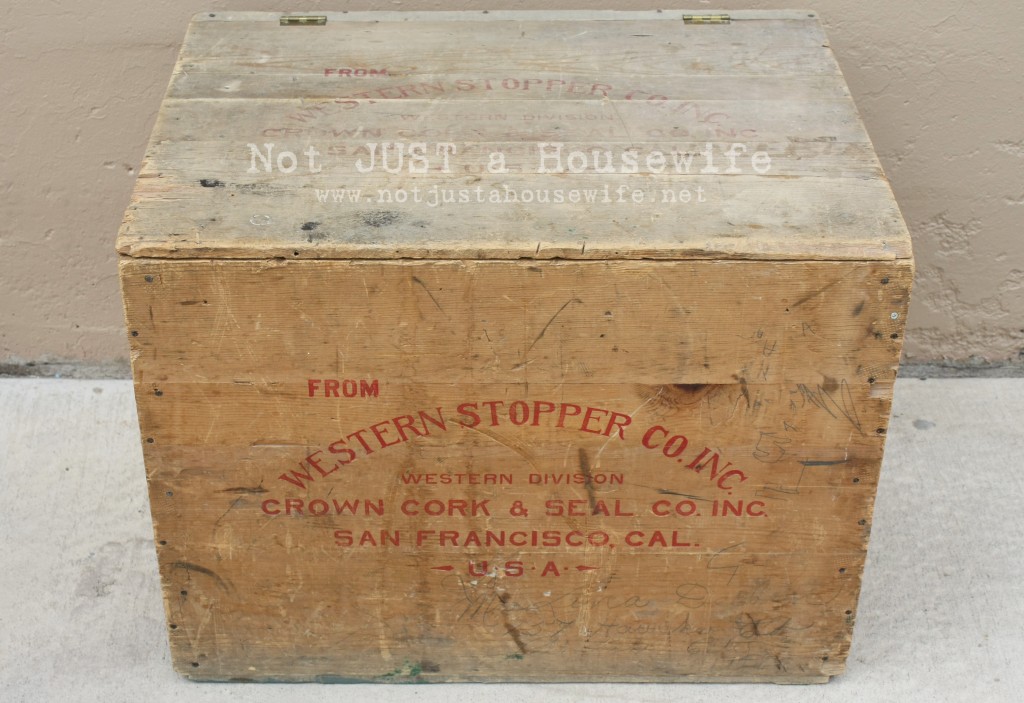
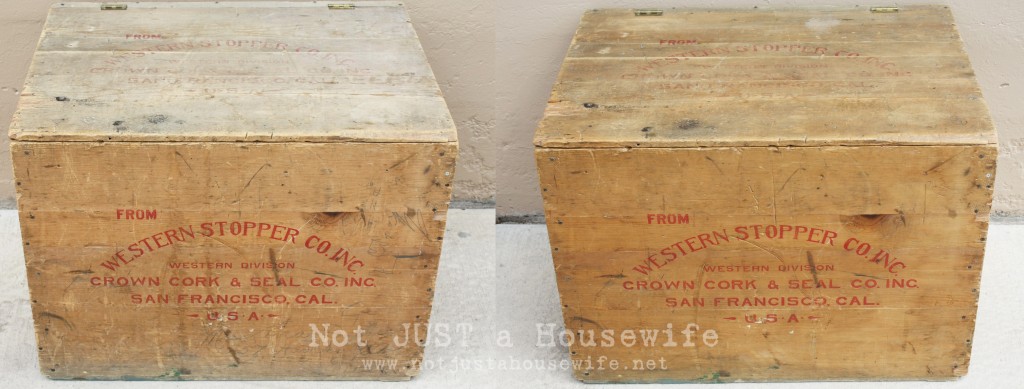
    THE BEFORE:

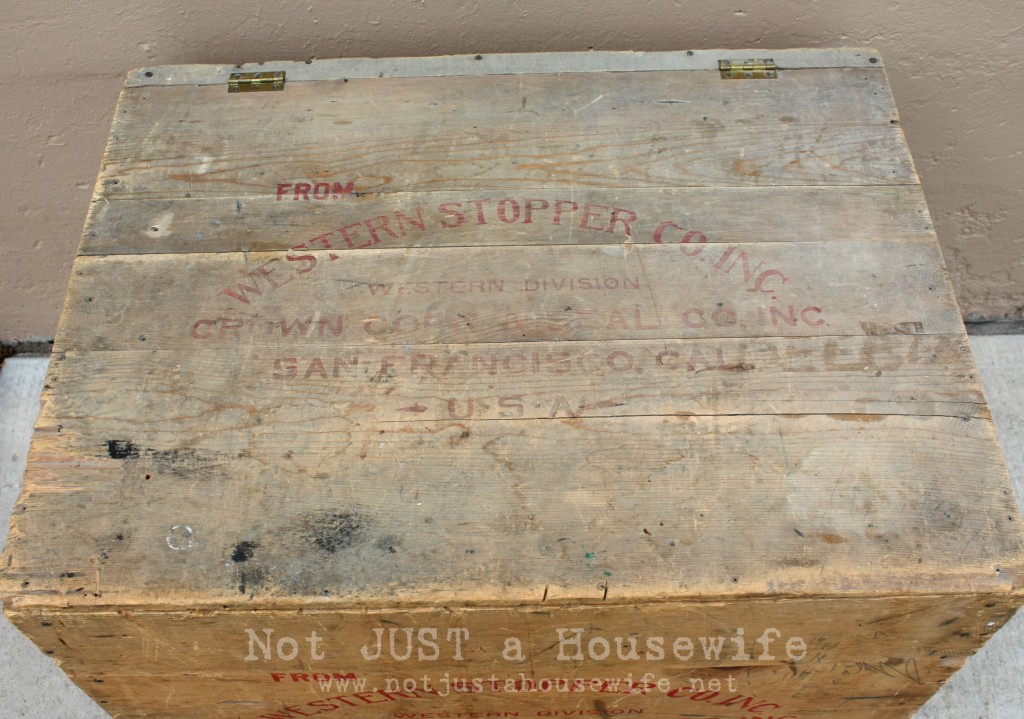
    I loved how old it looked and I didn't want to really change it very much. It did have a lot of writing on it though. The kind when a child gets a hold of a pencil :) And it was dusty. So I got a soapy rag and wiped the whole thing down. I only scrubbed the areas that had the pencil marks. I wanted it to still be "dirty" if you know what I mean. I didn't want to clean it so much that it looked new.

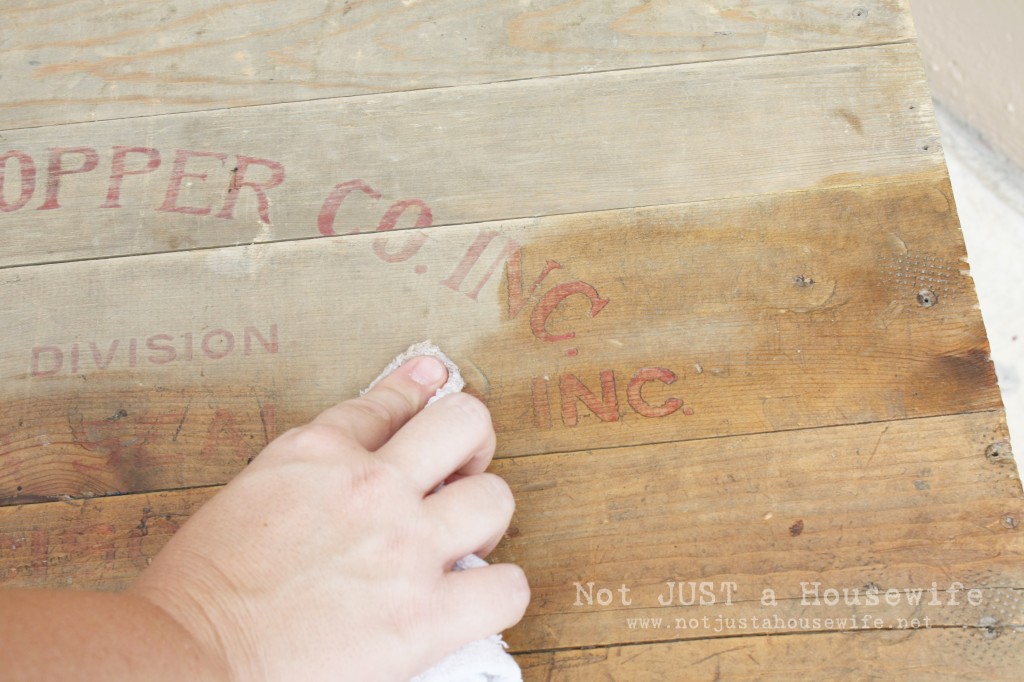
    I used some wax instead of polyurethane like I usually do because I didn't want to change the color of the wood that much. I knew the wax would sink into the unfinished wood of the crate and still protect the wood with out giving it a shiny (darker) finish.
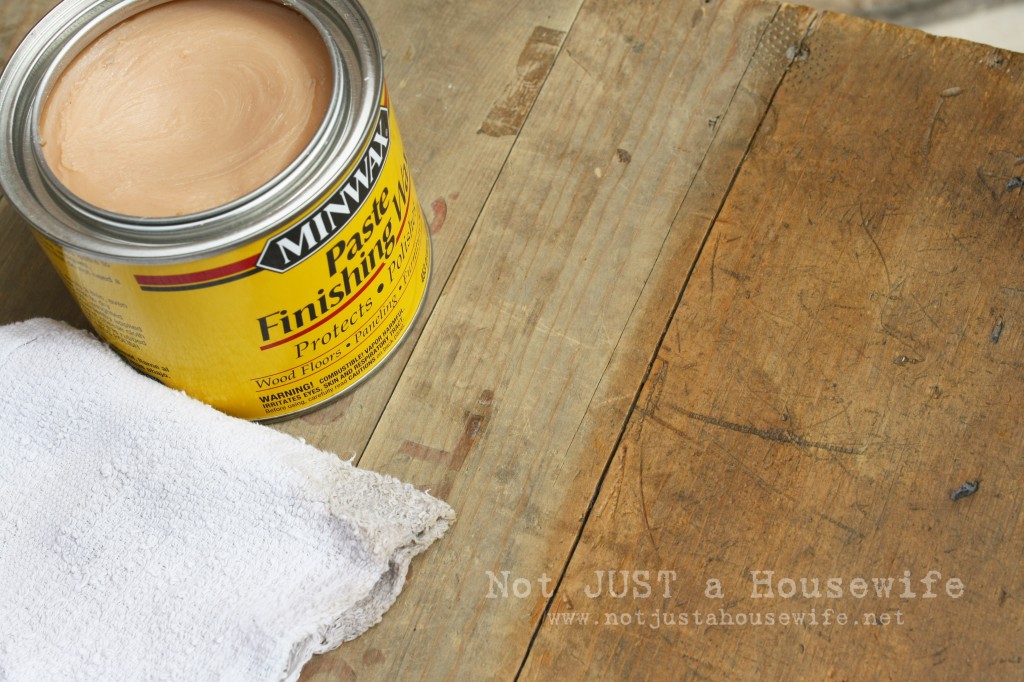
    I applied it by using an old rag. I rubbed on a thin coat going in the direction of the wood grain. It did make it a tiny bit darker but not as much as it shows in this picture. It sunk down in and lightened up a bit. This was right after I applied it.

    I just love before and after shots together so here you go! Not a super dramatic shot, but that is what I wanted. I wanted it to look the same. . . just a little better. Plus now the wood is protected and will be easier to clean.
    This will be going in my office!!!  It will hold my fabric and sewing machine. I am going to put it under a window and have some pillows on top so it will act as a bench as well.  I love it!!!

    You will also like:

    • Crushing On: MarbleCrushing On: Marble
    • Funky Frame TutorialFunky Frame Tutorial
    • Spicy Garlic Lime Shrimp & PastaSpicy Garlic Lime Shrimp & Pasta
    • DIY Braided Fabric BasketDIY Braided Fabric Basket
    • New Year, New Projects!New Year, New Projects!
    • My Life and Kids- Guest PostMy Life and Kids- Guest Post
    • "Rescuing One To Rescue Another" {Celebration of Service}"Rescuing One To Rescue Another" {Celebration of Service}
    • 6 Hardware Options {Help Me Decide!}6 Hardware Options {Help Me Decide!}

    « Design Inspiration From Nature
    Do you want fries with that? »

    Filed Under: DIY & Tutorials, Furniture 22 Comments

    Subscribe

    for your weekly DIY fix.

    Reader Interactions

    Comments

    1. Angie

      August 19, 2011 at 1:13 pm

      I.love.this! I am a huge fan of anything "old". It is an amazing piece! I am so jealous! :)

      Reply
    2. Maureen

      August 19, 2011 at 2:17 pm

      A subtle change, but it makes it look amazing!

      Reply
    3. Nanalie Knotts

      August 19, 2011 at 2:19 pm

      It's Stacy's "TOYBOX"!!! Love it! I have several old wooden boxes. I wish I knew the stories they could tell!

      Reply
    4. Autumn

      August 19, 2011 at 3:17 pm

      It looks great! I love old boxes. I need to hunt done some for my house!

      Reply
    5. Rachel @ Linesacrossmyface

      August 19, 2011 at 5:10 pm

      I love it! You definitely made it look so much better without changing it too much. What a fun piece. I would love to see how it looks under the window with pillows.

      Reply
    6. Mindy

      August 19, 2011 at 5:33 pm

      Yeah, that's pretty friggin' awesome.

      Reply
    7. angie @ the cellar door stories

      August 19, 2011 at 6:42 pm

      wow, i love it! amazing the difference!

      Reply
    8. Kris

      August 19, 2011 at 8:30 pm

      I love it! Such a unique, beautiful piece.

      Reply
    9. Sherry Smyth

      August 20, 2011 at 8:27 am

      This is great and just what I needed. We cleaned out my in-laws' house for it to be sold and came across a number of old crates and old boxes that my husband's grandfather used in his catering business (from the 20s). I want to clean them up but hadn't a clue and your DIY was just the right thing...I good wash and some wax is exactly what they need! thanks so much!

      Reply
    10. Lindsay

      August 20, 2011 at 9:04 am

      This is a gorgeous piece! I really adore it, actually. :)

      I would love to have you share this project at my first link party--

      http://southernlovely.blogspot.com/2011/08/show-share-1.html

      Reply
    11. Brook @BeingBrook

      August 20, 2011 at 1:30 pm

      Love! I like that you used finishing wax. I've been wondering what kind of projects you would use that for.

      Reply
    12. loving momma @ happy as a lark

      August 20, 2011 at 9:07 pm

      I love the way you will have many uses for this great piece :)

      Reply
    13. Mom

      August 21, 2011 at 9:11 pm

      I just love the job you did on the crate. Kris would be so proud of you! I love your idea of putting your sewing machine inside--anxious to see it!

      Reply
    14. Moddy

      August 21, 2011 at 10:44 pm

      I love waxing furniture! I just waxed my antique armoire! It makes all the difference! Hope you had a wondeful weekend!
      http://www.moddybee.blogspot.com

      Reply
    15. Mindy @ Heart Maine Home

      August 22, 2011 at 3:42 pm

      Simply stunning! I love how the wax brought out its colors and textures without compromising its character.

      Reply
    16. Michelle

      August 25, 2011 at 10:14 am

      So cool! Wish my aunt would call me up with an awesome gift like this! It will be so cute with the pillows.

      Reply
    17. Becky

      August 25, 2011 at 11:16 am

      Where did you you find your tinted wax? I have looked everywhere! I live in Lehi so not too far from you.

      Reply
    18. Amanda

      August 27, 2011 at 11:06 am

      Wow, that is a great crate! I like that you kept the integrity of it, but still "freshened" it up. Very nice!

      Reply
    19. Shelley Cavin

      April 13, 2017 at 11:45 am

      DO you think this technique would work on an old soda crate?

      Reply
    20. Judy

      September 08, 2017 at 2:50 pm

      love the finish... minwax makes a light or dark past finishing wax. Please let me know which one you used ... I am assuming it was the Light Wax. Thanks a bunch!

      Reply

    Trackbacks

    1. Great Ideas — DIY Inspiration {10} says:
      August 24, 2011 at 8:28 pm

      [...] Great Ideas — DIY Inspiration {10} August 20, 2011 By Jen Leave a Comment  Painted Cabinet Makeover @ The V Spot  Ceiling Medallion Clock @ Positively Splendid DIY Kids Table and Chairs @ Shanty 2 Chic  New Old Crate @ Not Just a Housewife [...]

      Reply
    2. Great Ideas — DIY Inspiration {10} says:
      September 1, 2011 at 12:10 am

      [...] Great Ideas — DIY Inspiration {10} August 20, 2011 By Jen 13 Comments  Painted Cabinet Makeover @ The V Spot  Ceiling Medallion Clock @ Positively Splendid DIY Kids Table and Chairs @ Shanty 2 Chic  New Old Crate @ Not Just a Housewife [...]

      Reply

    Comment Below! Cancel reply

    Your email address will not be published. Required fields are marked *

    This site uses Akismet to reduce spam. Learn how your comment data is processed.

    Primary Sidebar

    stacyHey! I'm Stacy and am a DIY addict. I love to get my hands dirty, whether it's sawdust, paint, or dirt. My goal is to help YOU learn to fix up your home and yard. No matter the style or size, I think everyone should love their home. And it doesn't takes a big budget to get there. Let's DIY together!

    Subscribe to My Blog!

    Search this site

    categories


    Subscribe

    Footer

    Welcome! I'm sharing our adventures as we fix up our 1938 cottage. Whether it is big or small, I think everyone should love their home and I don't think it takes a lot of money to make a space your own

    About Stacy

    • Facebook
    • Instagram
    • Pinterest
    • Twitter

    My Favorites

    copyright

    All images and content are copyrighted via Stacy Risenmay unless otherwise stated. If you'd like to share my work, please link back to this blog.
    Thank you for visiting!


    Footer

    ↑ back to top

    About

    • Meet Stacy
    • Privacy Policy
    • Contact

    Categories 

    • Home Decor
    • Outdoor Projects & Gardening
    • DIY & Tutorials
    • Kid Activities
    • Recipes
    • Travel
    • Cleaning
    • Houseplants
    • Staining
    • Painting
    • Power Tools
    • Holiday Ideas

    Newsletter

    • Sign Up! for emails and updates

    As an Amazon Associate I earn from qualifying purchases.

    Copyright © 2020 Brunch Pro on the Brunch Pro Theme


    Privacy Policy
    Welcome! Thanks for visiting.
    Hi! I'm Stacy and I want to help YOU become a DIY rockstar! Sign up for my email list so each project, tip, and trick will go directly to your inbox :)
    Your information will *never* be shared or sold to a 3rd party. Pinky promise :)
    Welcome!
    Hi! I'm Stacy and I blog about fixing up our 1938 cottage. Join the thousand of others who get my posts sent to their inbox for FREE!
    Your information will *never* be shared or sold to a 3rd party.