
The finished part of our basement was covered in mismatched carpet that was who knows how old. Remember when I shared the before pictures? I was thrilled when we were finally ready to replace it with a better option. We replaced the carpet with vinyl flooring. It is cost effective, easy to install, and it is waterproof! When I asked your help about flooring options for our whole house, many of you were curious about this type of flooring. I'll show you the supplies needed and the steps for installing vinyl plank flooring and tell you what I think of it now that we have lived with it for a while. This post was sponsored by The Home Depot.

Prepping the Space for New Flooring
The baseboards in the two bedrooms were not real wood and they were heavily damaged so we removed them. When we ripped out the carpet we were met with a fun surprise. We found the original 1930's vinyl! It was in great condition. It was a bit too pink for my boys though :) I cut it into sections and slid it right out the window.

A fun side story... Soon after taking this flooring out, the granddaughter of the original owner stopped by out of the blue and asked if she could take a picture of the outside of the house. I ended up giving her a tour of the home and she told me stories about the home and her family. She took a small piece of the flooring to frame and give to the last surviving Great Aunt who had slept in this room with this flooring. It seriously made my whole year! I love that a little bit of this was preserved.

After the old flooring was removed, I scrubbed the flooring a few times until I was sure it was all the way clean. I let it dry completely overnight. We lucked out and our floors are very smooth without any real cracks. If you have areas that are higher, use and angle grinder to level them a bit. Fill any cracks with a concrete sealer.

I chose Home Decorators luxury vinyl planks in the color Highland Pine.
Installing the Vinyl Planks
Supplies:
Carpenters Square
Tool to Cut Door Frame Trim
Needle Nose Pliers
Pencil
Retractable Utility Knife
Mallet
Wood Block

Start from the left and move to the right. Make sure that you leave a small gap between the flooring and the wall but not too big that it would not get covered when you install the baseboard. Follow the exact instructions provided in the box.

Cutting the vinyl is super easy! Measure and mark using the carpenters square and a pencil then score using the utility knife. Simply snap at the score mark.

Once you have the first couple of rows done you start to move rather quickly. They planks snap into place. Sometimes they may require a bit of tapping. Use a smooth wood block and a mallet to gently tap them in place creating a seamless connection.

If your door trim extends all the way to the cement, you will need to cut a tiny bit of it away so that the flooring can go under it. I used the Ryobi JobPlus cutting tool and it cut through like butter.


I traced the profile of the door trim onto paper so I knew how to cut the flooring. I scored it as best I could along the line and used needle nose pliers to help snap it off. Needle nose pliars come in handy when you need to break off smaller pieces.

Sorry for these 2 crappy cell phone pictures.

I now have both bedrooms and the hallway done. Here is bedroom #2 that will soon have a makeover reveal! You can see the completed bedroom #1 here.

After the flooring was complete, I added new baseboard which covered up the small gap between the flooring and the wall.

I installed the flooring by myself and it took a day for each space. I can't wait to add it to the laundry room and the third basement bedroom.
Here are some questions you may have about this flooring.
Q&A
Why did you choose this type of flooring instead of carpet or laminate?
Our washer and dryer plus the water heater are both in the basement. If either of them leaked, our basement could potentially flood. These floors are 100% waterproof. I like knowing they won't warp if they get wet. I also have a son with allergies and felt like removing carpet would help him.
Does it look like real wood?
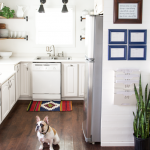
It looks as real as most laminates do. It FEELS different when you walk on it. It doesn't feel like wood. But that being said, I don't mind how it feels. It is just different. It has a texture to resemble wood and the grain pattering is realistic. I love the color that I chose because it hides dust and lint and other little things that floors get covered in. Our upstairs gets mopped daily but we aren't great about mopping daily downstairs. It is more like weekly.
Are you happy with your choice?
YES! They are not only waterproof but very durable. I love that peace of mind. With 4 boys and a dog, I didn't want something high maintenance that I had to worry about getting damaged. It didn't break the bank either. I bought it at Home Depot and they had many brand and color options.
Let me know in the comments if you have any other questions. I'd be happy to answer them! I also want to know if you already have vinyl, what you think of it. Let me know below!

This post was sponsored by The Home Depot. All experiences and opinions are 100% mine.


Looks terrific. I'm impressed that you did it all yourself, and that it went in so quickly.
Looks great! We installed the same flooring last year and we still love it! Ours is a darker to contrast with all of the white Shiplap. It's so easy to take care of! And if you can't get to the wet messes right away, you don't have to worry about it getting hurt! It made sense going this direction for us for we have 2 cats and one boy... so lots of messes! Enjoy!
I put this in my upstairs baths. It was some work because it went over osb so I had to do a cement finish first. It is so good looking my hubby wanted me to do the bedroom and loft . We originally had carpet in that bath and it was under the toilet who the hell does that ? Geez I cried when I removed it and had black mold under that leaky toilet. This was my project so I did it all, my husband pulled the toilet out and we had a handyman repair the wood underneath.colleen
I had 1/4 inch Lauan installed over the wood subfloor to level things out and prevent any unevenness telegraphing through, worked great!
Did it have much of a odor ? We are thinking about this for our house on the lake. I have a lot of allergies and sometimes new products have off gassing for months.
It didn’t have a strong smell. Here’s what I found in the answer section for the product on the Home Depot website:
Q: I read that some vinyl plank flooring gives off toxic fumes. I also read that many big stores like Home Depot were going to work with companies making this product to request that their product meet low-VOC regulations. How does your product rate?
A: Thank you for your question. Our product is FloorScore certified to ensure indoor air quality. You can view a copy of our FloorScore certificate here: http://www.homedepot.com/catalog/pdfImages/34/34f7eb68-6aca-446f-a66f-cbb25a5deb22.pdf
Thanks for sharing another neat project! I love the history about the house and the granddaughter who stopped by to take a pic of the old flooring! But Updating for your needs is so important and now that it's done, I'm sure it feels wonderful! It looks awesome! :-)
Can the home decorators brand be installed on stairs?
Yes. They also sell the stair noses. I read in the answer section on the Home Depot site that the coordinating piece is this one: https://www.homedepot.com/p/Zamma-Markum-Oak-Medium-Perfect-Oak-3-4-in-Thick-x-2-1-8-in-Wide-x-94-in-Length-Vinyl-Stair-Nose-Molding-015543516/205082732
We're currently in the process of installing the same flooring. I love the way it looks. I'm sure that I'll be very happy with the finished product.
It looks amazing and you doing it by yourself is quite impressive.
Cindy
This is a wonderful tutorial. We are going to be putting this into our kitchen when we finish it. The floors look great.
Thank you for sharing at Merry Monday. Hope to see you at the party next week!
My Mom had Luxury Vinyl Plank flooring from Home Depot installed over the real wood in her kitchen and dining area and absolutely loves it. I have remodeled two of her rental units in the last 6 months and had Home Depot's Coastal Oak LVP installed throughout each unit and it looks truly awesome!! In a rental, one can expect carpeting to last 5 years before replacement; any longer is a bonus. The last tenant had totally trashed the carpeting in just 3-1/2 years. By eliminating the separate carpet and vinyl areas, the units look so much larger. I expect the LVP to last and to provide actual cost savings
for many years. The thought of what resides inside carpet fibers that cleaning simply cannot remove makes me shudder!
In reference to above concerns regarding VOCs, I hardly noticed any odor at all after the flooring was installed in the rental units. I'll be installing it in all of them!
Flooring DIY projects are very rewarding. For future projects, consider flooring supplies and flooring materials from Rustic Lumber Co. https://www.rusticlumberco.com/our-products