• Skip to primary navigation
  • Skip to main content
  • Skip to primary sidebar
  • Skip to footer
Stacy Risenmay
  • Home
  • About me
  • PRESS
  • Contact Me
  • My Book
    • Facebook
    • Instagram
    • Pinterest
    • Twitter
menu icon
go to homepage
subscribe
search icon
Homepage link
  • Home
  • About me
  • Project Gallery
  • Our House
  • PRESS
  • Contact Me
  • Privacy Policy
    • Facebook
    • Instagram
    • Pinterest
    • Twitter
  • ×

    IKEA Hack Using Reclaimed Wood

    By Stacy 29 Comments

    When I painted my upstairs all white, I added some IKEA shelves to either side of the window in my living room. I have lived with them as is for months and months and restyled them numerous times trying to get them "just right". One day I was thinking about how much I loved my reclaimed wood shelves in my office and how I wished I had not run out of reclaimed wood. If I had more wood would have made more shelves. Then I had an idea....


    white walls with shelves


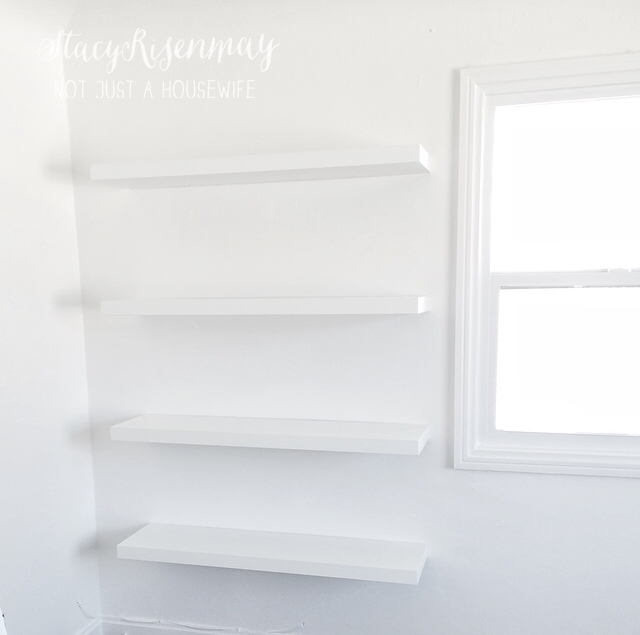
    I have seen Stikwood walls pop up all over the internet and I thought why not use it on the shelves instead of a wall? So I did! I gave my IKEA shelves a makeover.


    ikea shelf hack with barn wood

    stikwood-01


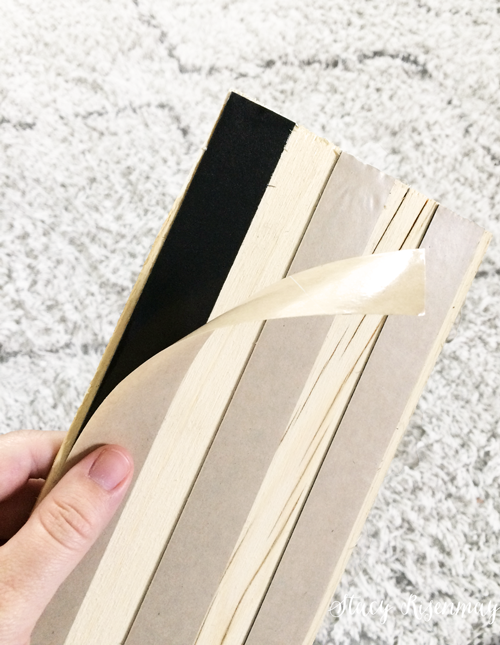
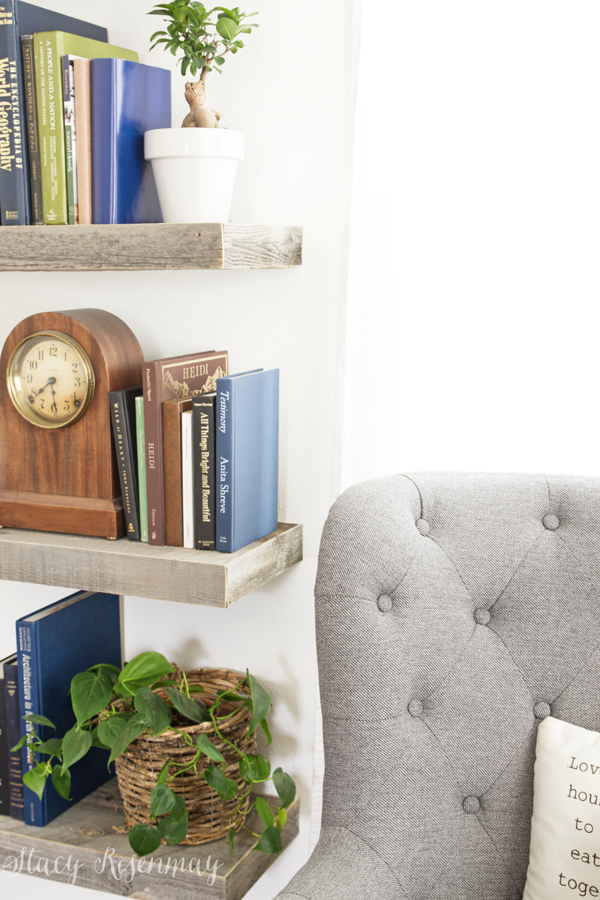
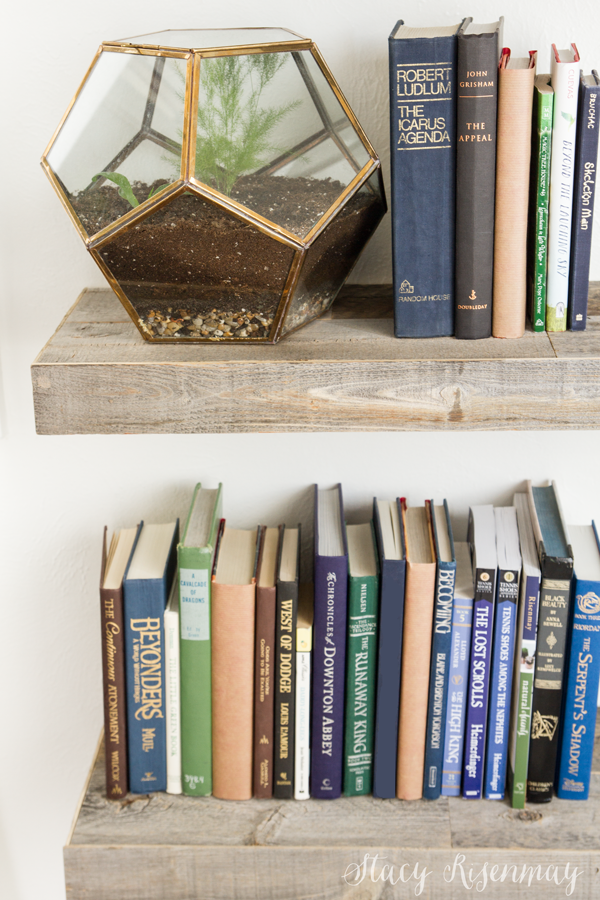
    I ordered the reclaimed weathered wood (they have different types and colors) because it looked the closest to my office shelves. You cut them to size and then just peel the backing off and stick them on!

    back-of-stikwood


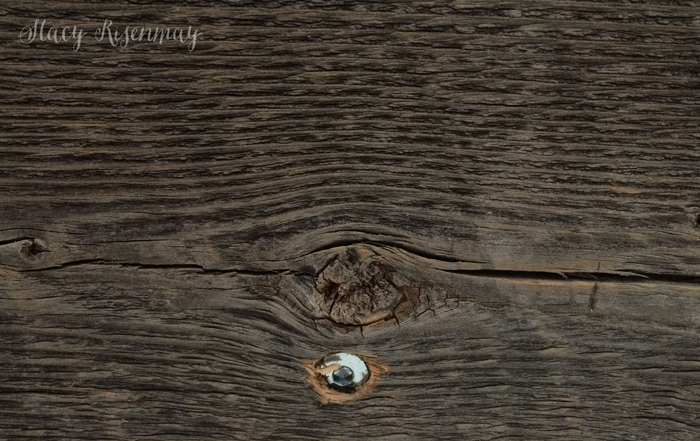
    The only tricky part was that I had to measure and then drill a hole through the Stikwood so I could still access the bolt that holds the shelf onto the bracket. This way I can easily remove the shelves if we decide one day to take them down or move them.


    drill-hole-for-screw


    barn wood shelves


    I added the wood to the top and bottom of the shelf first. Then I added the sides. The fronts went on last so they would cover up all the edges of the wood on the top and bottom.


    IKEA shelves hack with reclaimed wood


    I found bird poop on several pieces so I went ahead and finished adding the wood to the shelves and then I scrubbed them with soapy water. Be careful not to get them too wet since they have an adhesive on the back.

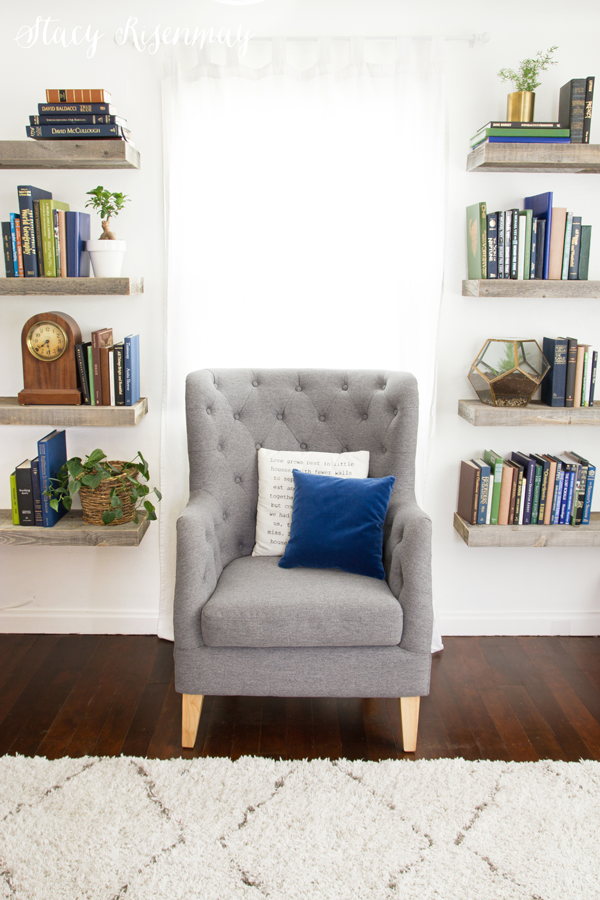
    I am really happy with the outcome. These shelves feel so much more like me :)


    IKEA shelf makeover with reclaimed wood


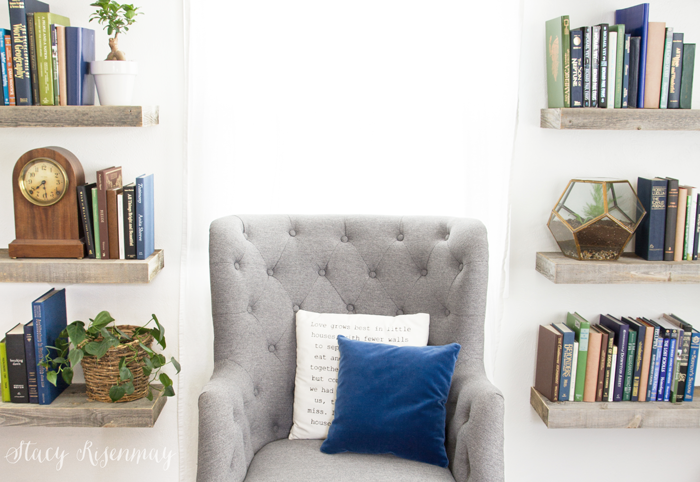
    Can we chat for a quick second about my new chair? I bought it off the local classifieds from a lady who bought it and then decided it didn't work in the space she intended it for so I got it BRAND NEW for a killer deal. I bought it originally to have it recovered in navy velvet (that is my DREAM chair) but I am really liking the grey. I am going to live with it grey for awhile and I may just decided to keep this that way!

    I bought the Stikwood planks myself but I did receive a discount in return for posting about my experience. The thoughts and ideas were all mine!

    You will also like:

    • Open Shelves In The KitchenOpen Shelves In The Kitchen
    • Laundry Room ProgressLaundry Room Progress
    • Fun Finds {Metal Foil}Fun Finds {Metal Foil}
    • My Organized Pantry!My Organized Pantry!
    • Bathroom Shelves!Bathroom Shelves!
    • Mason Jar Wall PlanterMason Jar Wall Planter
    • My Home Office Reveal!My Home Office Reveal!
    • Closet Makeover!Closet Makeover!

    « Laundry Room Makeover!
    Styled X3 {Geometric Push Pins} »

    Filed Under: DIY & Tutorials, Home Decor 29 Comments

    Subscribe

    for your weekly DIY fix.

    Reader Interactions

    Comments

    1. Gina

      June 14, 2016 at 8:38 am

      Oh man- I love the ease of this. I want to do this to everything!!!

      Reply
    2. Jeanne

      June 14, 2016 at 10:37 am

      This almost looks too good to be true...will definitely have to try! Thanks for a fun post.
      http://doodlet.me/

      Reply
    3. Tammara

      June 14, 2016 at 10:48 am

      WOW, looks good. What a great alternative.

      Reply
    4. Linda

      June 14, 2016 at 11:14 am

      I really like this idea! You made it look so fabulous!! :)

      Reply
    5. Andrea

      June 14, 2016 at 8:10 pm

      Exactly how did you cover the edges? Did you overlap and wrap it around?

      Reply
      • Stacy

        June 14, 2016 at 8:23 pm

        I laid the boards down on the top and the bottom first and then cut thinner strips (I actually cut them in half) to cover the sides and front. The front went on last so it would cover up all the edges.

        Reply
    6. Brad

      June 14, 2016 at 10:21 pm

      Stacy,

      What are you using to cut the stikwood planks lengthwise? I used a utility knife on my project but it wasn't easy on the long pieces. Would love to know how other people do it.

      Sincerely,

      Brad

      Reply
      • Stacy

        June 14, 2016 at 10:25 pm

        I rip cut it on a table saw. It worked really well! The other cuts were done on a miter saw.

        Reply
    7. cath

      June 15, 2016 at 6:38 am

      The shelves look great. Intriguing product. You really had me, up until the bird poop. But, I remember using recycled barn siding was quite the thing years and years ago, and barns are pretty much poop factories. Ultimately, I really like the rough, natural wood look and the peel and stick idea has huge advantages. Gray chair looks very inviting to sit in. Blue velvet would be dreamy, but I wonder if it would be a lint magnet. When we were growing up, Mother had a chair done in a golden velvet. Very pretty. We weren't allow to sit in it. To this day, it looks pristine because it was so rarely used.

      Reply
    8. Vineta @ The Handyman's Daughter

      June 21, 2016 at 1:42 pm

      The Stikwood planks are the perfect way to update those IKEA shelves! They look amazing!

      Reply
    9. Kristi

      June 22, 2016 at 9:50 pm

      BRILLIANT!!!

      Reply
    10. the cape on the corner

      June 23, 2016 at 10:08 am

      that looks great, and i love all the natural blue and green tones. very earthy in there! looks like a calming spot to read.
      b

      Reply
    11. Anita

      June 23, 2016 at 5:14 pm

      This is an awesome idea!

      Reply
    12. Kara

      June 24, 2016 at 8:10 am

      Wow, those are awesome! I love how your shelves turned out. I need to get me some of those! I also love your chair - what a score!

      Reply
    13. Samantha

      June 26, 2016 at 9:45 pm

      This.is.genius!!!!!!!!!!! Love love love how they turned out! SO smart! Thanks for sharing at Dream. Create. Inspire. Link! Pinning and featuring you Tuesday night!

      Reply
    14. BonBon

      June 27, 2016 at 7:40 am

      I love this project. Thanks for sharing at Inspire Me Monday link party. I have selected you as one of my Featured Links this week. Come by and check it out. Enjoy your week!

      Reply
    15. Jaclyn | One Thousand Oaks

      June 28, 2016 at 9:20 pm

      I have seen this stick wood and have been trying to figure out how to use them in our house because they are lovely. This is a great idea. I love your chair! How awesome that you got such a beautiful chair for such a great deal. I really want a navy velvet chair for our bedroom! someday!

      - Jaclyn

      Reply
    16. Mindi

      June 29, 2016 at 12:18 am

      Stacy you are a genius!! They look gorgeous!! Seriously you inspire me!

      Reply
    17. Kayleen

      July 25, 2016 at 6:03 am

      Inihtsgs like this liven things up around here.

      Reply
    18. Karen

      September 02, 2016 at 6:17 pm

      Love This! How much sq ft would you need for 4 shelves??

      Reply
    19. Lee

      September 04, 2016 at 1:05 pm

      Looks amazing! This is going to be my next project. What color of the reclaimed weathered wood did you use? Thanks!

      Reply
    20. Angela September

      September 14, 2016 at 11:14 am

      bird poop? lol

      Reply
    21. naomi

      May 22, 2017 at 8:59 am

      Hi, i'm just wondering are the Ikea shelves the Lack shelves? and if so, how much sq ft. did you order to cover one? I love the look of this and want to do it to the outdated black lack shelf i bought

      Reply

    Trackbacks

    1. Show + Tell 223 - Tauni Everett says:
      June 27, 2016 at 6:00 pm

      […] IKEA Shelves Hack with Reclaimed Wood via Not Just A Housewife […]

      Reply
    2. Show and Tell, link party time! - Sugar Bee Crafts says:
      June 27, 2016 at 11:14 pm

      […] IKEA Shelves Hack with Reclaimed Wood via Not Just A Housewife […]

      Reply
    3. Simple Nature Decor says:
      June 28, 2016 at 7:47 pm

      […] Not Just a Housewife: Ikea Shelf Hack Reclaimed wood […]

      Reply
    4. 10 Fantastic Outdoor DIY Projects | Work it Wednesday No. 154 | The Turquoise Home says:
      June 29, 2016 at 7:00 am

      […] IKEA Shelves Hack with Reclaimed Barnwood from Stacy Risenmay […]

      Reply
    5. Meet Stacy! - Sawdust 2 Stitches says:
      November 28, 2018 at 11:11 am

      […] is no exception. It’s sunny and is the perfect place to curl up and read a book. From the reclaimed wood shelves for all our books, to the gallery wall with photos from trips we have taken, and the card catalog […]

      Reply
    6. 17 Great IKEA Shelf Hacks & Ideas for your home says:
      May 26, 2019 at 7:11 pm

      […] This hack uses Stikwood, which is used in a lot of Ikea hacks and can be used all around your home for various DIY projects.  It is peel and stick reclaimed wood, which works great on just any piece of furniture.  This DIY project makes for more interesting shelves. See the tutorial here. […]

      Reply

    Comment Below! Cancel reply

    Your email address will not be published. Required fields are marked *

    This site uses Akismet to reduce spam. Learn how your comment data is processed.

    Primary Sidebar

    stacyHey! I'm Stacy and am a DIY addict. I love to get my hands dirty, whether it's sawdust, paint, or dirt. My goal is to help YOU learn to fix up your home and yard. No matter the style or size, I think everyone should love their home. And it doesn't takes a big budget to get there. Let's DIY together!

    Subscribe to My Blog!

    Search this site

    categories


    Subscribe

    Footer

    Welcome! I'm sharing our adventures as we fix up our 1938 cottage. Whether it is big or small, I think everyone should love their home and I don't think it takes a lot of money to make a space your own

    About Stacy

    • Facebook
    • Instagram
    • Pinterest
    • Twitter

    My Favorites

    copyright

    All images and content are copyrighted via Stacy Risenmay unless otherwise stated. If you'd like to share my work, please link back to this blog.
    Thank you for visiting!


    Footer

    ↑ back to top

    About

    • Meet Stacy
    • Privacy Policy
    • Contact

    Categories 

    • Home Decor
    • Outdoor Projects & Gardening
    • DIY & Tutorials
    • Kid Activities
    • Recipes
    • Travel
    • Cleaning
    • Houseplants
    • Staining
    • Painting
    • Power Tools
    • Holiday Ideas

    Newsletter

    • Sign Up! for emails and updates

    As an Amazon Associate I earn from qualifying purchases.

    Copyright © 2020 Brunch Pro on the Brunch Pro Theme


    Privacy Policy
    Welcome! Thanks for visiting.
    Hi! I'm Stacy and I want to help YOU become a DIY rockstar! Sign up for my email list so each project, tip, and trick will go directly to your inbox :)
    Your information will *never* be shared or sold to a 3rd party. Pinky promise :)
    Welcome!
    Hi! I'm Stacy and I blog about fixing up our 1938 cottage. Join the thousand of others who get my posts sent to their inbox for FREE!
    Your information will *never* be shared or sold to a 3rd party.