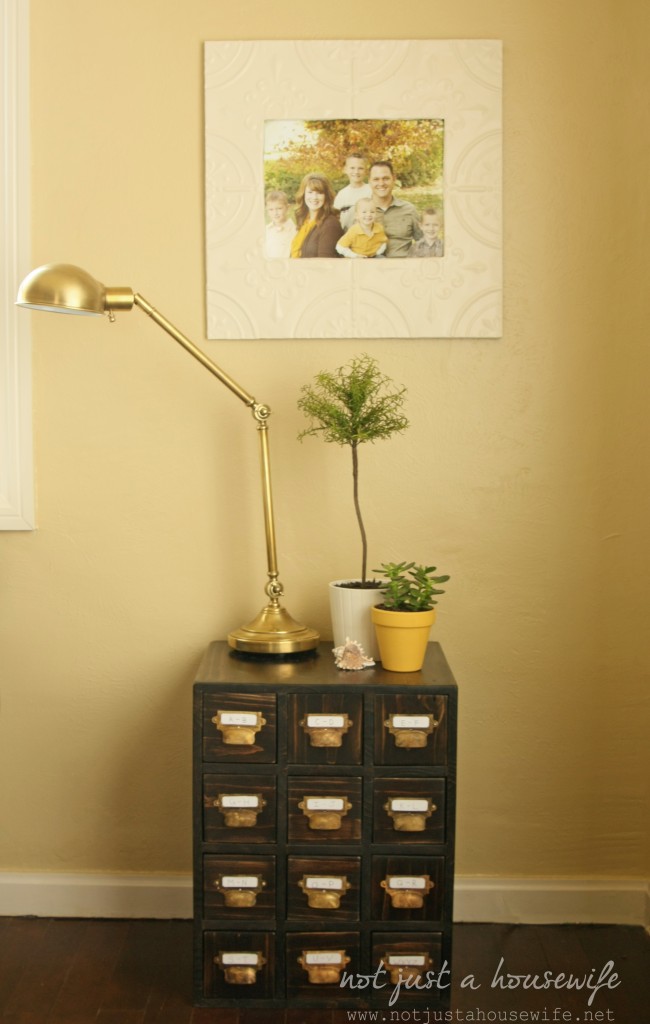
I have always wanted a piece of furniture with a bunch of tiny drawers. When I was a child, my mom had a spice cabinet on the wall of our kitchen that I would hide all sorts of treasures in. As I grew up I wanted my boys to have something similar. What I really wanted was a card catalog. I have actively searched for one for one for about three years. The ones I found were either too big or too expensive. Every once in a while I would find a decently priced one on ebay, but then I would notice the shipping. The shipping more often than not was more than the price of the cabinet!
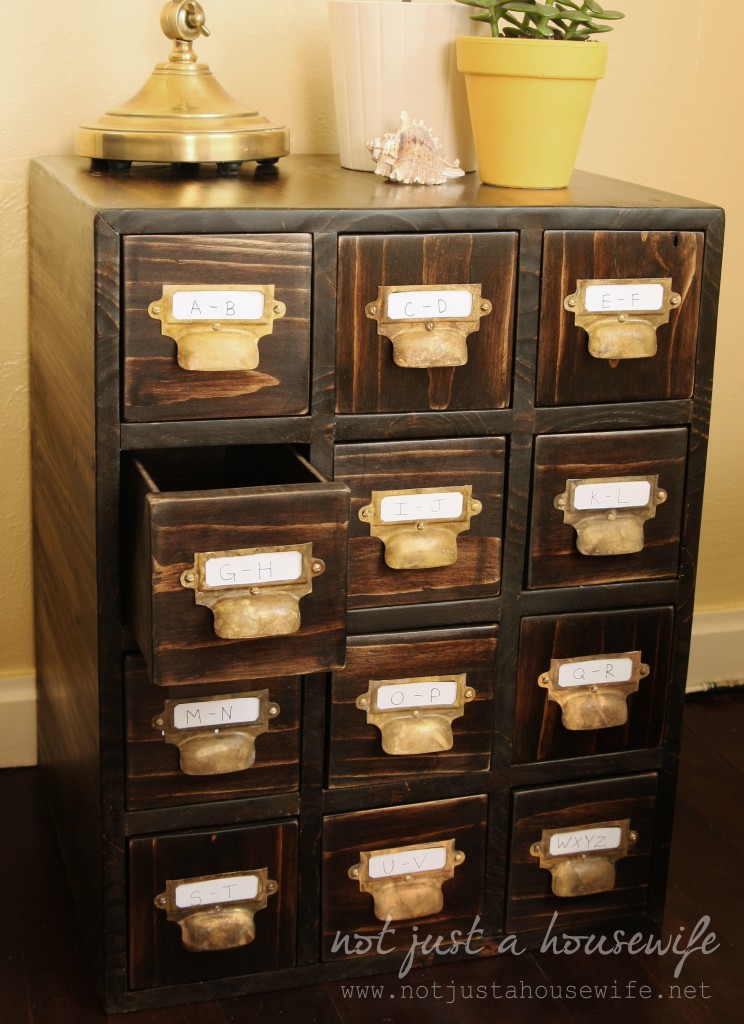
So when I was in the planning stages of my family room renovation, I decided to figure out how to build one and make it look like an antique.
Before I show the tutorial, let me apologize for the crappy cell phone pics. I do a lot of my DIYing at night when my kids are in bed. Since I was doing this project indoors (because of record low temps this winter) it got pretty dusty in my dining room so I didn't want to pull out my nice camera. They won't win any photography awards, but you will get the idea :)
Supplies needed:
(affiliate links)
*Laminated Pine Boards
The building.........
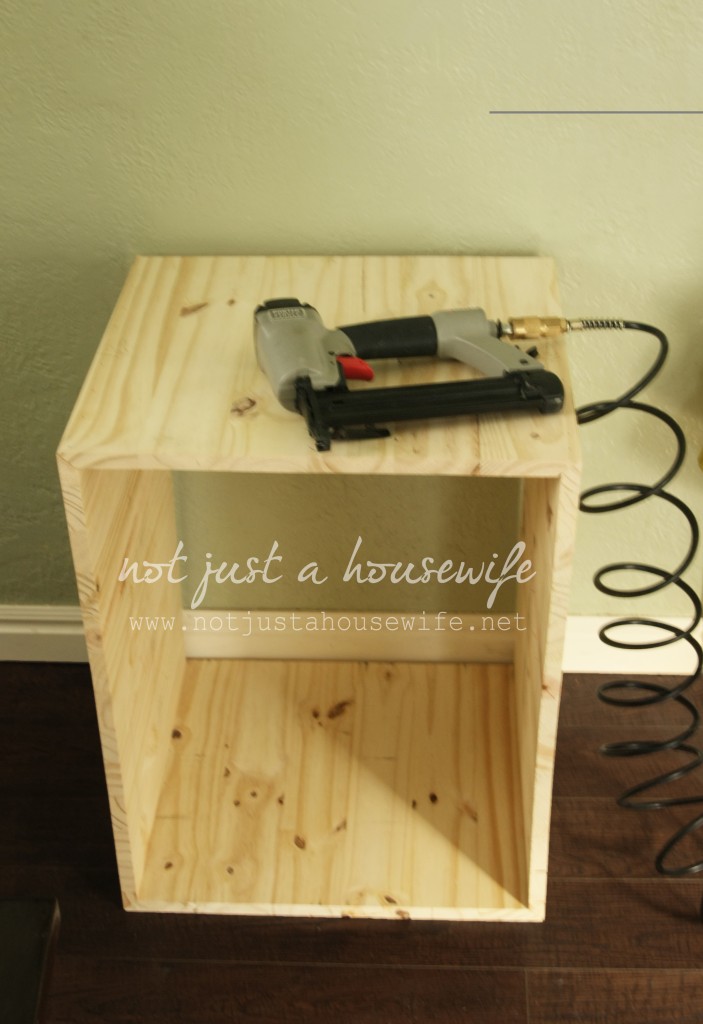
You basically start with a box. Make the dimensions fit your own space, but be smart and make sure with the size that you choose, you will have the least amount of cutting possible to eliminate extra work. For example...
I am old school. I should one day learn sketch-up or some other computer program, but for now I really enjoy just drawing out my ideas on paper. I had it all done. The dimensions, shopping list, cut list, etc. And then I lost it. I was pretty confident that I remembered everything so I went to the store and bought the lumber. I had remembered the width of the box being 18 inches. So that is how it was cut. But what it really was, was 18 inches on the inside of the box, not the outside. If I had made it 19 ½ inches like it was suppose to be, the 1x6 boards I was using for the drawer fronts (which due to planing/sanding are really 5 ½ inches) would have worked perfectly and I would not have had to cut them down. Instead, I ended up having to shave some off with a saw. Just something to think about when you are doing the math.
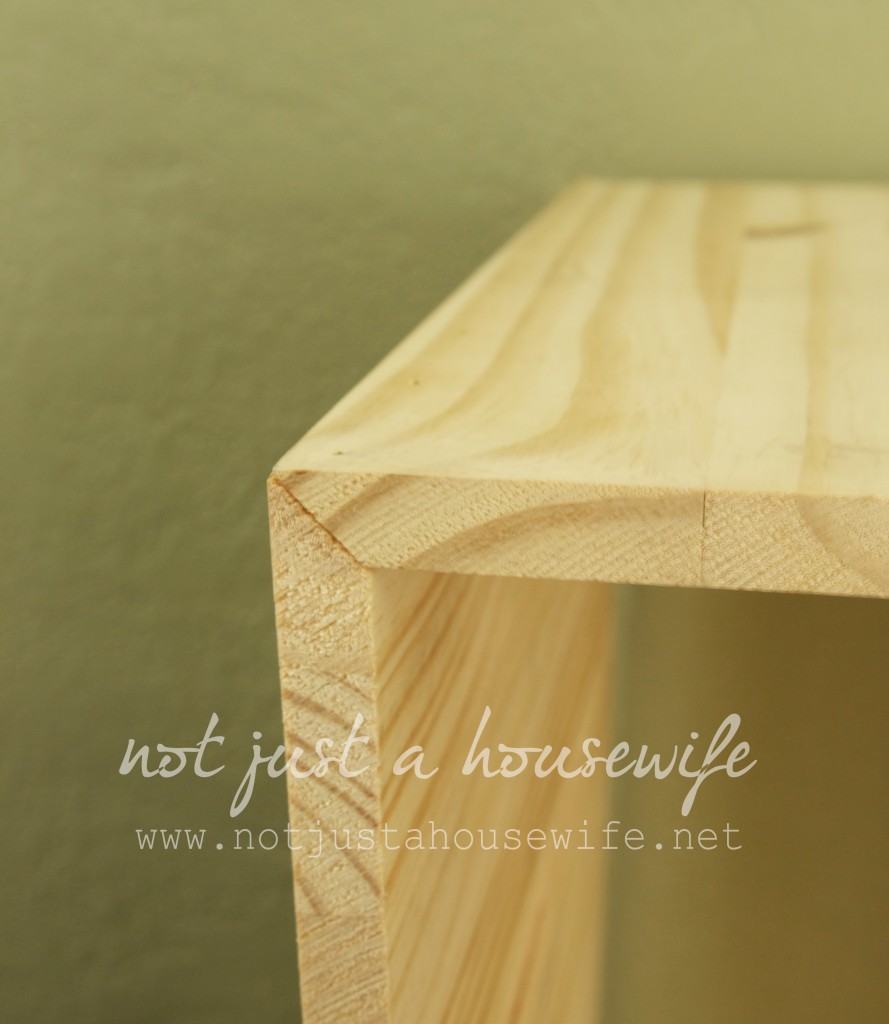
I went with a mitered joint since you would see the edges and because I was choosing to stain and not paint.
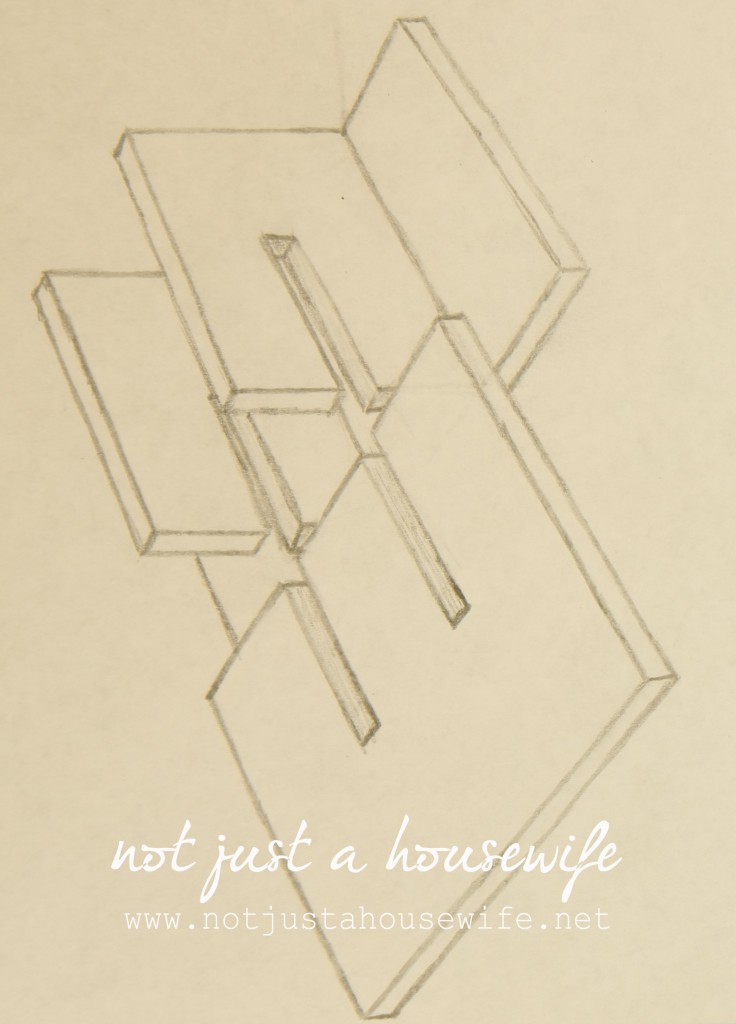
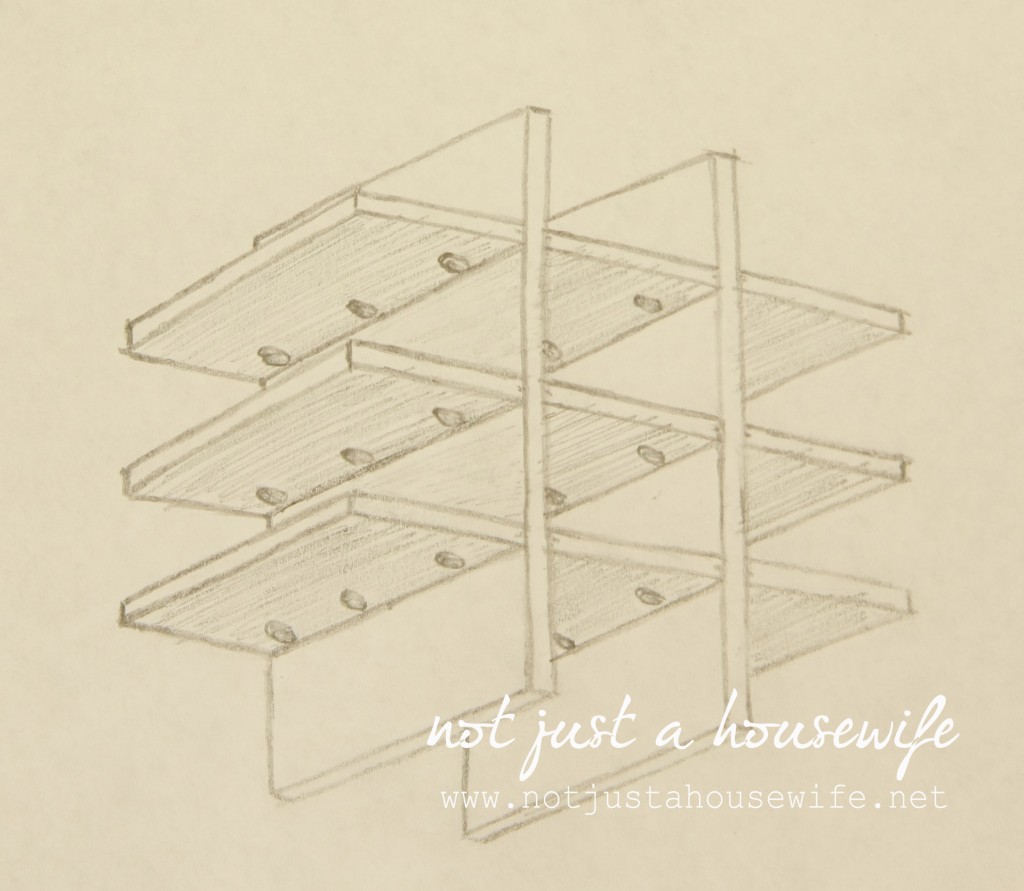
Then it is time to do the insert. You can do one of two things...
Here are some lovely sketches. The first is just like the shoe cubbies you can buy for cheap at Target or Walmart that you put together your self. There are notches that slide together.
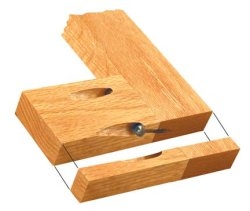
The second way is to screw the pieces together using a Kreg Jig. I used one on the barnwoood cupboard I built awhile ago and you can buy a small inexpensive one like the one I have.
Here is a good look at the joint up close.
If you go this route make sure and put the screws on the bottom so you will not see them. I know the drawers will be in the cubbies they create but it will just look better ( in case you take the drawer out) if the screws are hidden.
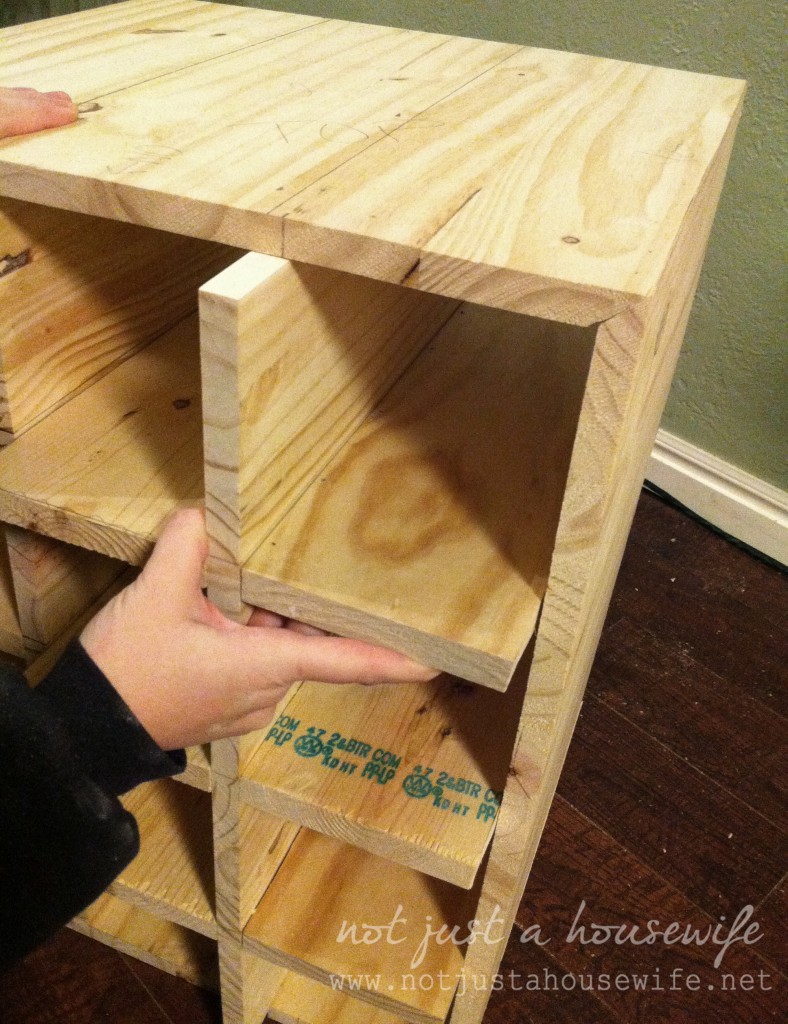
Okay, if you cut everything right your insert should slide right in. If it is too tight, just use a hand sander ( don't use a belt sander since they eat through wood VERY quickly) and sand it down a bit. If it is too small and there are gaps, then cut a thin piece of wood to act as a shim between the box and the insert.
Luckily mine was a perfect fit :)
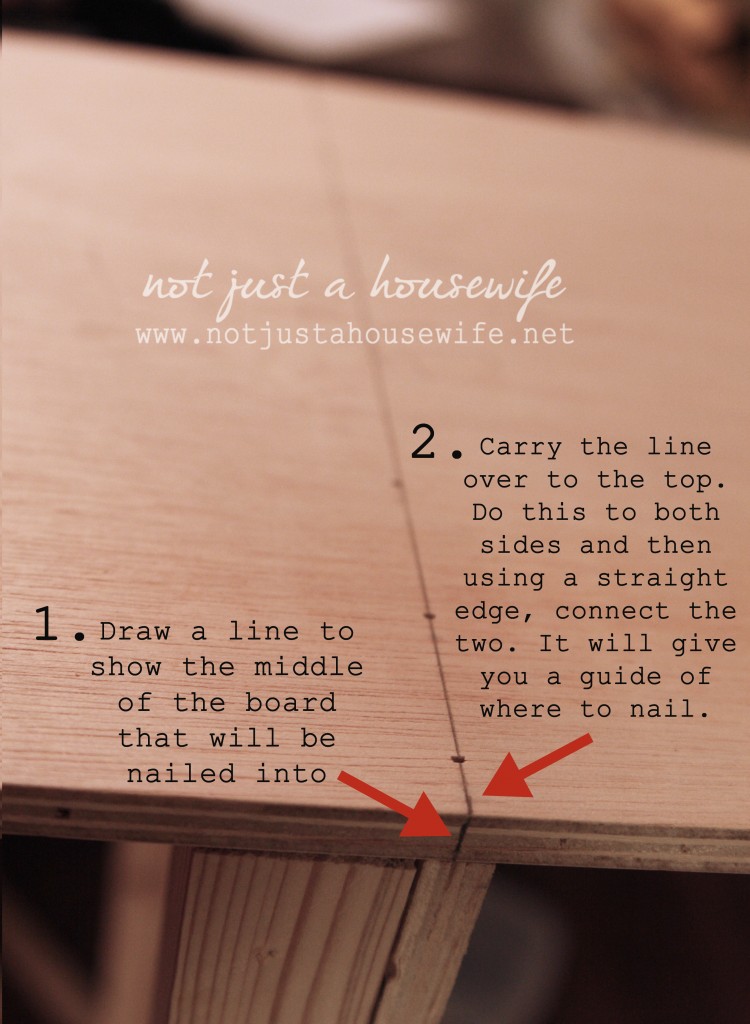
I then nailed it into place with my brad nailer. I draw a line across so I know where to nail.
This was the easy part. Now on the the tedious job of making all 12 drawers!
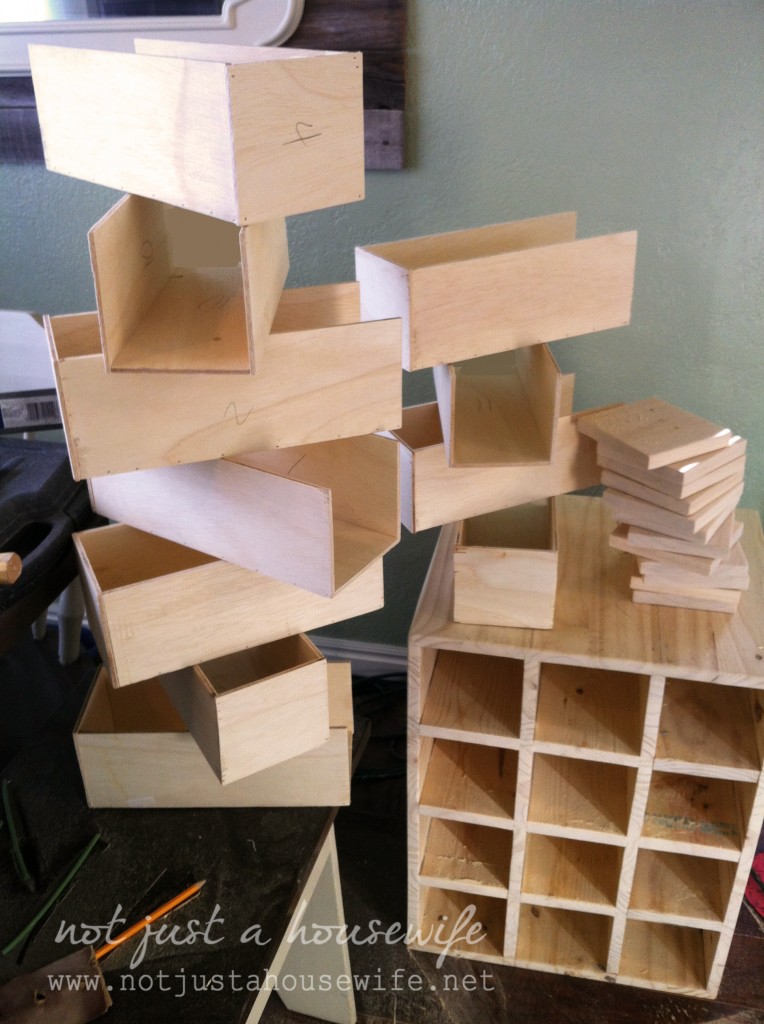
I cut all the the wood except for the plywood I used for the drawers. Home Depot will cut wood for you so to cut down on my work load I decided to have them rip cut the ply wood into 4 ½ inch strips. That way I just had to come home and use the miter saw to cut them to the right length. I do not have a table saw and this would eliminate having to mooch ask our neighbor to use theirs AGAIN.
I chose ¼ inch plywood because the thinner the drawer sides the bigger the inside of the drawer. That was my reasoning. I had used ¼ inch ply wood on my son's floating side table drawer and it worked out pretty good. BUT I will say that it is very hard to nail the brad nail into such a thin board without it missing. I would recommend using ½ ply wood for the drawer sides, back and bottom.
I wanted the drawer to be shallower than the cubby it was going in so it could have some wiggle room. You don't want it to be the same height or it will get stuck easily.
I cut the drawer fronts one at a time. I measured each individual cubby, then cut the drawer front for that specific cubby, and then labled it with a number. There are bound to be tiny imperfections ( something bog ones) so even if it only off my a 1/16th or ⅛th of an inch, it will look better if you cut them one at a time to have a nice fit.
I knew I was going to be sanding mine quite a bit to make it look aged so I was okay if the fit was a little tight. If you want to sand it, keep that in mind.
As far as how I got the drawer fronts to be nailed on with out too many nails missing their mark, I hot glued a tiny dot on each drawer and stick the front on. Once it was stuck, I drew a line (like shown above) to know where to nail. The thicker the wood the bigger the target and the less likely you are to have a nail miss. That is why the ½ inch would be easier.
I puttied the crap out of it. I always add more than maybe what I need because you can always sand it off, but that way you don't have to go back and add more. ALWAYS use a paint-able, sand-able, stain-able putty. And pick the color closest to the color you will be staining. Especially if you are going to stain.
The staining.......
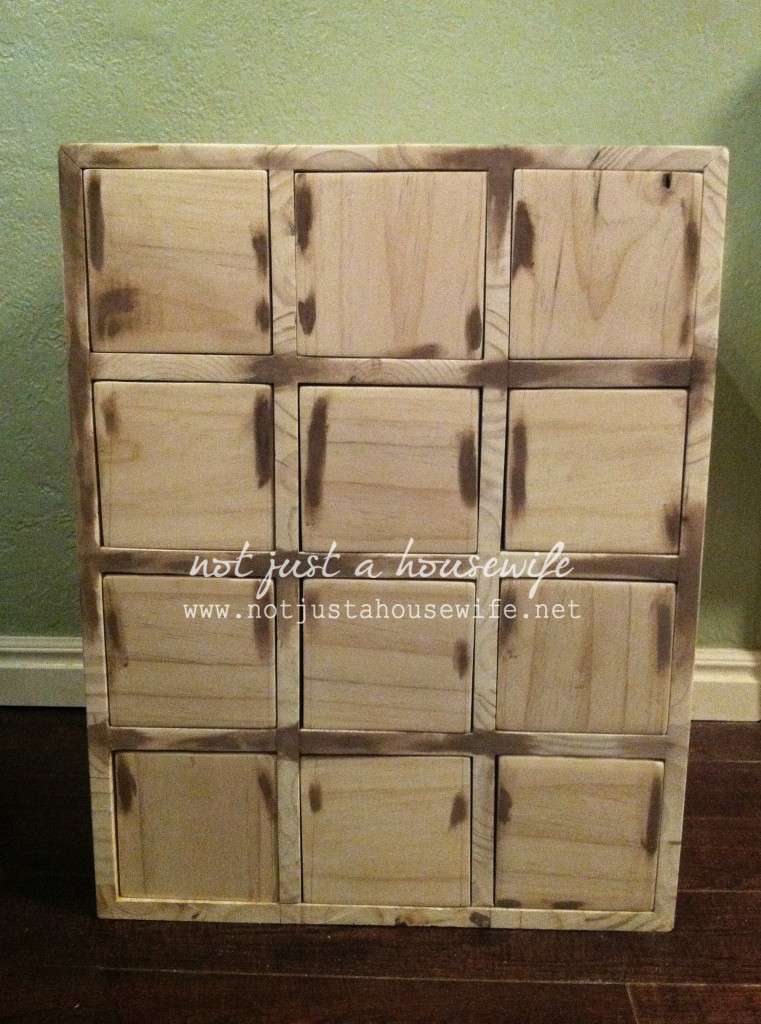
I wanted it to have an aged look. It is easy to get an aged look if you paint something. You either sand it or you glaze it (or both). Aging something stained is a whole other ball game. If you look at a real antique, it looks almost rubbed off. It is smooth and lighter in those areas. I had actually never tried to age a stained piece so this was an experiment for me.
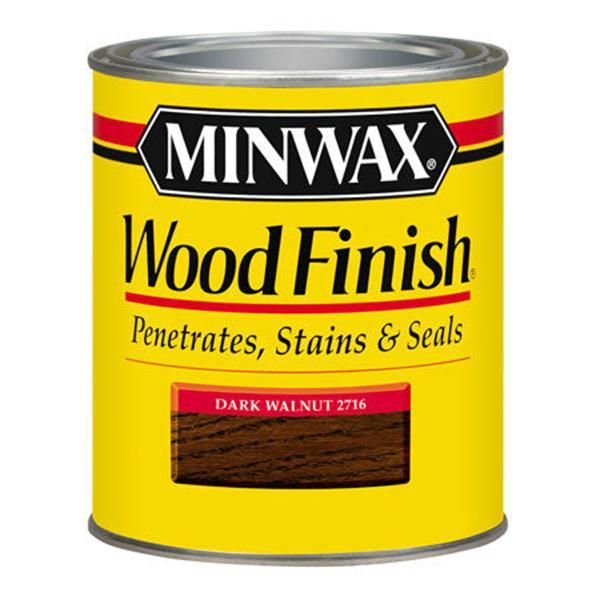
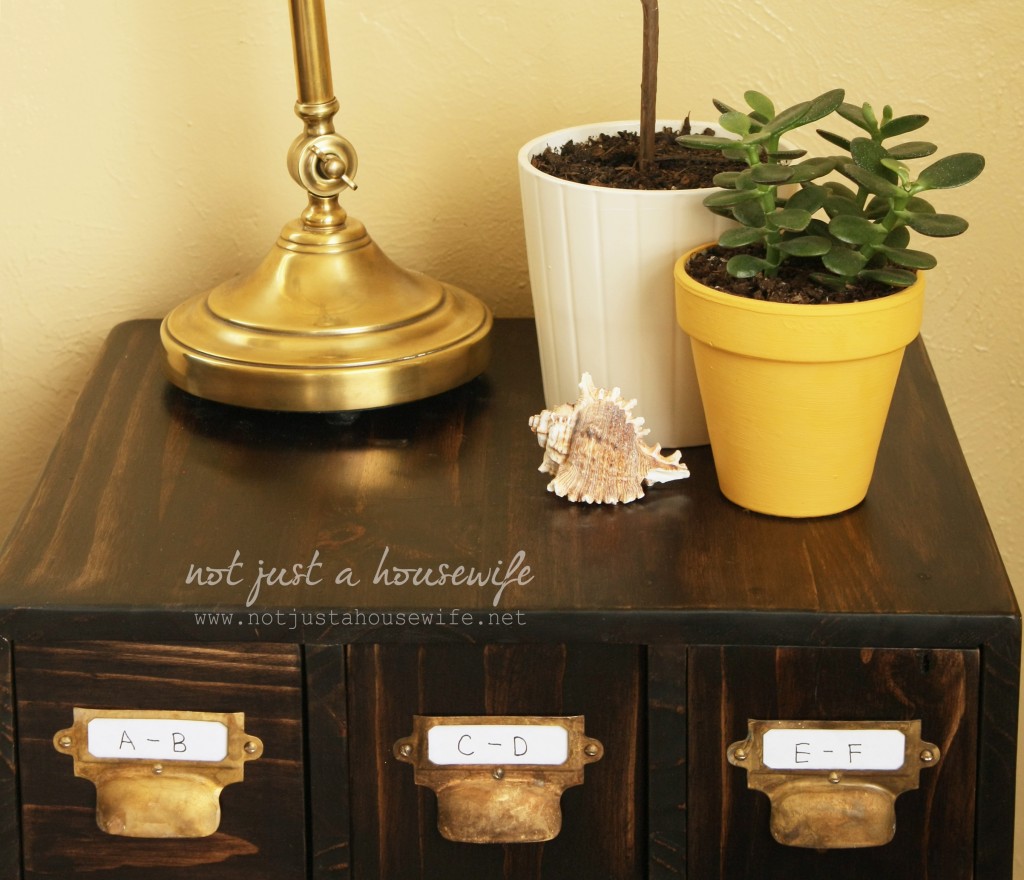
I applied a thick coat of Minwax's oil based stain in Dark Walnut. (This method will only work with oil based stain. Do not use water based) Instead of following the directions and letting it sit for a bit and then wiping off the excess stain, I let it sit for quite awhile. I let it sit to the point of it being almost dry. It was sticky. And very dark. You couldn't see a lot of the wood grain. I then got a cloth and wiped it. I had to wipe hard and almost buff it because it was so sticky. And at first the fibers from the rag were sticking and I thought "Crap! What have I done?" But as I kept rubbing along the wood grain it began to get better.
I thought about the places that would normally get worn, like the edges, and the top where things would get set. I rubbed those areas more and it took off more stain. You have to play around with it. There were a few places I took too much off so I lightly brushed a little more stain over it and it was fine.
Once I got it to where I wanted it I let it completely dry over night. The next day I looked at it with fresh eyes and realized I wanted it a little more worn. Since the stain was dry at this point I got a very fine sand paper (220 grit) and ever so lightly sanded a few more spots. The sanding worked but didn't look as good as the other way.
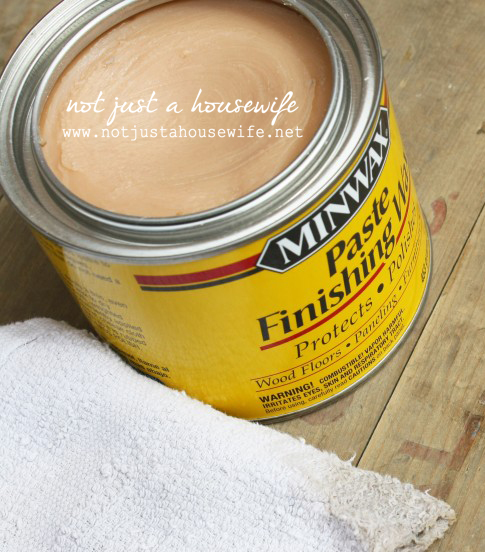
I normally use Minwax's polyurethane to seal and finish off a piece but since I was going for a worn look and since antique stained pieces have a rubbed look, I decided to go with a wax this time. It requires a little more elbow grease to buff, but the look was perfection when I was done!
The hardware.......
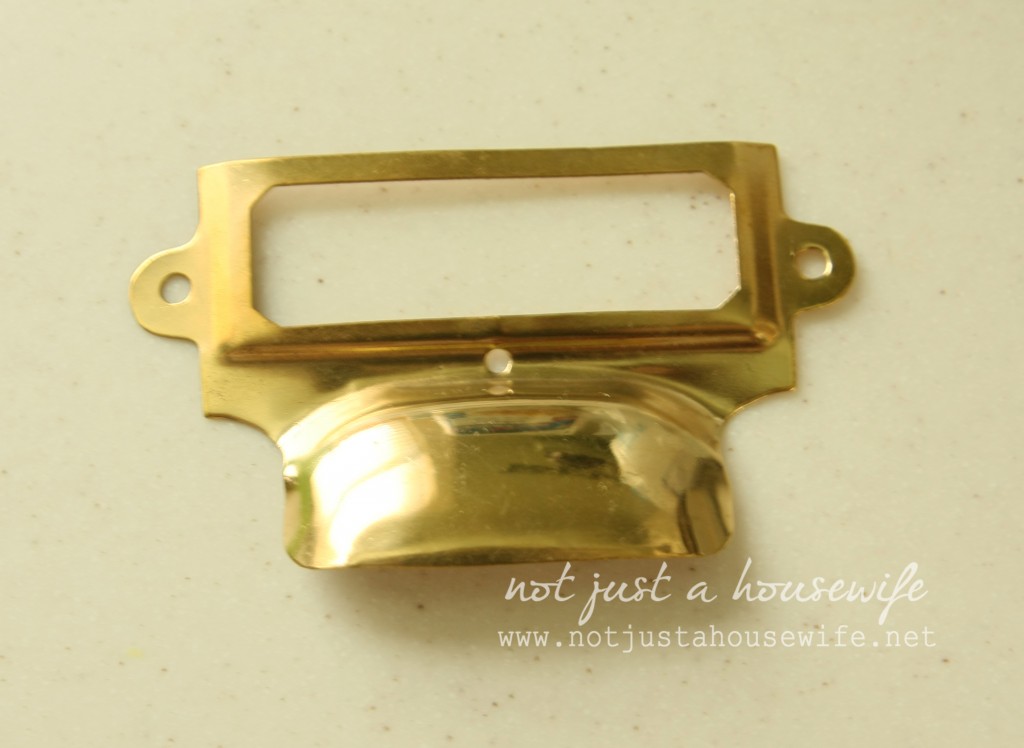
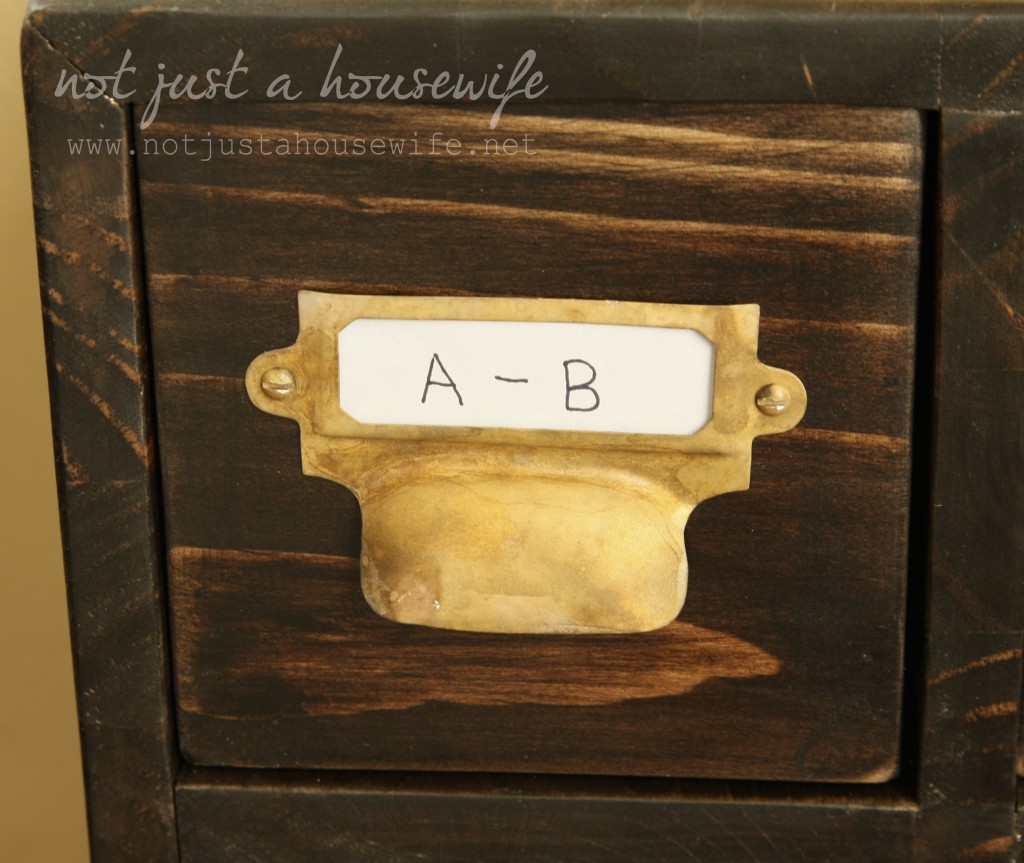
I knew the kind of drawer pulls I wanted. I searched online and MAN! They were pricey. I needed twelve and I didn't want to break the bank. While I was searching for them I saw on my friend Beth's blog, that she had found the same style I was looking for at a really good price from a place called Van Dykes. I am not sure why or how the site works, but the prices vary all the time. I got the drawer pulls for like $1.20 each but today the price says $3.50 each and I think Beth got them for $2 something.
I knew they would be too shiny and new for my aged card catalog but I knew a trick...
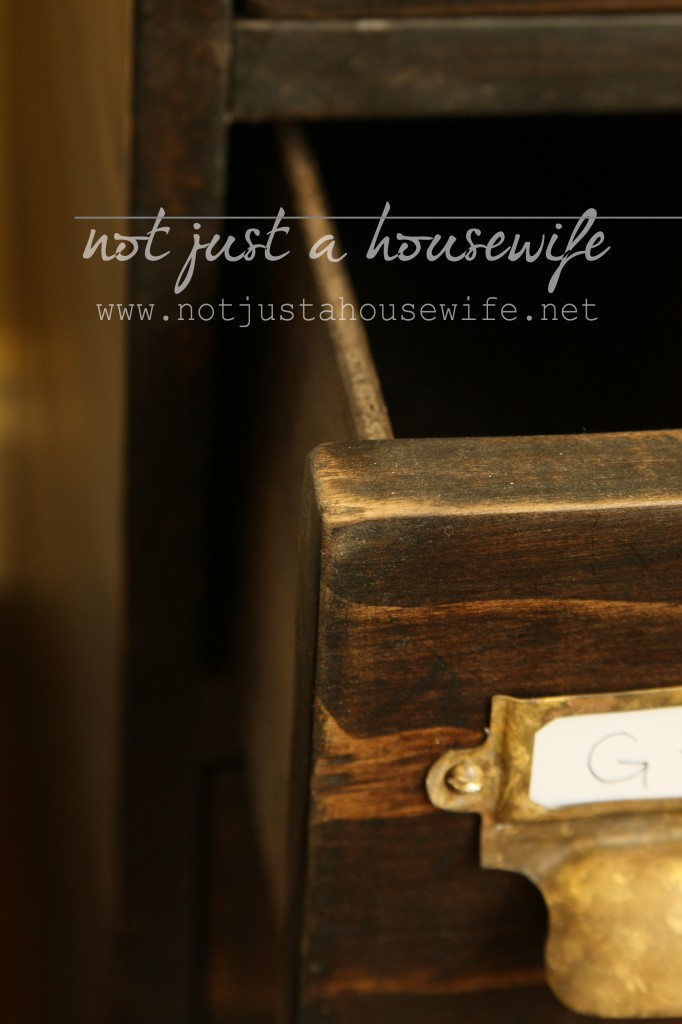
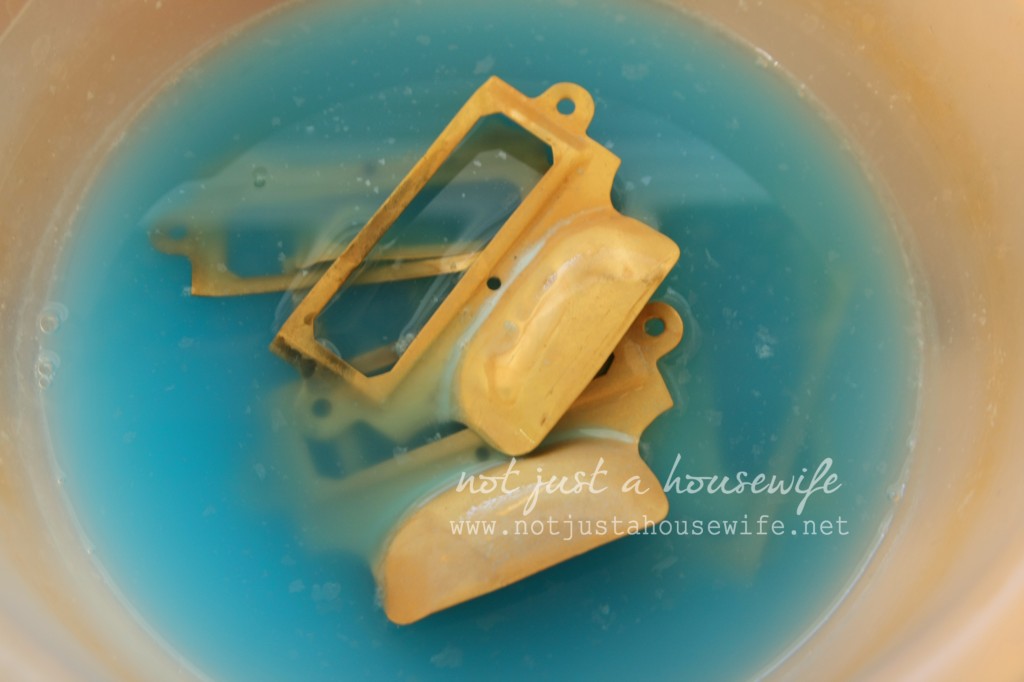
A long time ago my mom told me about soaking metal in ammonia to age it. I did it for the first time about 10 years ago on the yellow side table in my front room. So I did it again for these.
The first that will happen after a few days, is the clear ammonia will turn blue. Then clear coating will dissolve and they will look dull. After that is when it starts to get darker.
*A little tip ... If you don't watch it close and it goes too dark, then you can stick it in new (clear) ammonia for a few seconds and it will lighten. And if you lighten it too much you can stick it back in the blue used ammonia. BUT be careful how long you let it soak because eventually it will eat through the metal coating down to the real metal it is made out of. These pulls were made out of copper and a few of them have the copper peeking through.
You will also like:












Do you know how much I love card catalog. Can you make one too! Love it.
I love it, love it, love it! I have always wanted one of those. Wish I was a DIY kind of girl...
AMAZING! How inspirational!
Love this table! Wish i was brave enough to try to make one for myself. :)
You built that?! That's amazing! It looks professionally done!
I have been salivating/coveting/dreaming of a card catalog for years! I love books and love the look of one. You bet I'm pinning this and sending it to my hubby. He'll be thrilled. Not :)
Marty@Marty's Musings
Love this! I am always keeping my eye out for a card catalog and when I do see them, they are too expensive to justify buying one. Your's turned out just beautiful!
perfection! i love everything about this!! i purchased a small metal version from hobby lobby when metal storage was on sale but your wooden beauty is what i dream of - enjoy it :) & i hope your boys enjoy storing their treasures in it too ;)
Can't believe you made that! Looks awesome.
Thanks for the tips on the stain...it came at the perfect time for me, since Im using that exact same stain, for an aged looks on some crates! Thank you...
LOVE this! I'm pinning it!
OMG! I just got so stinkin' giddy! Ive seen so many tutorials popping up laely for "card catalog" tables, but they're just look-like-card-catalog tables. This is legit! Love you for this!
Oh my goodness Stacy! This is so gorgeous! I have been wanting a card catalog forever, but never thought to make one myself! You instructions almost make me think I might be able to do it! I am going to give this to my son and ask him to build it for Mother's Day :) Thanks for sharing this great tutorial!
So awesome! I love, love, love it! :) You've inspired me to want to make my own!
Oh my gosh, I love this! This will be a project I might actually do..... or have my handy sister do for me ;)
pinned! ;)
Stacy, this is a really cute project! I love your little card catalog. ANd cool trick about the ammonia. I didn't know that.
Wow this came out great! I love that you built it from scratch :)
OMG… this is amazing - I will be tackling this this coming weekend! wish me luck! I hope it's as good looking as yours!
Thanks for the inspiration! xo
I cannot believe you made that! You are so amazing and talented!
Absolutely aw-inspiring! What a great job! Thanks so much for sharing your awesome tutorial.
I love love love it.
I have always loved boxes and stuff like that I love that you made it.
It is beautiful and you should be proud of yourself
perfection! i love everything about this!! i purchased a small metal version from hobby lobby when metal storage was on sale but your wooden beauty is what i dream of – enjoy it :) & i hope your boys enjoy storing their treasures in it too ;) - See more at: http://www.notjustahousewife.net/2013/01/how-to-build-card-catalog.html#sthash.0qa2RODH.dpuf
Wow, amazing job, it looks so pretty and...old!
This cabinet is absolutely gorgeous!!!!! I have wanted one of these forever but they are so expensive. I am going to give this a try. Wish me luck!!!!!!
Thanks for sharing this great tutorial.
Ruth
You are amazing! You write excellent tutorials as well. Thanks for sharing how you made this. It turned out gorgeous! :)
You are simply amazing my friend! It is just beautiful!
Awesome job. Love it.
You are definitely a motivated individual where DIY is concerned. It is admirable. I'm about to renew a good portion of my house and hope I can bring the same motivation to my tasks. Hardware prices probably vary because of the cost of metal, which will fluctuate based on the market.
Wow, this looks amazing. You really break it down step by step.
Amazing doesn't begin...am in complete awe of this. Fab job. xx
Outstanding job! I love the fact that you write/design it out on paper first. It helps visualize the process! My husband just made a huge cat tree and he did the same thing. On paper then calculated materials. Way too smart for me! You did phenomenal work making that card catalog cabinet AND making it look just the way you wanted! It's really lovely!
You are quite handy with those power tools! :-)
Danita
Wow, that is dedication...and it sure paid off. That is a beautiful piece. Very well done!!!
That is so cool. I would love to have that. I wonder if I can con my Dad into making it?
WOW! You are too talented! you make it look so easy! I love the look and am sharing it at somedaycrafts.blogspot.com with my readers!
You are amazing! You made this sound like it was no big deal, but WE ALL KNOW it was an incredibly detailed, fiddly little project, and you NAILED IT (no pun intended ;-)) Great work!
So very very awesome! I am pinning, and if I ever get brave enough I would love to make one! Your's is beautiful!
This might be my favorite DIY furniture piece ever! Definitely going to be making one. I'll let you know when I make it!
Aloha,
Charlie
I need to find someone to build one of these for me. I LOVE it!!!
Thanks for sharing,
Desiree
Looks great. Love the dark finish.
I love this- you have done an amazing job in making this!
Wunderbare Arbeit. Die Kommode gefällt mir ausgezeichnet.
Liebe Grüße aus dem kalten Deutschland,
Simone
That's amazing! It looks like a lot of work....until I peek at Craigslist and see the $800-1000 price tags on old card catalogs there. Great job!
Fantastic job, and good tutorial. The pulls really add a lot of character, making it look like an original. Van Dyke's is amazing. Thank you so much for sharing!
Awesome tutorial! I appreciate the "what not to do's" as much as the "to do's." Your card catalog turned out beautifully. I would love it if you would link this to my new linky party, "What I Accomplished Wednesdays."
http://www.greenwillowpond.com/2013/01/what-ive-accomplished-wednesday-cha-cha.html
Have a great weekend!
Deborah
Sooo excited to have found this on Pinterest!!! Been dying to try and build one, knowing I can't afford an antique. It's perfect! Pinned from your site, and can't wait to get started. Thanks!
I am so happy to have found this. I have been searching high and low for an affordable card catalogue, even if I need to refurbish one. I have my name in with a bunch of consignment shops in the Denver area and even have an alert set for craigslist. So, instead of waiting for who knows how long, I think I will tackle this! Thanks for the detailed how-to!!!!!!! I have happily pinned your site as well!!
You are amazing... really love card catalog
I'm truly enjoying the design and layout of your blog. It's a very easy on the
eyes which makes it much more pleasant for me to come here and
visit more often. Did you hire out a developer to create your theme?
Outstanding work!
AWESOME, what a fantastic job you did...............oh how fun to hide such treasures in all those drawers, have fun, Love & Blessings to you/yours...
Love this! PINNED!
This is stunning. Better than those overly-expensive ones that you buy on ebay or craigslist. Do you have a materials/cut list for this one?
What are the overall dimensions for the piece? I know you mentioned you lost all your notes did you happen to reconstruct them?
These label pulls must be in pretty high demand now because they shot up to $6.99 each. I love this plan and I will be making a long one to use as a wine storage/buffet. I have been searching high and low for a horizontal one but now I can customize to my needs. Thanks for these plans.
Hello there
Just got linked to your blog from Denmark and searching for a catalogue card box.
And I'm totally stealing your SPLENDID WORK AND IDEA to make one for my self right now this very second
Rushing of to buy some wood and supplies RIGHT NOW THIS VERY moment...... I adore your proff like work
Thank You for a lovely lovely tutorial on this card box.....♥ ♥ ♥
And after buying the parts - I gladly hand it all over to my loving very own handyman to make it.
THANKS AGAIN VERY MUCH!!!
I have some great whiskey bottle boxes that I can use for this and avoid having to build the drawers, but what great inspiration. I have been looking for a small cabinet like this to put my makeup in on my bathroom counter, this is the perfect thing, only on a smaller scale.
Thanks,
I was wondering what dimensions you used? I am trying to plan one out myself (thanks to your site) and just wonder what you are using based on size of drawers... Thank you.
I think you're a genius! Thank you for talking us through this, I would love to make one for myself! xx
OMG! Another item that I've wanted to make for ages but didn't really know where to start, so have been putting it off, but now ..... yet another item on my 'to do' list, lol.
Many thanks for sharing your tutorial, it really is appreciated.
Judi in the UK
Thank you for posting this tutorial. I have always loved card catalogs and decided I needed one to store my postage stamp collection. I wanted to build one with dove tails but I love your plan so much better. Thank You!!!!!!!!!!!!!!!!!!!!!
Just a couple of questions...
I am trying to visualize the sizing of some items. What size were the drawer pulls and the drawers?
Can I do the ammonia trick on the shiny silver pulls?
Would be nice if all the demensions for building the index card cabinet were given!
This is incredible! I will buy one if you sell me one!
I am definitely going to try and make this! I am so glad you went step by step. I hope mine turns out as well as yours. Thanks
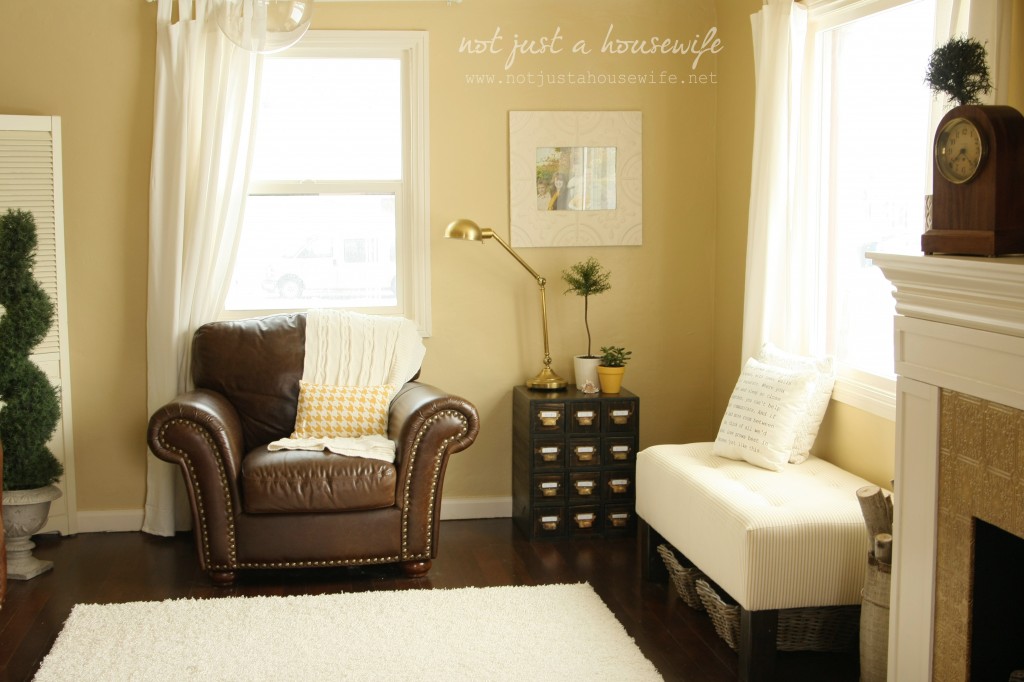
Stacy, I love the look of your living room. Could you please tell me what brand and color you used in that room pleeeeease. One of the first yellows that I really love for our living room. Been going round and round in circles picking something out for that room. The card catalog is beautiful. I can sew but no carpentry skills. My daughter however is willing to take it on.,
Great blog. Thank you
I'm so glad I found this! My husband is a collector/trader/player of Magic cards, and he has been wanting a card catalog for years (he, easily, has well over 60,000 cards). I might have to hijack a local friend's garage to make one this summer as a big ol' gift for him. I'm by no means a crafty person, but I did some woodworking back in middle school (way back when...) to form a basis for where to get started. I'm so excited, but also very fearful that it will turn into a wreck!
Emily - what a fabulous idea! My hubby has so many boxes & binders & Rubbermaid storage bins of MTG cards cluttering up our living room. Building something like this would be the perfect gift (for both of us)!
Thank you for the fantastic directions and tips!! I have a weakness for card catalogs but no budget to buy a real one. Though I'll have to find a different source for the hardware -- those pulls are $10 apiece now!
You so rock for sharing how you made this. I have wanted one for years and found the same as you did that either they were wrong size or shipping made the cost prohibitive so just put it out of mind til I came across your site! I am going to drop a few HUge HINTS to my son lol--hopefully he will take the hints haha. I don't have tools anymore so can't do it myself :-(
Have totally enjoyed reading all your projects and tutorials and have saved some I hope to do. Your place is lovely and you are so blessed to be so talented!
Many blessings
Jo
like the cabinet. saved the instructions, now to fne someone to make it for me as I am unable to do wood working bany nlonger
What a nice thought! I would love to give my grand babies a nice gift of what was precious to me as a child.
Nice job. I want something like this for holding a large collectible card came collection. Card catalog from libraries are expensive or disappear quickly and I'd have to destroy them to remove the bottom bar, so I like how you did this and will do this. I have the luxury of a 3D printer, so for the pulls, I'll likely just design something custom, print and spray paint metallic, if I care enough about that.
It turned out great. What does the putty on it do? I've not seen that before.
Love your little card catalog cabinet! A lot of work, but the end result is certainly worth it. I too have always loved cabinets, etc. with lots of little drawers. My late husband built a number of them over the years. One question - why is the grain running in different directions on the drawer fronts? Also if you are looking for a great source for all types of pulls, label holders (with or without pulls) trunk corners, hinges or any other neat little object go to dlawless.com (D. Lawless Hardware. The have tons of stuff (from curved glass for cabinets to Hoosier cabinet parts) and prices are very good. They have label holders with pulls in several finishes for 60 cents each. Their service is excellent and they are very friendly and helpful when you call (618-395-3945). They also sometimes show items that customers have made using their products. You will pleased with their products and service. Thank again for posting your card catalog cabinet, it is a great little piece of furniture.
Love this project, I'm going to make this for my partner's birthday. Could you tell me about how much this project cost you? Thanks!
Great result... just wanted to know if it was pine that you used to make it (minus the MDF drawers) and if so what thickness was it? It looks to be about 19 mm?.
Can you provide the dimensions of the box and the drawer dividers? I think I can figure out the drawer sizes. I just need a starting point. I like the size of the one you built! Awesome job!
The outside box is 18" wide, 18" deep, and 23" tall. As far as the drawer dividers go, do you want the dimentions of each indidiual boad?
I just stumbled across your blog as I was looking for plans for building this type of cabinet for CD and DVD storage. I was wondering what the approximate total cost of material (mostly the wood) and if your design could be expanded to have more drawers?
I love the work that you do and am so glad I found your blog.
I'm not sure since the laminated boards I used at the time are no longer available at Home Depot or Lowes. You would need to glue boards together or use plywood, which would change the cost. But yes, you could totally change the design to add more drawers!