• Skip to primary navigation
  • Skip to main content
  • Skip to primary sidebar
  • Skip to footer
Stacy Risenmay
  • Home
  • About me
  • PRESS
  • Contact Me
  • My Book
    • Facebook
    • Instagram
    • Pinterest
    • Twitter
menu icon
go to homepage
subscribe
search icon
Homepage link
  • Home
  • About me
  • Project Gallery
  • Our House
  • PRESS
  • Contact Me
  • Privacy Policy
    • Facebook
    • Instagram
    • Pinterest
    • Twitter
  • ×

    Easy DIY Valentine's Day Vase

    By Stacy 3 Comments

    I am not one who decorates for every holiday, but I do like to add a few things here and there every once in a while. I really love Valentine's day and always, at the very least, decorate the fireplace mantel. By the time February hits, I am so tired of winter that I start buying fresh flowers for my home. I thought it would be fun to create an easy DIY Valentine's Day vase for this years mantel!

    It doesn't get much easier that this diy project! All you need are these few supplies: (contains affiliate links)
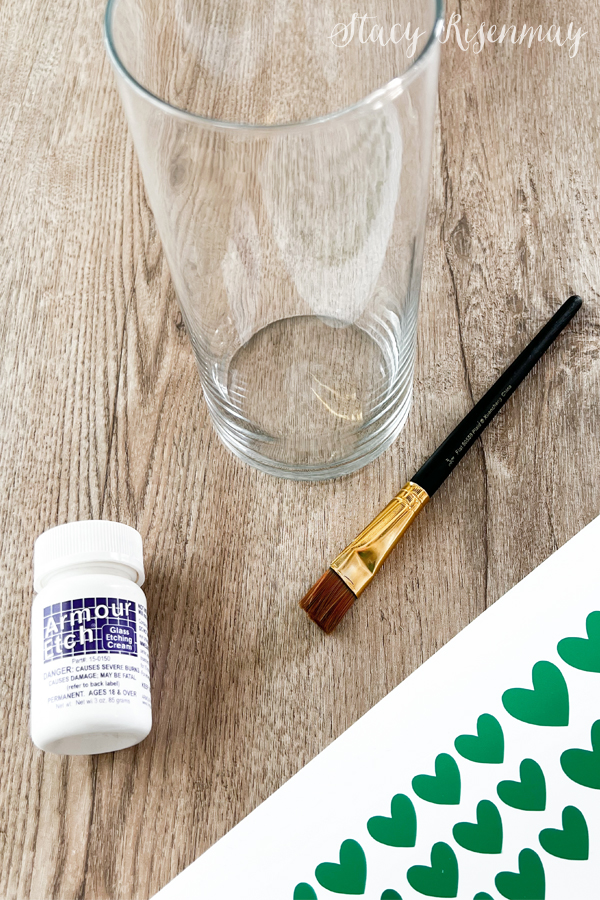
    Supplies

    Glass Etching Cream

    Paint Brush

    Glass Vase

    Vinyl or Stickers

    Easy DIY Valentine's Day Vase

    I bought this vase at my local dollar store. I buy a lot of them because they are so inexpensive and then when I give flowers to someone, I don't have to worry about getting the vase back. They have taller ones and a smaller vase option as well. I like the simple shape and clean lines. They work great for glass etching! I have glass etched stripes and other patterns on vases in the past.

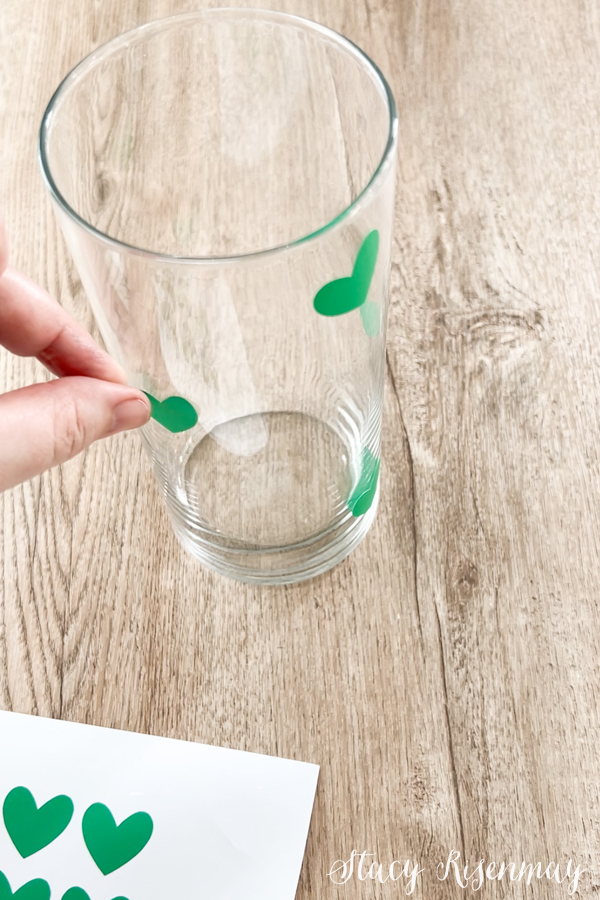
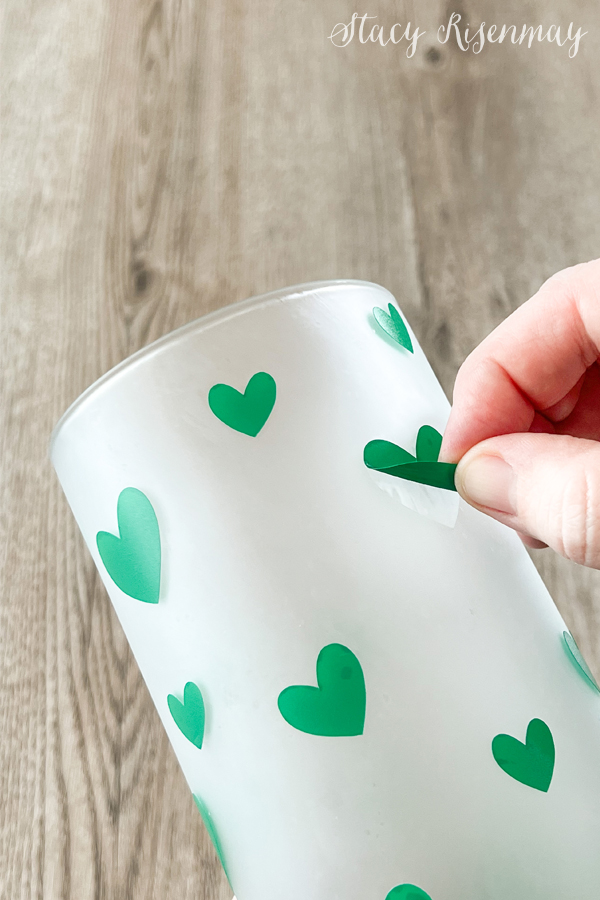
    I cut out the heart shape stickers with my cricut machine, but you can buy stickers if you don't have a vinyl cutting machine. I chose to do three different sized hearts and placed them randomly on the vase. You could also create a uniform pattern. If you want the hearts themselves to be etched, you would have to use the negative space of the cut vinyl to create a stencil. You can see an example of that in my glass etched ornament tutorial. That version uses less etching cream.

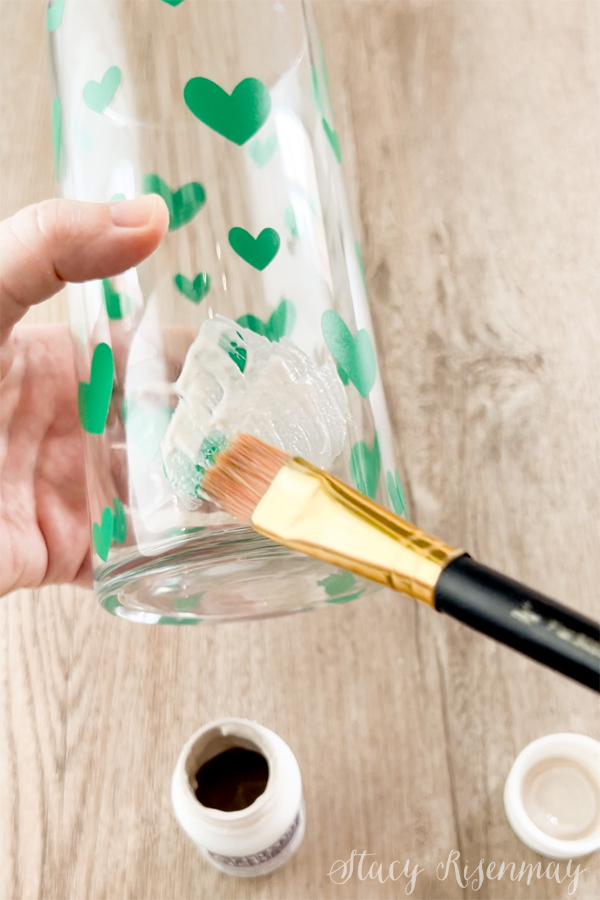
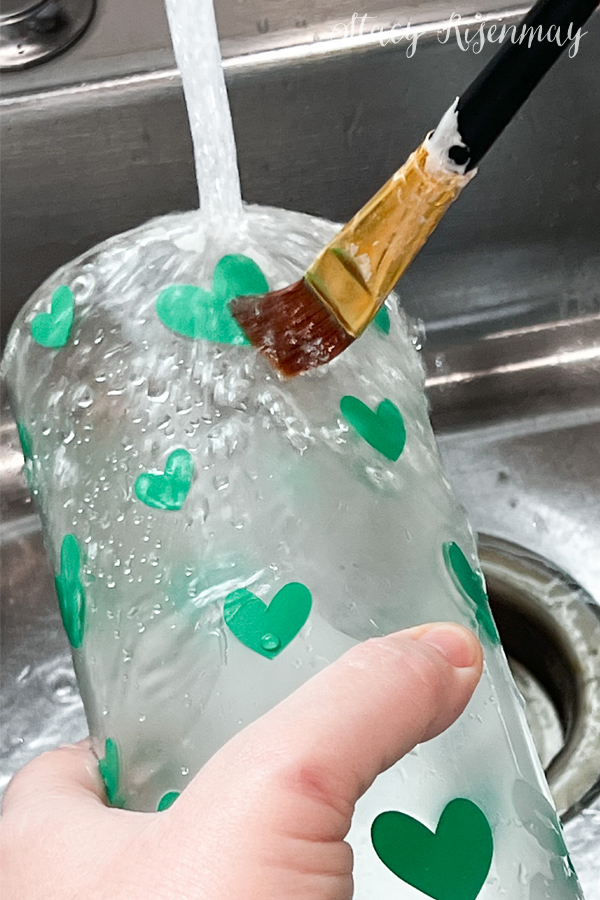
    Using a craft paint brush, add the etching cream to the vase. Make sure it is a thich, even coat. A thin coat of etching cream will be fainter than a thick coat so if it is uneven, the end result will be uneven as well. I stick my left hand inside the vase while my right hand applies the cream. This way I don't get any cream on my skin. If you are worried about possibly getting it on your hands, wear gloves.

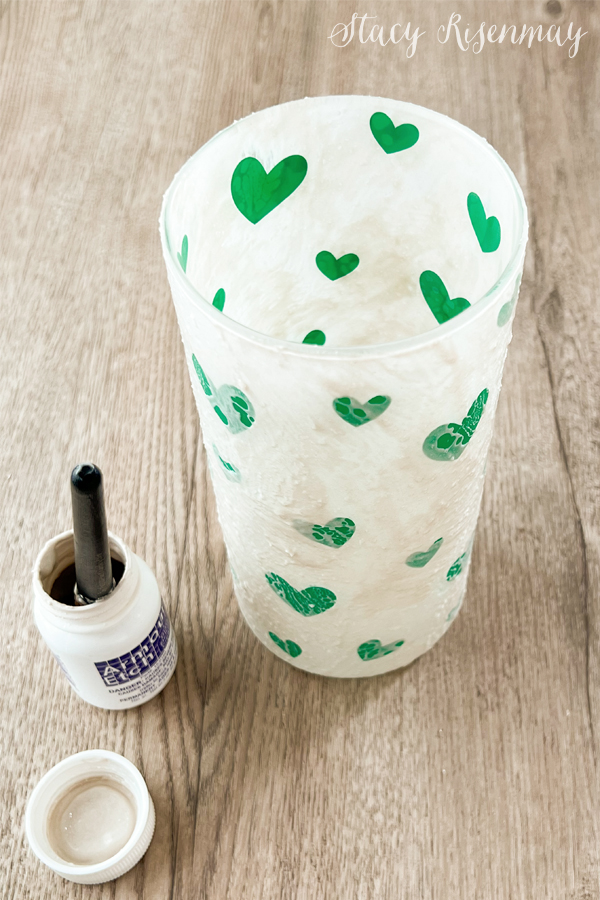
    Let the vase sit for at least 10 minutes so the etching cream can do it thing. Then you will rinse it off with water. I like to use the same brush I used to apply it, to help brush off the cream.

    As soon as it is clean and dry, peel off the stickers. It is so fun to peel them off and see the reveal!

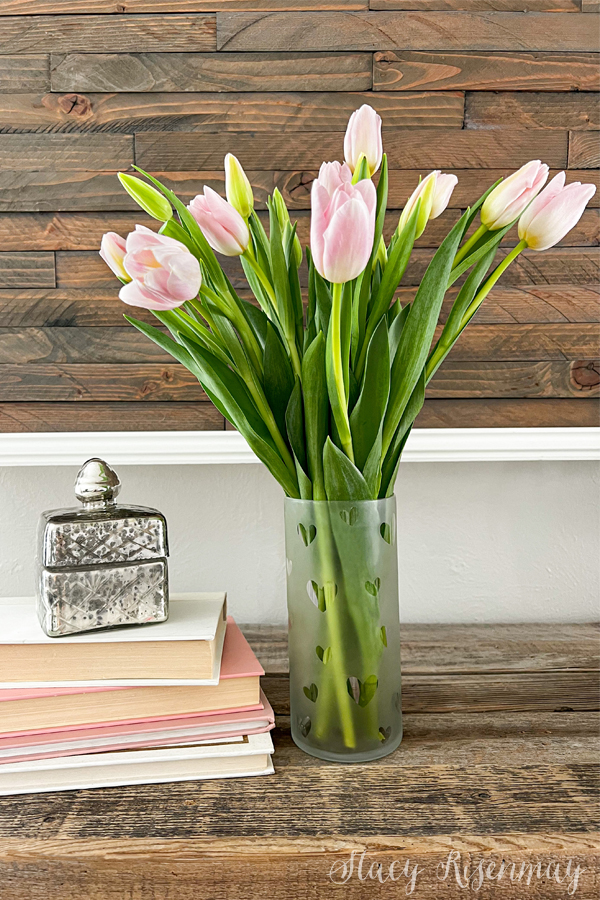
    Now it is ready to be filled with beautiful flowers! It really is such a simple craft. I also think it would make a stunning candle holder. Imagine how cute it would be as a table decoration for a Valentines Day dinner? You wouldn't have to wait for Valentine's day either. It would work for anniversaries and other special occasions.

    Do you decorate for Valentine's Day? Would you ever try this easy Valentine's Day craft?
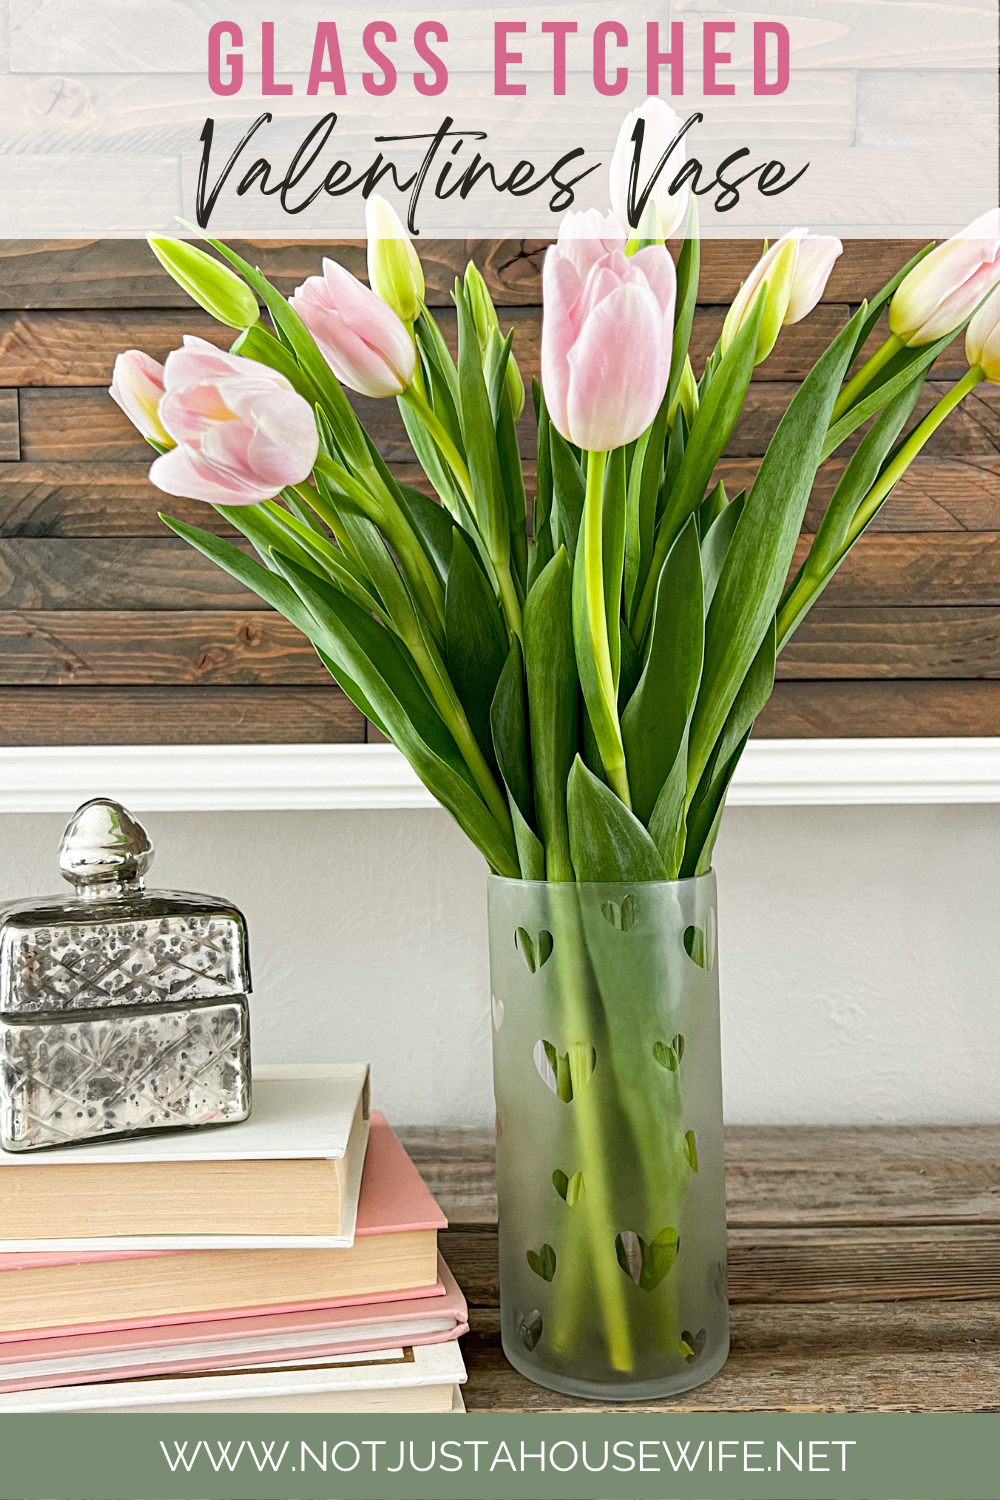
    Pin For Later:

    You will also like:

    • Driftwood Vase { + Giveaway!}Driftwood Vase { + Giveaway!}
    • DIY Concrete VaseDIY Concrete Vase
    • Glass Light Shade Vase: Three Ways!Glass Light Shade Vase: Three Ways!
    • Valentine's Day Decor that Transitions to SpringValentine's Day Decor that Transitions to Spring
    • Valentine's Day Mantel {all you need is love...and flowers}Valentine's Day Mantel {all you need is love...and flowers}
    • Glass Etched VaseGlass Etched Vase
    • Valentine's Day Table SettingValentine's Day Table Setting
    • Valentine's Day Decor {Blog Hop}Valentine's Day Decor {Blog Hop}

    « Home Goals For 2023
    Valentine Candlesticks »

    Filed Under: Holiday 3 Comments

    Subscribe

    for your weekly DIY fix.

    Reader Interactions

    Comments

    1. Elizabeth H

      February 04, 2023 at 6:14 pm

      I love it! Thanks for sharing.

      Reply
    2. Beverly E.

      February 04, 2023 at 7:18 pm

      Thanks for the inspiration. I think I will try both a vase and some votives for "Galentines Day"!

      Reply
      • Stacy

        February 06, 2023 at 3:29 pm

        I have a couple of shorter glass vases that I am going to do them for candles too!

        Reply

    Comment Below! Cancel reply

    Your email address will not be published. Required fields are marked *

    This site uses Akismet to reduce spam. Learn how your comment data is processed.

    Primary Sidebar

    stacyHey! I'm Stacy and am a DIY addict. I love to get my hands dirty, whether it's sawdust, paint, or dirt. My goal is to help YOU learn to fix up your home and yard. No matter the style or size, I think everyone should love their home. And it doesn't takes a big budget to get there. Let's DIY together!

    Subscribe to My Blog!

    Search this site

    categories


    Subscribe

    Footer

    Welcome! I'm sharing our adventures as we fix up our 1938 cottage. Whether it is big or small, I think everyone should love their home and I don't think it takes a lot of money to make a space your own

    About Stacy

    • Facebook
    • Instagram
    • Pinterest
    • Twitter

    My Favorites

    copyright

    All images and content are copyrighted via Stacy Risenmay unless otherwise stated. If you'd like to share my work, please link back to this blog.
    Thank you for visiting!


    Footer

    ↑ back to top

    About

    • Meet Stacy
    • Privacy Policy
    • Contact

    Categories 

    • Home Decor
    • Outdoor Projects & Gardening
    • DIY & Tutorials
    • Kid Activities
    • Recipes
    • Travel
    • Cleaning
    • Houseplants
    • Staining
    • Painting
    • Power Tools
    • Holiday Ideas

    Newsletter

    • Sign Up! for emails and updates

    As an Amazon Associate I earn from qualifying purchases.

    Copyright © 2020 Brunch Pro on the Brunch Pro Theme


    Privacy Policy
    Welcome! Thanks for visiting.
    Hi! I'm Stacy and I want to help YOU become a DIY rockstar! Sign up for my email list so each project, tip, and trick will go directly to your inbox :)
    Your information will *never* be shared or sold to a 3rd party. Pinky promise :)
    Welcome!
    Hi! I'm Stacy and I blog about fixing up our 1938 cottage. Join the thousand of others who get my posts sent to their inbox for FREE!
    Your information will *never* be shared or sold to a 3rd party.