
I love building and refinishing furniture! It all started when I was a newly wed and received a ton of hand-me-down furniture from family and friends. Most people probably would have left it "as is" until they could afford new things. But not me. I wanted them to look nice and match right then ( I don't have a whole lot of patience). So I figured out how to fix them up. I still have almost all of that furniture and some are my favorite pieces even though I have lots of new things too.


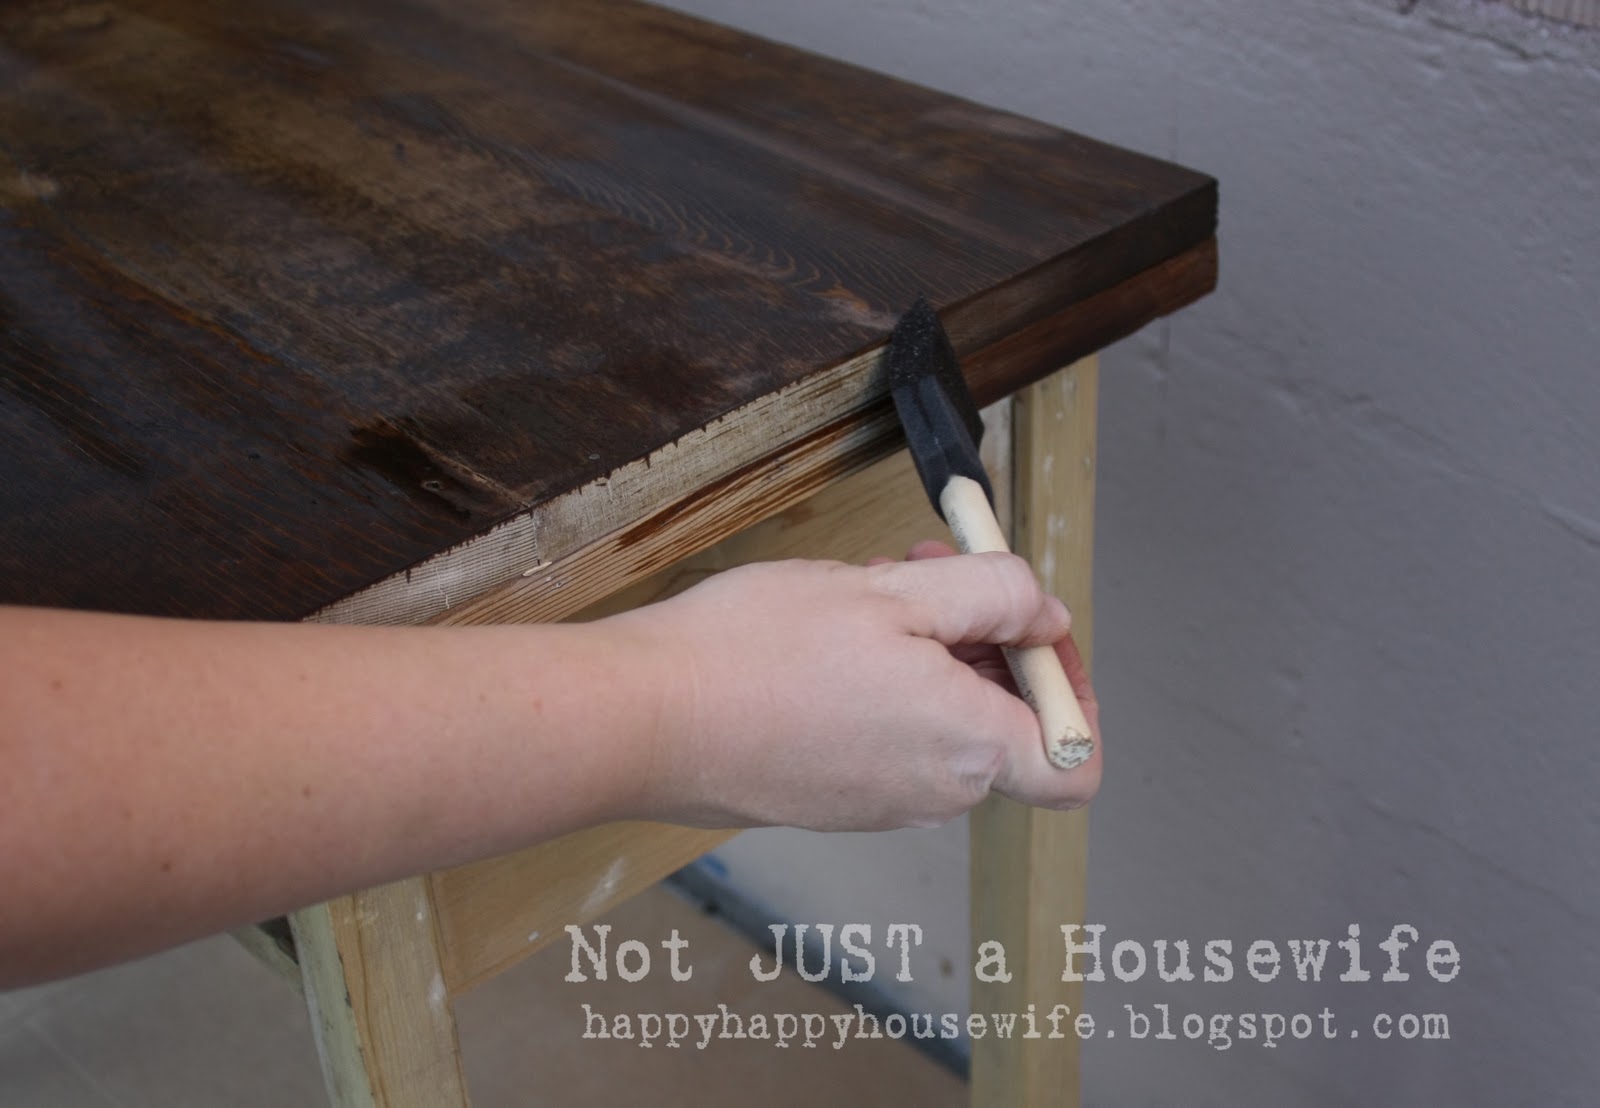

Then you can add the polyurethane. I love the smell of polyurethane! I know, I know, in the state of California it is known to cause cancer yadda yadda. . . But I love it. In a well ventilated area of course. It brings the wood to life and protects it. I use Minwax's Fast Drying Clear Satin finsih.
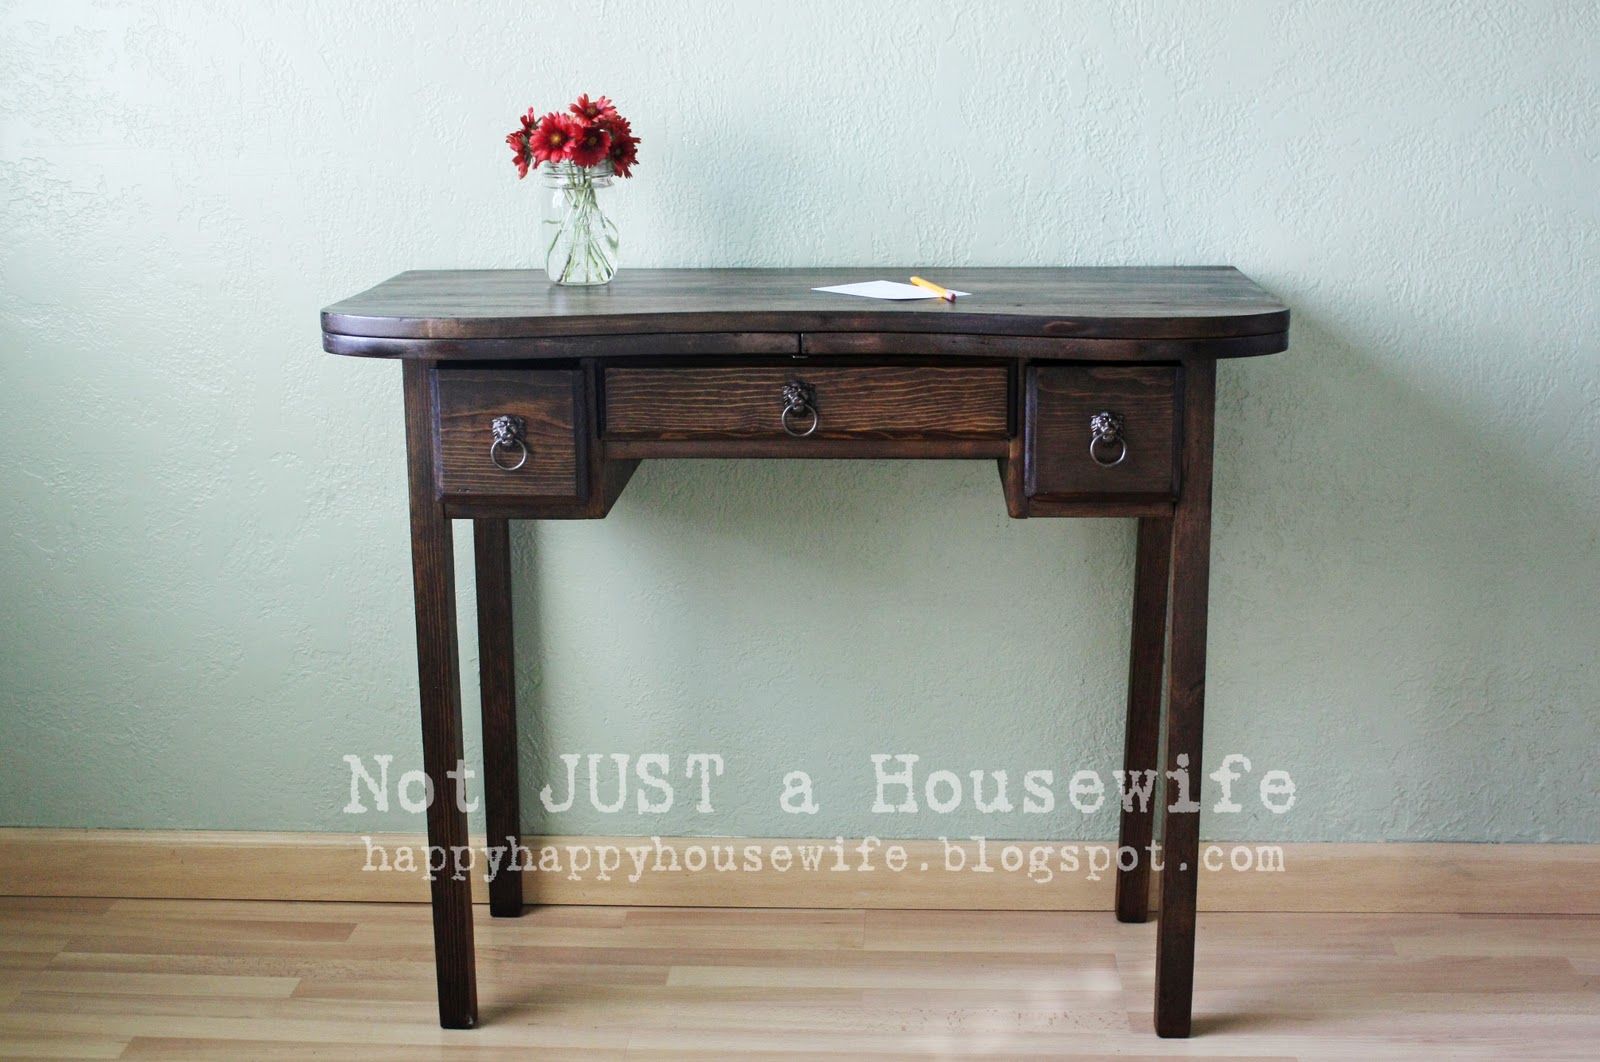
And drum roll please. . . . . .
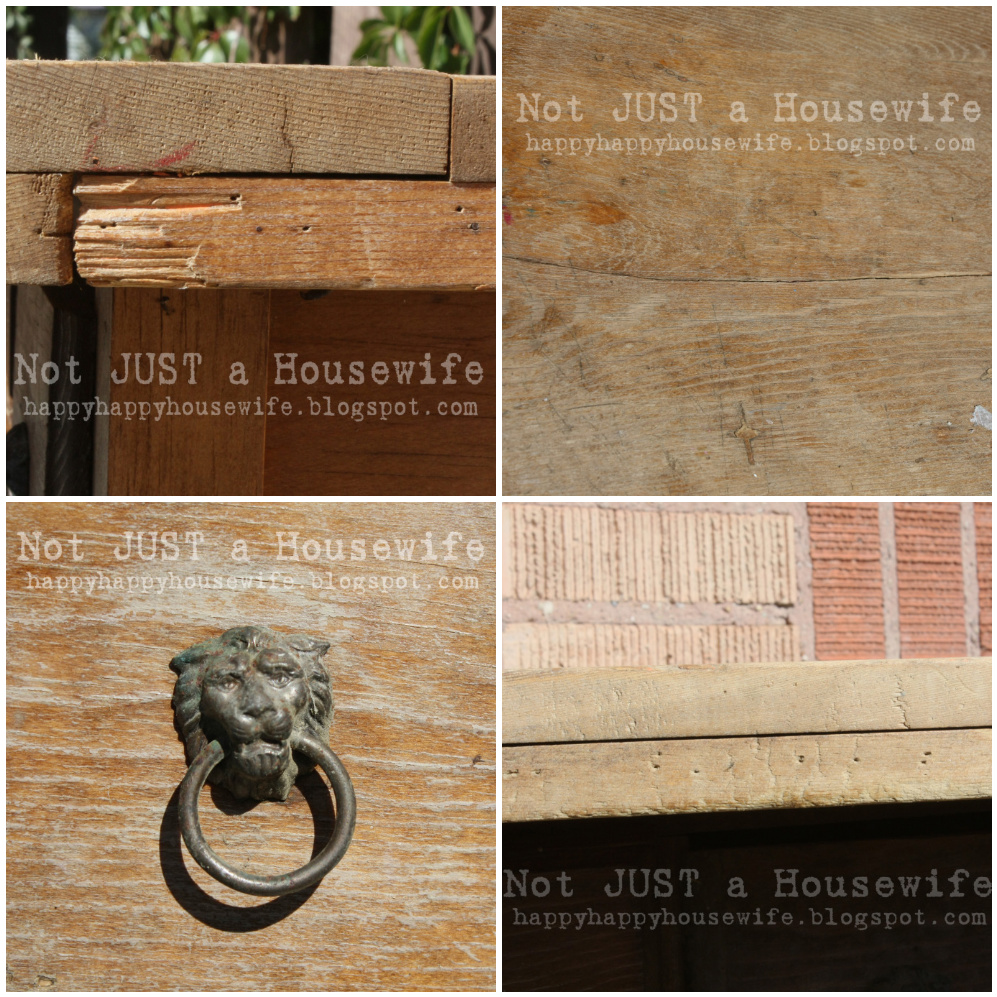
Taaadaaaa! Isn't she a beaut??? All I did for the drawer pulls was scrub them in some soapy water. I love the patina on them. I think this will make a welcome addition to my office.


It looks fabulous. Thanks for sharing!
BEAUTIFUL!
Wow! Amazing!...Christine
Sooooo cute! I love what you did with it, probably what it looked like when they first made it.
Such a pretty desk!
You are amazing. I look forward to seeing more of your ideas. I'm trying the ones I can and saving the ones I can't right now.
Oh my gosh, I can't believe it's the same desk! It looks amazing.
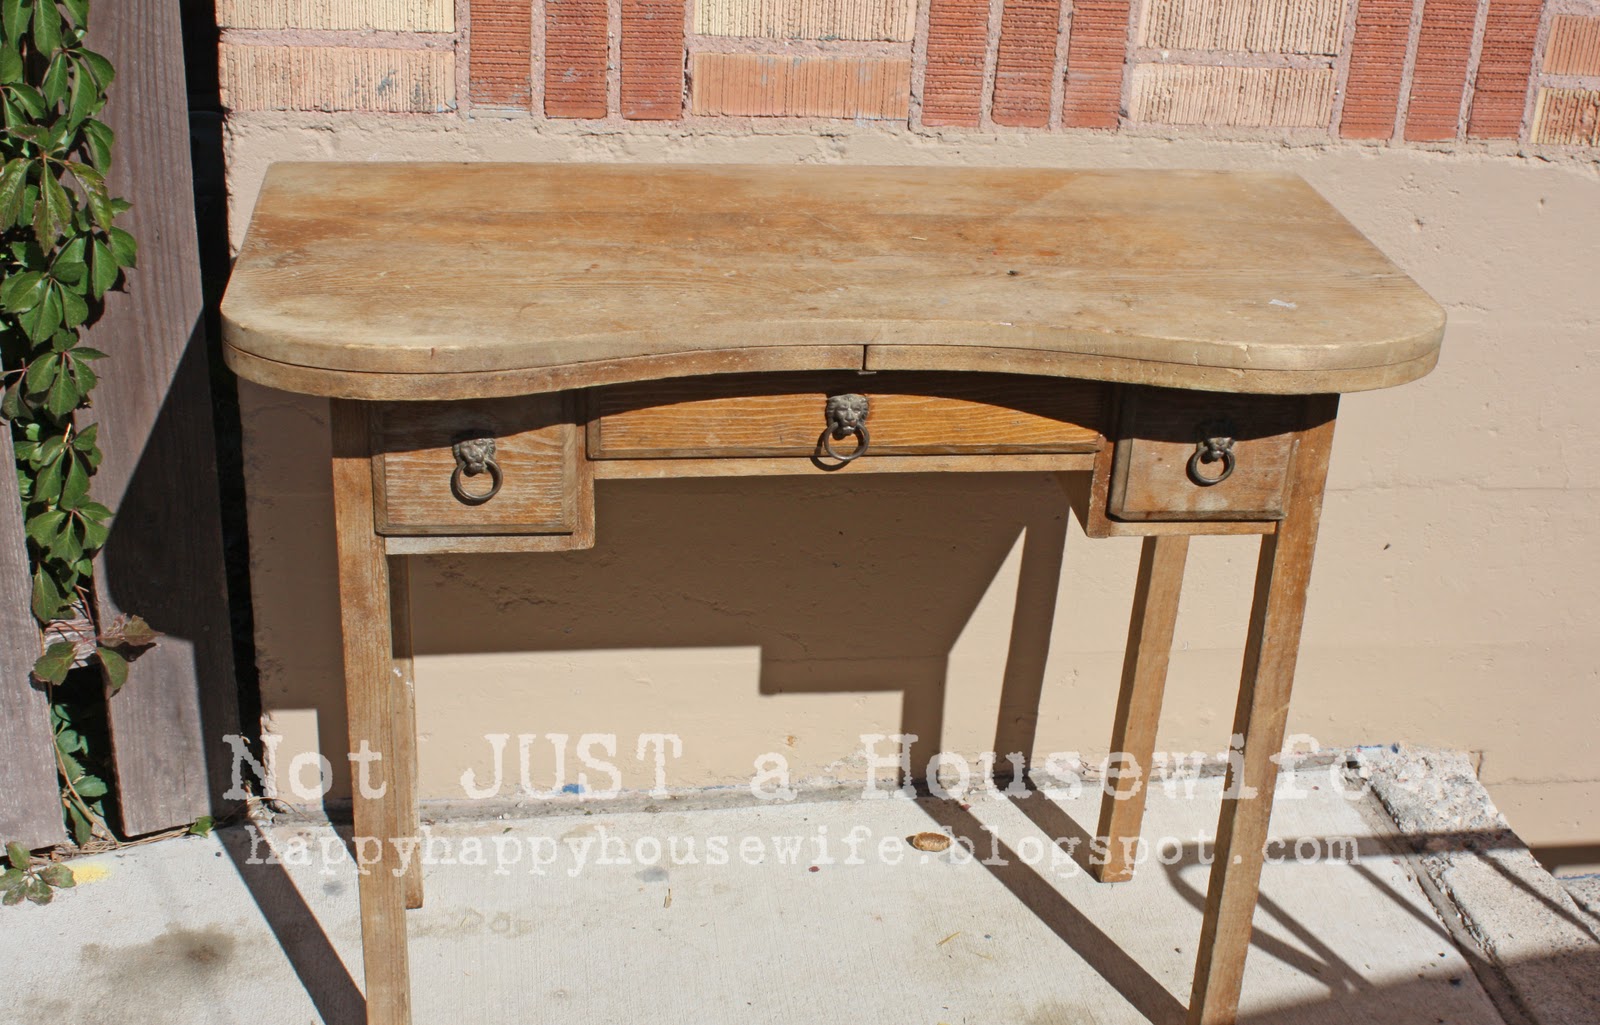
I agree. Beautiful! I love the shape of it, too. :)
The before picture is great! Most people would have walked right past it! Great job!
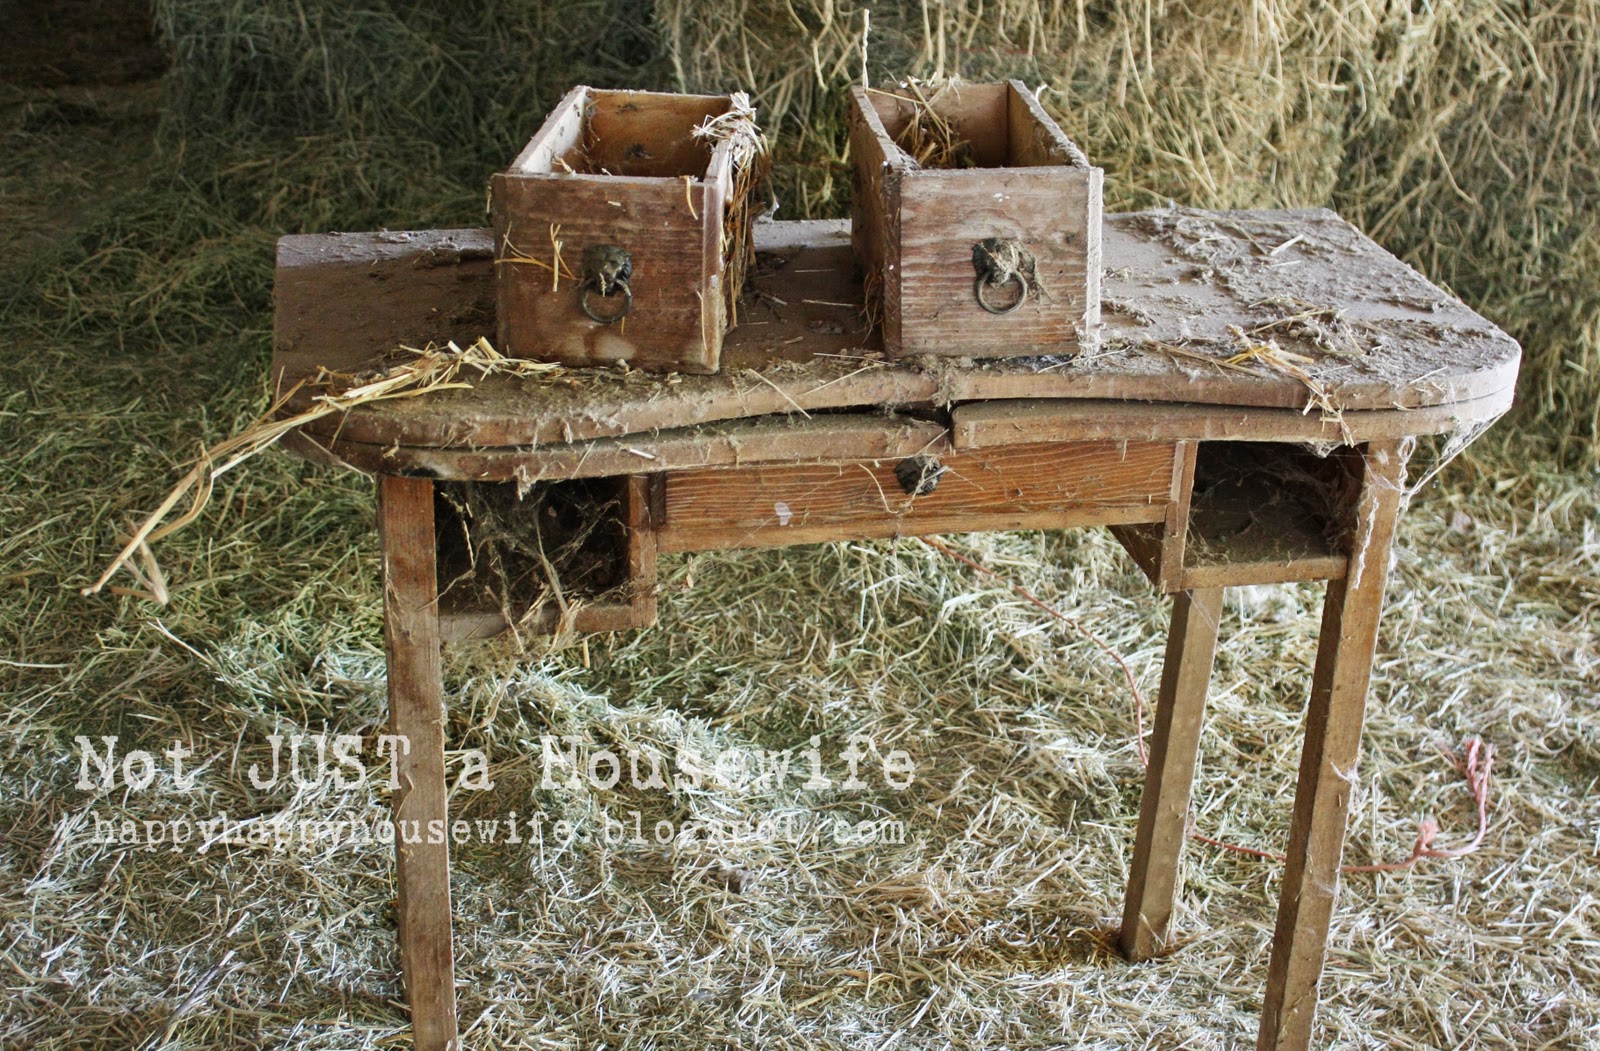
Amazing redo. Can't believe it was just sitting in a barn. Wow. Great job. Visiting from Craft-o-maniac.
That is incredibly beautiful. How can I get so lucky to find that in an attic somewhere? LOL.
Beautiful just like the others have said this is such a great job.
Penny
Such a cool post. Great project and it looks great after you got it all finished.
-Dale
Love your blog
-Dale
http://www.savvyspice.blogspot.com
Hey there, this desk is perfect! I'm new at this DIY furniture stuff and still need a bit of help. I'm learning today, first hand, why everyone paints instead of restaining. :) I'm working on my second restaining project today and if you wouldn't mind, could you please share the color/type of stain you used - I love the finished look of it! Thanks! :)
Oh my, this is totally beautiful.
What a beauty! Love the lines, the finish and the hardware. Great job.
Wow, simply amazing. You saved a wonderful piece.
LOVE YOUR LITTLE DESK REDO AND ID LOVE TO FEATURE IT ON MY REVIVAL MONDAY. PLEASE LET ME KNOW IF THIS WOULD BE OK WITH YOU.
I have a question about the hand sander. I have begun working on larger projects, such as bookshelves, that require sanding. I have been doing it all by hand *shudders* and really want to get a handsander. But I have joint problems (so you can only imagine how hard it is to sand by hand) and my husband thinks a machine will hurt even worse. Any advice?
LOVE the table!! I need to find someone with an old barn and lots of old furniture they no longer want :) And then I need to go by a few more power tools :)
I love this. I have one almost identical. Stripped it down and did the same thing you did. Lived with it for a year and painted it on the weekend. I'm even more in love with it now. :)
Good job!
Your desk looks amazing. It makes me wish I had taken the time to refinish one I found from an antique store. I brought it and the chair for $25.00 and it was solid wood. I got frustrated with the desk after half a year and had my husband curb it. I won't do that again...I'll come to your tutorial for assistance:)
What a wonderful new life you gave this old desk, I love it!
Would you mind sharing the color of the stain?
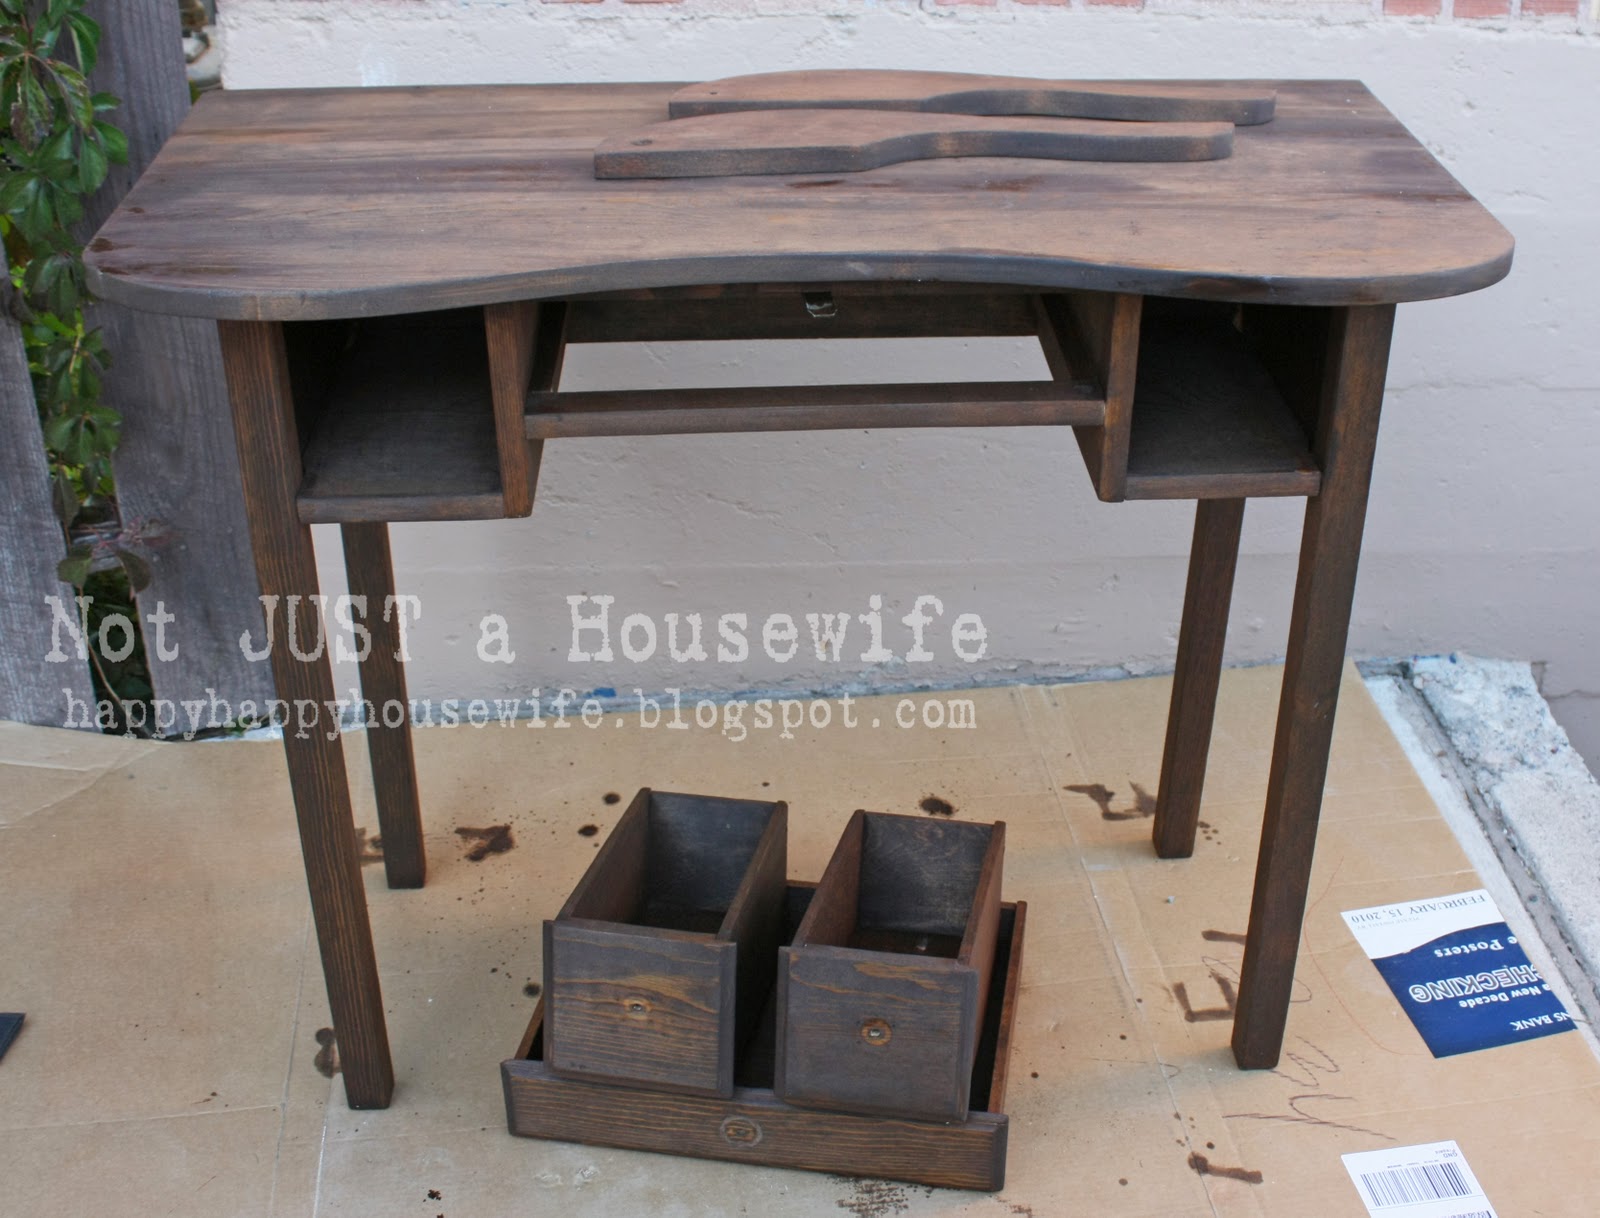
Awesome refinishing job...but the purist in me has to mention that, though it works beautifully as a desk, it's design suggests that it was originally meant to be a skirted dressing table. Back in the late 1930s through the1950s, many brothers, husbands, and fathers made these curved-top dressing tables for the ladies in their families. Those two strange oar-shaped pieces you see sitting on top of the desk in the "stained' picture were actually meant to hold two sides of the dressing table skirt. They sit just under the top of the table, and you would swing them out from the center so you could sit at the table and/or access the drawers. So, when you get tired of using it as a desk, you can make a pair of pocketed panels for it, add a glass top to put lace or photos under, and use it as a dressing table!
Thank you for the history lesson. Good information.
Wow! You have really inspired me to do some home projects I've been meaning to tackle. This turned out beautifully!
I just stumbled onto this site while looking for instructions on refinishing a desk. Thank you!!! My dad and I are going to turn it into a father/daughter project!
I just bought an old beautiful oak desk for only $40.00. I am going to refinish it and am scared to death! I have NEVER refinished anything....
Yours came out beautiful!
Any advice for a newbie?
looks great.. I really want to refinish furniture but never seem to find the time.
Hi: I wish I had the wear-with-all to do this to my old desk...but I live in a small condo with no room to do these refinishing things. Plus the fact that I'm old and don't have the patience. The reason I'm writing you is perhaps you know of someone in my area who does what you do and wants a once beautiful mahogany desk to restore. It has been sitting on my porch. I covered it with a plastic tarp. I hate to just drag it down to the dumpster outside my building ( i live on the second floor). My desk is by no means as bad as the one you started with. I live in Las Vegas. Maybe there are some people who read your blog who would be interested. I DON'T TRUST CRAIG'S LIST so I don't want to put an ad there. The desk is over 60 years old. It had been in my mom's house and after she passed away, I moved it to a back bedroom. Unfortunately sitting in bright morning sun. Over the years the draws starting falling apart, but not so bad that they can't be repaired easily. I would love to see this beautiful old desk go to someone who could restore it to its original beauty.
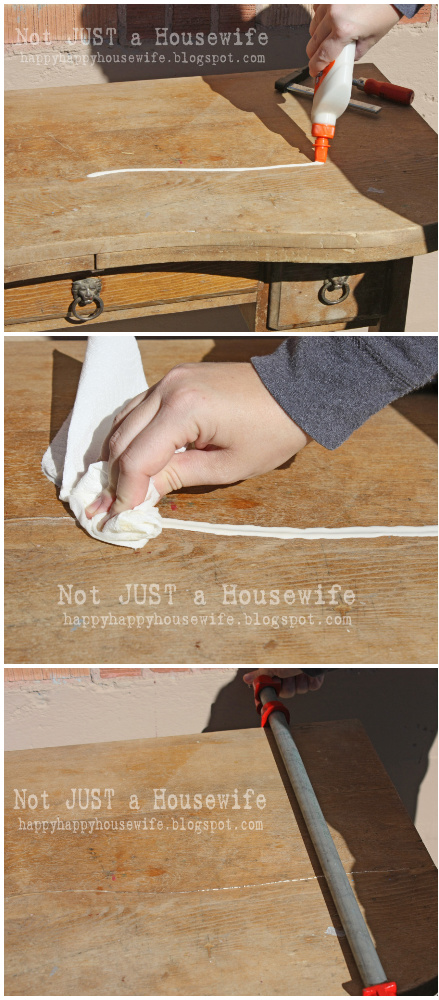
My grandmother recently passed away and I was lucky enough to lay claim to an old wooden desk she got as a wedding present. It does have quite a few cracks, so I appreciated your tip to use wood glue to fill in the holes. I think after it is stained, the glue won't be noticeable at all.
Beautiful! I could tell even in it's original state that it would finish up nicely.
Stacy.thanks for sharing your table.
I have a old writers desk .it has a pull down, not roll up. It is a dark color looks like many coats of varnish shellac or paint.
I don't know if I should sand it down to th bare wood or use some type of refurbish fluid and rub it down. I think I would like the darker color but black as it nearly appears now,
Is it any way I can send pictures
Thanks