• Skip to primary navigation
  • Skip to main content
  • Skip to primary sidebar
  • Skip to footer
Stacy Risenmay
  • Home
  • About me
  • PRESS
  • Contact Me
  • My Book
    • Facebook
    • Instagram
    • Pinterest
    • Twitter
menu icon
go to homepage
subscribe
search icon
Homepage link
  • Home
  • About me
  • Project Gallery
  • Our House
  • PRESS
  • Contact Me
  • Privacy Policy
    • Facebook
    • Instagram
    • Pinterest
    • Twitter
  • ×

    Pick Stitch Pillow

    By Stacy 6 Comments

    On a whim I decided to give my front room a makeover. I guess I didn't think I had enough to do. Or maybe that is just how my crazy mind works. But then I accepted a book deal and so the "quick and simple makeover" has been limping along. It gets ignored for the most part. But every once in awhile I complete another project for it.

    You guys! I sewed!!!!

    pick stick pillow tutorial_edited-1

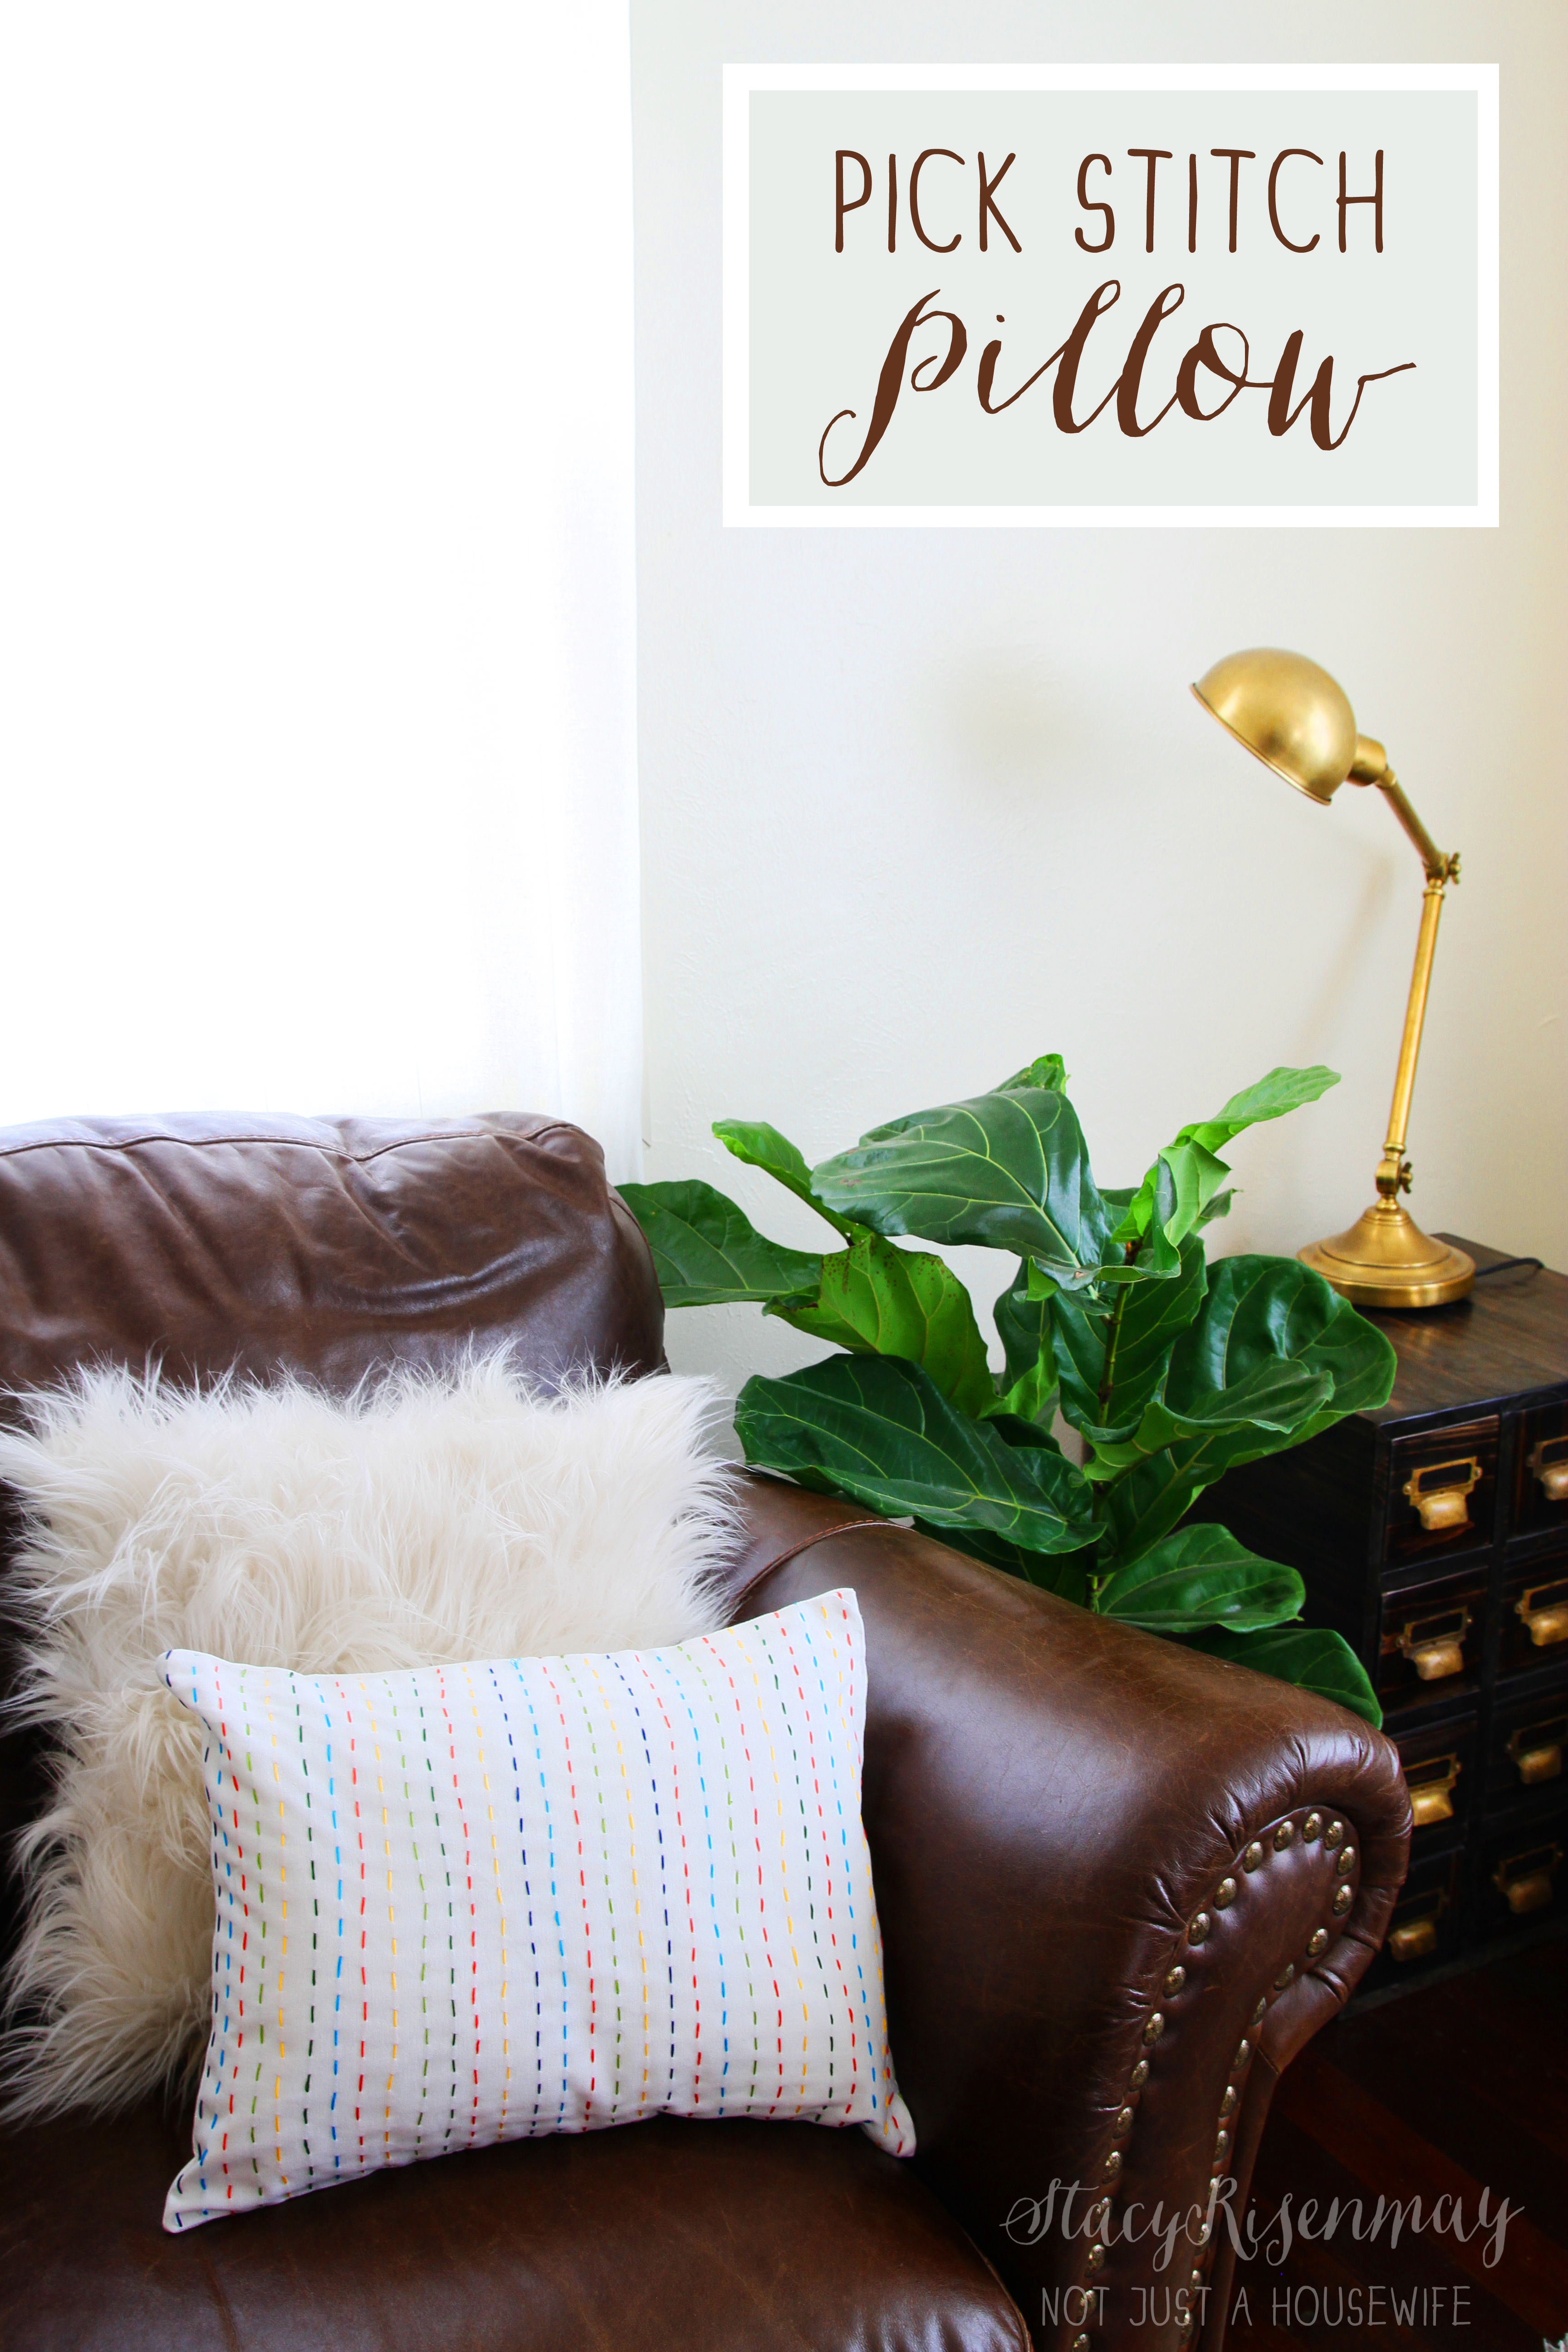
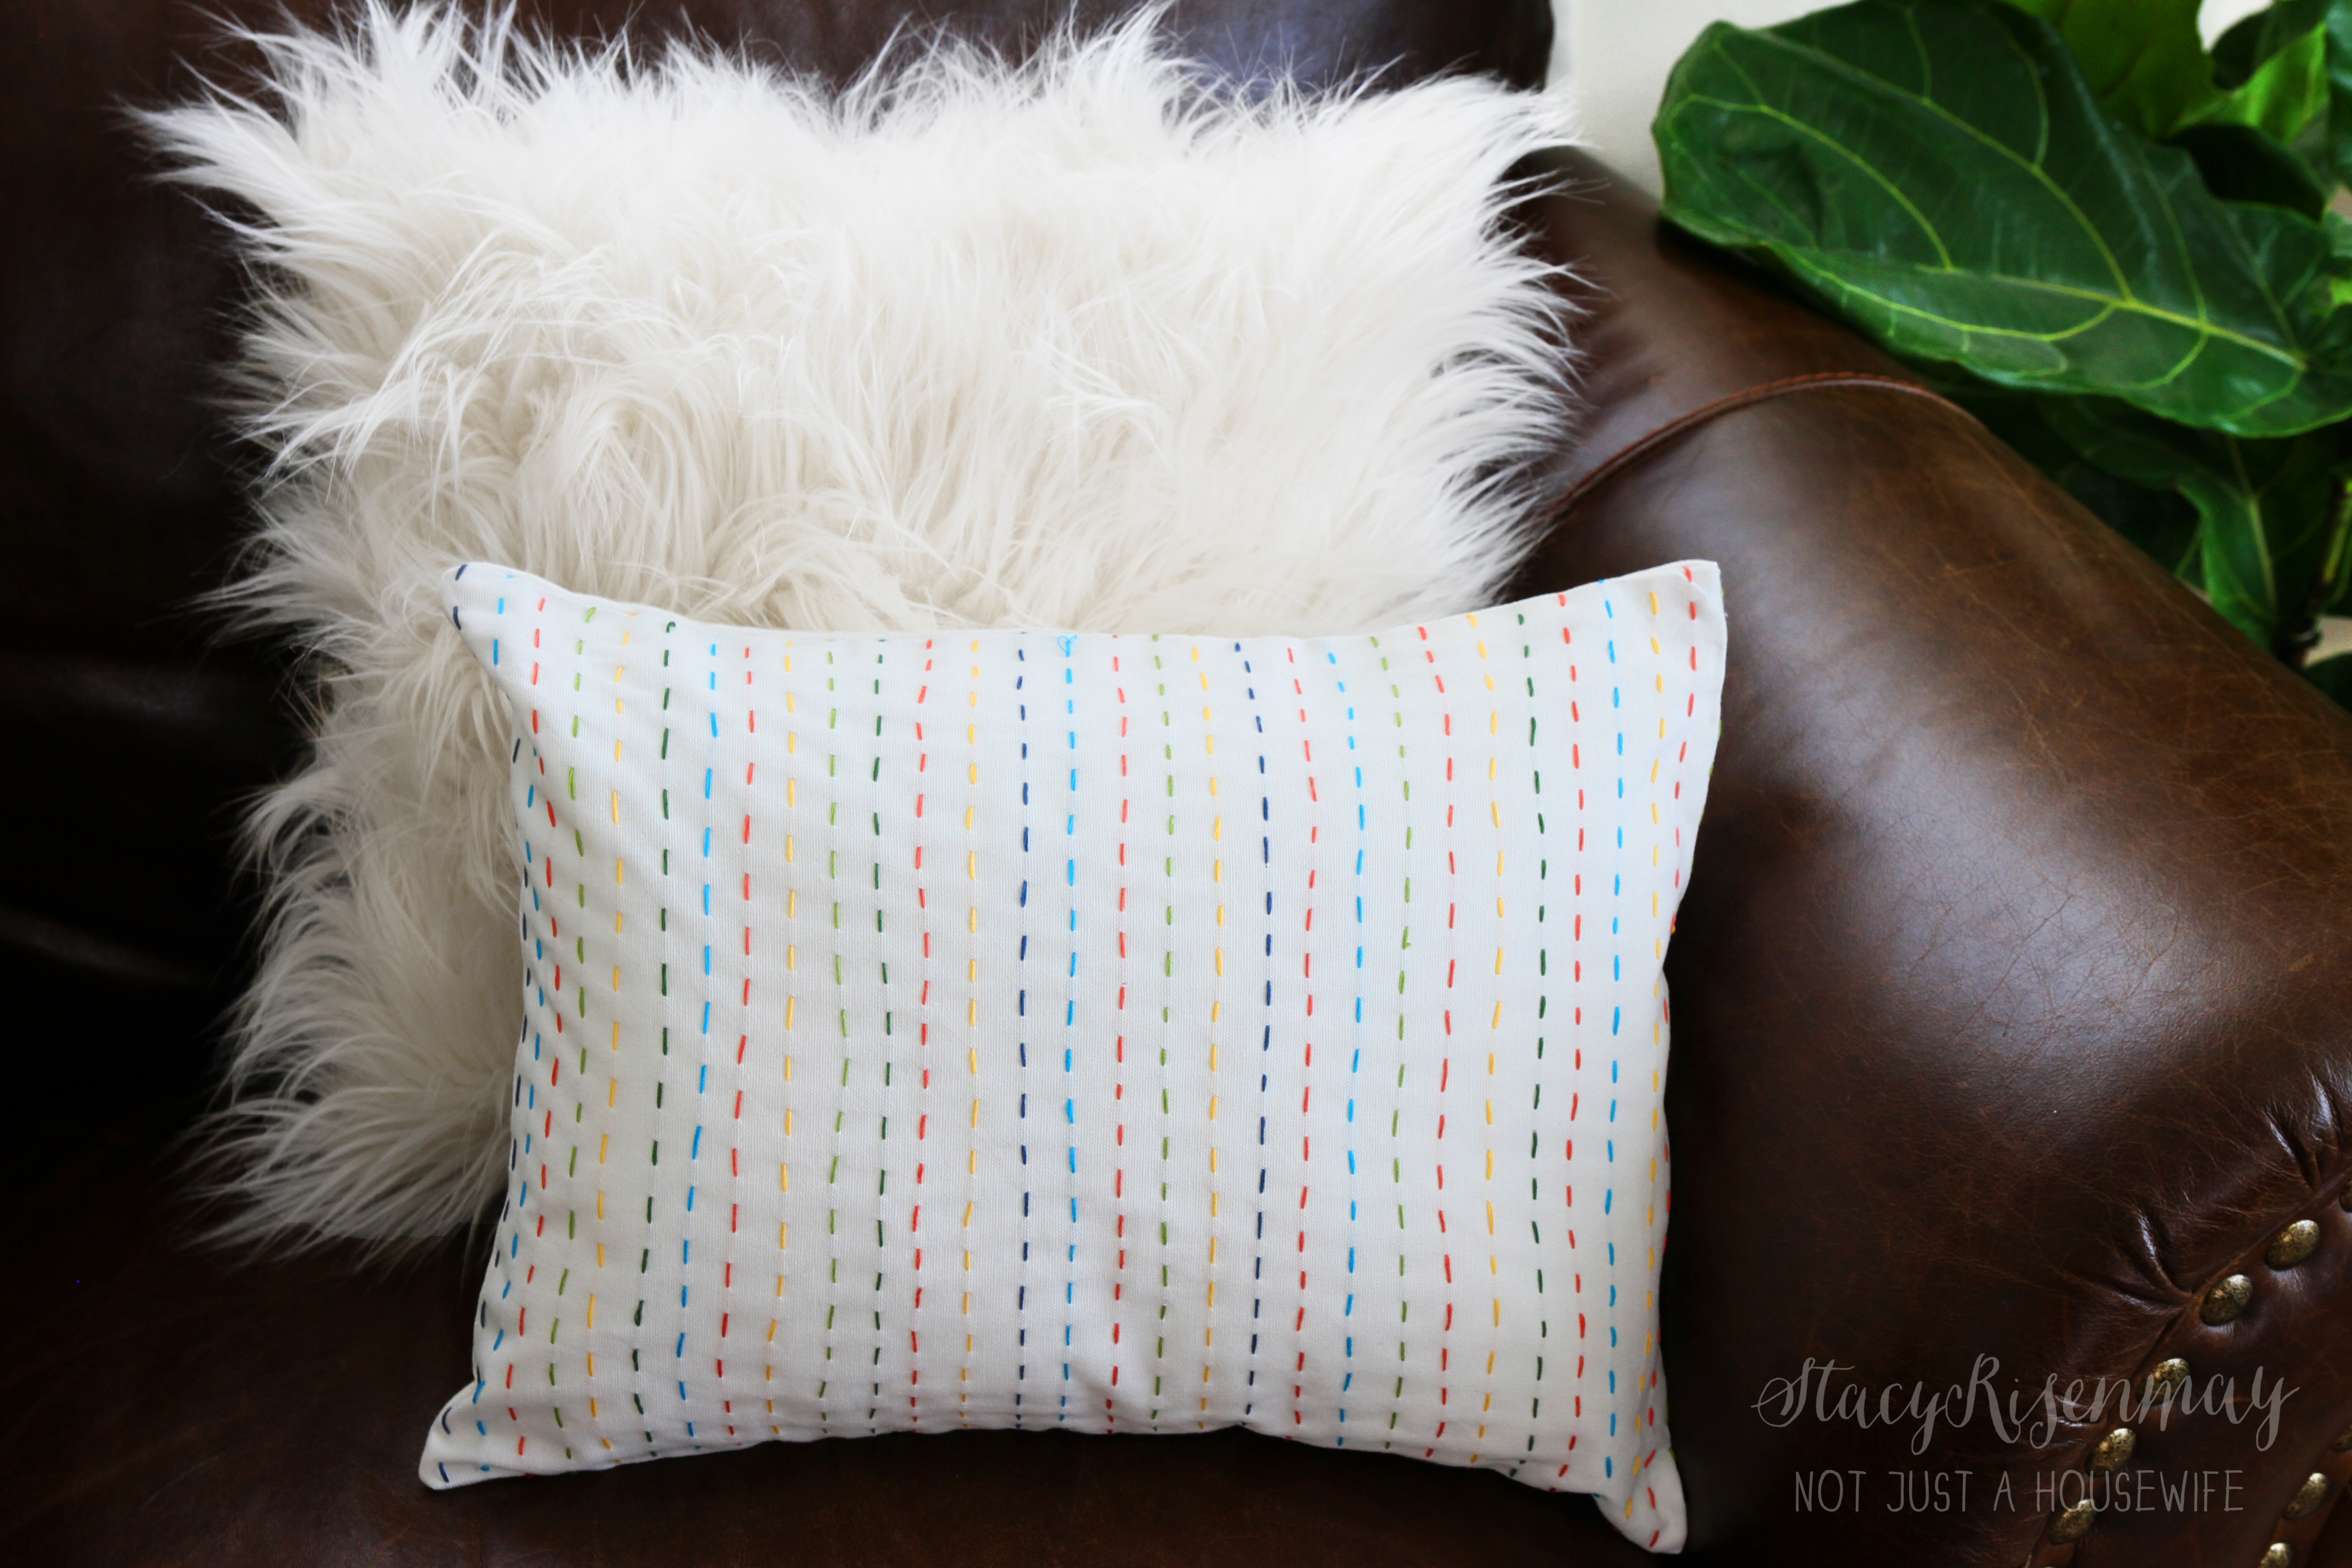
    We bought a pick stitch quilt from Pottery Barn about 8 years ago for our bedroom. The stitching is the same color as the fabric so it gives it a texture without the stitches really standing out. I have been meaning to make a pick stick pillow for YEARS and I was going to do it the same as our quilt. But then I changed my mind. I wanted COLOR!

    pick stitch pillow_edited-2

    This really is super simple. If I sewed it, then you KNOW it is :)

    pick stick up close

    First I started out with a nice cotton duck fabric. It is my fabric of choice when painting pillows and so I had some on hand. I bought some embroidery thread in the colors of our new family room.

    Thread the needle and start by tying a knot on one end.

    tying the knot

    And then you just do a basic running stitch. P.S. I totally had to google what it was called. HA! #idontsewmuch

    pick stitch

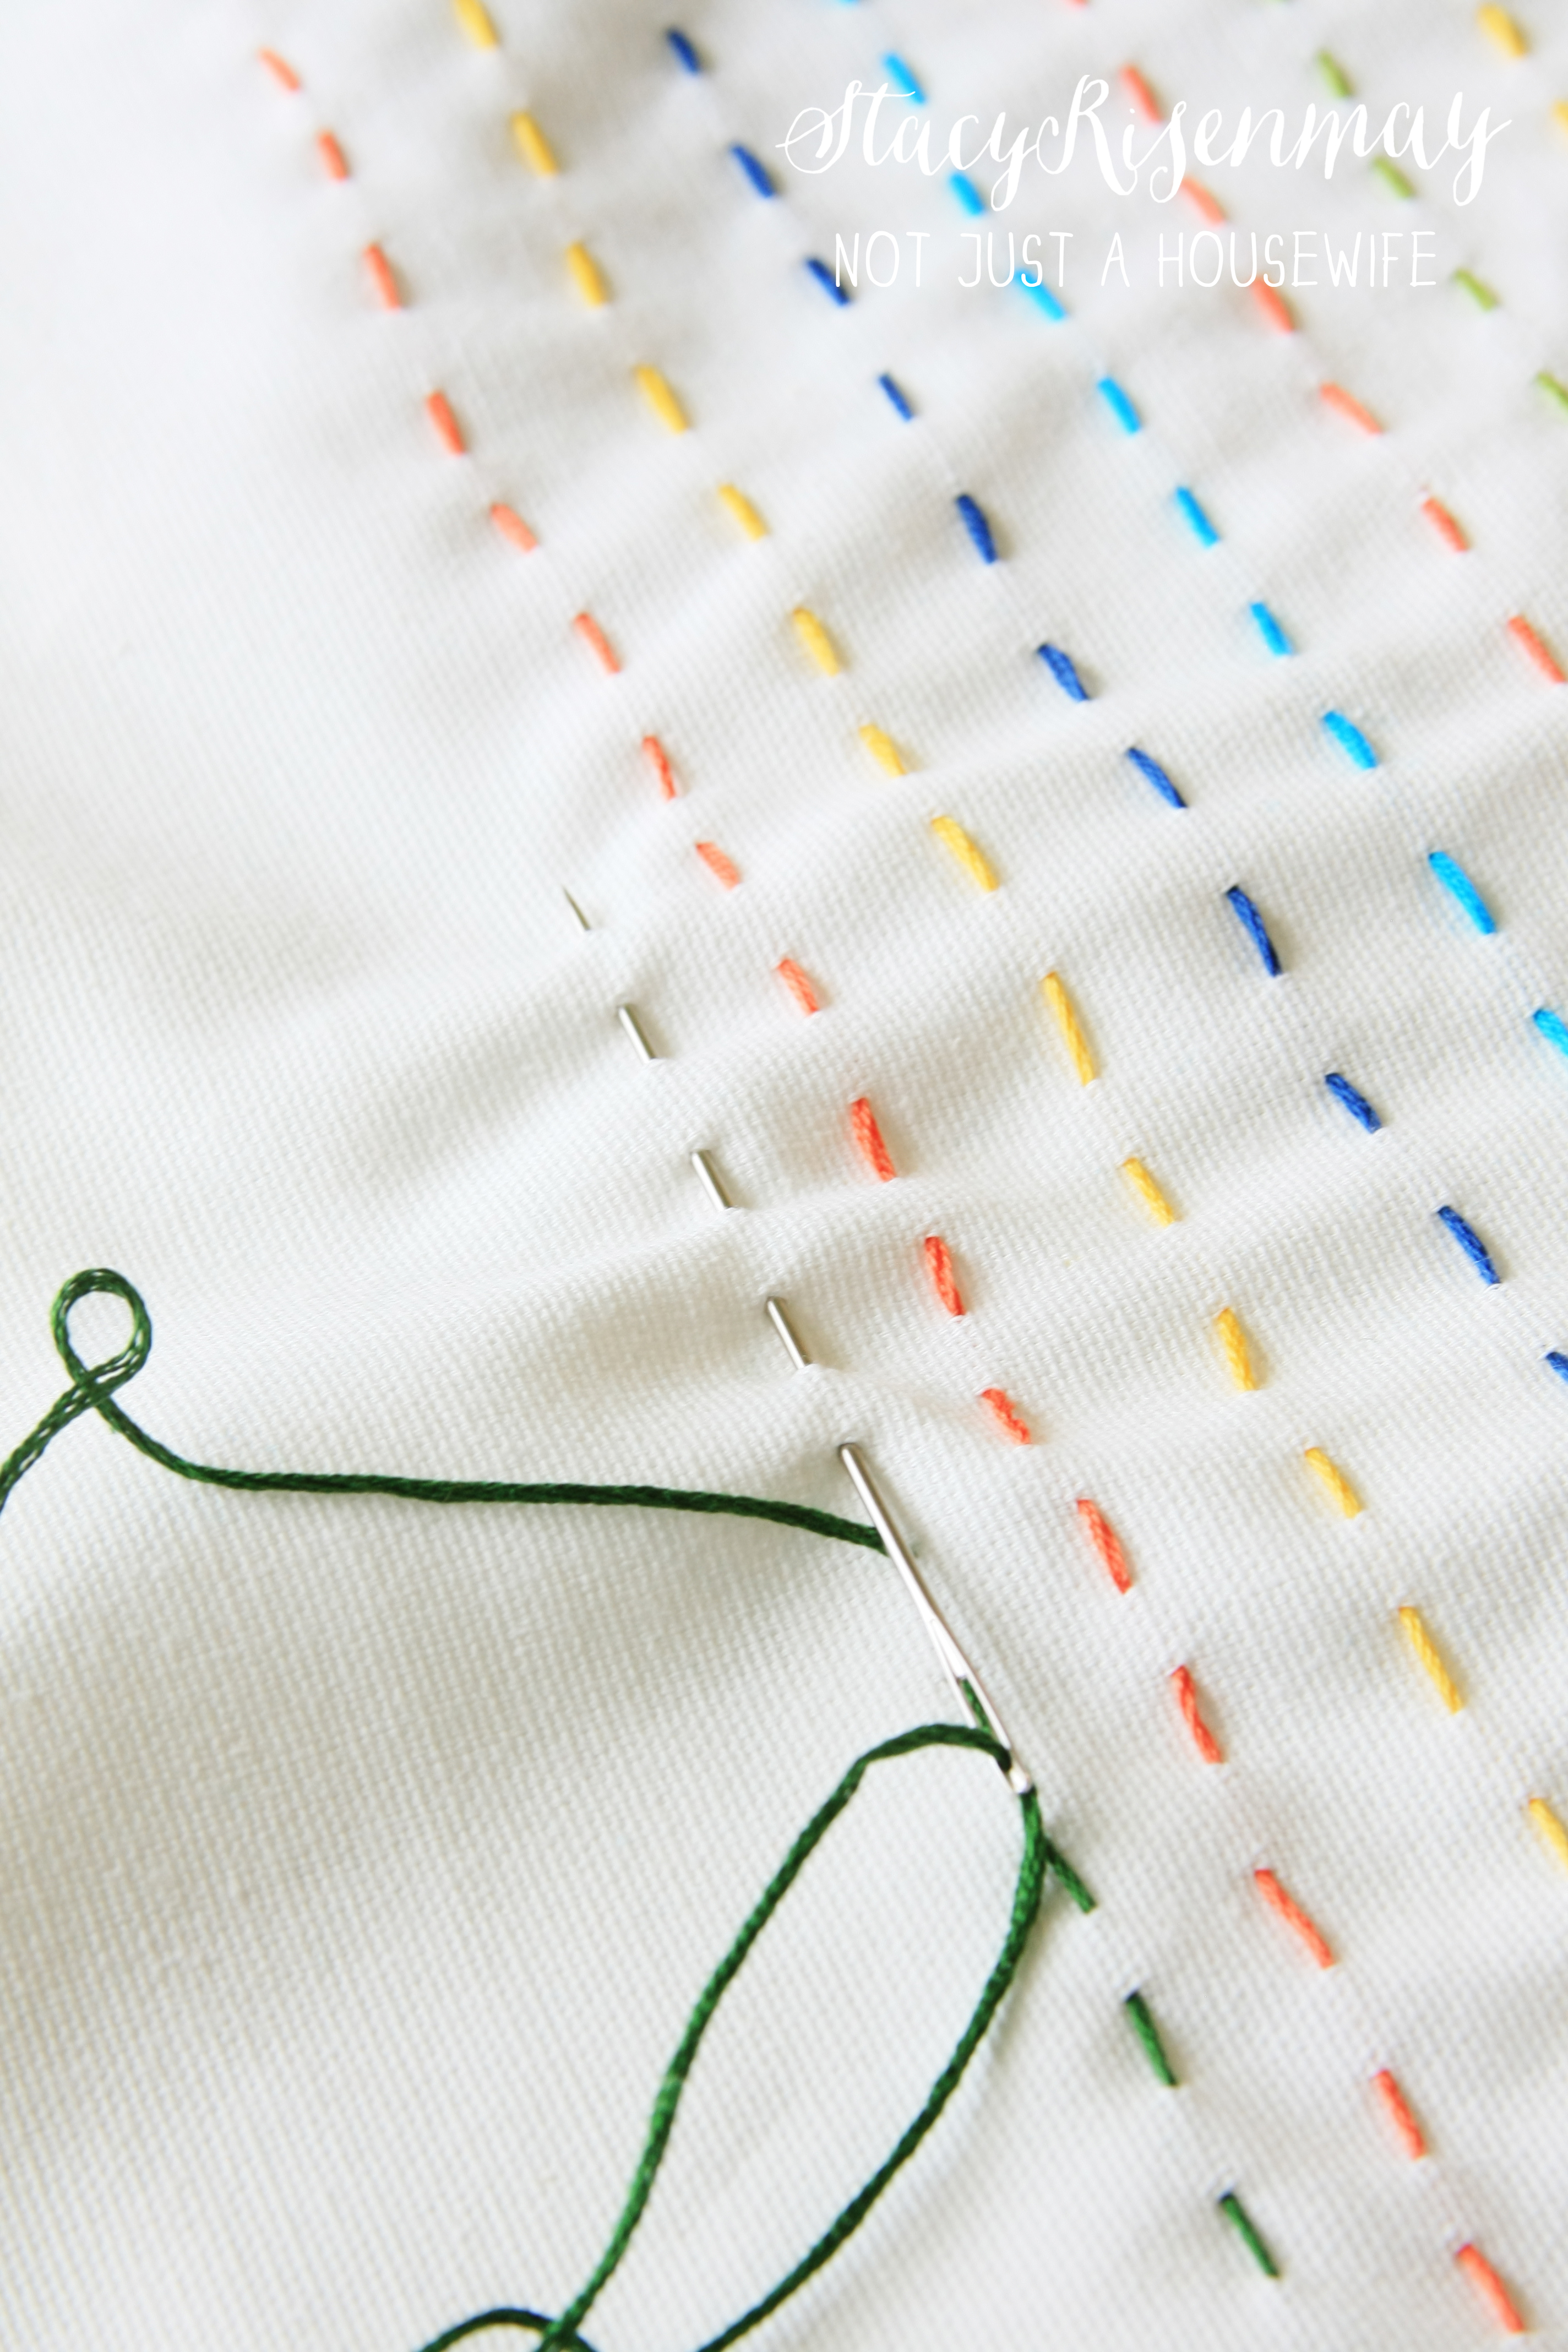
    It doesn't matter if the stitches are perfect. In fact, I think it is charming when they are uneven and occasionally crooked. You want it to look handmade and not like a machine did it. Have fun and don't stress about everything lining up.

    pick stitch tutorial

    Once you complete the line of stitches, tie it off on the other end. Keep going until you have filled the whole front side. I opted to only stitch one side. You can do both if you want. I certainly has enough thread to do both had I wanted.

    Then I just sewed it like normal fabric.

    pick stitch pillow_edited-2

    I am hoping to have my new gallery wall photographed and up on the blog soon. It is slowly but surely coming along :)


    You will also like:

    • Small House Series {Make Your Space Appear Larger}Small House Series {Make Your Space Appear Larger}
    • How to Care for Prayer Plants {Maranta, Calathea, Ctenanthe, & Stromanthe}How to Care for Prayer Plants {Maranta, Calathea, Ctenanthe, & Stromanthe}
    • Alien CakeAlien Cake
    • Painting UpholsteryPainting Upholstery
    • St. Patrick's Day Decor { + FREE Printable}St. Patrick's Day Decor { + FREE Printable}
    • Garden SignsGarden Signs
    • Worm CakeWorm Cake
    • Decorating Someone Else's House: Part TWODecorating Someone Else's House: Part TWO

    « Abstract Plastic Bowl
    Steam Clean Your Mattress! »

    Filed Under: DIY & Tutorials 6 Comments

    Subscribe

    for your weekly DIY fix.

    Reader Interactions

    Comments

    1. Melanie

      September 03, 2014 at 6:00 am

      What a great idea Stacy! I usually hate having to sew free hand, but this looks like a project I could handle. I even have all the supplies on hand, which means its even better! Thanks for sharing, I will definitely be pinning this one!

      Reply
      • Stacy

        September 04, 2014 at 6:30 pm

        I usually hate sewing of any kind :P But one movie later and this was done. Not too bad!

        Reply
    2. Robin Johnson

      September 03, 2014 at 9:43 am

      Your pillow turned out so pretty. I just love Pick Stitching. I did something similar last year on some mini Christmas stocking and loved it. Love the idea of using multiple colors, so pretty.

      I do have to say this is a very well timed post. I have a been wanting to sew something fierce lately but haven't been able to figure out what to work on. Now I know. Thanks.

      Reply
      • Stacy

        September 04, 2014 at 6:32 pm

        Pick stitching would be darling on a sticking! I bet they were so cute :)

        Reply
    3. Kelly

      September 16, 2014 at 10:23 pm

      Adorable! I will have to try this soon.

      Reply
    4. Anjali

      December 11, 2014 at 4:26 am

      Wow, I really happy to read this article. Thank you very much.

      Reply

    Comment Below! Cancel reply

    Your email address will not be published. Required fields are marked *

    This site uses Akismet to reduce spam. Learn how your comment data is processed.

    Primary Sidebar

    stacyHey! I'm Stacy and am a DIY addict. I love to get my hands dirty, whether it's sawdust, paint, or dirt. My goal is to help YOU learn to fix up your home and yard. No matter the style or size, I think everyone should love their home. And it doesn't takes a big budget to get there. Let's DIY together!

    Subscribe to My Blog!

    Search this site

    categories


    Subscribe

    Footer

    Welcome! I'm sharing our adventures as we fix up our 1938 cottage. Whether it is big or small, I think everyone should love their home and I don't think it takes a lot of money to make a space your own

    About Stacy

    • Facebook
    • Instagram
    • Pinterest
    • Twitter

    My Favorites

    copyright

    All images and content are copyrighted via Stacy Risenmay unless otherwise stated. If you'd like to share my work, please link back to this blog.
    Thank you for visiting!


    Footer

    ↑ back to top

    About

    • Meet Stacy
    • Privacy Policy
    • Contact

    Categories 

    • Home Decor
    • Outdoor Projects & Gardening
    • DIY & Tutorials
    • Kid Activities
    • Recipes
    • Travel
    • Cleaning
    • Houseplants
    • Staining
    • Painting
    • Power Tools
    • Holiday Ideas

    Newsletter

    • Sign Up! for emails and updates

    As an Amazon Associate I earn from qualifying purchases.

    Copyright © 2020 Brunch Pro on the Brunch Pro Theme


    Privacy Policy
    Welcome! Thanks for visiting.
    Hi! I'm Stacy and I want to help YOU become a DIY rockstar! Sign up for my email list so each project, tip, and trick will go directly to your inbox :)
    Your information will *never* be shared or sold to a 3rd party. Pinky promise :)
    Welcome!
    Hi! I'm Stacy and I blog about fixing up our 1938 cottage. Join the thousand of others who get my posts sent to their inbox for FREE!
    Your information will *never* be shared or sold to a 3rd party.