• Skip to primary navigation
  • Skip to main content
  • Skip to primary sidebar
  • Skip to footer
Stacy Risenmay
  • Home
  • About me
  • PRESS
  • Contact Me
  • My Book
    • Facebook
    • Instagram
    • Pinterest
    • Twitter
menu icon
go to homepage
subscribe
search icon
Homepage link
  • Home
  • About me
  • Project Gallery
  • Our House
  • PRESS
  • Contact Me
  • Privacy Policy
    • Facebook
    • Instagram
    • Pinterest
    • Twitter
  • ×

    Glass Light Shade Vase: Three Ways!

    By Stacy 20 Comments

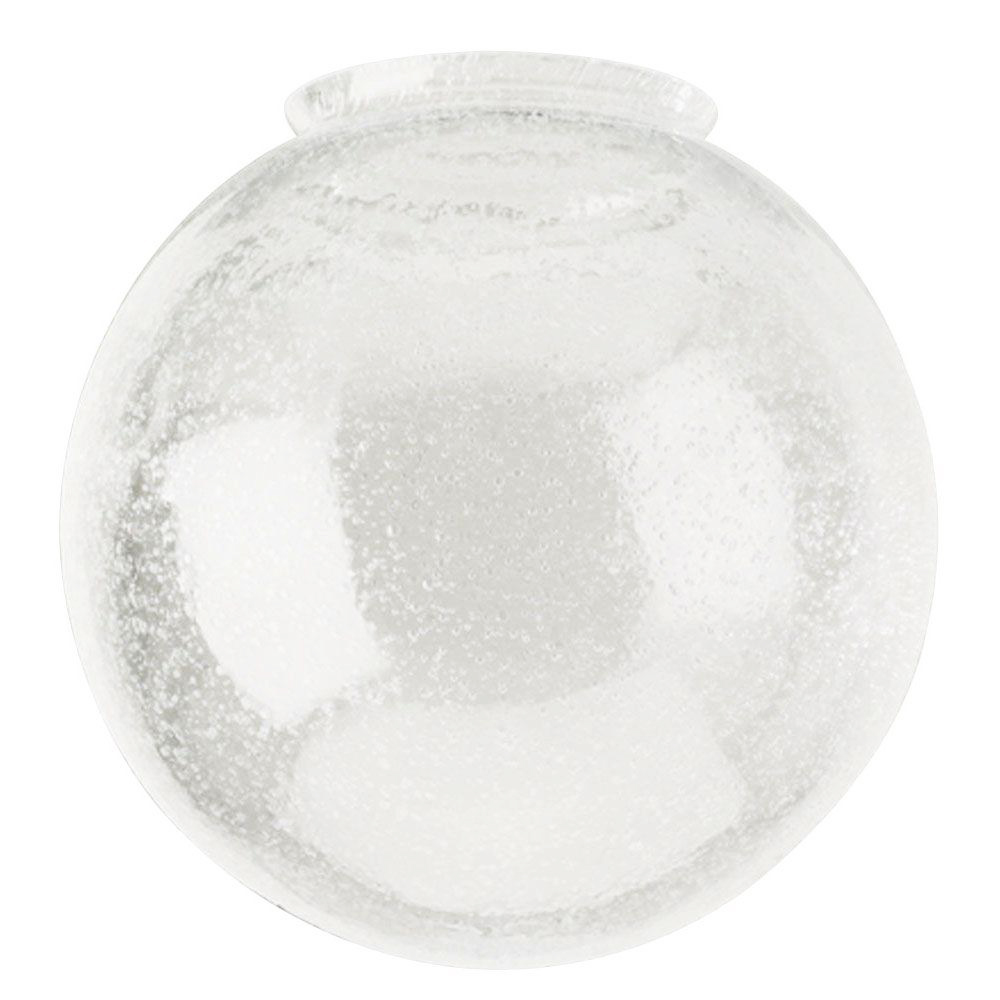
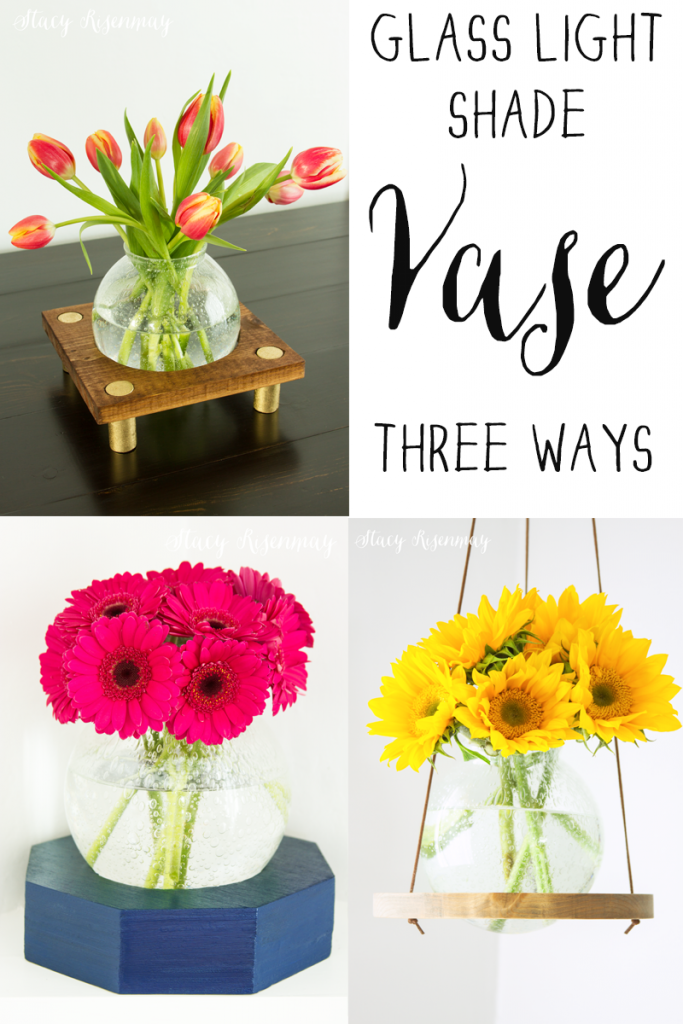
    When I finished the bathroom in the basement, we couldn't do recessed lights because of all the pipes and such in the ceiling. I had to find light that didn't hang down very far from the ceiling since the ceiling is lower in the basement than upstairs and I have a tall husband. I have a love affair with seeded glass (glass with bubbles) and so I ordered some seeded glass light shades online. I ended up with an extra one and it has been sitting on the window ledge for almost two years collecting dust. Every time I get in the shower I see it sitting there and think that I should do something with it. I decided to make a vase out of it but never got around to it since I could not decide on which base idea to create. Well, this week I decided to make all three and see which one I liked best!


    seeded glass light shade


    Ever since my first trip to Trader Joe's a couple weeks ago, I have been wanting to go back for some more fresh flowers. A post about vases was the perfect excuse! It is probably a good thing it is an hour away or I would spend most of my money there.

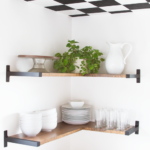
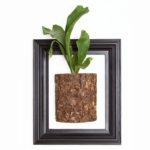
    Vase 1: Hanging Vase

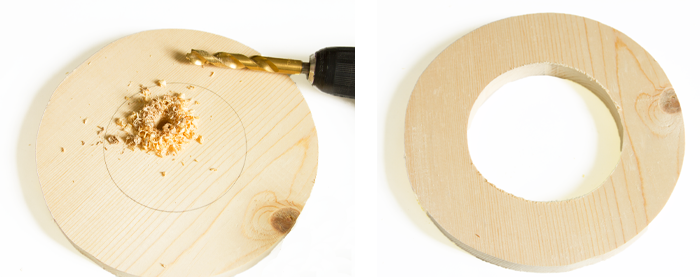
    This first vase I decided to make round. You could make it any shape you want really. After tracing a bowl on the wood, I cut out the 9 inch circle. I then traced another circle in the center. It was 4 inches. Drill a hole large enough that your jigsaw blade can fit then use the jigsaw to cut out the center circle. Sand it all really well with a 220 grit sandpaper.


    drill-hole-for-jig-saw-blade-to-fit


    I stained it the same color as the peg board and boxes in my new office closet. I love it!


    stain-wood-base


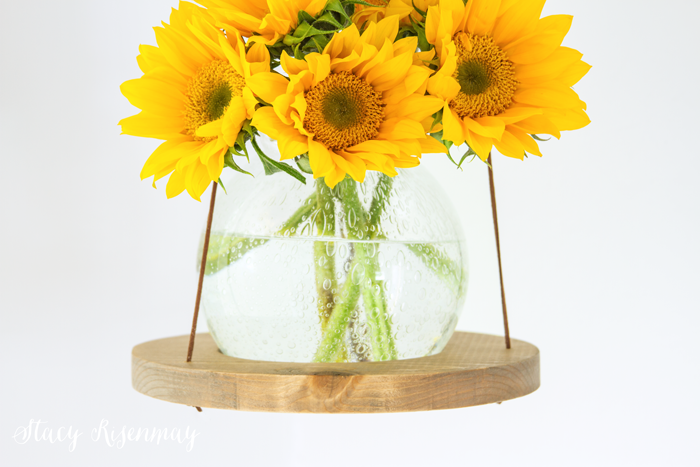
    Once the stain was dry, I drilled three small holes evenly around the circle and threaded faux leather lacing through it. I knotted the ends so it wouldn't pull back through the small holes.


    hanging-vase-leather-straps


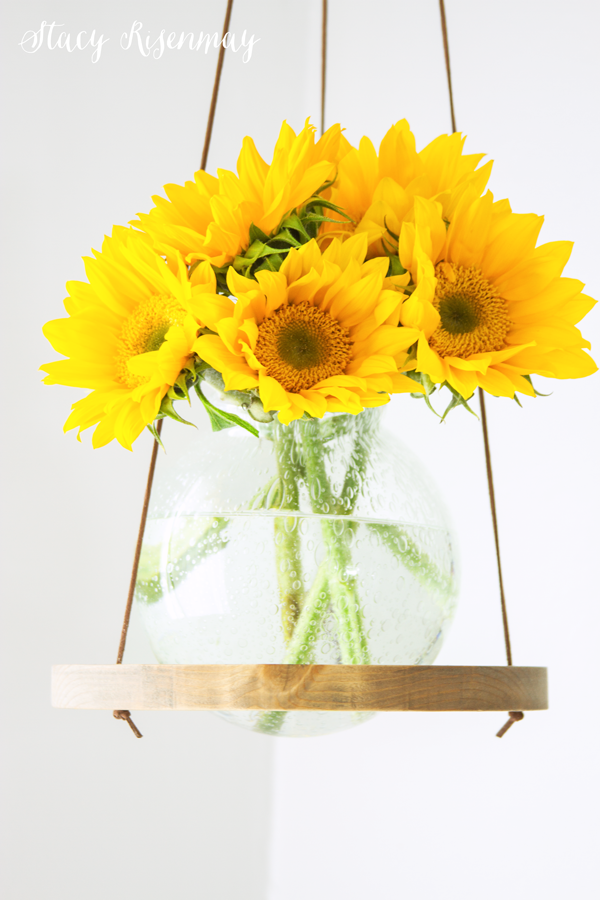
    I still can't believe these giant sunflowers were only a few bucks at Trader Joe's!
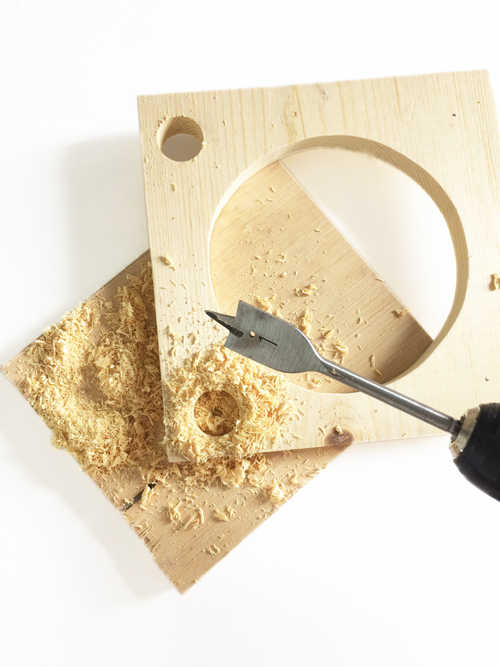
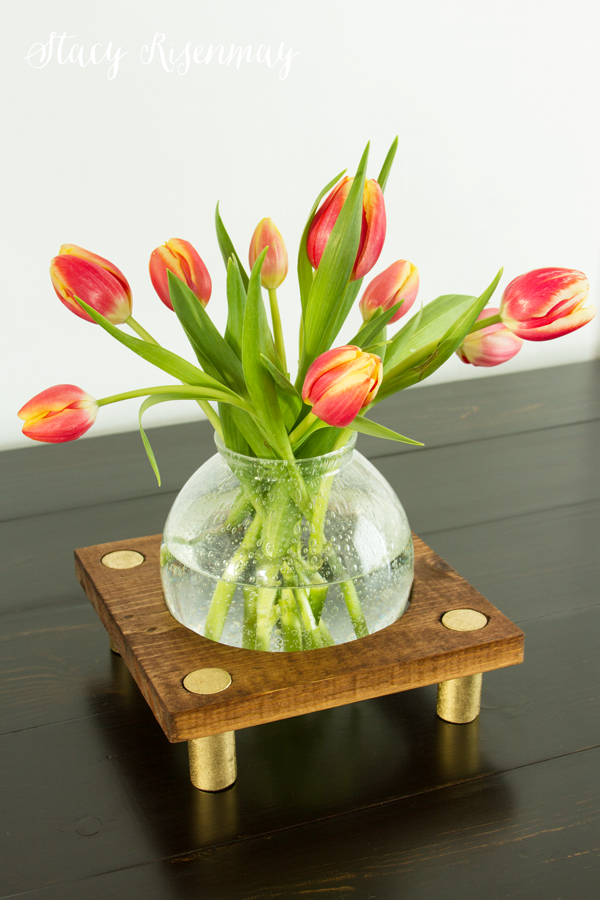
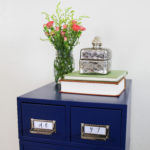
     

    hanging-vase-with-sunflowers


    Vase 2: Gold Legs

    For this one, I cut out an 8 inch by 8 inch square. I traced a 5 inch circle in the center. Just like the one above, I drilled a hole big enough for the jigsaw blade to fit. I cut out the hole and sanded the whole thing really well.

    I had a 1 inch wooden dowel I was going to use for the legs so I used a 1 inch drill bit to drill holes in each corner. Measure and mark it before drilling.

    I cut the dowel into 2 ½ inch pieces for the legs. I didn't want to too tal. It just needed to be tall enough that the bottom of the vase wouldn't touch the table top. Think pot bellied pig verses gangly teenage boy.

    drill-holes-for-legs


    I stained it using Early American by Minwax. The legs I spray painted gold. I added some wood glue and pushed the legs into the holes. I waited for the glue to dry before turning it over and adding the vase.


    vase-with-stand


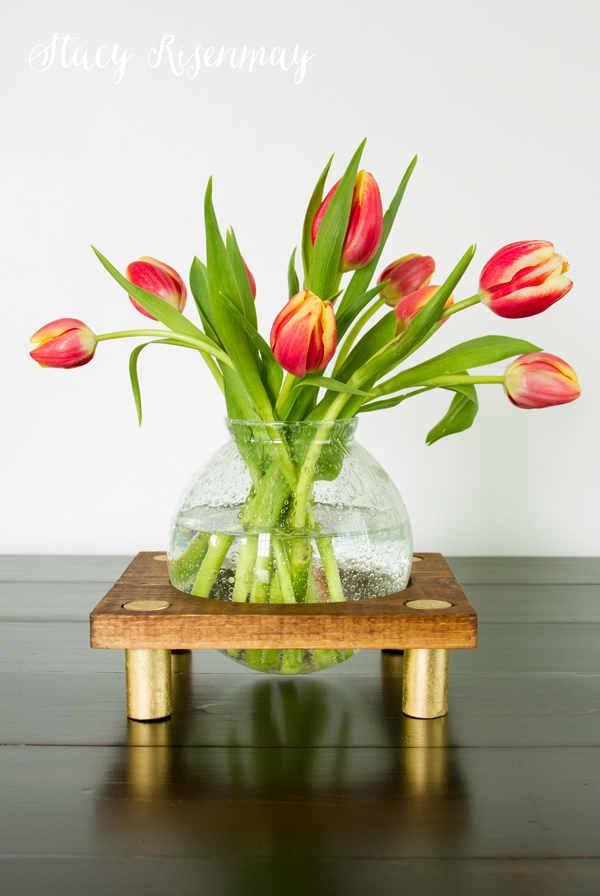
    I love that you can see the legs on the top! It reminds me of the entry way  bench I built.


    vase-with-gold-legs


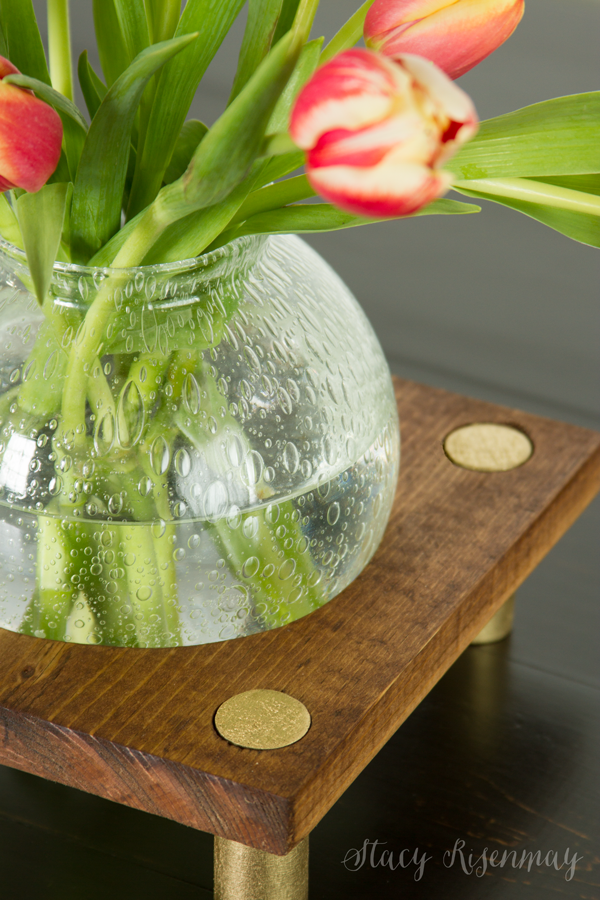
    I ended up liking the 5 inch size hole better than the 4 inch hole.
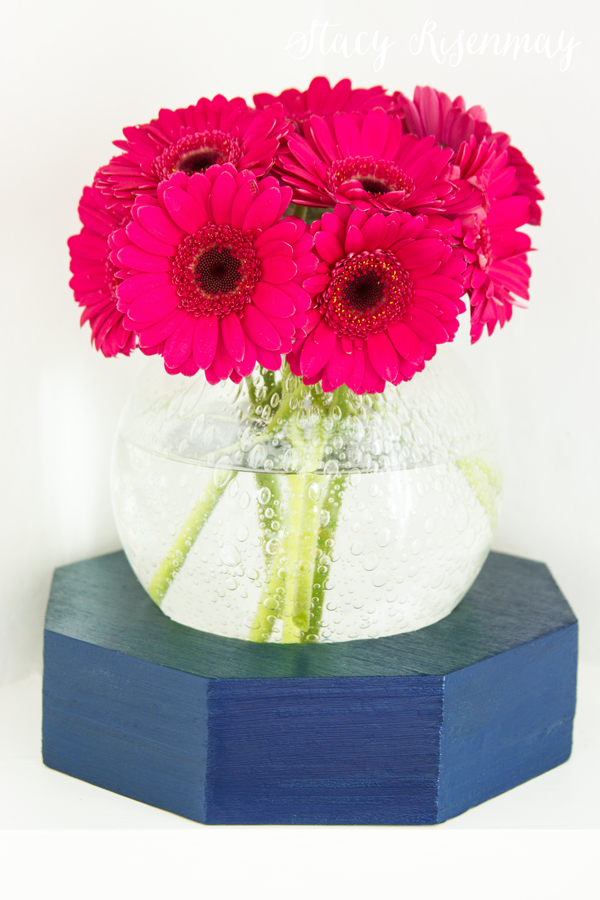
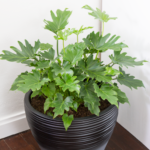
     

    flower-vase-with-gold-legs


    Vase 3: Geometric!

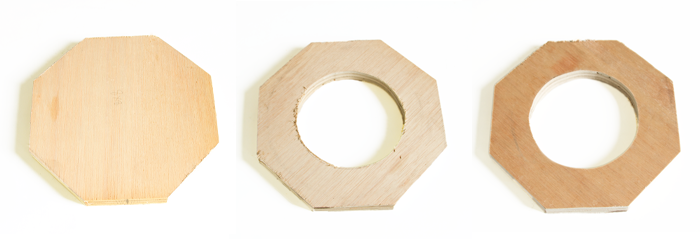
    I started out by cutting three 8 inch squares out of plywood. You can use any wood, I just chose to use scrap wood for these vases. Once I had the square cut, I measured and marked about an inch and a half from each corner, drew a line, and using the miter saw chopped off the corners. It helps to have clamps to hold the wood in pace on the base of the saw. This created the octagonal shape.

    Like the hanging vase, I drilled a large hole for the saw blade to fit through. I used the jigsaw to cut out a center circle in two of the pieces.


    drill-hole-for-saw-blade-to-fit-and-then-cut-out-center


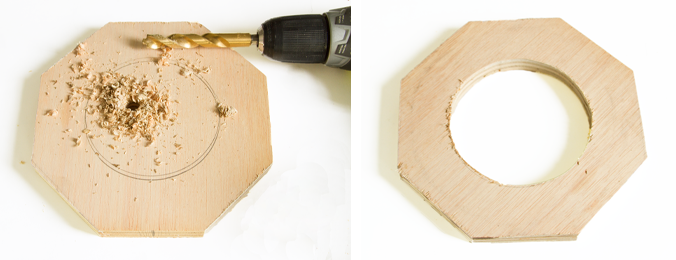
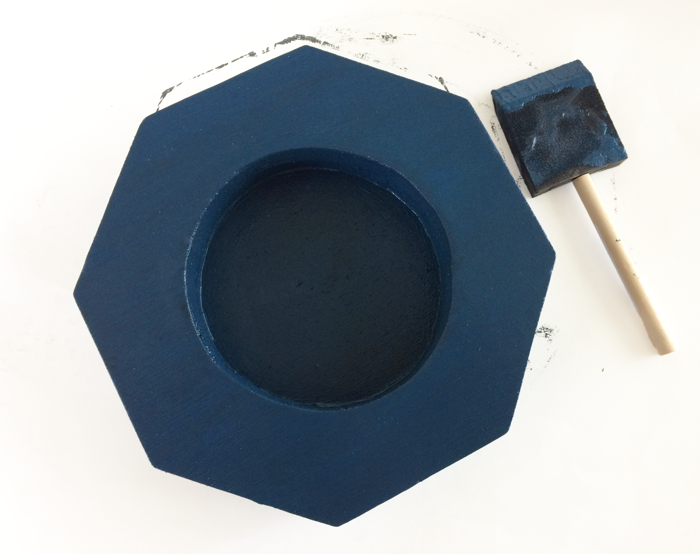
    You will end up with two that have center circles and one that does not. You can either use wood glue to attach them together or a brad nailer. Putty it really well and when dry, sand it smooth.


    pieces-for-geometric-vase


    I painted it my favorite cobalt blue!

    paint-the-vase


    It looks so cheery on the shelf!

    geometric-vase


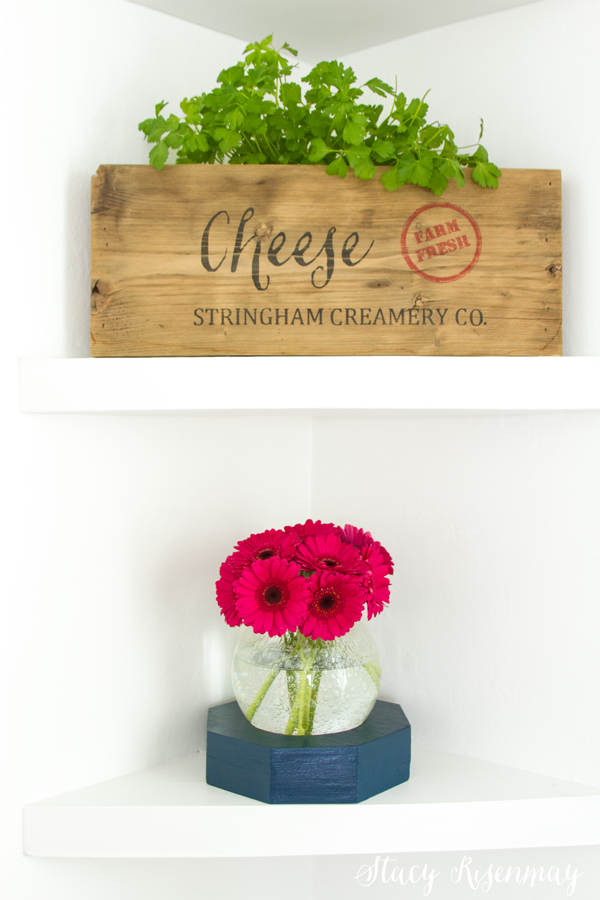
    Real gerbera daisies are so perfect that they look fake even in person! They are such a great cut flower.


    geometric-vase-with-gerber-daisies

    Which one was your favorite? Which one do you think was mine?


    PIN for later:


    a-glass-light-shade-vase-three-different-ways

    You will also like:

    • Geometric Hanging Vase {Styled X3}Geometric Hanging Vase {Styled X3}
    • Wooden Cheese Crate {tutorial}Wooden Cheese Crate {tutorial}
    • Open Shelves In The KitchenOpen Shelves In The Kitchen
    • Card Catalog Side TableCard Catalog Side Table
    • 15 Easy To Care For Houseplants15 Easy To Care For Houseplants
    • DIY Concrete VaseDIY Concrete Vase
    • Abstract Plastic BowlAbstract Plastic Bowl
    • Staghorn Fern Wall ArtStaghorn Fern Wall Art

    « Crushing On: Cork!
    Let's Get Our Spring Cleaning On! »

    Filed Under: DIY & Tutorials, Favorites, Power Tools, Staining 20 Comments

    Subscribe

    for your weekly DIY fix.

    Reader Interactions

    Comments

    1. Arlene

      March 07, 2017 at 6:58 am

      You are so creative! I like them all but especially like the hanging vase.

      Reply
    2. Dani H

      March 07, 2017 at 8:21 am

      These are wonderful - I can't make up my mind between the hanging vase or the stand with the gold legs - stunning!

      Love your blog!

      Reply
    3. jean

      March 07, 2017 at 8:41 am

      #2 was your favorite. Mine also, but I really liked all three. I might just have to go to the Restore to look for a glass glove

      Reply
      • Stacy

        March 07, 2017 at 5:35 pm

        Yep! You are right :) The Restore would be the perfect place to get one!

        Reply
    4. Darlene

      March 07, 2017 at 8:55 am

      I love all of them but especially the gold legs. Blue is also a favourite. What a great inspirational design idea!

      Reply
    5. Lindsay

      March 07, 2017 at 11:24 am

      The pot-bellied pig gets my vote!

      Reply
      • Stacy

        March 07, 2017 at 5:36 pm

        Hahaha! Me too.

        Reply
    6. Auntiepatch

      March 07, 2017 at 11:52 am

      1. Vase with legs
      2. Hanging vase
      3. Geometric

      Reply
    7. chris aka monkey

      March 07, 2017 at 12:00 pm

      i am going to guess the vase with legs is your favorite, it sure is mine love it xx

      Reply
      • Stacy

        March 07, 2017 at 5:36 pm

        Yes! It is, but it was a close call.

        Reply
    8. Lisa

      March 07, 2017 at 1:34 pm

      I'm guessing the stand with the gold legs is your favorite. I like them all, but my favorite is definitely the hanging vase. Great idea! I'm thinking the "one thing 3 different ways" could be a challenging and fun series.

      Reply
      • Stacy

        March 07, 2017 at 5:37 pm

        The last two years I had a series called Styled X3 where three bloggers all styled/used the same item somehow. It was really fun!
        http://www.notjustahousewife.net/?s=styled+x3

        Reply
    9. nancy

      March 07, 2017 at 4:07 pm

      I was looking for an excuse to get out my jig saw!!!! Great projects. Thanks for sharing.

      Reply
    10. Lynn

      March 07, 2017 at 4:21 pm

      All of them are great. My fave is the square one. Love the gold legs.

      Reply
    11. rue

      March 20, 2017 at 3:25 pm

      Hi Stacy :)

      I found you via Michael's Foodie Friday. This was a really cute project!

      By the way, I love your home. I live in a 1930s house too, but I went backwards in time fixing it up instead of forwards ;) It's neat that you were contacted by a former owner daughter. I hope you were able to meet the man that lived there. I've always hoped someone would do the same here, but no luck so far.

      Anyway, have a lovely Monday evening,
      rue

      Reply
    12. Samantha

      March 20, 2017 at 6:37 pm

      These are all beautiful and so creative!

      Reply
    13. Angie ~ ambient wares

      March 24, 2017 at 5:48 pm

      All of these are amazing and I'm always wondering what I can do with old light shades I see when thrifting. Thank you for the inspiration!! Pinned and sharing

      Reply

    Trackbacks

    1. Sundays at Home # 151 | My Soulful Home says:
      March 18, 2017 at 6:00 pm

      […] Love this vase from Stacy at  Not Just a Housewife. […]

      Reply
    2. Busy Monday 258 says:
      March 19, 2017 at 1:32 pm

      […] Featured from last week:  Rose Bakes — Roll Out Brownie Cookies      She Saved — Easy Single Serve Monkey Bread   Moms Choose Joy — Five Surprisingly Simple Ways to Get More Done       Dagmar’s Home – DIY Project: Mason Jar Apothecary Jar    Just Measuring Up — DIY Picnic Table that you can build in one day      Cravings of a Lunatic — Red Velvet Sweet Rolls     Frog Prince Paperie — Tips for Getting a Good Night’s Sleep at Your Daughter’s Slumber Party  Tinselbox – Sweet Watercolor Bunnies Gift Wrap Free Printable    Twelve on Main – Home Remodeling Projects | Tips for Success   Not Just a Housewife — Glass Light Shade Vase  […]

      Reply
    3. Meet Stacy! - Sawdust 2 Stitches says:
      November 28, 2018 at 11:11 am

      […] I don’t have a large room makeover in the works, I love creating smaller projects. This vase is one of three based on the idea of reusing a glass light shade. I had three “base” ideas. One hangs, […]

      Reply

    Comment Below! Cancel reply

    Your email address will not be published. Required fields are marked *

    This site uses Akismet to reduce spam. Learn how your comment data is processed.

    Primary Sidebar

    stacyHey! I'm Stacy and am a DIY addict. I love to get my hands dirty, whether it's sawdust, paint, or dirt. My goal is to help YOU learn to fix up your home and yard. No matter the style or size, I think everyone should love their home. And it doesn't takes a big budget to get there. Let's DIY together!

    Subscribe to My Blog!

    Search this site

    categories


    Subscribe

    Footer

    Welcome! I'm sharing our adventures as we fix up our 1938 cottage. Whether it is big or small, I think everyone should love their home and I don't think it takes a lot of money to make a space your own

    About Stacy

    • Facebook
    • Instagram
    • Pinterest
    • Twitter

    My Favorites

    copyright

    All images and content are copyrighted via Stacy Risenmay unless otherwise stated. If you'd like to share my work, please link back to this blog.
    Thank you for visiting!


    Footer

    ↑ back to top

    About

    • Meet Stacy
    • Privacy Policy
    • Contact

    Categories 

    • Home Decor
    • Outdoor Projects & Gardening
    • DIY & Tutorials
    • Kid Activities
    • Recipes
    • Travel
    • Cleaning
    • Houseplants
    • Staining
    • Painting
    • Power Tools
    • Holiday Ideas

    Newsletter

    • Sign Up! for emails and updates

    As an Amazon Associate I earn from qualifying purchases.

    Copyright © 2020 Brunch Pro on the Brunch Pro Theme


    Privacy Policy
    Welcome! Thanks for visiting.
    Hi! I'm Stacy and I want to help YOU become a DIY rockstar! Sign up for my email list so each project, tip, and trick will go directly to your inbox :)
    Your information will *never* be shared or sold to a 3rd party. Pinky promise :)
    Welcome!
    Hi! I'm Stacy and I blog about fixing up our 1938 cottage. Join the thousand of others who get my posts sent to their inbox for FREE!
    Your information will *never* be shared or sold to a 3rd party.