• Skip to primary navigation
  • Skip to main content
  • Skip to primary sidebar
  • Skip to footer
Stacy Risenmay
  • Home
  • About me
  • PRESS
  • Contact Me
  • My Book
    • Facebook
    • Instagram
    • Pinterest
    • Twitter
menu icon
go to homepage
subscribe
search icon
Homepage link
  • Home
  • About me
  • Project Gallery
  • Our House
  • PRESS
  • Contact Me
  • Privacy Policy
    • Facebook
    • Instagram
    • Pinterest
    • Twitter
  • ×

    Color Burst Pillow

    By Stacy 15 Comments

    I have seen so many color burst pillows, rugs, throws and such floating around and I particularly fell in love with the one I saw on SF Girl By Bay. So when ScotchBlue™ asked for me to partner with them in a fun new campaign to showcase pattern, I KNEW this was the perfect first project for our collaboration.

    hand painted pillow with color burst design_edited-1


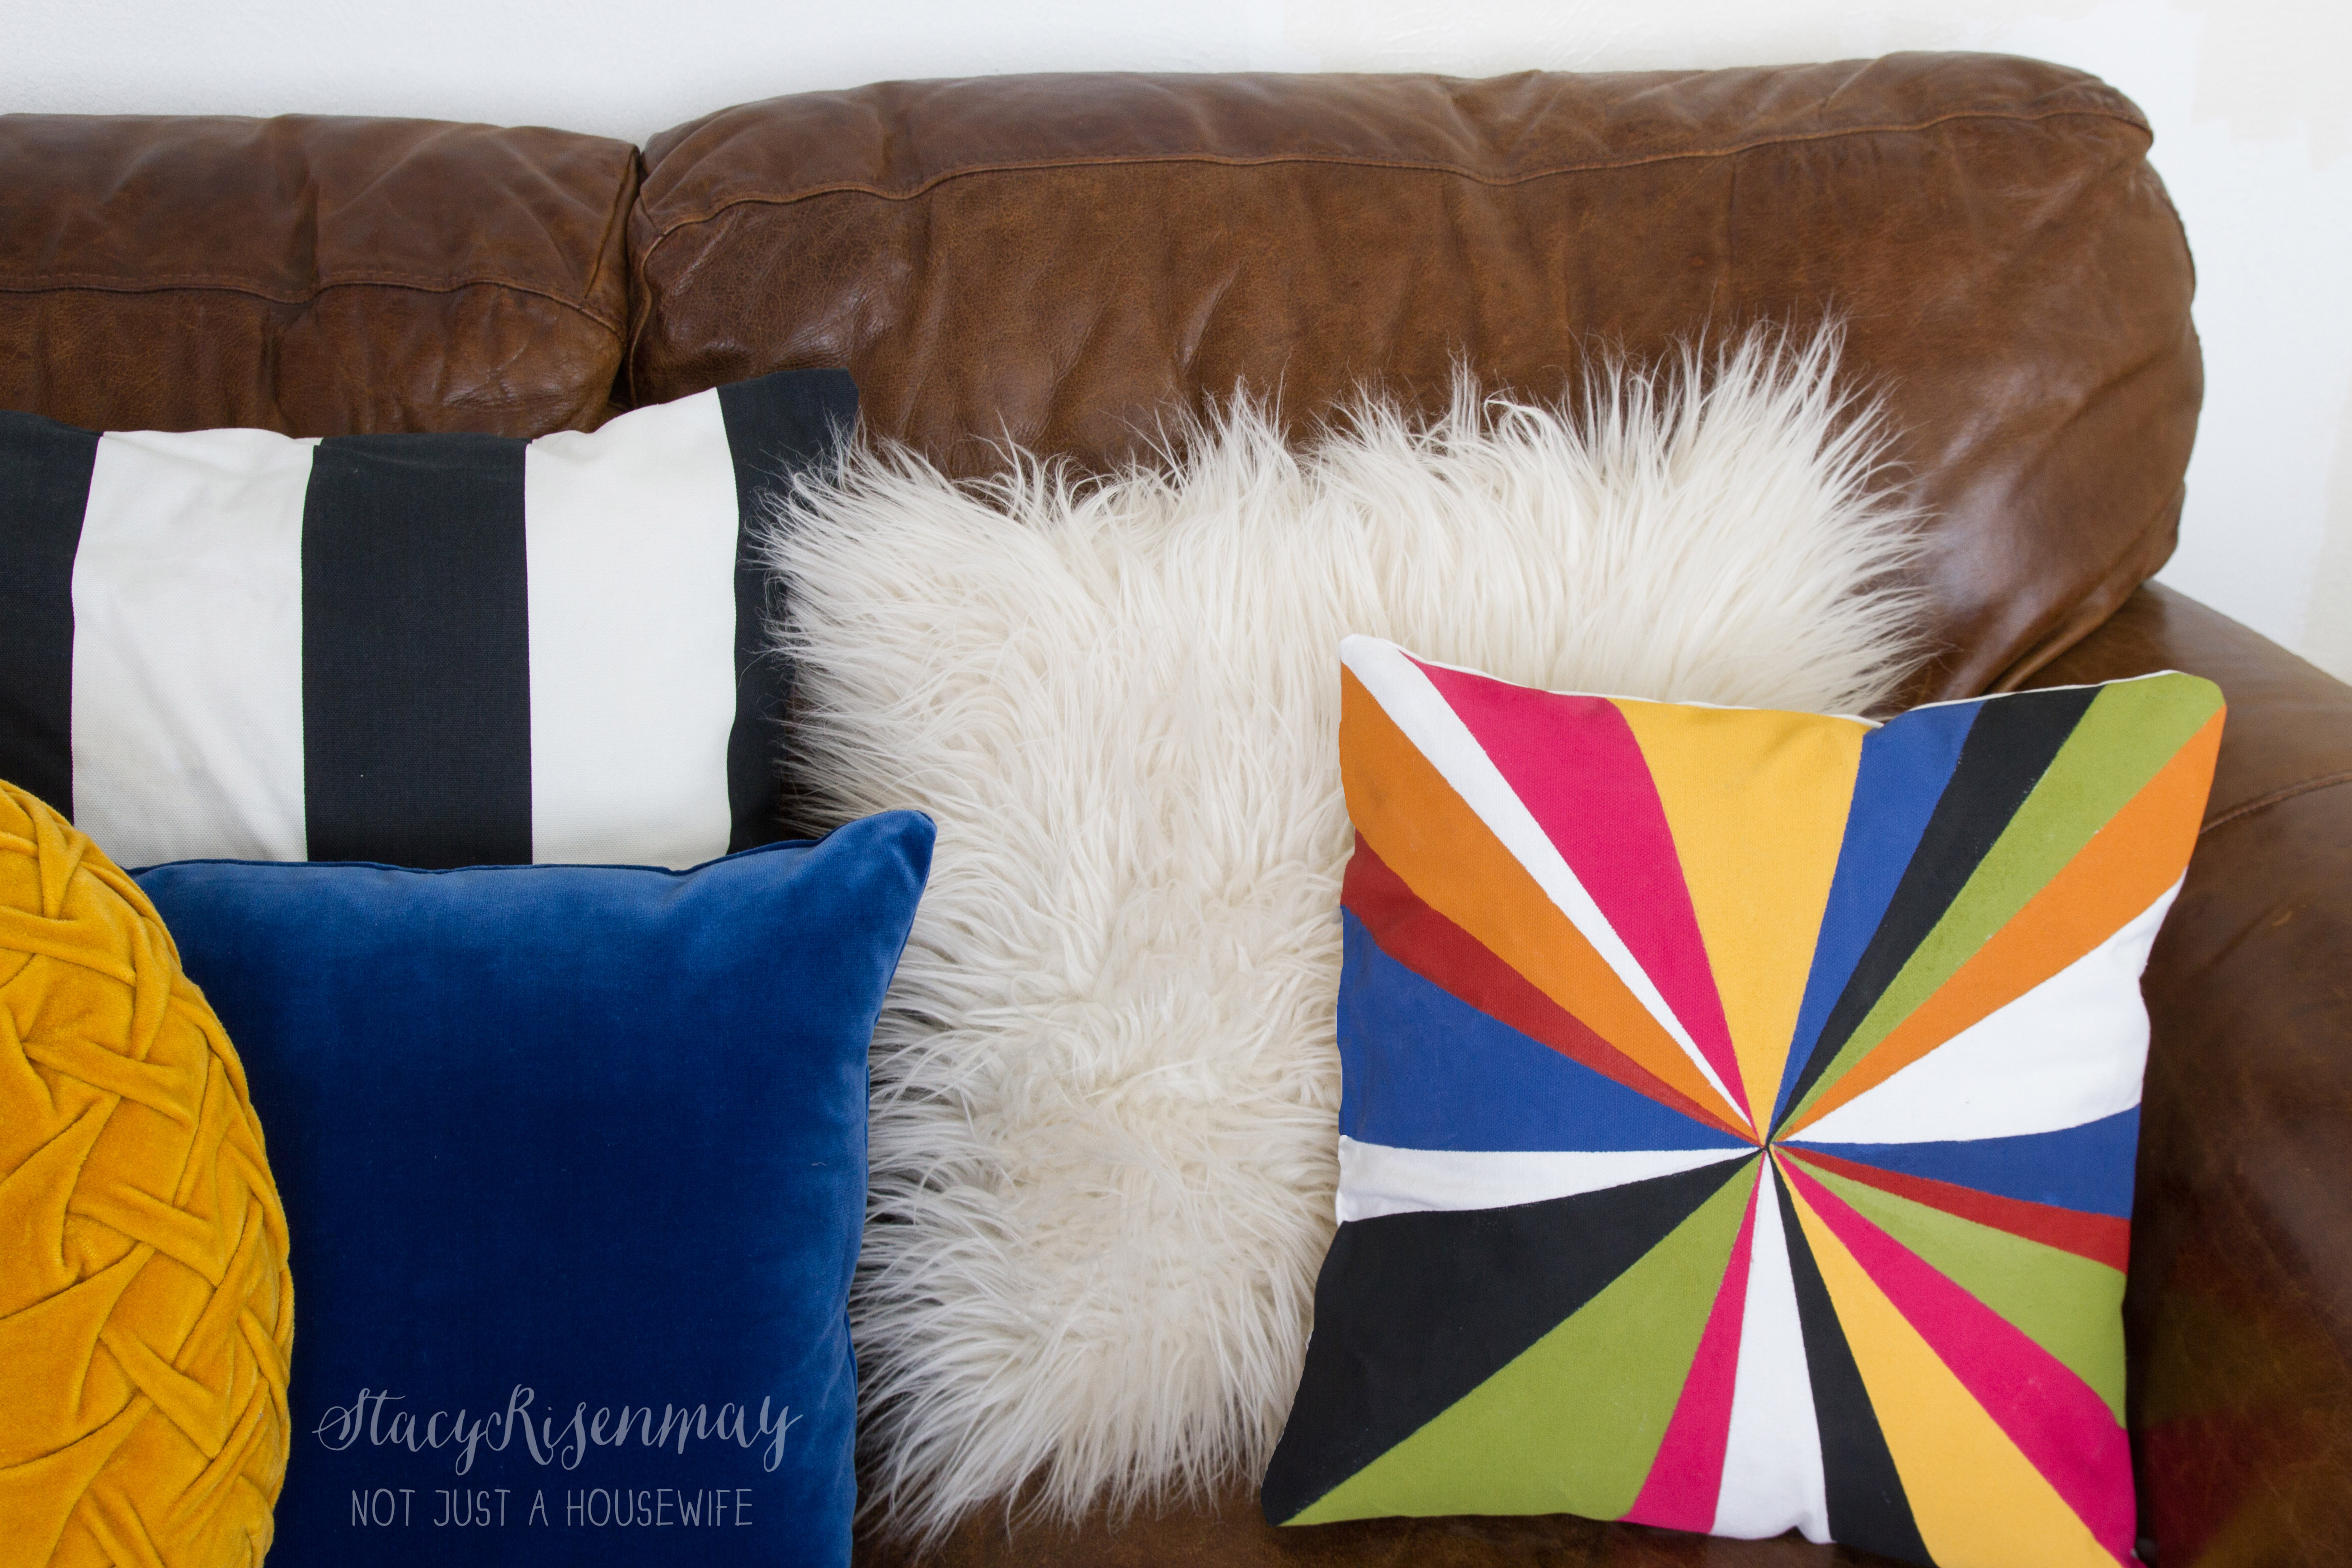
    As I am sure you already know, pillows are a fun way to add color and pattern to a space. They are easily changed out when the mood strikes. I am sure my husband would like my mood not to strike so often.... :) #ihoardpillows

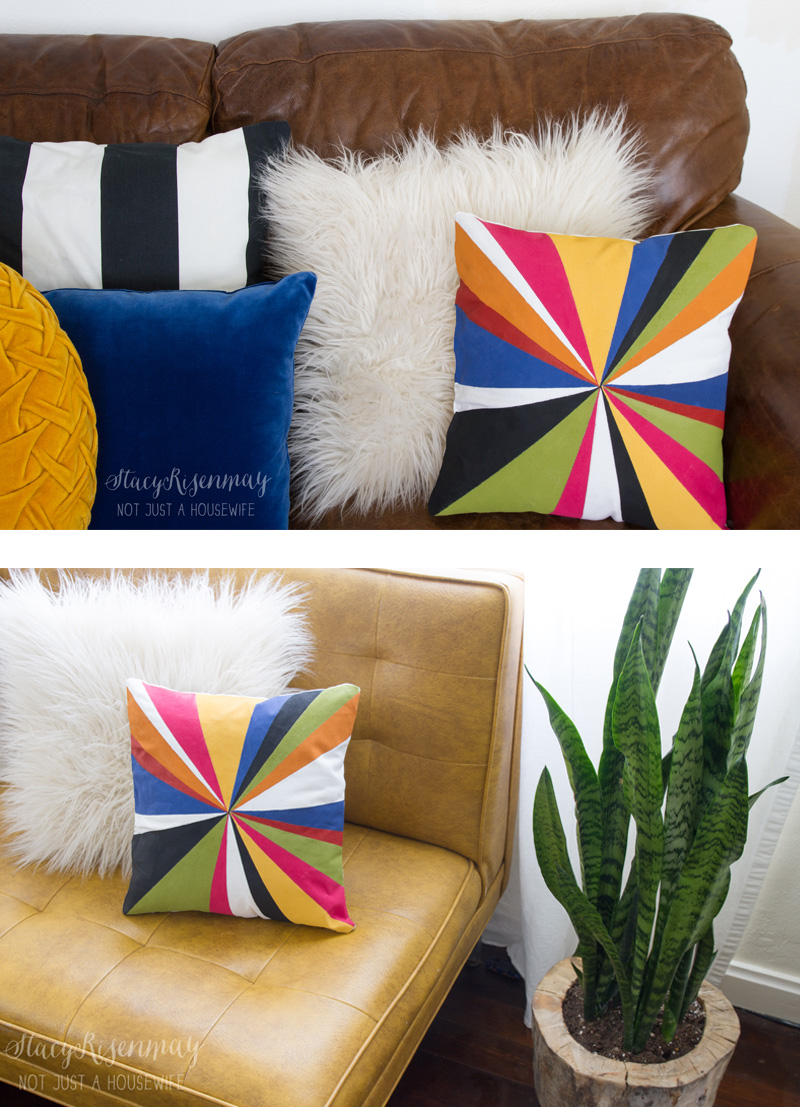
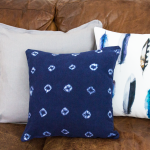
    Speaking of moods, doesn't this pillow exude happiness?

    painted pillow with color burst design


    So here is the low down on how to get super sharp lines when painting fabric.
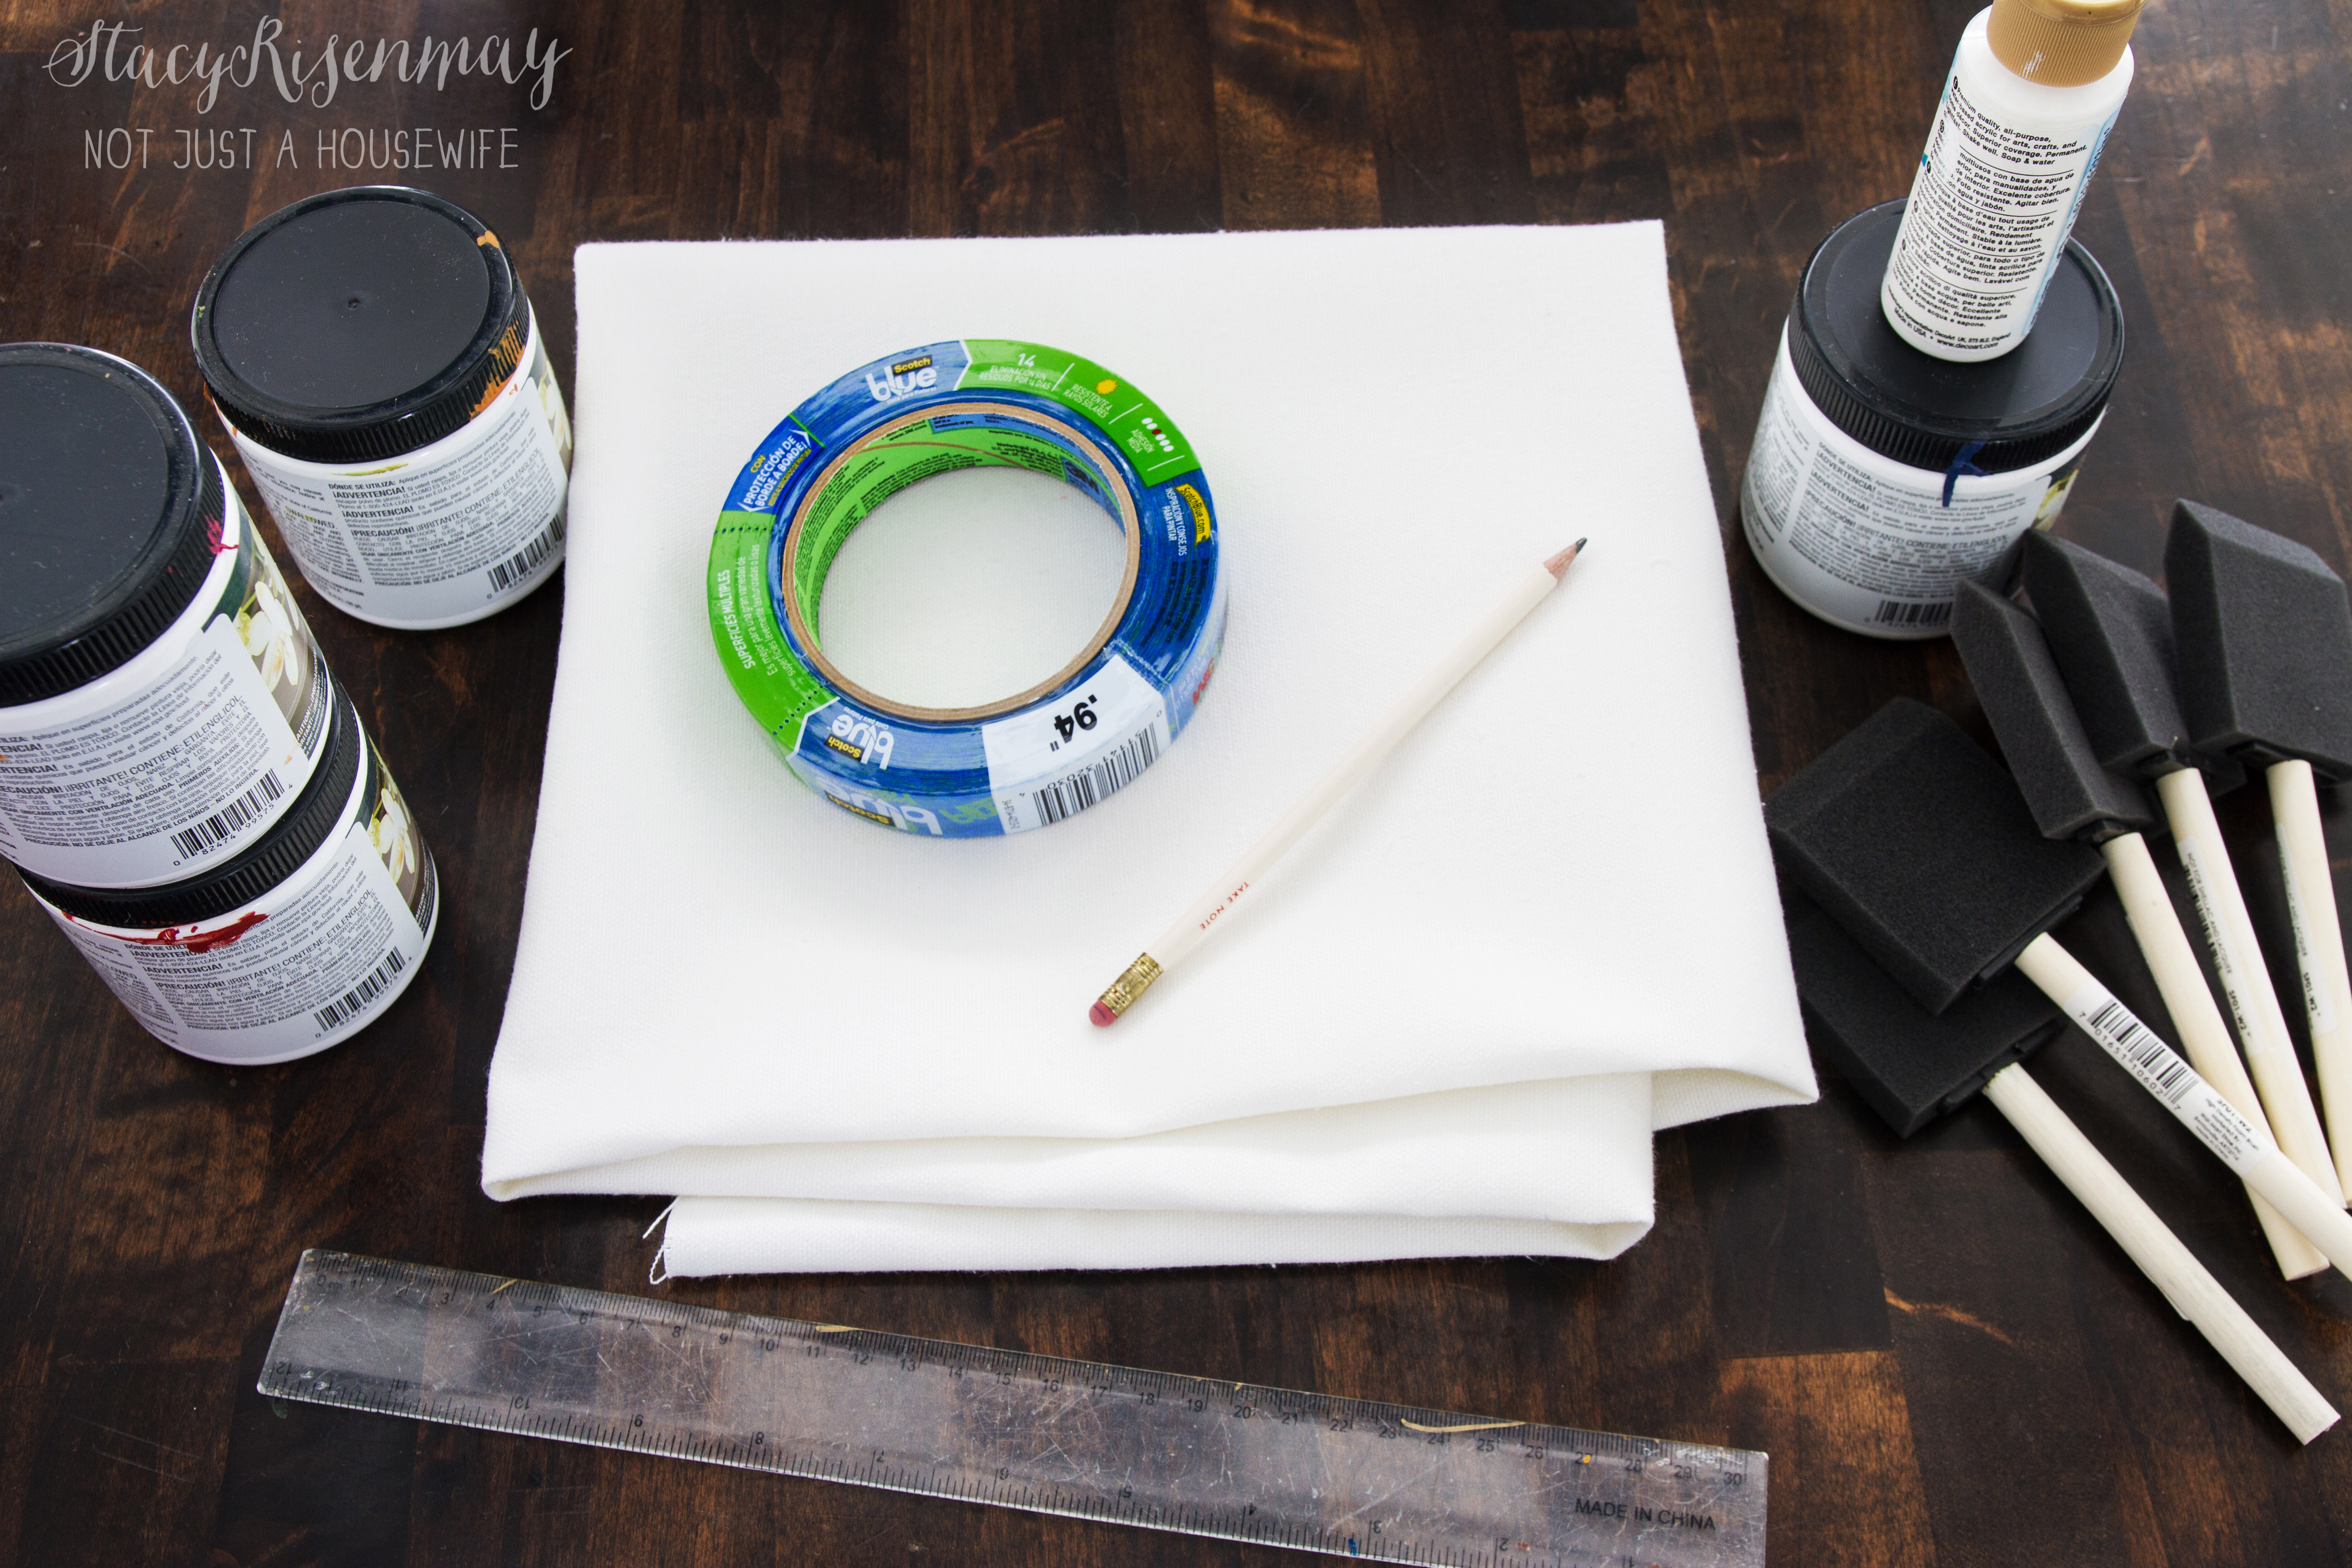
    Materials Needed:

    ScotchBlue™ multi surface tape, white cotton duck fabric, ruler, pencil, foam brushes, paint, and fabric paint medium.

    Note: Follow all ScotchBlue™ Painter’s Tape package instructions for proper surface cleaning and prep, adhesion and removal.

    supplies for hand painted pillow


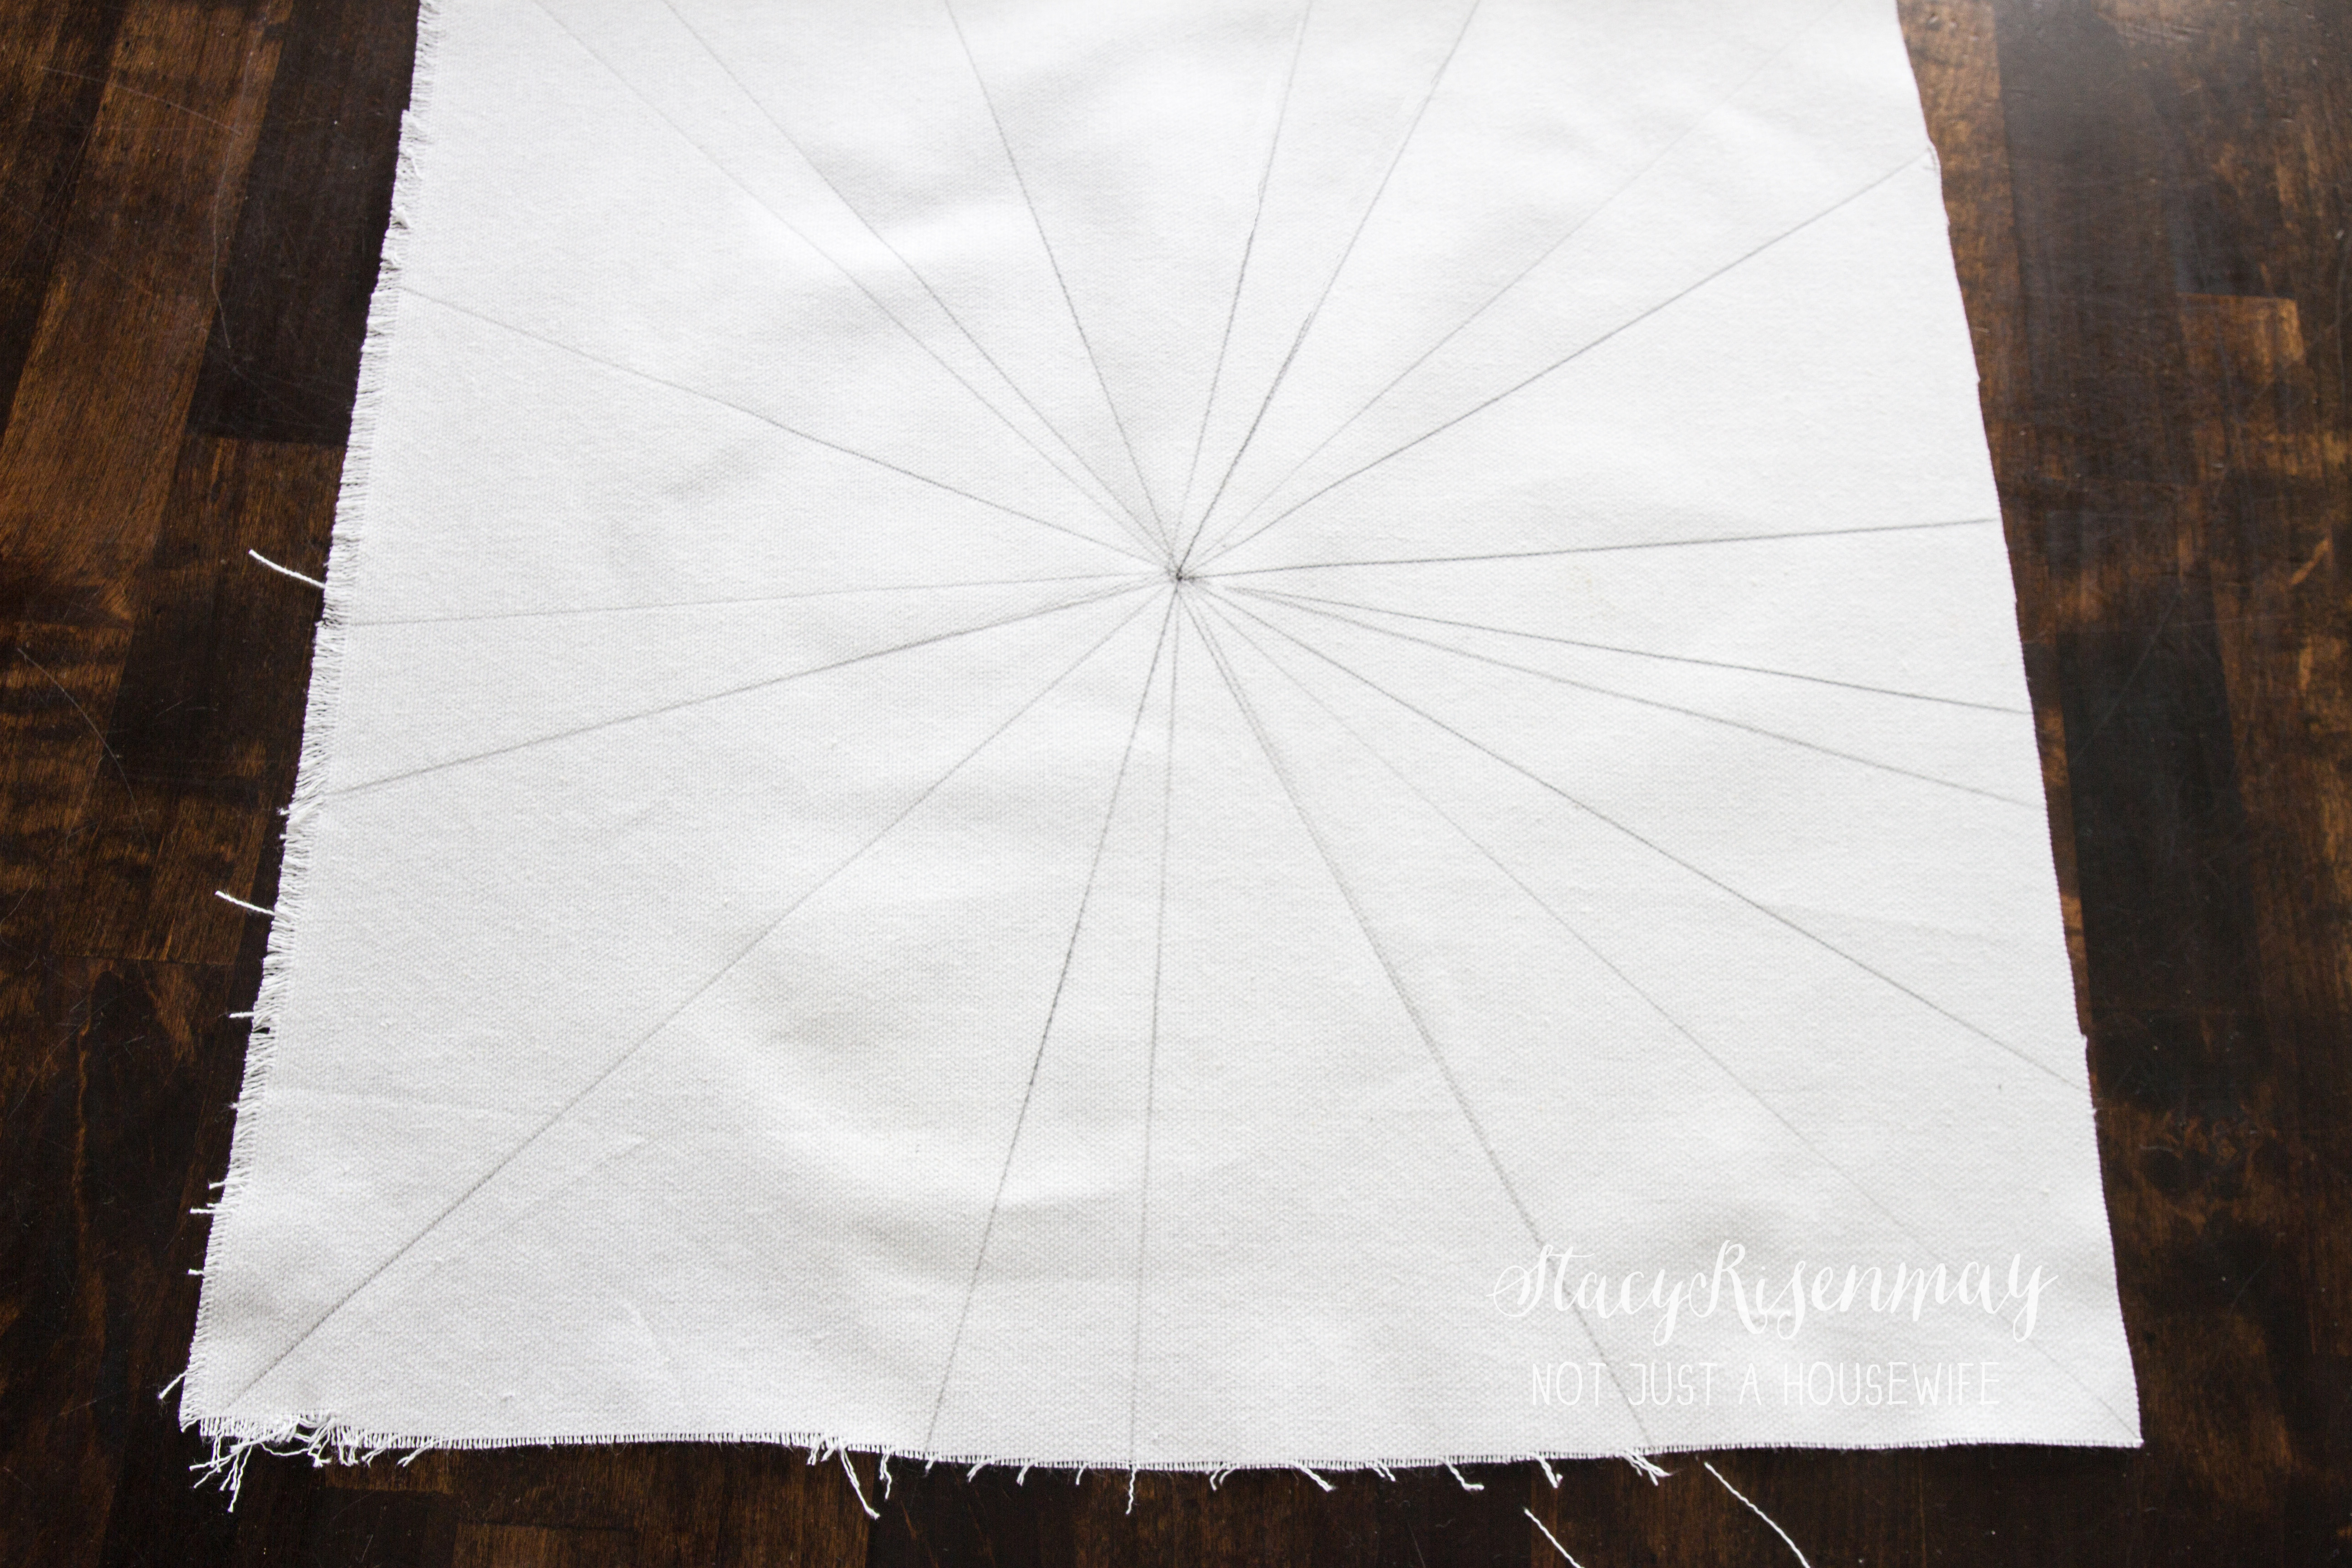
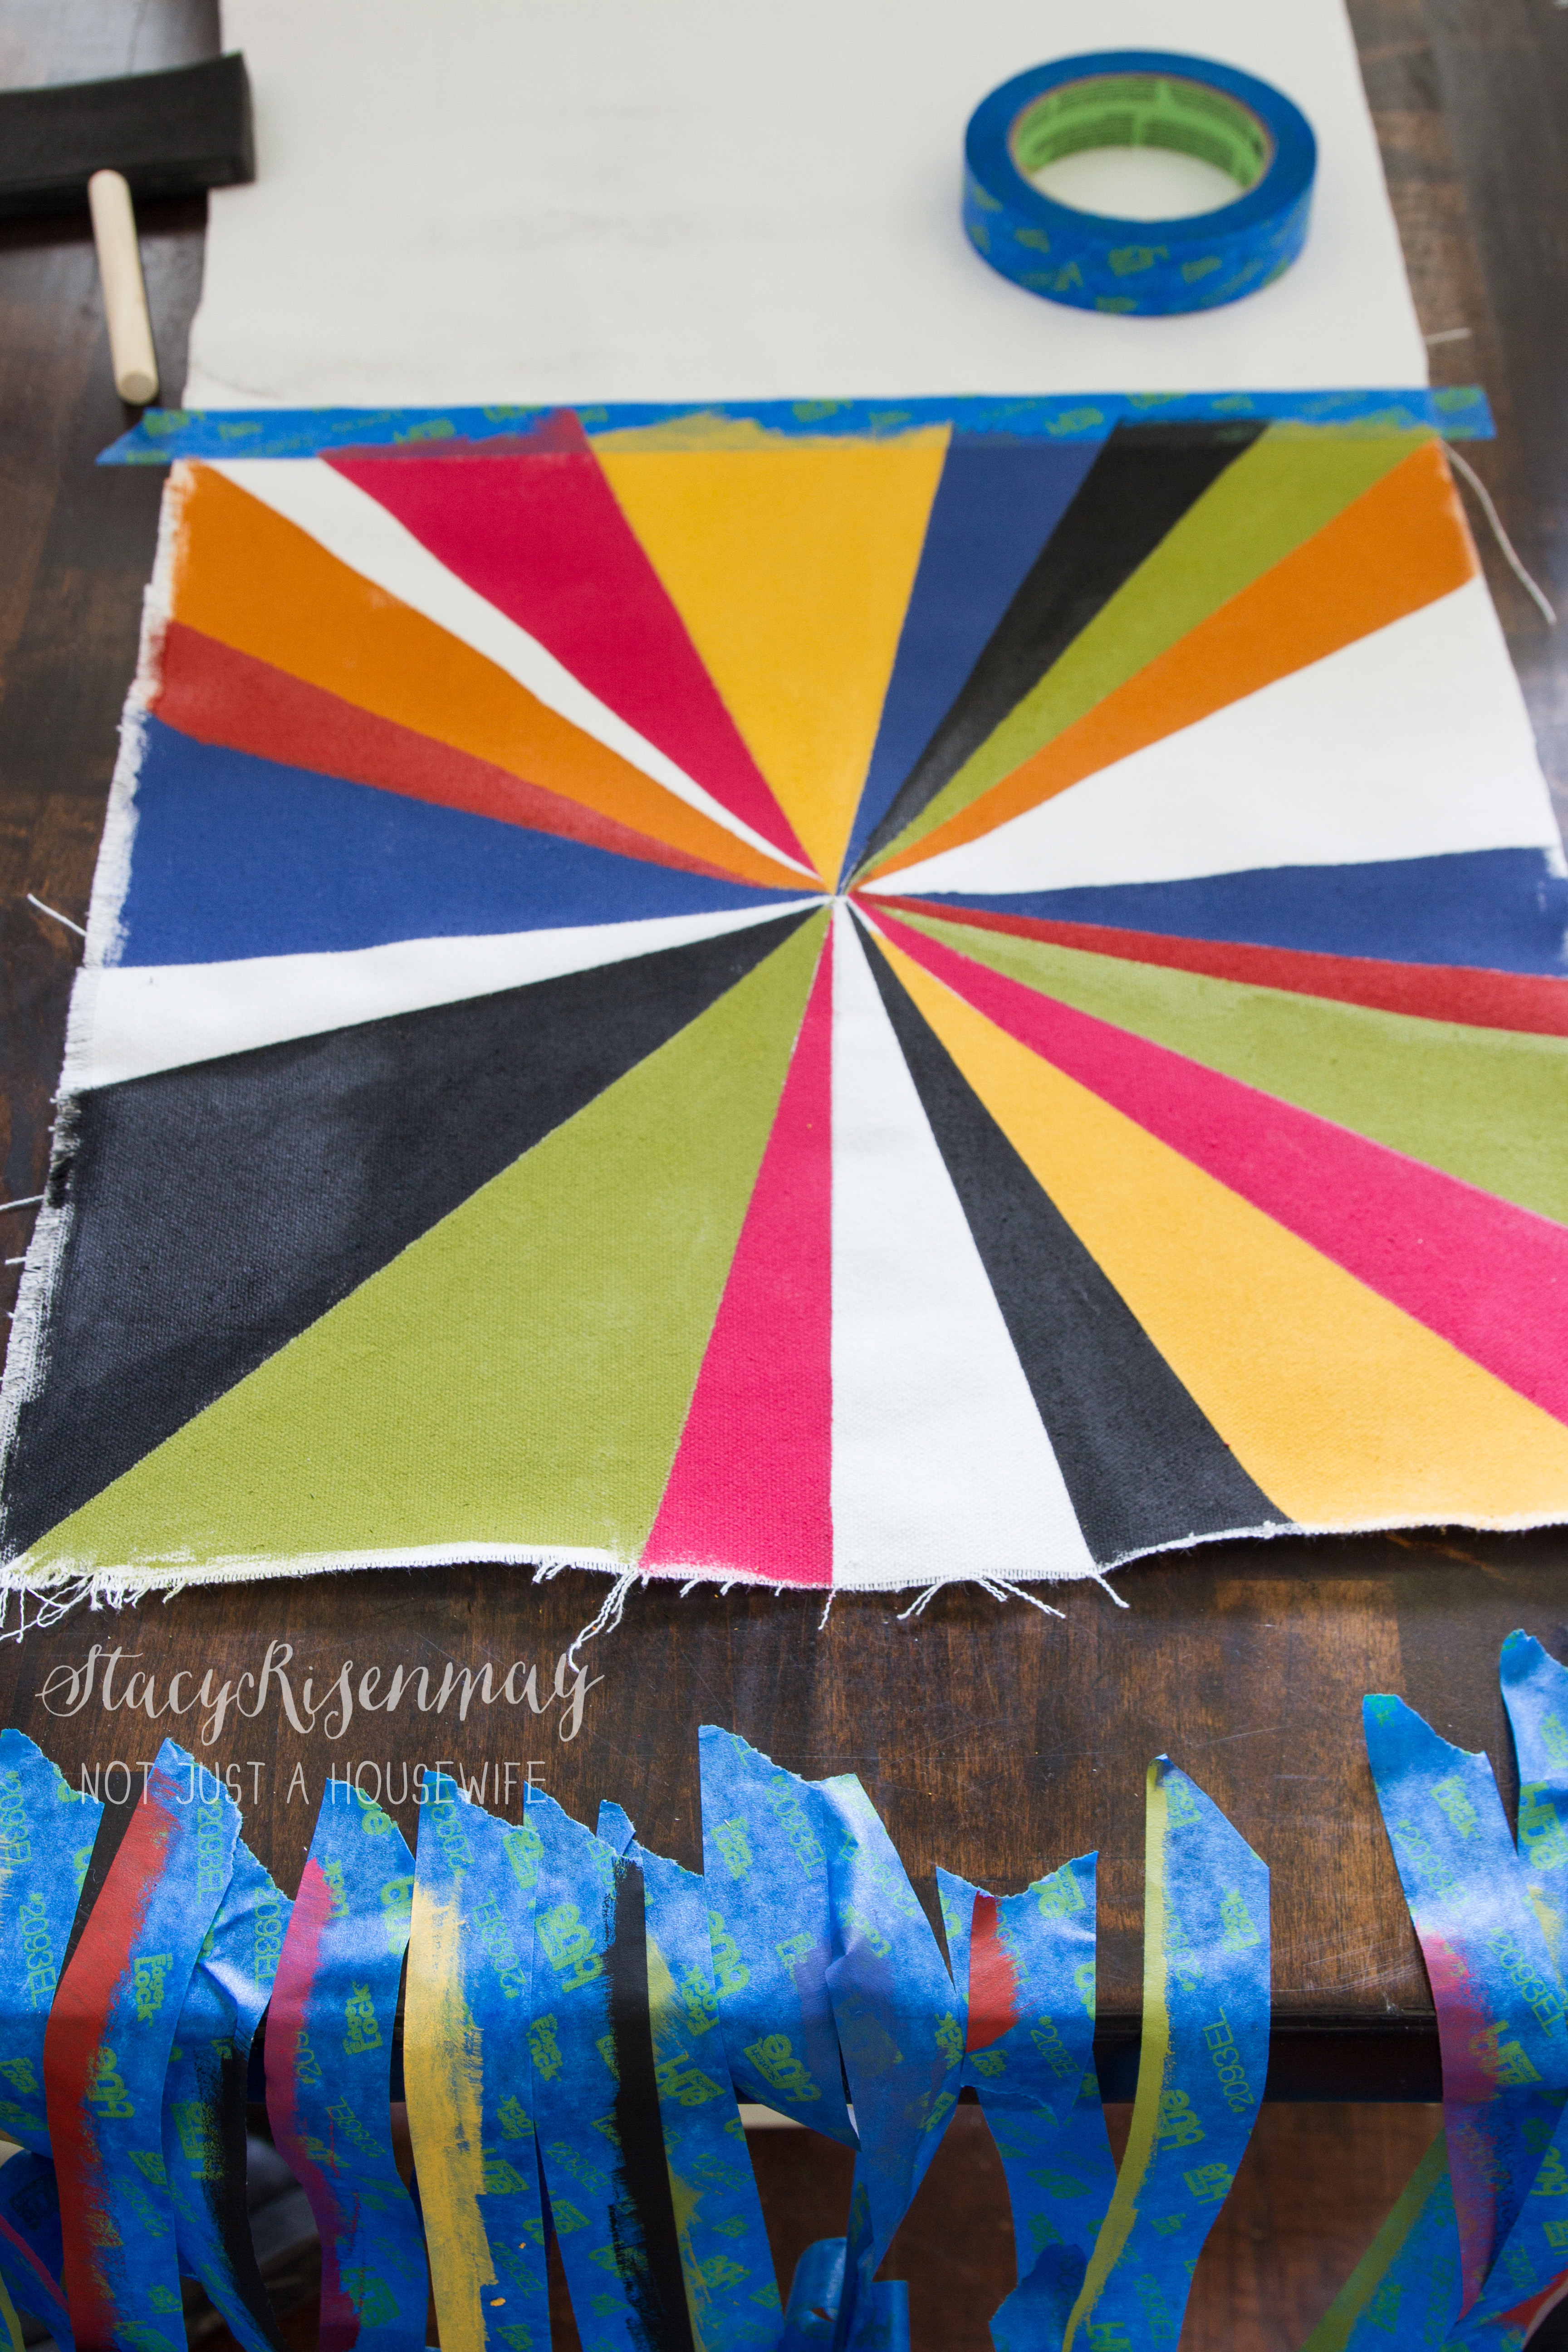
    First of all you'll find the center of the fabric by drawing two diagonal lines, creating and x on the square of fabric.

    find the center of the fabric_edited-1


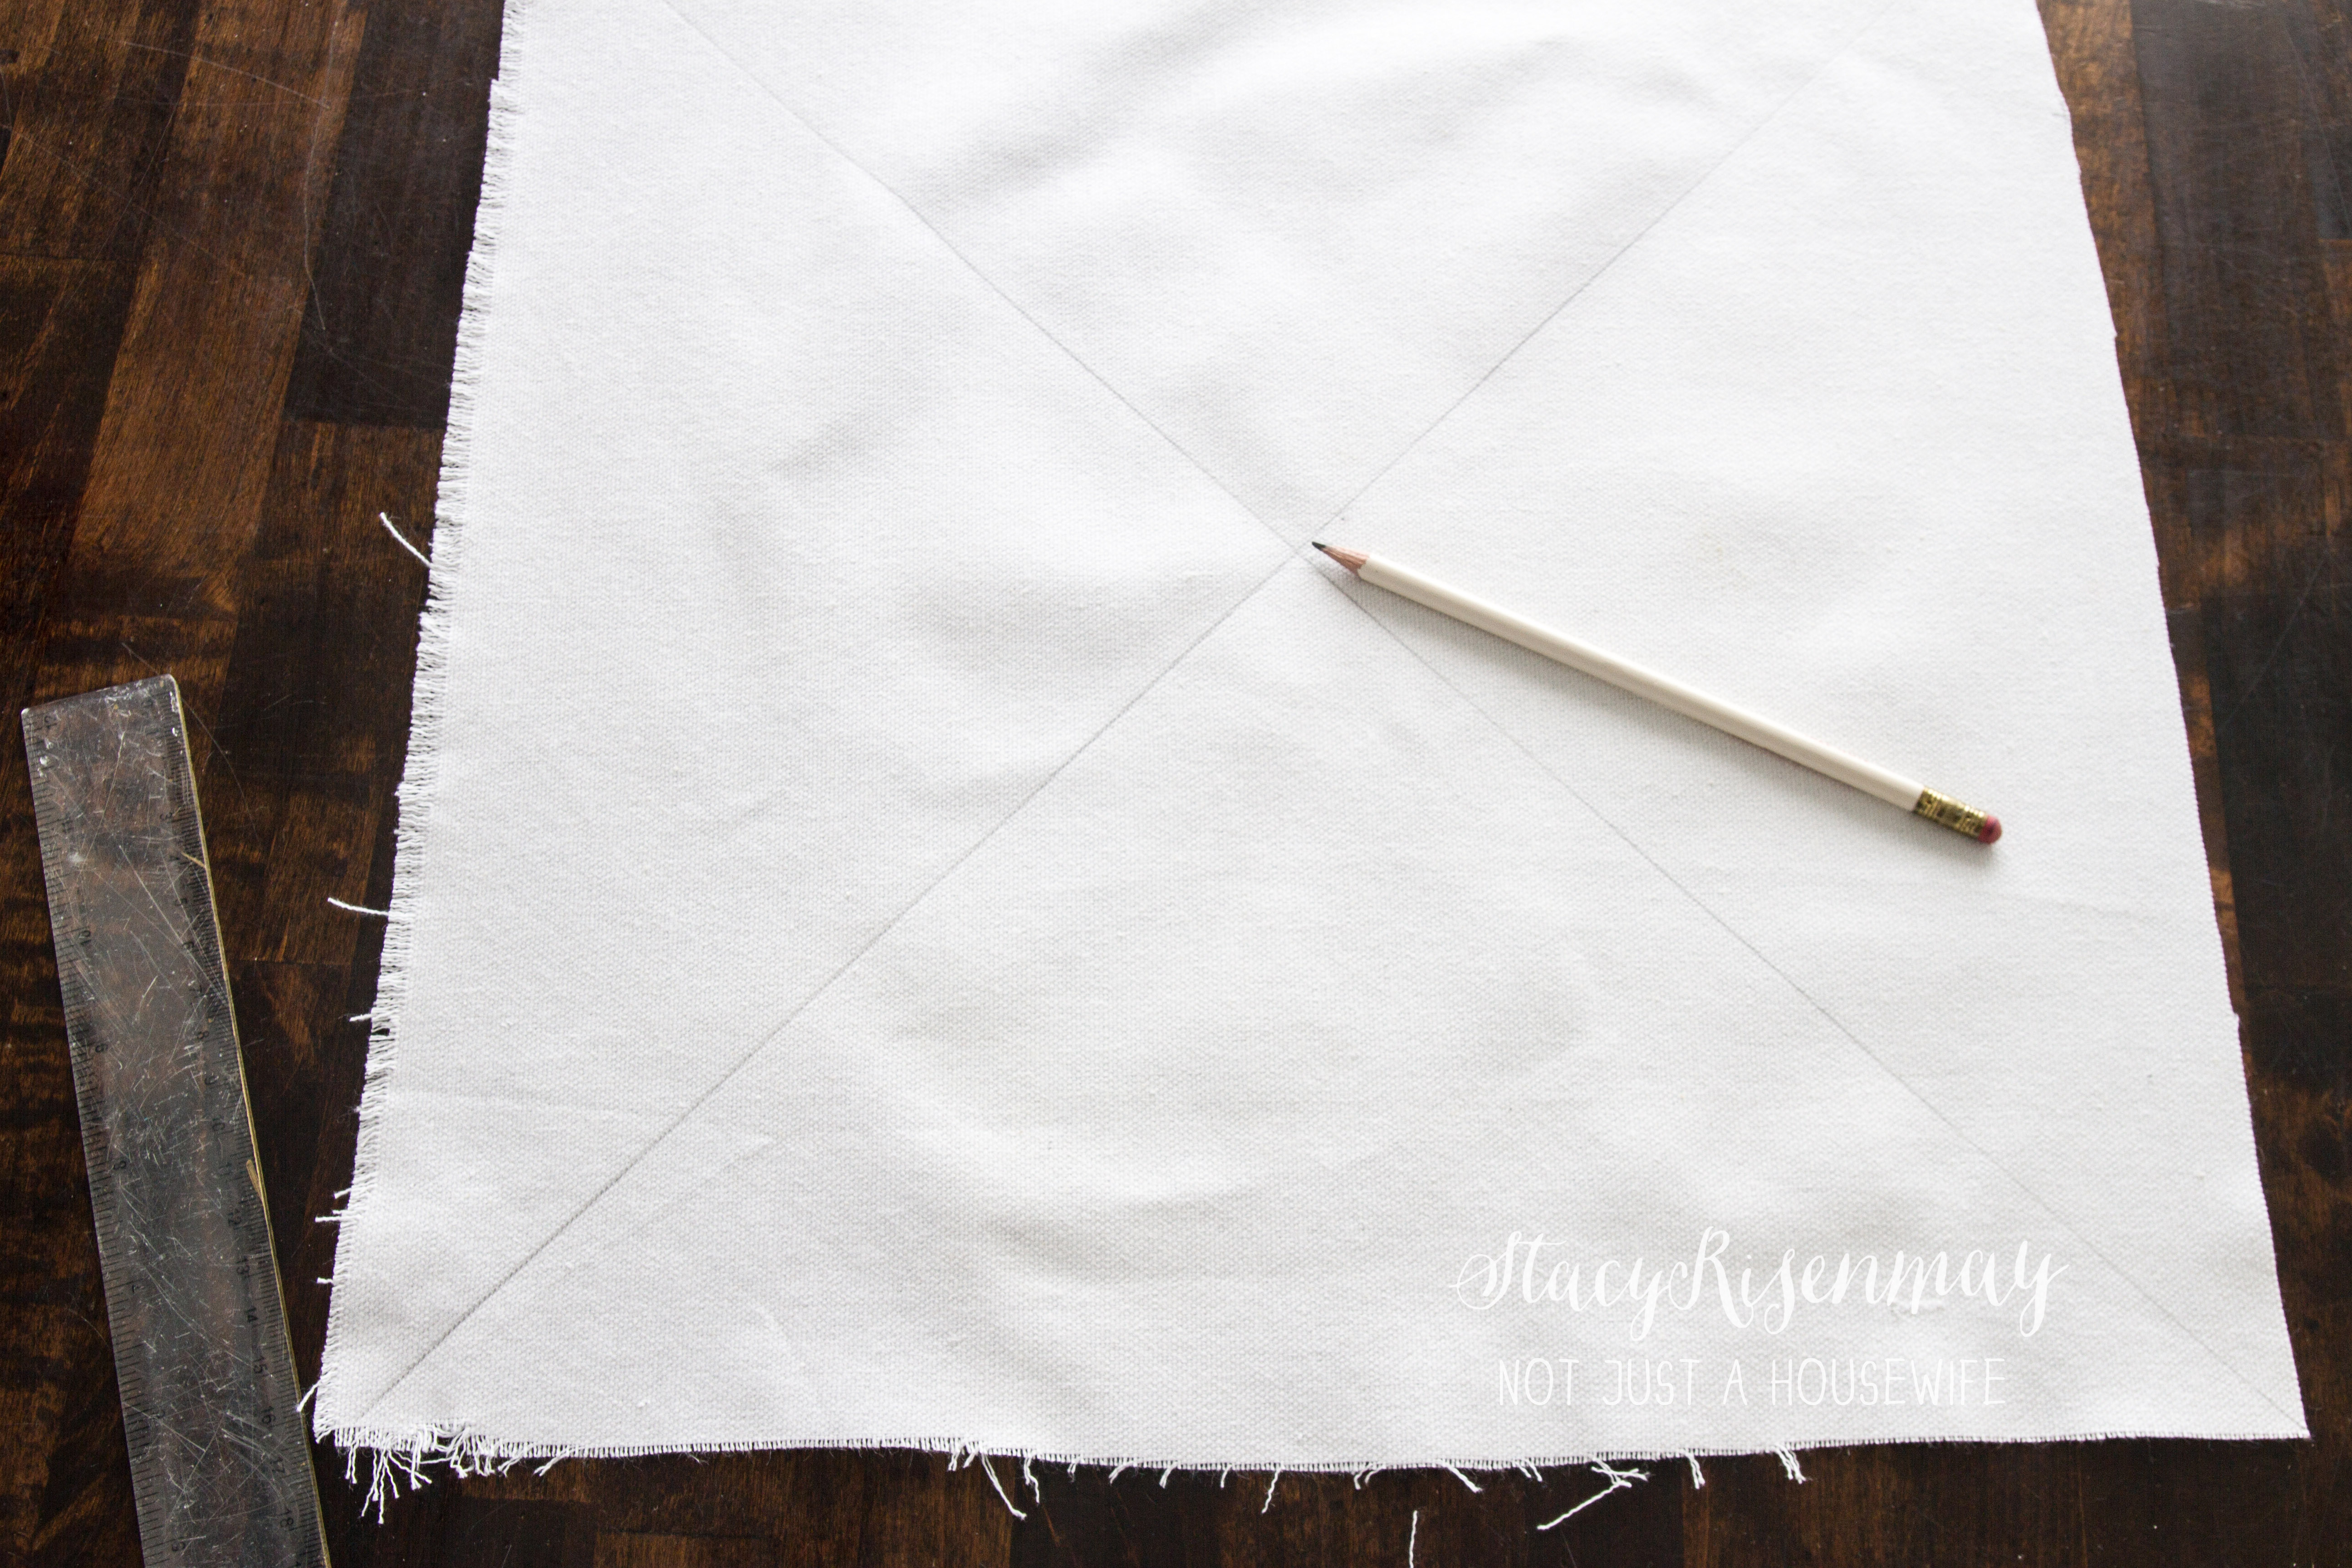
    Then draw additional diagonal lines to create your star burst pattern. You can measure and make them all even or intentionally make them all different sizes like mine.

    draw lines on fabric


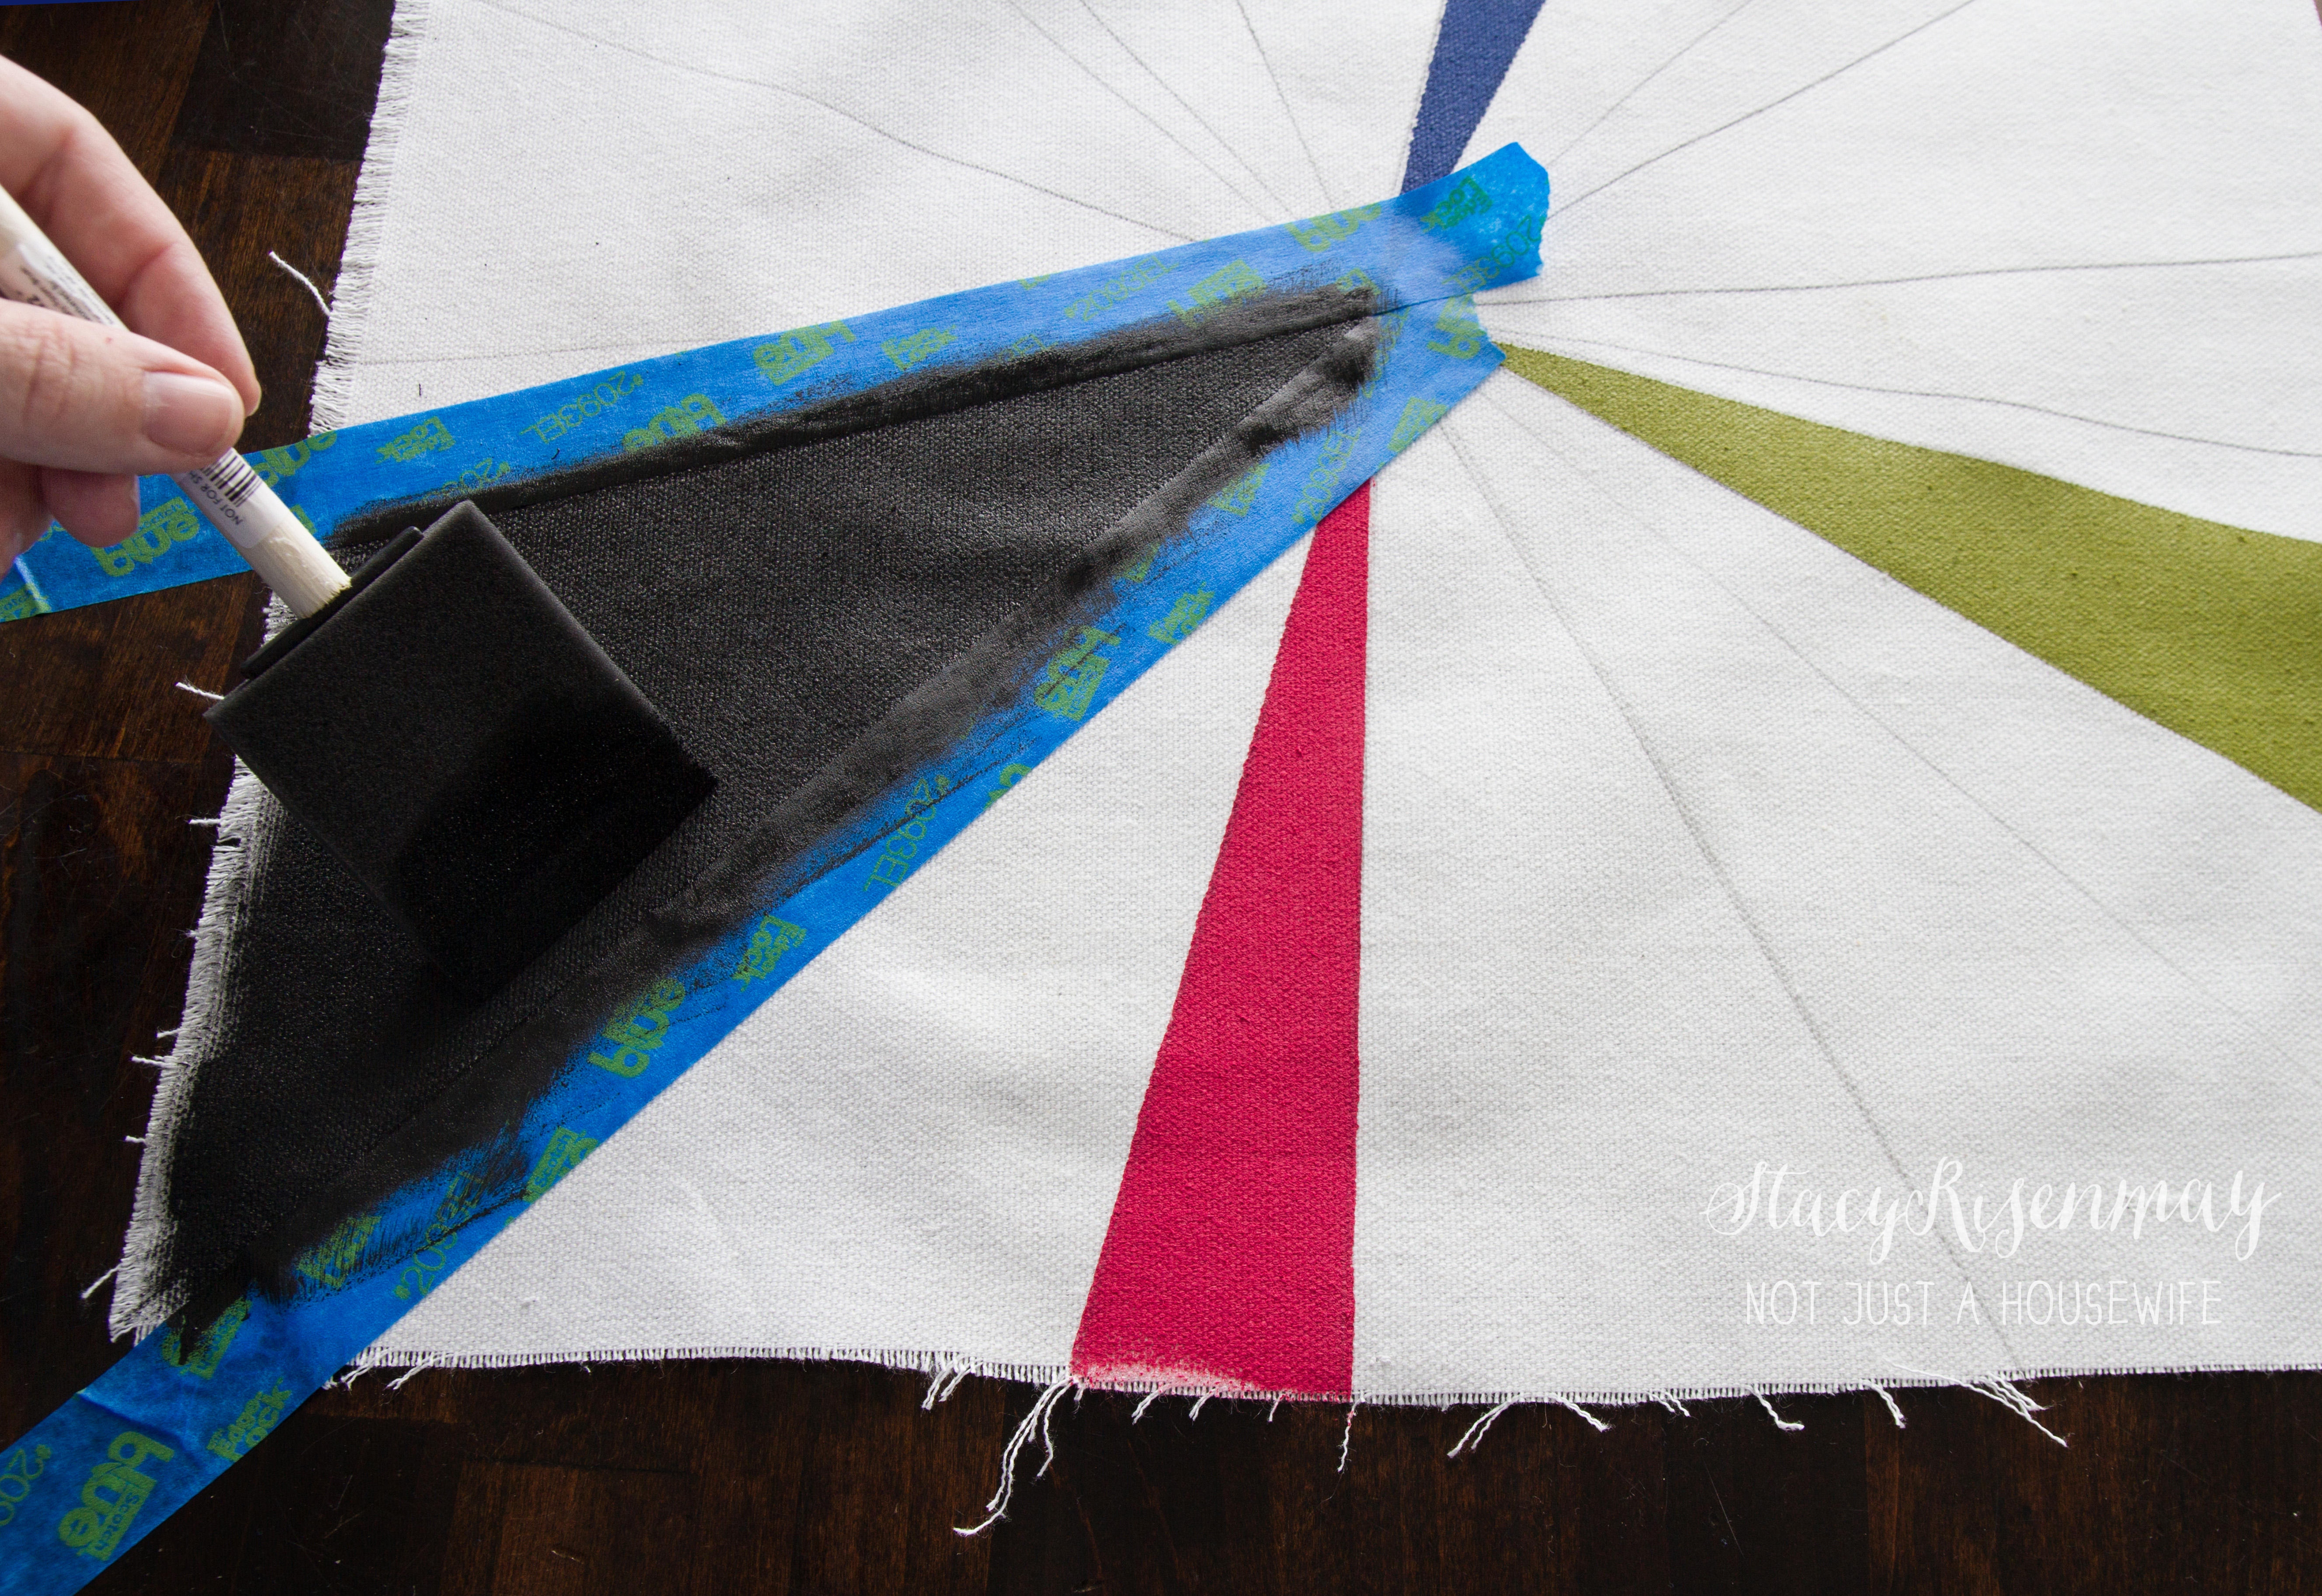
    Place the tape on the lines. Use a foam brush to apply the paint.

    use the foam brush to apply the paint


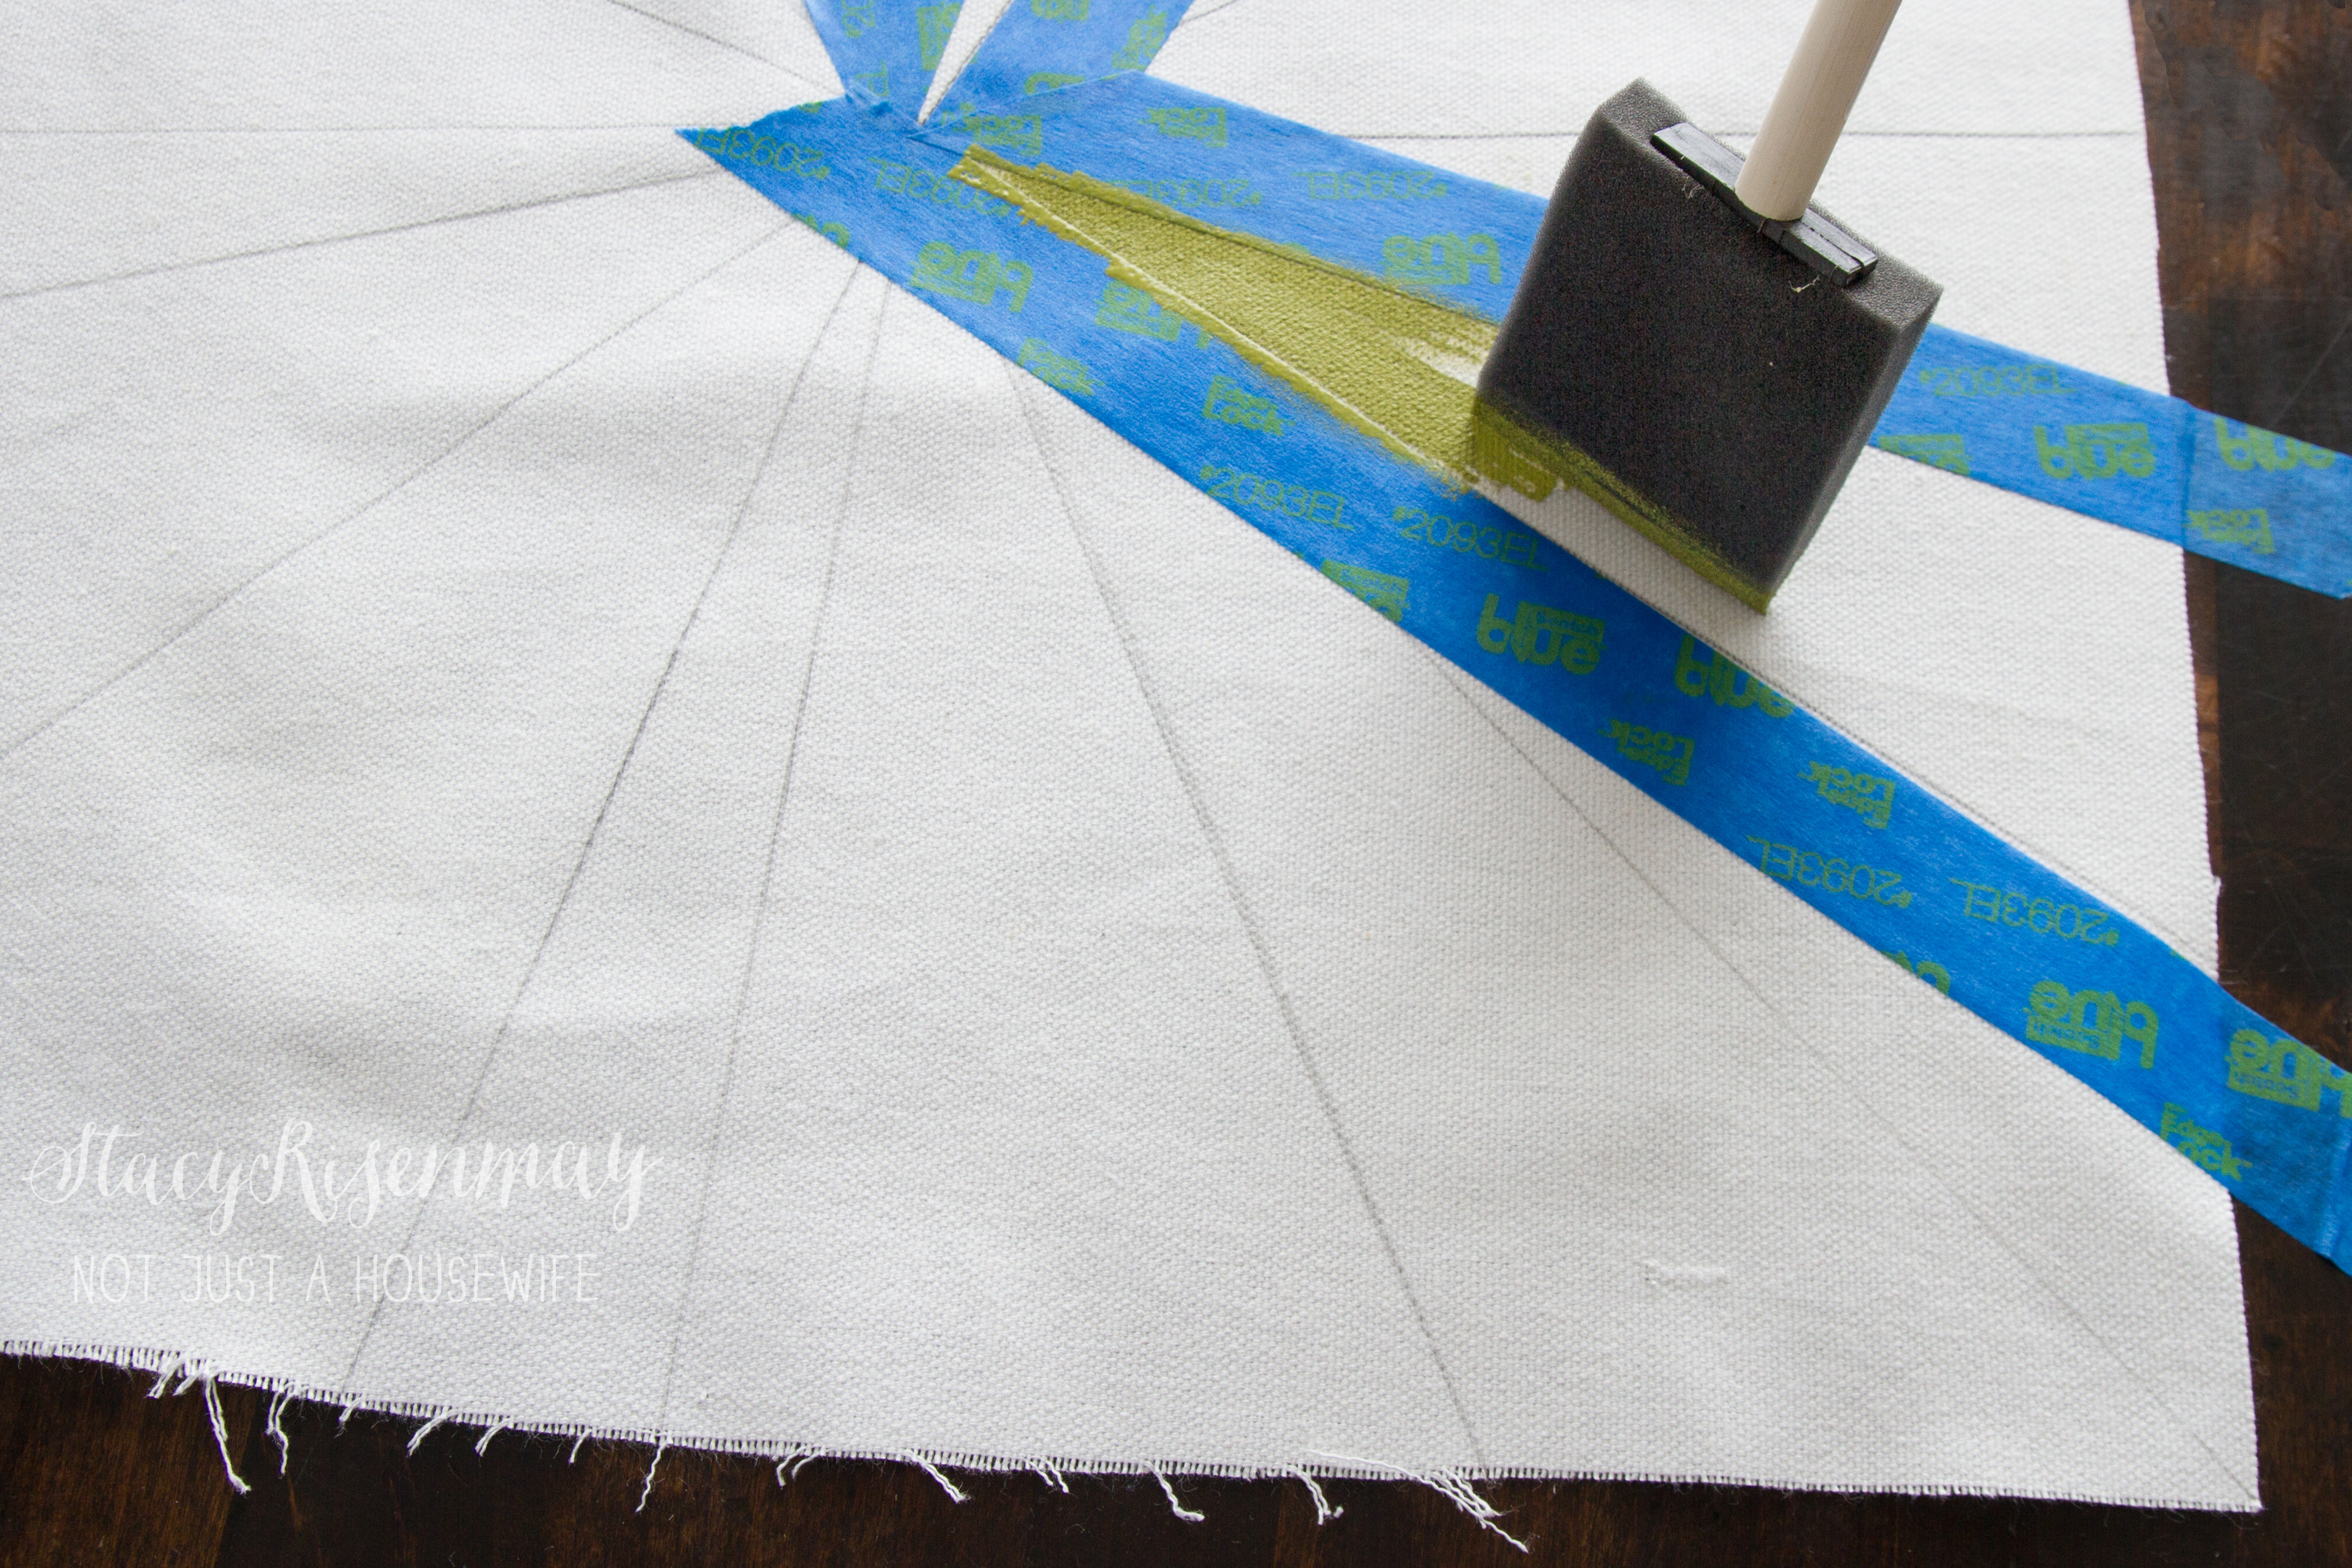
    Work the paint into the fabric by brushing back and forth.

    work the paint into the fabric


    Tip: Press your finger along the tape to make sure it has fully adhered to the fabric.

    press the tape down before painting


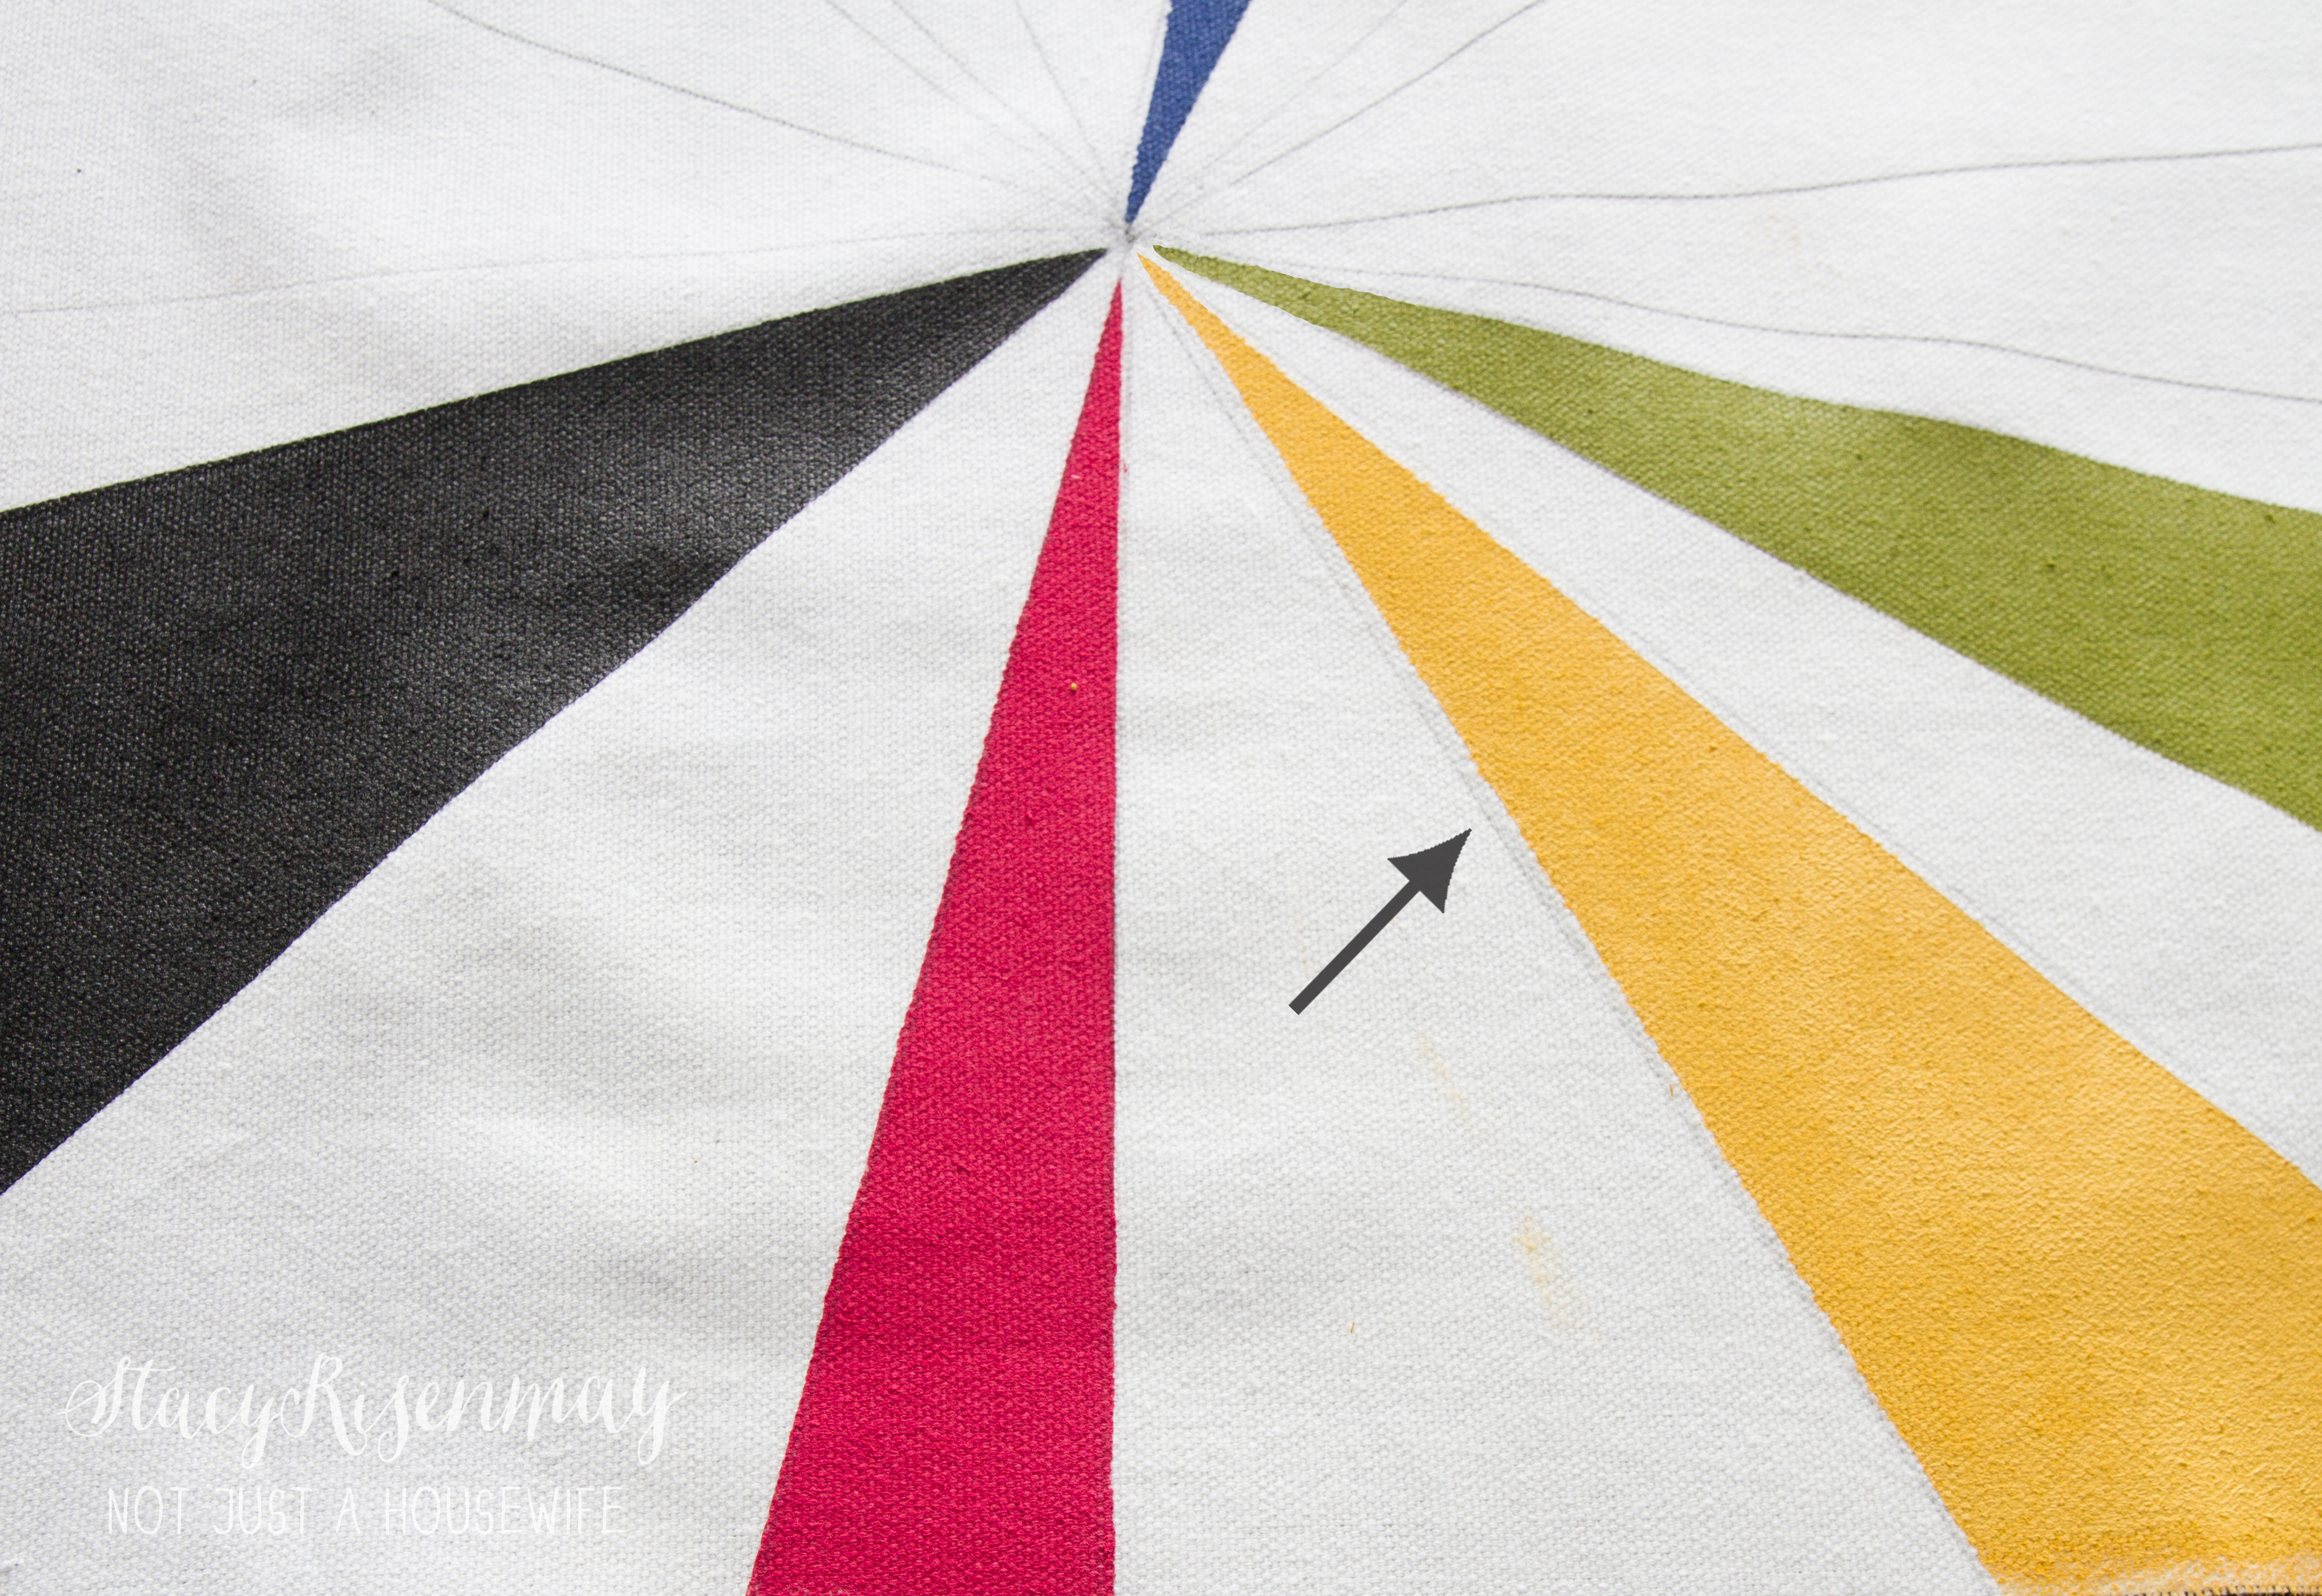
    For lighter paint colors, paint slightly inside the pencil lines to prevent the pencil lines from showing through the paint. Darker colors won’t have this problem.

    for light colors paint inside the lines


    Let the paint fully dry before sewing the pillow. Read the instructions on the fabric paint medium. Most will require you to heat set the paint with an iron. I iron the painted fabric before I sew it together.

    let dry before sewing


    Here is a quick video in case you want to see the technique I use to get the paint applied evenly.


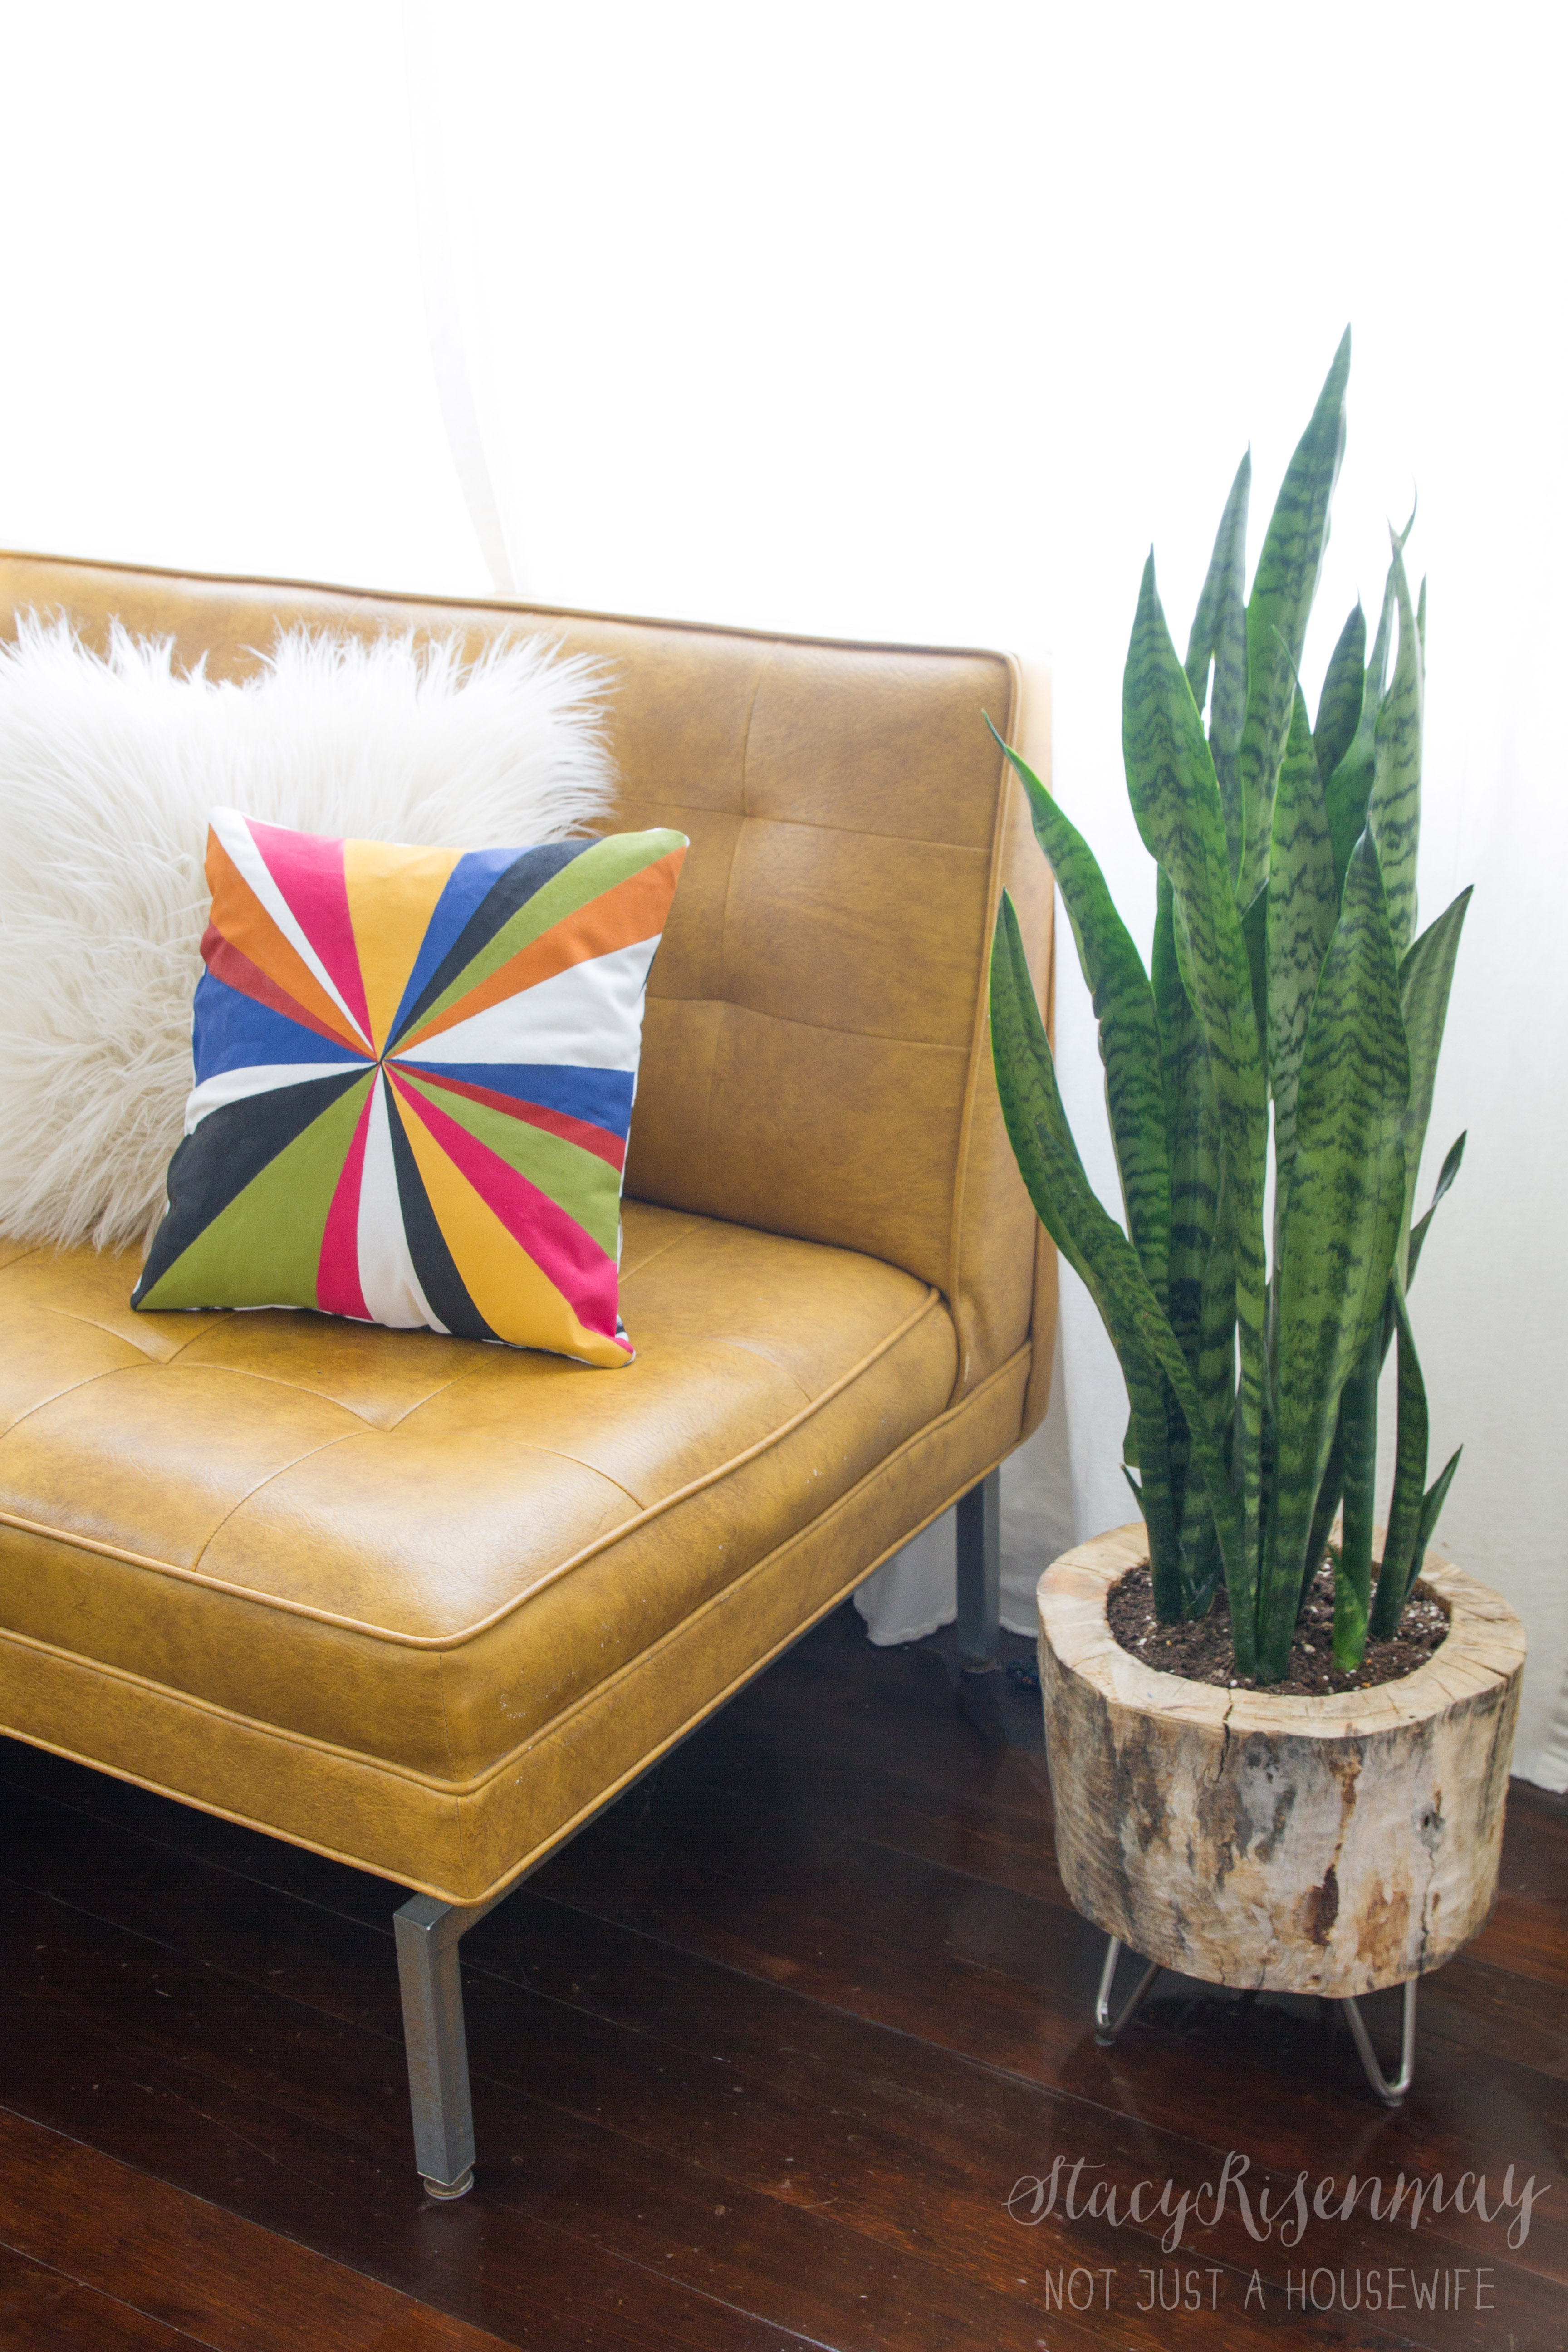
    I LOVE this pillow in all of its colorful glory! It's cheerful burst of color on my couch. And one of my favorite things about having a ton of throw pillows that are all different is that it can go anywhere in the room. When my boys tidy the family room they never put the pillows in the same place. When I had matching pillows that went in a "certain order" before, I always went and fixed the pillows. Now it doesn't matter because they look good no matter where they go.

    hand painted color burst pillow


    I have partnered with ScotchBlue™ to bring you projects this summer that have lots of fun patterns! It is going to be awesome :) I have been compensated for my time. The projects and opinions are all my own.

    You will also like:

    • Blueberry Yogurt BarsBlueberry Yogurt Bars
    • Reclaimed Wood DeskReclaimed Wood Desk
    • BIG NEWS! My Annual DIY CONTEST is Coming!BIG NEWS! My Annual DIY CONTEST is Coming!
    • Favorite Things 2014 editionFavorite Things 2014 edition
    • Re-purpose!Re-purpose!
    • PerspectivePerspective
    • Retexturing My Kitchen WallsRetexturing My Kitchen Walls
    • Citrus Hot DrinkCitrus Hot Drink

    « You're Invited....
    Super Easy Pizza Dough! »

    Filed Under: DIY & Tutorials, Painted Fabric, Painting 15 Comments

    Subscribe

    for your weekly DIY fix.

    Reader Interactions

    Comments

    1. Ashley @ Cherished Bliss

      June 22, 2015 at 7:27 am

      Seriously love how these turned out Stacy! So bright and happy! : )

      Reply
    2. Malia

      June 22, 2015 at 7:32 am

      Wow what nice, clean lines... lovely!

      Reply
    3. Laura

      June 22, 2015 at 8:46 am

      Love the pillow! It is so bright and fun! Such a great idea to use paint so you can get the exact pattern you want.

      Reply
    4. Natalie Dixon

      June 22, 2015 at 10:04 am

      I love it! Never would have guessed you could get lines that crisp on fabric with tape!

      Reply
    5. Ursula

      June 22, 2015 at 11:38 am

      Oh my goodness, this is gorgeous! Pinned here ;)

      https://www.pinterest.com/pin/229120699769318620/

      Ursula

      Reply
    6. linda(burlap+blue)

      June 22, 2015 at 12:17 pm

      This is amazing! Such a cute pillow!

      Reply
    7. Mary Beth|Cupcakes and Crinoline

      June 22, 2015 at 3:40 pm

      So pretty and colorful!

      Reply
    8. LUCY

      June 23, 2015 at 9:13 am

      This is crazy cool...love it! Love the video too..xo

      Reply
    9. Shannon

      June 23, 2015 at 9:16 am

      This is so creative and colourful! And a little awesome retro too!

      Reply
    10. amy @ one artsy mama

      June 23, 2015 at 9:25 am

      I LOVE that pillow! So colorful and fun, and matches everything!

      Reply
    11. Katie {Sweet Rose Studio}

      June 23, 2015 at 10:28 am

      Holy cow Stacy! That pillow is amazing and you can't even tell it was painted!

      Reply
    12. Virginia Fynes

      June 23, 2015 at 11:50 am

      I can't believe that was handmade, the lines are so crisp! Definitely bright and cheery!

      Reply
    13. Ashley @ Simply Designing

      June 23, 2015 at 5:59 pm

      Aw I love this pillow!

      Reply
    14. Barb

      July 16, 2015 at 10:37 am

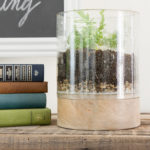
      I love the pillow but also LOVE the planter. Did you make the planter too? If so, how did you do it?

      Reply

    Trackbacks

    1. Malaise Blog says:
      August 24, 2016 at 12:21 pm

      Let Your Decor Burst

      [...] fixing up our tiny 1938 cottage. Whether it is big or small, I think everyone s [...]

      Reply

    Comment Below! Cancel reply

    Your email address will not be published. Required fields are marked *

    This site uses Akismet to reduce spam. Learn how your comment data is processed.

    Primary Sidebar

    stacyHey! I'm Stacy and am a DIY addict. I love to get my hands dirty, whether it's sawdust, paint, or dirt. My goal is to help YOU learn to fix up your home and yard. No matter the style or size, I think everyone should love their home. And it doesn't takes a big budget to get there. Let's DIY together!

    Subscribe to My Blog!

    Search this site

    categories


    Subscribe

    Footer

    Welcome! I'm sharing our adventures as we fix up our 1938 cottage. Whether it is big or small, I think everyone should love their home and I don't think it takes a lot of money to make a space your own

    About Stacy

    • Facebook
    • Instagram
    • Pinterest
    • Twitter

    My Favorites

    copyright

    All images and content are copyrighted via Stacy Risenmay unless otherwise stated. If you'd like to share my work, please link back to this blog.
    Thank you for visiting!


    Footer

    ↑ back to top

    About

    • Meet Stacy
    • Privacy Policy
    • Contact

    Categories 

    • Home Decor
    • Outdoor Projects & Gardening
    • DIY & Tutorials
    • Kid Activities
    • Recipes
    • Travel
    • Cleaning
    • Houseplants
    • Staining
    • Painting
    • Power Tools
    • Holiday Ideas

    Newsletter

    • Sign Up! for emails and updates

    As an Amazon Associate I earn from qualifying purchases.

    Copyright © 2020 Brunch Pro on the Brunch Pro Theme


    Privacy Policy
    Welcome! Thanks for visiting.
    Hi! I'm Stacy and I want to help YOU become a DIY rockstar! Sign up for my email list so each project, tip, and trick will go directly to your inbox :)
    Your information will *never* be shared or sold to a 3rd party. Pinky promise :)
    Welcome!
    Hi! I'm Stacy and I blog about fixing up our 1938 cottage. Join the thousand of others who get my posts sent to their inbox for FREE!
    Your information will *never* be shared or sold to a 3rd party.