
I am so excited to share my Christmas tablescape with you and show you how I made some inexpensive candlesticks that look like a million bucks! I know things have been a little sleepy over here but whenever that happens you can be certain I am working like a maniac behind the scenes. Not only have I been working on a new blog design but I have been decorating my whole house for Christmas. Most of the things I made so it wasn't just a matter of unpacking.
I did my first tablescapes last year and I kind of fell in love with the whole process. I was thinking of ways I could change it up this year without breaking the bank. I remembered a candlestick I had made when my husband and I were newly weds. I only made one and when we moved to Utah, it got lost.
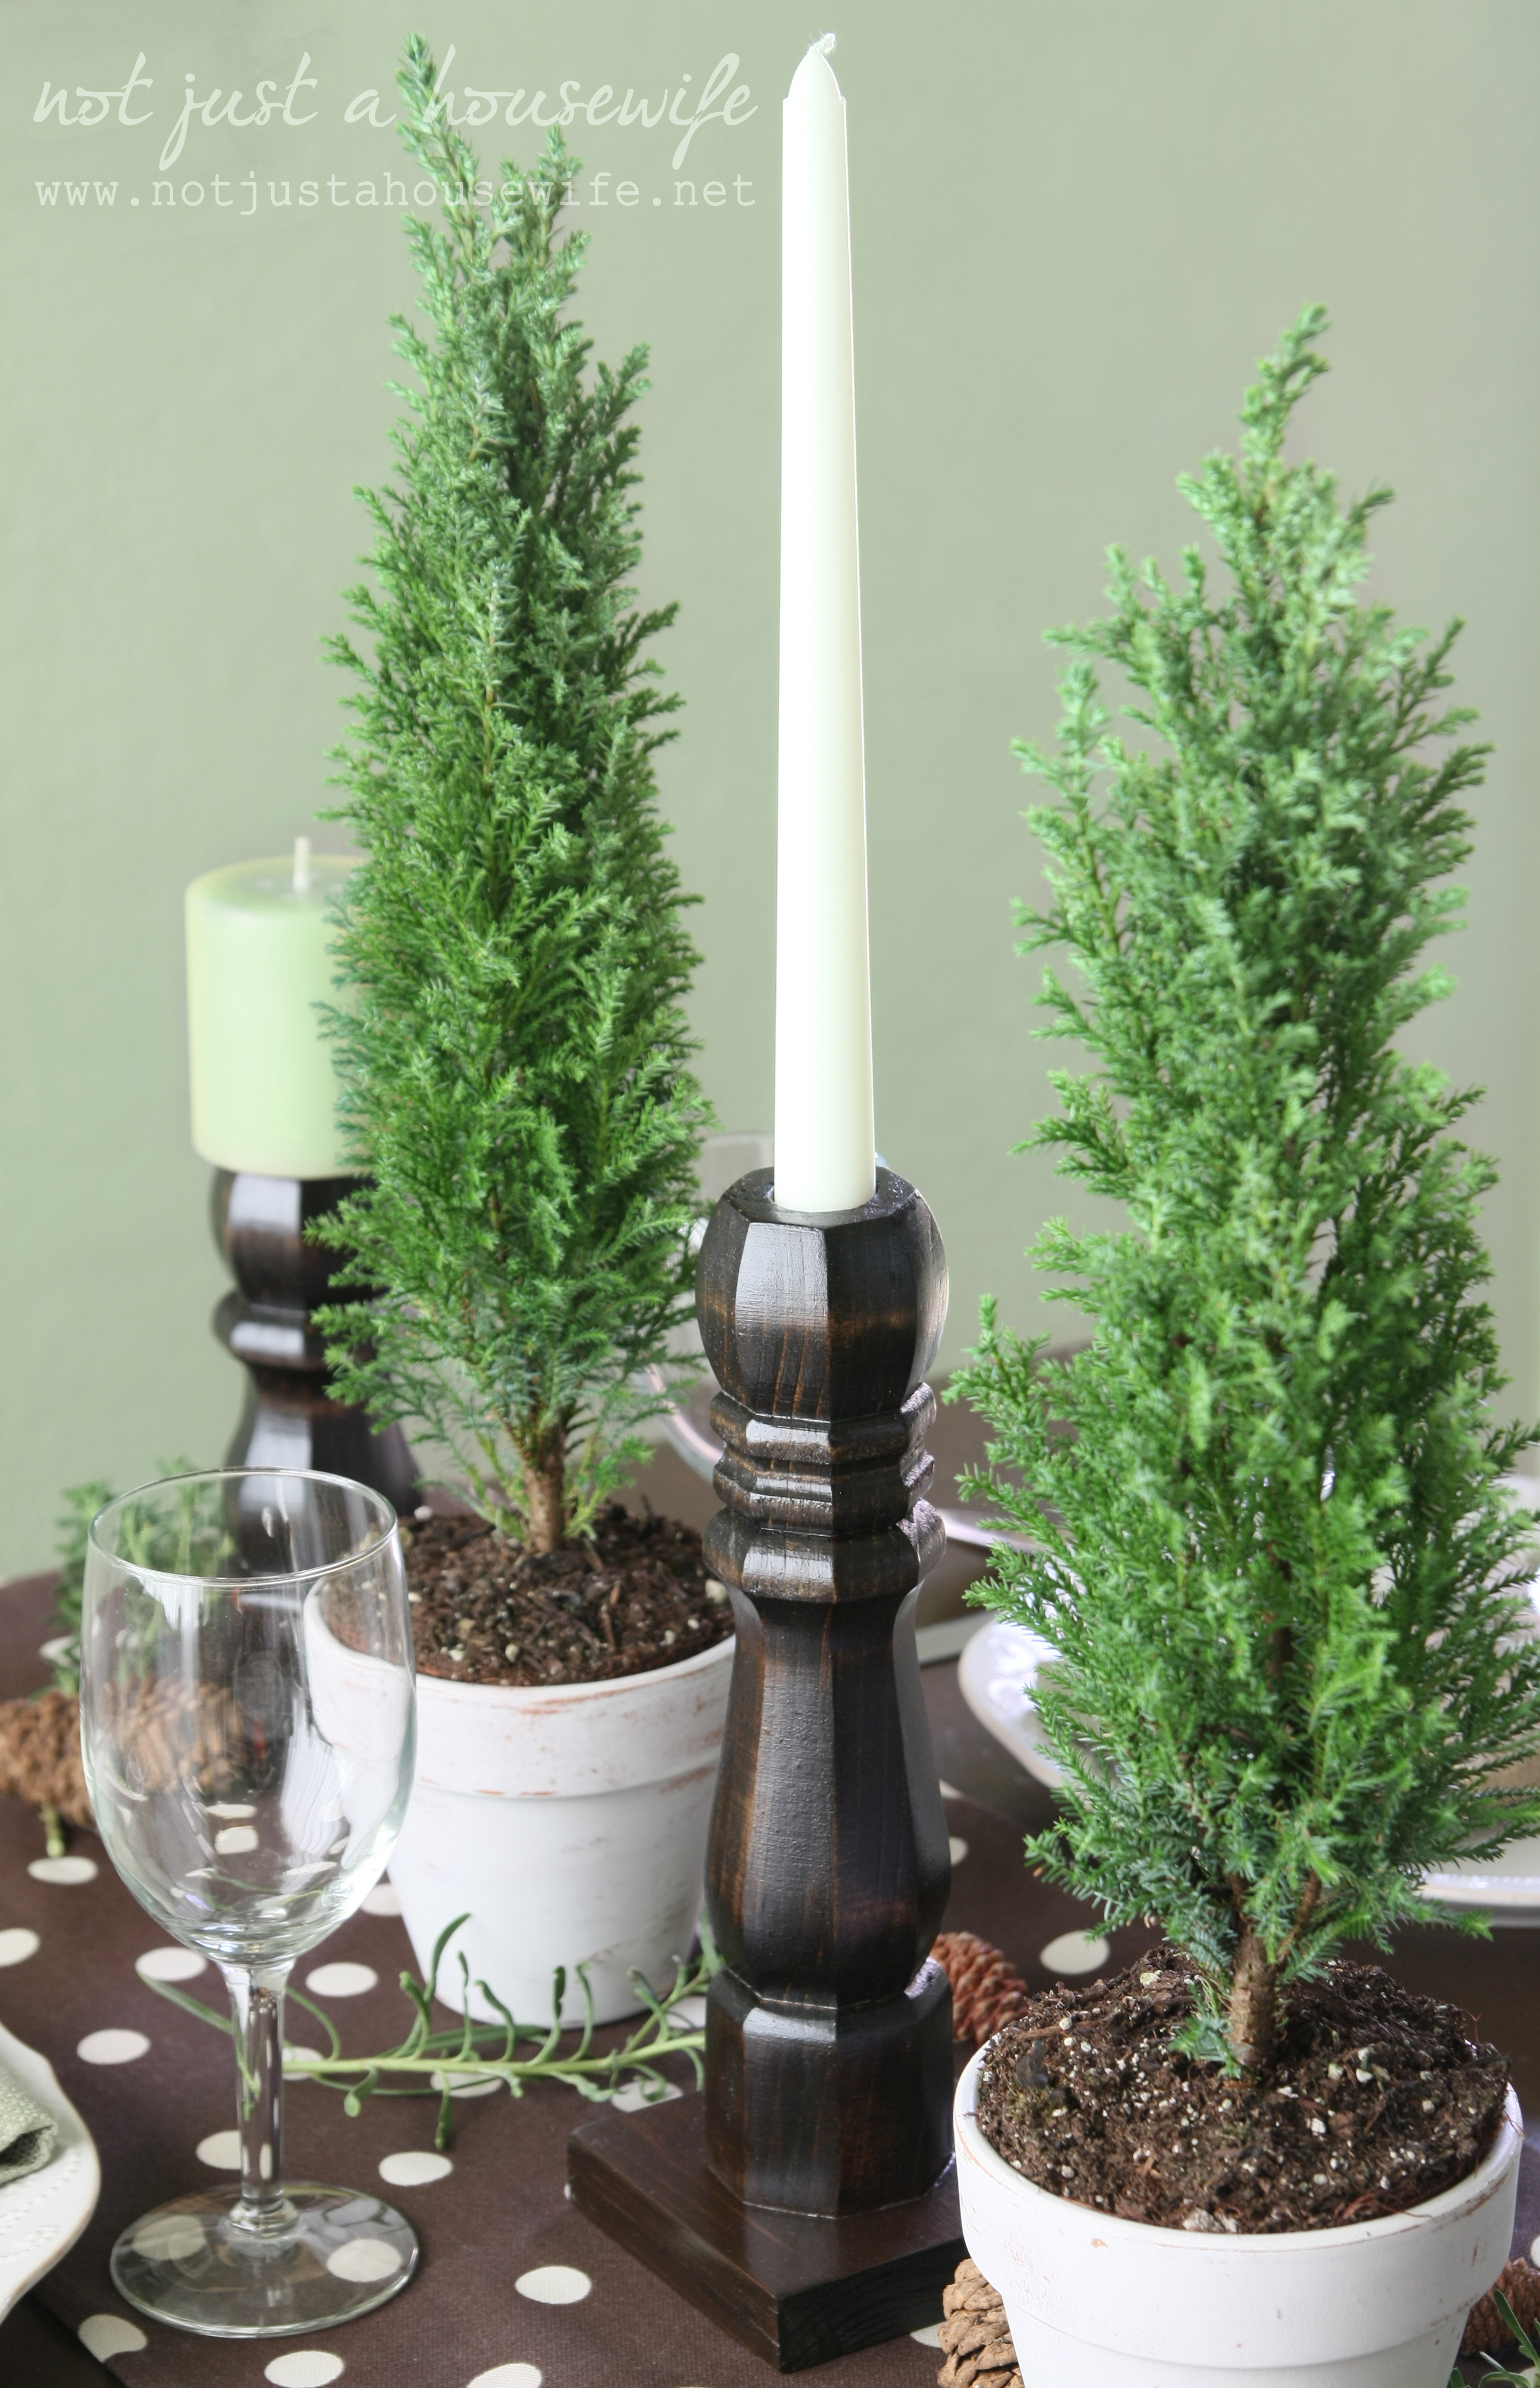
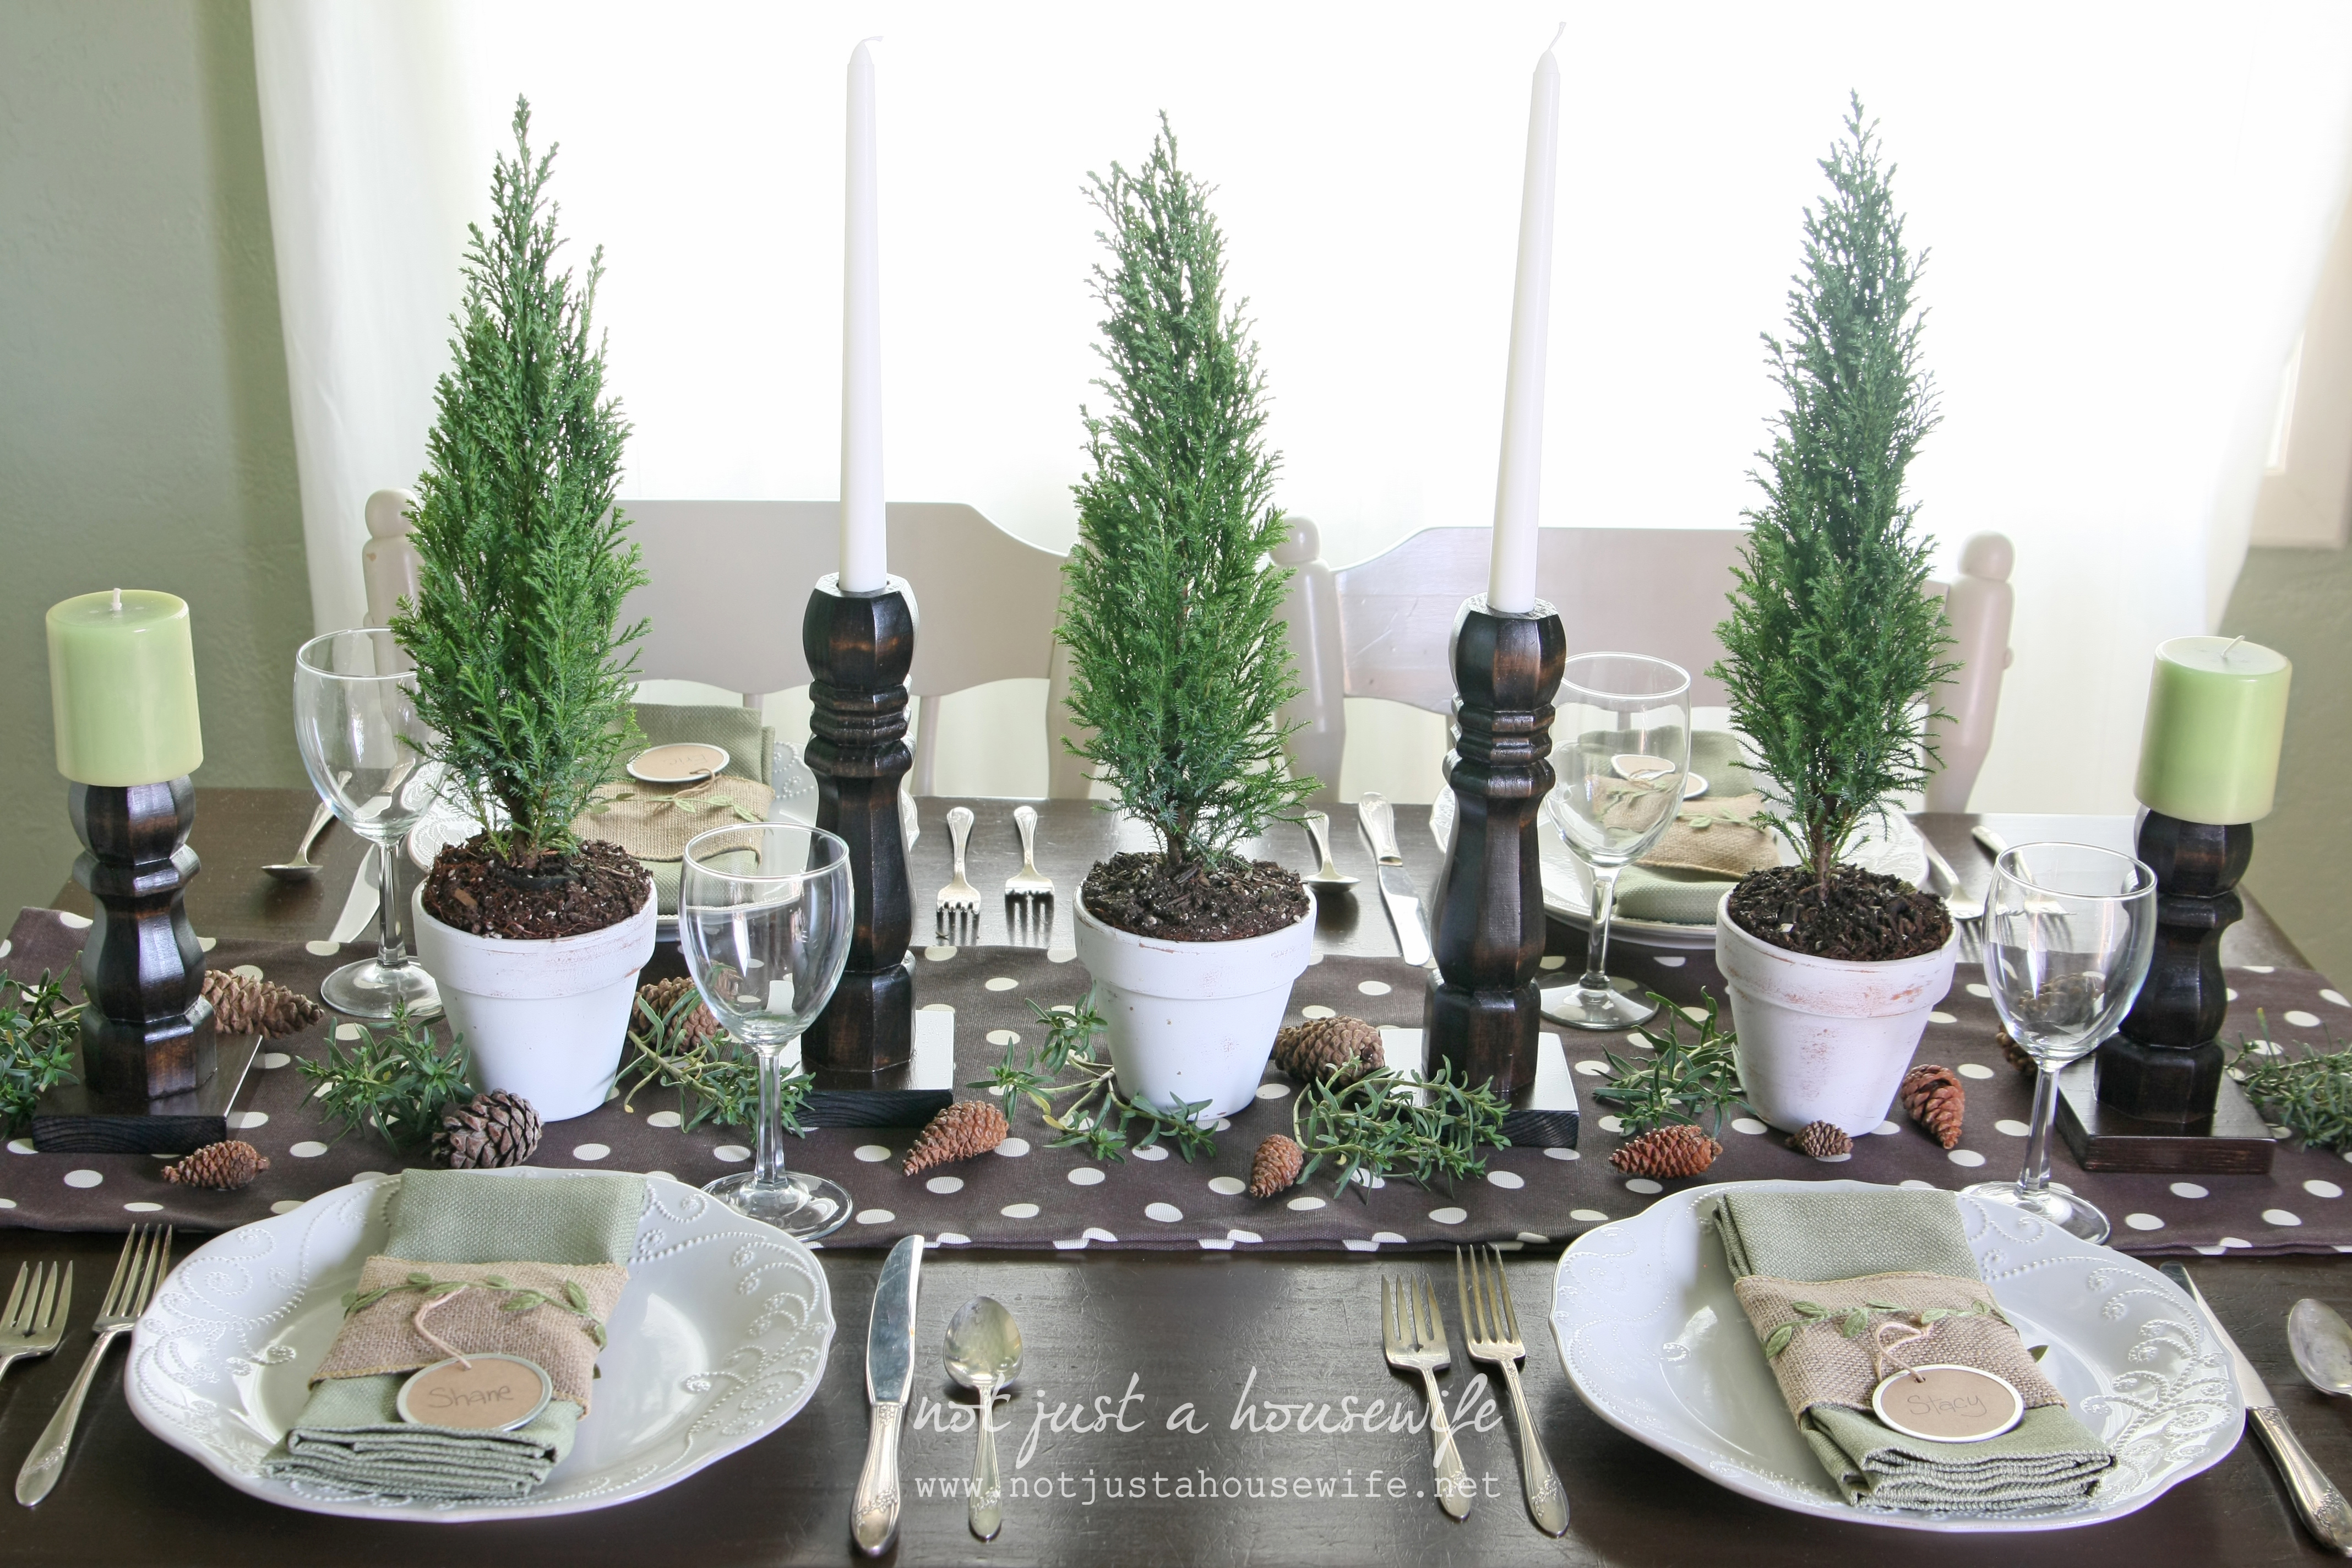
I knew they were inexpensive to make so I decided to make several for my table. I added some fabric that was left over from making curtains, some darling live trees from Home Depot, and touches of nature courtesy of my backyard.
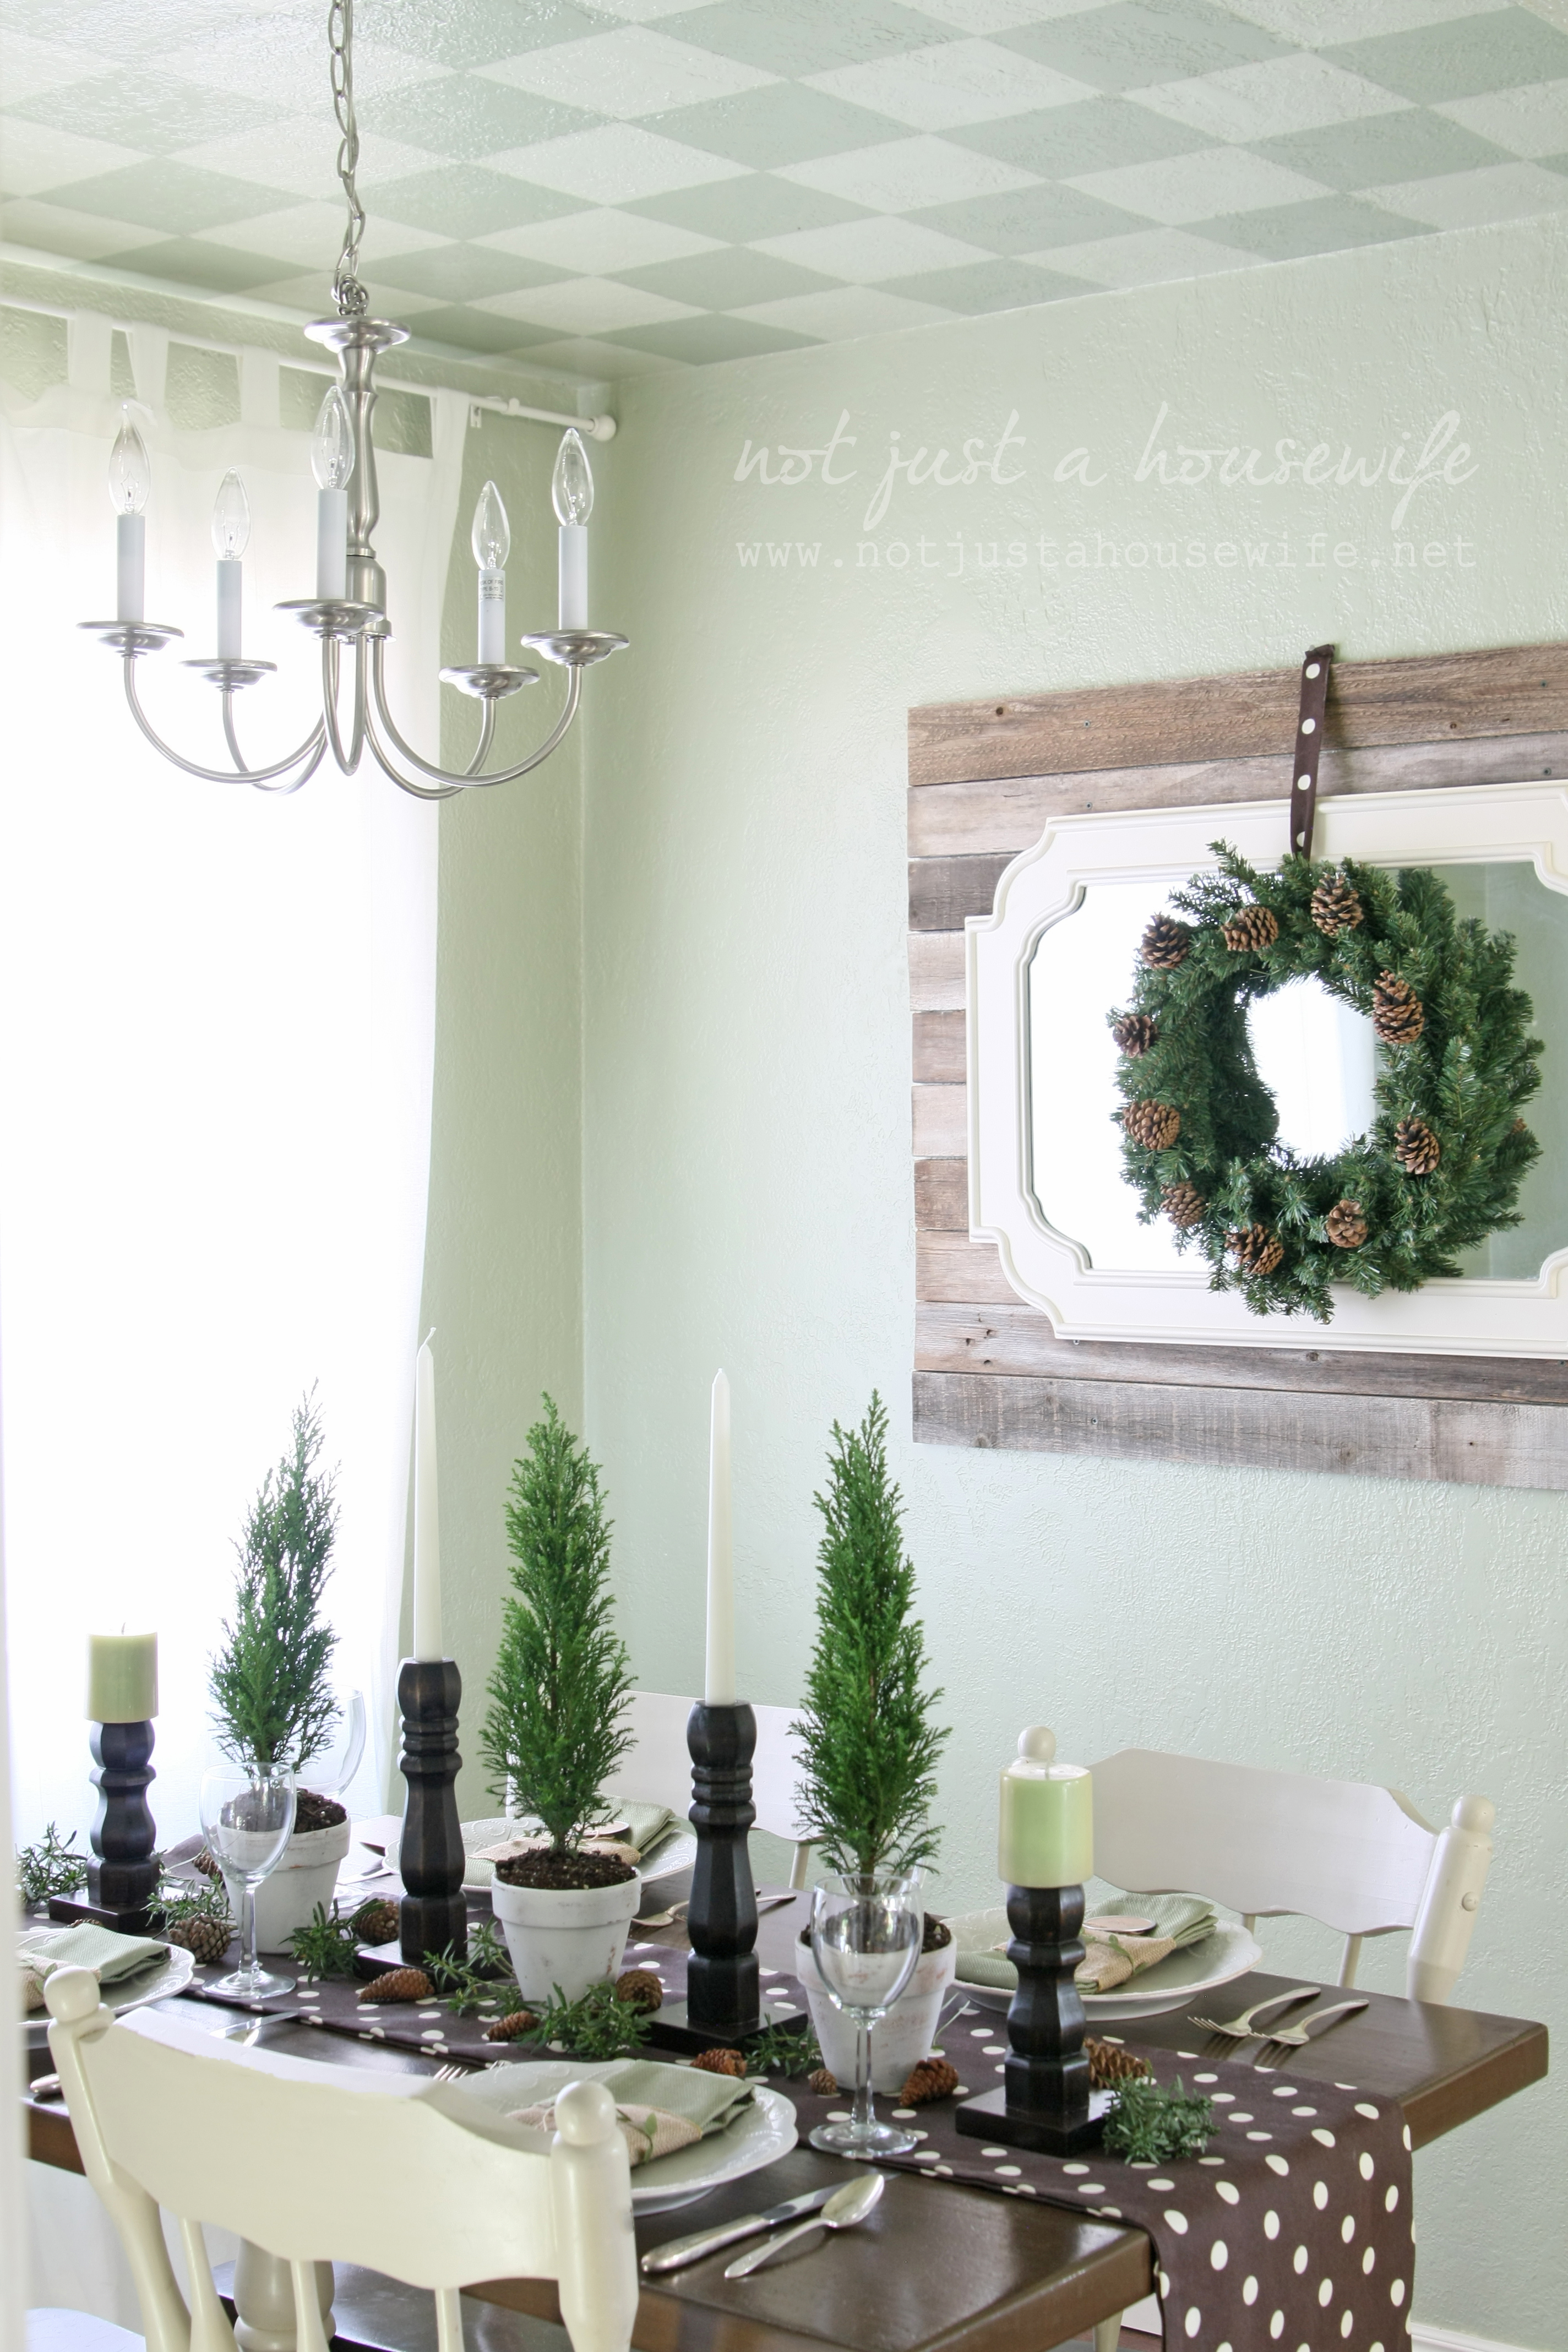
I love the different shades of green!
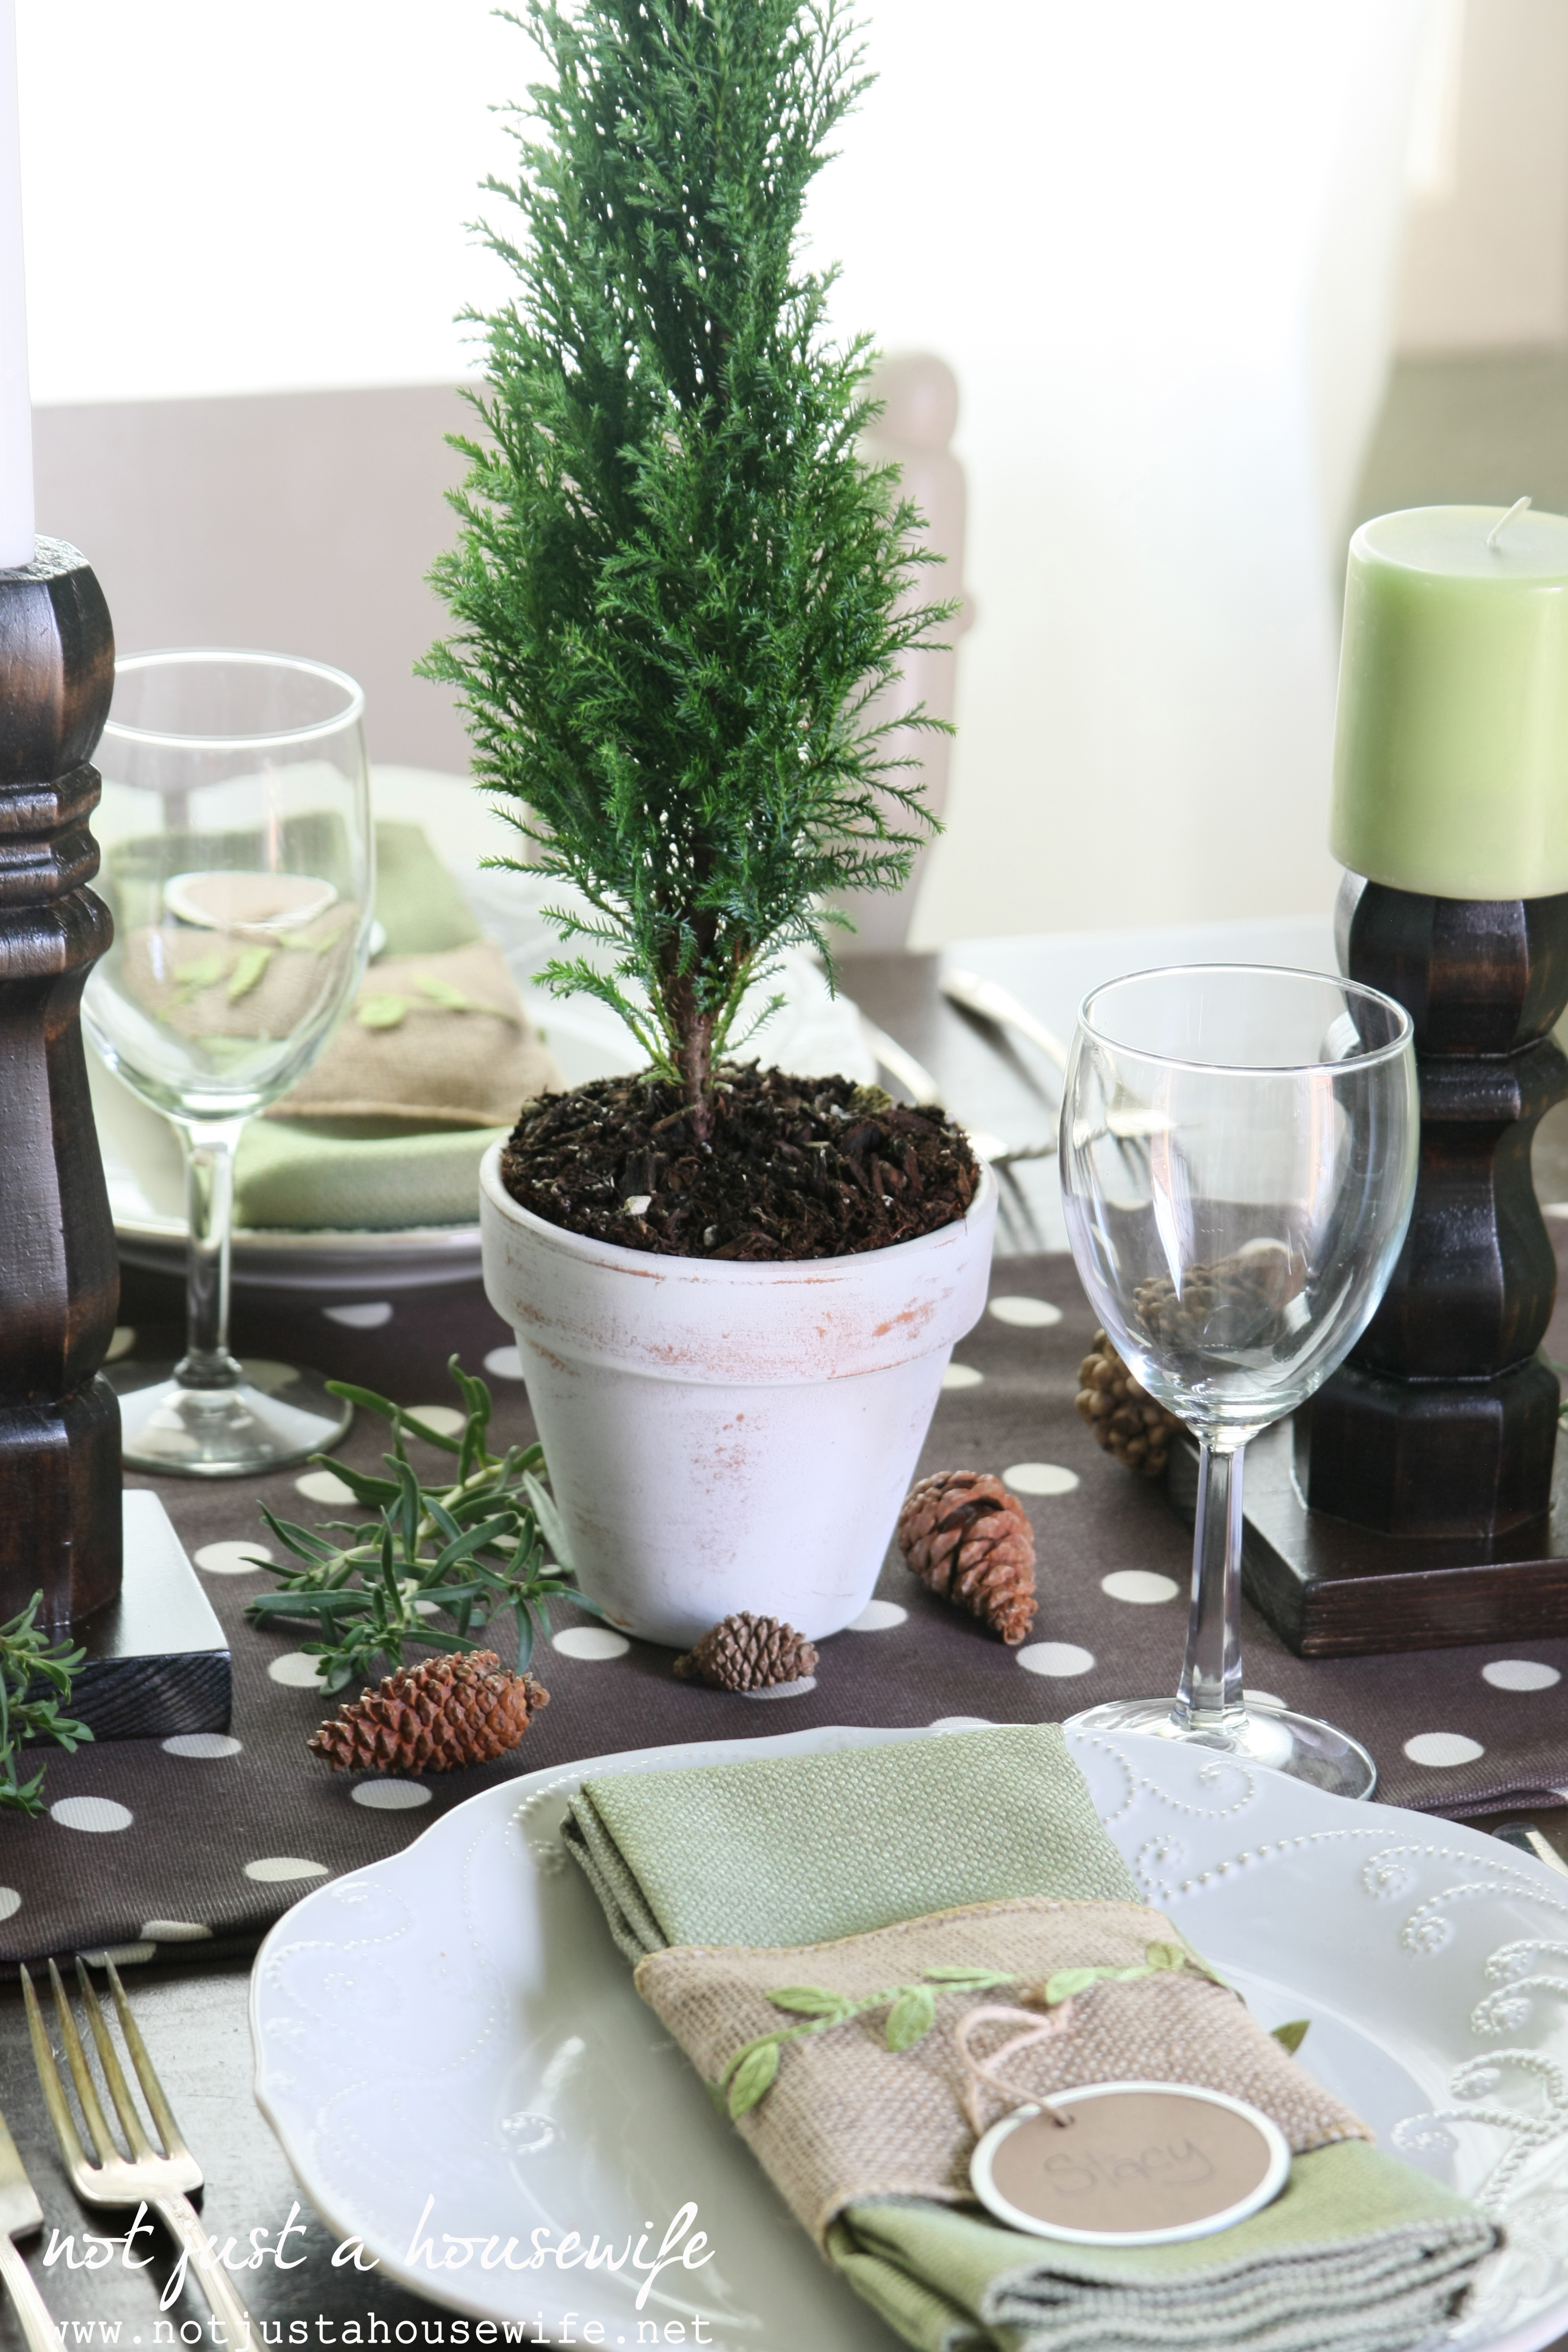
I love mixing different types of candles together. The height, color, and thickness differences make them more interesting.
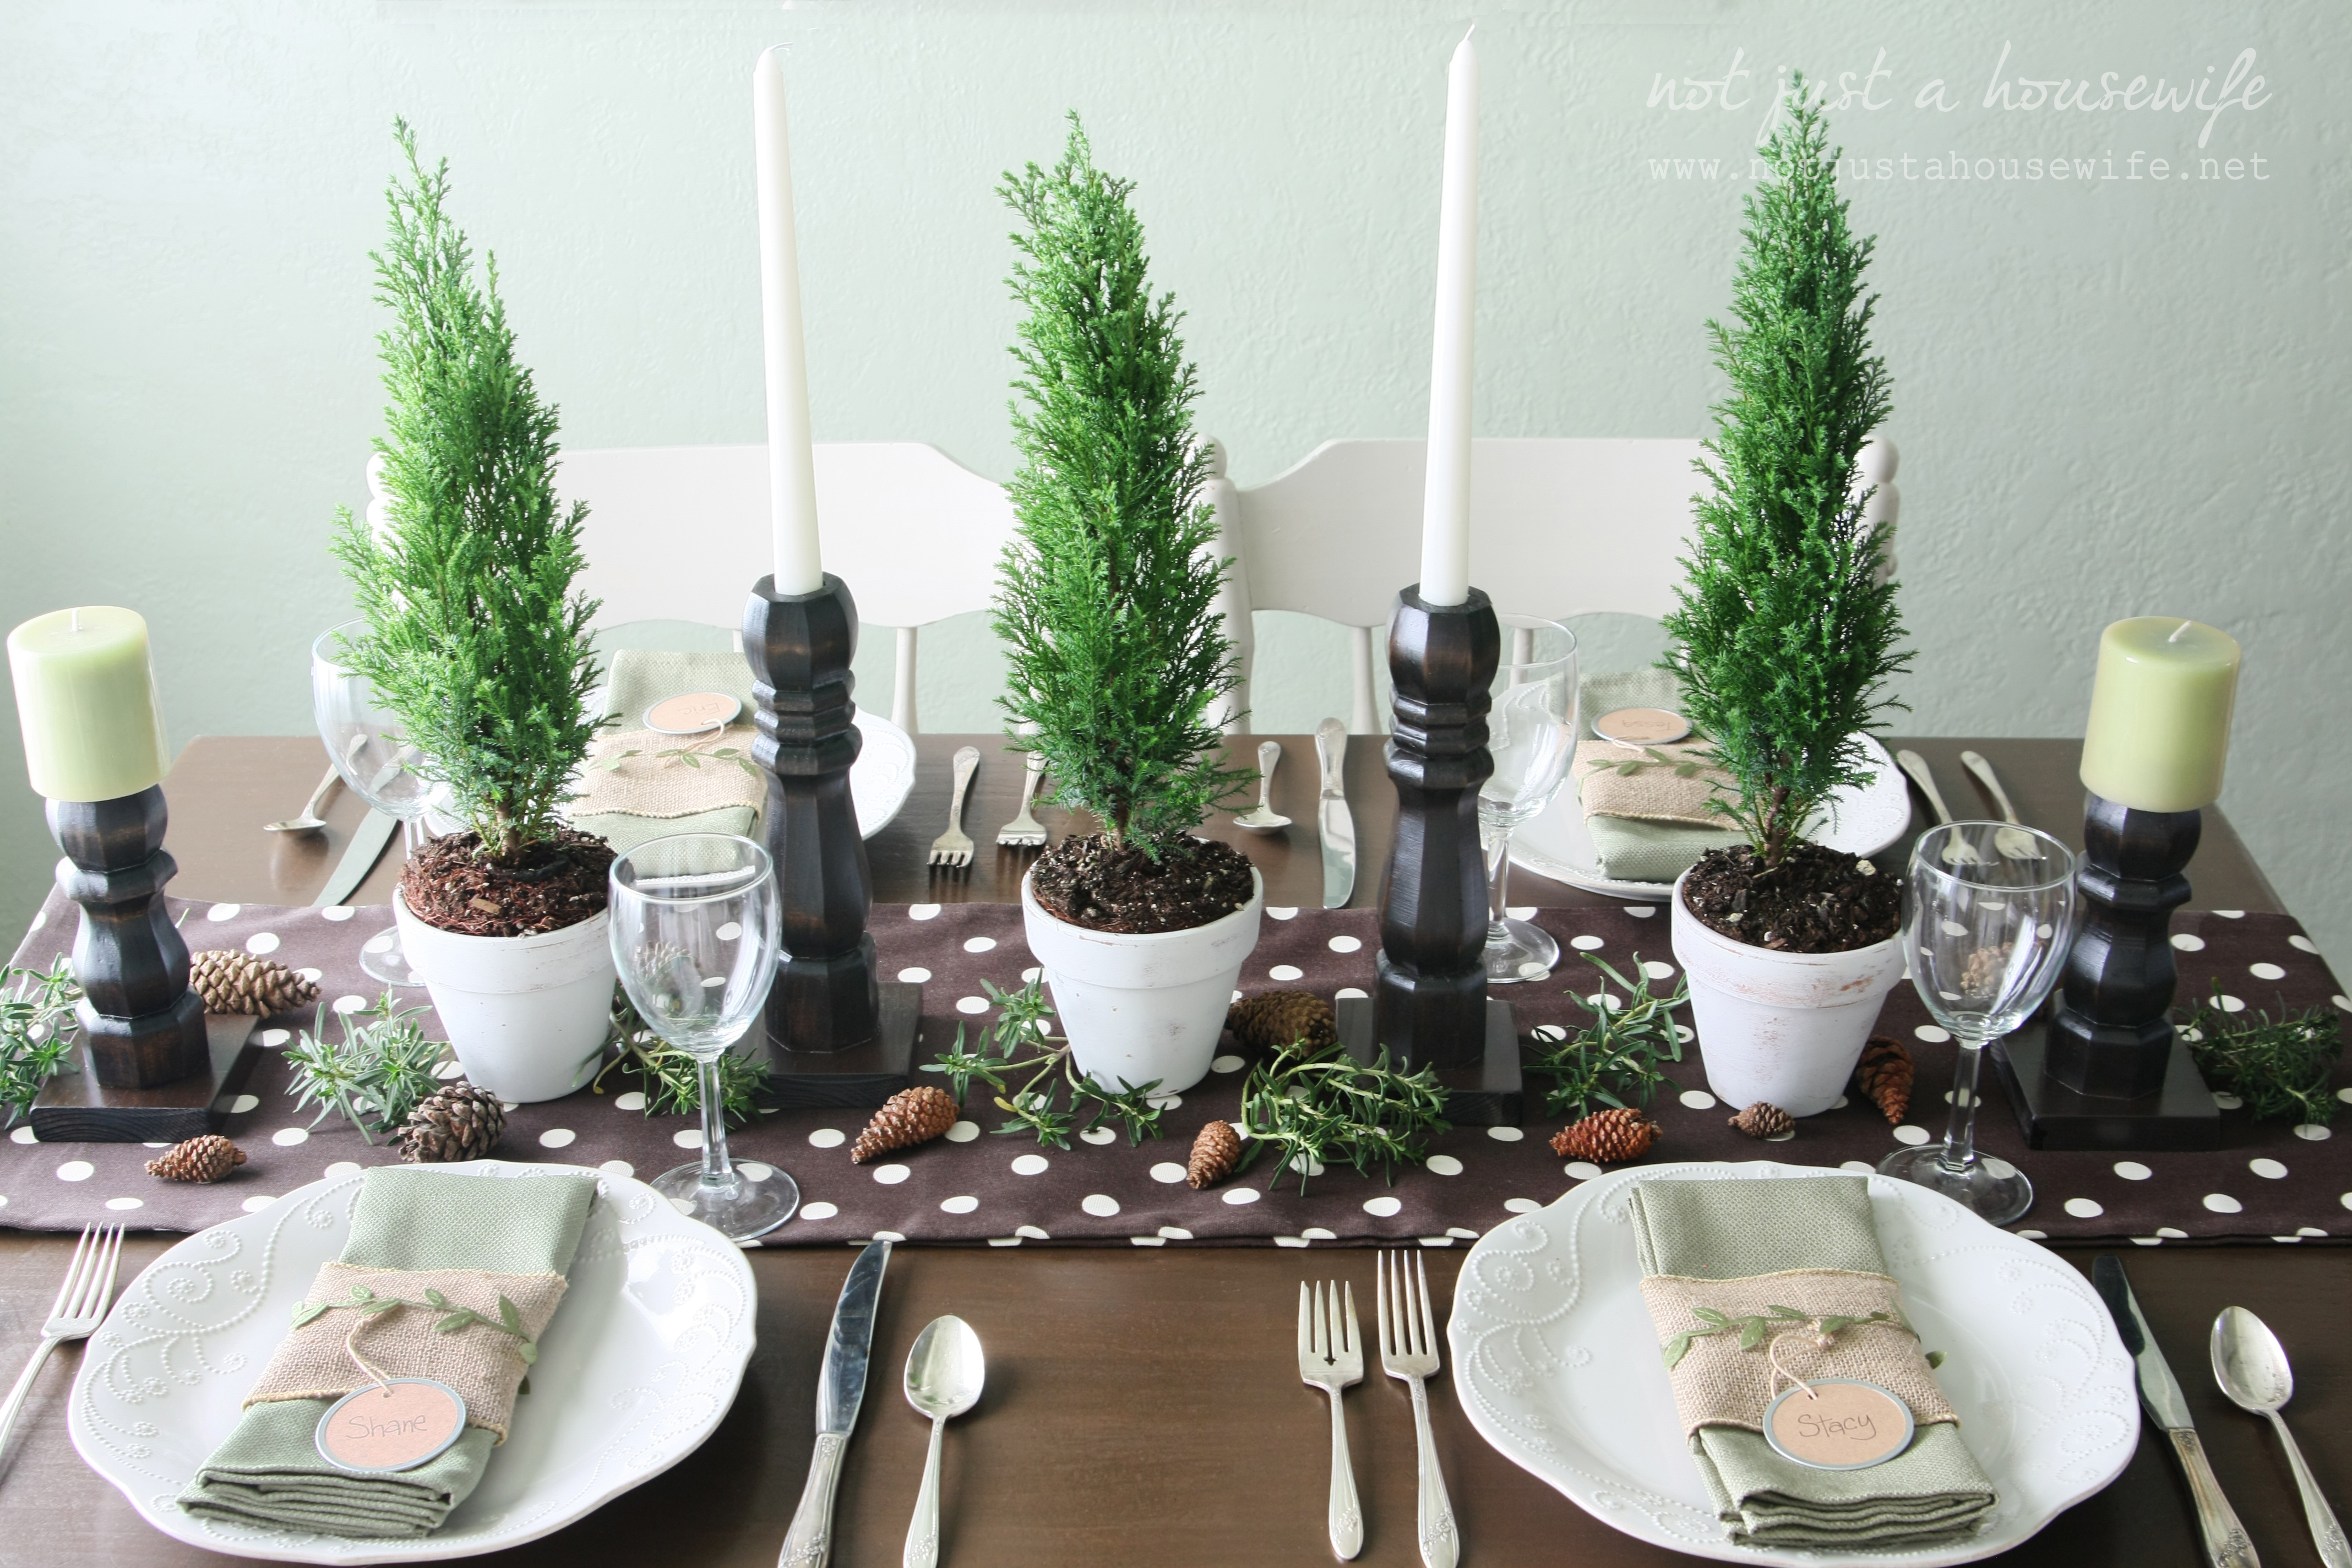
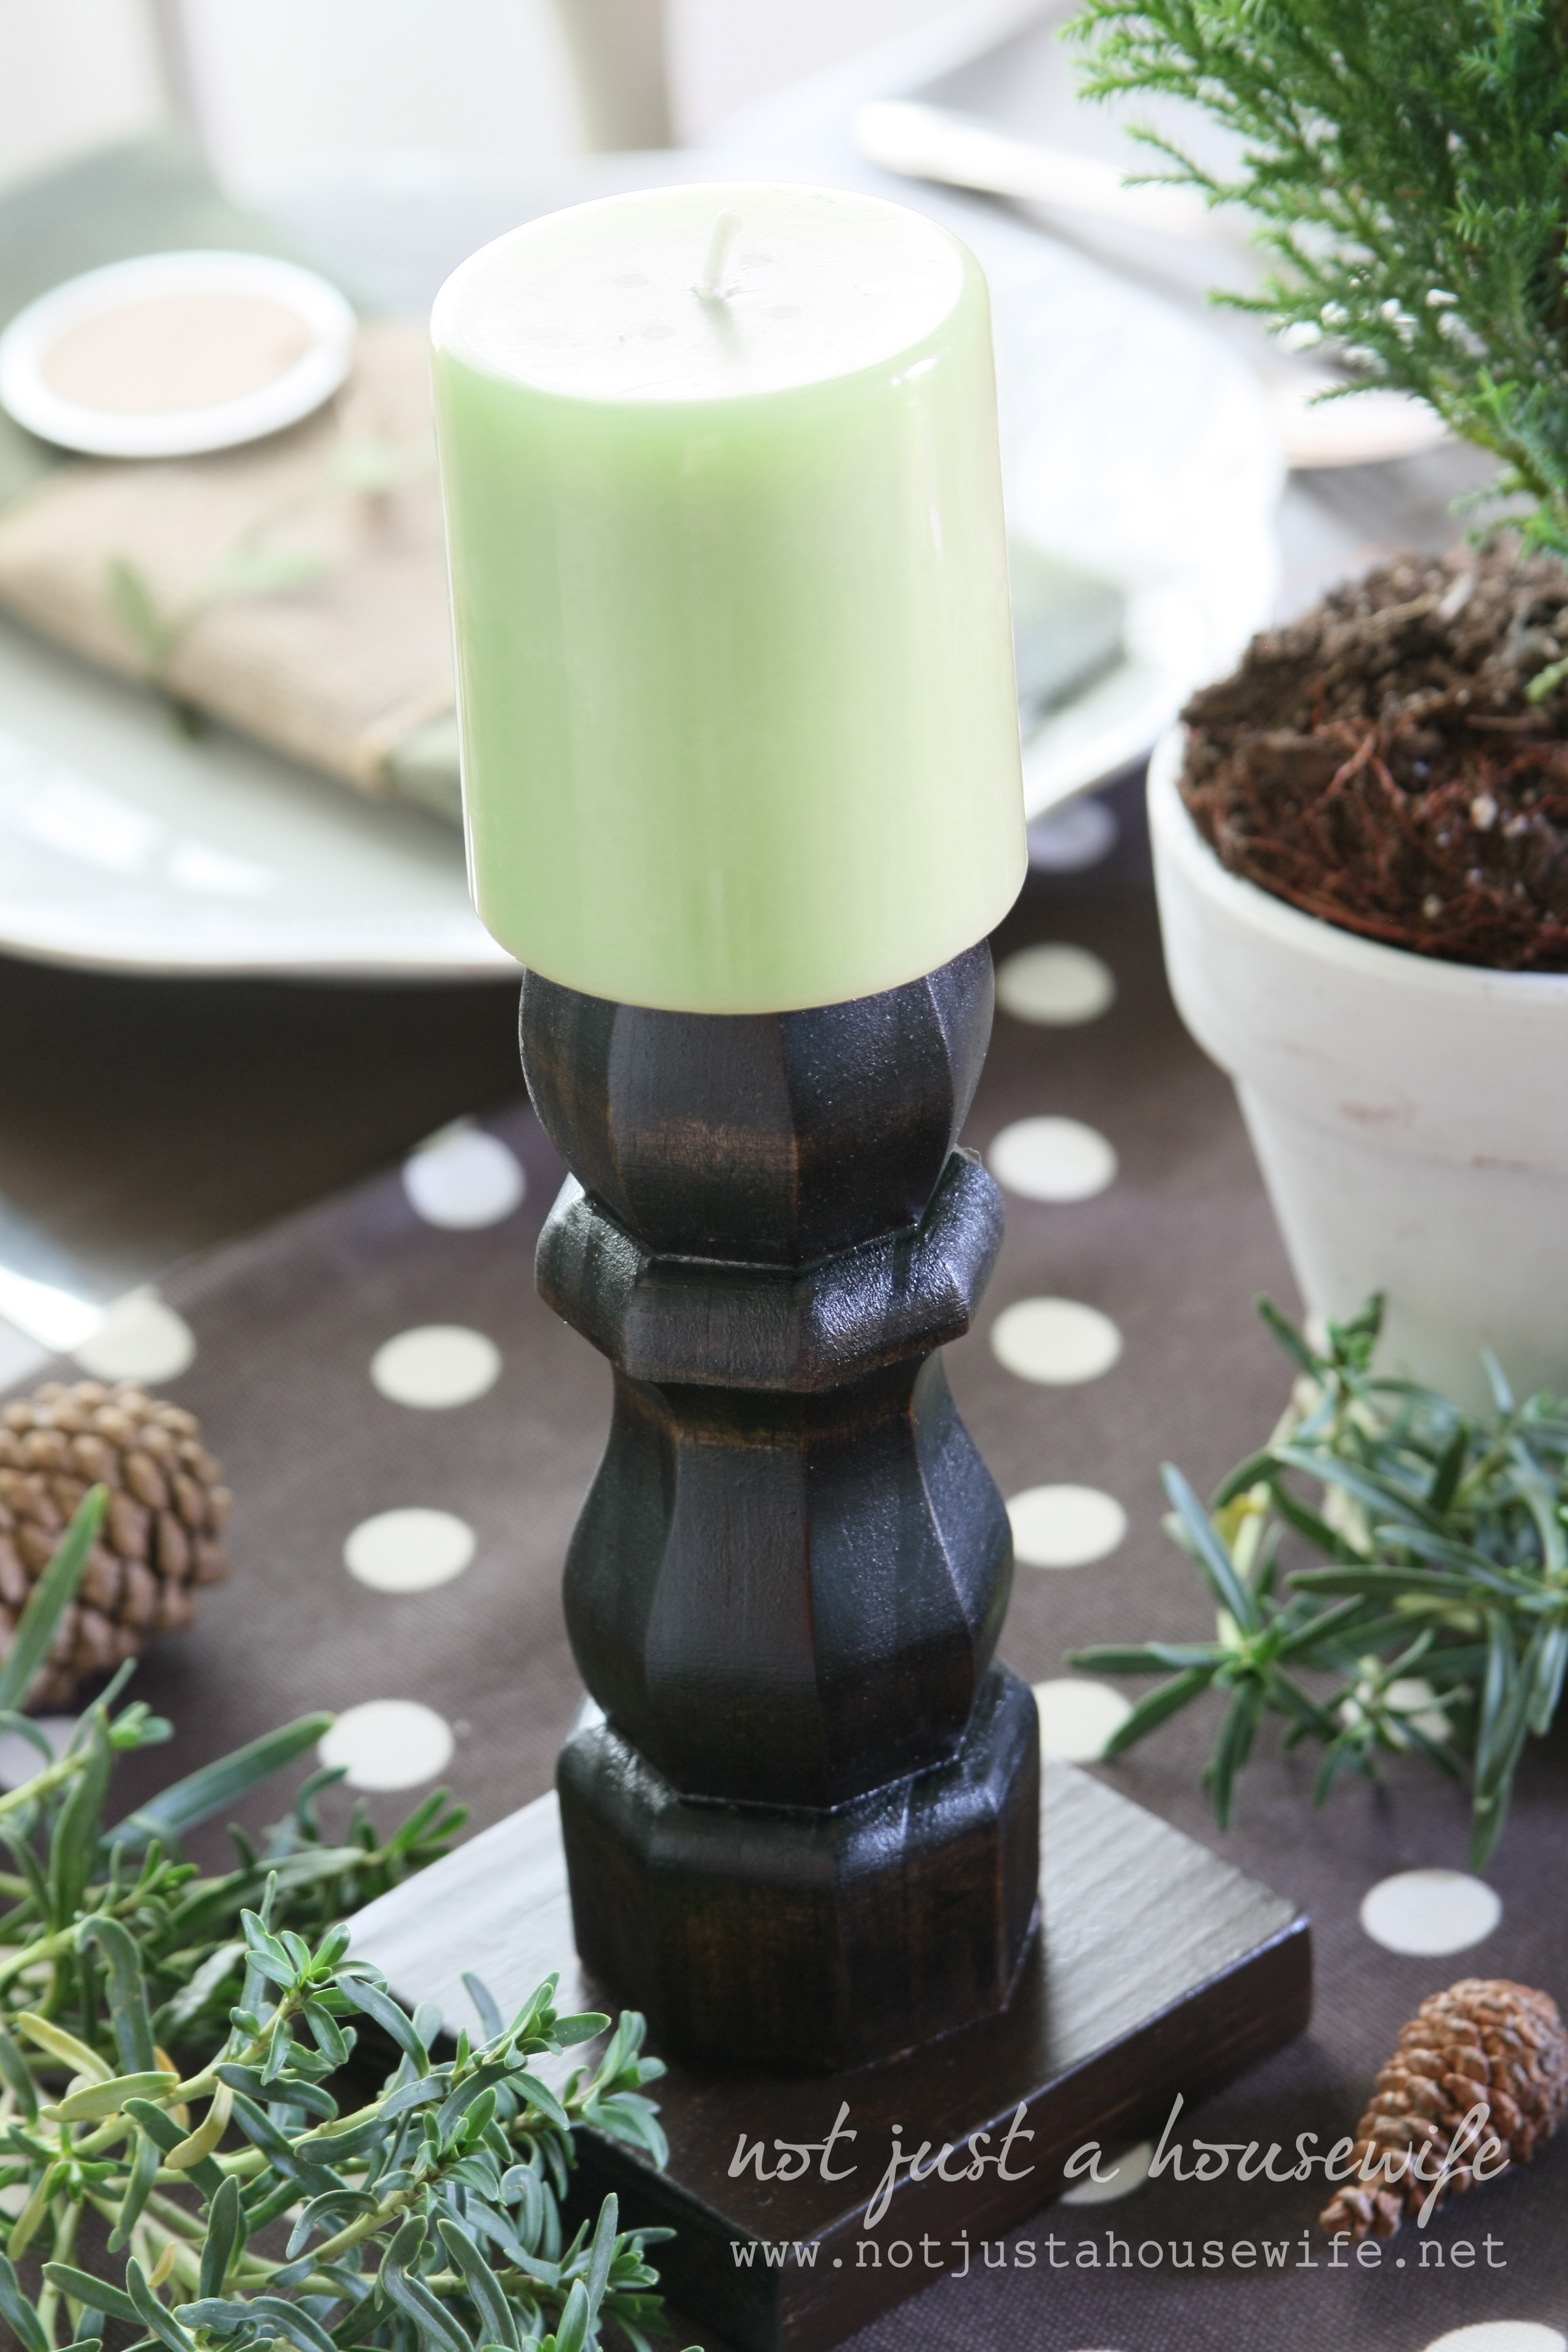
I used decorative table legs from Home Depot and a scrap piece of 1x4 to make these candlesticks. It cost $24 total to make all five of these. I used 6 inch legs and 9 inch legs. And they were very easy to put together.
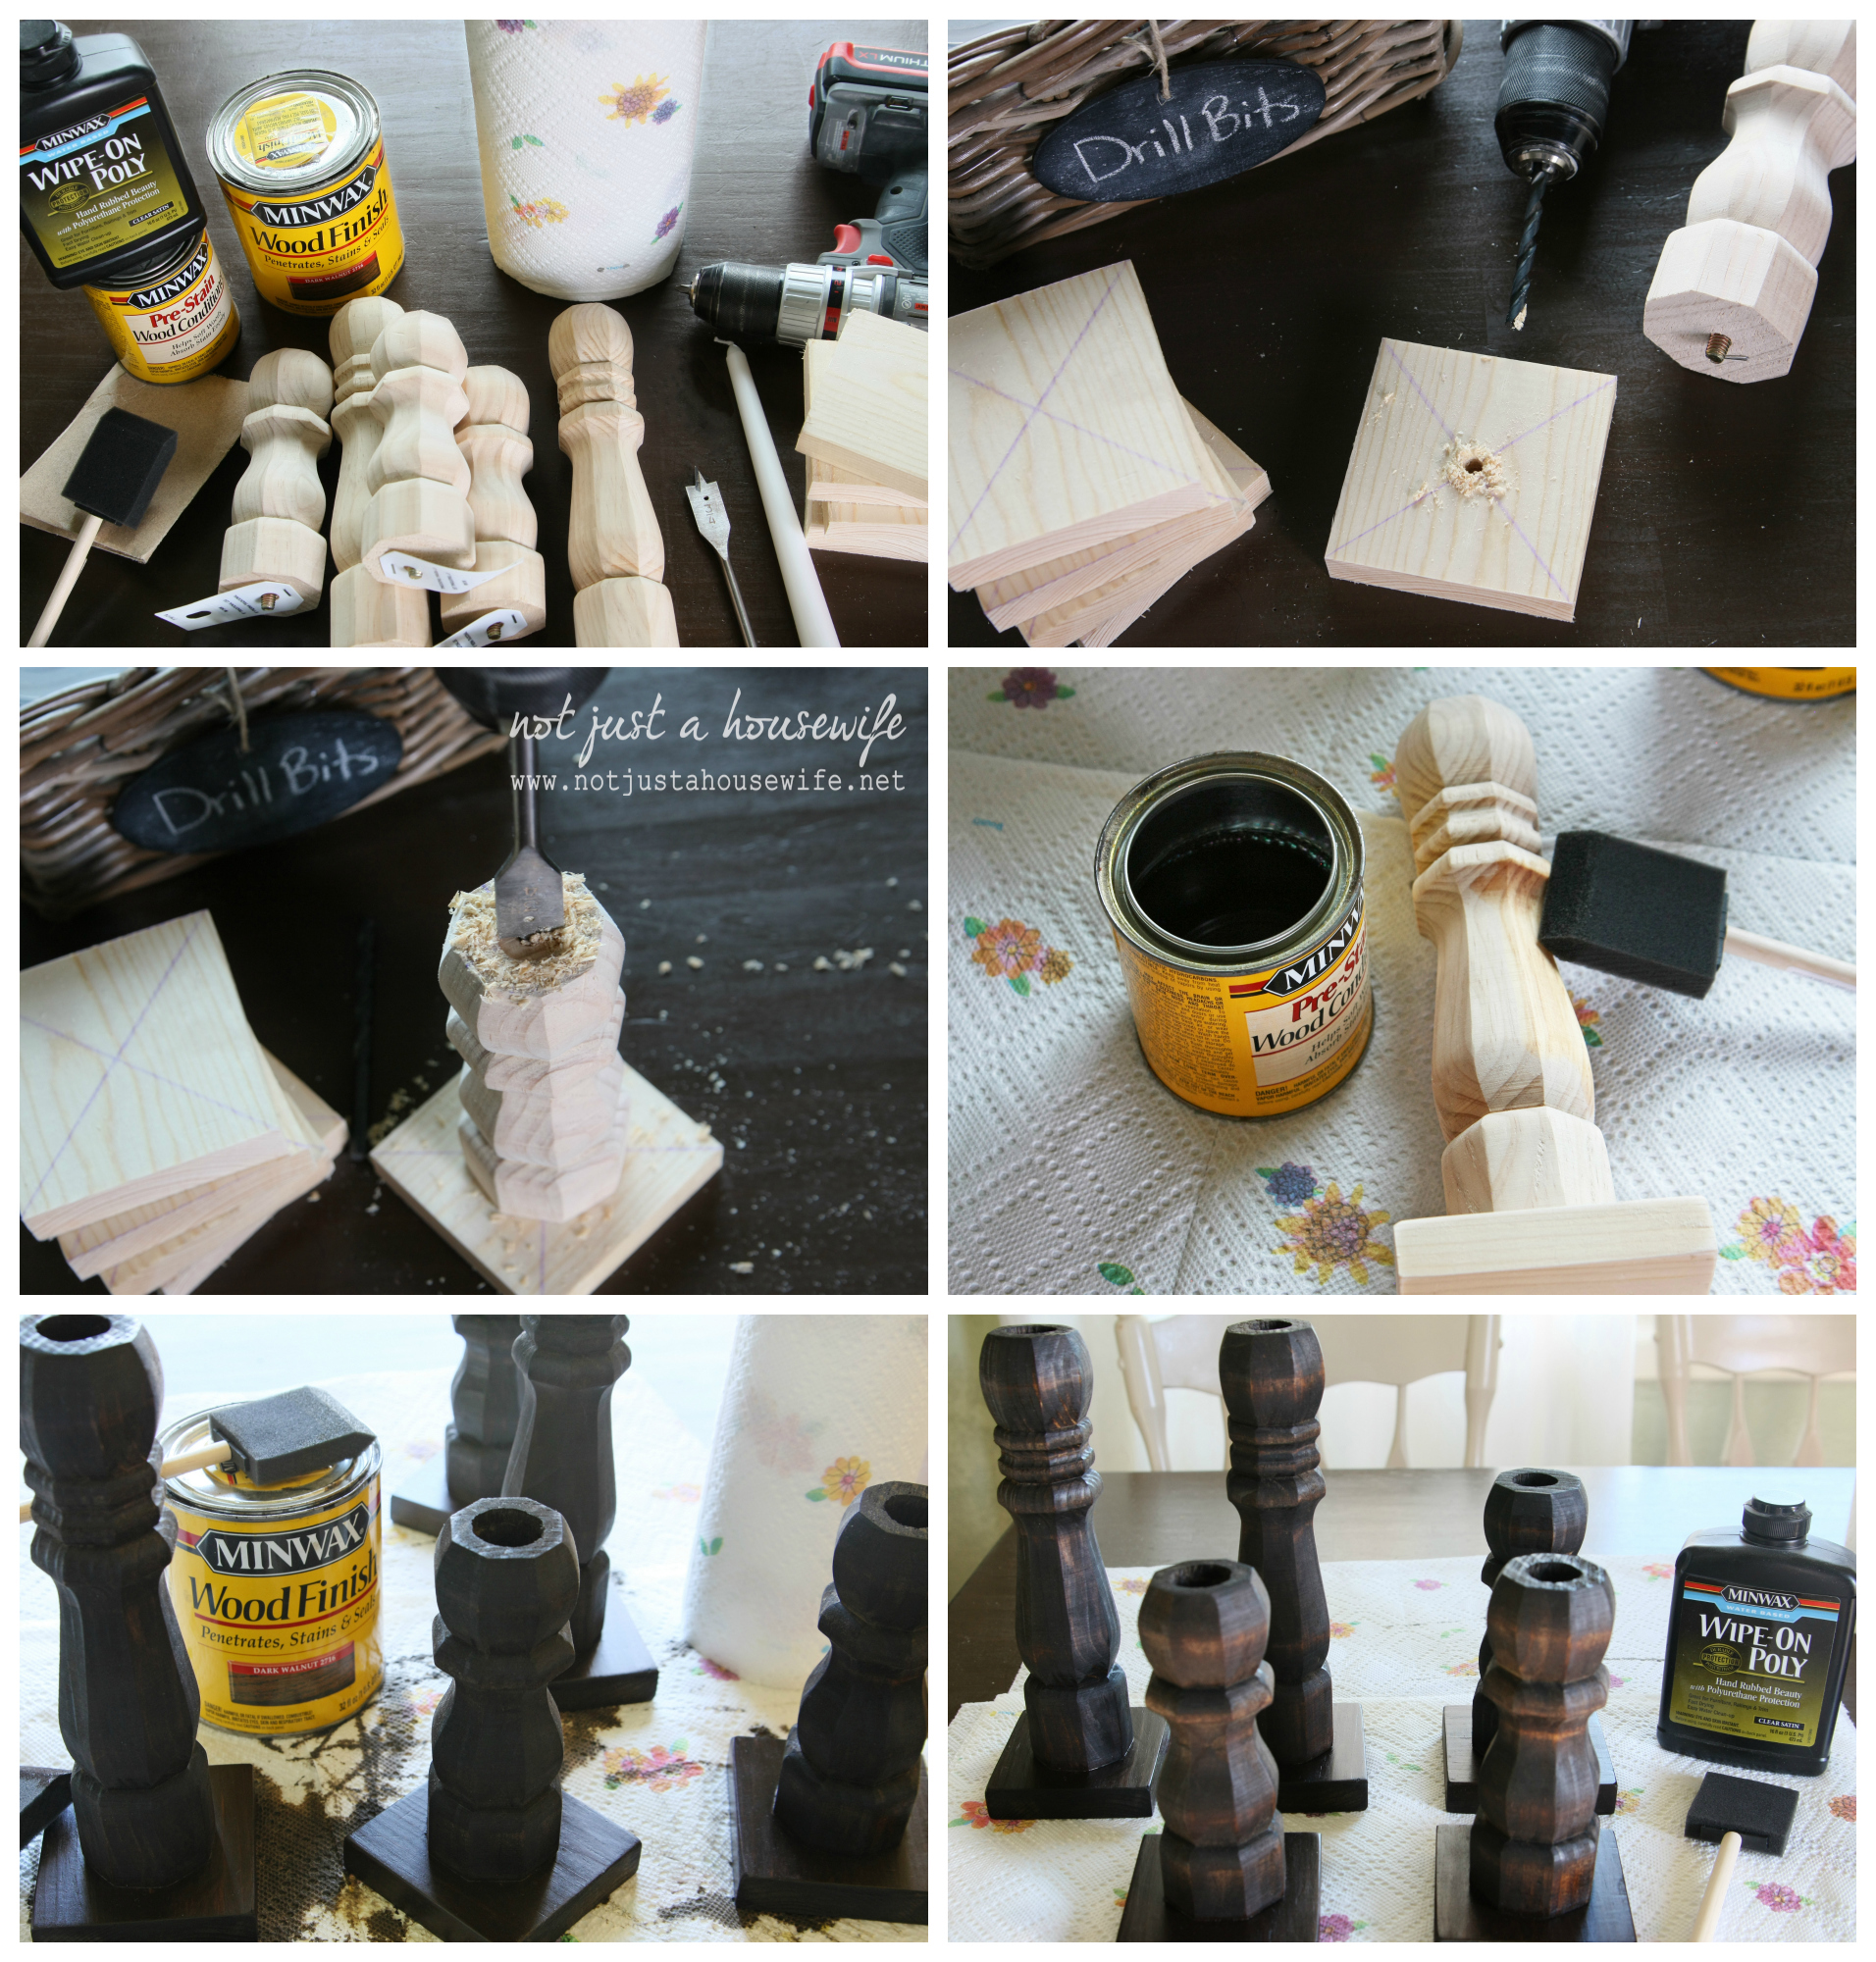
I first cut a 1x4 board I had on hand into squares. 1x4 boards are really 3 ½ inches (not 4 inches) because of the planing and sanding that happens to the board. So I measured 3 ½ along the board and cut it with my miter saw. This way they ended up being 3 ½ x 3 ½.
Draw lines from corner to corner to find the center. Using a drill bit that is slightly smaller around than the threaded piece on the leg, drill into the center of the square board. I only went down about half the length of the threaded piece.Twist the leg into the square piece of wood.
Next you will need to get a boring bit. It is important to measure the end of the candle you want to use. The tapered candles I have are ¾ inch. SO I used my ¾ inch boring bit to drill a hole in the center of the top of the candlestick. I went down a couple of inches deep.
I sanded it after that. The main body of the candlestick is already pretty smooth but the 1x4 base will need to be smoothed and the pencil marks sanded off. The wood will accept the stain better if you sand it all over.
Before getting started with either the painting or the staining, protect your work area with plastic or paper towels. If you are going to paint your candlesticks, then you can use whatever paint you would like. If you want to stain them like I have done, you will need to add a pre-stain conditioner. If you are using an oil based stain, use and oil based conditioner. If you are using a water based stain, use a water based conditioner. The conditioner helps the wood accept the stain more evenly.
Once that has been applied and has sat for at least 5 minutes, you can apply the stain. I apply it with a foam brush and let it sit for 5-10 minutes. Then I wipe off the access with a paper towel. If I want it darker, I repeat the process until it is as dark as I want. And if I am smart, I put on rubber gloves while doing this :) I used Minwax's Dark Walnut.
I let them completely dry before putting on the sealer. I chose Wipe-On Poly because it dries quickly and I like the hand rubbed looking finish it has. You can used regular polyurethane or even a spray poly. Follow the directions on the bottle or can of whatever product you chose.
Once they were dry they were ready to use!
Now for those of you who think my table and dinging room always look like this, here is the reality.
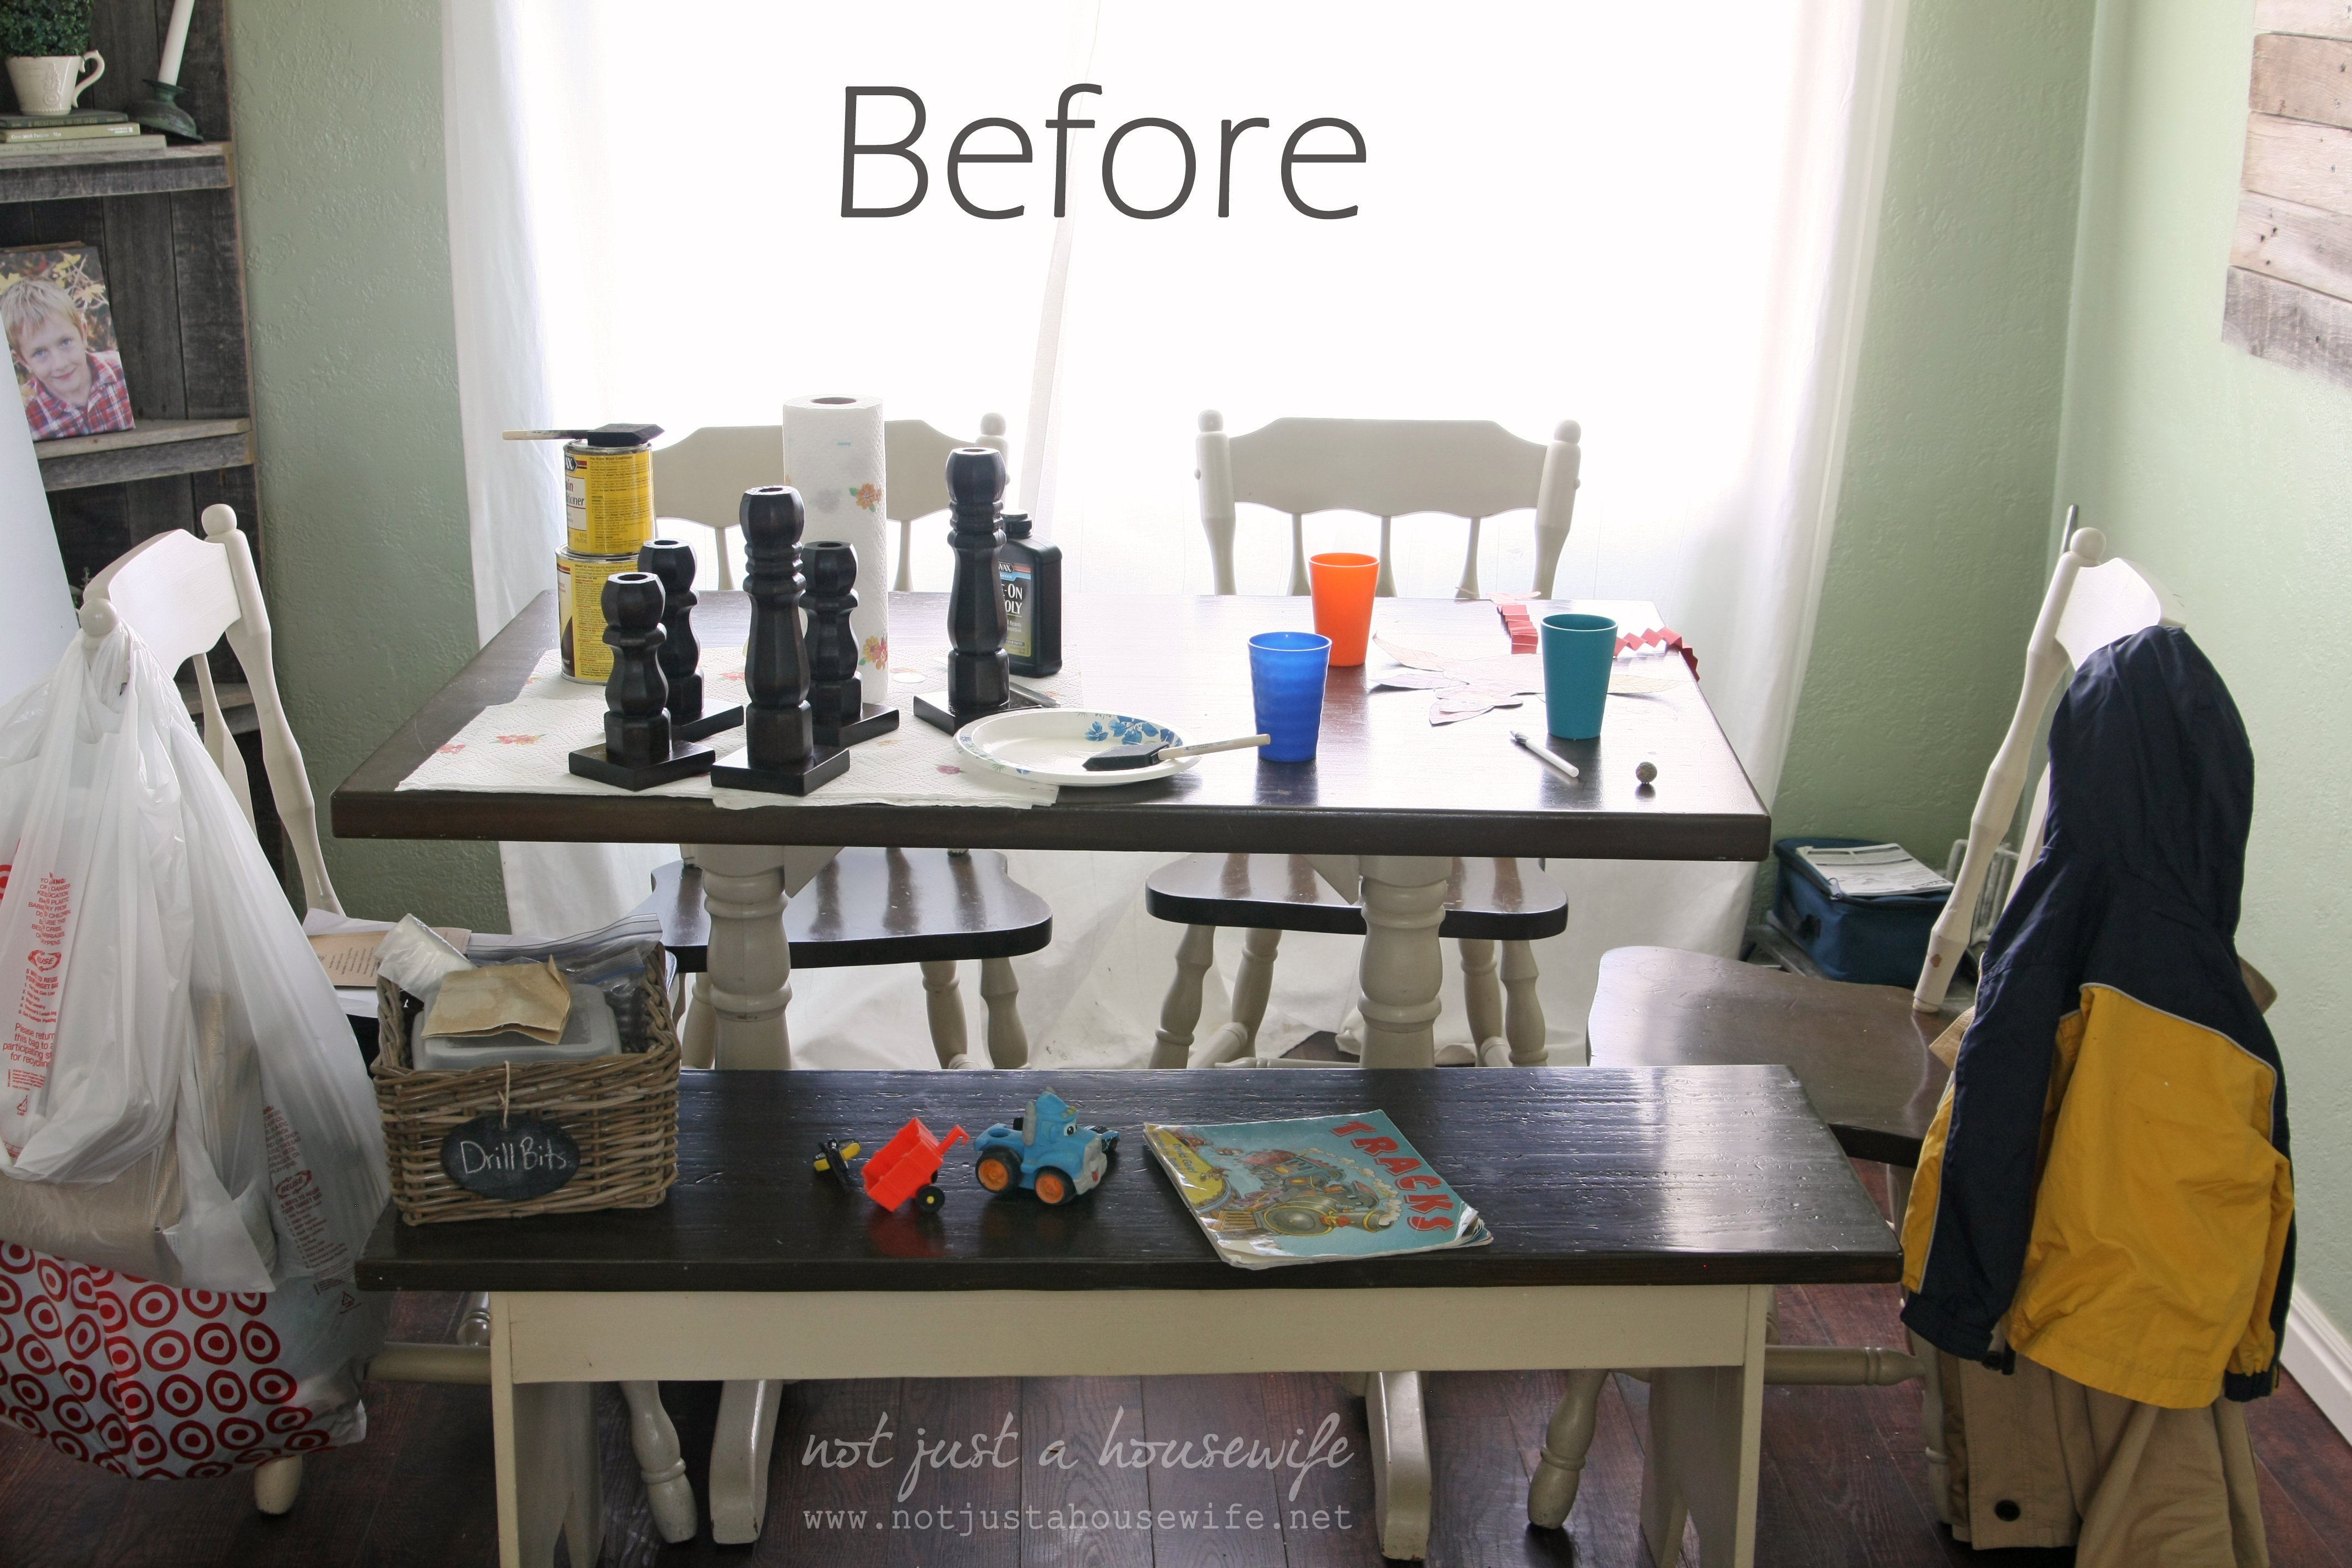
I had to clean it before I could even get to the decorating :)
I kept it pretty like this for several days because I hardly ever set the table like this and I wanted to enjoy it. My kids didn't mind. They got to have "picnics" in the family room :)
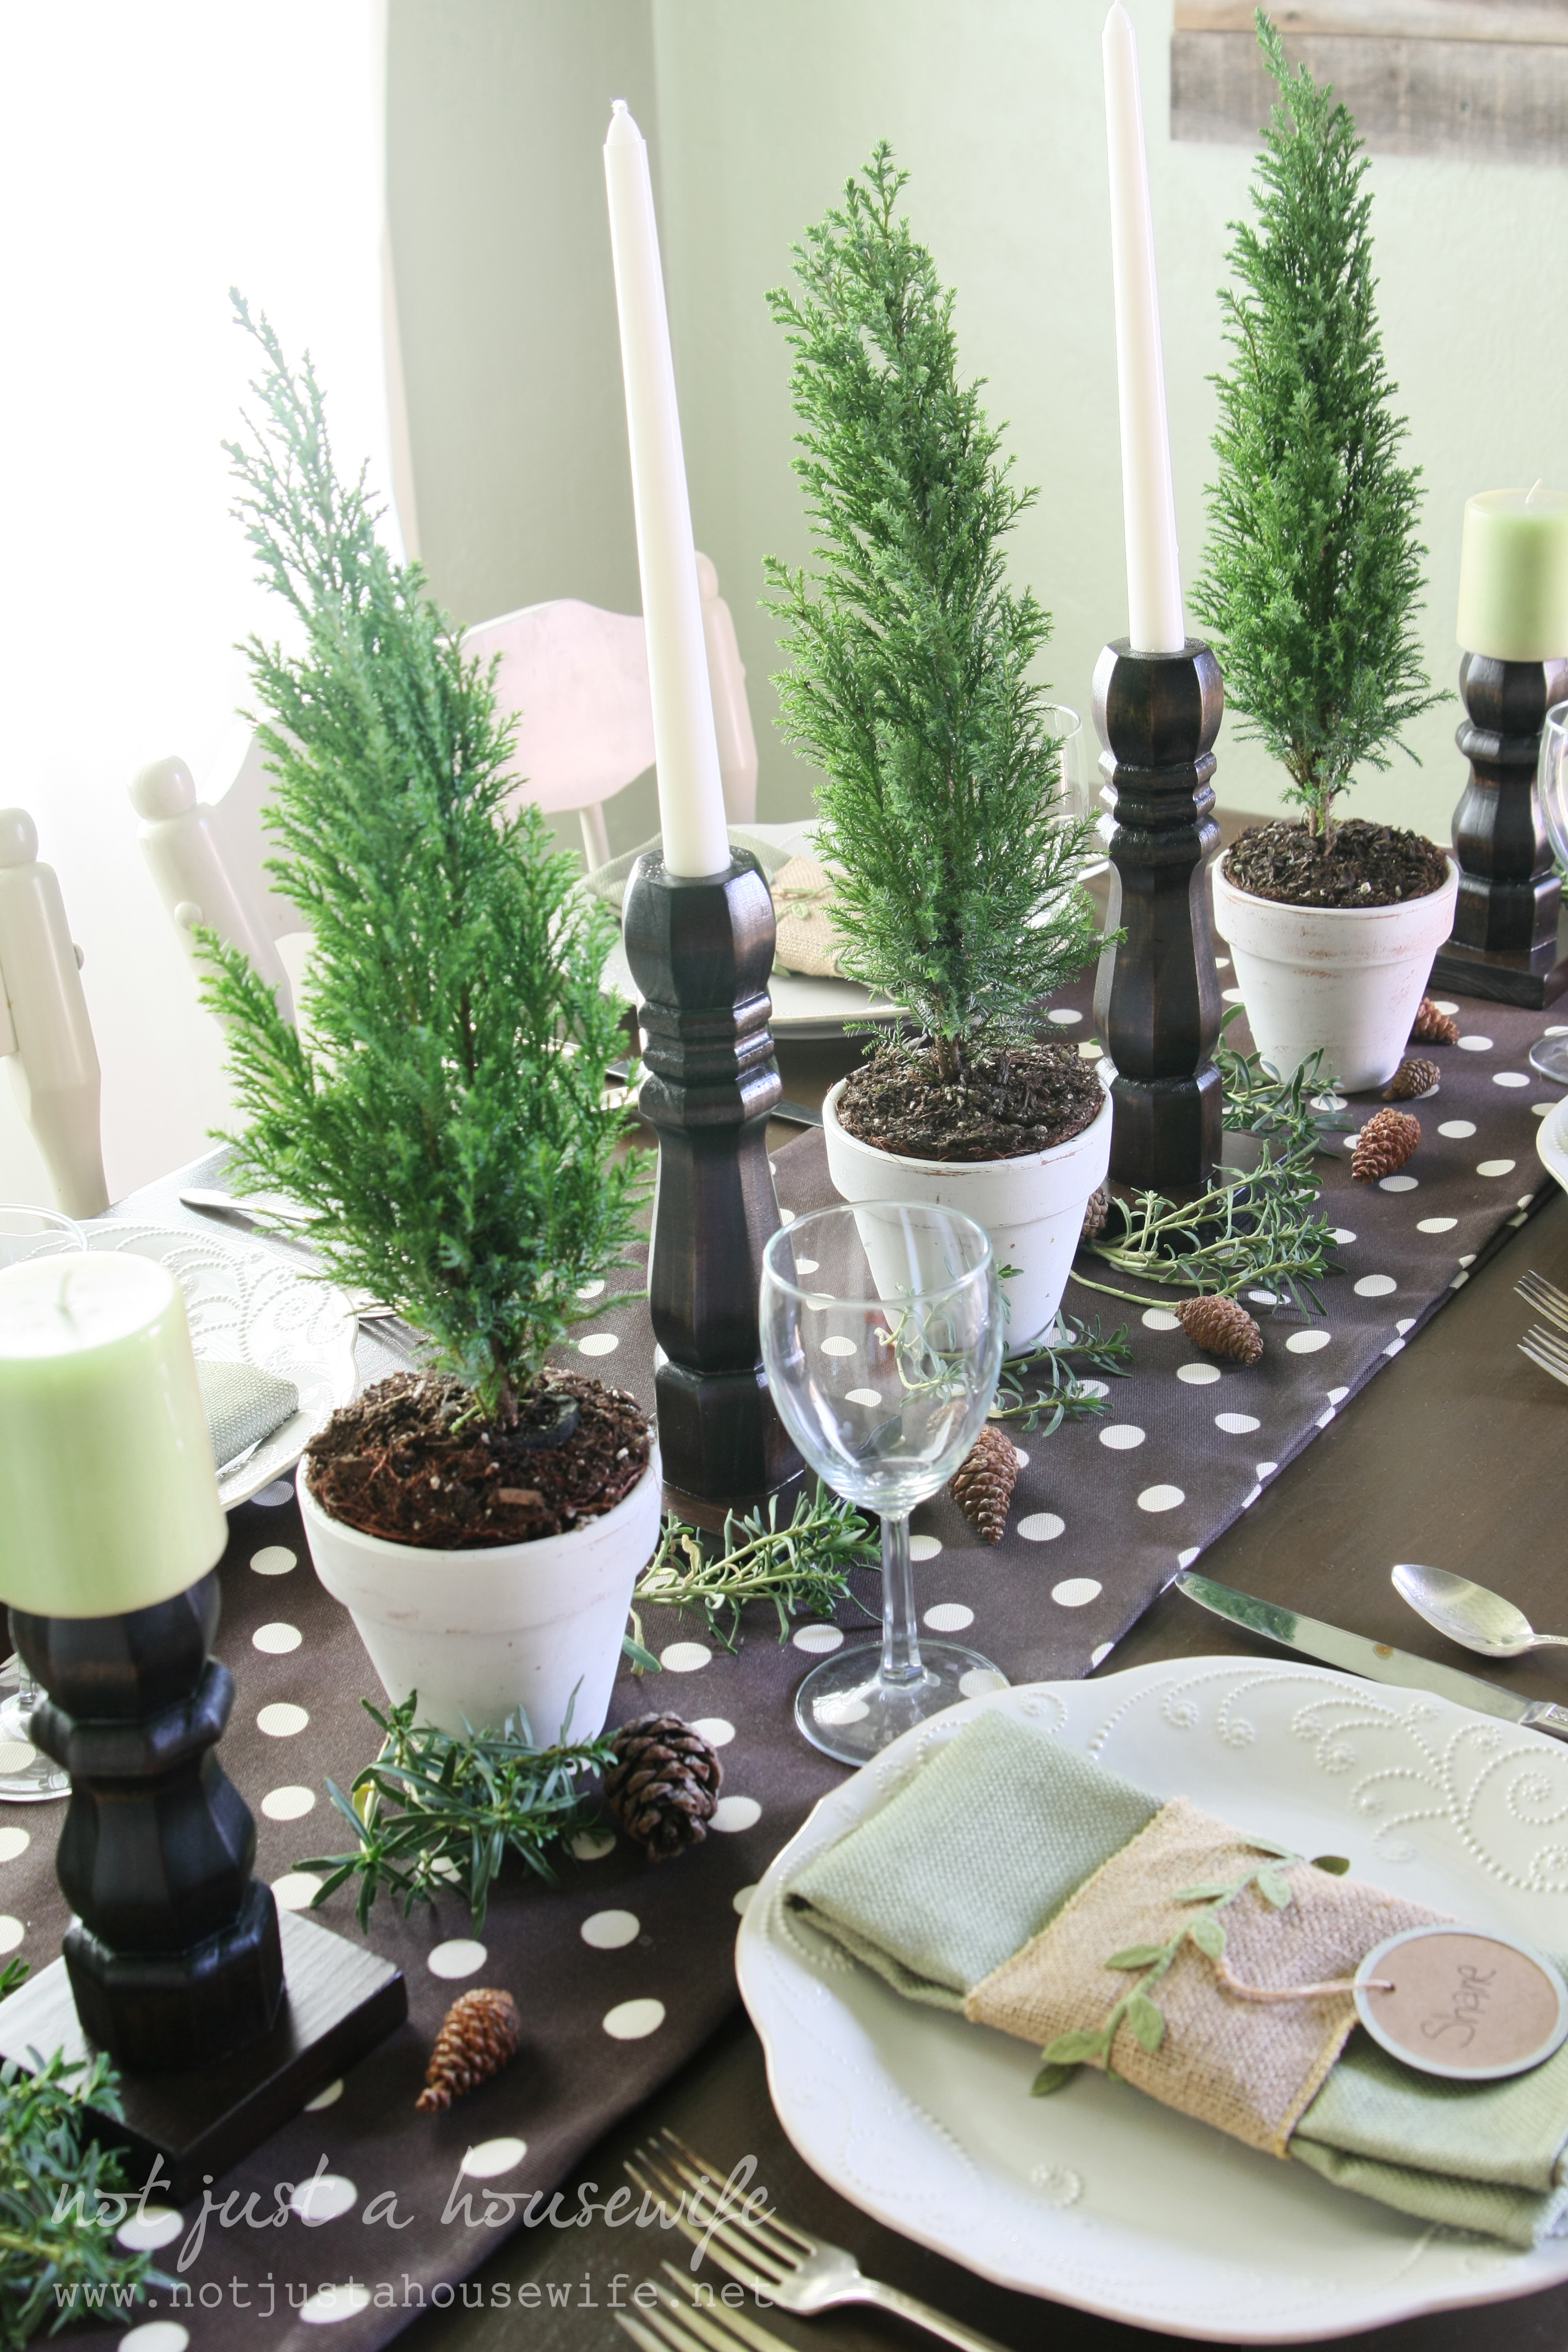
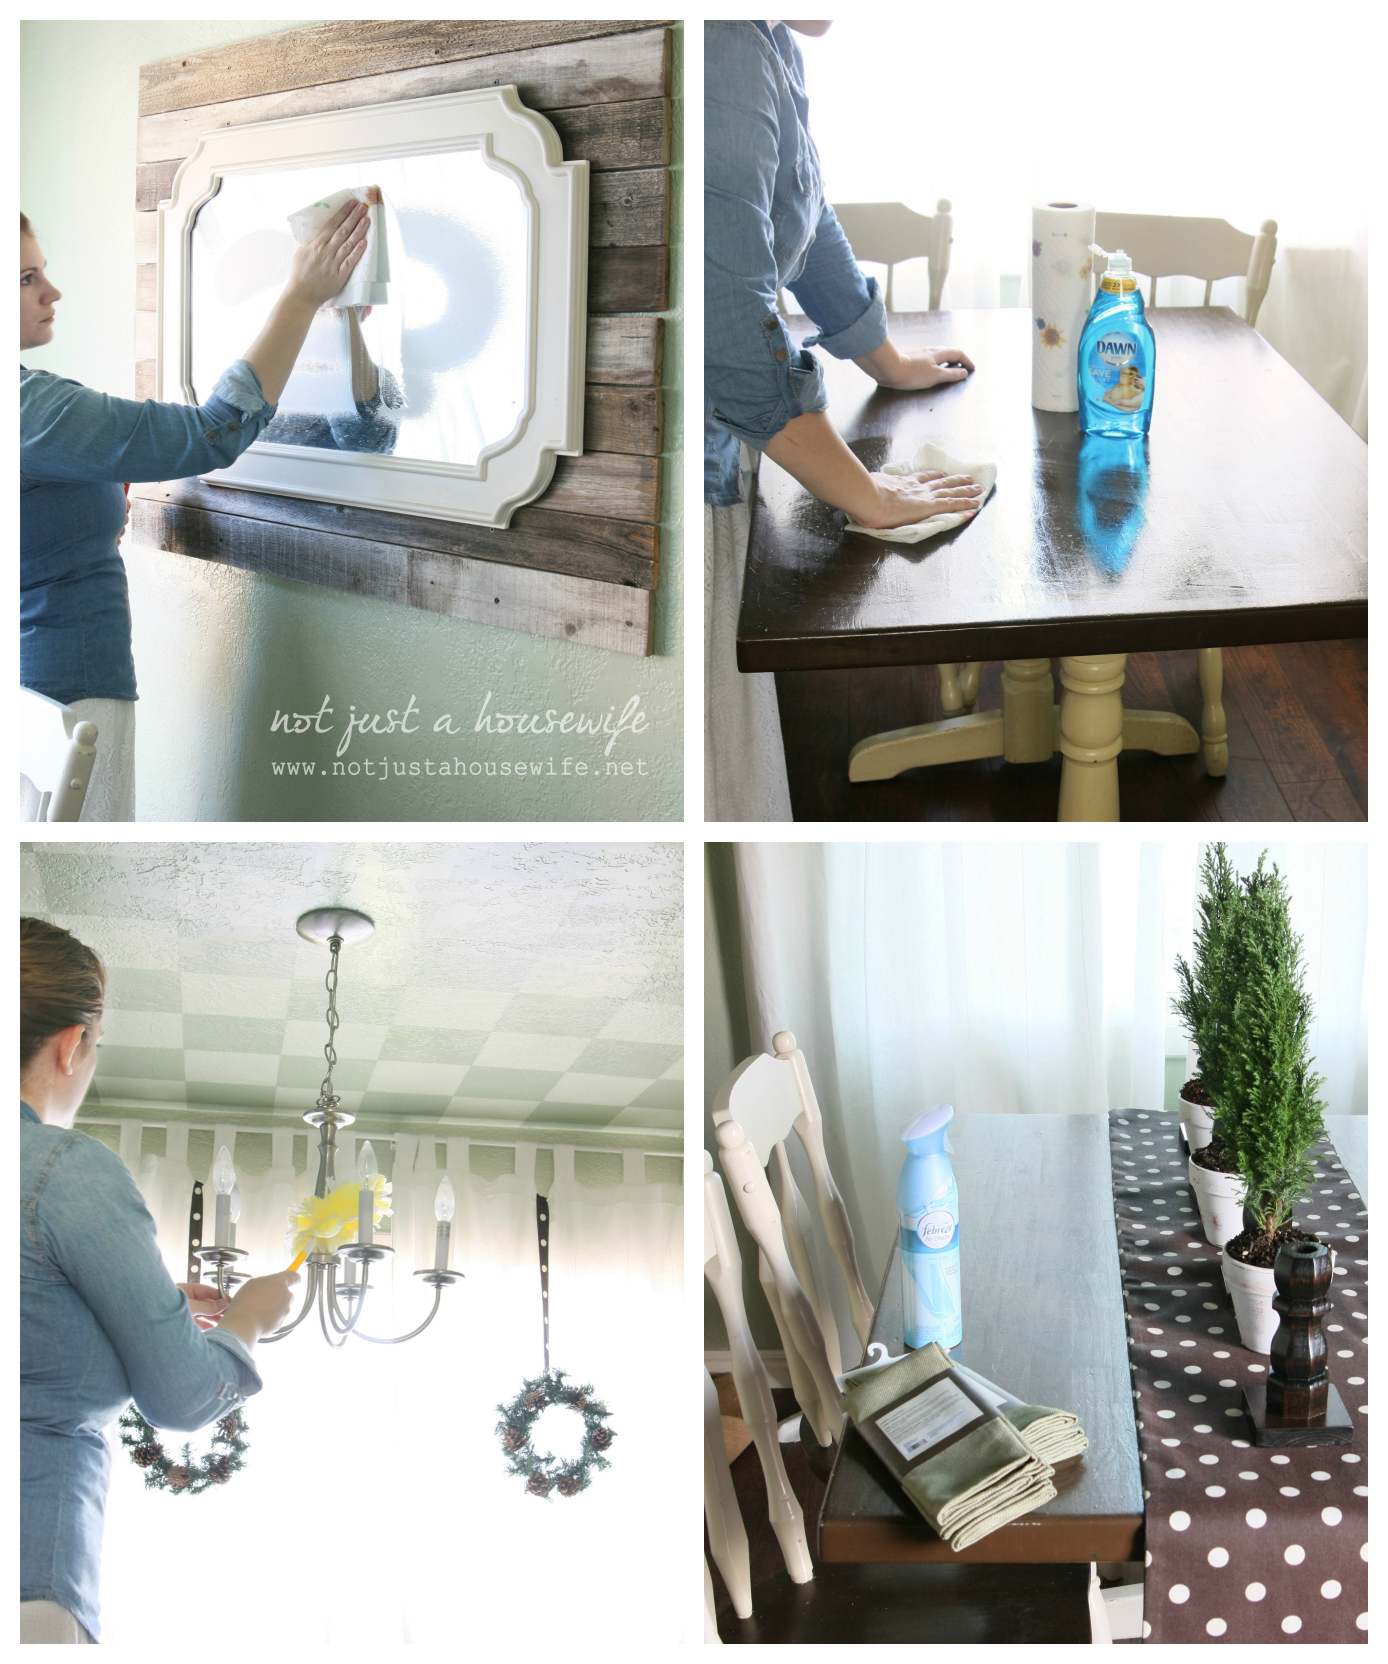
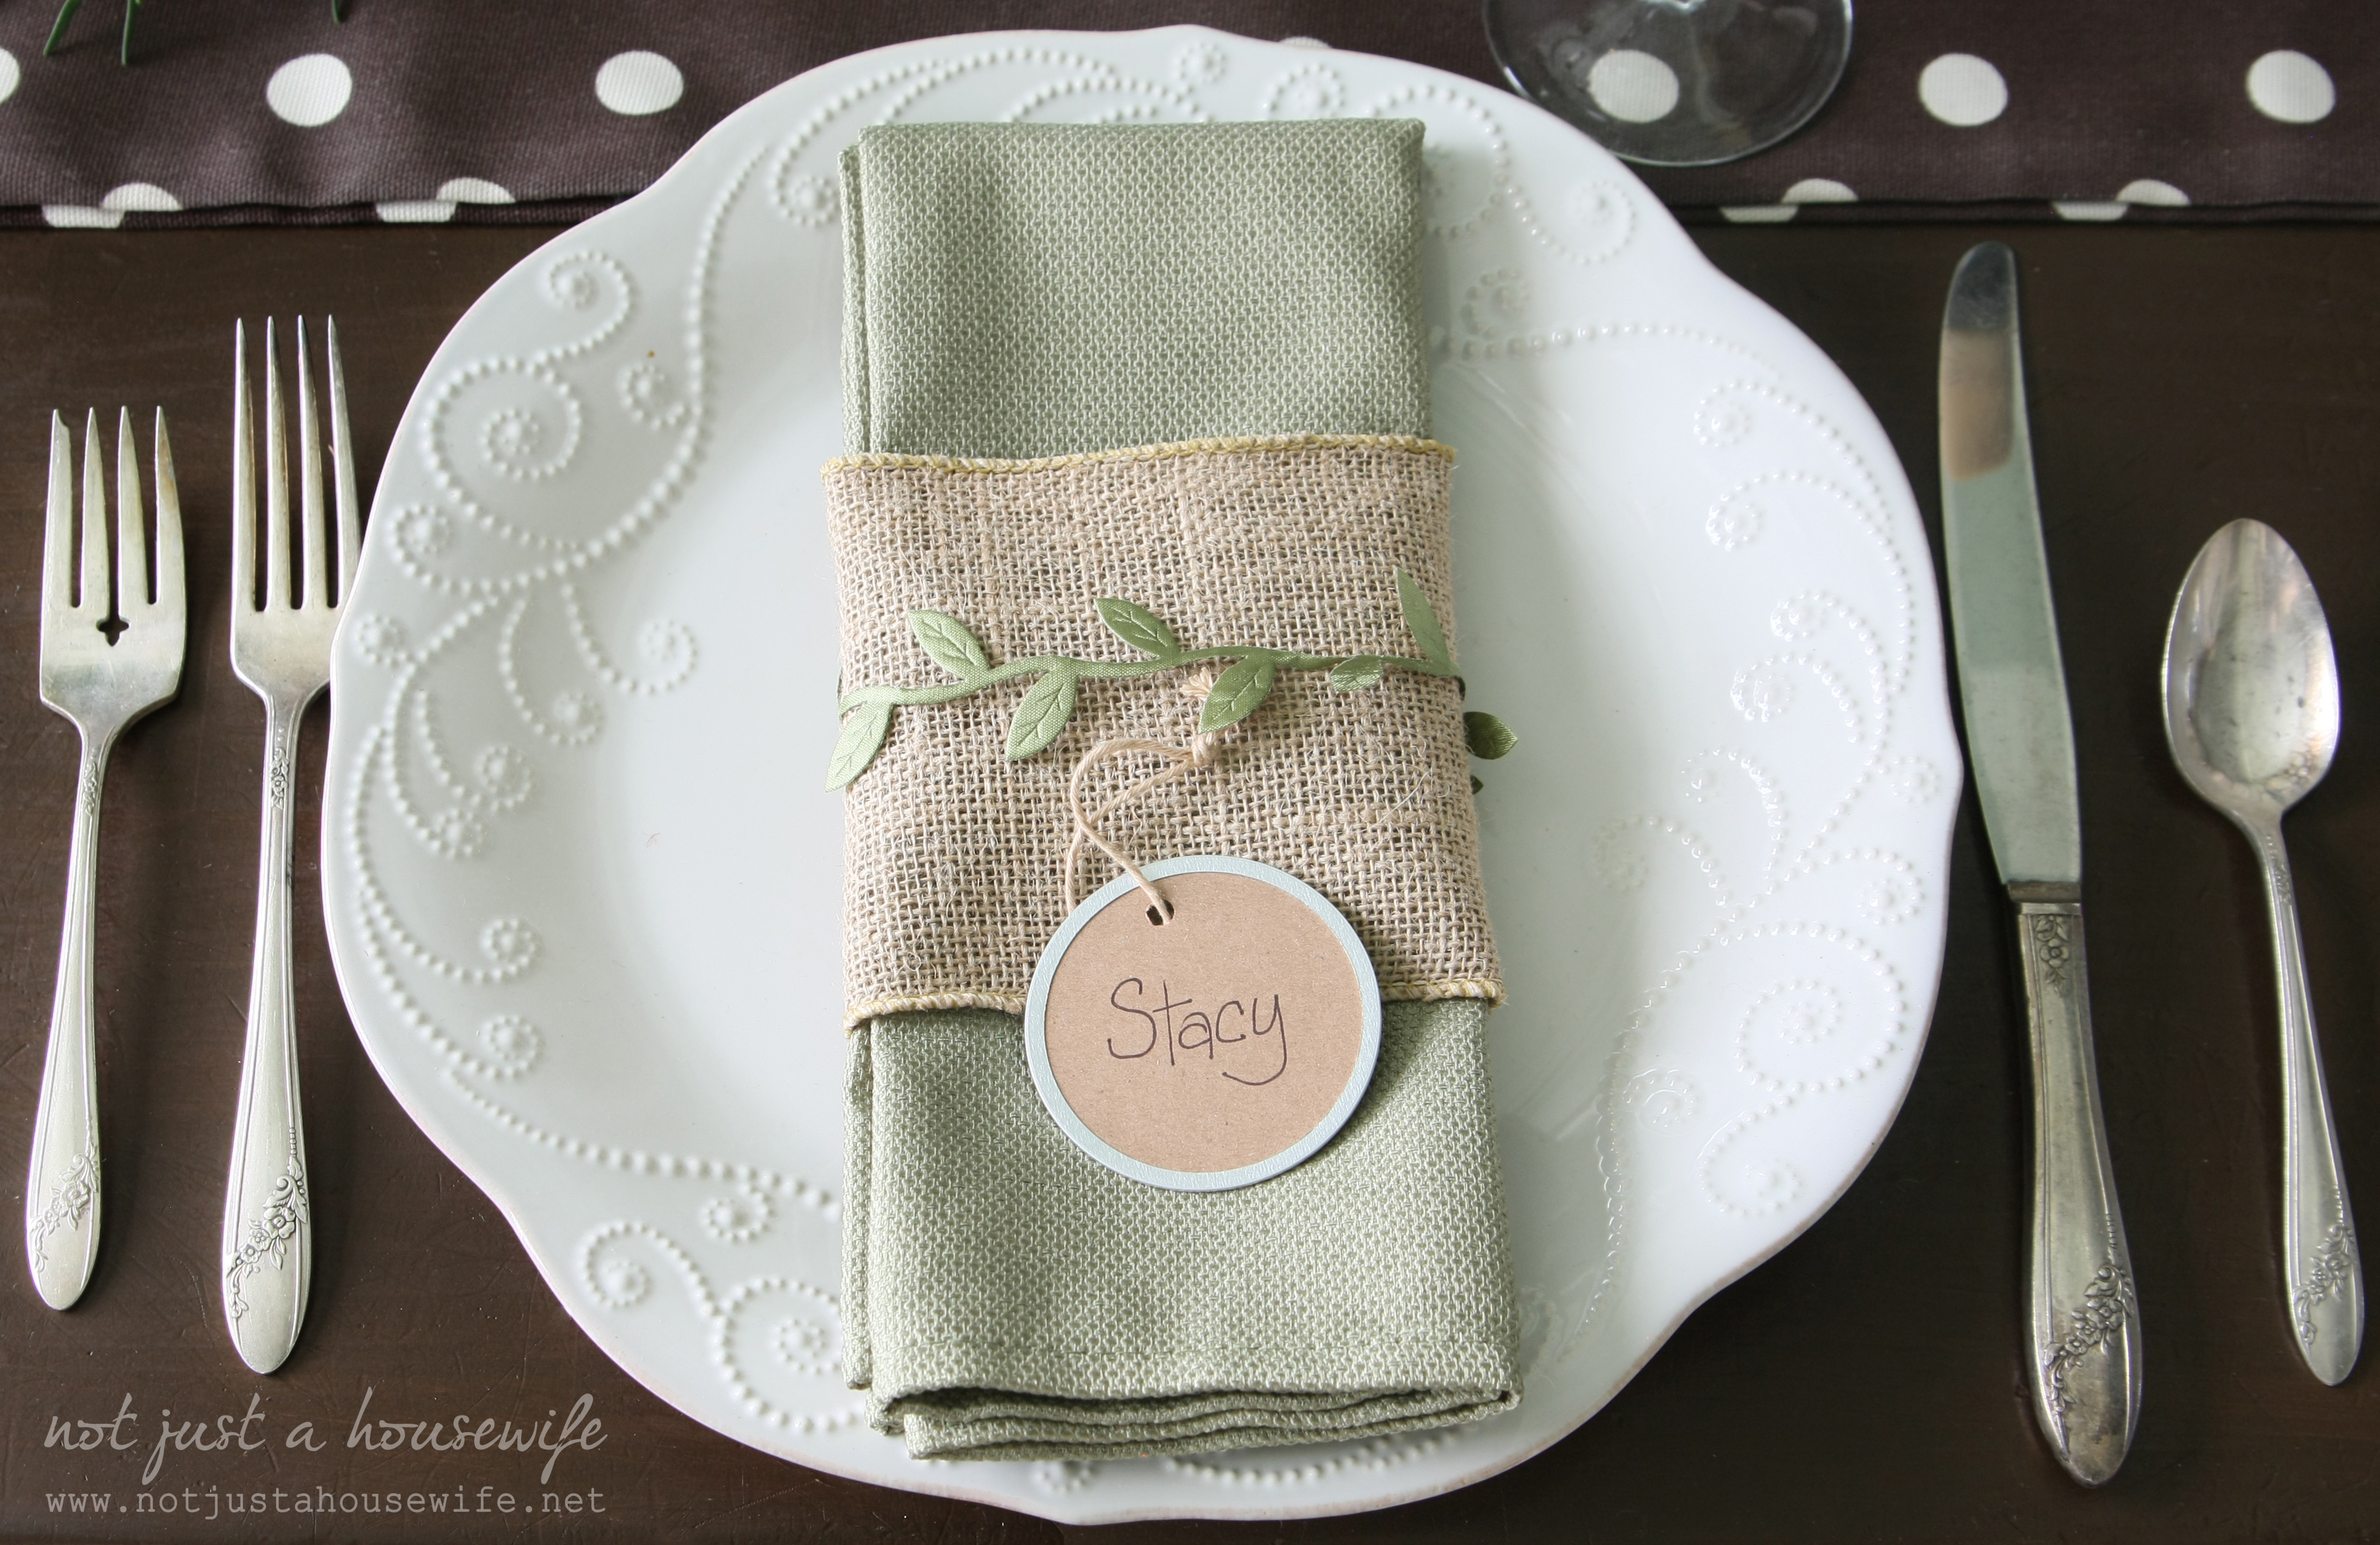
I got the cloth napkins from Bed Bath and Beyond. They were the perfect color match to my walls and I loved the texture. I added some burlap and cute leaf ribbon from The Paper Source. The tags are also from The Paper Source. I bought them for gift tags but thought they looked cute as name tags for the place settings too.

You may remember the plates from last year. They are from Wayfair and I ADORE them. The silverware was my grandma's and I purposely didn't polish them. I like the rustic feel.
Now I think I will head back to Home Depot and buy more supplies because my family room just might need some that are painted yellow...... ;)


What a pretty table Stacy! I love the chunky look of your candlesticks, and the rich color of the stained finish. My dining table gets to look good on special occasions, too, but most of the time it's my "crafting" space!
Have a great day,
Val
Stacy your tablescape is breath taking! Jon always wants me to do a tablescape but I've never committed to doing one. You are convincing me that I should break out and try something new!
Beautiful. This has inspired me to go and set my table. To be honest we almost always eat at our kitchen island so it will stay that way for a while. And it really make it look like you're ready to host at any time!
Oh, this is gorgeous! Wished my table looked like this!
This is beautiful Stacy! I love the colors you chose - so festive and rustic and elegant all at once! Those candlesticks are amazing too!
I love the colors you chose for this tablescape - soothing and beautiful!
This is breathtaking! I normally don't put much effort into my dining area - placemats and napkins feel like an upgrade at my house haha! But I love the beauty and simplicity in this look. Well done!
What a beautiful table, I love the candle holders and the trees work perfectly
It looks lovely if it's not going to be used but not very good for socialising - lol! As a decoration it's wonderful though.
Hahaha! I of course thought of that AFTER the photoshoot ;) When we ate here we just switched the trees out for the shorter candlesticks. Moving them around made it so we could see each other and it stilled looked great!
This is perfection and you are my hero!!!
The table looks awesome. I love the little trees you used.
The candlesticks are beautiful. I would've never guessed they were table legs! I was wondering what kind of fancy woodworking tools you had to make all those curves, haha.
Hmmm, so it looks like the table legs came with a "screw" that you turned into the base right? If it didn't have the screw built-in already, what method would you use to attach? I am working on a Christmas project attaching wood letters to a wood base, and trying to figure out best method to attach them. Drill small holes and use wood dowels perhaps?
And I like the idea of picnic in the living room w/the kids to keep a fancy table setting for a few days! Might just have to try that. "Fancy" here is remembering to set the table with paper napkins ;-)
The first time I made one of these it didn't have a screw like these did so I used long thin screws. I did two. But a wood dowel would also work with wood glue :)
Love the candlesticks--never would have thought of it. Also love all the choices for the tablescape--you always know how to pull the elements together into an interesting medley.
So super cute!!
So pretty! I love the polka dots, of course.
What a gorgeous table, Stacy! I love those plates, too, they're so gorgeous! And your candle holders are fabulous! What a great DIY!
I am loving this modern-shabby setting! The polka dots make me swoon! I love those candlesticks too! Thanks for sharing!
So pretty! Love the planks behind the mirror and the table looks beautiful!
Just beautiful...I love the beautiful nature inside...
I don't even know what my favorite part is....I'm loving the different shades of green too! And the polka dot runner...oh and the trees. LOVE that. We had a wildfire take out acres of woods behind us and now I'm thinking I should do ALL kinds of decorating with live trees & then I can replant them {squeal} thanks for the inspiration! Oh, and how in the world have I never noticed your checkerboard ceiling? I have to go search your site for a (hopefully) tutorial! =) Beautiful Stacy! Merry Christmas! Marcy
Aww thank you! My mom and dad while I was growing up always bought a pine tree in a pot. We decorated it for Christmas and then planted it outside in the yard when we were done. All of the trees in my mom's property were former Christmas trees :) BTW, here is the link to the ceiling tutorial :) https://www.notjustahousewife.net/2011/07/checkered-ceiling-tutorial.html
Thanks so much for the link! I just pin'd for later (prob take me 6 years to do too LOL!) sharing on Svere too! GREAT straight line tip! =)
Stacy, I just found your blog today and wanted to tell you, you and I must have the very same taste because I think your table is the most gorgeous Christmas setting I've seen on all the blogs. I don't know how you do it with four little boys! Keep up the beautiful work.
Rosie from Raymore
I love your room and table setting, what a clever idea making the candlesticks. This year I have also opted for a simpler, back to nature theme, I think we can sometimes go overboard with glitz and glamour at Christmas.
Thank you for the party link ups and all the work you do on your inspiring blog.
Lee :)
It looks beautiful! I especially love the polka dot runner!
I absolutely love this table. It is both elegant and simple. I speak for many when I say that I have tons of pine cones in my yard and lots of rosemary: this is a time to bring some of those natural things inside to be enjoyed. I would definitely feel special if I were a guest at this table. Love the candlesticks and the little trees, too!!