• Skip to primary navigation
  • Skip to main content
  • Skip to primary sidebar
  • Skip to footer
Stacy Risenmay
  • Home
  • About me
  • PRESS
  • Contact Me
  • My Book
    • Facebook
    • Instagram
    • Pinterest
    • Twitter
menu icon
go to homepage
subscribe
search icon
Homepage link
  • Home
  • About me
  • Project Gallery
  • Our House
  • PRESS
  • Contact Me
  • Privacy Policy
    • Facebook
    • Instagram
    • Pinterest
    • Twitter
  • ×

    Chalkboard Wreath

    By Stacy 2 Comments

    I have a confession..... I am not a huge wreath fan. I want to like them and I think that most are pretty cute. But I just don't get super excited over them. Christmas is really the only time (with very few exceptions) that I even hang them. I was trying to think of a fun non'traditional wreath I could make this year. I was working on a chalkboard project while I was contemplating this challenge and this idea popped in my head.

    wreath-boxwood_edited-2

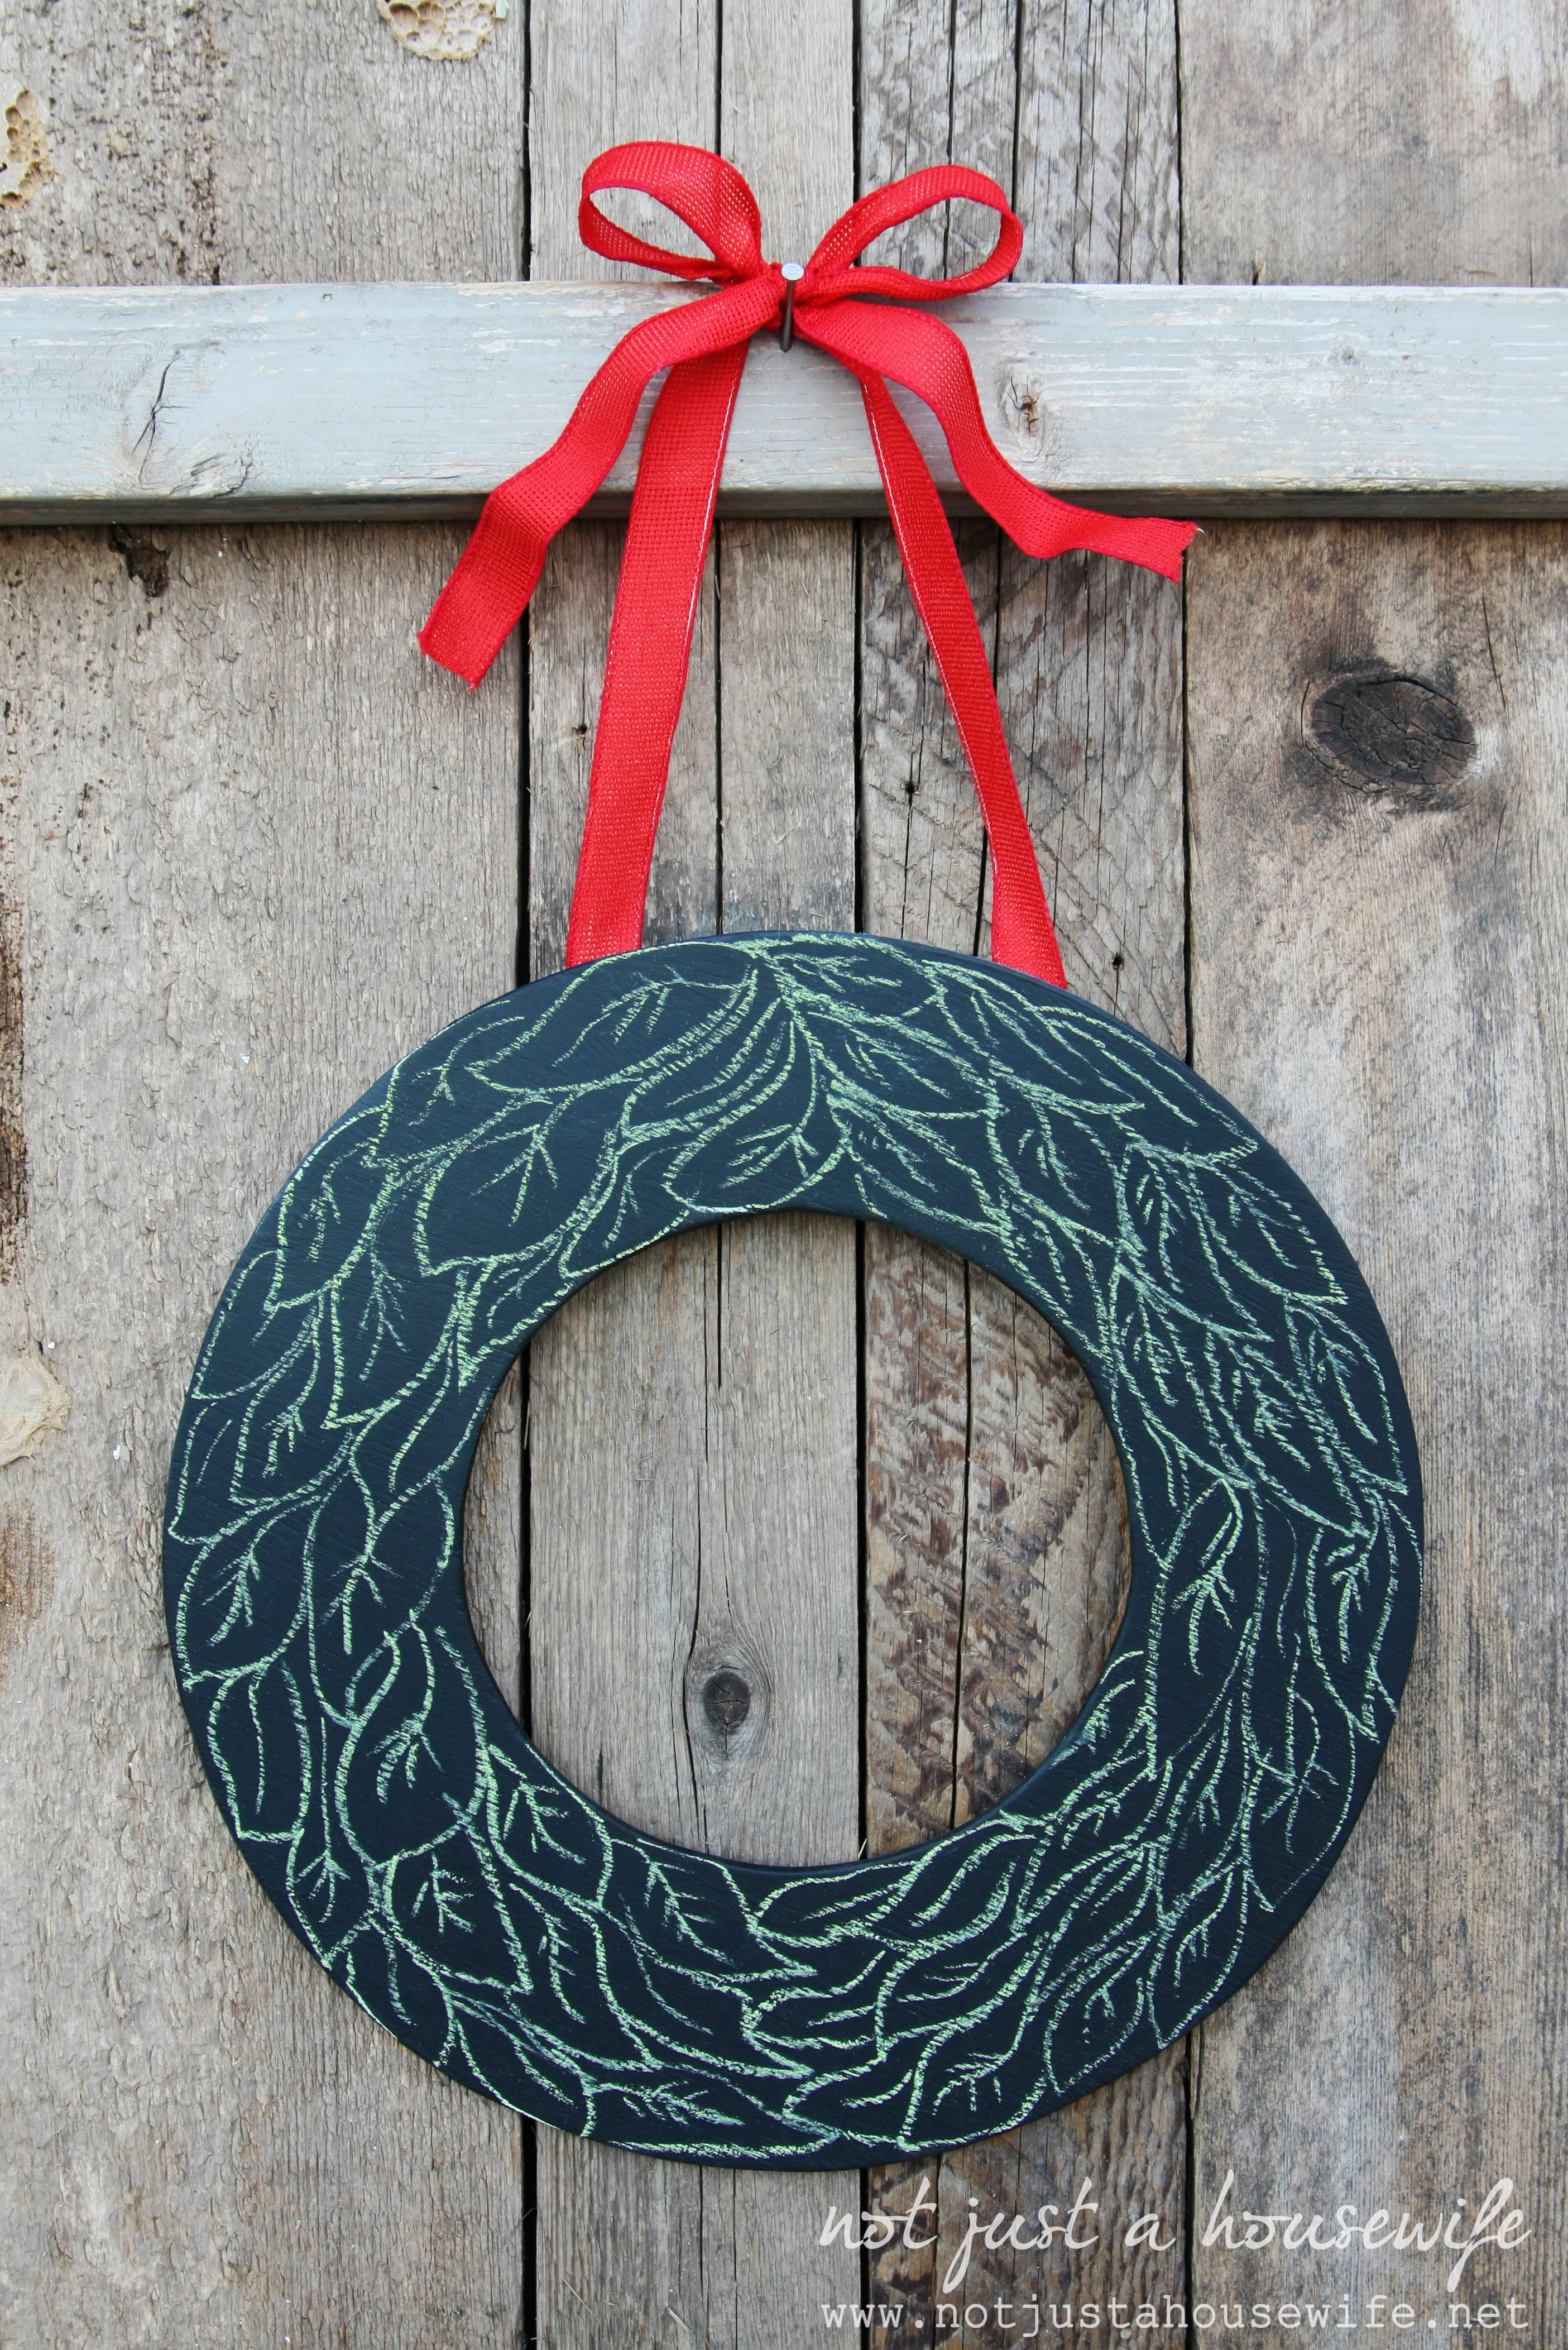
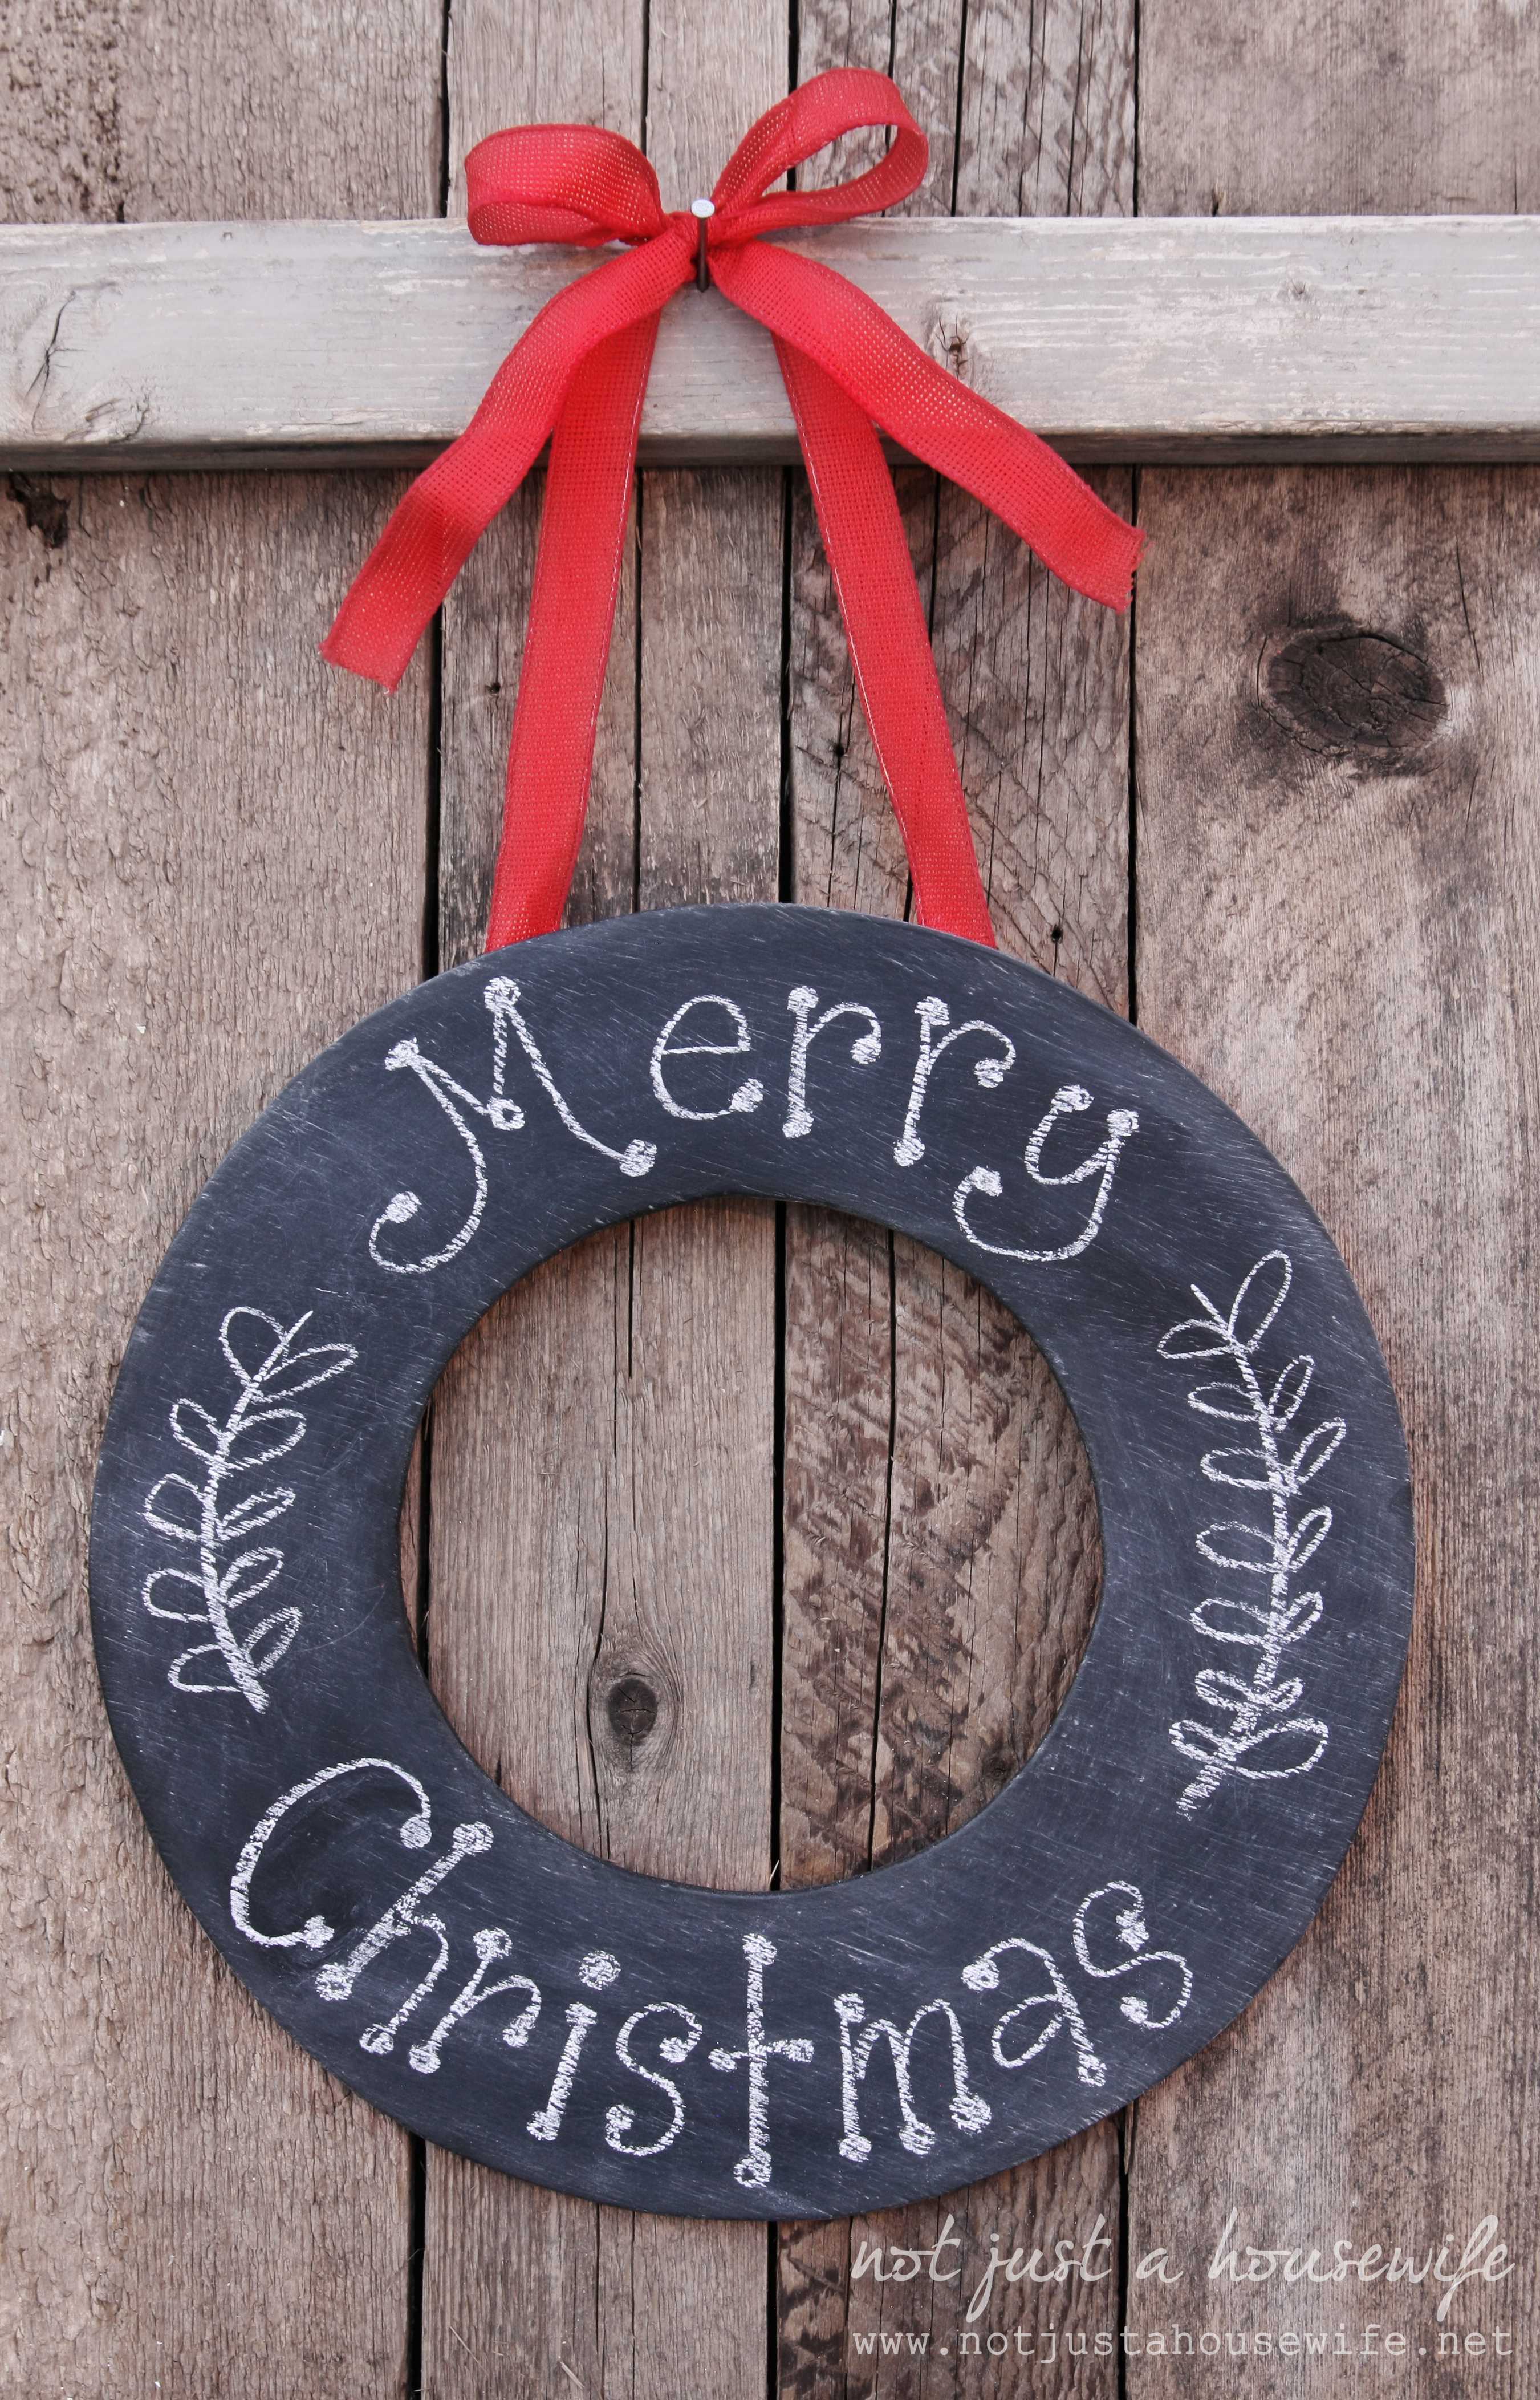
    I love the idea of a chalkboard wreath because you can make it look like anything you want. This is my take on a boxwood wreath.

    wreath-holly_edited-2

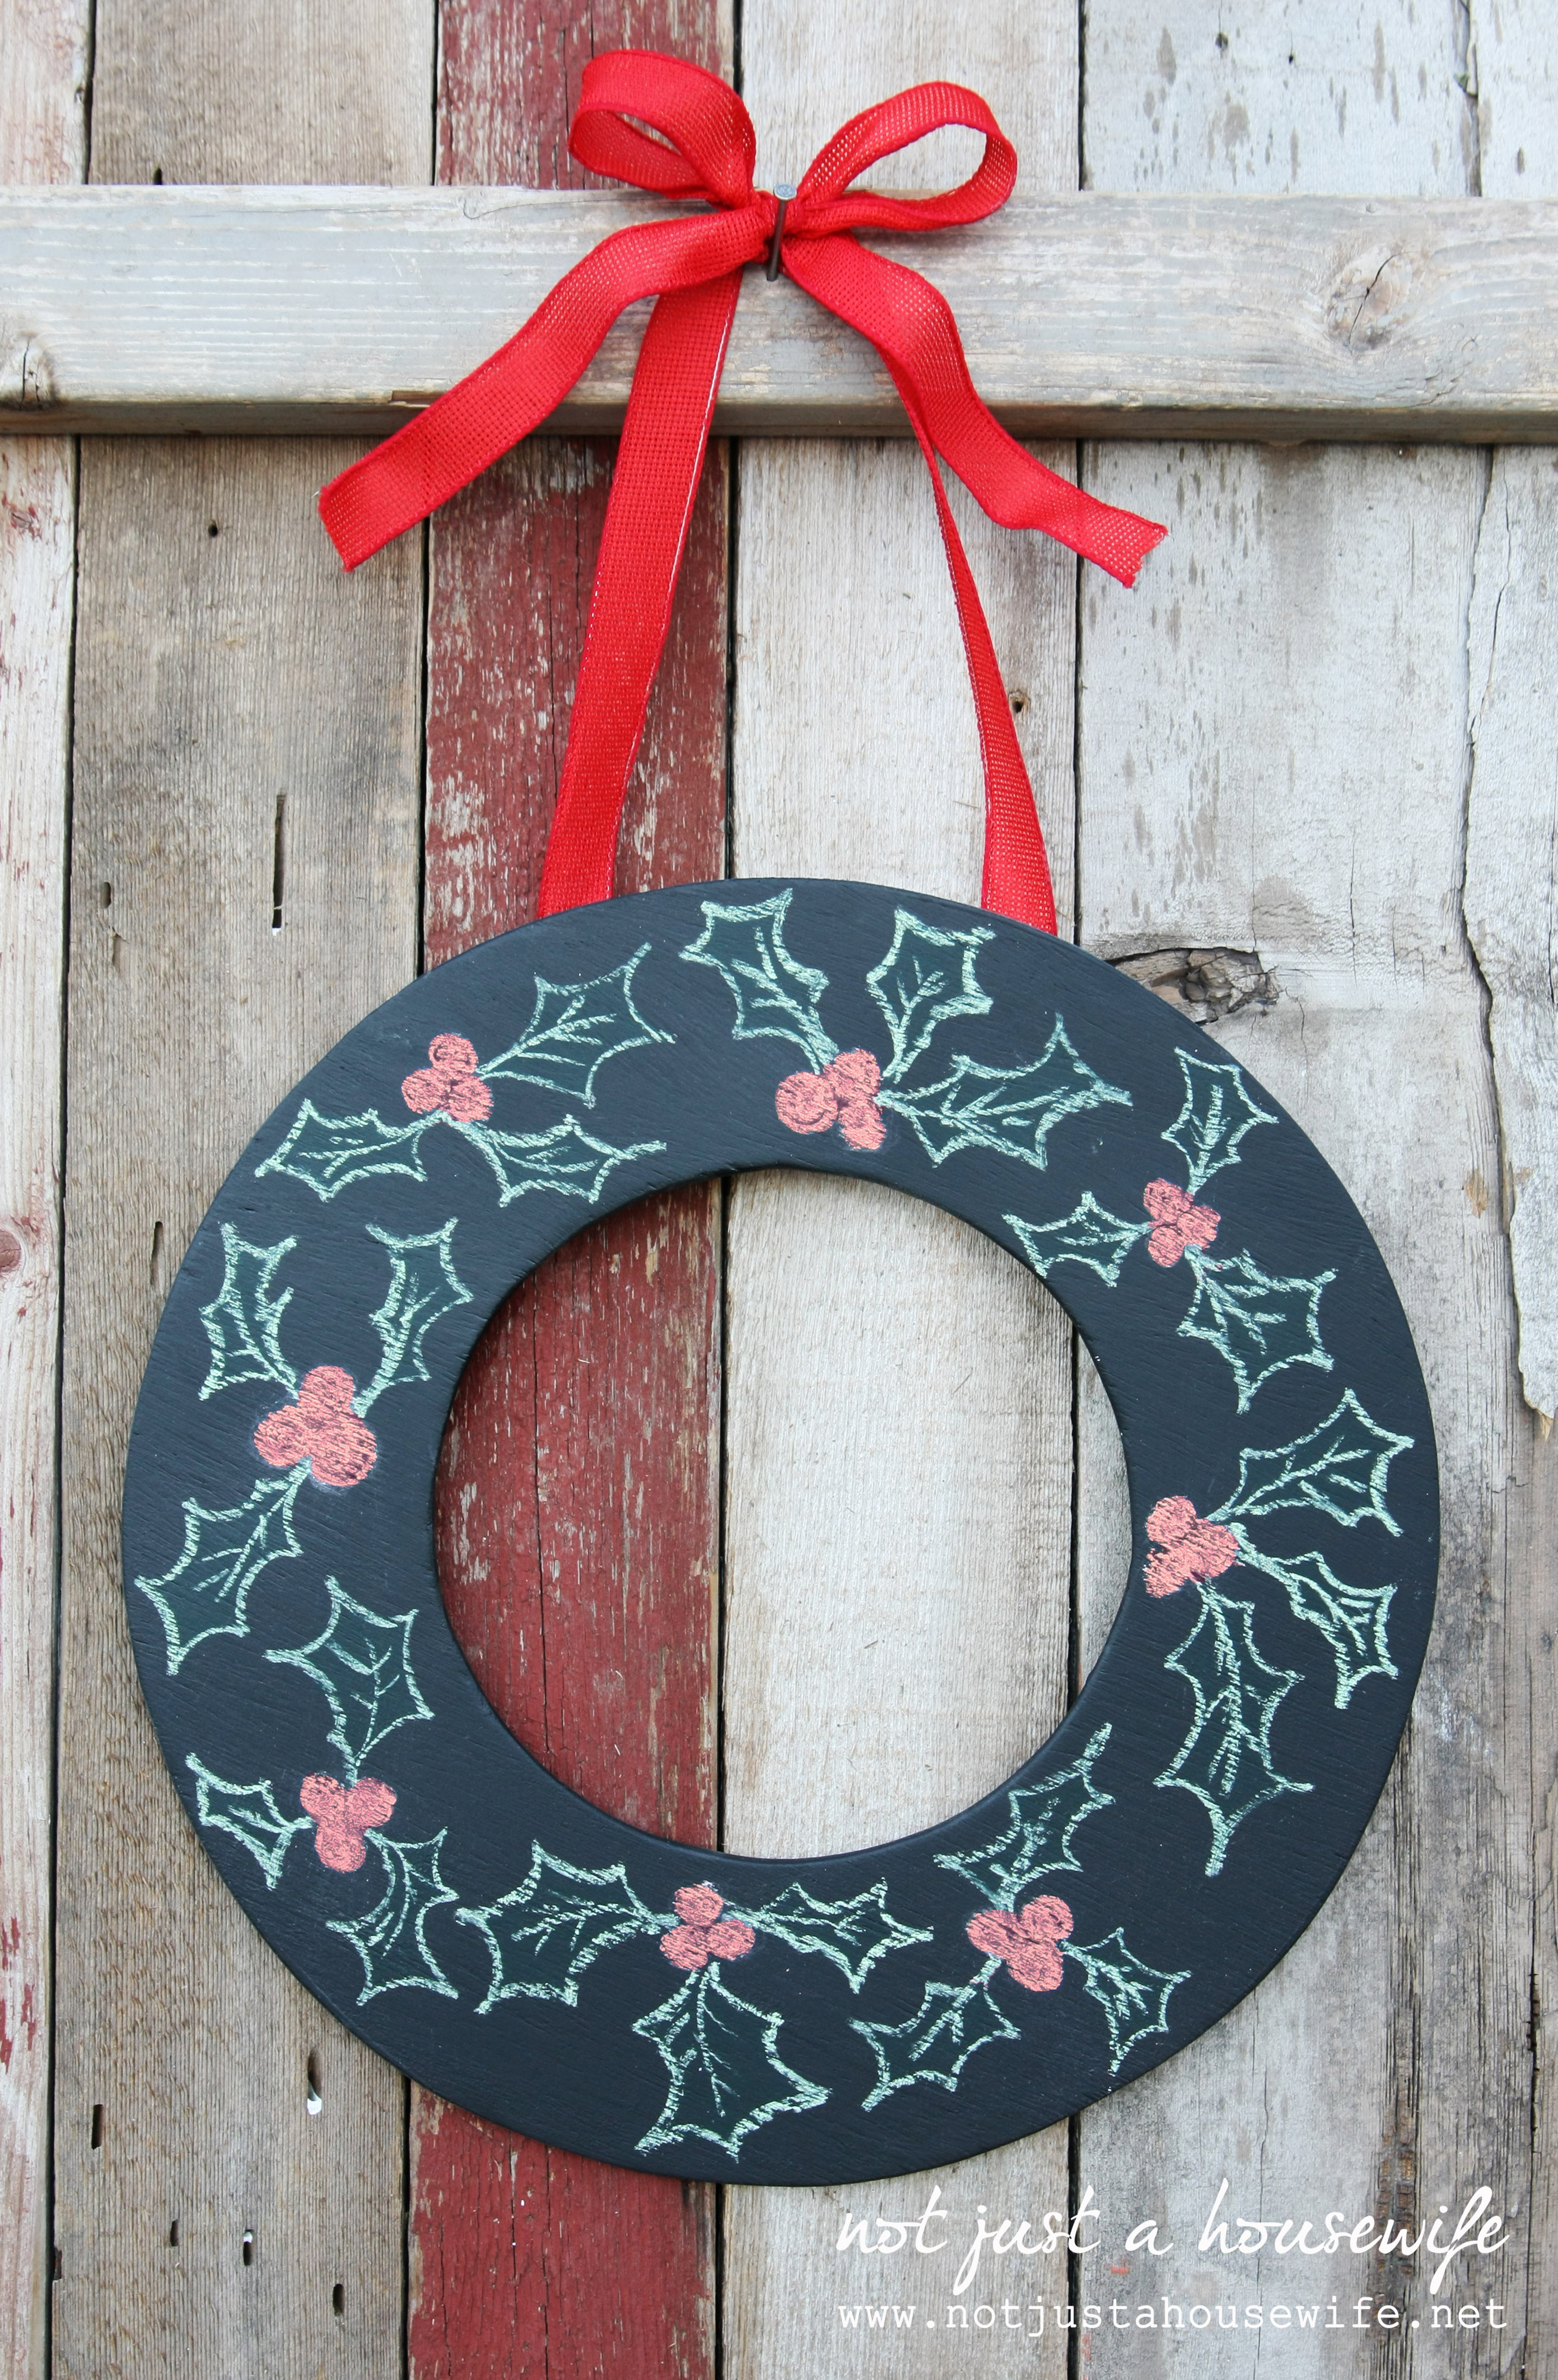
     And here is a holy one!


    It is super simple to make. I used thin plywood because that is what I had on hand. But you could also use foam core poster board or chipboard.

    wreath-tutorial_edited-1

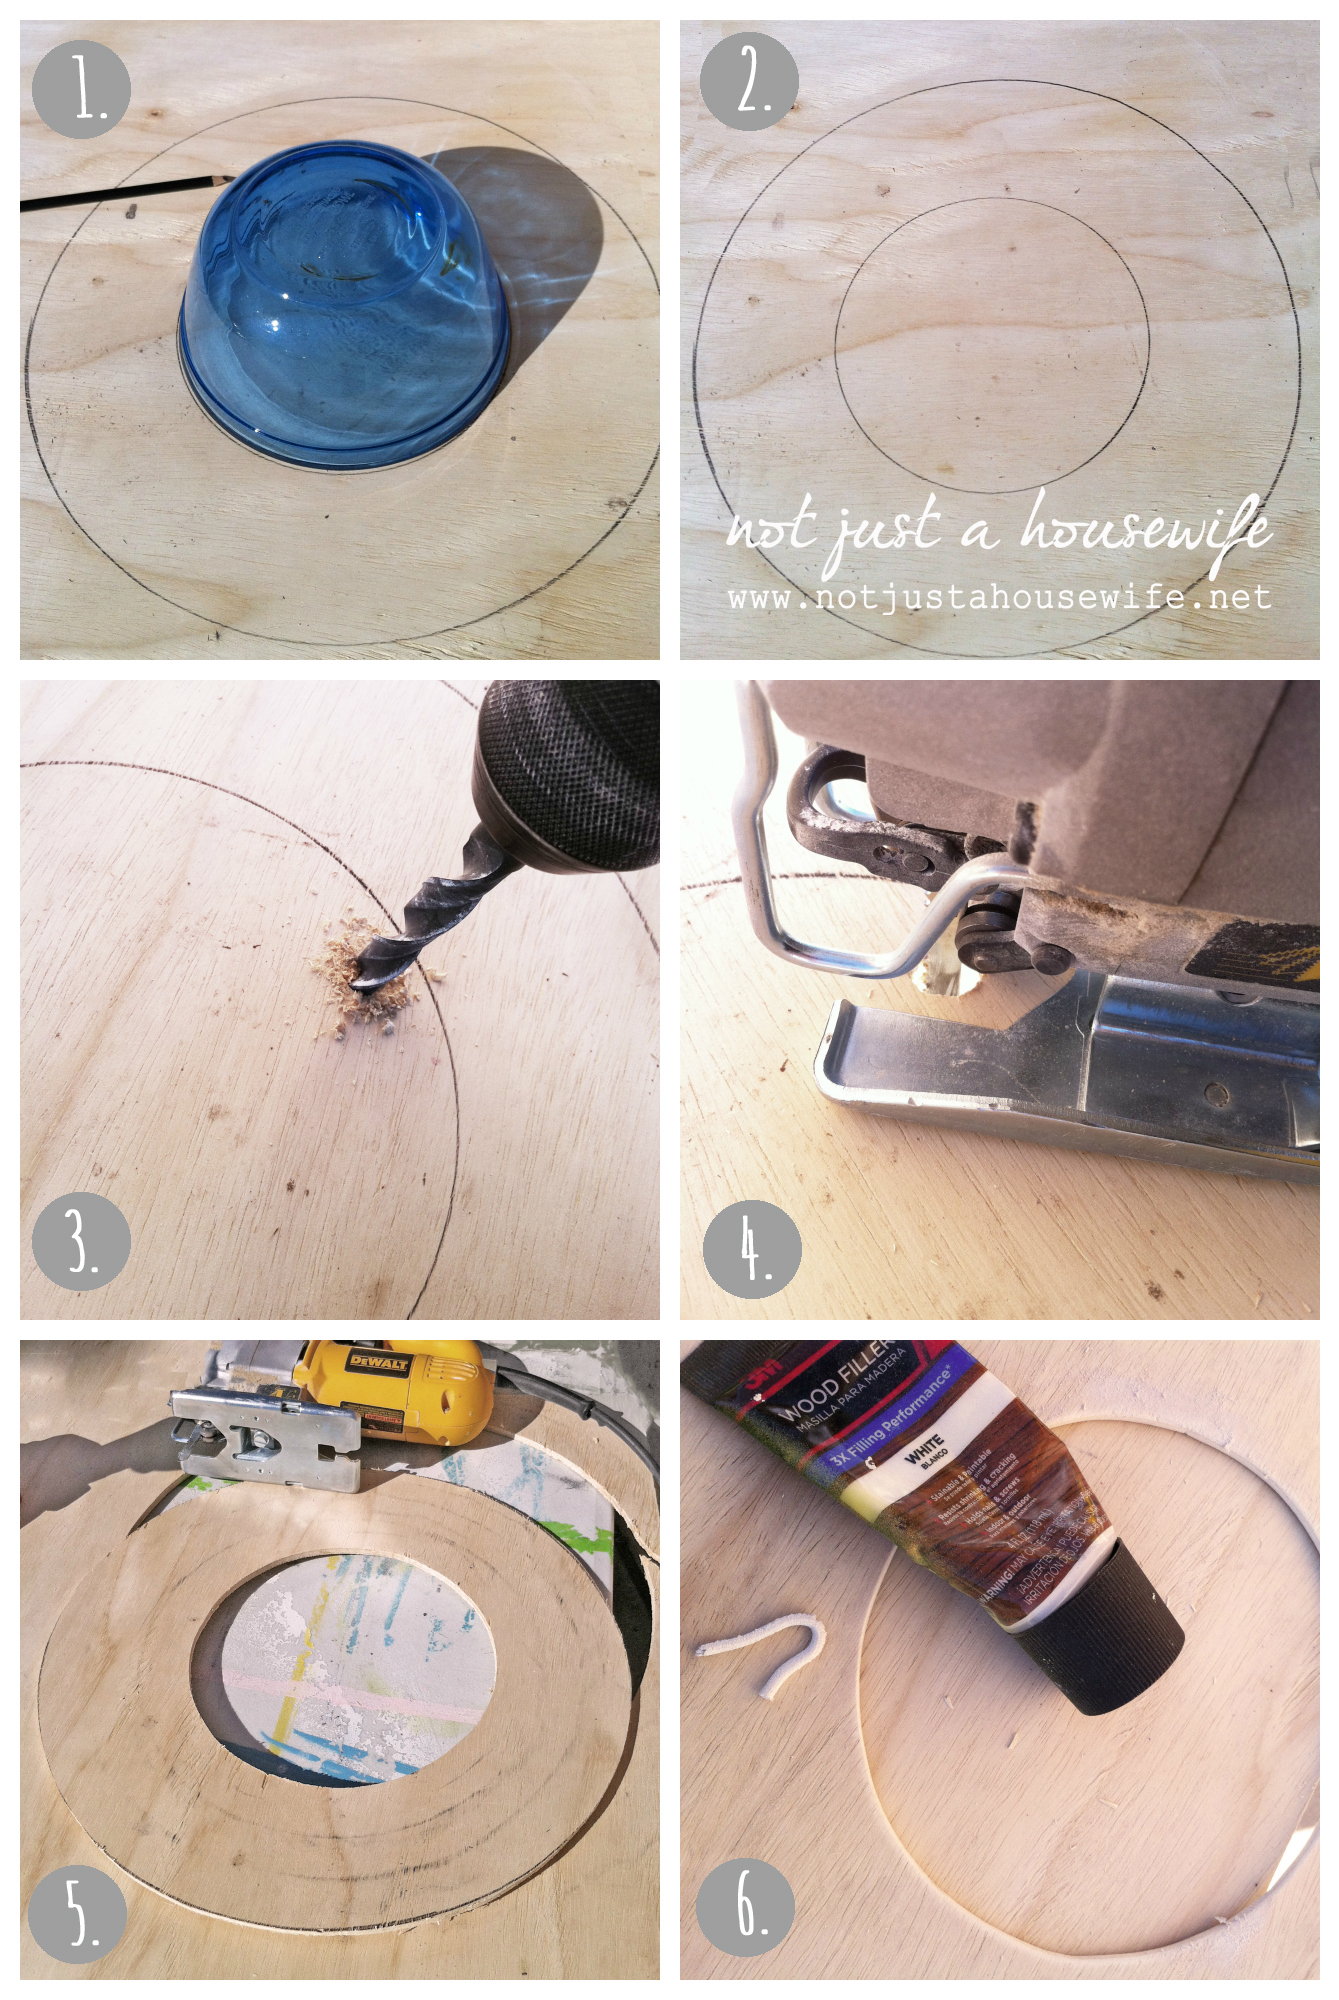
    I traced two bowls onto the plywood. I eyeballed it but you can measure to find the exact center if you want.

    In order to get the jig saw blade in to cut the center circle out, you will need to drill a hole large enough for the jigsaw blade to fit. It is easier to cut the center out first.

    Then you can cut the outer circle.

    I puttied any place the wood was rough or where it splintered from the saw. Then I sanded the whole thing smooth as I could.

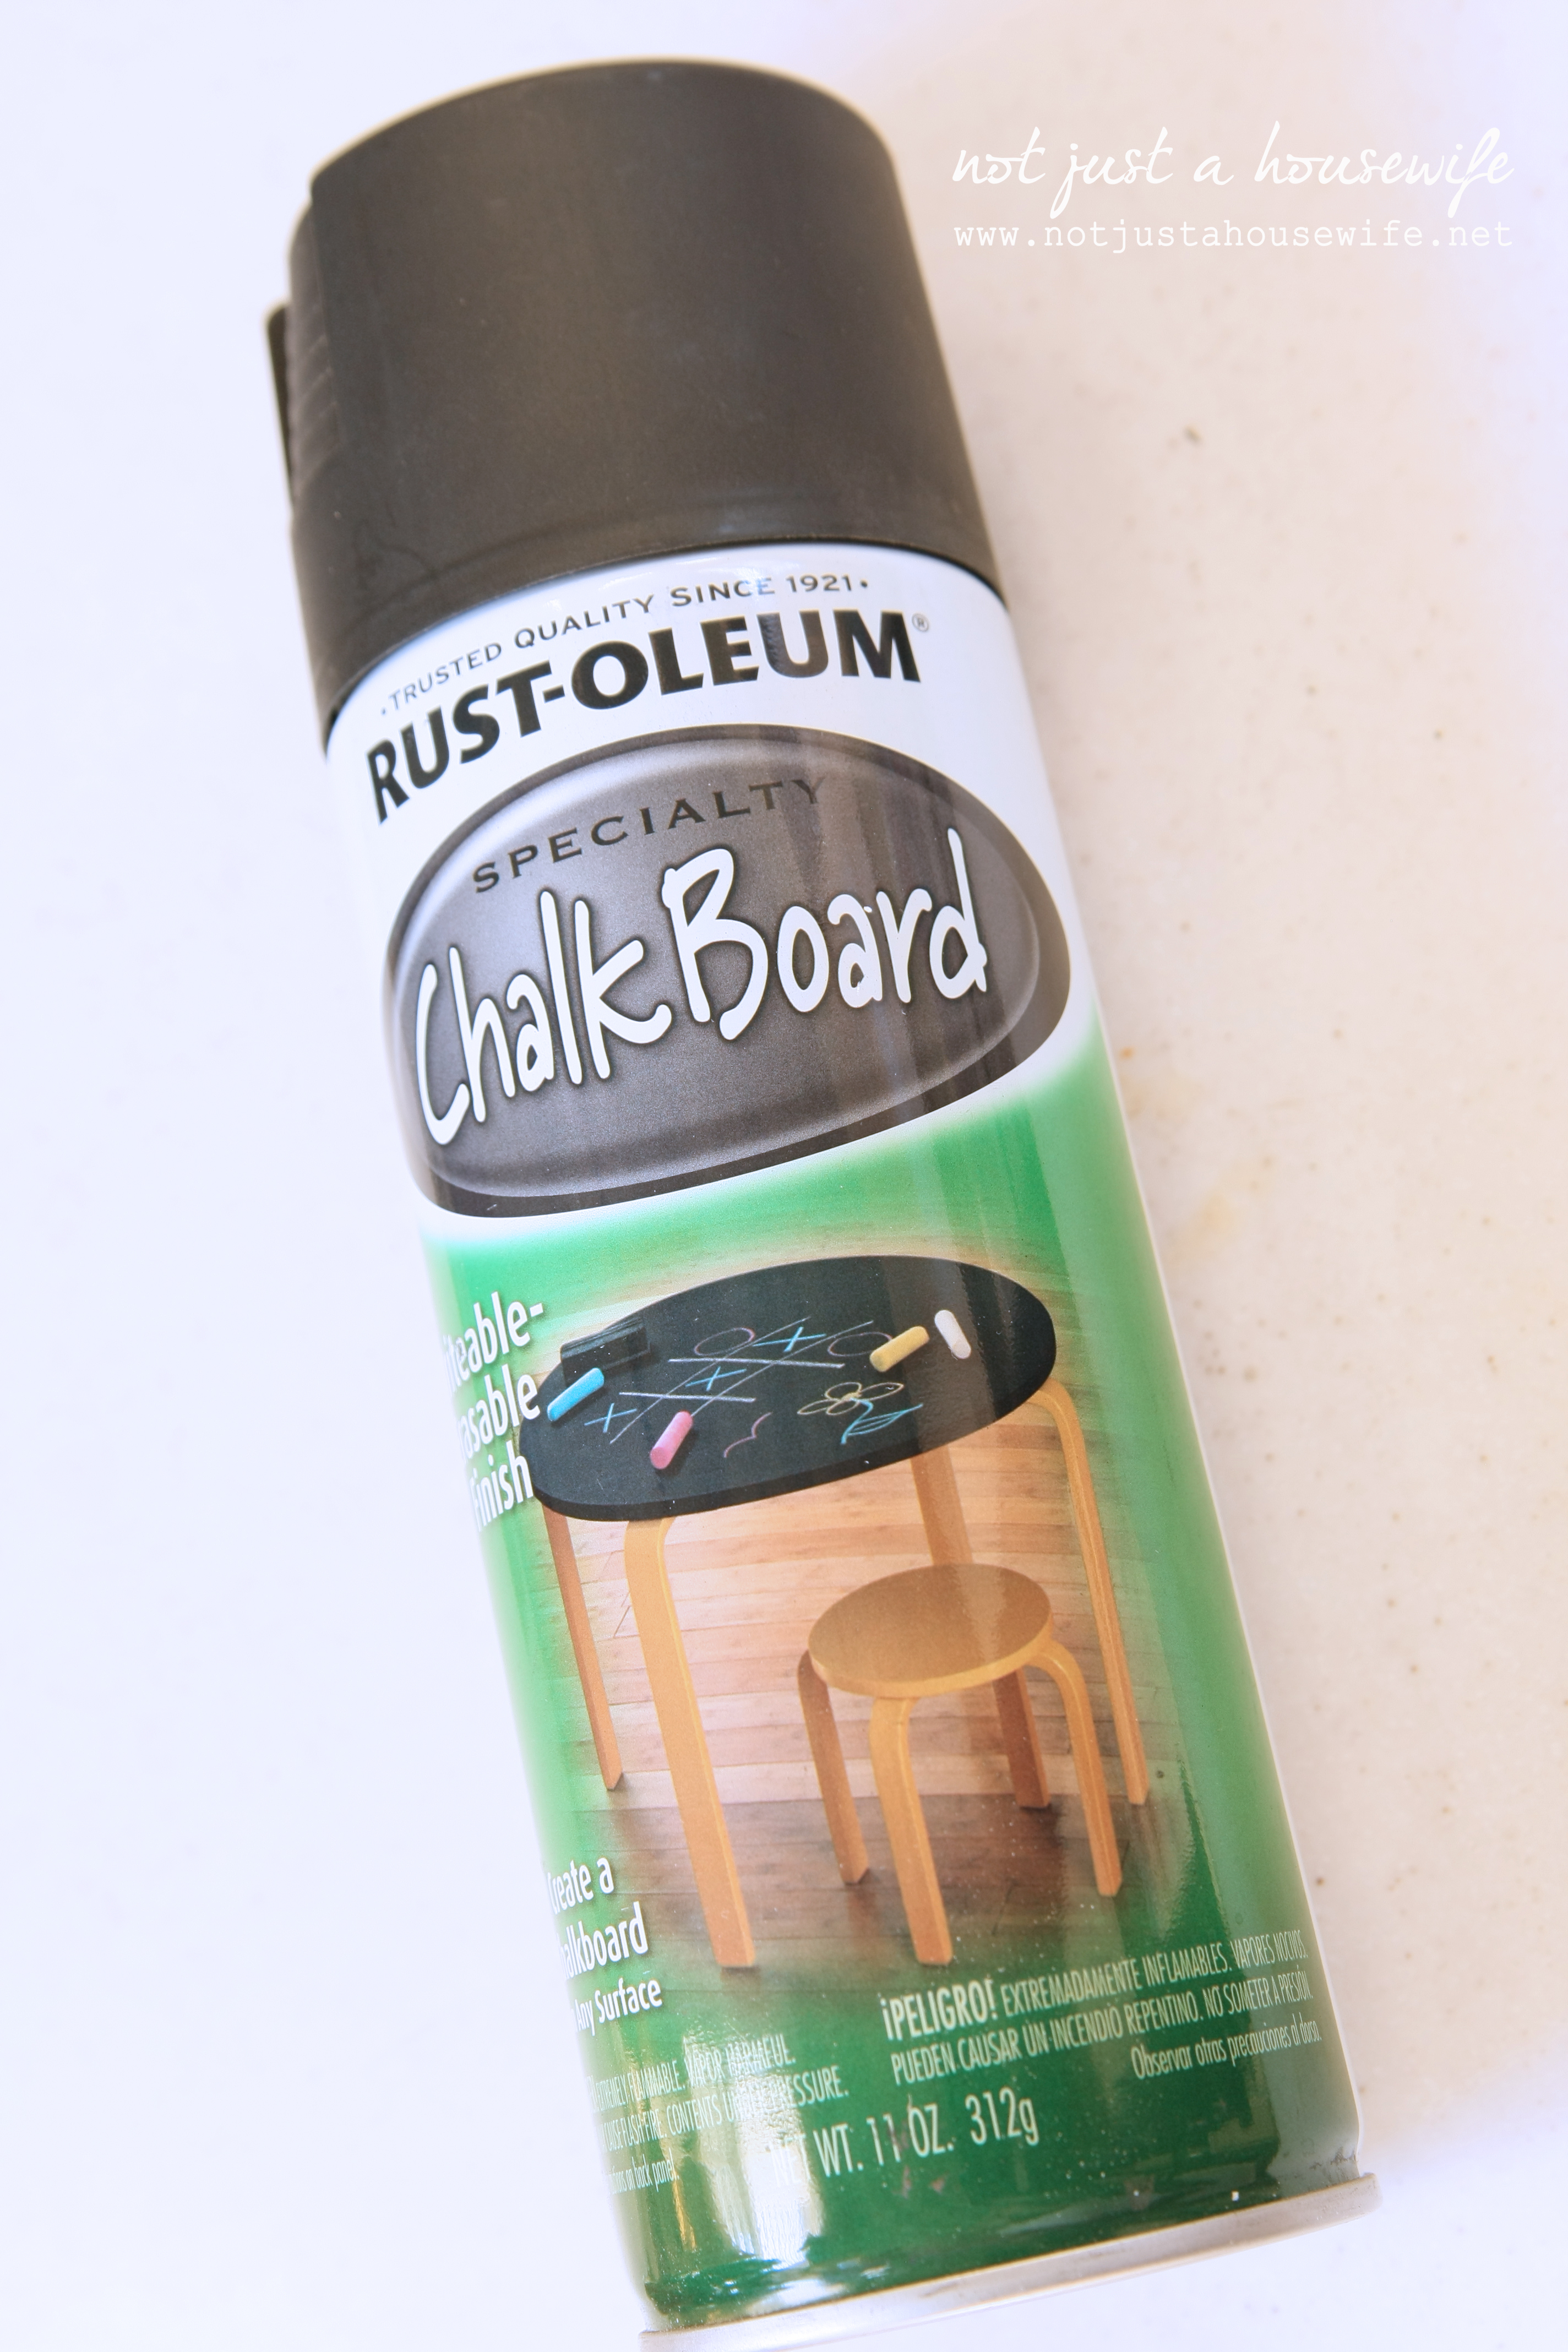
    Then I sprayed it with chalkboard spray paint. It soaked up a lot of paint so I had to do 4 coats.

    2

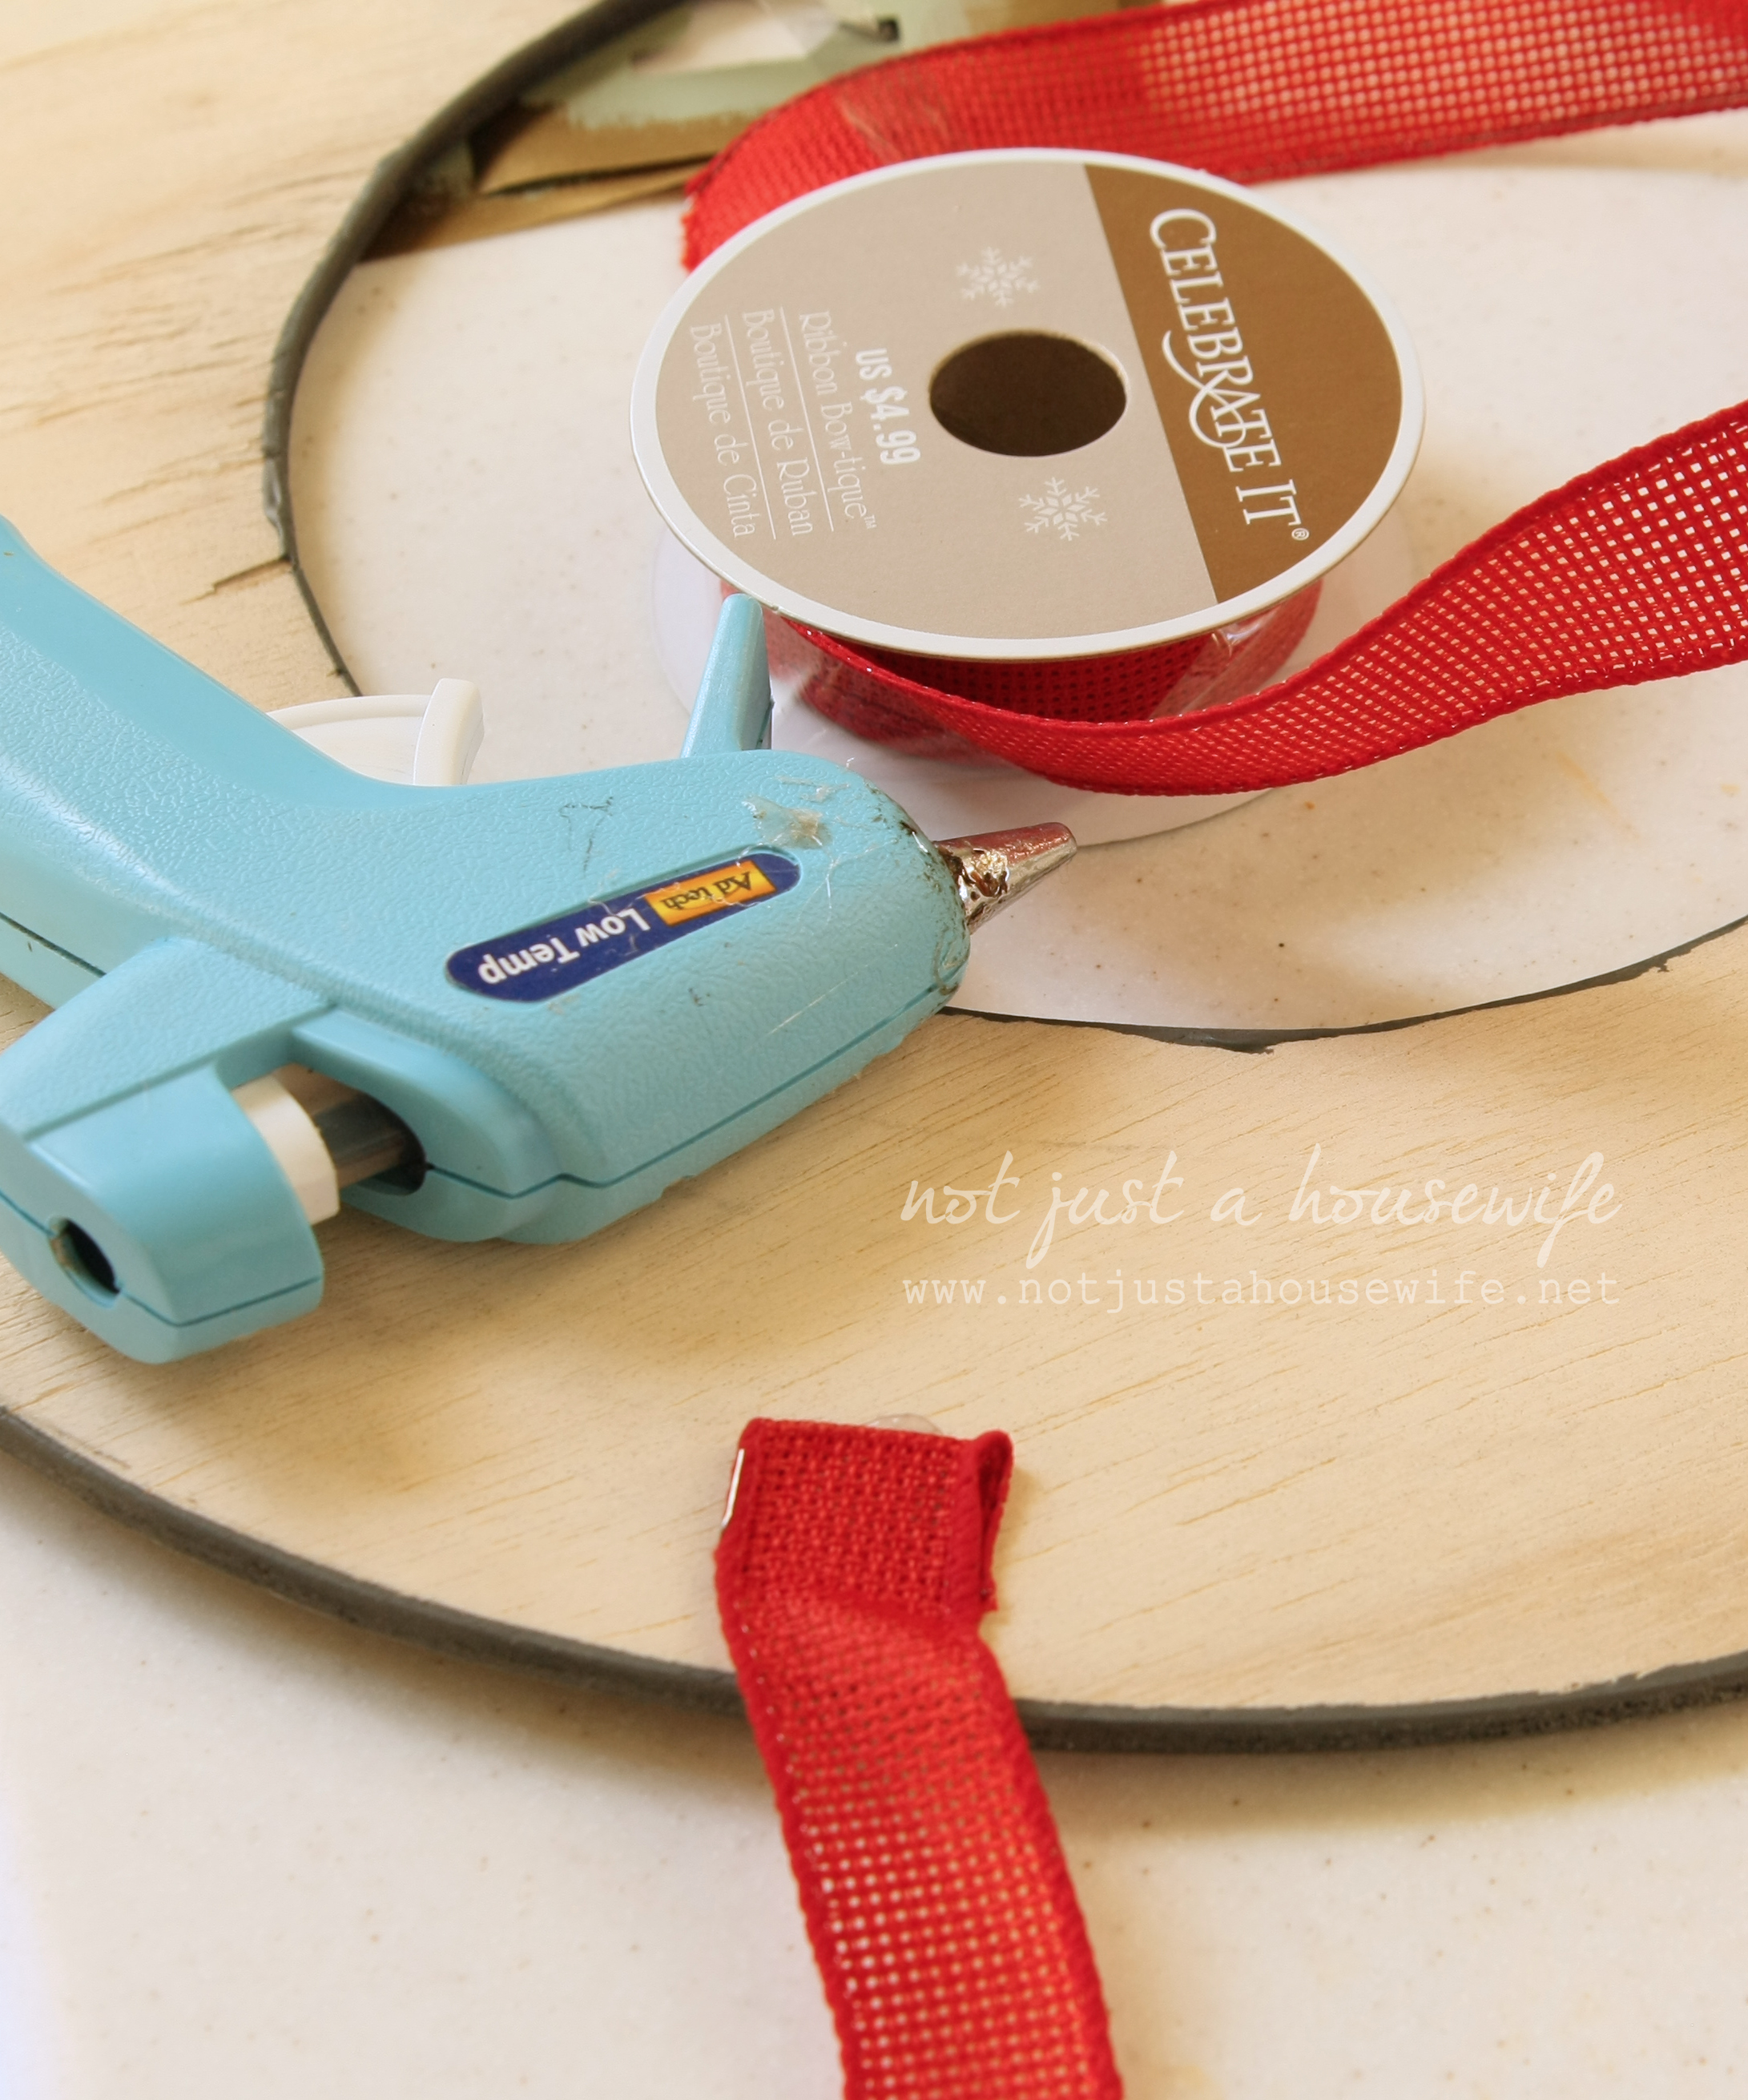
    Then I glued ribbon onto the back. If this were heavier I would have had to use staples but since the plywood I used was so thin, it is very light weight.

    1

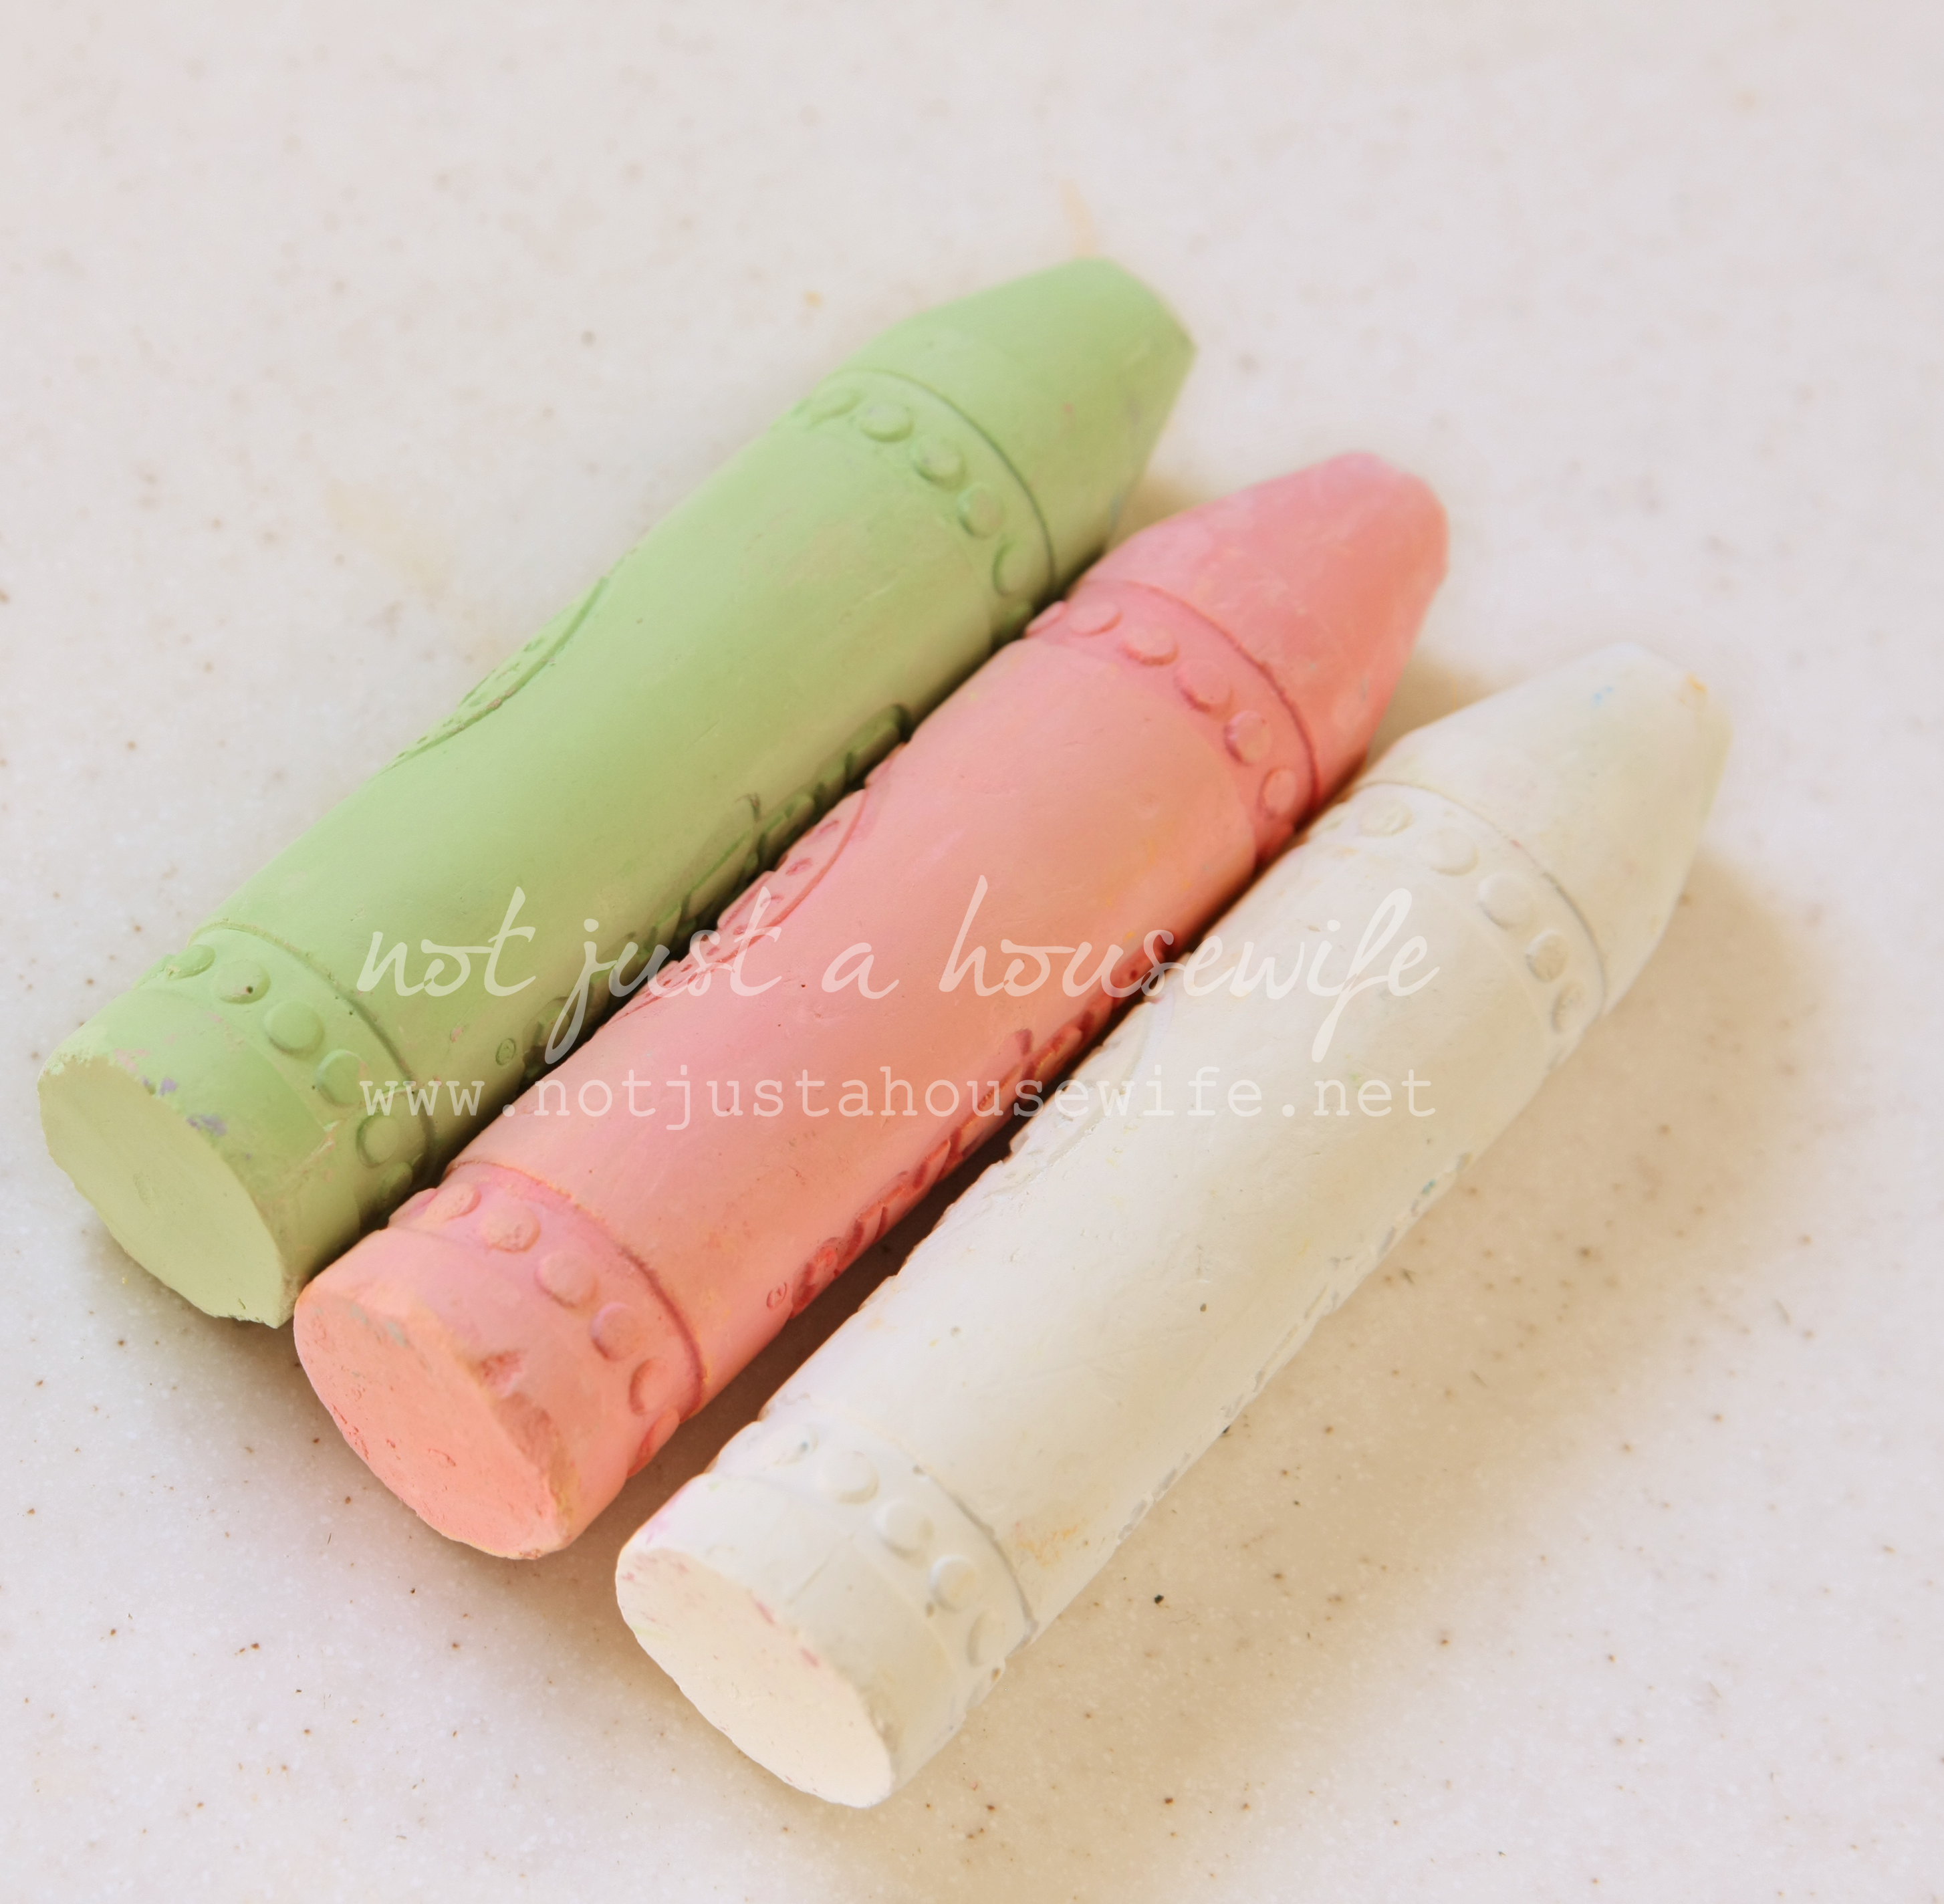
    Then comes the fun part! Decorate it anyway you want. I did a fall leaf wreath first when I made this back in October. You can also use chalk markers so it will last longer. But if you use regular chalk, a little trick I learned from my mom is to lightly spray it with hairspray and it won't rub off until you wash it off.

    3

    So what do you think of this non-traditional wreath???

    christmas-wreath_edited-2

    You will also like:

    • Outdoor Solar Lamp TutorialOutdoor Solar Lamp Tutorial
    • Open Shelves In The KitchenOpen Shelves In The Kitchen
    • DIY Wood Canoe!DIY Wood Canoe!
    • My version of a "Thankful Tree"My version of a "Thankful Tree"
    • My scrap wood lamp with hand painted shadeMy scrap wood lamp with hand painted shade
    • Re-purpose!Re-purpose!
    • Fall and Thanksgiving DecorFall and Thanksgiving Decor
    • Modern Tree Stump PlanterModern Tree Stump Planter

    « Favorite Things 2014 edition
    It's That Time Of Year Again..... »

    Filed Under: Holiday, Uncategorized 2 Comments

    Subscribe

    for your weekly DIY fix.

    Reader Interactions

    Trackbacks

    1. 35 DIY Inspiring Unique Christmas Wreaths | Mommy Evolution says:
      December 2, 2019 at 9:08 pm

      […] Chalkboard Wreath | Homes.com […]

      Reply
    2. 35 DIY Inspiring Unique Christmas Wreaths - My Hub List says:
      August 12, 2021 at 12:10 am

      […] Chalkboard Wreath | Homes.com […]

      Reply

    Comment Below! Cancel reply

    Your email address will not be published. Required fields are marked *

    This site uses Akismet to reduce spam. Learn how your comment data is processed.

    Primary Sidebar

    stacyHey! I'm Stacy and am a DIY addict. I love to get my hands dirty, whether it's sawdust, paint, or dirt. My goal is to help YOU learn to fix up your home and yard. No matter the style or size, I think everyone should love their home. And it doesn't takes a big budget to get there. Let's DIY together!

    Subscribe to My Blog!

    Search this site

    categories


    Subscribe

    Footer

    Welcome! I'm sharing our adventures as we fix up our 1938 cottage. Whether it is big or small, I think everyone should love their home and I don't think it takes a lot of money to make a space your own

    About Stacy

    • Facebook
    • Instagram
    • Pinterest
    • Twitter

    My Favorites

    copyright

    All images and content are copyrighted via Stacy Risenmay unless otherwise stated. If you'd like to share my work, please link back to this blog.
    Thank you for visiting!


    Footer

    ↑ back to top

    About

    • Meet Stacy
    • Privacy Policy
    • Contact

    Categories 

    • Home Decor
    • Outdoor Projects & Gardening
    • DIY & Tutorials
    • Kid Activities
    • Recipes
    • Travel
    • Cleaning
    • Houseplants
    • Staining
    • Painting
    • Power Tools
    • Holiday Ideas

    Newsletter

    • Sign Up! for emails and updates

    As an Amazon Associate I earn from qualifying purchases.

    Copyright © 2020 Brunch Pro on the Brunch Pro Theme


    Privacy Policy
    Welcome! Thanks for visiting.
    Hi! I'm Stacy and I want to help YOU become a DIY rockstar! Sign up for my email list so each project, tip, and trick will go directly to your inbox :)
    Your information will *never* be shared or sold to a 3rd party. Pinky promise :)
    Welcome!
    Hi! I'm Stacy and I blog about fixing up our 1938 cottage. Join the thousand of others who get my posts sent to their inbox for FREE!
    Your information will *never* be shared or sold to a 3rd party.