• Skip to primary navigation
  • Skip to main content
  • Skip to primary sidebar
  • Skip to footer
Stacy Risenmay
  • Home
  • About me
  • Subscribe
  • Shop
  • Contact Me
  • My Book
  • PRESS
    • Facebook
    • Instagram
    • Pinterest
    • Twitter
menu icon
go to homepage
subscribe
search icon
Homepage link
  • Home
  • About me
  • Project Gallery
  • Our House
  • Shop
  • PRESS
  • Contact Me
  • Privacy Policy
    • Facebook
    • Instagram
    • Pinterest
    • Twitter
  • ×

    Adding Texture To A Planter

    By Stacy Leave a Comment

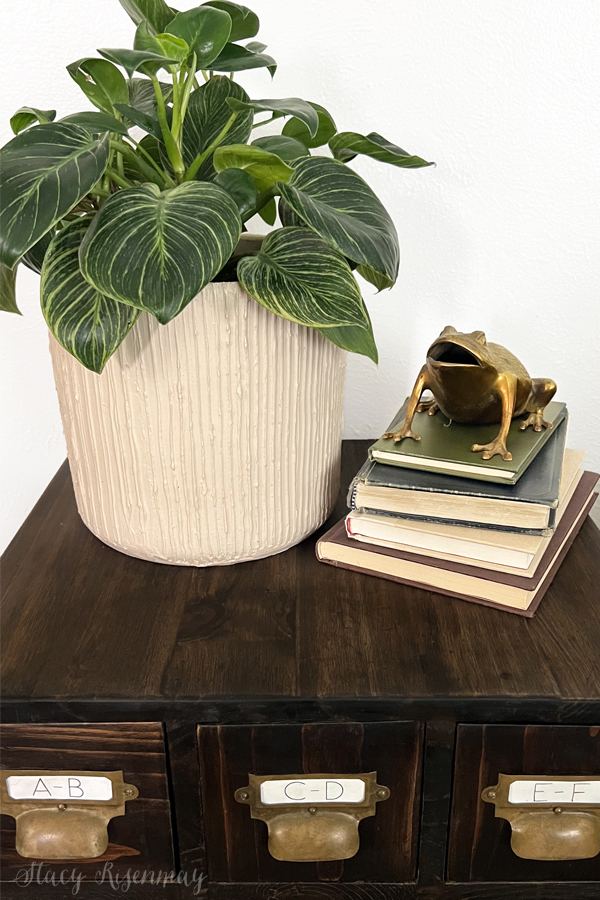
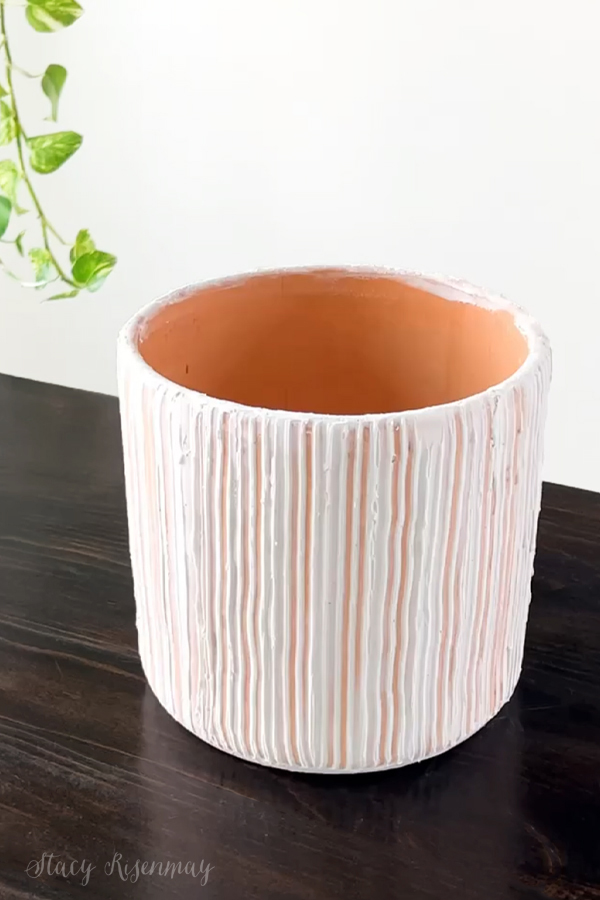
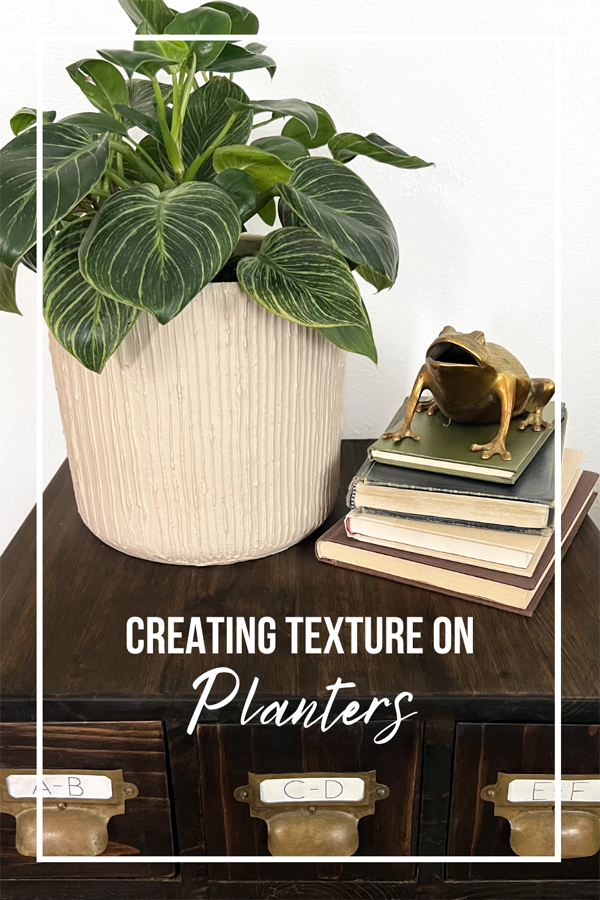
    I will admit I have more planters than I should. More planters than even plants. But it is nice when you have a plant that needs to be repotted, to have options. I had a couple of terracotta pots lying around and while I loved the shape, they were a bit plain. I decided to add some texture. Adding texture to your space is a great way to add visual interest. Here is how I added some fun texture to these planters!

    Choosing A Medium

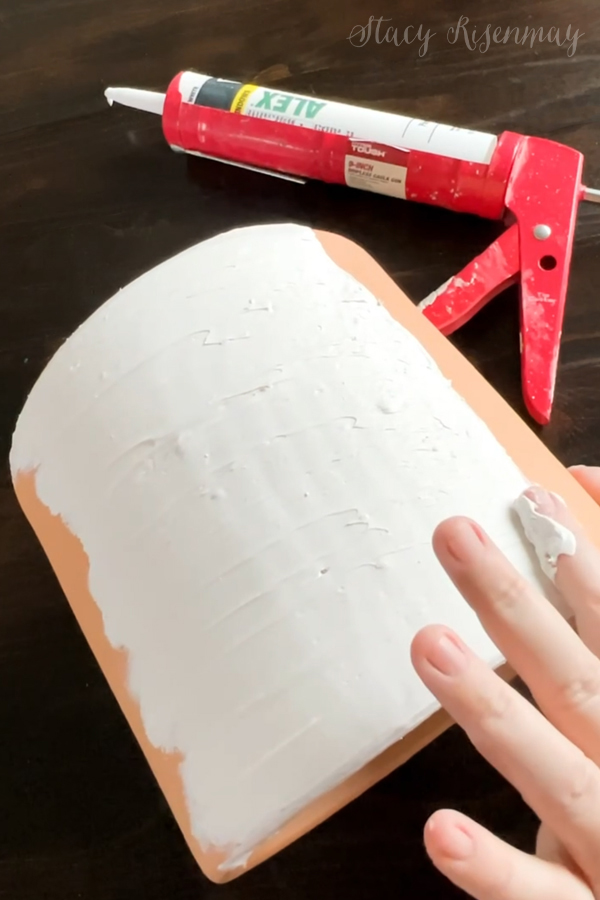
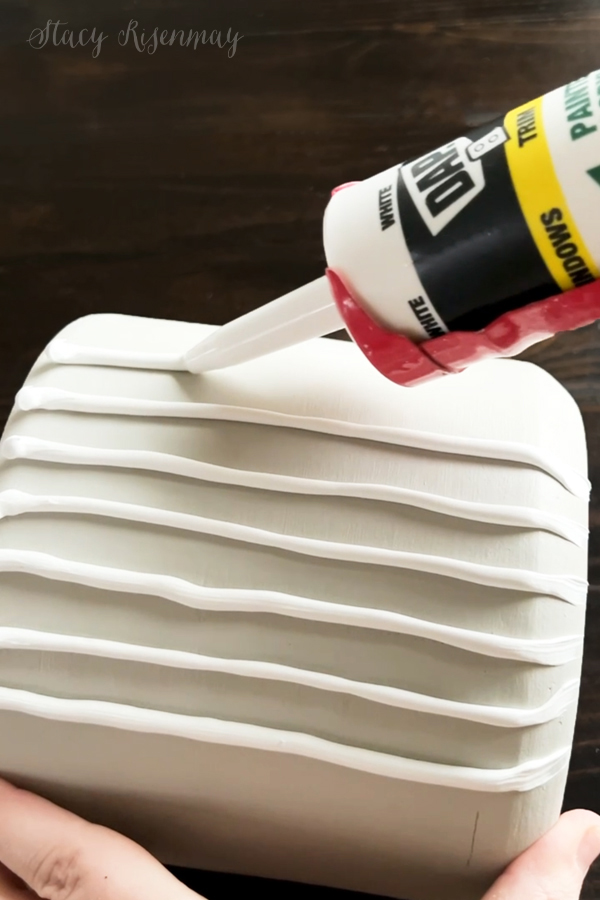
    I have seen a lot of videos on social media of people using joint compound (drywall mud) to create textured art pieces for their walls. While it would work for an art piece, I don't think it would have been a good choice for a pot that gets handled often and gets wet. After weighing the options, I decided to use paintable caulk.

    Adding Texture To A Planter

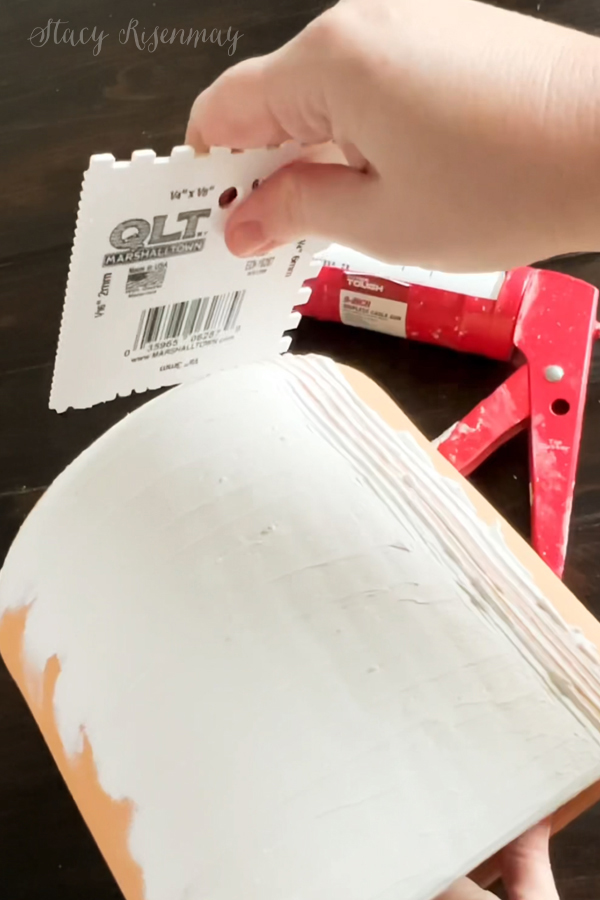
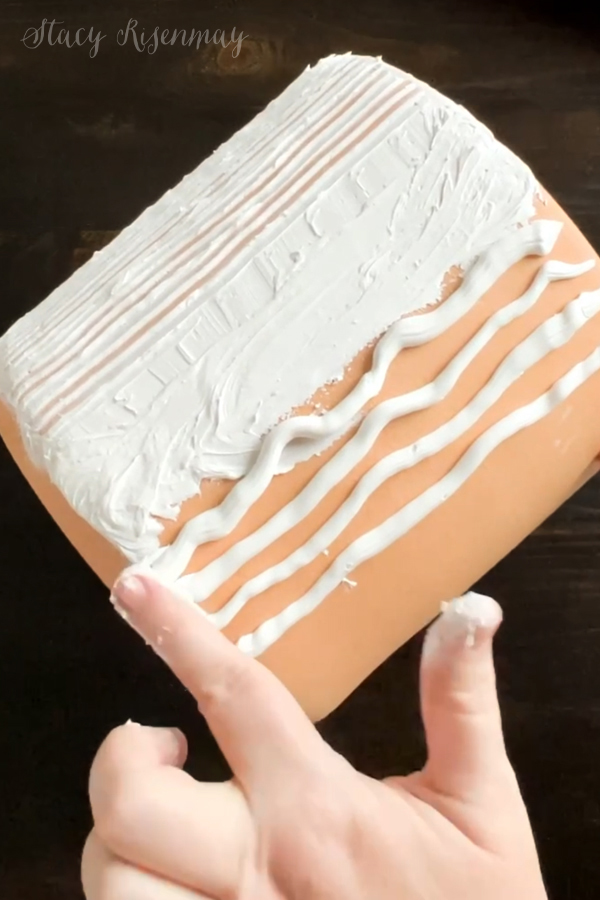
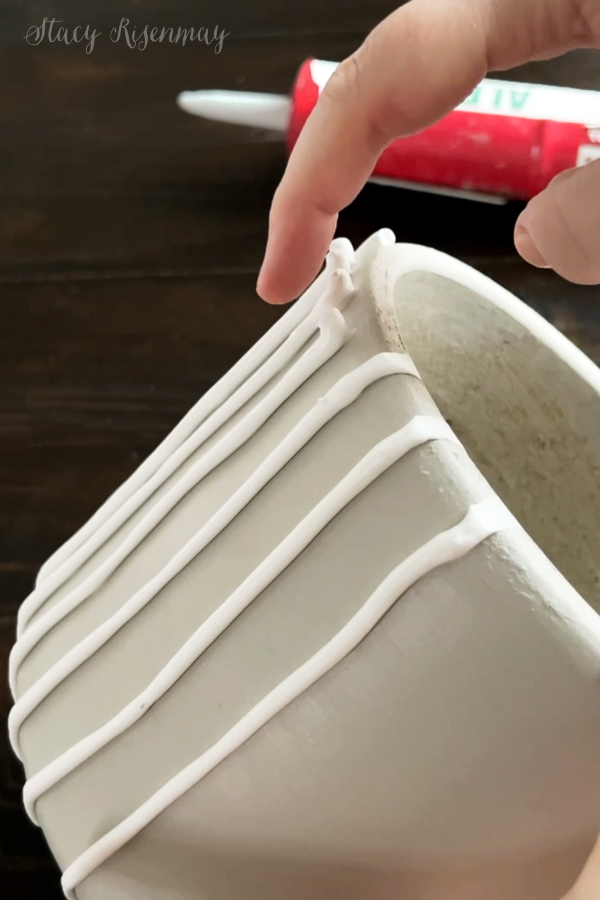
    I spread the caulk around, only doing a small section at a time. Then I used a notched tool to create the lines. I played around with all the sizes but like the smaller notches best. The caulk that got removed by the tool as it scraped, was then added back on the pot for the next section so none was wasted.

    You can really have fun with this and use all sorts of things to create the texture. You could use a fork, wire brush, a sponge, or even leaves.

    I love projects where you can be creative and you don't have to worry about everything being perfect.

    You can use the caulk to make all sorts of designs! I made some lines on the second pot but you could also do dots, squiggles, or even a face. Have fun with it!

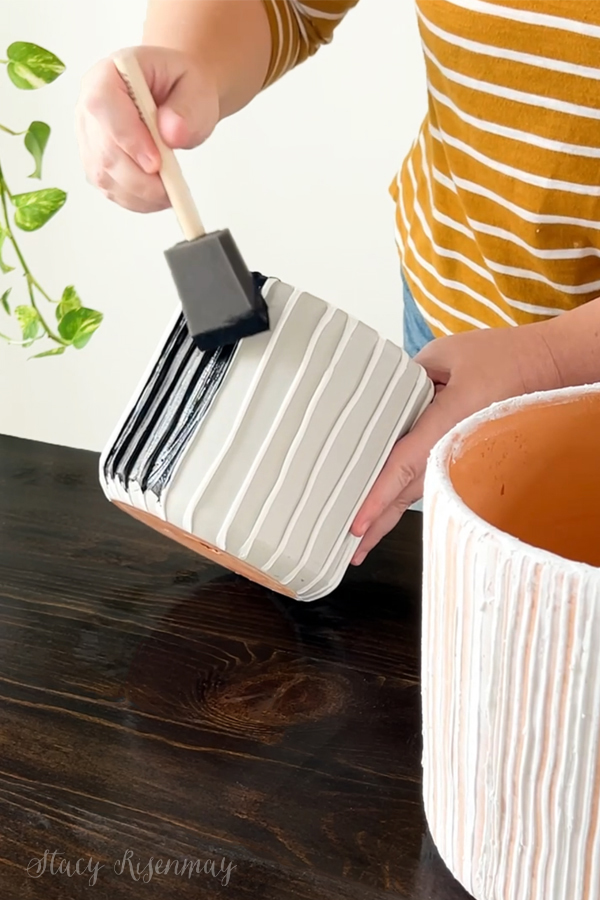
    Once the caulk was completely dry, it was time to paint. Because caulk still has some flexibility to it even when dry, I don't suggest using spray paint.

    I love the pots even more now! They look great filled with the plants that needed a bigger home.

    Pin For Later:

    « DIY Log Candle Holder (+Planter!)
    5 Creative DIY Drawer Knobs »

    Filed Under: Houseplants Leave a Comment

    Subscribe

    for your weekly DIY fix.

    Reader Interactions

    Comment Below! Cancel reply

    Your email address will not be published. Required fields are marked *

    This site uses Akismet to reduce spam. Learn how your comment data is processed.

    Primary Sidebar

    stacyHey! I'm Stacy and am a DIY addict. I love to get my hands dirty, whether it's sawdust, paint, or dirt. My goal is to help YOU learn to fix up your home and yard. No matter the style or size, I think everyone should love their home. And it doesn't takes a big budget to get there. Let's DIY together!

    Search this site

    categories

    Subscribe to my newsletter!

    Footer

    Welcome! I'm sharing our adventures as we fix up our 1938 cottage. Whether it is big or small, I think everyone should love their home and I don't think it takes a lot of money to make a space your own

    About Stacy

    • Facebook
    • Instagram
    • Pinterest
    • Twitter

    My Favorites

    copyright

    All images and content are copyrighted via Stacy Risenmay unless otherwise stated. If you'd like to share my work, please link back to this blog.
    Thank you for visiting!


    Footer

    ↑ back to top

    About

    • Meet Stacy
    • Privacy Policy
    • Contact

    Categories 

    • Home Decor
    • Outdoor Projects & Gardening
    • DIY & Tutorials
    • Kid Activities
    • Recipes
    • Travel
    • Cleaning
    • Houseplants
    • Staining
    • Painting
    • Power Tools
    • Holiday Ideas

    Newsletter

    • Sign Up! for emails and updates

    As an Amazon Associate I earn from qualifying purchases.

    Copyright © 2020 Brunch Pro on the Brunch Pro Theme


    Privacy Policy
    Welcome! Thanks for visiting.
    Hi! I'm Stacy and I want to help YOU become a DIY rockstar! Sign up for my email list so each project, tip, and trick will go directly to your inbox :)
    Your information will *never* be shared or sold to a 3rd party. Pinky promise :)
    Welcome!
    Hi! I'm Stacy and I blog about fixing up our 1938 cottage. Join the thousand of others who get my posts sent to their inbox for FREE!
    Your information will *never* be shared or sold to a 3rd party.